
I do a lot of work on the command line in Linux and Windows.
One of my favorite apps that makes working on the command line more efficient is Tmux.
There hasn’t been anything quite like it in Windows, until now.
The Windows Subsystem for Linux (WSL) changes all of this.
Here are the steps for installing the WSL on Windows, and installing Tmux.
Step 1: Install WSL
If you haven’t already done so, install the Windows Subsystem for Linux (WSL).
Enable-WindowsOptionalFeature -Online -FeatureName Microsoft-Windows-Subsystem-Linux
# Will likely require and prompt for a reboot
# If you want to upgrade to WSL2, do not reboot yet, otherwise reboot now
NOTE: If you are on Windows 2004 or later,
you should install WSL 2 for better performance / supportability.
Second NOTE: If you are running this on a VM like VirtualBox,
you will need to use WSL 1
Step 2 (Optional): Upgrade to WSL2
Enable the ‘Virtual Machine Platform’ Windows feature.
Enable-WindowsOptionalFeature -Online -FeatureName VirtualMachinePlatform
# Will likely require and prompt for a reboot
# Go ahead and reboot
Set WSL2 as the default WSL version
wsl --set-default-version 2
# Will likely require updating the kernel, Visit https://aka.ms/wsl2kernel
# Install the new kernel and reboot if needed
Step 3: Install a Linux distro from the Windows store
In the Windows store, you can search for your preferred Linux distribution.
Not all are available,
but I have successfully used Ubuntu, Debian, and Kali Linux.
Step 4 (Optional): Install Windows Terminal from the Windows store.
Since you are in the Windows Store,
I would recommend installing the Windows Terminal.
Step 5: Launch the Linux distro application to complete the installation
Run the application you installed from the Windows store;
it should be available on the start menu once it is installed.
Complete the initial user setup:

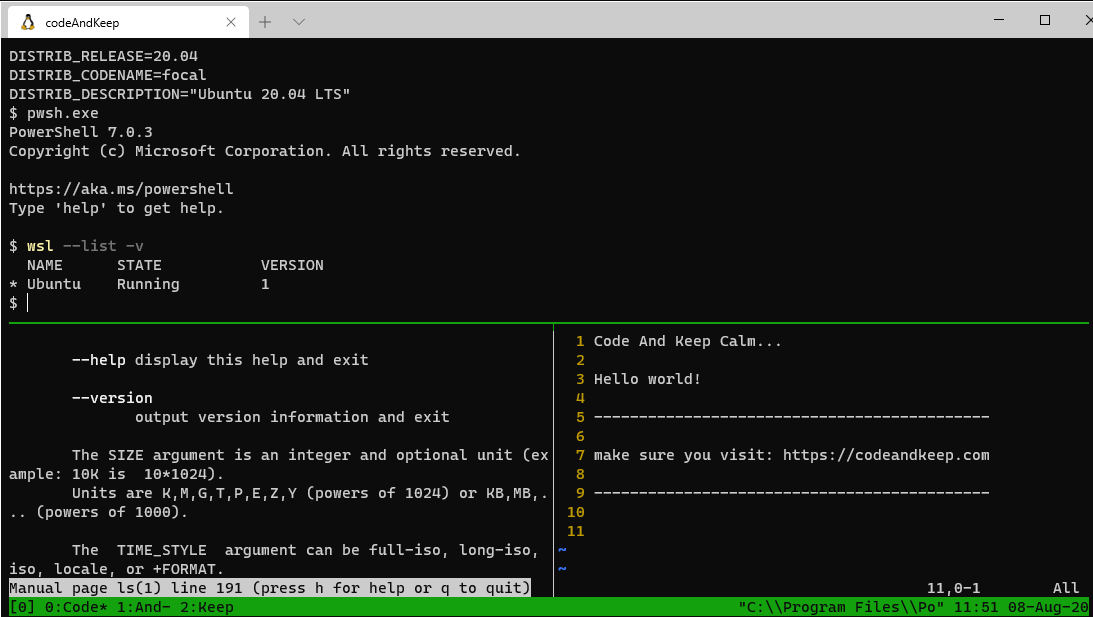
Step 6 (Optional): Run the Linux Shell in the Windows Terminal
If you launch the Windows Terminal now,
in the drop-down menu you should now have an option to select your Linux distro
If you want to set this as your default shell in the Windows Terminal,
you can update the settings Ctrl + , to do so.
Replace the GUID in defaultProfile with the one for your Linux app.
You can find the GUID in the list section under profiles.
You should see something like this:
    [
        "guid": "{2c4de342-38b7-51cf-b940-2309a097f518}",
        "hidden": false,
        "name": "Ubuntu",
        "source": "Windows.Terminal.Wsl"
    ]
Set this GUID as the defaultProfile,
and this will be the shell that opens by default.
Step 6: Install tmux
Open up the Linux distro app
(or launch it from the Windows Terminal if you have it installed).
Update / upgrade the applications using the package manager
For Ubuntu / Debian / Kali Linux
sudo apt update
sudo apt upgrade -y

# If using Ubuntu, Tmux should be installed already
sudo apt install tmux
Step 7: Launch
If you are just getting started with Tmux, search for Tmux Cheatsheet for useful examples
Now you can multiplex your terminals til the cows come home.
I will go into detail on configuring Tmux in VIM style in a future post.
Post: Customizing Tmux with VIM keys
Thanks for reading
PS> exit

If you’re a developer or a power user, you probably understand the importance of having an efficient and organized workflow.
Whenever I get to work with a Windows-based system, I really miss the terminal emulator along with the ability to quickly switch between different terminal sessions. Not to mention, sometimes I need to gather 2-3 command sessions in a single view. There are many scenarios where I need to run multiple commands simultaneously.
Sure, we have the command prompt, or Windows terminal to use, but it is not enough for a similar experience.
💡
Windows 11 Terminal does provide you the ability to create multiple panes within a tab. You can use the shortcut Alt + Shift + — and Alt + Shift + + to create horizontal and vertical panes, respectively.
With Linux, I had access to terminal multiplexers like tmux and screen.
But, wait, there is a solution on Windows 10 and Windows 11 that can work as a terminal multiplexer and a text editor – all in one!
Enter Emacs 🤩
Why Use Emacs as a Terminal Multiplexer?
While I have already mentioned why we are looking at a solution like Emacs, let me give highlight some more reasons you want to try this out (apart from the fact that it is open source and super awesome):
1. Less is More
Emacs is an all-in-one solution. It can work as a terminal, text editor, file manager, email client, calculator, a text-based web browser. All these features are packed in a 150 MB zipped file. Pretty crazy, right? You won’t know all this until you give it a try!
2. Powerful Customization
Emacs is famously customizable. You can tweak almost everything: keybindings, window layouts, themes, and even the behavior of your terminal sessions. This allows you to tailor the environment to your exact needs, providing a highly efficient experience.
3. Integrated Shell Support
Emacs allows you to open a shell session inside a buffer, and with its support for eshell, shell, you can run shell commands, manipulate files, and perform operations right alongside your text editing.
4. Flexibility with Windows
Emacs is great at handling multiple buffers in a single window. You can split your window into multiple panes (or «windows,» as Emacs calls them), just like with tmux, enabling you to work on different tasks simultaneously without feeling cluttered.
Using Emacs as Terminal Multiplexer
Now that you know the benefits, to help you use it, let me give you a walkthrough on using Emacs as a terminal multiplexer.
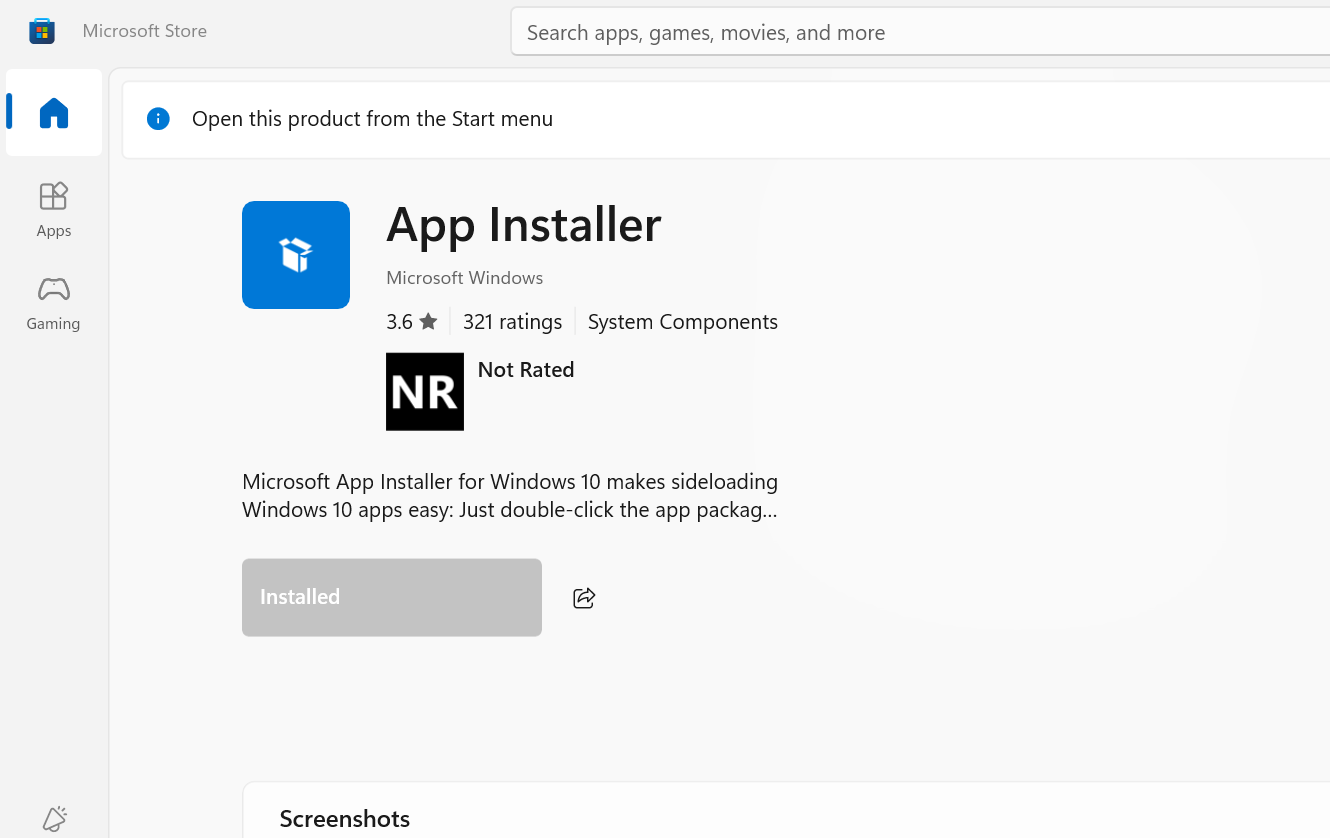
Step 1: Install Winget
Winget comes as a part of the App Installer package. So, you need to first install the App Installer from Microsoft Store:
Step 2: Install Emacs on Windows 11 or Windows 10
Winget makes it super simple to install Emacs. Simply run this command:
winget install emacsStep 3: Open Emacs
Open Emacs from the Windows 11 Start menu.
Step 4: Run shell
Within emacs, press Alt + X, and type shell and hit Enter to get the interactive user interface.
💡
In Emacs terminology, the Alt key is often referred to as M, and Ctrl is referred to as C. I have used C, and M to represent the same throughout the article.
Now, with Emacs, you will realize the following benefits:
- A nice auto-completion system
- Ability to edit any previous command at a point
- Quickly jump between different command sessions.
To see autocomplete in shell buffer, simply type in ‘a’ and then hit Tab, you’ll be presented with a list of options. You can select one of the options with a mouse click as shown above.
📋
If you see terms like C-s, or C-u, or Alt-x, read it as Ctrl + s/u or Alt + x.
To search for previous commands and outputs, hit C-s <your-term>. This is what I referred to when I mentioned consistent keybindings for all of your workflow. Within your Emacs environment, C-s will do a forward search everywhere unless you modify it.
To edit your previous commands, move your cursor to the previous command or do a quick search, make the necessary adjustments, and hit enter.
If you want to open another shell, press C-u keys, and then Alt-x to open another shell.
By default, this buffer will be named “Shell 2”. And you can navigate between these different shells by C-x b and Tab. Use the mouse for selection. We’ll make it more efficient in the next section.
Terminal Multiplexing
Now here comes the magic. If you want to create two vertical layouts, simply use the keybinding C-x + 3. Then, if you want two horizontal layouts, use the shortcut C-x + 2.
For navigation to other panes, you can use your mouse or use Emacs shortcut
C-x + o
Auto-completion and multi-window layouts
Another quick tip. With just one line configuration, Emacs can provide useful completions based on your action with ido-mode.
Save the line below in a new .emacs file usually located at your user C:/Users/YourUser/AppData/Roaming. After saving, you don’t need to restart Emacs.
(ido-mode 1)Let’s enable winner-mode as well to undo and redo multi-window layouts. Add the line below to the config file like you did above:
(winner-mode 1)Finally, save this two-line configuration
Simply, do Alt + x and then type eval-buffer.
Now with ido-mode, you can simply switch to shell 2 buffer using C-x b 2.
With winner-mode in place, if you want to get a full preview of a single pane, press C-x + 1, and then to go back to the previous layout, run
winner-undoYou can save yourself time by mapping a keybinding for winner-undo and winner-redo commands.
Keybindings Cheatsheet
Here’s a list of all keybindings we used throughout this tutorial.
| Keybinding Shortcut | What it does |
|---|---|
| C-x C-s | Saves the file |
| Alt-x | Opens mini prompt to enter interactive commands |
| C-s | Forward Search |
| C-u Alt-x | Run another instance of the command |
| C-x b | Navigates between the buffer |
| C-x 2 | Splits into two horizontal layouts |
| C-x 3 | Splits into two vertical layouts |
| C-x o | Move to another pane |
| C-x 1 | Get a full view of a particular pane |
💬Do you love having multiple terminal sessions as well? Let me know your thoughts in the comments!
Author Info
Bhuwan Mishra is a Fullstack developer, with Python and Go as his tools of choice. He takes pride in building and securing web applications, APIs, and CI/CD pipelines, as well as tuning servers for optimal performance. He also has passion for working with Kubernetes.
Tmux for windows using wsl support
Pre-request
- WSL
Setup WSL
Install a new distro(as the backend), alpine is recommended(it is lightweight).
Follow the basic instruction on installing it. Official guide
Then install tmux.
Alpine : apk update&&apk add tmux
Debian/Ubuntu: apt install tmux
Add new file ~/.profile with this code to automatically run powershell in tmux sessions
if [ -n "$TMUX" ]; then
        pwsh.exe
fi
You can change «pwsh.exe» to other shell (e.g cmd.exe, bash.exe, sh.exe, etc)
Installation
Download our program
Download
Setup our program
Add the path you download our program to environment path. Article about this
!!!! Remember to restart the terminal after added to environment path.
Setup config
Add or edit file tmux.conf with your favourite editor on the same folder of our program.
distro: alpine //your distro name of the backend distro
currently only one parms is required and used
Enjoy
In Windows 10 build 14361, available now to Windows Insiders fast-ring users, we’ve added Pseudo Terminal support to Windows Subsystem for Linux (WSL) which, along with improvements to Windows Console’s much improved support for rendering VT control sequences, enables Tmux support to light-up your console!
For those not familiar with it, Tmux is a terminal multiplexer – a popular (even essential) command-line tool that allows one to divide a console/terminal window into multiple “panes” and render the output of a shell and/or tool in each “pane”, and to switch input between each pane.
Tmux relies on a *NIX feature called Pseudo Terminals (PTY) that are attached to a process running a shell/tool, and which virtualize the behaviors of a terminal. A physical terminal (TTY) can then be attached to any PTY … or more than one in the case of Tmux: Tmux “attaches” each “pane” it contains to a separate PTY, allowing a single console/terminal to render the output of several *NIX tools in their own “pane” within the console.
To start, let’s open Bash on Ubuntu on Windows and install Tmux using apt-get:
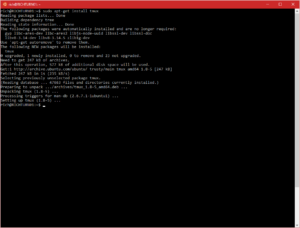
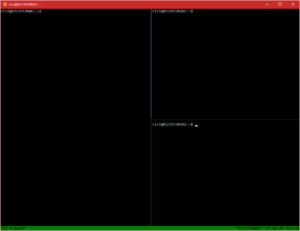
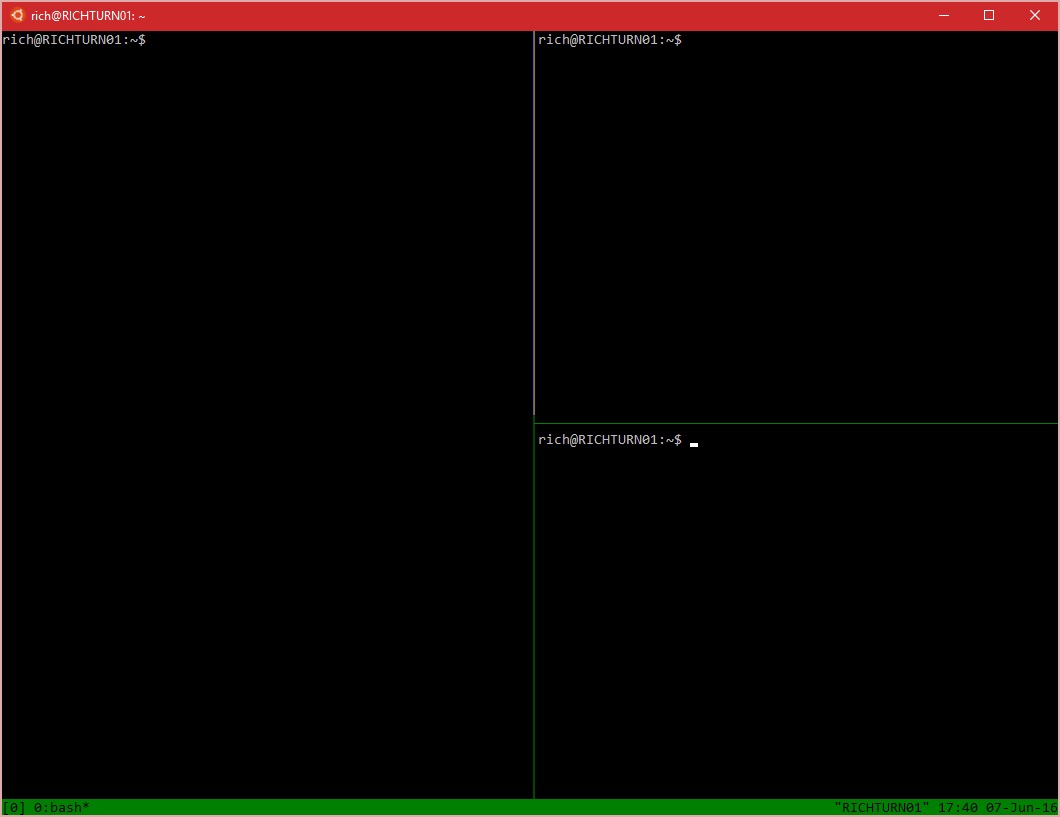
We start Tmux by running … well … tmux 🙂 This will clear your screen and add a (customizable) status bar to the bottom of the screen.
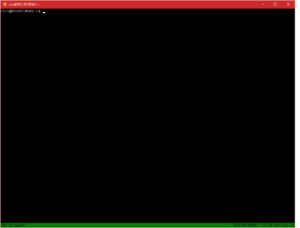
First, let’s split the current pane vertically using [CTRL B] + [%]:
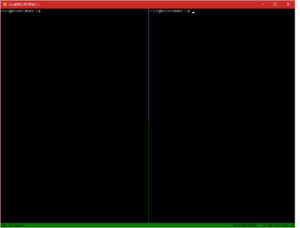
Now let’s split this new pane horizontally using [CTRL B] + [“]
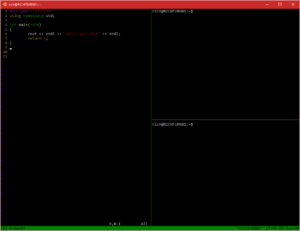
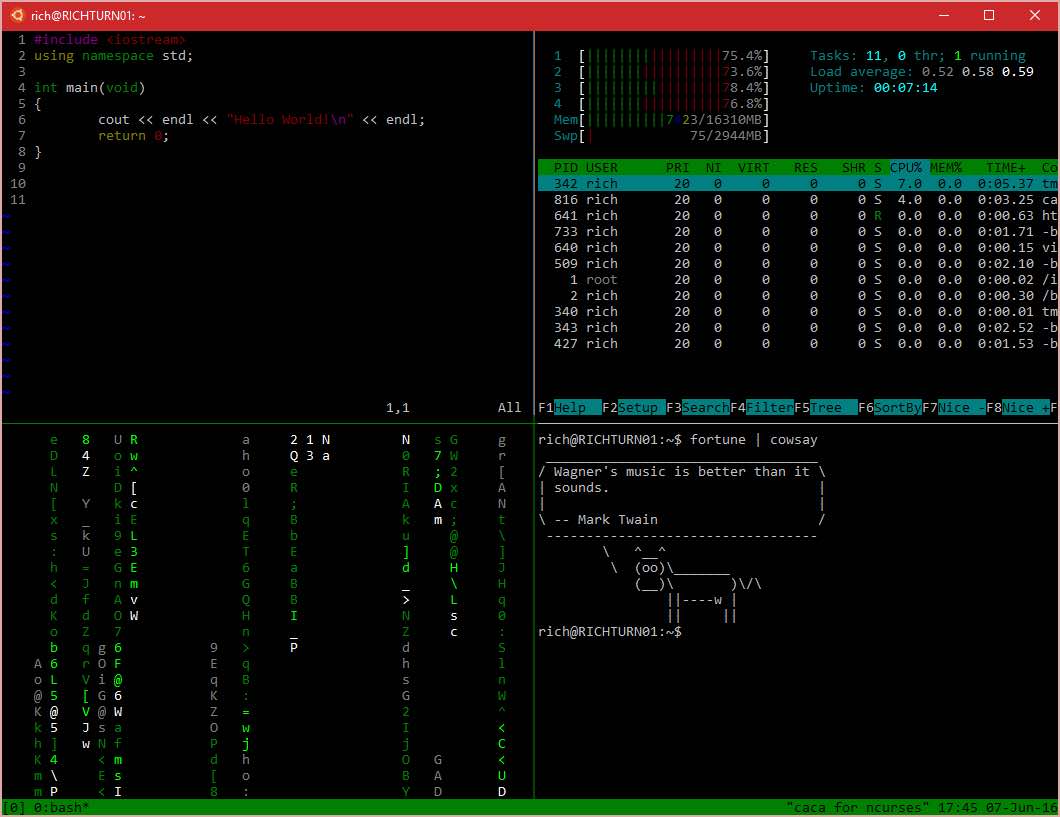
Cool! So, using [CTRL B] + [Arrow-key | P | N] we can navigate between panes. Let’s return to the left-hand pane and open a file in vim (e.g. “vim hello.cpp” in this case):
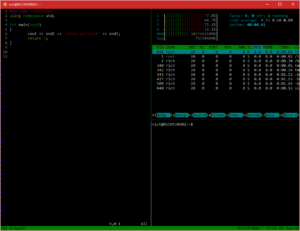
If we now navigate to the top-right pane again, and run “htop”, we can see a textual process monitor:
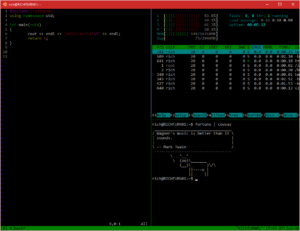
Move to the bottom-right pane and run “fortune | cowsay” (install using apt-get if they’re missing), and you can see a cow read out the fortune cookie message of the day 🙂
Three panes just aren’t fancy enough, so let’s split the left hand pane again: Navigate to the left pane using [CTRL B] + [Arrow-key] and hit [CTRL B] + [“] to split horizontally.
Now run “cacademo” (install using apt-get install caca-utils) and you’ll see a selection of crazy swirling and dripping text-effects!:
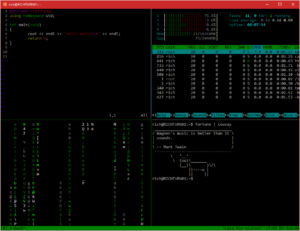
This is just a taste of what Tmux can do, but as you can imagine, its an amazingly powerful multi-paned terminals within a terminal tool that you can use to build dashboards of tools to suit many of your geeky needs!
Enjoy!
Author
Geek, Nerd, Hacker. Fan of Rugby, Motorcycles, Skiing, Outdoor activities.
Microsoft has recently released Windows 10 build 14361 to the Fast Ring Insiders. Apart from the regular fixes and improvements, Redmond has brought numerous changes to its Linux subsystem that runs Ubuntu on Windows 10.
In its official release notes, Microsoft has listed these changes that are highlighted by the newly-added support for Pseudo Terminal, enabling Tmux support.
For those unfamiliar with Tmux, it’s a command line tool that allows you to divide a terminal window into multiple panes. This terminal multiplexer allows the user to switch between different panes and render the output in each pane.
How to install and use Tmux on Ubuntu on Windows?
I hope that you’ve already installed Ubuntu on Windows 10. If you haven’t, follow our dedicated guide and proceed: How To Install And Run Bash On Ubuntu On Windows 10
Just like the usual Bash on Ubuntu, you can install Tmux in Windows 10 Bash using the apt-get command:
$ sudo apt-get install tmux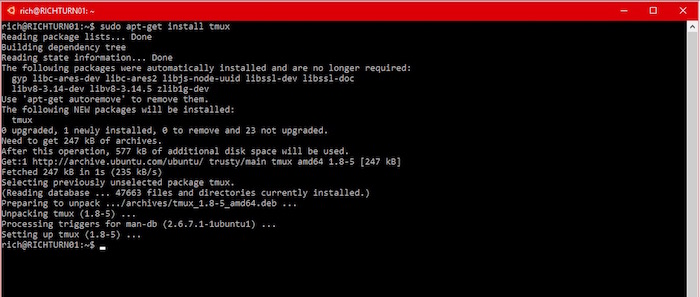
Now you need to start Tmux by running tmux command. This will bring a status bar to the bottom of your Bash screen and clear your screen.
Now you are good to go. You can split the screen vertically using this: [CTRL B] + [%]. To split the new pane horizontally, use this: [CTRL B] + [“].
To navigate between the panes, you need to use this: [CTRL B] + [Arrow-key | P | N]
Talking about what Tmux can do, this was just a drop in the ocean. Using this powerful tool, one can make multi-paned terminals and build a customized dashboard full of multiple tools.
Another important change in Bash on Ubuntu on Windows 10 comes in the form of case sensitivity in DrvFs. So, now it can recognise a difference between HELLO.TXT and hello.txt.
It should be noted that an unexpected behaviour may occur while using case sensitivity outside Bash on Windows.
Now Bash on Windows users can also chmod and delete read-only files from DrvFs. The connection to 0.0.0.0 and :: as localhost is also allowed.
To read the complete list of changes made to Microsoft’s Ubuntu port, visit here.
Did you find this article helpful? Don’t forget to drop your feedback in the comments section below.
Recommended: Microsoft’s Love Affair With Linux