
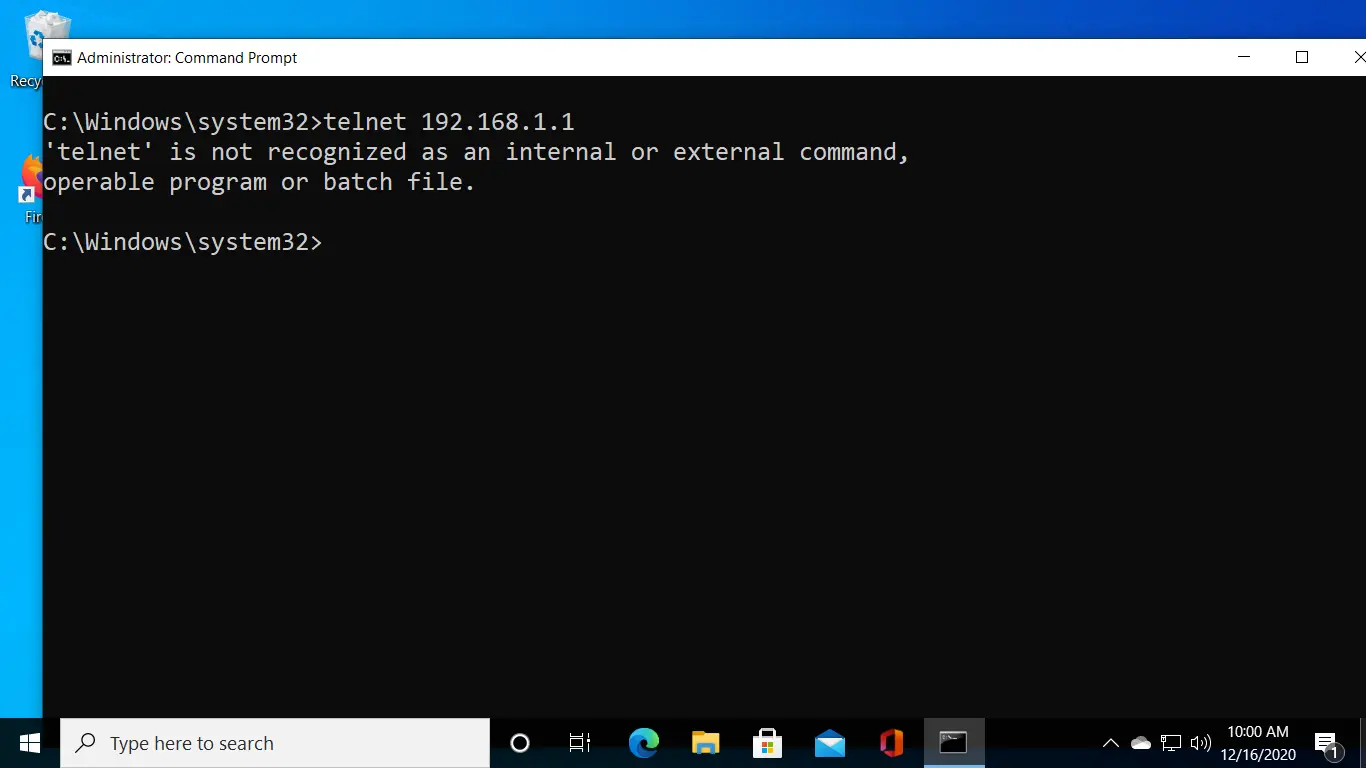
Windows 10 users may receive the following message on CMD when attempting to run the telnet command: 'telnet' is not recognized as an internal or external command, operable program or batch file.
A similar error happens on PowerShell: The term 'telnet' is not recognized as the name of a cmdlet, function, script file, or operable program. So what is the problem?
The problem is that Telnet (client) is not enabled by default on Windows 10. But we can easily enable it by turning on the Telnet Client Windows feature.
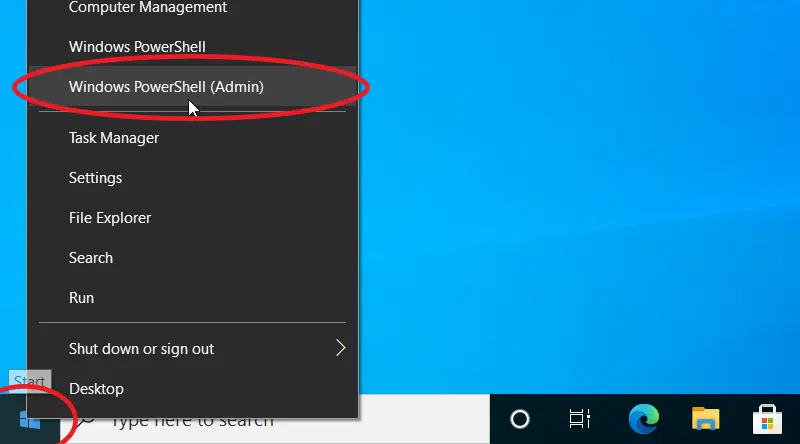
To enable Telnet on Windows 10, right-click the Start button, and choose Windows PowerShell (Admin).
Type the following command and hit Enter:
Enable-WindowsOptionalFeature –Online –FeatureName TelnetClient –AllAfter that telnet command will be available in both CMD and PowerShell.
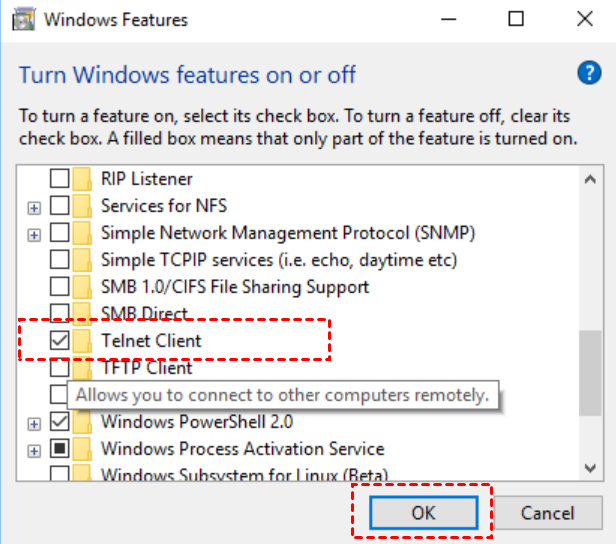
Alternatively, you can install Telnet Client by going to Control Panel | Programs and Features | Turn Windows features on and off.
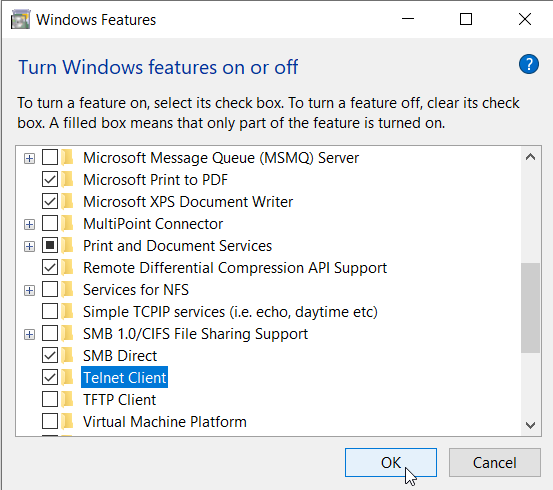
And selecting the Telnet Client check box, and then clicking OK.
- You need to enable the Telnet Client feature, cause it may not preinstalled on your Windows.
- In Windows 7, enable the Telnet Client via the Control Panel or using provided command.
- For Windows 10 and 11, you can also try PowerShell.
- Try Telnet alternatives like PuTTY and AirDroid Remote Support.
One thing about Telnet is that is not just smooth sailing. There are times when it runs so perfectly, that you get your projects running smoothly like a well-oiled machine. You are living the dream, then as it happens, glitches get in. Perhaps you switched to a different CPU, your windows got changed or updated.
The thing is whether its that Windows 7, 10, or 11 you are going to get a “Telnet is not recognized” error. It can be one of those demoralizing moments and the question is, can you fix it? Sure, there is a way around this but before we get to that, let’s figure out this problem first.
Why «Telnet is Not Recognized»
Okay, Telnet by default is not active on modern versions of Windows. That is from Windows 7 going to 11. Understand this, it’s got some security vulnerabilities. Some do consider SSH instead. By some point Telnet is outdated. Assuming you don’t get it included as a default part of your Windows features, you are going to get the Telnet not recognized error. So here is what you need to do to get it running.
Enabling Telnet Client via Control Panel (Windows 7/10/11)
The convenient thing about the Control Panel is that its graphical interface does not change between all Windows-enabled devices. This comes in very handy when Windows fails to recognize Telnet.
Step by Step Instructions:
- Open the Control Panel: Click the Start button. Type «Control Panel» in the search bar. Press Enter to open it.
- Go to Programs and Features: Under the Control Panel, under the category of Programs, click on «Programs and Features «. This will open a window with all your installed applications.
- Turn Windows Features On or Off: On the left side of the Programs and Features window, you will see an option titled «Turn Windows features, on or off.» Click on it.
- Activate Telnet Client: Following the list of features windows down, scroll down your screen to get the Telnet Client. Tick the box beside it. Click OK to enable it. Windows will take a few moments to implement these changes including installation for this feature.
- Getting Ready for Telnet: After the installation is complete, go ahead to turn on the Telnet client by typing «cmd» in the Start menu and then pressing Enter. Then type «Telnet» Once you’ve completed the steps press the Enter key. If ‘Telnet’ appears on your screen then you’ve successfully turned on the Telnet client.
Here’s a tip, for troubleshooting :
If you can’t find the Telnet Client in your Windows Features list it could be due, to missing system updates. Have Windows Update set to Run on your computer, and try connecting with the Telnet client once more.
Trigger Command Prompt to Install Telnet Client (Windows 7/10/11)
Command Prompt is a very quick and efficient way, here is what you need to do
Step-by-Step Guide:
- You can get the command prompt by searching it from the search bar. Simply type in the command prompt.
- In the next part, you are going to do some right-clicking on the search result that is on the Command Prompt. Then run as admin.
- Now you are going to enable Telnet using DISM. Here is the command you need
- Type in the command prompt bar cmd after you copy this code, then hit enter
copy Copied!
dism /online /Enable-Feature /FeatureName:TelnetClient
This will enable the Telnet client to use the Deployment Imaging Service and Management Tool which is a command line tool.
Check whether it is installed: Just open Command Prompt and type Telnet then check if it acknowledges it or not. If yes, that’s all good.
Other Command Line Options
Sometimes it is possible to fail using DISM because of your system configurations. Then use pkgmgr in such situations:
copy Copied!
pkgmgr /iu:"TelnetClient"
This also installs the Telnet client
Enable Telnet Client through Powershell (Windows 10/11)
PowerShell has more advanced scripting ability than the command prompt hence preferred by systems administrators. This may be the way to go if you know PowerShell.
Step-by-Step Guide:
Step 1: Run PowerShell as Administrator:
Click on Start Menu, at the bottom of the start menu search field type in “PowerShell”.
⚠️Note : Running PowerShell as an admin is important especially when enabling system features like Telnet, that require high privilege. Some commands may fail if you attempt to run Powershell without administrative rights.
Step 2: Install Telnet Client using Powershell
Having Powershell already open using administrative power, run the following command to install the Telnet client;
Copy and paste the following script in the window of Windows Powershell and run.
copy Copied!
Install-WindowsFeature -name Telnet-Client
Once done, the installation process is complete. That’s it. You receive a successful installation message right in your PowerShell.
Other Alternatives to Telnet
While there are some uses where Telnet would be appropriate, there are occasions where it does become inappropriate—especially during issues of security and features. Therefore, two powerful alternatives will be discussed hereafter: PuTTY and AirDroid Remote Support.
PuTTY:
PuTTY is an open-source emulator for terminals supporting various network protocols: Telnet, SSH, and serial communications. It arrives as one of the very popular tools to connect with remote servers or devices on a network.
The best about PuTTY is that it works with many other standards like SSH, which is a security feature lacking in the Windows-built-in Telnet. It’s possible to personalize since there are a variety of options to customize it. Light, portable, and no installation hassles make this tool workable on any machine. If you have some situation where the security has to be top-notch, then instead of Telnet you should use PuTTY.
AirDroid Remote Support
AirDroid Remote Support will give an easy way to use the solution for the realization of the capability of managing one’s computer safely from a distance, even by non-technical users. It also has a Black Screen Mode, meaning that the screen of the other person will turn black so as not to compromise privacy during the session. AirDroid gives end-to-end encryption; hence, its secure remote access is more reliable compared to other traditional tools available.
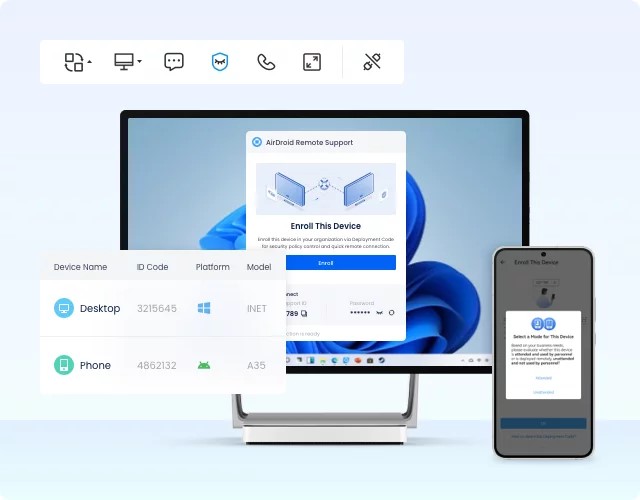
Besides the lightweight feature, AirDroid does not affect the performance of devices at all, hence making it perfect for support services or handling multiple devices at one time and still being compatible with almost all platforms or devices in use.
FAQs
Why does my Windows computer not let me Telnet?
Telnet on Windows has been disabled in every latest version although it can be turned on by going to Control Panel, PowerShell, or Command Prompt.
How do I know if my system’s Telnet is enabled?
In case you type “Telnet” into the command prompt or PowerShell and get the program responding as expected, this means that your computer is capable of Accessing Telnet.
Is there any security risk with Telnetting?
Since these messages are sent in plain text it is unsafe to use Telnet for such communication puts important information at risk; instead use secure methods like SSH to transmit such data.
Can I replace Telnet with PuTTY?
PuTTY is a more secure alternative compared to the default Telnet client which offers some additional features while serving as a blend of what SSH, Telnet, etc. require from each other.
What else could I use if Windows can’t find the Telnet?
AirDroid Remote Support is one of the safest and easiest solutions, with features like Black Screen Mode, which provides high security for their data.
Introduction
In the world of computer networking, Telnet has served as an important protocol for remote communication. Primarily used to access remote servers and devices, Telnet facilitates command-line interface access over the Internet. However, users often encounter a common issue: the «Telnet is not recognized as an internal or external command» error in Windows. This article aims to delve into the reasons behind this problem, solutions to resolve it, practical applications of Telnet, and insights into security considerations.
Understanding Telnet
What is Telnet?
Telnet, which stands for «Telecommunication Network,» is a network protocol that allows for text-based communication over the Internet or a local area network (LAN). By using Telnet, users can authenticate themselves on remote systems, manage devices such as routers, and execute commands on servers.
Historical Context
Telnet was developed in the late 1960s and became widely used in early networks. In its early life, it enabled multiple networked computers to communicate with one another. While it still holds some relevance today, it has been largely superseded by more secure protocols like SSH (Secure Shell), primarily due to the lack of encryption.
Core Features
- Remote Access: Users can access a host computer from anywhere, providing a significant advantage for server management and troubleshooting.
- Command-Line Interface: Telnet provides users with a straightforward ASCII-based command interface for executing commands on the remote machine.
- Support for Multiple Platforms: It can operate across different platforms and devices, making it versatile.
Causes of the «Telnet is not recognized» Error
Experiencing the «Telnet is not recognized as an internal or external command» error typically occurs in Windows operating systems. Below are some of the main causes:
1. Telnet Client Not Installed
The most common reason for this error is that the Telnet client is not enabled on your Windows operating system. Unlike other operating systems such as Linux, where Telnet is often pre-installed, Windows requires users to enable it manually.
2. System PATH Environment Variable
Even when the Telnet client is installed, if the PATH environment variable in your Windows system does not include the folder where the Telnet executable is located, you will receive this error message.
3. User Permissions
Even if you have the Telnet client installed, inadequate user permissions might hinder access to the command, leading to this error.
4. Corrupted Files
In some rare cases, files related to the Telnet client could be corrupted, thus leading to issues when attempting to run the command.
5. Windows Version
Telnet is not supported out of the box in some versions of Windows and may require different steps to enable, especially with Windows 10 for instance, where Microsoft has made it an optional feature.
How to Resolve the «Telnet is Not Recognized» Error
Step 1: Enable the Telnet Client
To use Telnet, you first need to enable the Telnet Client feature in Windows. Here are the steps:
-
Open Control Panel: You can search for «Control Panel» in the Windows search bar and click on it.
-
Navigate to Programs: Select «Programs,» then click on «Turn Windows features on or off.»
-
Locate Telnet Client: In the Windows Features dialog box that appears, scroll down to find «Telnet Client.»
-
Enable Telnet Client: Check the box next to «Telnet Client» and click «OK.»
-
Wait for Installation: Windows might take a few moments to install this feature.
-
Verify Installation: After installation, open Command Prompt again and type
telnet. If the client is enabled successfully, you should no longer receive the «not recognized» error.
Step 2: Check the PATH Environment Variable
If the Telnet client is enabled but the error persists, it may be due to the PATH environment variable not including the required directory.
-
Open System Properties: Right-click on «This PC» or «My Computer» on your desktop or in File Explorer and select «Properties.»
-
Advanced System Settings: Click on «Advanced system settings» located on the left side.
-
Environment Variables: In the System Properties window, click on the «Environment Variables» button.
-
Edit System Variables: In the Environment Variables window, find the «Path» variable in the «System variables» section, select it, and click «Edit.»
-
Add Telnet Path: If
C:WindowsSystem32is not already listed, click «New» and add this directory. This is the default location where the Telnet executable is stored. -
Save Changes: Click «OK» on all dialog boxes to save the changes.
Step 3: Run Command Prompt as Administrator
If the correct settings are in place and you’re still facing the error, try running Command Prompt as an administrator:
- Search for «Command Prompt» in the Windows search bar.
- Right-click on it and select «Run as administrator.»
- Then type
telnetand hit Enter.
Step 4: System File Check
If problems persist, consider running a System File Check (SFC) to detect and repair any corrupted system files.
- Open Command Prompt as Administrator.
- Type
sfc /scannowand press Enter. - Wait for the scan to complete and follow any on-screen prompts.
Usage Examples of Telnet
Once the Telnet client is running without any glitches, you can start using it for a variety of purposes.
Example 1: Connecting to a Remote Server
The most basic and common use of Telnet is to connect to a remote server. For example, to connect to a mail server at mail.example.com on port 25, you would type:
telnet mail.example.com 25Example 2: Checking Open Ports
Telnet can also be used to test network connections and open ports. By attempting to connect to a particular port, users can check if that port is open or closed. For example:
telnet example.com 80This command checks if port 80, typically used for HTTP, is open on the server.
Example 3: Remote Device Management
System administrators often use Telnet to remotely manage network devices. For instance, many routers provide Telnet access for configuration purposes. The connection is usually established as follows:
telnet 192.168.1.1Once connected, you can issue commands to configure or troubleshoot the device.
Security Considerations
Risks of Using Telnet
While Telnet provides an easy way to access remote systems, it comes with significant security risks:
-
Lack of Encryption: Telnet transmits data, including usernames and passwords, in plain text. This makes it susceptible to eavesdropping and man-in-the-middle attacks.
-
Unauthorized Access: Due to weak authentication mechanisms, unauthorized individuals can easily gain access to sensitive systems if Telnet is left enabled.
Recommendations for Secure Access
Given the inherent insecurity of Telnet, consider the following best practices:
-
Use SSH: For secure remote access, consider using SSH instead of Telnet. SSH encrypts all traffic and provides better authentication options.
-
Restrict Access: Implement access controls by using firewalls to restrict Telnet access to trusted IP addresses only.
-
Disable Telnet When Not in Use: If Telnet is not actively used, disable it to minimize attack vectors.
-
Regularly Update: Ensure your operating system and networking devices are regularly updated to address any security vulnerabilities.
Conclusion
The «Telnet is not recognized as an internal or external command» error is a common hurdle faced by many Windows users when attempting to leverage the Telnet protocol. However, by following the outlined steps to enable the Telnet client and troubleshoot potential issues, users can effectively access remote systems for various purposes, including management, testing, and monitoring.
While Telnet remains a valuable tool in the networking toolkit, it’s essential to remember its limitations, particularly in terms of security. Wherever possible, opting for more secure alternatives such as SSH is highly recommended. Understanding both the functionality and risks associated with Telnet can lead to smarter choices in managing network systems and maintaining security protocols.
Telnet is a network protocol used to establish a text-based connection between two devices. It is used to manage network devices and troubleshoot network problems. Telnet is a powerful remote terminal connection tool.
It is not enabled by default in Windows 10. However, you can easily facilitate it with just a few clicks. It is not recognized in Windows 10 by default. This article will show you Telnet Is Not Recognized On Windows 10!
What is Telnet?
Telnet is a protocol used to connect to remote systems. It is a text-based interface that uses TCP/IP. You can use Telnet to connect to Unix, Linux, Microsoft Windows, and Mac OS systems. Telnet is not recognized on Windows 10.
Telnet is a program used to connect to remote systems. On Windows 10, Telnet is not recognized as an available program. This can be a problem if you need to connect to a remote system.
If you are using Windows 10 and need to connect to a remote system, you may experience problems if Telnet is not recognized. This can be a problem if you need to connect to a remote system for troubleshooting or performing administrative tasks.
If you cannot connect to a remote system using Telnet, consider using another method such as SSH or WinRM.
How to Use Telnet Step by Step?
Step 1: Open a Telnet Client
If you are using a Windows 10 device, you may not connect to a Telnet server. In this case, you can try to open a Telnet client.
Step 2: Type in the IP Address of the Device you wish to Access
If you are trying to access a device on your network that is not currently connected to the internet, you will need to type in its IP address.
Step 3: Type in the Username and Password of the Device
If you’re using a Windows 10 computer, you might be wondering why Telnet isn’t recognized. This is likely because Windows 10 has updated its Telnet client and no longer supports older versions. If you need to use Telnet on a Windows 10 computer, you can type the username and password of the device into the Telnet window.
Also Read: How To Change Audio Output On Windows 10
How to Enable Telnet in Windows 10?
Telnet is a protocol used to access a computer remotely. It can be used to troubleshoot issues or to access remote systems. In Windows 10, Telnet can be enabled by following these steps:
- Open the Control Panel.
- Under System and Security, click on the Administrative Tools menu item.
- Under Services, click on Telnet.
- In the Telnet Properties dialog box, click on the Enable button.
- Click on the OK button to close the Telnet Properties dialog box.
Also Read: How To Charge Laptop In Car? 4 Easy Method
How to Use Telnet in Windows 10?
Telnet is a command-line utility that allows you to connect to remote systems. In Windows 10, Telnet can connect to systems running Unix, Linux, or macOS.
To use Telnet in Windows 10, open the Start menu, type “telnet,” and press Enter. To connect to a system running Windows 10, enter the system’s IP address or hostname in the telnet prompt.
Windows 10 does not recognize Telnet. If you want to connect to a remote computer, you need to use a different protocol such as SSH or RDP.
Microsoft’s most recent operating system is Windows 10. It is a desktop and laptop operating system released on July 29, 2015.
Telnet is not recognized on Windows 10 because Microsoft has removed it from the operating system. Telnet is a program that allows you to connect to a remote computer over a network.
Windows 10 does not recognize Telnet, which could be because it is not installed or because it is not configured to be identified.
- Check if Telnet is installed on your computer.
- If Telnet is not installed, see if Windows 10 recognizes it by trying to open a Telnet session.
- If Windows 10 does not recognize Telnet, see if you can configure it to be identified.
Internally or externally, Telnet is not recognized as a command.
Telnet is a protocol that allows a user to connect to a remote computer and execute commands on that computer. Telnet is not recognized as an internal or external command on Windows 10.
This means that Telnet will not work as expected when connecting to a remote computer.
If you are trying to connect to a remote computer using Telnet, you may find that the connection does not work as expected. This is because Telnet is not recognized on Windows 10.
1: Telnet is not recognized as an internal or external command.
2: Telnet isn’t accepted as a legitimate command.
3: Telnet is not recognized as a valid protocol.
4: Telnet is not recognized as a valid hostname.
5: Telnet is not recognized as a valid port.
6: Telnet is not recognized as a valid command.
7: Telnet is not recognized as a valid user name.
Also Read: T Mobile Revvl 5G Phone Case-How To Buy?
What are the Disadvantages of Telnet?
There are several disadvantages to using Telnet.
First, it can be slow and difficult to use.
Second, it is not secure, making it vulnerable to attack.
Finally, Telnet is not always available, making it difficult to access information.
Also Read: How To Project Laptop Screen To A Wall Without A Projector? Step-By-Step
Final Thinking
Telnet is a powerful tool that it can use to manage and troubleshoot network devices. Telnet allows users to connect to remote devices and issue commands to them. This can be useful for diagnosing and resolving issues with network devices.
However, it is not recognized in Windows 10 by default. Windows 10 does not include support for Telnet by default, which can be a problem for some users.
If you need to use Telnet on your Windows 10 machine, you can install the Telnet client from the Microsoft Store.
Read More:
A Device Attached To The System Is Not Functioning Windows 10; Six Easiest Solution
How To Uninstall Kodi On Windows 10? A To Z Guide
Avast UI Failed To Load Windows 10 1803; Details Information
How Long Does System Restore Take Windows 10? Details Description
Arun is a self-published author and blogger with a passion for sharing his knowledge and expertise on Tech with people who are looking to find the perfect content for their needs. He tries to furnish you with genuine content about gadgets & tech that can assist you with deciding whether a gadget is appropriate according to your requirements or not.
Способ 1: «Программы и компоненты»
По умолчанию в «десятке» утилита telnet отключена, однако её можно без труда активировать. Самый простой способ сделать это – воспользоваться системной оснасткой «Программы и компоненты».
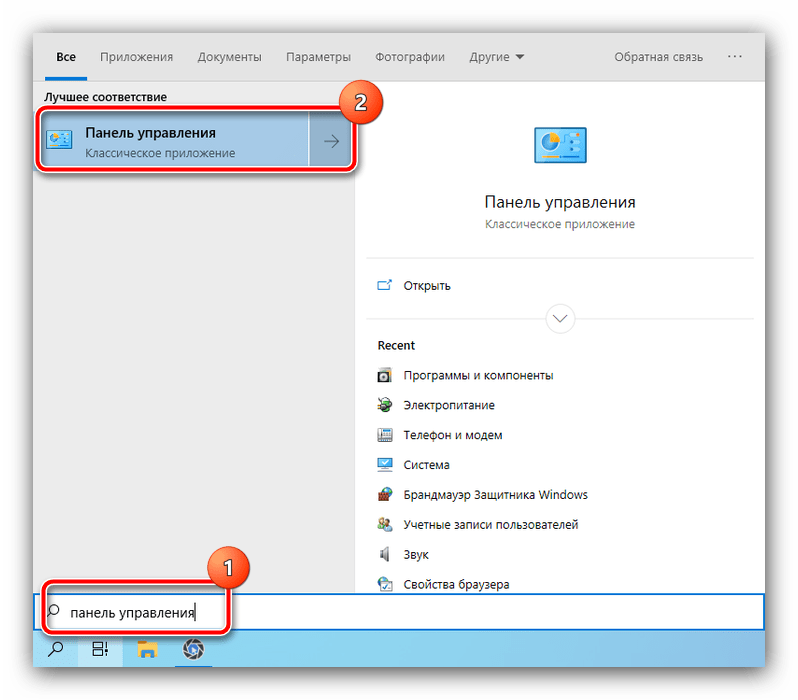
- Вызовите «Поиск», введите в нём запрос
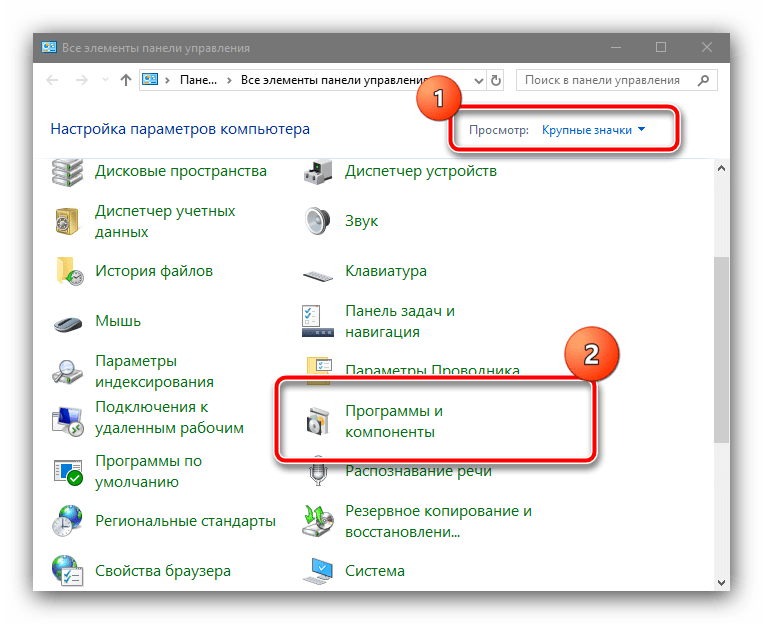
панель управленияи откройте найденный результат. - Переключите отображение значков в режим «Крупные», затем найдите в перечне пункт «Программы и компоненты» и перейдите к нему.
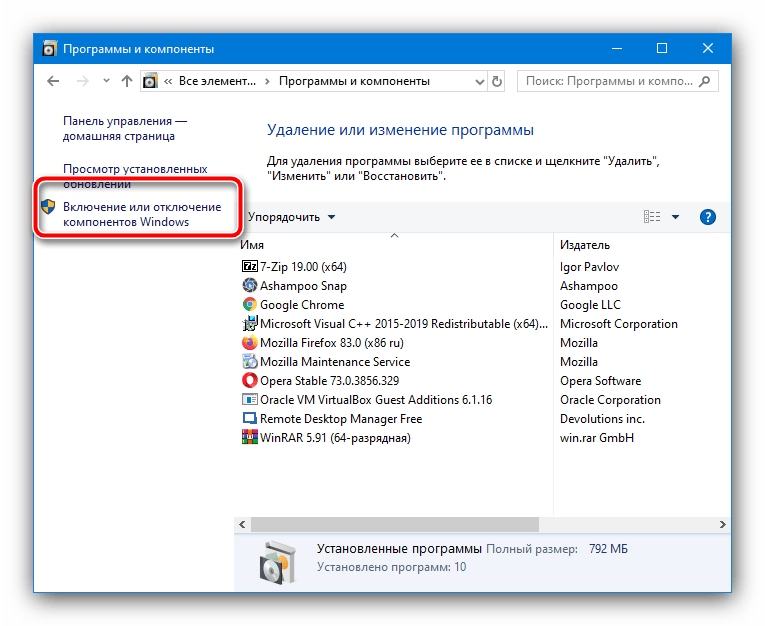
- Здесь воспользуйтесь ссылкой «Включение или отключение компонентов Windows» в левом меню.
- После запуска окна найдите в списке каталог «Client Telnet» и поставьте напротив него отметку.
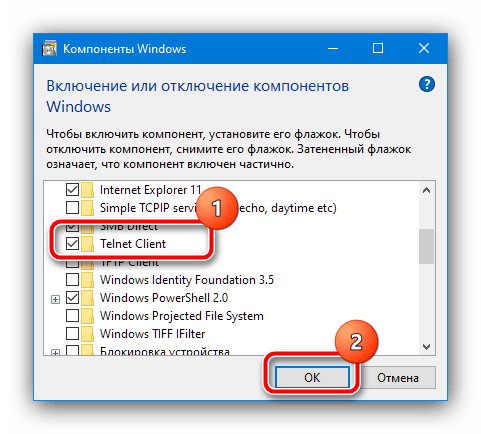
Дождитесь окончания установки и перезагрузите компьютер, после чего попробуйте задействовать telnet – теперь всё должно пройти без проблем.
Способ 2: «Командная строка»
Если первый вариант по каким-то причинам недоступен, альтернативой ему будет «Командная строка».
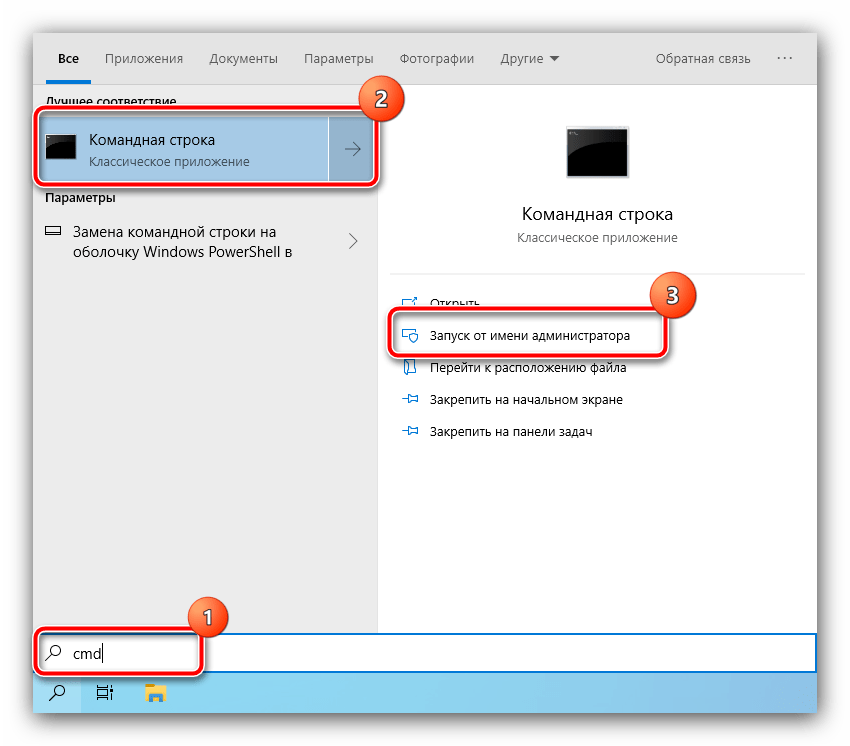
- Запустите инструмент от имени администратора – сделать это в «десятке» проще всего будет через тот же «Поиск»: откройте его, начните вводить
cmd, затем воспользуйтесь соответствующей опцией запуска.Подробнее: Запуск «Командной строки» от имени администратора в Windows 10
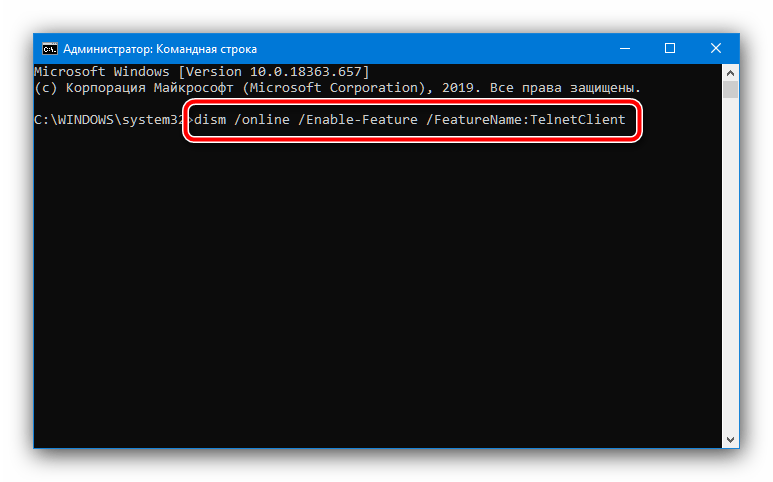
- В интерфейсе ввода команд пропишите следующее и нажмите Enter.
dism /online /Enable-Feature /FeatureName:TelnetClient - Подождите, пока появится надпись «Операция успешно завершена», после чего закройте консоль и перезапустите систему.
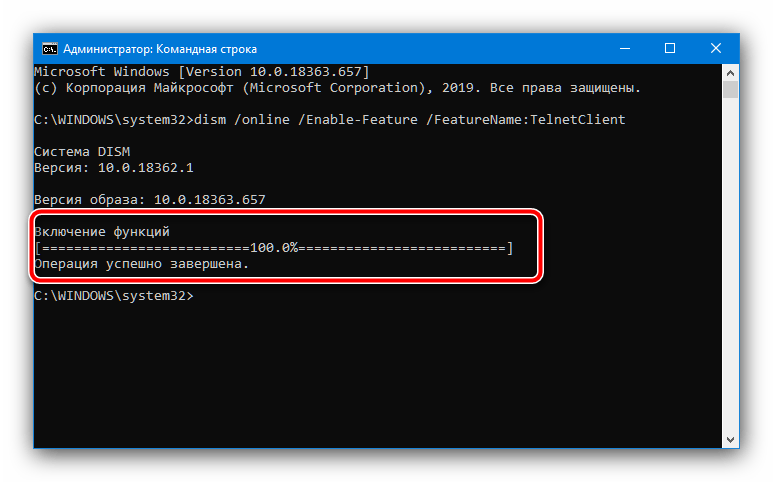
Как правило, использование «Командной строки» гарантирует решение проблемы.
Наша группа в TelegramПолезные советы и помощь