
Всё начало после того, как я скачал репак игры с торрентов. У меня не открывались все антивирусы и компьютер жутко зависал, прочитав один из постов на этом сайте я зашёл в безопасный режим (предварительно скачав Malwarebytes и DrWeb) запустил и ждал проверки. Антивирусы нашли угрозы и удалили их, после чего зайдя в обычный режим у меня стали запускаться антивирусами, я ещё раз всё проверил и угроз на этот раз выявлено небыло. Дальше я скачал программу AVbr, запустил и погодя пару секунд она начала удалять «майнер», удалила учётную запить о которой я не знал, всё было хорошо пока я не перезагрузил компьютер. В последующей проверке AVbr предлагала сбросить файл «host», я соглашался и после перезагрузки ничего не менялось. Каждый раз когда после того как программа AVbr удаляет майнер скриптом компьютер перезагружается и всё по новой, ничего не меняется. Прошу помочь. Лог прикреплён.
Сообщение от модератора thyrex
Темы объединены
CollectionLog-2023.05.01-12.33.zip
Hi,
We’ve used the optimization script on a 20H2 image and are having some strange issues. Logging in with a fresh user profile on the optimized 20H2 image and then logging out fairly quickly after is causing the Windows logout to hang due to the above mentioned task. If you force the logout and log back in again, open Task Scheduler, we can see this task initiates at login and runs for 10 minutes until it hits the defined 10 minute timeout. A logout after the task has timed out, or if the task is stopped manually is successful.
What’s interesting is that the same does not occur on the same image before the optimization script has been run against it. The task will fire at login and complete with the same second.
Do you have any thoughts around this?
Thanks in advance.
Quick Tips
- Windows allows you to sync various settings, such as your wallpapers, passwords, language, and more when using the same Microsoft account.
- Enabling sync settings can be helpful if you work on multiple Windows devices.
- You can turn sync settings on or off using the Settings app, Registry Editor, or Group Policy Editor.
Method 1: Turn Sync Settings On or Off Using the Settings App
The Settings app gives you several options for managing your account preferences, including the ability to enable or disable sync. Whether you want to configure a single setting or stop syncing altogether, you can use the following steps to manage sync settings in Windows.
Step 1: Press the Windows + I keys to open the Settings app. Then, head to Accounts > Windows backup.

Step 2: Click on Remember my preferences to expand it. Then, use the checkboxes to enable or disable sync for accessibility, passwords, language preferences, and other Windows settings.

Alternatively, you can use the toggle next to Remember my preferences to enable or disable sync entirely.
Method 2: Turn Sync Settings On or Off With the Registry Editor
The Registry Editor is a useful tool that lets you configure various system settings by modifying a few registry files. However, as registry files contain important settings for Windows and its system apps, it’s important to be cautious while making any changes.
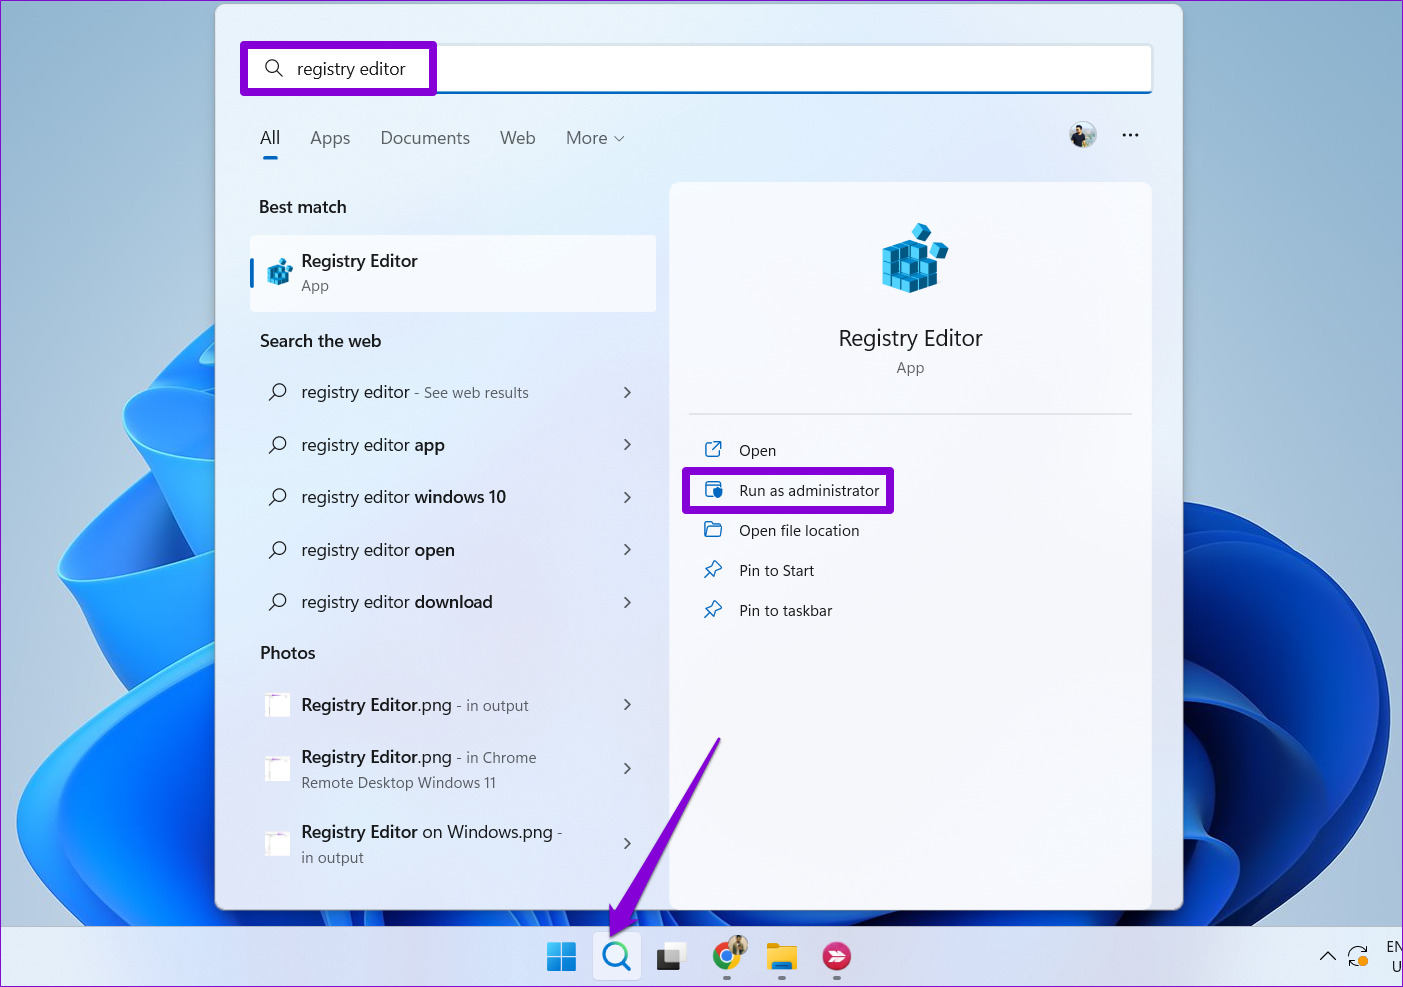
Step 1: Click the search icon on the taskbar and type in registry editor. Select Run as administrator.
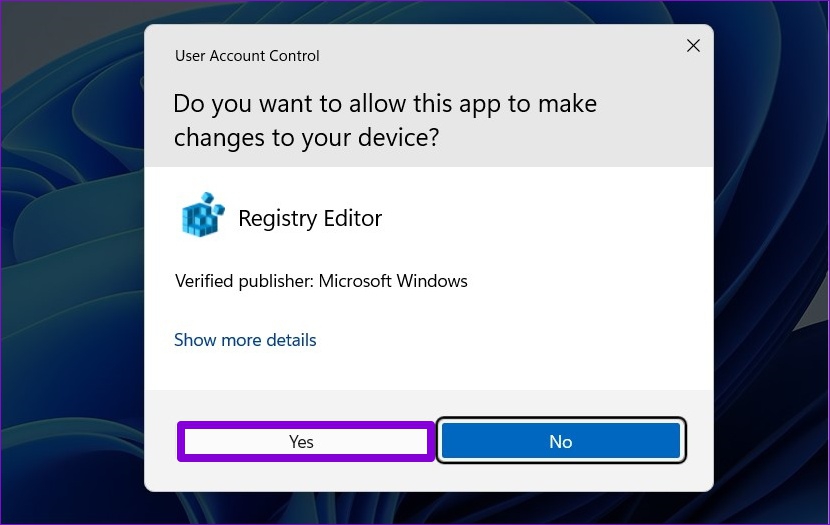
Step 2: Select Yes when the User Account Control (UAC) prompt appears.
Step 3: Paste the following path in the address bar at the top and press Enter to quickly navigate to the SettingSync key.
HKEY_CURRENT_USER\SOFTWARE\Microsoft\Windows\CurrentVersion\SettingSync

Step 4: Right-click on the SettingSync key in the left sidebar and choose New > DWORD (32-bit) Value. Name the new DWORD DisableSettingSync.

Step 5: Right-click on the SettingSync key in the left sidebar and choose New > DWORD (32-bit) Value. Name the new DWORD DisableSettingSyncUserOverride.

Step 6: Double-click the DisableSettingSync DWORD and change its value data to 2 to disable sync settings. Then, click OK.

Step 7: Double-click the DisableSettingSyncUserOverride DWORD and set its value data to 1 to disable sync settings. Then, click OK.

Similarly, if you want to configure Windows to sync settings across your devices, set the value of the DisableSettingSync and DisableSettingSyncUserOverride DWORDs to 0. Then, restart your PC to apply the changes.
Method 3: Turn Sync Settings On or Off Using the Group Policy Editor
The Group Policy Editor provides yet another way to configure sync settings on your Windows computer. However, you can only use this method if you’re using Windows 10 or Windows 11 Professional, Education, or Enterprise editions. If you’re using Windows Home Edition, you will have to use the Settings app or the Registry Editor solutions above to enable or disable sync settings.
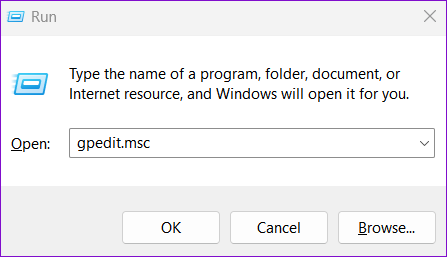
Step 1: Press the Windows + R keys to open the Run dialog box. Type gpedit.msc in the text box and hit OK.
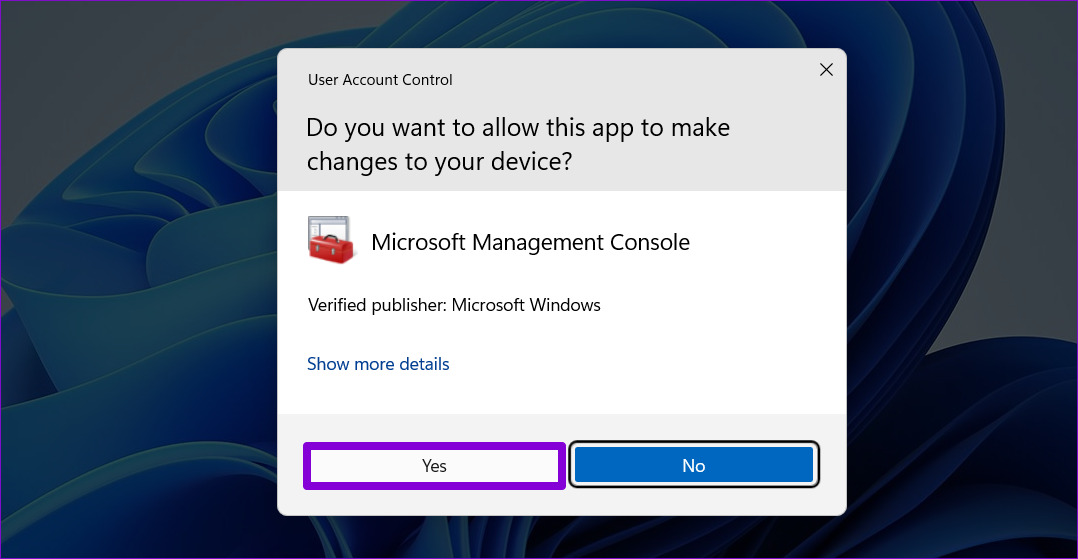
Step 2: When the User Account Control (UAC) prompt appears, select Yes to proceed.
Step 3: Use the left pane to navigate to the following folder:
Computer Configuration\Administrative Templates\Windows Components\Sync your settings
Step 4: Double-click the Do not sync policy from the right pane.

Step 5: Select the Enabled option if you want to stop Windows from syncing settings across devices. If you want to turn on sync settings, select Disabled or Not Configured instead.
Step 6: Click Apply followed by OK.

Was this helpful?
Thanks for your feedback!
The article above may contain affiliate links which help support Guiding Tech. The content remains unbiased and authentic and will never affect our editorial integrity.
Содержание статьи:
- Рекомендации по устранению
- Первое
- Второе
- Третье
- Четвертое (общие рекомендации)
- Вопросы и ответы: 0
Здравия!
Вероятно вы наткнулись на эту заметку из-за сообщения на экране про какой-то там «Task Host Windows»*, который мешает выкл. компьютер?! (см. пример на рис. ниже)
* Для начала отвечу о том, что это вообще такое «Task Host Windows»?
Это системное приложение Windows, отвечающее за работу с DLL библиотеками других программ. Работает оно постоянно, и если есть какое-то задание (даже отложенное, фоновое) — то при выкл. компьютера можно увидеть как раз это предупреждение о работе «Task Host Windows»… 👇
Т.е. в подавляющем большинстве случаев причина в появл. окна — какое-нибудь стороннее ПО, которое в данный момент работает (некоторые игры, редакторы, оптимизаторы, не сохраненные документы, и т.п.)
Ниже рассмотрим неск. рекомендаций, как его убрать (и что вообще можно сделать…). 😉👌
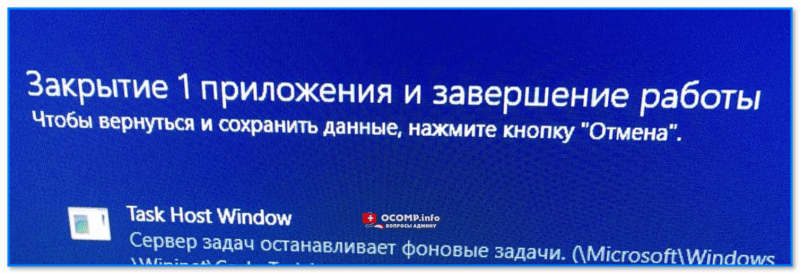
Task Host Windows. Закрытие одного приложения и перезагрузка — Чтобы вернуться и сохранить данные нажмите отмену. Сервер задач останавливает фоновые задачи // в качестве примера
*
Рекомендации по устранению
Первое
При появлении подобного окна (как на рис. ниже/выше) — обратите внимание на описание. Как правило, всегда указывается либо само «проблемное» приложение (например, Word или Блокнот 👇), либо фоновый процесс, который мешает завершить задачу.
Если данные из этого указанного приложения вам не нужны* — то можно просто-напросто нажать на кнопку «Все равно перезагрузить / выкл.» (как в примере ниже👇), и на этом вопрос должен быть решен…
*Разумеется, если данные из приложения нужны — необходимо отменить выключение ПК и предварительно всё сохранить на диск…
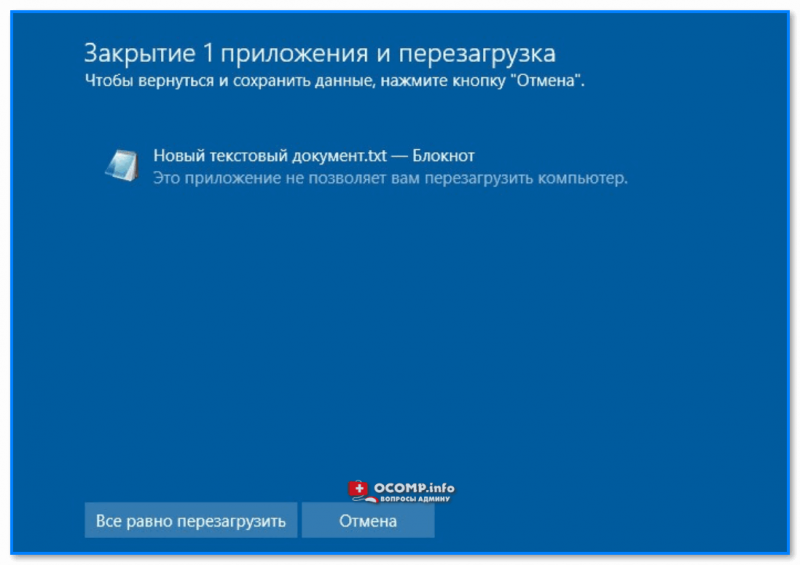
Проблема с блокнотом. Закрытие 1 приложения и перезагрузка… (еще один пример).
*
Второе
Если приложение из описания не очевидно (и вы не знаете из-за чего появляется окно с «Task Host Windows») — можно попробовать его узнать через 📌диспетчер задач (нажмите Ctrl+Alt+Del для его вызова).
Далее нужно открыть вкладку «Сведения» (либо «Подробности», зависит от версии Windows), найти процесс «taskhostw.exe», нажать по нему правой кнопкой мыши и перейти во вкладку «Анализ цепочки ожидания».

Анализ цепочки ожидания — Диспетчер задач Windows 11
Затем должно появиться окно с деревом процессов и приложений, которые вызывают «проблему»… 👇👌

Здесь может быть указан процесс, программа, которые вызвали проблему…
*
Третье
Есть ряд параметров, которые могут приводить к рассматриваемой проблеме — и на время диагностики я бы порекомендовал вам попробовать их откл.:
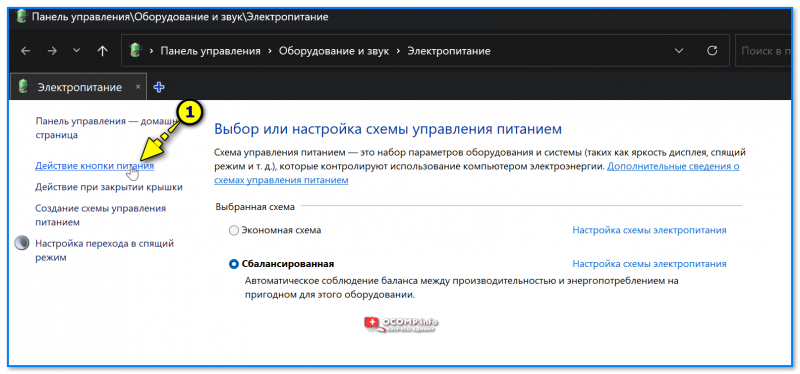
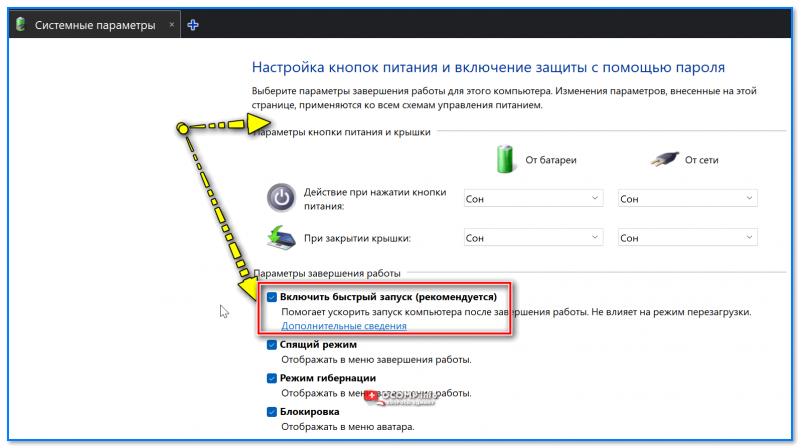
- быстрый запуск: чтобы его откл. — необходимо открыть настройки электропитания (Win+R, и команда powercfg.cpl), затем перейти в «Действие кнопки питания» и снять галочку напротив пункта «Вкл. быстрый запуск» 👇👇(Перезагрузить ПК);

Действие кнопок питания

Откл. быстрый запуск — настройки электропитания Windows
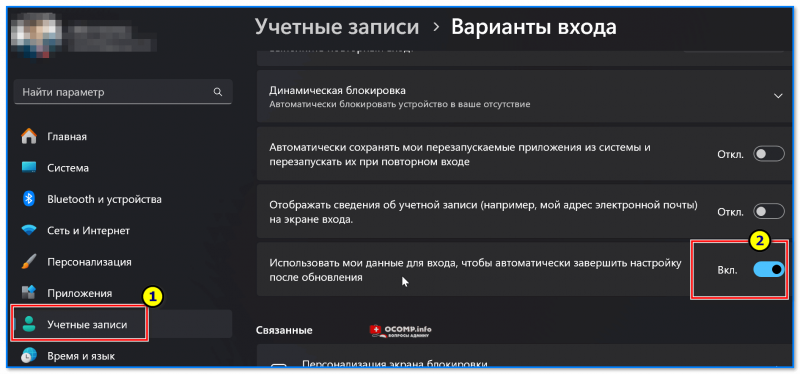
- в параметрах Windows 10 (11) во вкладке «Учетные записи \ варианты входа» можно откл. использование данных для входа при заверш. настройки после перезапуска и обновлений (рекомендуется передвинуть ползунок в режим «Выкл.»);
Учетные записи — варианты входа — исп. мои данные — Windows 11
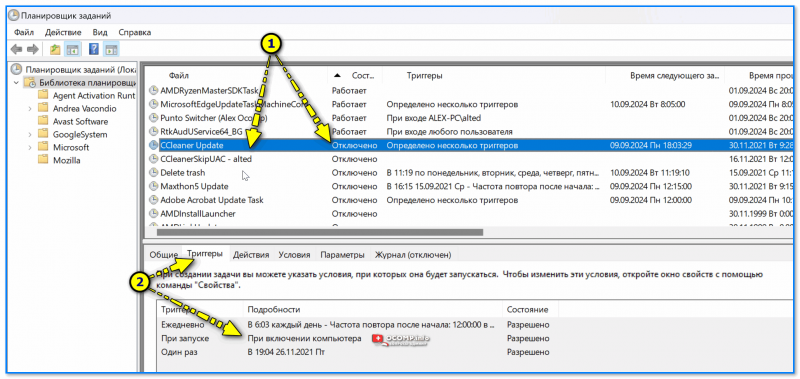
- также рекомендуется пройтись в «Планировщике задач» (Win+R, команда control schedtasks) по всем задачам, и поискать, какие из них работают в текущий момент + какие поставлены на активацию при выкл. компьютера. Затем всё незнакомое и ненужное откл.! Примечание: для откл. задачи — нажмите по ней ПКМ и выберите опцию «Откл.», чтобы у нее поменялось состояние (см. скрин ниже стрелка-1).

Отключаем регулярный запуск всего ненужного — планировщик заданий Windows
*
Четвертое (общие рекомендации)
- во-первых, стоило бы проверить свой компьютер антивирусом (это можно быстро сделать с помощью 📌онлайн-сканеров, которые не нужно устанавливать);

Работа сканера ESET’s Free Online Scanner
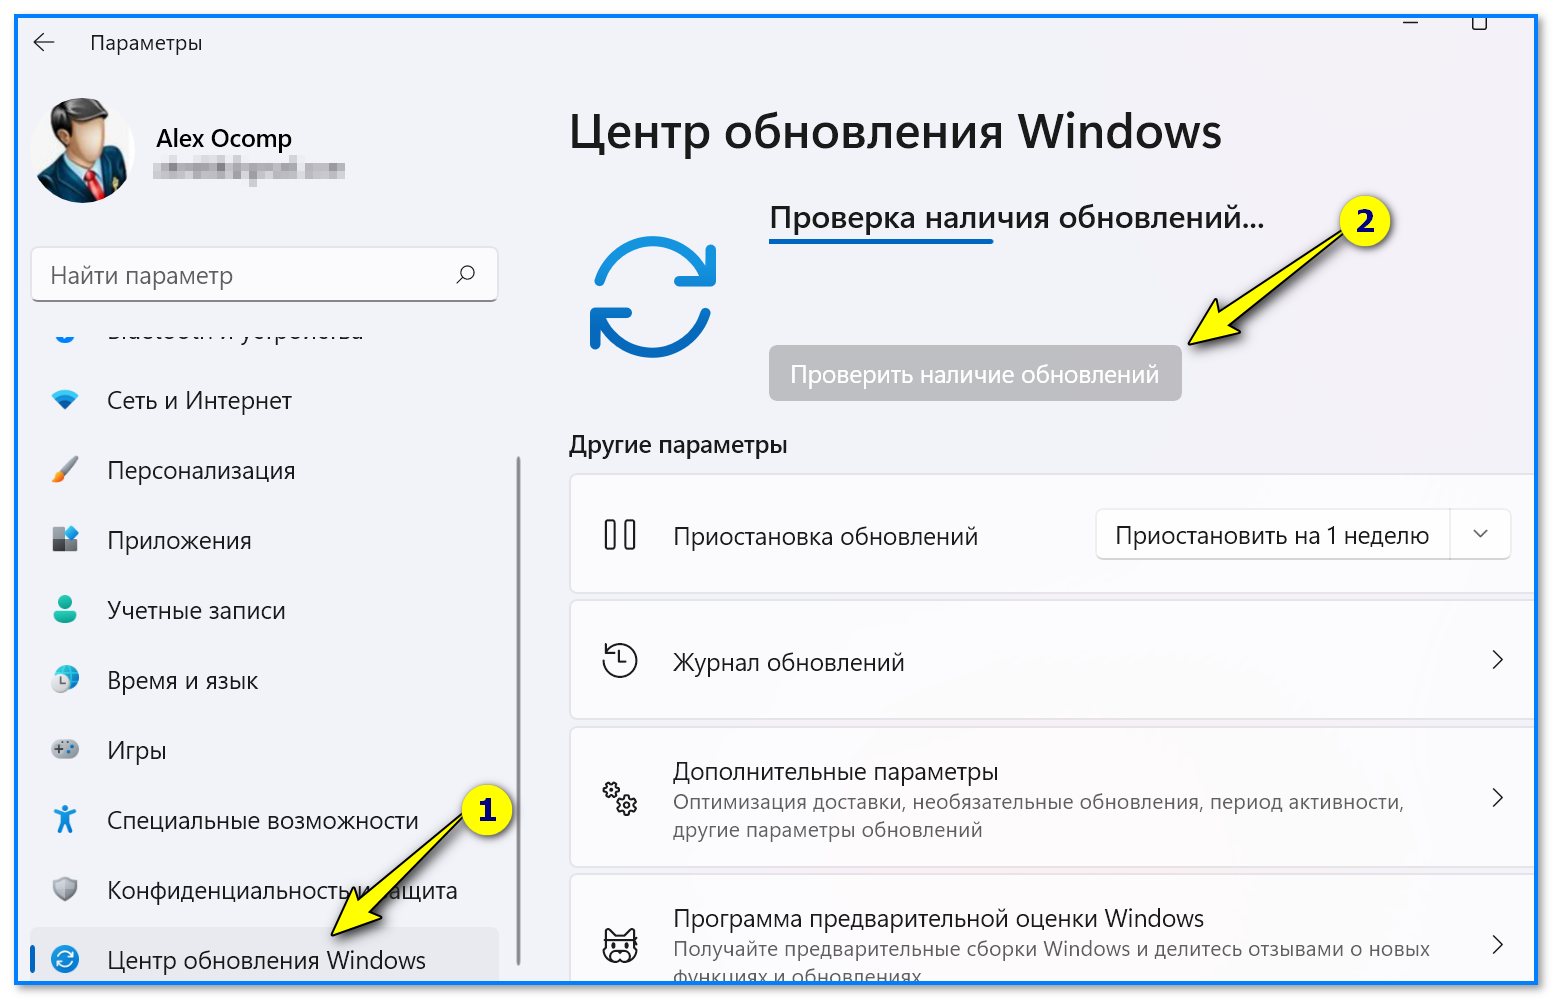
- во-вторых, не лишним было бы проверить обновления (при наличии оных — обновить Windows. 📌В помощь: как обновить Windows до посл. версии);

Центр обновления в Windows 11
- в-третьих, стоит проверить (и восстановить при необходимости) системные файлы в Windows. Как это сделать с помощью SFC, Chkdsk и DISM 📌показывал в этой заметке;
- в-четвертых, если все остальное не помогло — можно попробовать посмотреть 📌точки восстановления. Если среди них есть точка с датой создания при которой все работало штатно — можно попробовать 📌откатить систему к ней.

*
Дополнения и иные решения — приветствуются в комментариях (См. форму для комментирования ниже).
Всем удачи!
👋
Synchronization has been a standard feature of Windows since it is becoming more typical for users to utilize the same Microsoft account on numerous devices. Settings Synchronization, also known as SettingSyncHost.exe is a Windows OS procedure that synchronizes all of your system settings with the rest of your devices. If the service fails to sync the information correctly, it will not automatically terminate. Instead, it will continue the operation forever creating high disk usage of the host process for Windows tasks. In this article, we have explained the troubleshooting methods to fix the host process for setting synchronization issues on Windows 10 PCs.

Table of Contents
SettingSyncHost.exe is found in the C:\Windows\System32 folder, which is an essential component of Windows. It synchronizes your Internet Explorer, OneDrive, Xbox, and other important programs. However, as beneficial as this procedure is, it may frequently produce issues such as
- It may consume a large number of resources (CPU) over an extended period of time.
- In other situations, this operation would use 100% of one of the logical processors all the time.
- It can cause the system to hang or freeze at times.
Follow the given methods step by step to fix host process for setting synchronization in Windows 10.
Method 1: Perform Windows Clean Boot
Only the most critical services and drivers will execute when Windows is started in Clean Boot mode. Follow the steps below to boot into Clean Boot mode to fix host process for Windows tasks high disk usage issue.
1. Launch the Run dialog box by hitting Windows + R keys simultaneously.
2. Type msconfig and click on OK to open System Configuration.

3. Go to the Services tab and check the checkbox for the Hide All Microsoft Services option.

4. Click on Disable all button and click on Apply > OK to save changes.

5. Then, press the Ctrl + Shift + Esc keys simultaneously to bring up the Task Manager window.
6. Navigate to the Startup tab.

7. Select the apps (e.g. Skype) and click on Disable button.

8. Finally, reboot your Windows 10 PC.
Also Read: Fix DISM Host Servicing Process High CPU Usage
Method 2: Add Ownership for Registry Key
In certain circumstances, the process SettingSyncHost.exe appears to constantly attempt to write a file to a specified location and subsequently change the registry value, but failing because it lacks the necessary permissions. Thus this results in the following things:
- It keeps writing the files over and over and attempts again and again.
- This is what causes your computer excessive CPU consumption.
We can try adding ownership of the registry key on your PC to fix host process for setting synchronization issues.
1. Press Windows + R keys together to open a Run dialog box
2. Type regedit and click on OK to launch Registry Editor.

2. Click on Yes in the User Account Control confirmation prompt.
3. Go to the following path from the address bar in the Registry Editor.
HKEY_CURRENT_USER\Software\Microsoft\InputPersonalization\TrainedDataStore\

4. Right-click the TrainedDataStore in the left pane and select Permissions… from the context menu.

5. Check the Allow checkbox for the Full Control option for all the Group or user names.

6. Finally, click on Apply > OK to save changes.
Method 3: Run PowerShell Script
You can also run a PowerShell script to kill the SettingSyncHost.exe process. This script will kill the process every five minutes if it reappears to fix host process for setting synchronization issues. So, follow the given steps to run the PowerShell script.
Note: You will be asked to input your credentials to run the script.
1. Hit the Windows key, type PowerShell, and click on Run as administrator.

2. Type the following command and press the Enter key.
Register-ScheduledJob -Name Kill SettingSyncHost -RunNow -RunEvery 00:05:00 -Credential (Get-Credential) -ScheduledJobOption (New-ScheduledJobOption -StartIfOnBattery -ContinueIfGoingOnBattery) -ScriptBlock { Get-Process | ?{ $_.Name -eq SettingSyncHost -and $_.StartTime -lt ([System.DateTime]::Now).AddMinutes(-5) } | Stop-Process -Force}

3. Finally, restart your PC.
As you can see, before you can register the job on your computer, you must first input credentials. Check if the SettingSyncHost process is stopped automatically after inputting the credentials. If it still doesn’t work, restart your computer and double-check.
Note: If you’ve previously registered the task but wish to terminate it, run the following command:
Get-ScheduledJob | ? Name -eq Kill SettingSyncHost | Unregister-ScheduledJob

Also Read: Fix .NET Runtime Optimization Service High CPU Usage
Method 4: Force Disable SettingSync
You can also deactivate the SettingSync host to fix host process for setting synchronization issues. Follow these steps to force disable SettingSync.
1. Download the Disable SettingSync.bat file from Google Drive.

2. Once you’ve downloaded the file, right-click on it and select Run as administrator.

3. Then, simply restart your computer to fix host process for Windows tasks high disk usage issues.
Method 5: Update Windows
Microsoft releases updates regularly to address bugs and provide new functionality. If you haven’t done so in a long time, it is recommended that you upgrade Windows right away. When these issues are uncovered, Microsoft engineers work promptly to offer fixes. Before proceeding, double-check that you are logged in as an administrator. Follow these steps to update Windows to fix host process for setting synchronization issue.
1. Press Windows + I keys simultaneously to launch Settings.
2. Click on the Update & Security tile, as shown.

3. In the Windows Update tab, click on Check for updates button.

4A. If a new update is available, then click Install Now and follow the instructions to update.

4B. Otherwise, if the Windows is up-to-date, then it will show You’re up to date message.

Also Read: How to Fix hkcmd High CPU Usage
Method 6: Allow the Process Through Firewall
Whether you don’t wish to disable this option, check if your firewall is blocking this procedure or temporarily disable your anti-virus. After that, observe whether the problem of host process for Windows tasks remains and report back. Follow the given steps to fix host process for setting synchronization issue.
Option 1: Allow Process in Windows Firewall
1. Hit the Windows key, type Control Panel in the Windows Search bar, and click Open.

2. Here, set View by: > Large icons and click on Windows Defender Firewall to continue.
3. Next, click on Allow an app or feature through Windows Defender Firewall.

4A. Search and allow Host process through the Firewall by ticking the checkboxes marked Private and Public

4B. Alternatively, you can click on Change Settings, then Allow another app… button to browse and add the Host process to the list. Then, check the boxes corresponding to it.
5. Finally, click OK to save the changes.
Option 2: Disable Third-party Antivirus (If Applicable)
1. Navigate to the Antivirus icon in the Taskbar and right-click on it.
2. Now, select the Avast shields control option.
3. Choose any one of the given options according to your convenience:
- Disable for 10 minutes
- Disable for 1 hour
- Disable until computer is restarted
- Disable permanently
4. Confirm the prompt displayed on the screen and reboot your PC.
Note: You can go to the Antivirus menu and click on TURN ON to reactivate the shield.

Also Read: Best Free Malware Removal Tools
Is there a Malware as SettingSyncHost.exe?
The names of viruses are usually chosen by cyber criminals in such a way that the system or the user is unable to recognize them. SettingSyncHost.exe is a possible name for a virus or malware that thieves might use to pass themselves off as a real process. The original SettingSyncHost.exe file may be found in the System32 subdirectory. To check the authenticity of SettingSyncHost.exe, follow these steps:
1. Press Ctrl + Shift + Esc keys together to open the Task Manager.
2. In the Processes tab, right-click on the Host Process for Setting Synchronization and click on Open file location from the context menu.

3. If the file location is C:\Windows\System32, the process is genuine. If not, it can be malware or a virus that is posing as SettingSyncHost.exe to avoid detection.

Run a full system antivirus scan on the machine if the location isn’t the System32 folder. To run a full malware scan follow the given steps.
1. Hit Windows + I keys simultaneously to launch Settings.
2. Here, click on Update & Security settings as shown.
3. Go to Windows Security in the left pane.
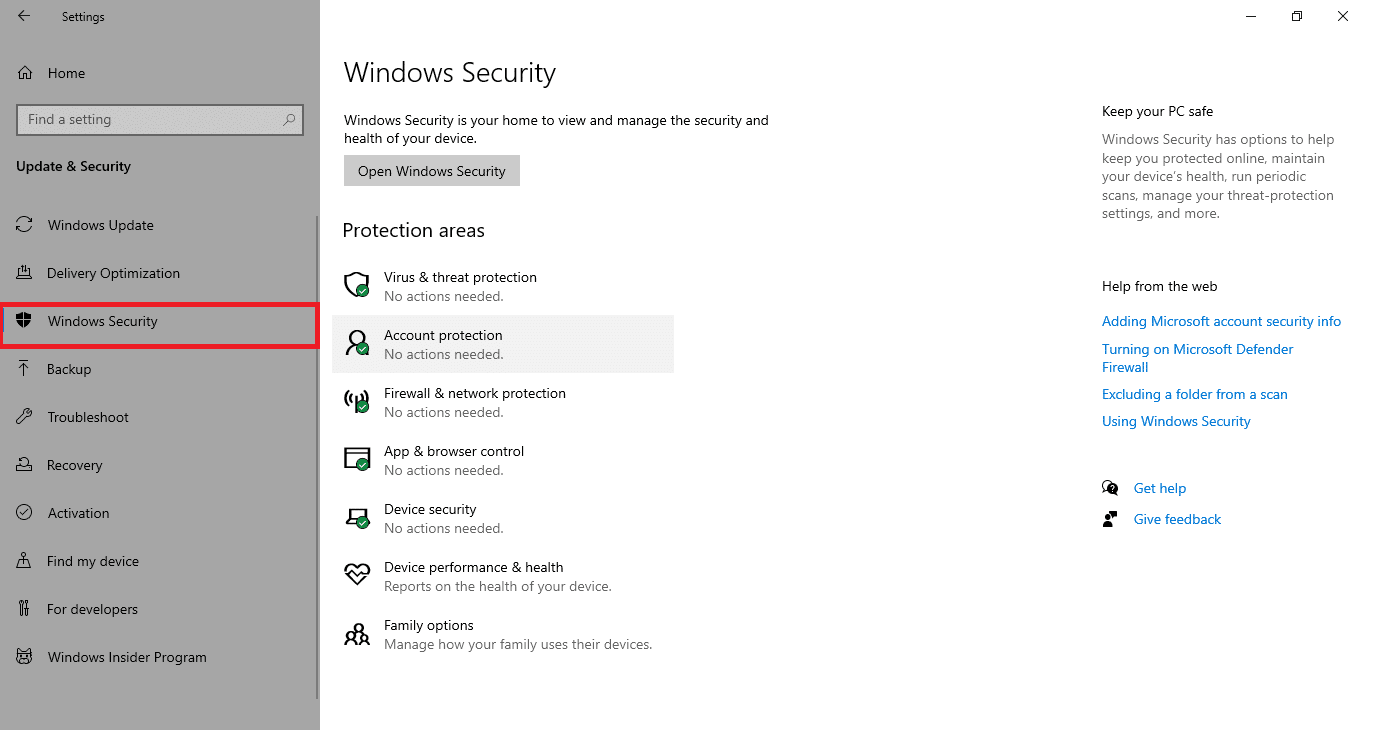
4. Click on the Virus & threat protection option in the right pane.

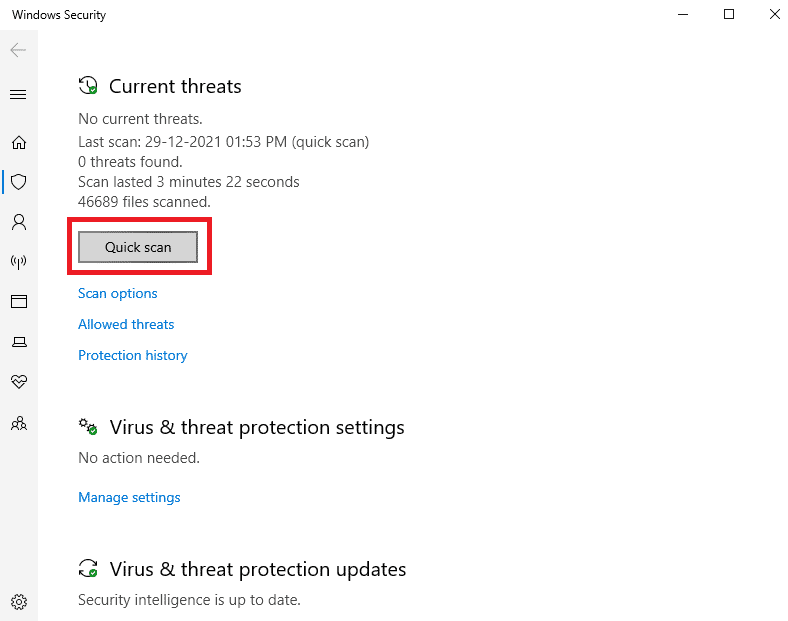
5. Click on the Quick Scan button to search for malware.
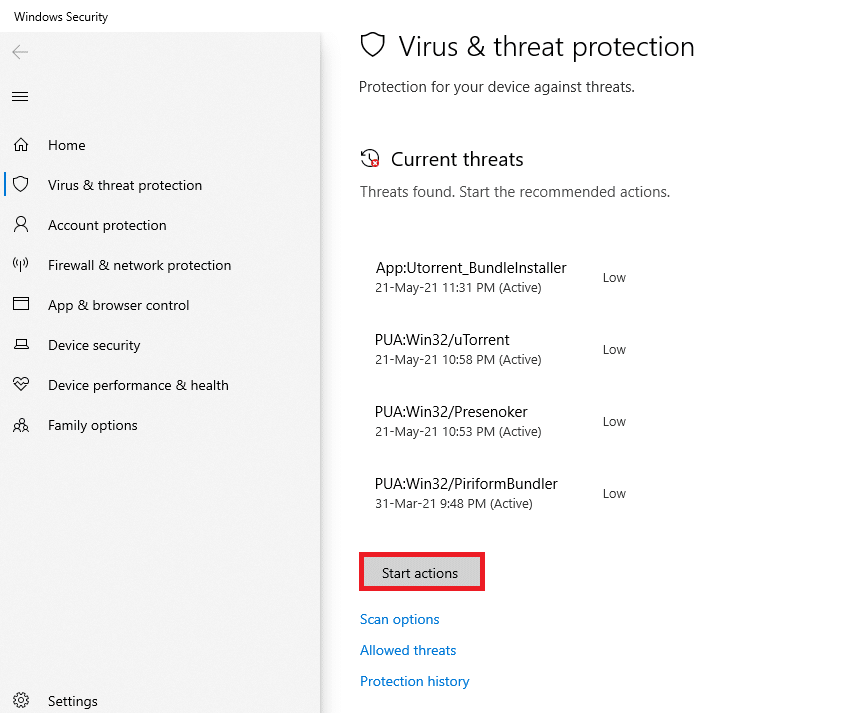
6A. Once the scan is done, all the threats will be displayed. Click on Start Actions under Current threats.
6B. If there is no threat in your device, the device will show the No current threats alert.

Frequently Asked Questions (FAQs)
Q1. How can I bring the host process to a halt so that I can set synchronization?
Ans. Follow these procedures to halt the host process for Synchronization on your PC. Sync your settings by going to Start Menu>Settings>Accounts>Sync Your Settings. By pressing the toggle button, you may switch off the Sync Settings.
Q2. How do I turn off the Windows Services Host Process?
Ans. If you see that the Windows Host Process is using a lot of CPU, don’t deactivate it because it’s one of Windows’ most vital processes.
Recommended: Fix SearchUI.exe Suspended Error on Windows 10
We hope this information was helpful and that you were able to fix host process for setting synchronization issue. Please let us know which method worked best for you. If you have any questions or comments, please leave them in the comments area.