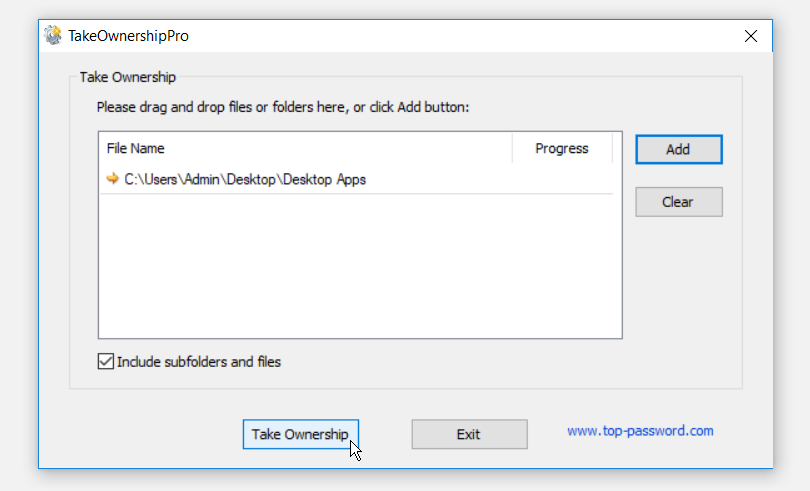
Получение прав на полный доступ к файлам, папкам или дискам в Windows 11, Windows 10 и предыдущих версиях системы возможно как вручную, что для некоторых пользователей вызывает сложности, так и с помощью сторонних утилит: об этом ранее на сайте публиковалась инструкция Как добавить «Стать владельцем» в контекстное меню папок и файлов.
TakeOwnershipEx — ещё одна простая бесплатная утилита, позволяющая не только легко стать владельцем и получить полный доступ к файлу или папке, но и вернуть исходного владельца и разрешения при необходимости, что может оказаться полезным. Об этой программе и пойдёт речь далее в статье.
Использование TakeOwnershipEx
Скачать TakeOwnershipEx можно с официального сайта разработчика: https://winaero.com/takeownershipex/. В загруженном архиве присутствуют два файла установщика утилиты, рекомендую использовать вариант с «Win8» в названии (подходит для Windows 11 и Windows 10): в этом случае при запуске уже установленной утилиты вам не потребуется дополнительно устанавливать .NET Framework 3.5

Порядок использования TakeOwnershipEx для получения и восстановления прав доступа к элементам файловой системы:
- Если требуется быстро получить права на доступ к папке, файлу или диску, нажмите по соответствующему элементу правой кнопкой мыши (в Windows 11 после этого потребуется нажать «Показать дополнительные параметры») и выберите пункт «Получить доступ/Восстановить права» (Take Ownership/Restore Rights).

- В результате вы получите сообщение «You get full access to target» — группа «Администраторы» на компьютере будет иметь полный доступ к указанному элементу.
- Если использовать тот же пункт контекстного меню для папки или файла, права для которого ранее изменялись в TakeOwnershipEx, будут восстановлены изначальный владелец и права доступа.
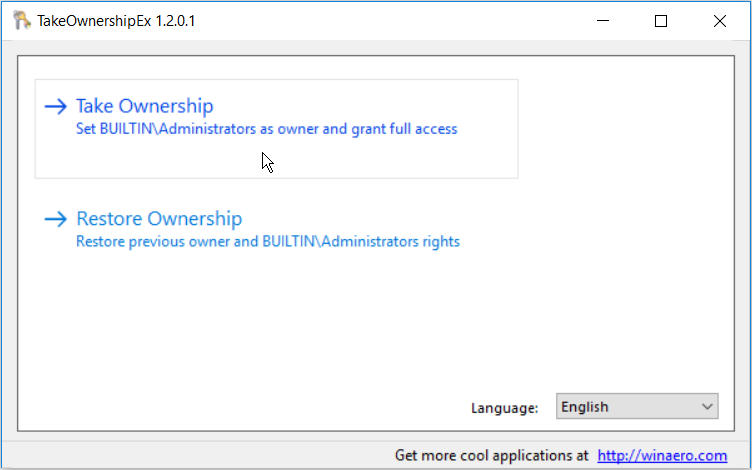
- Программу можно использовать не в контекстном меню, а в её собственном интерфейсе, где присутствуют две опции: Take Ownership (стать владельцем) и Restore Ownership (восстановить владельца).

- При выборе первой опции вам будет предложено выбрать элемент файловой системы, для которого нужно получить права доступа. Второй вариант отобразит список папок и файлов, для которых вы ранее меняли владельца и права доступа: выберите нужный пункт и нажмите кнопку «Restore rights», чтобы восстановить изначальные разрешения.


Как итог, утилита TakeOwnershipEx интересна не только тем, что позволяет легко получить необходимые права доступа, но и возможностью их быстрого сброса к по умолчанию: это может быть важным для некоторых системных папок.
При удалении программы вам также будет предложено восстановить владельца и права для всех папок, с которыми вы ранее работали:

И в завершение важное примечание: если вы меняете владельца, получаете полный доступ и удаляете системные папки Windows или папки антивирусов, это может привести к нежелательным последствиям — не делайте этого, если не уверены в своих действиях и не готовы к тому, что результат может отличаться от ожидаемого.
Taking ownership of a file or folder in Windows means becoming its primary controller. It allows you to assume full control over files or folders that are restricted due to permission settings.
In this guide, we will walk you through the straightforward ways on how to add a “Take Ownership” option to the right-click context menu in Windows 10 and 11. This is particularly useful if you’ve been encountering some common ownership issues, such as needing to modify system files for troubleshooting but can’t, accessing files from an old Windows installation, or inheriting files from another system and lacking the necessary permissions.
How to take file ownership in Windows 10
The simplest way to add “Take Ownership” to the right-click context menu in Windows 10 and 11 is by modifying the Windows Registry.
Step 1: Open the Registry Editor
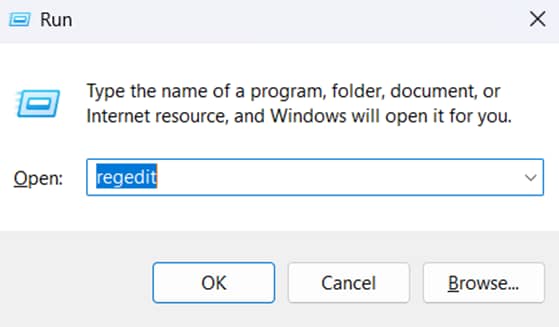
- Simultaneously press Win + R to open the Run dialog box.
- Type regedit and press Enter.

Step 2: Navigate to the Context Menu Registry Key
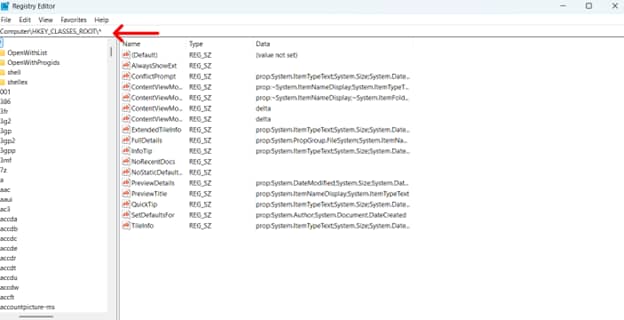
- In the Registry Editor, navigate to the following key: HKEY_CLASSES_ROOT\*

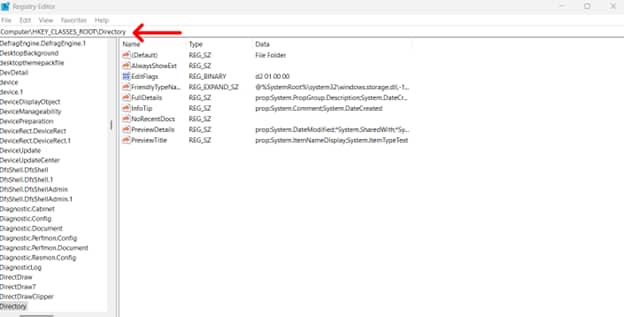
- For adding the option to folders instead of files, navigate to: HKEY_CLASSES_ROOT\Directory

Step 3: Create a new registry entry
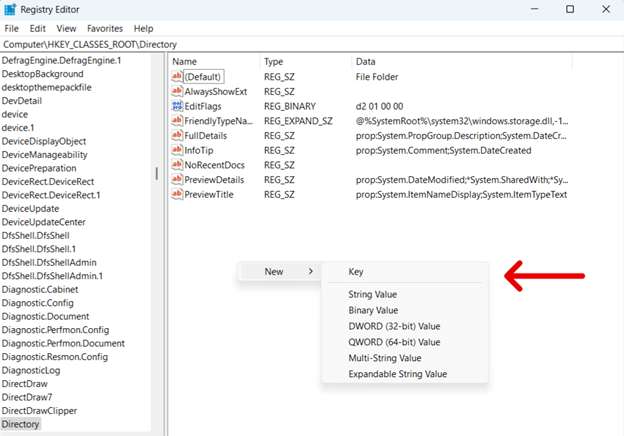
- Right-click on the shell key inside the selected path.
- Choose New > Key and name it TakeOwnership.
- Create a new String Value named “MUIVerb”
- Set its value to Take Ownership.
- cmd.exe /c takeown /f “%1” /r /d y && icacls “%1” /grant administrators:F /t /c /l /q
Step 4: Restart Windows Explorer
- Open Task Manager.
- Locate Windows Explorer in the Processes tab.
- Right-click the process and select Restart.
- Right-clicking a file or folder should display the “Take Ownership” option.
How to remove “Take Ownership” from the context menu
Despite its many advantages, taking ownership of files and folders is not always safe. This is why the default option in all Windows devices is to limit permissions to maintain system integrity and user privacy. It makes sense when you consider that granting ownership rights too easily can lead to accidental system modifications.
Adding “Take Ownership” to the context menu grants multiple users to have access to a system. While this can improve collaboration, it also increases the risk of someone misusing the feature.
To remove Take Ownership from the context menu:
- Open the Registry Editor by prompting the regedit command through the Run dialog box.
- Navigate to the “HKEY_CLASSES_ROOT\*\shell\TakeOwnership” key.
- Right-click on the TakeOwnership key and select Delete.
- Confirm deletion.
- Restart Windows Explorer, as described in the previous instructions.
Alternative methods to take ownership of files
There are three other ways to take full ownership of files. While we will describe them below, be aware that the Windows Registry option is still the most efficient way to perform this action. That said, if you encounter problems with that option, there are other methods to consider:
Option 1: Using Command Prompt
⚠️ Note: Make sure that you open Command Prompt as an Administrator. Even so, there are some operations that even an Admin cannot carry out in its entirety.
- Open Command Prompt.
- Type the following command:
- takeown /f foldername /r /d y (Replace foldername with the specific folder you want to take ownership of.)
- Run the command:
- if you only want to give ownership to a specific user in the system, the command is: icacls foldername /grant %username%:F /t /q
- If you want to give full permission to the Administrator, the command would be: icacls full_folder_path /grant administrators:F /t
Option 2: Using PowerShell
To take ownership using PowerShell, use the following command.
-
- takeown /f “C:\Path\To\Your\FileOrFolder” /r /d y
Replace FileOrFolder with the specific file path.
You can also use access control lists (ACLs) in Windows to define permissions attached to files. PowerShell provides the cmdlets “Get-ACL” and “Set-ACL” to manage these lists.
- Retrieve the current ALC: $acl = Get-ACL “C:\path\to\your\file.txt”
- State the new owner with the following command. Replace YourDomain \YourUsername with the relevant information.
- $principal = New-Object System.Security.Principal.NTAccount(“YourDomain\YourUsername”)
- Set the new owner:
-
- $acl.SetOwner($principal)
- Set-Acl “C:\path\to\your\file.txt” $acl
To take ownership of multiple files, you would use the ‘ForEach-Object’ cmdlet. For example, if you want to take ownership of all files within a folder, you would execute the command:
-
- Get-ChildItem “C:\path\to\your\folder” | ForEach-Object { takeown /f $_.FullName }
Option 3: Changing folder properties
- Go to the desired file or folder and right-click on it.
- Select Properties.
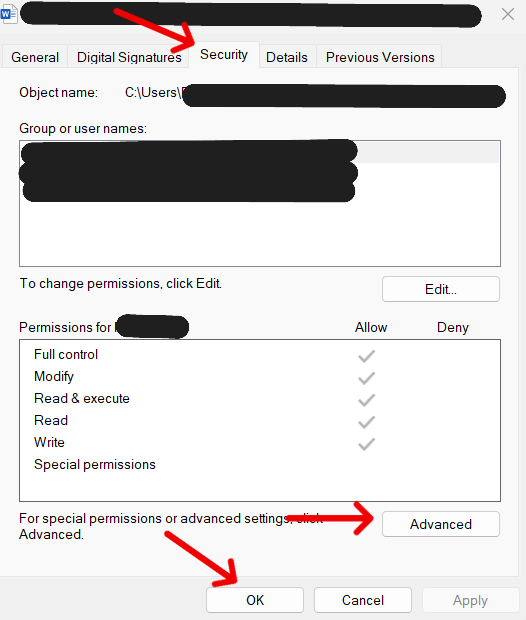
- Go to Security tab, and click the Advanced button.

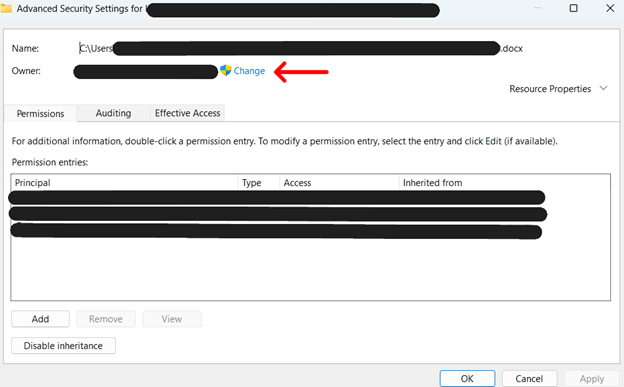
- Click on the Change button next to Owner. This will open a new window.

- Write Administrator in the Enter the object names to select form, and then click on Check Names. Press Ok to proceed.
⚠️ You should see the Owner changed to the initial name of your administrative account. - Click on Replace owner on sub containers and objects, then Apply. End by pressing Ok. You should receive a notification once ownership has been changed. Simply press Ok to close this window.
Troubleshooting issues with taking ownership
Occasionally, you will encounter issues when taking ownership of the context menu in Windows. This usually occurs when you use other methods aside from the Windows Registry. Below are some common issues you may experience, with suggested solutions.
Issue: “Access Denied” even after taking ownership
This issue occurs when ownership alone does not grant full permissions. After taking ownership, make sure that you explicitly grant yourself Full Control in the Security tab. If this still doesn’t work, try opening the file or folder using Safe Mode. Check out this guide, How to Start Safe Mode with Windows Command Prompt, for more information.
Issue: “Take Ownership” option is missing from the context menu
If you cannot see the “Take Ownership” option after following the modification steps, try restarting Windows Explorer or your device itself. This applies the changes to your device. If this still doesn’t resolve the issue, check for system policy restrictions that may prevent changes to the context menu.
Issue: File is still locked after taking ownership
This happens when files or folders are actively used by Windows processes. To resolve this, reboot your computer in Safe Mode and attempt changes. In the worst-case scenario, you may have to perform a system restore to revert to default configurations; however, keep in mind that a full system restore will affect all changes, including those that are working.
Best practices for managing file ownership
Only modify system files when necessary
System defaults are defaults for a reason. Changing system file ownership without proper justification can lead to potential security vulnerabilities.
Always create backups
As a redundant layer, make sure that you back up your files before modifying file permissions. This is a crucial action to take, especially for business-critical files.
Be selective when applying “Take Ownership”
Take particular care when applying “Take Ownership” to multiple files – especially if you are using PowerShell or Command Prompt. This can lead to unintended behavior.
Check for running processes
Take note that Take Ownership may not work if a file is actively being used.
Restore permissions when finished
If you are only taking ownership for troubleshooting purposes, make sure to revert to default settings once you’re finished.
Frequently Asked Questions (FAQs)
Does taking ownership affect system security?
Yes, especially if you change permissions on critical system files. Even with the best solutions, consider that some files are protected for a reason. Unless you absolutely need to take ownership, modifying files can accidentally leave your system vulnerable to threat actors.
Can I take ownership of system files without affecting Windows updates?
Taking ownership of system files can sometimes affect Windows updates, as the system expects default permissions to remain intact. It’s a good idea to revert permissions on critical system files to minimize the risk of faulty updates.
What happens if I take ownership of an entire drive?
It is never recommended to take ownership of an entire drive. Doing so can lead to unintended access control issues, especially if system files and application data are affected. We recommend doing this only for troubleshooting and reverting to default permissions once done.
Can I use this method on external drives or network folders?
Yes, but with limitations. You can take ownership of files on external drives as long as they are formatted with NTFS. This is because FAT32 and exFAT do not support Windows ownership and permissions. For network folders, taking ownership may not work if the files are managed by a different system of domain administrators. For such cases, permission changes need to be made on the host system.
How do I restore default permissions after taking ownership?
To restore default permissions, you need to reset the original owner and access control settings. You can follow the instructions as listed above for more information.
The importance of “Take Ownership”
There are specific use cases when you must take file ownership in Windows 10, such as troubleshooting files. The process is straightforward, but keep in mind that there are security risks involved. It is always a good practice to revert to default permissions once you’ve accomplished your intended purpose.