
In this article, I will show you how to tag files in Windows 11/10 and use it to make file search efficient. Windows 11/10 has a powerful search built into the system. You can search your files by typing their names in Windows 11/10 Search. Moreover, you can also apply filters to your searches in File Explorer if you want to search for the files with a particular extension, like mp3, mp4, png, etc.

One of the most underrated, but efficient ways to search files easily is using TAGS. It is a feature in Windows available for a very long time, but not much used. In this post, I am going to talk about how you can use Tags to find files that are important to you quickly.
What are Tags in Windows?
These are metadata that can be associated with files and are part of Properties. Windows Search indexes Properties, which allows users to search for these tags.
Why should you use Tags? When different types of files fall into multiple categories and projects and belong to multiple persons, tags make sense. You can keep them organized into different folders, but when you put tags on them, you see them in one window.
You can tag files in Windows 11/10 by opening their properties. Let’s see how to do that.
- Open File Explorer and select the file to which you want to add a tag.
- Right-click on the selected file and open its Properties. Alternatively, you can press the Alt + Enter keys to open the properties window of the selected file.
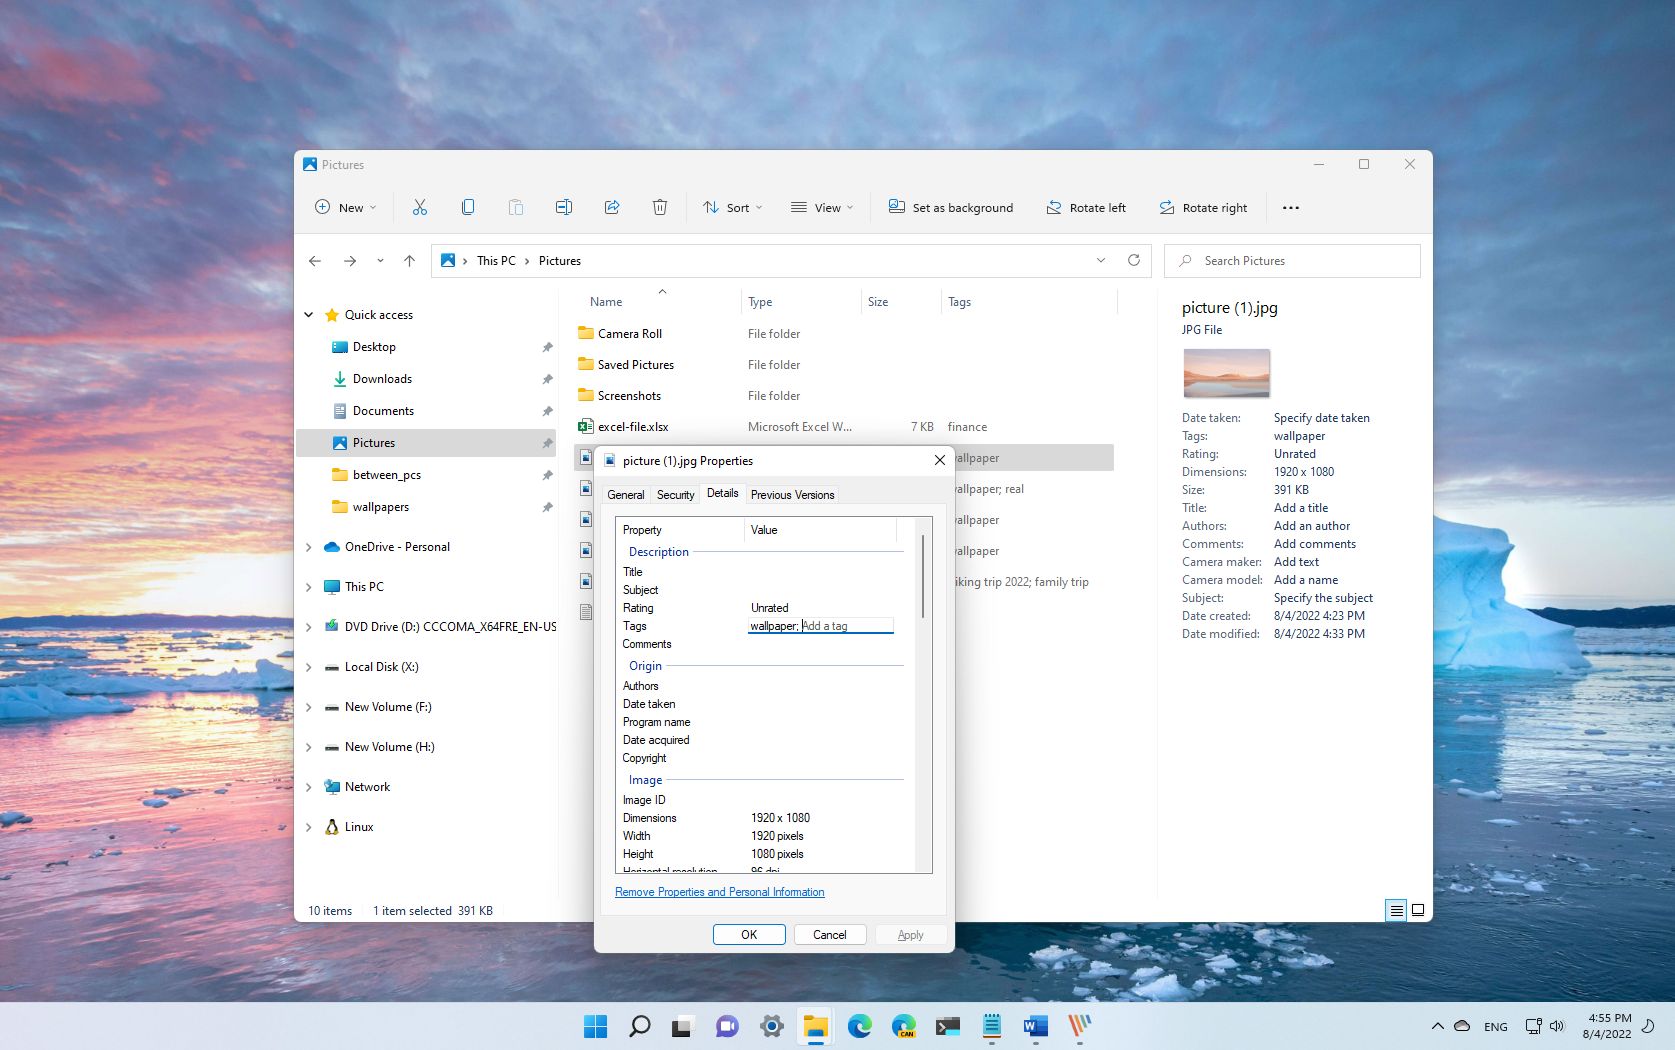
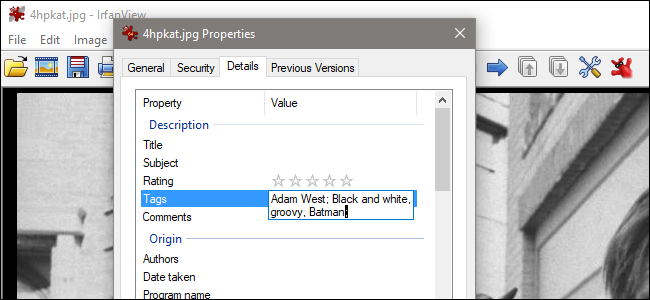
- Switch to the Details tab and look for the Tags field.
- Select the empty place right beside it, and it will convert to the text box.
- Here you can input one or multiple tags. In case you want to add multiple tags, add a semicolon between each of them.Once done, hit enter and click on the OK button to save the changes.

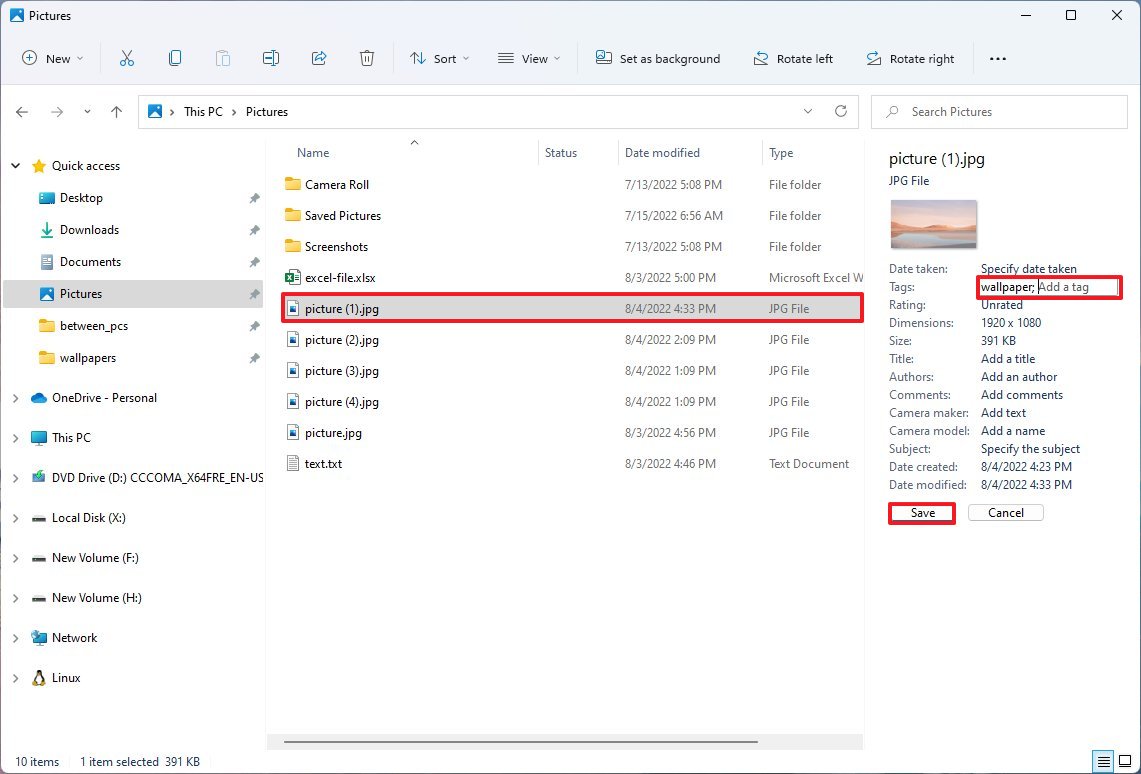
After adding the tag(s) to your files, you can view the added tag(s) in File Explorer. For this, activate the Details pane. In Windows 11, you can easily activate the Details pane. Open File Explorer, click on the View menu on the ribbon and select the Details pane option. After this, the Details pane will appear on the right side in File Explorer automatically when you select a file. You can see the tags there.
Do note that you cannot add tags to every file format. For example, if you want to add tags to images, the option is only available for images in JPG or JPEG file formats.
Add tags to Microsoft Office documents
If you use Microsoft Office, you can add tags to Office documents, like Word, Excel, and PowerPoint files. You can do so in two different ways:
- By following the usual method as described earlier in this article.
- By opening the Office document.
Do note that the first method does not work for empty Office documents or files. To add tags to Office documents, say Word, follow the steps provided below:
- Open Microsoft Word document.
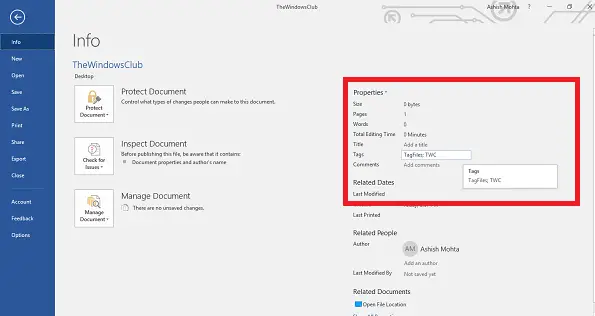
- Go to File > Info.
- Click on the text box next to the Tags option under the Properties section there.
You will be able to easily add Tags here.
How to add Tags to Multiple Files
You can also add tags to multiple files in Windows 11/10. This is useful if you want to add the same tags to multiple files. Go through the following instructions:
- Using the CTRL key, select multiple files within the same directory.
- Right-click on the selected files and select Properties.
- Go to the Details tab.
- Add your tags just like above, and then click OK.
- All those tags will be applied to all the selected files.
This method works only if the file format of the selected files is allowed to add tags. If the file format of any one of the selected files is not allowed to add tags, you will not see the Tgs options in the properties window.
How to Search for Files using Tags
That was the tough part, but searching is much easier. Windows 11/10 Indexing works almost instantly. The files to which you add tags remain available to appear in the search results when you enter the particular tag.

To search your files using tags, open File Explorer and click on the File Explorer search bar (available on the top right side). Type the following command and hit Enter.
tag: <name of the tag>
For example, if you want to search for the files with the tag TWC, type the following in the File Explorer search bar and hit Enter.
tag: TWC
While the search result is pretty quick, if you have tons of files with similar tags, you should make use of the Filter option. Here you can narrow down your search results by type.
You can also use a free File Tagging Software for Windows 11/10 to better manage your files.
Read: How to add Tags to Images in OneDrive
Which File Formats are supported for Tags?
The sad thing about Windows tags is they are limited to very few formats like images, Office documents and so on. So when you right-click on PDF files or a text file, you will not see an option to add tags. But you can use File Meta Association Manager to enable Tags for unsupported files.
TIP: You can rename and tag music files quickly with TagScanner.
On Windows 11, the search feature allows you to quickly find virtually any type of file stored on your computer. However, if you have a lot of documents and pictures, you can use tags to make it easier to find files by keyword.
Tags are not new; they have been around for many years, but it’s one of those features that not many know or know how to use since it’s a manual process.
In a nutshell, tags are keywords that describe the file’s contents, and the data is saved as part of the file’s metadata information. Then when you need the file, you can search by the tag information instead of the file name, which you may not remember.
For example, in a picture that includes you with a dog with mountains in the background, you could use the following tags: dog, name of the dog, your name, mountain, and the name of the place.
The next time you need the file, if you can’t remember the name, search the tag to find, in this case, a specific picture.
In the same way, you can tag multiple files with the same tag so that a simple keyword search will return all the files.
This guide will walk you through the steps to use tags on Windows 11.
All the latest news, reviews, and guides for Windows and Xbox diehards.
How to add tags to files on Windows 11
On Windows 11, you can tag files in at least two ways. You can use File Explorer and the Microsoft Office apps.
File Explorer Details settings
To add tags to a file through the Details settings, use these steps:
- Open File Explorer.
- Browse to the folder with the files to tag.
- Right-click the file and select the Properties option.
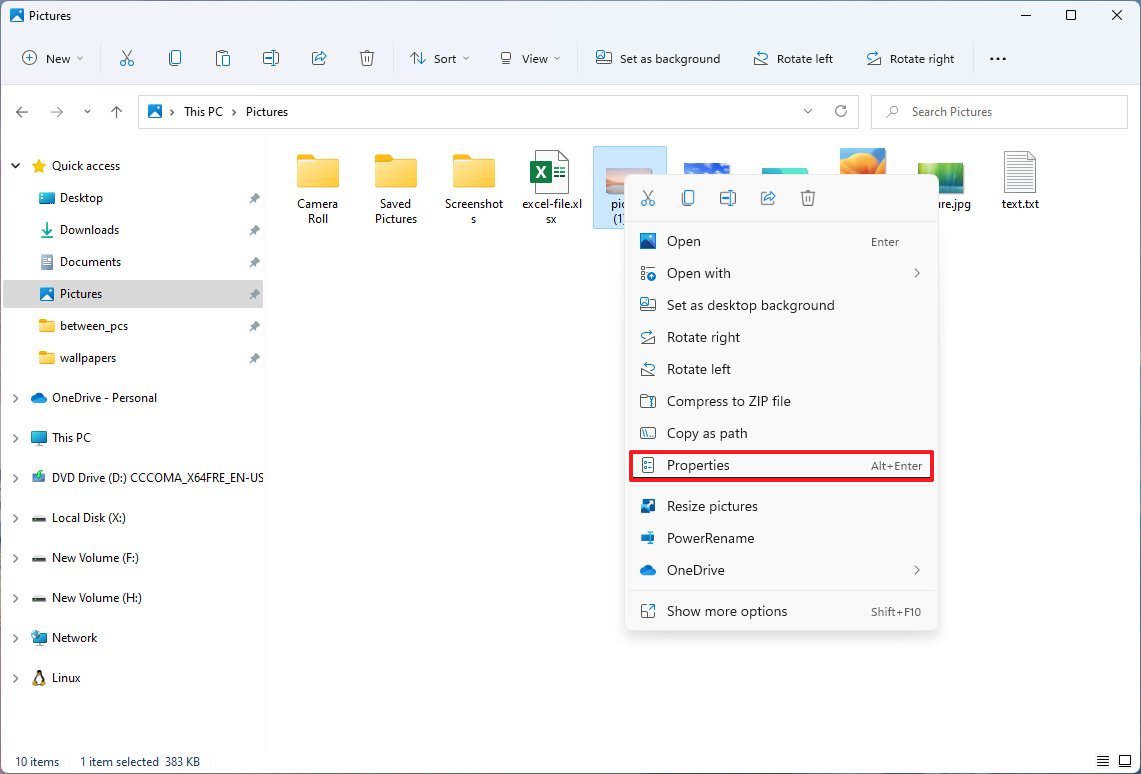
- Quick tip: You can also select multiple files, right-click the selection, and select the Properties option to tag more than one file at a time.
- Click the Details tab.
- Click on «Tags» and confirm the keyboards followed by a semicolon — for example, «hiking trip 2022;» «family trip;» etc.
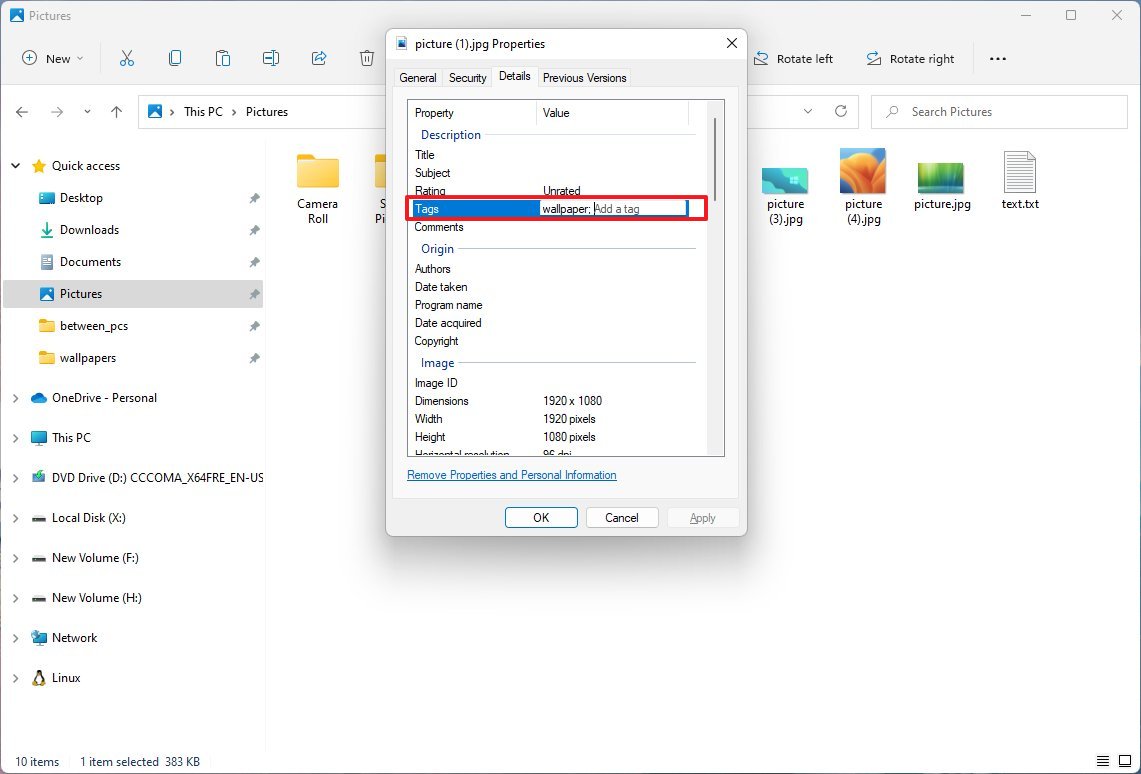
- Click the Apply button.
- Click the OK button.
Once you complete the steps, the keywords will save to the files you selected.
File Explorer Details pane
To tag files through the Details pane on File Explorer, use these steps:
- Open File Explorer.
- Browse to the folder with the files to tag.
- Click the View menu, select Show, and click the Details pane option.

- Select the file you want to tag.
- Click on «Tags» and confirm the keyboard and keyphrase followed by a semicolon — for example, «hiking trip 2022;» «family trip;» etc.
- Quick note: You can also tag multiple files at once by selecting the items you want to group with the same tag. Also, as you type the tag, if it was already used, you can choose it from the list.
- Click the Save button.
After you complete the steps, the file will save the tag in metadata information and should now be searchable.
Office apps
To add tags to an Office document, spreadsheet, or presentation, use these steps:
- Open Microsoft Word (or another app).
- Click on File.
- Click on Save As.
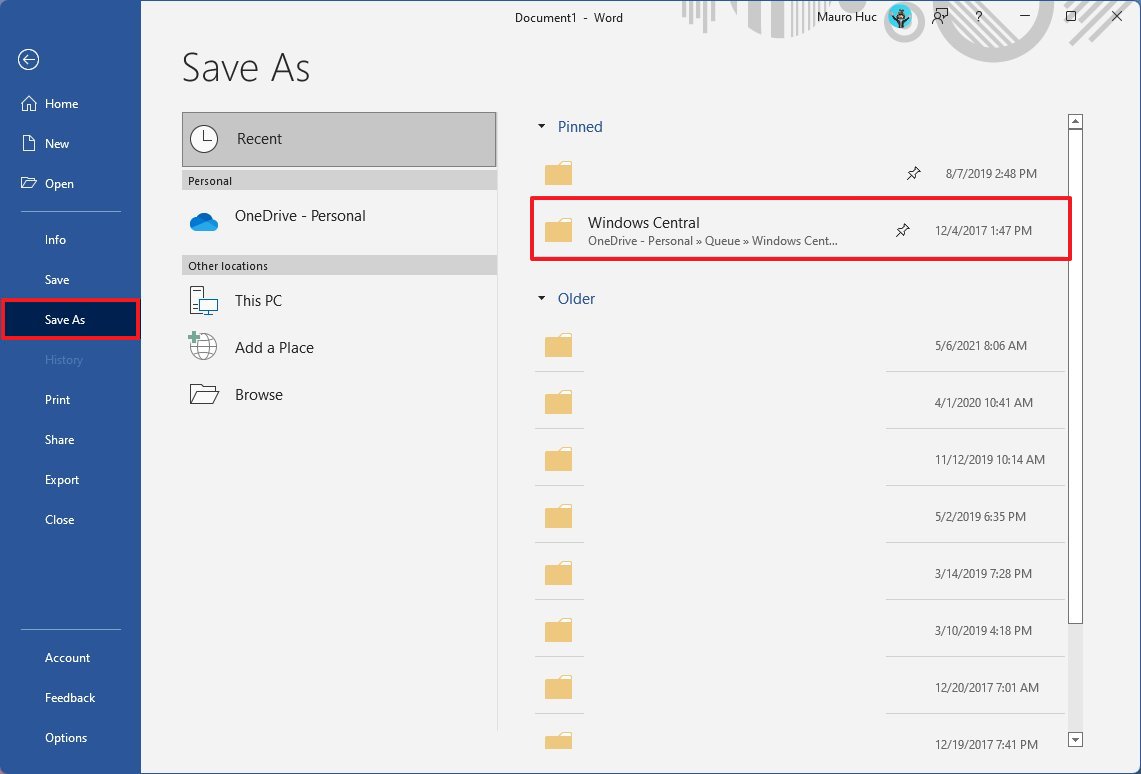
- Select the save location.
- Click on «Tags» and confirm the keyboard and keyphrase followed by a semicolon — for example, «hiking trip 2022;» «family trip;» etc.
- Click the Save button.
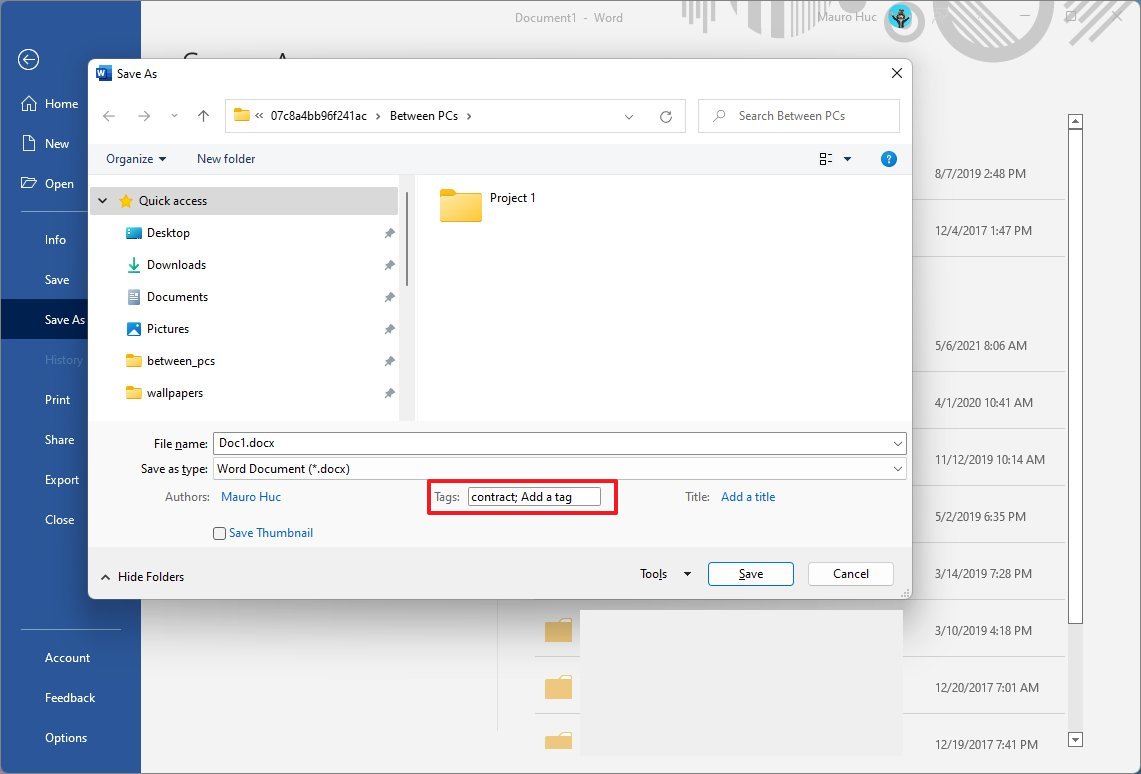
After you complete the steps, the file will save with the tags you added.
How to find tagged files on File Explorer
Once you have enough files with tags, you have at least two ways to make use of them. You can search tags by adding the «Tags» column in the «Details» view, or you can use Windows Search with a special command.
Show Tags column
To find files with the Tags column, use these steps:
- Open File Explorer.
- Open the folder with tagged files.
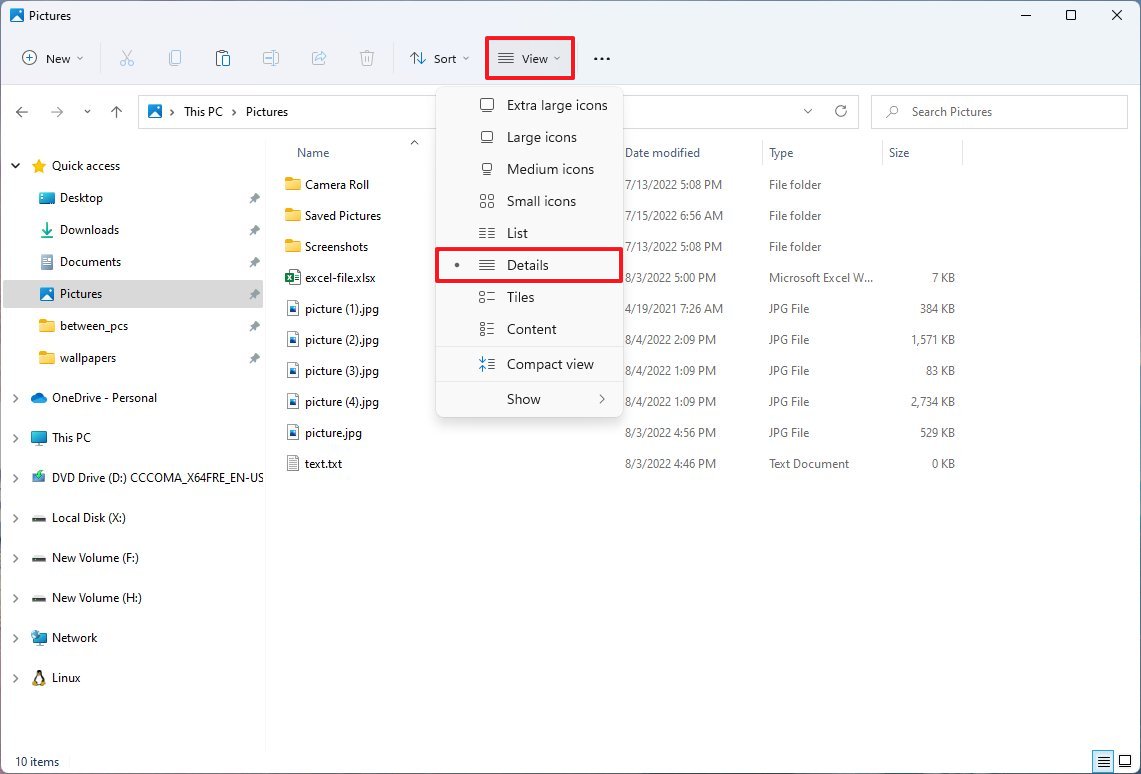
- Click the View menu and select the Details option.
- Right-click the column header and select the Tags option.
- Click the Tags column header to sort the files by tags.
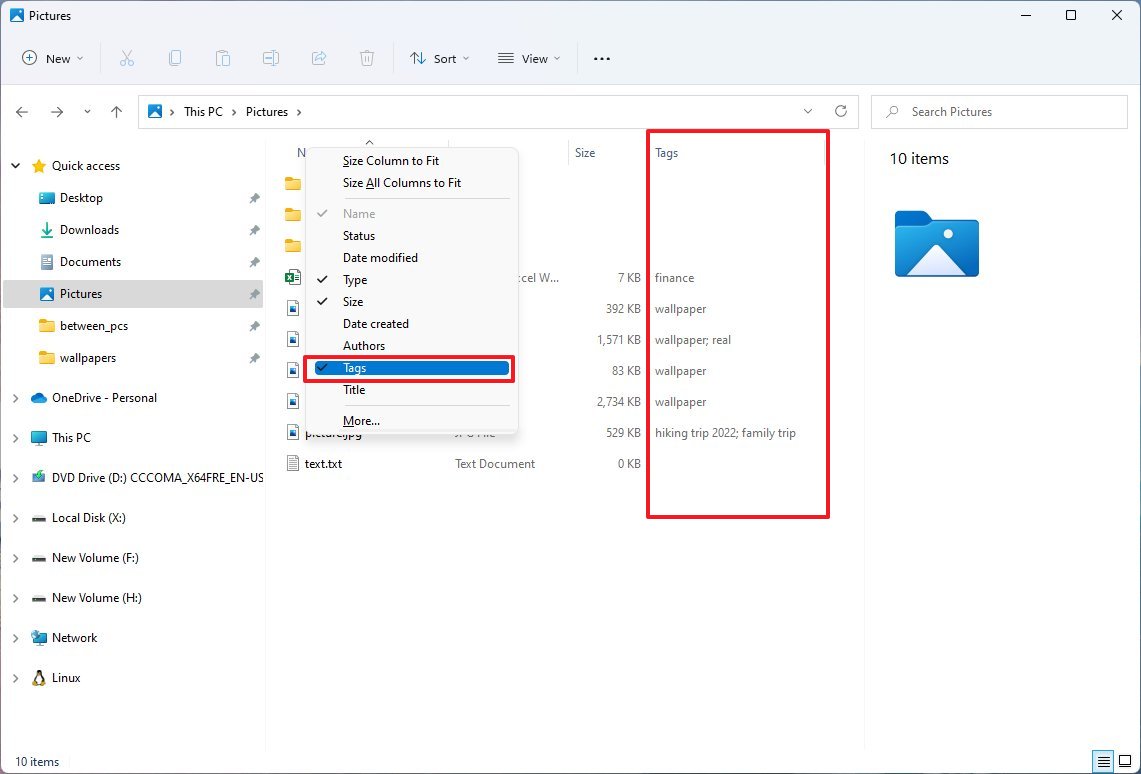
After you complete the steps, the files will be short with tags to make them easier to find.
Windows Search
To search files with tags on Windows 11, use these steps:
- Open File Explorer.
- Open the folder with tagged files.
- Click on the search box from the top-right corner and use the following string: tag: KEYWORD.
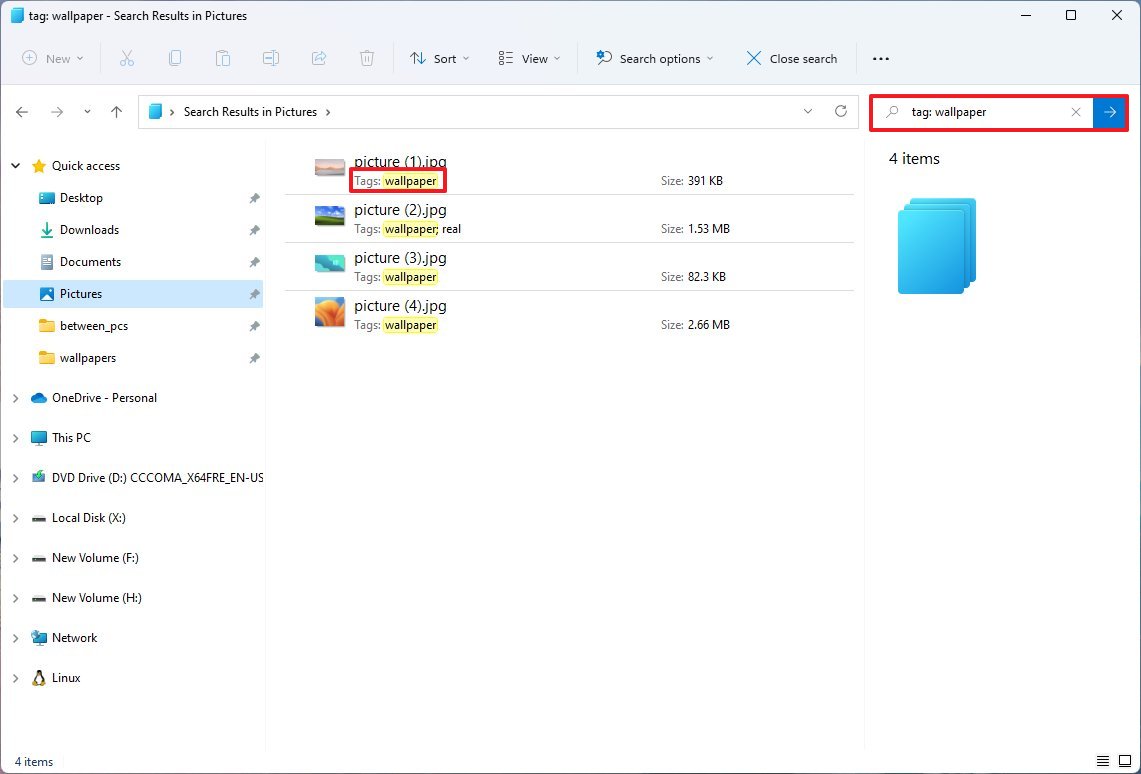
In the command, replace «KEYWORD» with the tag you want to find.
Once you complete the steps, the files with the tag you specified should show up in the result.
Although tags can help you to find and organize your files, it’s only available for specific formats, such as Microsoft Office documents, image formats like .jpeg or .jpg, and others, but not formats like .png, .pdf, .iso, etc. You can always find out whether the file supports tags because the option will be available in the «Details» tab inside the file’s properties.
More resources
For more helpful articles, coverage, and answers to common questions about Windows 10 and Windows 11, visit the following resources:
- Windows 11 on Windows Central — All you need to know
- Windows 10 on Windows Central — All you need to know
Mauro Huculak has been a Windows How-To Expert contributor for WindowsCentral.com for nearly a decade and has over 15 years of experience writing comprehensive guides. He also has an IT background and has achieved different professional certifications from Microsoft, Cisco, VMware, and CompTIA. He has been recognized as a Microsoft MVP for many years.
Windows 10 has a powerful in-built search function, which allows you to locate a specific file in a matter of seconds. The Cortana allows you to find anything more quickly using smart filters such as file type and storage location. Alternatively, you can also use the File Explorer to know the name and/or the type of the file you are looking for.
This means
that without it can be challenging to find a specific file without its correct
name, especially when you are handling thousands of files. Fortunately, you can
add tags to your files and improve the search speed in Windows 10. Furthermore,
tags enable you to organize your files into categories without having to create
several folders or renaming the files. This post will guide you on how to add
tags and use them to search for files.
What are Tags in Windows 10?
Tags are simply keywords (metadata) that forms part of the properties of a file(s). You can use tags to categorize your files into projects, status or any other classifications. For instance, you can label your photos according to locations or events, mark your unfinished project documents and so on, simplifying file management in file explorer. You can use these tags to group related files or for a quicker search.
How to Add Tags in Windows 10?
Windows 10
supports tags for various types of files such as Microsoft Office files,
images, videos and audios among others. There are three simple methods for
adding tags:
Option 1: Adding Tags from “Properties” Dialog
- Open the directory/folder containing the files, click your file of interest and select “Properties” from the context menu.
- On the “Properties” dialogue, go to the “Details” tab and look for “Tags” in the “Description” section.
- Click the space beside “Tags” to activate text and type the tag. If you want to add multiple tags, names with a semi-colon and click “Apply” then “Ok”.
- You can also add tags to multiple files by selecting the files and then repeat steps 1-3 above and then click the “Ok” button.
Option 2: Adding Tags in Windows Explorer “Details Pane”
- To show the “Details Pane”, click the “View” menu and click the “Details Pane” option located at the left edge of the explorer toolbar.

- Select the files or multiple files that you want to tag and on the right-side panel, add the tag(s) on the text box next to the “Tags” heading. The click the “Save” button at the bottom of the file details.
- Note that if you are adding an existing tag, Windows gives you suggestion and you only need to check the box to add.

Option 3: Adding Tags in Save Dialog
You can add
tags to your file such as Word document in the save dialog.
- Open the document, go to the “File” menu and click “Save” for a new document or “Save As” for existing documents.

- At the bottom of the “Save As”dialog window, click the space next to “Tags” and type the keywords of choice, then click the “Save” button.

Related: How to protect your Windows 10 PC?
Effectively Using Tags in Windows 10
Now that
you have learnt different ways of adding tags in Windows. You can follow one of
the easy ways that works for you. After adding tags to your files and folders,
you can use the tags to search and get the results quickly.
Using Tags to Search in Windows 10 File Explorer
- Open the File Explorer by pressing “Win + E” keys.
- Click on the search box and then go to the “Search Tools” in the menu bar.
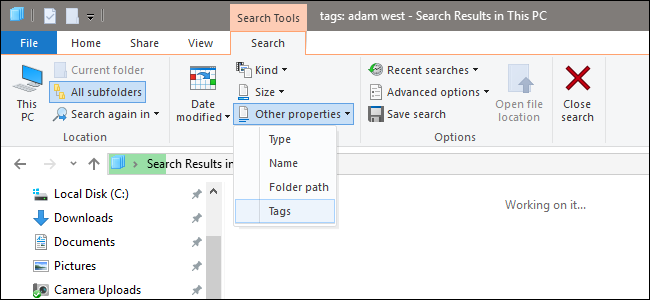
- Select “Other properties” to expand the options.
- Click “Tags” to allow Windows to reference tags when looking for the file.
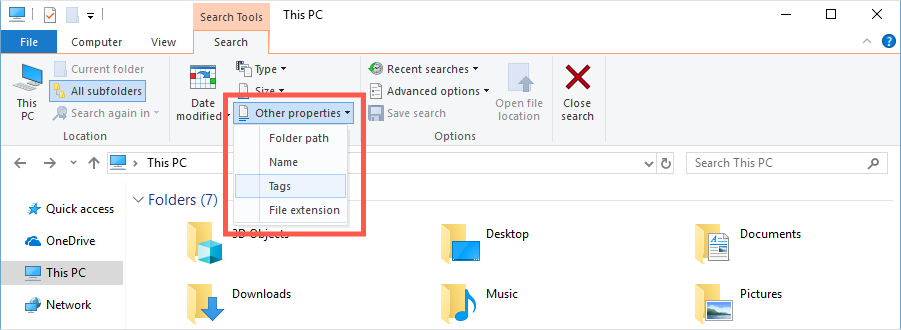
- Type the tag and wait for Windows to search for files associated with the tag.
- For example, we can search for “Project 1” files, all files with work in progress, “WIP” or photos with flowering trees, “Flowering” and so on.

Using Tags to Group Related or Sort Files
- To sort the file using the tags, go to the “View” menu, click the “Sort by” arrow and check the “Tags” option.
- Click the “Group by” arrow and choose “Tags” to categorize related files. You can click to expand the different groups.
Using Tags to Filter Files in the Same Directory
- When working on a particular directory, you can filter the files using tags.
- First, you need to add the “Tags” column by expanding the “Add columns” option in view tools and then check “Tags”.

- Click the arrow beside the column header “Tags” and check the appropriate tags.

Final Remarks
To enhance
your file management efficiency, you can add tags (keywords) to your file to
help you search and find a particular file in file explorer. You can add tags
to single or multiple files and use them to organize files into their
respective categories or filter files within a folder. The above guide teaches
you how to add and use file tags in Windows 10, but it is important to note
that Windows support tags in selected file types. However, you can find
third-party software that enables tagging of other file types.
118
118 people found this article helpful
How to Tag Files in Windows 10
Add tags to files to make finding them easier in Windows 10
Updated on October 18, 2021
What to Know
- Right-click the file and select Properties. On the Details tab, select Tags to add your tags, separating each one with a semicolon.
- Alternatively, open File Explorer and select View > Details Pane on the ribbon. Select the file, then select Add a tag in the Details pane.
- To search for tagged files in the File Explorer, enter tag: followed by your keyword in the search bar to the right of the window.
If you have tons of files stored in Windows, you know how hard it can be to find the right file when you need it. Fortunately, you can tag supported files in Windows 10 with one or more relevant keywords to make it simple to find them using Windows File Search.
Not all files stored in Windows can be tagged. Tagging is only supported on images, documents, and videos. And, in some cases, even some supported file types may not allow tagging.
How to Add Tags to a File in Windows 10
Although it’s not intuitive to tag files in Windows 10, it’s also not difficult once you’ve walked through it a few times. There are two ways to find and use the file tagging capabilities in Windows 10: from the Properties Window and from a file’s Details Pane.
How to Tag Files in the Properties Window
By default, the Properties Window is hidden in Windows 10. To find the Properties Window and tag your files, use these steps:
-
Open File Explorer.
-
Navigate to the file you want to tag and right-click it.
-
In the menu that appears, select Properties.
-
In the Properties window, select the Details tab.
-
On the Details tab, double-click the Tags line to add one or more tags, separating each one with a semicolon.
-
Press Enter when you’ve finished adding tags to apply them to the file.
-
Click Apply to save your changes.
-
Click OK to close the Properties window.
You can select multiple files to tag them all at one time.
How to Tag Files in the Details Pane
By default, the Details Pane is also hidden in Windows 10. To access it take just a few clicks:
-
Open File Explorer.
-
Navigate to and select the file you want to tag.
-
On the Ribbon, select the View tab.
-
From the View Ribbon, select the Details Pane.
-
In the Details Pane, click Add a tag and type the tags you want to assign to the file. Remember to separate tags with a semicolon.
-
When you’re done, press Enter or click Save to assign the tags.
You can select multiple files to assign the same tags to all of them, all at one time.
Once you have tagged your files, moving them to another computer or an external hard drive that uses a different file system than the one on which the files were tagged could cause the assigned tags to be erased.
Search for Tagged Files in Windows 10
Once you’ve added tags to your files, searching them becomes easier (and faster) because you can use a specific search string to find the tags you’ve created. To search for tagged files, in the File Explorer, use the search bar to the right of the window and use this search string:
tag: your keyword
Replace your keyword with the name of the tag you’re trying to find. The search results should return only files that contain the specified tags.
Thanks for letting us know!
Get the Latest Tech News Delivered Every Day
Subscribe
Quick Links
-
Tagging Files in Windows Explorer
-
Tagging Files While Saving in Microsoft Office
If Windows Search just isn’t cutting it for helping you find your files, you can give it a little help by adding tags to many file types, from images in JPEG and PNG format to Office documents in DOCX, XLSX, and PPTX format.
Tags work more or less like they do in any other system—photo libraries, social networks, et cetera. Unfortunately, there’s no way for Windows to auto-generate tags by itself. You’ll have to add and manage them manually. Then again, that might be a plus, depending on your personal style of organisation.
Tagging Files in Windows Explorer
Let’s take a look at my disorganized Pictures folder for an example. I use some subfolders for basic organization, but none of the files in the main folder are really named correctly—it’s just a bunch of stuff that doesn’t fit anywhere else.
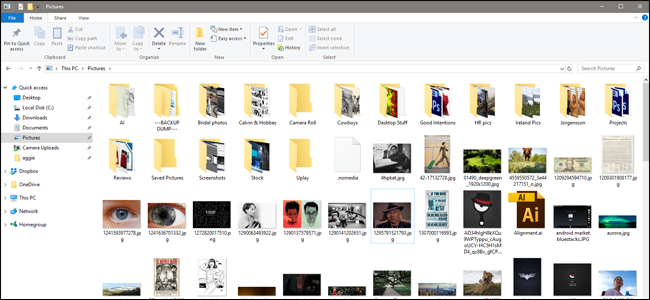
I’ll use this old stock photo of Adam West as an example. To tag any file, right-click it in Explorer, and then click the «Properties» command. In the image’s properties window, switch over to the «Details» tab. You’ll see the «Tags» entry in the «Description» section.
(If you don’t see a «Tags» entry here, that file type doesn’t support tags.)

To the right of the «Tags» entry, click the empty space in the «Value» column and a text box appears that just contains some «Add a tag» text. Type any tag you’d like to add. There are no predefined tags, so what you type is up to you. A tag can be any length and use any kind of standard character, including spaces, though we recommend keeping them reasonably short and easy to remember.
If you want to add multiple tags at once, just separate them with a semicolon.
When you’re done tagging, just click «OK» to finish.
After you’ve tagged some files, you can then use those tags in your searches. But things are a little weird, depending on where you’re doing your searching.
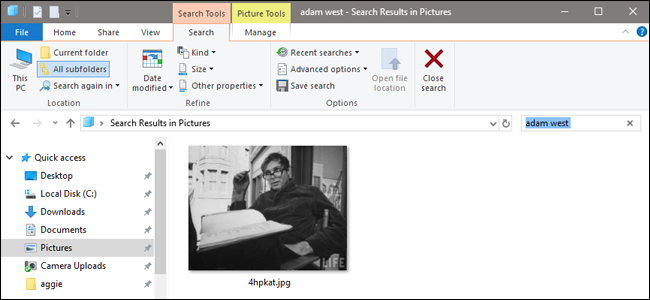
In File Explorer, if you have the folder open where the file is contained, you can just type a tag into the search box and Windows will show you files tagged that way. Of course, the results also include any files that have that text in the name or other searchable content.
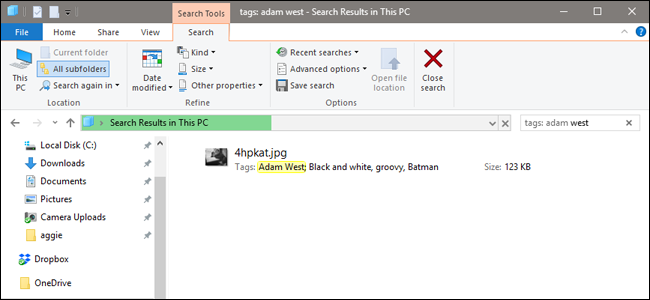
However, if you’re outside that folder (say, you want to search your whole PC or the entire Documents folder), you’ll have to add the «tags:» operator to the beginning of your search. The easiest way to do this is to just type «tags:» into the search box, and then type the tag text for which you want to search.
You can also add that operator from the «Search» tab on File Explorer’s Ribbon, if you want. It’s more cumbersome than just typing the operator, but it might be useful if you’ve already performed a search and just want to narrow it down to tags.
Tagging Files While Saving in Microsoft Office
Some apps, including all the Microsoft Office apps, let you add tags to files as you save them. Other apps, like Photoshop, do not. You’ll just have to play around with your apps to see which allow saving with tags.
Here’s how it looks in Word 2016. When you’re saving a document, just click the «More Options» link to open the full Save As dialog box.
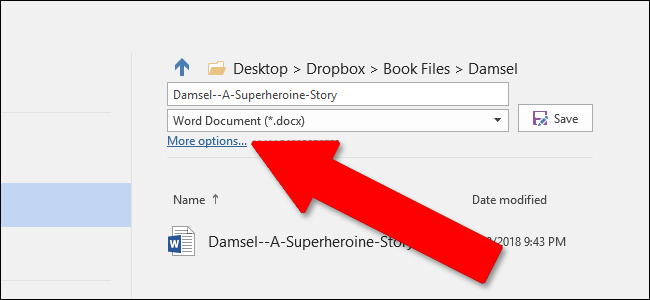
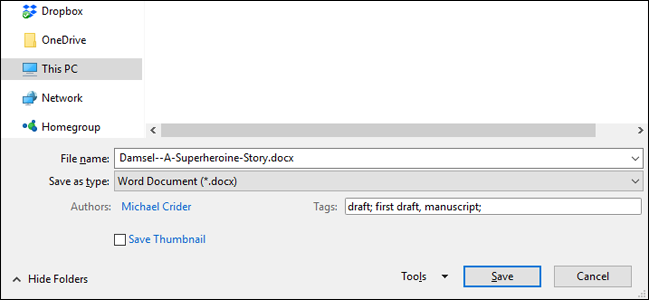
You’ll find a «Tags» box tucked under the file type dropdown menu. Click the box, and then type whatever tags you like.
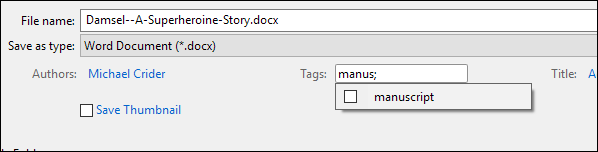
If you start typing a tag you’ve used before, Word will even pop up some suggestions.
To remove tags, just click the tag box, and then delete the tags you no longer want. Save the file again and the changes are applied.