
Last Updated :
30 Jun, 2019
In Windows Forms, Label control is used to display text on the form and it does not take part in user input or in mouse or keyboard events. You are allowed to style the border of the Label control using the BorderStyle Property. You can style the border of the label in three different ways and these values are provided by the BorderStyle enum:
- Fixed3D: The border of the label is a 3-D border.
- FixedSingle: The border of the label is single-line border.
- None: Label without border.
The default value of this property is BorderStyle.None. You can set this property using two different methods:
1. Design-Time: It is the easiest method to set the BorderStyle property of the Label control using the following steps:
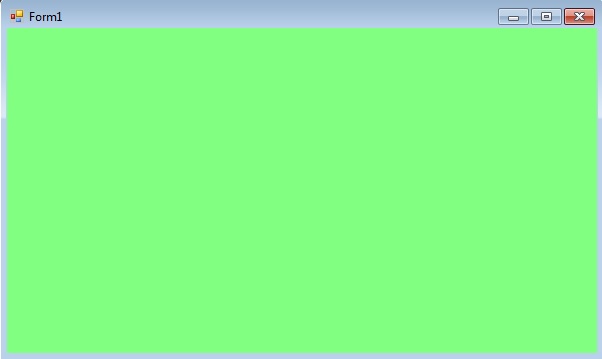
- Step 1: Create a windows form as shown in the below image:
Visual Studio -> File -> New -> Project -> WindowsFormApp
- Step 2: Drag the Label control from the ToolBox and drop it on the windows form. You are allowed to place a Label control anywhere on the windows form according to your need.
- Step 3: After drag and drop you will go to the properties of the Label control to set the BorderStyle property of the Label.
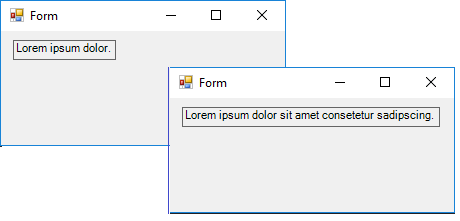
Output:
2. Run-Time: It is a little bit trickier than the above method. In this method, you can style the border of the Label control programmatically with the help of given syntax:
public virtual System.Windows.Forms.BorderStyle BorderStyle { get; set; }
Here, BorderStyle indicates border style values. It will throw an InvalidEnumArgumentException if the value assigned to this property does not belong to BorderStyle values. Following steps are used to set the BorderStyle property of the Label:
- Step 1: Create a label using the Label() constructor is provided by the Label class.
// Creating label using Label class
Label mylab = new Label();
- Step 2: After creating Label, set the BorderStyle property of the Label provided by the Label class.
// Set BorderStyle property of the label
mylab.BorderStyle = BorderStyle.FixedSingle;
- Step 3: And last add this Label control to form using Add() method.
// Add this label to the form
this.Controls.Add(mylab);
Example:
usingSystem;usingSystem.Collections.Generic;usingSystem.ComponentModel;usingSystem.Data;usingSystem.Drawing;usingSystem.Linq;usingSystem.Text;usingSystem.Threading.Tasks;usingSystem.Windows.Forms;namespaceWindowsFormsApp16 {publicpartialclassForm1 : Form {publicForm1(){InitializeComponent();}privatevoidForm1_Load(objectsender, EventArgs e){Label mylab =newLabel();mylab.Text ="GeeksforGeeks";mylab.Location =newPoint(222, 90);mylab.Size =newSize(120, 25);mylab.BorderStyle = BorderStyle.FixedSingle;this.Controls.Add(mylab);}}}Output:
- Details
- Written by June Blender
- Last Updated: 01 September 2016
- Created: 16 December 2015
- Hits: 31480
Label Control [System.Windows.Forms.Label]
Creates a clickable text box in a GUI application. Use a label to display text strings.
- MSDN Page: System.Windows.Forms.Label
- Default Event: Click
Tip: To display multiple lines of text, use a Textbox or RichTextBox control.
Important properties of the Label object
- Text
- Font
- ForeColor
- BackColor
- BorderStyle
- Image
- TextAlign
- Enabled
- AutoSize
Important Events:
- Click
Important properties of the Label object
Text property: Determines the text in the label
Use the Text property to set, get, or change the text that is displayed on the label.
Value type: System.String
Default value: (None)
To set the initial value of Text property, that is, the value that appears when the GUI app starts, use the Properties pane. On the Text row, type the text that appears on the Label.
NOTE: When you change the value of the Text property of a Label in the Properties pane, PowerShell Studio changes the name of the variable that stores the Label object in your script. For example, if you change the Text property value to ‘Close’, PowerShell Studio changes all references of the Label variable to $LabelClose.
To get or change the label text while the GUI app is running, use the Text property in the event handlers in your script.
To get the text in the label:
To set the text in the label use an assignment statement. You can include variables and expressions in the assigned string value.
$Name = 'PowerShell'
$LabelMain.Text = "Hello, $Name"
To change the text in the label:
$LabelMain_click = {

    # Get the text currently in the label and evaluate it.
    If ($LabelMain.Text -eq 'Click')
    {
        $LabelMain.Text = 'Clicked' # Change the text in the label.
    }
    Else
    {
        $LabelMain.Text = 'Click'
    }
}
Tip: To direct Windows PowerShell to evaluate an expression before inserting the result in a string, use a subexpression. The syntax is $( <expression ).
For example:
Without subexpression:
$LabelMain.Text = "Building automation on (Get-Process 'PowerShell Studio').MainWindowTitle"

With subexpression:
$LabelMain.Text = "Building automation on $((Get-Process 'PowerShell Studio').MainWindowTitle)"

Font property: Determines the style and size of the label text
Use the Font property to get, set, or change the font of the label text.
Value Type: System.Drawing.Font
Default: Microsoft Sans Serif 8.25.
To set the font easily, in the Properties pane for the Label, in the Font row, click the ellipsis (…) and then use the Font selector.
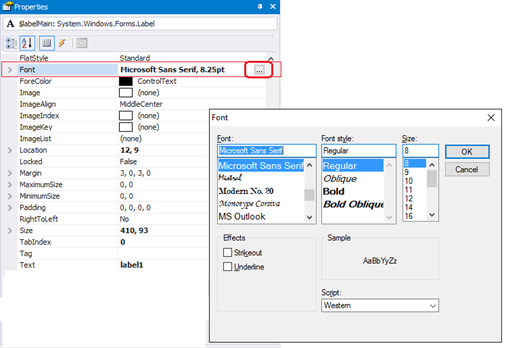
To display the properties of the Font object, in the Properties pane, click the Font group arrow.
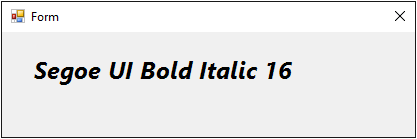
To script a font change, set the Font property to a string with the Font name, size, and style.
$labelMain.Font = 'Segoe UI, 15.75pt, style=Bold, Italic'
To determine other properties of the font, create a System.Drawing.Font object.
$ClickFont = [System.Drawing.Font]::new('Microsoft Sans Serif', 8.25, [System.Drawing.FontStyle]::Regular)
$ClickedFont = [System.Drawing.Font]::new('Segoe UI', 16, [System.Drawing.FontStyle]::Italic)

$labelMain_Click={
    if ($labelMain.Text -eq 'Click')
    {
        $labelMain.Text = 'Clicked'
        $labelMain.Font = $ClickedFont
    }
    else
    {
        $labelMain.Text = 'Click'
        $labelMain.Font = $ClickFont
    }
}
Tips:
- To enlarge the label automatically to fit its contents, set the AutoSize property of the Label to $True.
- When scripting a font, be sure to set the Font property of the Label. The Text property of the Label does not have a Font property.
ForeColor property: Determines the color of the label text.
Use the ForeColor property to get, set, and change the color of the text in the label.
Values: Any [System.Drawing.Color] type
Default: ControlText (Black)
To set the ForeColor property in the Properties pane.
To set ForeColor property in a script:
$Label1.ForeColor = [System.Drawing.Color]::Red
-or-
$Label1.ForeColor = "Red"
BackColor property: Determines the color of the background in the label
Use the BackColor property to get, set, and change the color of the label background.
Value Type: [System.Drawing.Color]
Default: (Determined by the operating system. Typically ‘Control’)
To set the BackColor property in a script:
If ($Label1.BackColor -eq 'Control')
{
    $Label1.BackColor = [System.Drawing.Color]::ControlDark
}
-or-
$Label1.BackColor = "ControlDark"
TextAlign property: Determines the position of the text in the label
Use the TextAlign property to get, set, or change the alignment of the text relative to the label border.
Value Type: [System.Drawing.ContentAlignment] enumeration
Values: TopLeft, TopCenter, TopRight, MiddleLeft, MiddleCenter, MiddleRight, BottomLeft, BottomCenter, BottomRight
Default: MiddleCenter
To set the TextAlign property in the Property pane:
To set the TextAlign property in a script:
$label1.TextAlign = 'TopRight'
BorderStyle property: Determines the style and thickness of the label border.
Use the BorderStyle property to get, set, or change the label border. Label borders are fixed. The end-user cannot resize any label border style.
Value Type: [System.Windows.Forms.BorderStyle] enumerator.
Values: None, FixedSingle, Fixed3D
Default: None
$label1.BorderStyle = 'None'
-or-
$label1.BorderStyle = [System.Windows.Forms.BorderStyle]'None'
$label1.BorderStyle = 'FixedSingle'
$label1.BorderStyle = 'Fixed3D'
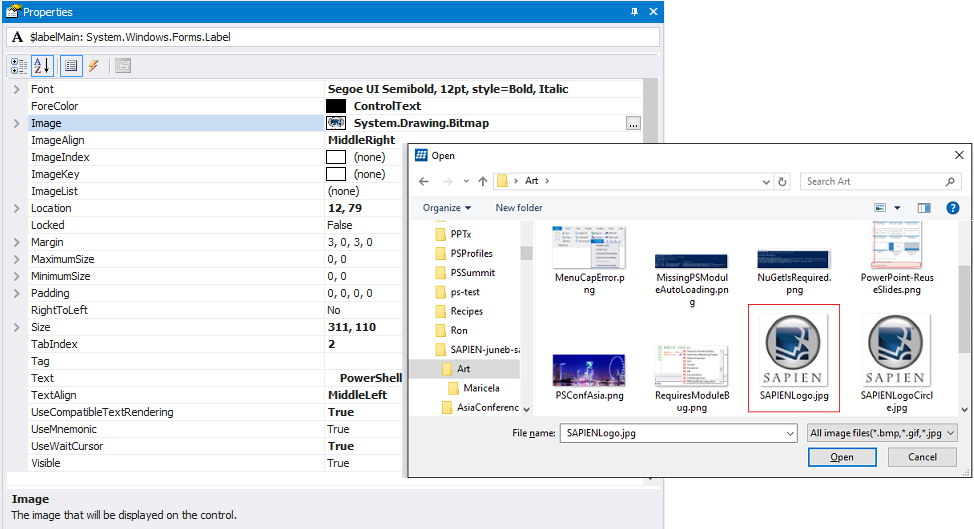
Image property: Determines that image that appears on the label
Use this property to display an icon, bitmap, or image of any type on the label.
Value Type: [System.Drawing.Image]
Default: (None; Same as Form.BackgroundImage)
To add an image from a file to a label, use Image property in the Property pane. Click the ellipsis and, in File Explorer, select a file. PowerShell Studio converts the file into a bitmap string (64-bit byte array) so it is independent of the local system.
On the label:
Tip: If you are using a label to display an image without text, consider using a PictureBox object.
Note: To add an image to a label, PowerShell Studio converts the image to a 64-bit string and then uses the FromBase64String static method to pass a byte array as the System.Drawing.Image type. It does not pass a path or use any local system values.
Enabled property: Determines whether the label can be clicked
Use the Enabled property to temporarily enable or disable the click feature of the label. For example, use Enabled = $false to disable the click feature after the label has been clicked or while a function is running.
Value Type: [System.Boolean] ($True, $False).
Default: $True
To completely disable the click feature of the label, omit the Click event handler or enter an empty script block.
To set the Enabled property in the script:
For example:
If ($Label1.Text -eq 'Click')
{
    $Label1.Text -eq 'Clicked'
    $Label1.Enabled = $false
}
AutoSize property: Adjusts the label length to enclose its contents
The AutoSize property automatically adjusts the length of the label (horizontally) to enclose the string in the value of its Text property.
Use an AutoSize value of $True when the contents of the label are not predetermined, such as when the label displays a value that is returned at runtime or the label can display text in multiple languages. To resize the label or set a fixed size, use $False.
Value Type: [System.Boolean] ($True, $False).
Default: $True (PowerShell Studio 5.2.124 and later. Otherwise, $False)
When the value of AutoSize is $True, Windows automatically resizes the label at runtime to display the text within the label borders.
The size of the label in the designer might not indicate its actual size when the form is displayed.
When the value of AutoSize is $False, you determine the label size, which is fixed, regardless of its content. To resize the label, the value of AutoSize must be $False.
AutoSize extends only the length of the label (horizontally) and the Label control does not have a MultiLine property. If the text exceeds the length of the form, the label and its text are truncated.
To use an ellipsis to prevent truncated text, set the value of AutoEllipsis to $True and AutoSize to $False.
To wrap the text in a Label to the next line, set AutoSize to $False and then increase the height of the label (vertically).
Important Events:
Click event: Determines how the label responds when a user clicks it.
The event handler for the Click event is called when the label is clicked.
IMPORTANT: The Click event is included because it’s the default event for the Label control. However, because the Label is static, not obviously clickable, and provides no user feedback when clicked, best practice guidelines recommend using a Button or LinkLabel control for most clicking actions.
$label1_Click={
    $label1.Enabled = $false
    $label1.Text = "Disabled"
}
Before Click event:
After Click event:
Note about events:
To discover which control called the event script block, use the $this automatic variable. The $this variable is particularly useful when you have multiple controls calling the same event script block. The $this variable tells which control triggered the event, so you can respond in a control-specific way.
For example, this Click event script block disables the control that called it:
$Disable_Click={
    $this.Enabled = $false
}
Looking for more Spotlight articles? In PowerShell Studio, in the Toolbox or in the Properties pane, right-click a control and then click ‘View Spotlight Article’.
June Blender is a technology evangelist at SAPIEN Technologies, Inc. You can reach her at This email address is being protected from spambots. You need JavaScript enabled to view it. or follow her on Twitter at @juneb_get_help.
Реализация DI в PHP
Jason-Webb 13.05.2025
Когда я начинал писать свой первый крупный PHP-проект, моя архитектура напоминала запутаный клубок спагетти. Классы создавали другие классы внутри себя, зависимости жостко прописывались в коде, а о. . .
Обработка изображений в реальном времени на C# с OpenCV
stackOverflow 13.05.2025
Объединение библиотеки компьютерного зрения OpenCV с современным языком программирования C# создаёт симбиоз, который открывает доступ к впечатляющему набору возможностей. Ключевое преимущество этого. . .
POCO, ACE, Loki и другие продвинутые C++ библиотеки
NullReferenced 13.05.2025
В C++ разработки существует такое обилие библиотек, что порой кажется, будто ты заблудился в дремучем лесу. И среди этого многообразия POCO (Portable Components) – как маяк для тех, кто ищет. . .
Паттерны проектирования GoF на C#
UnmanagedCoder 13.05.2025
Вы наверняка сталкивались с ситуациями, когда код разрастается до неприличных размеров, а его поддержка становится настоящим испытанием. Именно в такие моменты на помощь приходят паттерны Gang of. . .
Создаем CLI приложение на Python с Prompt Toolkit
py-thonny 13.05.2025
Современные командные интерфейсы давно перестали быть черно-белыми текстовыми программами, которые многие помнят по старым операционным системам. CLI сегодня – это мощные, интуитивные и даже. . .
Конвейеры ETL с Apache Airflow и Python
AI_Generated 13.05.2025
ETL-конвейеры – это набор процессов, отвечающих за извлечение данных из различных источников (Extract), их преобразование в нужный формат (Transform) и загрузку в целевое хранилище (Load). . . .
Выполнение асинхронных задач в Python с asyncio
py-thonny 12.05.2025
Современный мир программирования похож на оживлённый мегаполис – тысячи процессов одновременно требуют внимания, ресурсов и времени. В этих джунглях операций возникают ситуации, когда программа. . .
Работа с gRPC сервисами на C#
UnmanagedCoder 12.05.2025
gRPC (Google Remote Procedure Call) — открытый высокопроизводительный RPC-фреймворк, изначально разработанный компанией Google. Он отличается от традиционых REST-сервисов как минимум тем, что. . .
CQRS (Command Query Responsibility Segregation) на Java
Javaican 12.05.2025
CQRS — Command Query Responsibility Segregation, или разделение ответственности команд и запросов. Суть этого архитектурного паттерна проста: операции чтения данных (запросы) отделяются от операций. . .
Шаблоны и приёмы реализации DDD на C#
stackOverflow 12.05.2025
Когда я впервые погрузился в мир Domain-Driven Design, мне показалось, что это очередная модная методология, которая скоро канет в лету. Однако годы практики убедили меня в обратном. DDD — не просто. . .
- How to remove border of button in c# windows form code example
- Remove button border when entered
- C# winform remove button border
- How to remove border of button in c# windows form code example
How to remove border of button in c# windows form code example
People also askHow to get rid of the border around the button?How to get rid
of the border around the button?Try to override the Controltemplate of the
button and remove this border or trigger it differently on mouse over if
needed. Issues like this are better investigated when you show a screenshot of
the problematic area.c# — Button how to remove border — Stack Overflow
button.FlatStyle = FlatStyle.Flat;
button.FlatAppearance.BorderSize = 0;
Remove button border when entered
there is a way of taking the border away from the button and its in the button
properties. First make sure you have clicked on the button so …
this.TSVehicleButton.BorderStyle = None;


this.TSVehicleButton.System.Windows.Forms.BorderStyle = None;


public class CustomButton : Button
{
    public CustomButton()
        : base()
    {
        // Prevent the button from drawing its own border
        FlatAppearance.BorderSize = 0;
        FlatStyle = System.Windows.Forms.FlatStyle.Flat;
    }

    protected override void OnPaint(PaintEventArgs e)
    {
        base.OnPaint(e);

        // Draw Border using color specified in Flat Appearance
        Pen pen = new Pen(FlatAppearance.BorderColor, 1);
        Rectangle rectangle = new Rectangle(0, 0, Size.Width - 1, Size.Height - 1);
        e.Graphics.DrawRectangle(pen, rectangle);
    }
}


FlatStyle=Flat
FlatAppearance.BorderSize=0


button1.FlatStyle=True
button1.FlatAppearance.BorderSize=0


button.FlatAppearance.BorderColor = Color.FromArgb(0, 255, 255, 255); // transparent
button.FlatAppearance.BorderSize = 0;
C# winform remove button border
c# button remove border How to make windows form have no border on side c# how
to get rid of button outline c# c# remove button border how to remove a button
border in visual studio C# windows form remove border from butotn c# remove
border button how to remove outline of a button c how to remove border style
in windows forms c# C# hidden
button.FlatStyle = FlatStyle.Flat;
button.FlatAppearance.BorderSize = 0;
How to remove border of button in c# windows form code example
Example: c# winform remove button border button.FlatStyle = FlatStyle.Flat;
button.FlatAppearance.BorderSize = 0;
button.FlatStyle = FlatStyle.Flat;
button.FlatAppearance.BorderSize = 0;