Введение
Образы в WIM формате, подготовленные в системе MDT, компания Microsoft предлагает развертывать по сети с помощью WDS-сервера, либо интегрировать в SCCM.
SCCM стоит довольно дорого, а вот WDS-сервер бесплатен в случае, если вы являетесь счастливым обладателем лицензии на Windows Server 2008/2012. Но не всех устраивают возможности WDS-сервера.
Предлагаемый мной способ будет полезен тем:
- у кого нет лицензии на Windows Server, или все ресурсы на имеющихся серверах уже задействованы и нет возможности приобрести еще одну лицензию;
- кого не устраивает скорость загрузки Windows PE по протоколу TFTP, используемому WDS-сервером;
- кому необходимо совместить развертывание ОС Windows и Linux по сети на одном сервере.
Хочу предложить читателям решение на базе ОС Ubuntu Linux, с использованием syslinux и iPXE.
В дальнейшем будет подразумеваться использование ОС Ubuntu 14.04 LTS.
Упомянутые ниже службы не обязательно должны работать на одном и том же сервере.
Установка и настройка tftp-сервера
Для организации передачи данных по TFTP-протоколу будет использован сервер tftpd-hpa. Он обладает необходимыми возможностями, а также поддерживает remapping.
Установим соответсвующий пакет:
aptitude install tftpd-hpaНастройки находятся в конфигурационном файле
/etc/default/tftpd-hpa
RUN_DAEMON="yes"
TFTP_USERNAME="tftp"
TFTP_DIRECTORY="/var/lib/tftpboot"
TFTP_ADDRESS="0.0.0.0:69"
TFTP_OPTIONS="--secure --listen --verbose --verbosity 10 --map-file /etc/tftpd.remap --refuse blksize"
Также нам потребуется файл с правилами для remapping
/etc/tftpd.remap
rg \\ /
ri (.*)ÿ$ \1
ri (.*)M-\^\?$ \1
ri (pxelinux\.0).*$ \1
Первая строка переопределяет слэши для ОС Windows, последующие предупреждают возможные проблемы с загрузкой на некоторых сетевых адаптерах, когда клиент пытается запросить у tftp-сервера файл «pxelinux.0M-^» или «pxelinux.0ÿ» вместо «pxelinux.0».
Настройка http-сервера
Для чего вообще нам нужен http-сервер, ведь для загрузки WIM-образов по сети достаточно tftp-сервера?
Так получилось, что Trivial FTP хоть и обеспечивает базовые функции для передачи файлов по сети, но не может обеспечить высокую надежность и скорость передачи данных.
Как показывает практика, образы с Windows PE размером около 250МБ, скачиваются по сети 1Гбит с использованием http-протокола в несколько раз быстрее (5-10 секунд, против 30-60 секунд соответственно).
Также по протоколу http можно загружать preseed-файлы для установщика debian-installer.
В качестве http-сервера можно использовать apache, nginx или любой другой сервер который вам нравится. Каких-либо особенных настроек не требуется. Главное, чтоб перечисленные ниже файлы *.ipxe, *.wim и другие файлы, размещенные на http-сервере, были доступны для чтения.
Настройка dhcp-сервера
Согласно RFC1232 необходимо настроить опцию 66 TFTP server name, где указать IP-адрес вашего tftp-сервера, например 192.168.1.1; и опцию 67 Bootfile name, где указать имя файла для загрузки «pxelinux.0»;
Если вы используете, например isc-dhcp-server под управлением Ubuntu, то нужно будет добавить примерно такие настройки в файл
/etc/dhcp/dhcpd.conf
shared-network PXE-Netwotk {
  subnet 192.168.1.0  netmask 255.255.255.0 {
    # Общие настройки для подсети
    range 192.168.1.2 192.168.1.254;
    option routers 192.168.1.1;
    option subnet-mask 255.255.255.0;
    option domain-name-servers 192.168.1.1;

    # Настройки опций для сетевой загрузки в подсети
    filename "pxelinux.0";
    next-server 192.168.1.1;
    option root-path "192.168.1.1:/var/lib/tftpboot/"; # необязательный параметр
  }
}
Установка и настройка загрузчика syslinux
Установка загрузчика
Нам потребуется syslinux версии 5.03 или выше.
Я бы рекомендовал собрать загрузчик из исходных кодов, ничего страшного и сложного в этом нет
Для сборки из исходников нужно установить make, gcc, nasm, uuid-dev, и выполнить команды:
# Скачаем архив с исходными кодами
wget https://www.kernel.org/pub/linux/utils/boot/syslinux/syslinux-6.03.zip
# распакуем его
unzip syslinux-6.03.zip -d syslinux-6.03
# Собственно сама сборка с помощью make
cd syslinux-6.03
make
# Скопируем полученные файлы в каталог tftp-сервера:
cd ..
cp syslinux-6.03/bios/memdisk/memdisk /var/lib/tftpboot/
find ./syslinux-6.03/bios/ -name "pxelinux.0"|xargs -I {} cp '{}' /var/lib/tftpboot/
find ./syslinux-6.03/bios/ -name "*.c32"|xargs -I {} cp '{}' /var/lib/tftpboot/
Настройка меню загрузчика
Создадим каталог для файлов меню syslinux:
mkdir -p /var/lib/tftpboot/pxelinux.cfg/И создадим файл с меню по умолчанию
/var/lib/tftpboot/pxelinux.cfg/default
ui vesamenu.c32
PROMPT 0
menu background background.jpg
menu title PXE boot menu

# По умолчанию загружаемся с первого жесткого диска
LABEL bootlocal
   menu label Boot from first HDD
   kernel chain.c32
   append hd0 0
   # Таймаут для автоматической загрузки 12 секунд
   timeout 120
 TEXT HELP
The system will boot after the time is up
 ENDTEXT

# Подменю для центрального офиса
LABEL Central Office    ->
      KERNEL vesamenu.c32
      APPEND pxelinux.cfg/CentralOffice

# Подменю для региональных офисов
LABEL Regional Offices ->
      # menu PASSWD $1$15opgKTx$dP/IaLNiCbfECiC2KPkDC0 # раскомментировать если требуется вход в подменю по паролю, пароль Qwerty, алгоритм MD5
      KERNEL vesamenu.c32
      APPEND pxelinux.cfg/RegionalOffices
А теперь создадим подменю непосредственно для загрузки ОС:
/var/lib/tftpboot/pxelinux.cfg/CentralOffice
PROMPT 0
UI vesamenu.c32
MENU BACKGROUND background.jpg
MENU TITLE Central Office

# Возврат в главное меню
LABEL <- Main Menu
      KERNEL vesamenu.c32
      APPEND pxelinux.cfg/default

# Загрузка через http
LABEL PE via http
        KERNEL ipxe.lkrn
        APPEND dhcp && chain http://192.168.2.1/winpe.ipxe

# Для сравнения загрузка через tftp
LABEL PE via tftp
        KERNEL ipxe.lkrn
        APPEND dhcp && chain tftp://192.168.2.1/winpe.ipxe

# Можно также загрузить debian-installer
LABEL Ubuntu
        KERNEL ubuntu-installer/i386/linux
        APPEND initrd=ubuntu-installer/i386/initrd.gz preseed/url=http://192.168.1.1/preseed/custom.seed debconf/priority=high auto-install/enable=true debian-installer/language=ru debian-installer/locale=ru_RU.UTF-8 debian-installer/country=RU ipv6.disable=1 netcfg/hostname=testname DEBCONF_DEBUG=5 --
, где winpe.ipxe — конфигурационный файл с настройками для ipxe, который мы разберем ниже, в соответствующем разделе.
Не стоит забывать, что tftp-сервер не умеет работать с символическими ссылками, поэтому нужно будет сделать отдельную копию файла winpe.ipxe в каталоге tftp-сервера, если захочется сравнить скорость загрузки по http и tftp.
Некоторые сетевые карты не успевают поднять link с первого раза, поэтому можно сделать вторую попытку загрузки в случае неудачи, с использованием оператора «||». Если после второй попытки нас снова постигнет неудача, то можно вывести статистику интерфейса и открыть командную строку для диагностики проблемы:
APPEND dhcp && chain http://192.168.2.1/winpe.ipxe || dhcp && chain http://192.168.2.1/winpe.ipxe || ifstat && shelliPXE
Установка iPXE
iPXE я тоже предлагаю собирать из исходных кодов, к тому же это тоже очень просто:
git clone git://git.ipxe.org/ipxe.git
cd ipxe/src
make
cp bin/ipxe.lkrn /var/lib/tftpboot
Если какая-либо сетевая карта отказывается поднимать link с любой попытки, то скорее всего проблема в драйвере iPXE.
Особенно эта проблема касается новых сетевых карт от Intel. У меня возникли проблемы с картами i218lm и с i218v-2, при принудительно выставленной скорости 1Гбит на свиче.
Перед сборкой нужно поправить ipxe/src/drivers/net/intel.c: для i218lm и i218v-2 выставить флаг INTEL_NO_PHY_RST:
PCI_ROM ( 0x8086, 0x155a, "i218lm", "I218-LM", INTEL_NO_PHY_RST),
PCI_ROM ( 0x8086, 0x15a1, "i218v-2", "I218-V", INTEL_NO_PHY_RST ),
Установка wimboot
Для загрузки WIM-образов через iPXE потребуется утилита wimboot.
Установка этой утилиты также очень проста:
wget http://git.ipxe.org/releases/wimboot/wimboot-latest.zip
unzip wimboot-latest.zip
cp wimboot-2.5.1-signed/wimboot /var/lib/tftpboot/
Создание конфигурационных файлов .ipxe
Конфигурационные файлы .ipxe (расширение может быть любым, но так удобнее) содержат инструкции для ядра ipxe: что именно загружать дальше.
Мы будем загружать утилиту wimboot, и передадим ей в параметрах пути к файлу данных конфигурации загрузки BCD, файлу конфигурации RAM-диска boot.sdi и к образу boot.wim. Структуру каталогов сохранять не обязательно, wimboot сама позаботиться об этом. Все файлы можно сложить в один каталог.
winpe.ipxe
#!ipxe
kernel http://192.168.1.1/boot/wimboot
initrd http://192.168.1.1/boot/DeploymentShare/Boot/x86/Boot/bcd BCD
initrd http://192.168.1.1/boot/DeploymentShare/Boot/x86/Boot/boot.sdi  boot.sdi
initrd http://192.168.1.1/boot/DeploymentShare/Boot/LiteTouchPE_x86.wim boot.wim
boot
В данном примере на http-сервере сделана символическая ссылка для 192.168.1.1/boot/DeploymentShare прямо на корень MDT DeploymentShare. Этот способ не подходит в качестве основного рабочего варианта. Т.к. если Вы вдруг соберете «кривой» wim-образ, то сразу же испортите загрузку по сети для тех, кто с этим работает. Но этот способ хорошо подходит для тестирования новых wim-образов.
Желающие могут заменить в .ipxe файле протокол http на tftp — тоже будет работать, но медленно.
Все. Теперь можно загружаться и ставить ОС.
Setting up a bootable USB drive with multiple OS using Syslinux
- Prepare the USB drive
- Partitioning
- Create the filesystem
- Install Syslinux bootloader on the device
- Copy required c32 modules
- Install Syslinux
- Write MBR
- Deploy a sample configuration
- Test sample configuration
- Install Memtest86+
- Install SystemRescueCd
- Install ArchLinux
- BIOS Boot
- EFI Boot
- Install Windows (MEMDISK)
- Further remarks
- Syslinux commands
- Windows ISO Images without using MEMDISK
The USB drive will have only a single partition. (I have tried using multiple
partitions and chainloading them, but it did not work.)
For the remainder of this guide, I will refer to the USB device with
/dev/sdX and to the first (and only) partition on this device as /dev/sdX1.
Prepare the USB drive
Make sure the USB device is not mounted.
Partitioning
We start with partitioning our USB device. Run fdisk on the device.
# fdisk /dev/sdX

Welcome to fdisk (util-linux 2.25.2).
Changes will remain in memory only, until you decide to write them.
Be careful before using the write command.
When prompted for a command, create a new DOS partition table.
(Syslinux requires DOS partitions.)
Command (m for help): o
Created a new DOS disklabel with disk identifier 0x9c4e2fab.
We now have an empty DOS partition table. Create a single partition that spans
the whole device. After typing n just press ENTER to use the default
options.
Command (m for help): n
Partition type
   p   primary (0 primary, 0 extended, 4 free)
   e   extended (container for logical partitions)
Select (default p):
Partition number (1-4, default 1):
First sector (2048-30310399, default 2048):
Last sector, +sectors or +size{K,M,G,T,P} (2048-30310399, default 30310399):

Created a new partition 1 of type 'Linux' and of size 14.5 GiB.
To verify this procedure, enter p to print the current partition table.
Command (m for help): p
Disk /dev/sdX: 14.5 GiB, 15518924800 bytes, 30310400 sectors
Units: sectors of 1 * 512 = 512 bytes
Sector size (logical/physical): 512 bytes / 512 bytes
I/O size (minimum/optimal): 512 bytes / 512 bytes
Disklabel type: dos
Disk identifier: 0x9c4e2fab

Device     Boot Start      End  Sectors  Size Id Type
/dev/sdX1        2048 30310399 30308352 14.5G 83 Linux
Now we have to change the type of the partition to W95 FAT32. I am not sure
whether the Hex code is the same for every system, so use L to print the table
of Hex codes first.
Command (m for help): t
Selected partition 1
Hex code (type L to list all codes): L
0  Empty           24  NEC DOS         81  Minix / old Lin bf  Solaris
 1  FAT12           27  Hidden NTFS Win 82  Linux swap / So c1  DRDOS/sec (FAT-
 2  XENIX root      39  Plan 9          83  Linux           c4  DRDOS/sec (FAT-
 3  XENIX usr       3c  PartitionMagic  84  OS/2 hidden C:  c6  DRDOS/sec (FAT-
 4  FAT16 <32M      40  Venix 80286     85  Linux extended  c7  Syrinx
 5  Extended        41  PPC PReP Boot   86  NTFS volume set da  Non-FS data
 6  FAT16           42  SFS             87  NTFS volume set db  CP/M / CTOS / .
 7  HPFS/NTFS/exFAT 4d  QNX4.x          88  Linux plaintext de  Dell Utility
 8  AIX             4e  QNX4.x 2nd part 8e  Linux LVM       df  BootIt
 9  AIX bootable    4f  QNX4.x 3rd part 93  Amoeba          e1  DOS access
 a  OS/2 Boot Manag 50  OnTrack DM      94  Amoeba BBT      e3  DOS R/O
 b  W95 FAT32       51  OnTrack DM6 Aux 9f  BSD/OS          e4  SpeedStor
 c  W95 FAT32 (LBA) 52  CP/M            a0  IBM Thinkpad hi eb  BeOS fs
 e  W95 FAT16 (LBA) 53  OnTrack DM6 Aux a5  FreeBSD         ee  GPT
 f  W95 Ext'd (LBA) 54  OnTrackDM6      a6  OpenBSD         ef  EFI (FAT-12/16/
10  OPUS            55  EZ-Drive        a7  NeXTSTEP        f0  Linux/PA-RISC b
11  Hidden FAT12    56  Golden Bow      a8  Darwin UFS      f1  SpeedStor
12  Compaq diagnost 5c  Priam Edisk     a9  NetBSD          f4  SpeedStor
14  Hidden FAT16 <3 61  SpeedStor       ab  Darwin boot     f2  DOS secondary
16  Hidden FAT16    63  GNU HURD or Sys af  HFS / HFS+      fb  VMware VMFS
17  Hidden HPFS/NTF 64  Novell Netware  b7  BSDI fs         fc  VMware VMKCORE
18  AST SmartSleep  65  Novell Netware  b8  BSDI swap       fd  Linux raid auto
1b  Hidden W95 FAT3 70  DiskSecure Mult bb  Boot Wizard hid fe  LANstep
1c  Hidden W95 FAT3 75  PC/IX           be  Solaris boot    ff  BBT
1e  Hidden W95 FAT1 80  Old Minix
Hex code (type L to list all codes): b
(There might be another line of output... not imprtant)
Changed type of partition 'Linux' to 'W95 FAT32'.
To make the partition bootable, we have to set its boot flag.
Command (m for help): a
Selected partition 1
The bootable flag on partition 1 is enabled now.
Finally we write the changes to the device.
Command (m for help): w
The partition table has been altered.
Calling ioctl() to re-read partition table.
Syncing disks.
Create the filesystem
We now create a MS-DOS FAT32 filesystem on the partition.
Replace <LABEL> by a name of your choice.
# mkfs.fat -F32 -n <LABEL> /dev/sdX1
mkfs.fat 3.0.27 (2014-11-12)
If there is a warning/error in the output, try again with the -c option.
# mkfs.fat -F32 -c -n <LABEL> /dev/sdX1
Install Syslinux bootloader on the device
Mount the device.
# mkdir /mnt/usb
# mount /dev/sdX1 /mnt/usb
Create a directory for Syslinux.
# mkdir -p /mnt/usb/boot/syslinux
Copy required c32 modules
Copy necessary c32 modules. (I am a lazy person, I just copy all the c32
modules. One could identify the actually used modules, but since storage
capacity is not an issue…)
The location of the c32 modules depends on your OS and Syslinux installation.
# whereis syslinux
syslinux: /usr/bin/syslinux /usr/lib/syslinux /usr/share/man/man1/syslinux.1.gz
In my case they can be found at /usr/lib/syslinux. Now copy the required
modules.
# cp /usr/lib/syslinux/bios/*.c32 /mnt/usb/boot/syslinux
Install Syslinux
Install Syslinux on the partition. With the --directory option we specify a
relative path to where the Syslinux binary is placed.
# syslinux --directory boot/syslinux --install /dev/sdX1
Write MBR
To make the device bootable, we need to write the Master Boot Record of the
device.
# dd bs=440 count=1 conv=notrunc if=/usr/lib/syslinux/bios/mbr.bin of=/dev/sdX
1+0 records in
1+0 records out
440 bytes (440 B) copied, 8.7927e-05 s, 5.0 MB/s
Deploy a sample configuration
To check that nothing went wrong to this point, we deploy a sample Syslinux
configuration file.
Create the file /mnt/usb/boot/syslinux/syslinux.cfg and open it with your
favorite text editor.
# vim /mnt/usb/boot/syslinux/syslinux.cfg
Paste the following lines of code to the file, then save and exit.
DEFAULT hdt
PROMPT 0
TIMEOUT 50

# You can create syslinux keymaps with the keytab-lilo tool
#KBDMAP de.ktl

UI vesamenu.c32
MENU TITLE Multitool
MENU RESOLUTION 640 480

MENU WIDTH 110
MENU MARGIN 35
MENU ROWS 5
MENU VSHIFT 8

MENU TIMEOUTROW 13
MENU TABMSGROW 11
MENU CMDLINEROW 11
MENU HELPMSGROW 20
MENU HELPMSGENDROW 23

# Refer to http://www.syslinux.org/wiki/index.php/Comboot/menu.c32

MENU COLOR border       30;44   #40ffffff #a0000000 std
MENU COLOR title        1;36;44 #9033ccff #a0000000 std
MENU COLOR sel          7;37;40 #e0ffffff #20ffffff all
MENU COLOR unsel        37;44   #50ffffff #a0000000 std
MENU COLOR help         37;40   #c0ffffff #a0000000 std
MENU COLOR timeout_msg  37;40   #80ffffff #00000000 std
MENU COLOR timeout      1;37;40 #c0ffffff #00000000 std
MENU COLOR msg07        37;40   #90ffffff #a0000000 std
MENU COLOR tabmsg       31;40   #30ffffff #00000000 std


LABEL hdt
  MENU LABEL HDT (Hardware Detection Tool)
  COM32 hdt.c32

LABEL reboot
  MENU LABEL Reboot
  COM32 reboot.c32

LABEL poweroff
  MENU LABEL Poweroff
  COM32 poweroff.c32
Unmount the device.
Test sample configuration
Leave the USB drive plugged in. Restart your computer and make sure that the USB
drive has the highest boot priority.
The USB device should be booted, and you are shown the following table:
+---------------------------------------------+
|                                             |
|                  Multitool                  |
|                                             |
+---------------------------------------------+
|                                             |
|  HDT (Hardware Detection Tool)              |
|                                             |
|  Reboot                                     |
|                                             |
|  Poweroff                                   |
|                                             |
+---------------------------------------------+
If this is not the case, make sure you followed the guide correctly. If it
still does not work, feel free to open a new Issue and explain in detail what is
going wrong.
Install Memtest86+
Download Memtest86+ from http://www.memtest.org/. (Some distributions
already ship with a version of Memtest86+.)
Make sure the USB device is mounted.
Copy Memtest86+ to the USB device.
(I am not sure whether memtest.bin must be executable…)
# mkdir -p /mnt/usb/memtest86+
# cp path/to/memtest.bin /mnt/usb/memtest86+
Open the Syslinux configuration file on the USB device.
# vim /mnt/usb/boot/syslinux/syslinux.cfg
Add the following entry to the file. (The entries are displayed from top to
bottom. You can freely choose the order.)
LABEL memtest
  MENU LABEL Memtest86+
  TEXT HELP
  Run memory failure detection.
  ENDTEXT
  LINUX /memtest86+/memtest.bin
Save and exit the file. You can now test the setup, see Test sample
configuration.
Install SystemRescueCd
Download the latest version of the SystemRescueCd ISO image from
http://www.sysresccd.org .
Mount the ISO image.
# mkdir /mnt/srcd
# mount /path/to/systemrescuecd-x86-4.4.1.iso /mnt/srcd
Make sure the USB device is mounted.
Copy the content of the ISO image to the USB device.
# mkdir /mnt/usb/systemrescuecd
# cp -a /mnt/srcd/* /mnt/usb/systemrescuecd && sync
# umount /mnt/srcd
Edit the Syslinux configuration file on the device, and add the following entry.
MENU BEGIN
  MENU TITLE SystemRescueCd

  LABEL 32bit
  MENU LABEL SystemRescueCd (32-bit)
  TEXT HELP
  Live system running X that offers many repair tools.
  ENDTEXT
  LINUX /systemrescuecd/isolinux/rescue32
  INITRD /systemrescuecd/isolinux/initram.igz

  LABEL 64bit
  MENU LABEL SystemRescueCd (64-bit)
  TEXT HELP
  Live system running X that offers many repair tools.
  ENDTEXT
  LINUX /systemrescuecd/isolinux/rescue64
  INITRD /systemrescuecd/isolinux/initram.igz

  LABEL back
  MENU LABEL Back
  MENU EXIT
MENU END
Save and exit the file.
SystemRescueCd will look for the file sysrcd.dat under the root directory of
the partition. Therefore, we will move that file such that SystemRescueCd is
able to find it. (This little hack will cause a warning during the boot process
of SystemRescueCd, reporting that the md5sum did not match. This warning can
safely be ignored.)
# mv /mnt/usb/systemrescuecd/sysrcd.dat /mnt/usb
You can now test the setup, see Test sample configuration.
Install ArchLinux
This guide is based on
wiki.archlinux.org/index.php/USB_flash_installation_media#Using_manual_formatting
.
Get the latest version of the ArchLinux ISO image from www.archlinux.org .
Mount the ISO image.
# mkdir /mnt/archiso
# mount /path/to/archlinux-2015.01.01-dual.iso /mnt/archiso
Make sure the USB device is mounted.
Copy the content of the ISO image to the USB device.
# mkdir /mnt/usb/archlinux
# cp -a /mnt/archiso/* /mnt/usb/archlinux && sync
# umount /mnt/archiso
Add the follwoing entry to the Syslinux configuration file on the USB device.
LABEL arch
  MENU LABEL Arch Linux
  TEXT HELP
  Run the Arch Linux Live distribution.
  ENDTEXT
  CONFIG /archlinux/arch/boot/syslinux/archiso.cfg
  APPEND /archlinux/arch/
We additionally need to modify some of the ArchLinux files.
BIOS Boot
Edit /mnt/usb/archlinux/arch/boot/syslinux/archiso_sys32.cfg and replace
APPEND archisobasedir=arch archisolabel=ARCH_201501
by
APPEND archisobasedir=archlinux/arch archisodevice=/dev/disk/by-uuid/<UUID>
where <UUID> is the UUID of the USB device partition.
Repeat this procedure for
/mnt/usb/archlinux/arch/boot/syslinux/archiso_sys64.cfg .
You can now test the setup, see Test sample configuration.
EFI Boot (not tested)
Edit /mnt/usb/archlinux/loader/entries/archiso-x86_64.conf and replace
options archisobasedir=arch archisolabel=ARCH_201501
by
options archisobasedir=archlinux/arch archisodevice=/dev/disk/by-uuid/<UUID>
where <UUID> is the UUID of the USB device partition.
You can now test the setup, see Test sample configuration.
Install Windows (MEMDISK)
This guide explains how to install Windows 7 on the USB drive such that
Syslinux is able to chainload it.
However, there is a major problem: the bootloader for Windows (bootmgr) assumes
the Windows files to reside in the root directory of the partition. Therefore
it is impossible to chainload the extracted ISO image.
To circumvent this issue, we will place the full Windows 7 ISO image on the USB
device, and use MEMDISK to mount it to RAM and boot it.
Make sure the USB device is mounted.
Copy the Windows 7 ISO image to your USB device.
# mount /path/to/Windows7.iso /mnt/usb && sync
Install MEMDISK on the USB device. (Memdisk is included in Syslinux.)
# mkdir /mnt/usb/boot/memdisk
# cp /path/to/memdisk /mnt/usb/boot/memdisk
Add the follwoing entry to the Syslinux configuration file on the USB device.
LABEL win7
  MENU LABEL Windows 7
  KERNEL /boot/memdisk/memdisk
  INITRD /Windows7.iso
  APPEND raw iso
If you now select to boot the Windows ISO image from the Syslinux screen, the
ISO image will be loaded to a RAMDISK. This can take an extremely long time, be
patient. Remember that Windows requires you to press a key in order to trigger
the boot process, so stay close to the keyboard 
You can now test the setup, see Test sample configuration.
Further remarks
Syslinux commands
Modify DEFAULT hdt to any label specified in the Syslinux configuration file.
With
MENU BACKGROUND splash.png
you can specify a splash screen image to display.
Windows ISO Images without using MEMDISK
The article
http://superuser.com/questions/740448/multiple-windows-installers-on-a-usb-stick
explains in detail how to create a bootable USB drive with a bootable Windows
without extra partitions and without the use of MEMDISK.
Make sure to read both the question and the answer.
The proposed way has many benefits. Booting the Windows image is much
faster, since no RAMDISK has to be created. Furthermore, the target device does
not need to have that much memory (for Windows 7 >6GB).
Материал из Пингвиньи радостей
Перейти к: навигация, поиск
Содержание
- 1 Получение загрузчика
- 1.1 получение загрузчика через хранилища linux
- 1.2 получение загрузчика сайта www.pkgs.org
- 1.3 получение загрузчика с сайта www.kernel.org
- 2 Размещение SysLinux в качестве загрузчика
- 2.1 установка SysLinux из WINDOWS
- 2.2 установка SysLinux из DOS
- 2.3 установка SysLinux из LINUX
- 2.4 параметры установщика SysLinux
- 3 Литература
- 4 Справочная информация
Статья о загрузчике операционных сред Syslinux
Syslinux это универсальный загрузчик операционных сред.
Syslinux поддерживает загрузку
- с файловых систем Linux ext2/3/4 или btrfs — в этом случае говорят об extlinux
- с файловой системы MS-DOS FAT — это собственно загрузчик syslinux
- с CD/DVD дисков — в этом случае загрузчик называется isolinux
- по сети, используя PXE-загрузку с TFTP и/или HTTP серверов, — с помощью версии pxelinux.
Syslinux предоставляет множество модулей расширяющих его функциональность, например из известных memdisk. hdt.c32 и несколько подсистем организации меню: в текстовом варианте — menu.c32 и в графическом — vesamenu.c32 и gfxboot.c32.
Сайт проекта www.syslinux.org
Получение загрузчика
Syslinux распрораняется в открытых кодах и в виде скомпилированных бинарных пакетов.
В Debian дистрибутивах бинарные пакеты имеют названия syslinux, syslinux-common и syslinux-utils.
Эти пакеты могут быть получены как через хранилища пакетов, так и загружены напрямую с сайта pkgs.org.
  Внимание!
  Установка пакетвой в операционной среде не приводит к установке Syslinux на жёсткий диск в качестве
  первоначального загрузчика, но предоставляет возможность осуществить такую установку на любой носитель, собрать
  ISO-образ с использованием данного загрузчика или организовать PXE-загрузку.
получение загрузчика через хранилища linux
Описание получения загрузчика через хранилища linux приведено на примере Debian Squeeze.
Пакет присутствует в хранилище пакетов debian squeeze.
Для установки пакета
- в командной строке: следует выполнить команду # apt-get install syslinux syslinux-common syslinux-utils
- в графическом режиме: воспользоваться специализированной программой управления пакетами
После установки пакет доступен для использования.
  Замечание:
  COM32 модули необходимые для организации PXE-загрузки размещаются в каталоге /usr/lib/syslinux/modules.
получение загрузчика сайта www.pkgs.org
Получение загрузчика сайта www.pkgs.org может потребоваться, если нужна последняя версия Syslinux.
Для получения загрузчика Syslinux с сайта www.pkgs.org
- загружаются пакеты с хранилища www.pkgs.org
  на примере версии 6.03 и архитектуры amd64
  # wget http://ftp.br.debian.org/debian/pool/main/s/syslinux/syslinux_6.03+dfsg-5+deb8u1_amd64.deb
  # wget http://ftp.br.debian.org/debian/pool/main/s/syslinux/syslinux-common_6.03+dfsg-5+deb8u1_all.deb
  # wget http://ftp.br.debian.org/debian/pool/main/s/syslinux/syslinux-utils_6.03+dfsg-5+deb8u1_amd64.deb
- распаковывается (устаналивается) загрузчик Syslinux
# dpkg -i syslinux*
получение загрузчика с сайта www.kernel.org
Получение загрузчика сайта www.kernel.org может позволить избежать установки пакета в систему, например если загрузчик предполагается использовать лишь как PXELINUX.
Для получения загрузчика Syslinux с сайта www.kernel.org
- загружаются пакеты с сайта www.kernel.org
# wget https://www.kernel.org/pub/linux/utils/boot/syslinux/syslinux-6.03.tar.gz
- распаковается архив
# tar xvzf syslinux-6.03.tar.gz
  Внимание!
  В дальнейшем в статье указываемые пути, например [bios/]mbr/ или [bios/]win32/, понимаются
  как пути отложенные от корня данного распакованного архива.
- (например) извлекаются файлы необходимые для организации PXE-загрузки
  # find -H <syslinux-path>/ -name pxelinux.0 -exec cp {} <TFTP-path>/ \;
  # find -H <syslinux-path>/ -name *.c32      -exec cp {} <TFTP-path>/ \;
  # find -H <syslinux-path>/ -name memdisk    -exec cp {} <TFTP-path>/ \;
Размещение SysLinux в качестве загрузчика
Процедура размещения Syslinux в качестве главного загрузчика зависит от операционной среды, из которой она осуществляется.
установка SysLinux из WINDOWS
Для установки загрузчика Syslinux из Windows используется файл «[bios/]win32/syslinux.exe» для 32-х битных систем и «[bios/]win64/syslinux64.exe» для 64-х битных систем.
Установщик Syslinux для Windows поддерживает файловые системы FAT и NTFS.
Синтаксис команды
# syslinux[64].exe [options] <drive>: [bootsecfile]
  Например:
  # syslinux.exe --install a:                                               - установка на флоппи-диск
  # syslinux.exe --mbr --active --directory /boot/syslinux/ --install z:    - установка на диск z:, например флешку
                 где
                 - в качестве разделителей должны быть использованы именно /, а не \
                 - в каталоге z:\boot\syslinux\ будет размещён файл-загрузчик "ldlinux.sys"
                 - и раздел z: помечен как активный
                 - для организации меню должен быть создан файл z:\boot\syslinux\syslinux.cfg
  Внимание!
  Ни с параметром --mbr, ни без него установщик Syslinux НЕ устанавливает в MBR загрузочную запись.
  Для этого должны быть использованы специальные средства, например в linux команда dd:
     # dd if=[bios/]mbr/mbr.bin of=/dev/sda bs=440 count=1
установка SysLinux из DOS
Установка загрузчика Syslinux из DOS осуществляется с помощью файла «[bios/]dos/syslinux.com».
Установщик Syslinux для DOS поддерживает файловую систему FAT.
Синтаксис команды
# syslinux.com [options] <drive>: [bootsecfile]
  Например:
  # syslinux.com --install a:                                               - установка на флоппи-диск
  Замечание:
  Для установки стандартного простого MBR в DOS может быть использована команда
  # FDISK /MBR
установка SysLinux из LINUX
Установка загрузчика Syslinux из Linux может быть осуществлена с помощью нескольких файлов
- «[bios/]linux/syslinux» для установки с привилегиями суперпользователя на файловую систему FAT без монтирования раздела
- «[bios/]mtools/syslinux» для установки с разрешением непривилегированной записи на файловую систему FAT без монтирования раздела
- «[bios/]extlinux/extlinux» для установки на предварительно смонтированный раздел на все поддерживаемые ФС: FAT12/16/32, NTFS, ext2/3/4, Btrfs, XFS, UFS/FFS
Синтаксис команды syslinux
# syslinux [options] <Device_Or_Image>
  Например:
  # syslinux /dev/fd0                                                       - установка на флоппи-диск
Синтаксис команды extlinux
# extlinux [options] <target_directory>
  Например:
  # extlinux --directory /boot/syslinux/ --install /dev/sdb1                - установка загрузчика на носитель /dev/sdb1 в каталог /boot/syslinux/
  Замечание:
  Для маркировки раздела активным может быть использована команды
  # parted /dev/sdb set 1 boot on
    или
  # fdisk /dev/sdb
    Command (m for help): a
    Partition number (1-X): 1
    Command (m for help): w
  При отсутствии метки активный запуск загрузки с раздела с Syslinux будет остановлен с ошибкой Missing Operating System.
Ссылки:
- syslinux.org: wiki/Install
- syslinux.org: wiki/Common_Problems
параметры установщика SysLinux
Параметры ([options]) установщика загрузчика Syslinux различаются для различных вариантов установки.
  общие параметры
  -h --help              - отображение помощи по программе
  -v --version           - отображение версии программы
  -i --install           - установка поверх текущего загрузочного сектора
  -U --update            - обновление предыдущей установки
  -H --heads=#           - прямое указание номера heads
  -S --sectors=#         - прямое указание номера sectors per track
  -z --zip               - прямое указание геометрии zipdrive (-H 64 -S 32)
  -s --stupid            - медленный, безопасный, "тупой" режим
                           Используется на очень глючных BIOS-ах с которыми стандартный SYSLINUX не запускается.
  -r --raid              - RAID режим
                           Устраняет ошибку при загрузке при использовании RAID-1
     --once=...          - одноразовое выполнение команды при следующей загрузке; обычно команда это известная метка пункта меню (label)
     --clear-once        - очистка запланированной при загрузке команды
     --reset-adv         - Reset auxiliary data vector
     --menu-save=mylabel - установка пункта меню по умолчанию при следующей загрузке
                           Для постоянного применения данного параметра файл конфигурации должен содержать также директиву MENU SAVE
  параметры установки в неподключённые (несмонтированные) устройства
  -d --directory <target_path>    - целевой каталог для установки, откладываемый от корня целевого устройства
                           Каталог <target_path> должен быть создан до выполнения команды
  -f --force             - форсирование установки игнорируя предосторожности.
                           В некоторых случая эта директива не изменит результат.
  --offset=#             - указание смещения в байтах в образе файлового устройства целевого устройства
                           Параметр применяется только когда целевое устройство является файлов с образом диска
  параметры установки из-под DOS/Windows
  -d --directory <target_path>   - целевой каталог для установки, откладываемый от корня целевого устройства
                           Каталог <target_path> должен быть создан до выполнения команды
  -f --force             - форсирование установки игнорируя предосторожности.
                           В некоторых случая эта директива не изменит результат.
  -m --mbr               - установка сгенерерованного загрузочного кода в MBR
                           Замечание: Текущая версия SYSLINUX не устанавливает MBR даже с этим параметром.
  -a --active            - маркировка раздела в качестве "активного" (установка флага "загружаемый")
  параметры установки в подключённые (смонтированные) устройства
     --device            - [4.06+] форсирование использования специфичного блочного устройства (только для экспертов)
Ссылки:
- syslinux.org: Install
Литература
- wikipedia.org: SYSLINUX
- syslinux.org: WIKI
- wiki.archlinux.org: Syslinux
Справочная информация
- 28.09.2013: Syslinux: создание статьи о загрузчике операционных сред Syslinux
- 08.02.2015: Syslinux: добавлен раздел Получение и Установка загрузчика
- 18.02.2015: Syslinux: добавлен раздел Параметры установщика SysLinux
- 08.01.2016: Syslinux: добавлен раздел Получение загрузчика сайта www.pkgs.org
Once Windows Deployment Services is installed and running, locate the folder where WDS is installed.
My install is in D:\RemoteInstall.
- Rename
pxeboot.n12inD:\RemoteInstall\Boot\x64 to pxeboot.0. - Rename
abortpxe.cominD:\RemoteInstall\Boot\x86 to abortpxe.0. - Download syslinux. I used version 5.04. Your mileage may vary with other versions.
- From the syslinux archive, extract
core\pxelinux.0, com32\menu\vesamenu.c32, com32\modules\chain.c32, memdisk\memdisktoD:\RemoteInstall\Boot\x86 and D:\RemoteInstall\Boot\x64. - Rename
pxelinux.0topxelinux.comin both directories. - Create the following directories:
D:\RemoteInstall\Boot\x64\LinuxD:\RemoteInstall\Boot\x64\pxelinux.cfg(this is a directory, not a file)D:\RemoteInstall\Boot\x64\LinuxD:\RemoteInstall\Boot\x64\pxelinux.cfg(this is a directory as well)
- Open a command prompt with Administrator permissions and issue the following commands:
wdsutil /set-server /bootprogram:boot\x86\pxelinux.com /architecture:x86
wdsutil /set-server /bootprogram:boot\x64\pxelinux.com /architecture:x64
wdsutil /set-server /N12bootprogram:boot\x86\pxelinux.com /architecture:x86
wdsutil /set-server /N12bootprogram:boot\x64\pxelinux.com /architecture:x64

- Create a two files called default and graphics.conf in
D:\RemoteInstall\Boot\x64\pxelinux.cfgD:\RemoteInstall\Boot\x86\pxelinux.cfg
- Edit default and add the following text for the default menus:
DEFAULT vesamenu.c32
PROMPT 0
MENU TITLE PXE Boot Menu
MENU INCLUDE pxelinux.cfg/graphics.conf
MENU AUTOBOOT Starting Local System in 8 seconds
# Option 1 - Exit PXE Linux & boot normally
LABEL bootlocal
menu label ^Boot Normally
menu default
localboot 0
timeout 80
TOTALTIMEOUT 9000
# Option 2 - Run WDS
LABEL wds
MENU LABEL ^Windows Deployment Services
KERNEL pxeboot.0
# Option 3 - Exit PXE Linux
LABEL Abort
MENU LABEL E^xit
KERNEL abortpxe.0
- Edit graphics.conf and add the following text for the default menus:
MENU MARGIN 10
MENU ROWS 16
MENU TABMSGROW 21
MENU TIMEOUTROW 26
MENU COLOR BORDER 30;44 #00000000 #00000000 none
MENU COLOR SCROLLBAR 30;44 #00000000 #00000000 none
MENU COLOR TITLE 0 #00269B #00000000 none
MENU COLOR SEL 30;47 #40000000 #20ffffff
MENU BACKGROUND background.jpg
NOESCAPE 0
ALLOWOPTIONS 0
- Place your ISOs or image files in D:\RemoteInstall\Boot\x64 or D:\RemoteInstall\Boot\x86.
- Edit D:\RemoteInstall\Boot\x64\default or D:\RemoteInstall\Boot\x86 (depending on the architecture of your OS install) and add the following example text:
LABEL LABELNAME
MENU LABEL LABELNAME
Kernel memdisk
append iso raw initrd=FILENAME.iso
Your filename is the name of your ISO file.
Many distros will have their own way of getting this to boot correctly. For example, while Debian
provides a relatively easy path to add a network install, with Ubuntu 20.04, Canonical has taken steps
to push people to alternative ways to easily do a traditional network install. Much Googling is to be
had. See PXE config examples.
IT evolves very quickly and when you switch to a new version of Windows (for example), compatibility problems may appear with a specific program or a specific game.
For example : SimCity 4 no longer works under Windows 8.
To solve this compatibility problem and benefit from better security, the simplest solution is to install 2 versions of Windows on your computer.
- the old version will allow to run games that were compatible with this version of Windows
- the new version will allow to run the new programs and the new games, as well as to surf safely (in particular, thanks to the security updates of Windows)
For this tutorial, we will create a multiboot with Windows 7 and Windows 10.
Then, we’ll also add an option to access Windows Repair tools (these tools are in the Windows RE environment that is by default in the 100 MB system partition created at Windows installation).
Finally, if you wish, you can also add iso files of Live CDs to be able to start on them in 1 click.
- Why use syslinux to create a multiboot ?
- Configuration used
- Install Windows 7
- Install Windows 10
- Create a multiboot with syslinux
- Add Win RE environments of Windows
- Create a partition for Win RE environments
- Configure syslinux to boot on Win RE
- Fix for Windows 7 boot
- Add the Win RE of Windows 10
- Test of the Win RE of Windows 10
- Optional : add live CDs in ISO format
- Protection of syslinux system files
- Final test of the multiboot
1. Why use syslinux to create a multiboot ?
Some users may wonder, because they know that it’s very easy to create a multiboot with different versions of Windows.
Indeed, when you want to create a multiboot with different versions of Windows, you simply have to install them on different partitions in their order of release date.
Nevertheless, the purpose of this tutorial is to provide a flexible and totally customized system.
Thanks to syslinux, you can create a menu to boot on partitions, boot managers, Live CDs (in iso format), bootable floppy disks, …
In short, thanks to this tutorial, you can create a multiboot with :
- Windows 7
- Windows 10
- Windows RE (the Windows Repair Environment provided by Microsoft)
- live CDs in ISO format
- etc.
2. Configuration used
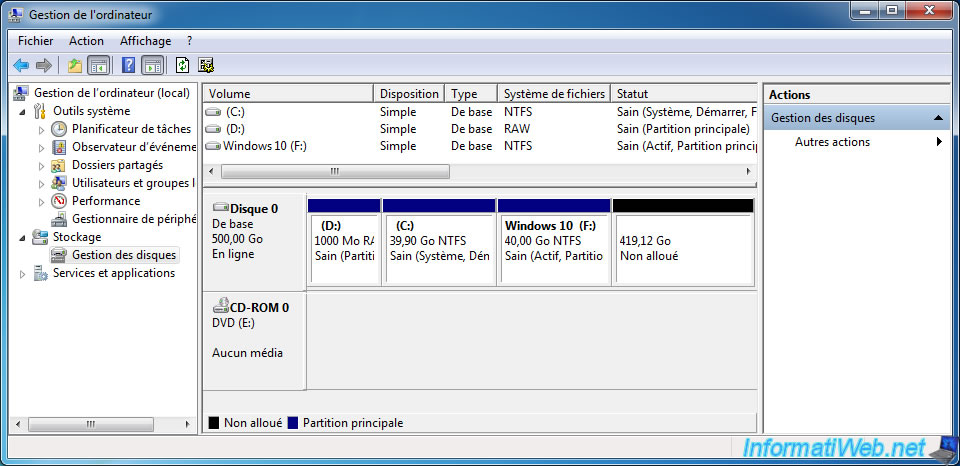
For this tutorial, we used a 500 GB hard disk on which we will create 3 partitions :
- Windows RE : 1 Go
- Windows 7 : 40 Go
- Windows 10 : 40 Go
At the end, you will have an unallocated space that you can partition as you wish.
If necessary, please refer to our tutorial : Windows Vista / 7 / 8 / 8.1 — Partitioning your hard drive
3. Install Windows 7
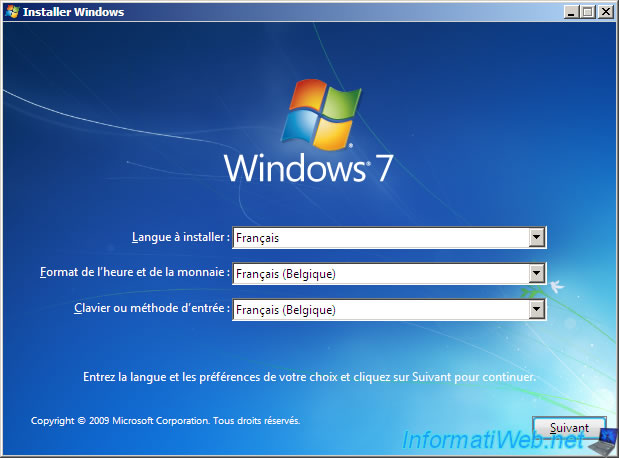
To begin, boot your computer on the Windows 7 installation DVD and select your language.
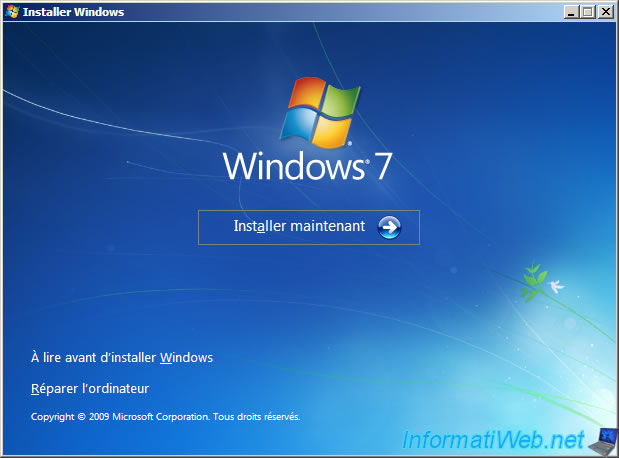
Click : Install now.
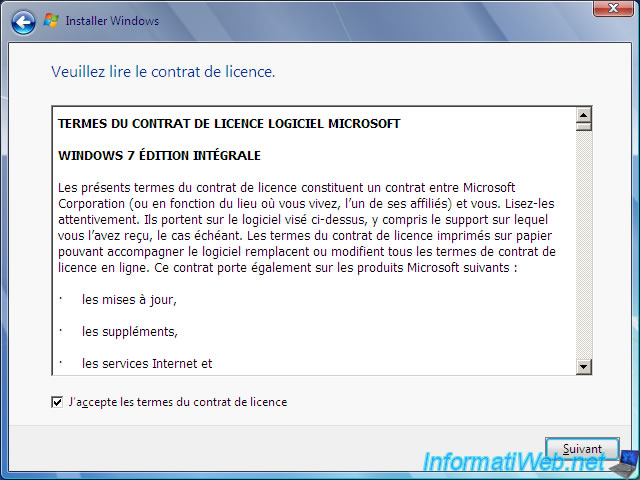
Accept the license agreement
Click : Custom (advanced).
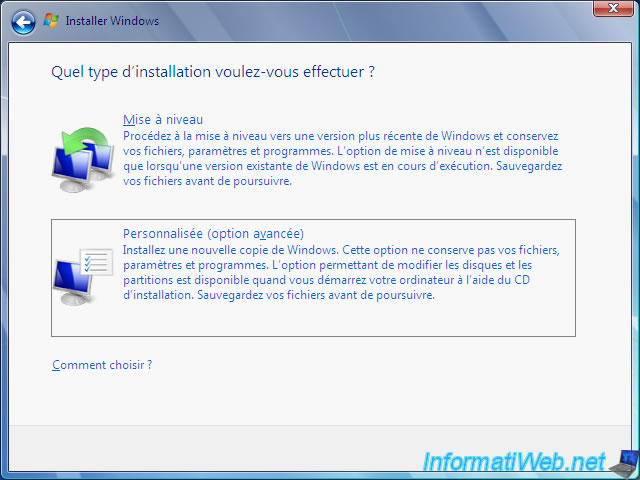
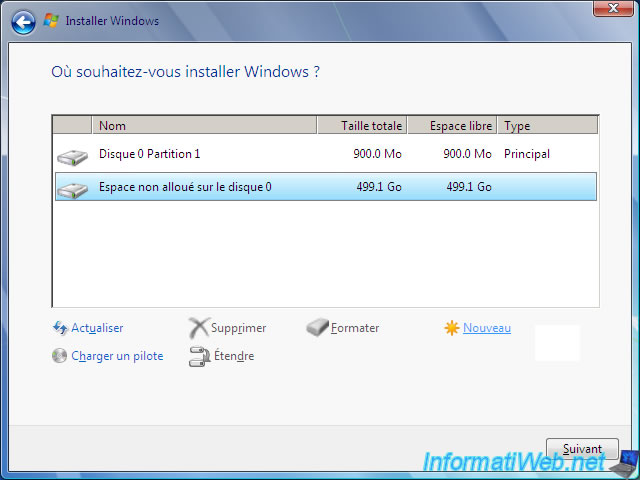
As explained at the beginning of the tutorial, to create our multiboot, we will need 3 partitions (Windows 7, Windows 10 and Windows RE).
Since a hard disk can only have 4 primary partitions (or 3 primary partitions + 1 extended partition with one or more logical drives), we are forced to use only 3 partitions so that you can store data on other partitions (logical partitions in this case).
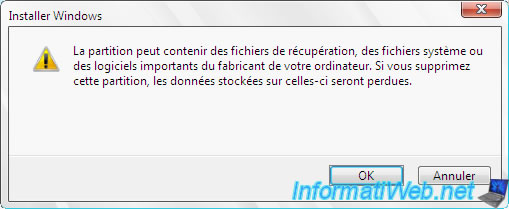
By default, you will see that Windows will require you to create a system partition of 100 MB. (This is the case only when the hard disk is not yet partitioned)
The problem is that if we leave it, we will already have 4 partitions (Windows 7, 10, RE and the system partition of 100 MB). In other words, you will not be able to create partitions to store your data.
Fortunately, we have found a trick that works for this tutorial and will allow you to use only 3 primary partitions for Windows 7, 10 and RE (Recovery Environment).
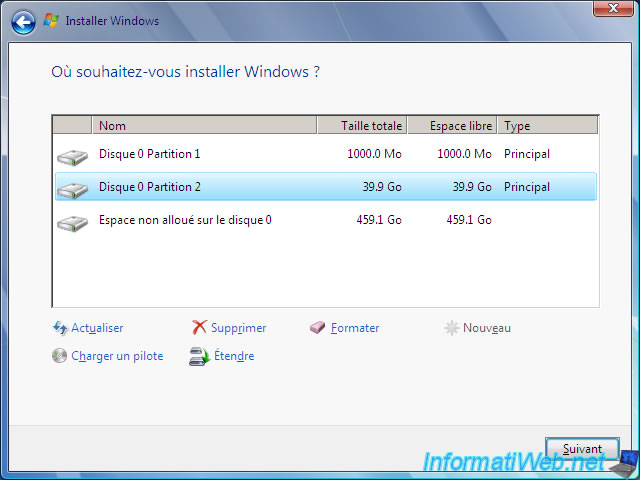
To begin, select the unallocated space on the hard drive and click «Drive options (advanced)».
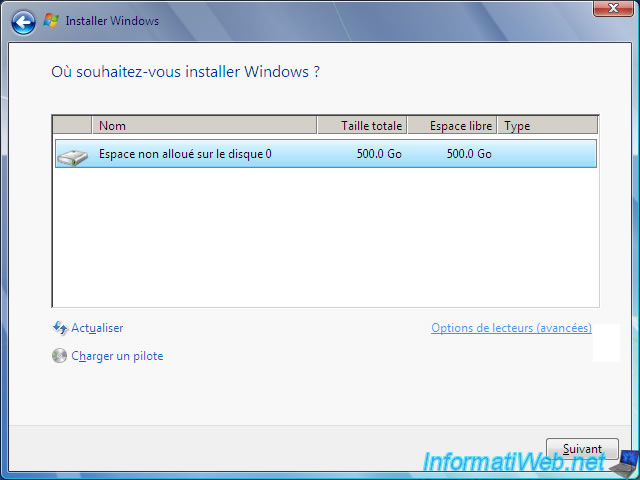
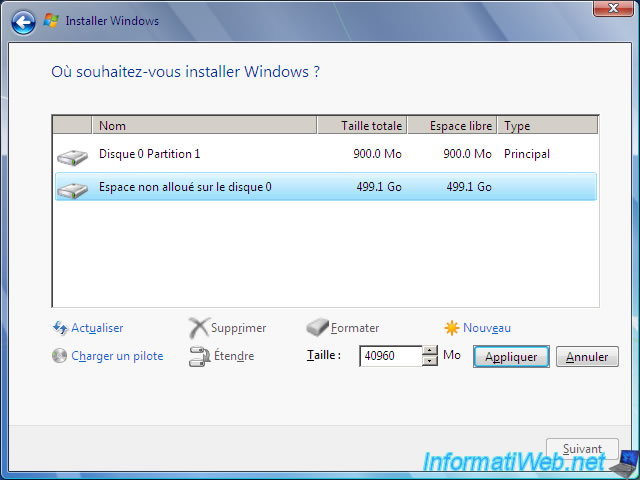
To store the Windows RE environments of Windows 7 and Windows 10, we recommend that you create a 1 GB partition at the beginning of the hard disk.
Since Windows 7 will want to create a 100MB system partition, you must create a partition of 900 MB.
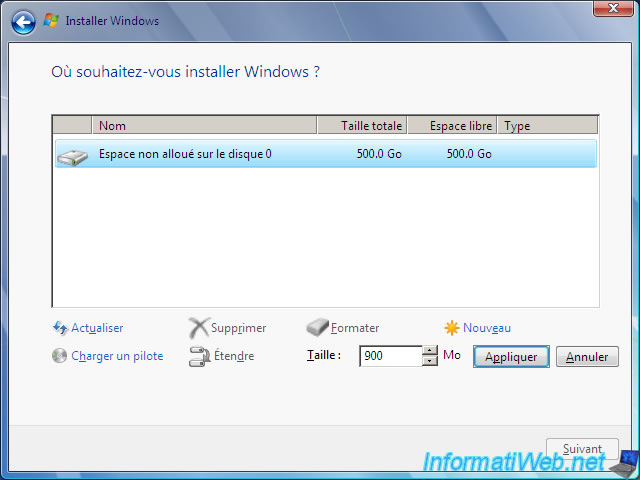
Click New.
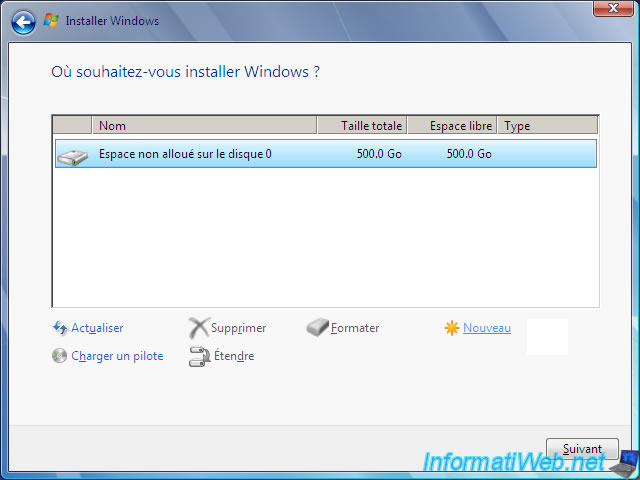
Create a partition of 900 MB.
Now we will create a partition for Windows 7 of 40 GB.
To do this, select the unallocated space and click New.
Type : 40960 MB.
Note : 1 GB = 1024 MB. So, 40 GB = 40 * 1024 = 40960
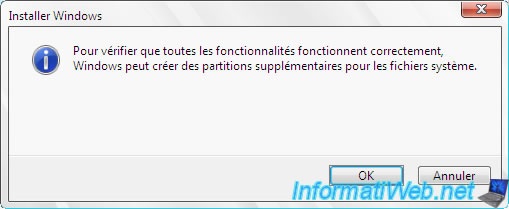
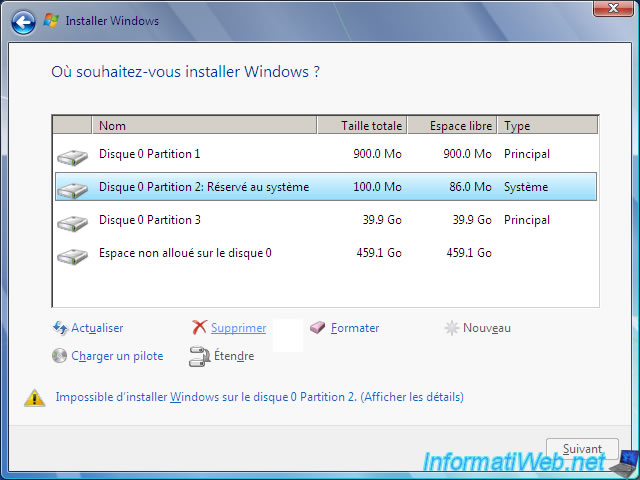
As expected, Windows requires you to create the system partition of 100 MB.
For now, you have :
- the 900 MB partition for Windows RE
- the system partition of Windows 7 (which have a size of 100 MB)
- the 40 GB partition to install Windows 7
Delete the 100MB «System Reserved» partition that Windows just created.
To do this, select it and click «Delete».
Confirm its deletion by clicking OK.
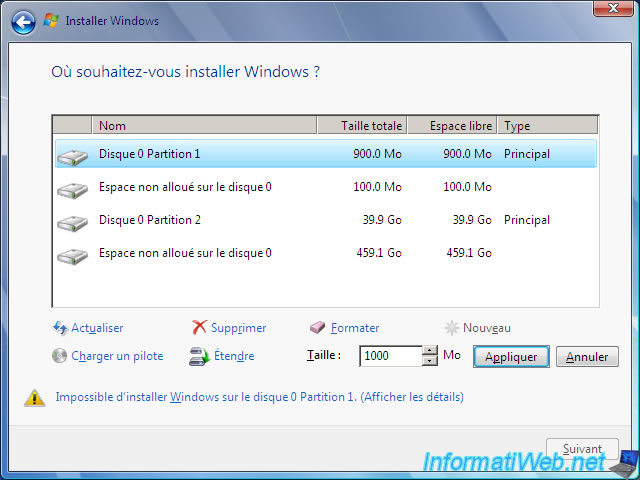
Finally, extend the 900 MB partition with the unallocated space of 100 MB that has just appeared.
To do this, select it and click Expand.
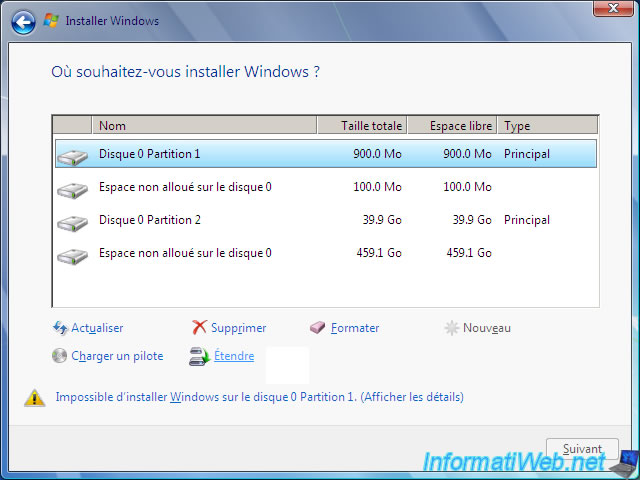
As expected, the size indicated is 1000 MB.
In other words, our partition for Windows RE will have a size of 1 GB.
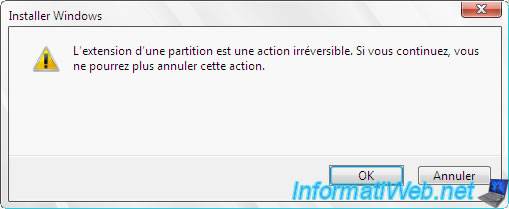
Confirm the extension of the partition by clicking OK.
And here are our 2 partitions : 1000 MB for the future Windows RE and 39.9 GB for Windows 7.
Select the 39.9 GB partition and click «Next» to install Windows.
The Windows 7 installation begins.
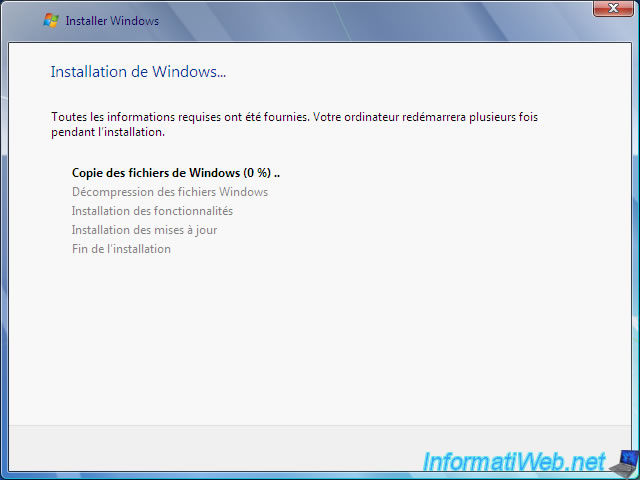
Windows is installed.
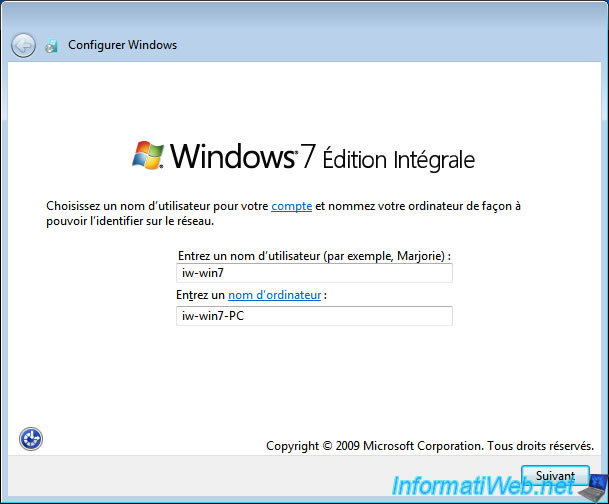
Install the drivers of your computer.
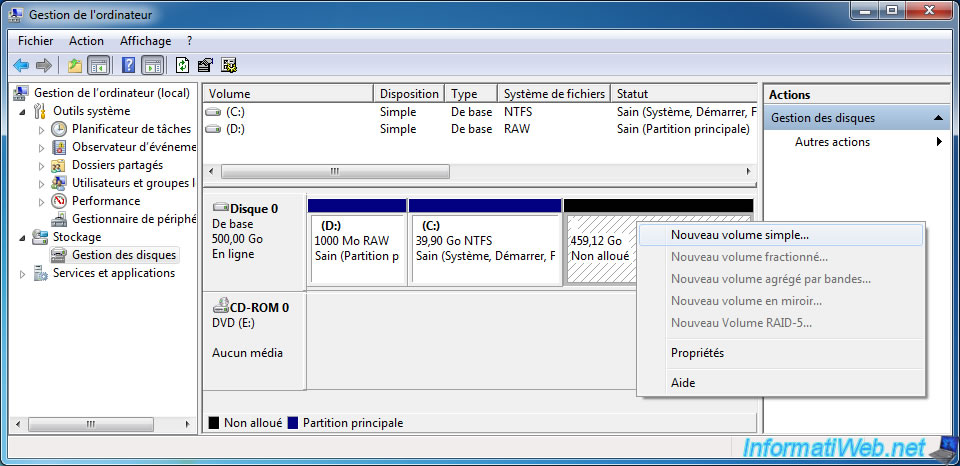
Now that Windows and your drivers are installed, go to the Start menu and right click «Manage» on Computer.
Then, go to : Disk Management.
As you can see, we only have our 1 GB partition (which is empty at the moment, hence RAW) and the 40 GB partition where Windows 7 is installed.
Therefore, the system partition of 100 MB was not created by Windows.
Before installing Windows 10, we will first create a new partition.
To do this, right-click in the unallocated space and click on «New Simple Volume».
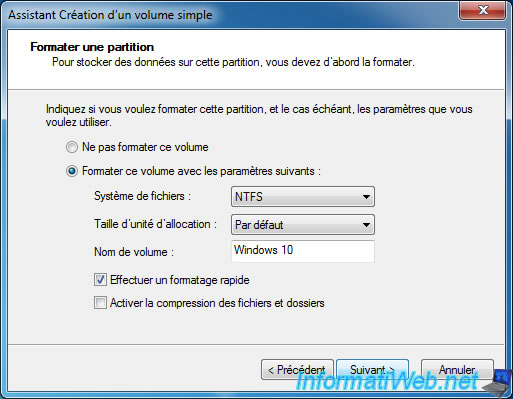
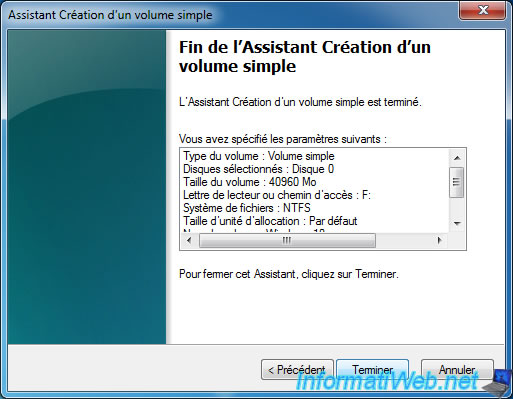
The wizard to create a simple volume appears.
Specify 40960 to create a 40 GB partition for Windows 10.
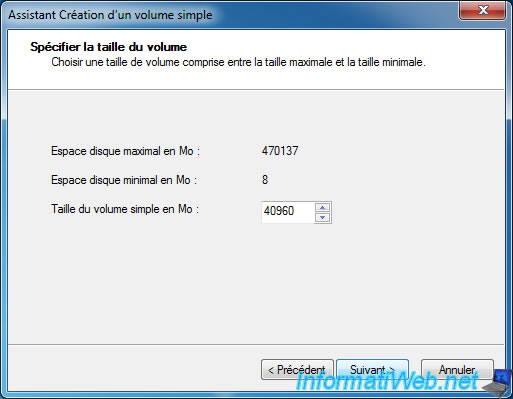
Click Next.
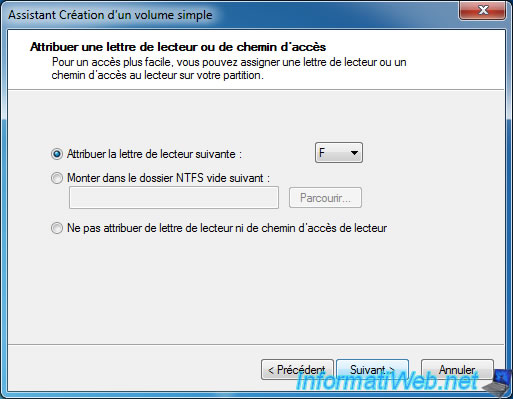
Note : the choice of the letter does not matter, but it is necessary to be able to access the partition of Windows 10 from Windows 7. Especially to retrieve its Win RE (as explained later in the tutorial).
Specify «Windows 10» for the partition name.
The partition was created.
Wait while formatting the partition.
After formatting, you will see that there is a new partition «Windows 10» in NTFS.
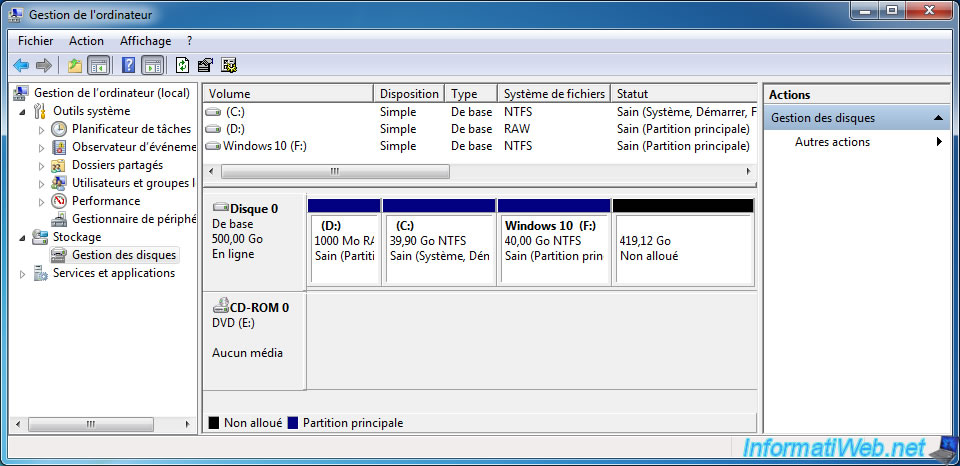
Before installing Windows 10 on this partition, it’s important to mark its partition as active.
This will prevent Windows 10 from creating a Microsoft multiboot (which would have prevented you from creating a multiboot with syslinux) and it also makes sure that the boot sector of Windows 10 will be on this partition.
To mark the «Windows 10» partition as active, right-click on it and click «Mark Partition as Active».
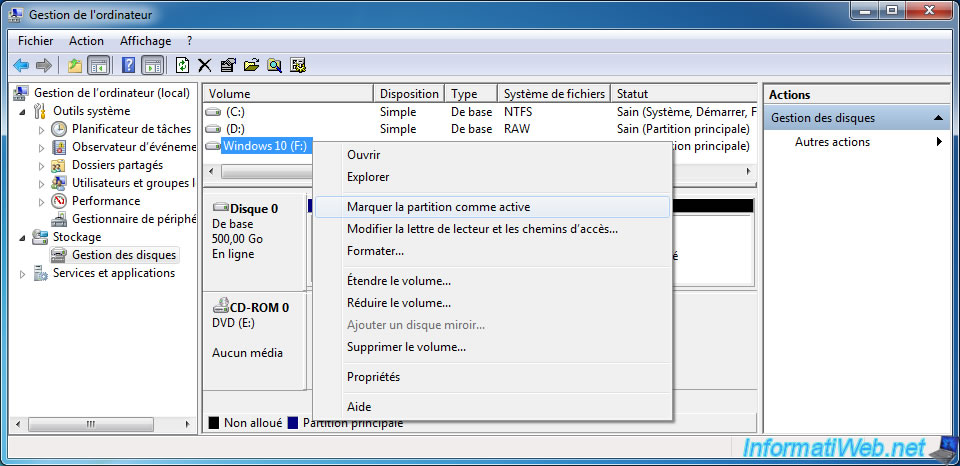
Confirm by clicking Yes.
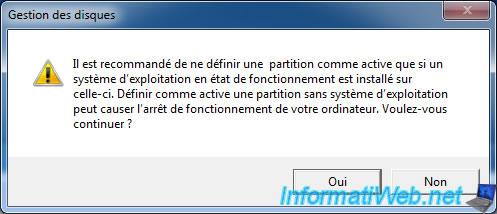
Now the status of the partition «Windows 10» will contain the word «Active».