
Synology Drive Server and Drive Client with Cloud Station Migration
Synology Drive is the successor to CloudStation, allowing you to store files in your own cloud. Anyone granted access can view and edit these files on any device. This post shows how to install Synology Drive Server with DSM 7 and how to set up Synology Drive Client on Windows.
As with its predecessor, Synology Drive works simply like offline files that are synchronized via a server, you set up a folder on the Synology NAS, which is then synchronized with any devices in the network or mobile devices on the go. The purpose is that files are available and up-to-date on all devices. Unlike a public cloud, you have 100% data control and no additional costs, so there is no circumstance with privacy.
Secure online access to personal and shared data via Synology Drive Mobile App, desktop clients, web browser, or other Synology NAS, with granular permission settings and SSL encryption. Also, Synology Drive Client with backup task includes a simple and fast way to back up the data.
Installation
The installation of Synology Drive Server is done quickly, you open the package center and enter drive in the search field, after clicking on Install the package is deployed in a few seconds. However, the prerequisite is that the DiskStataion is DSM 7 capable, if this is not the case, get as here in this case and buy a new DS220.
The Windows client requires its counterpart, the desktop application Synology Drive Client, which can be downloaded from DSM 7 via the link “Get Synology Drive apps now” from the opened Synology Drive app.
An account must be created in the DSM control panel, if not already available, go to Synology Account to create new account, log in to Synology with your account, a QuickConnect ID can be created under External Access. Alternatively, there is the option of using the DDNS service, Synology offers itself as a service provider, or if you prefer another provider, one of the well-known DDNS providers can be selected.
On the Windows the Synology Drive Client is up and running, click the +Create button to connect to Synology Drive Server.
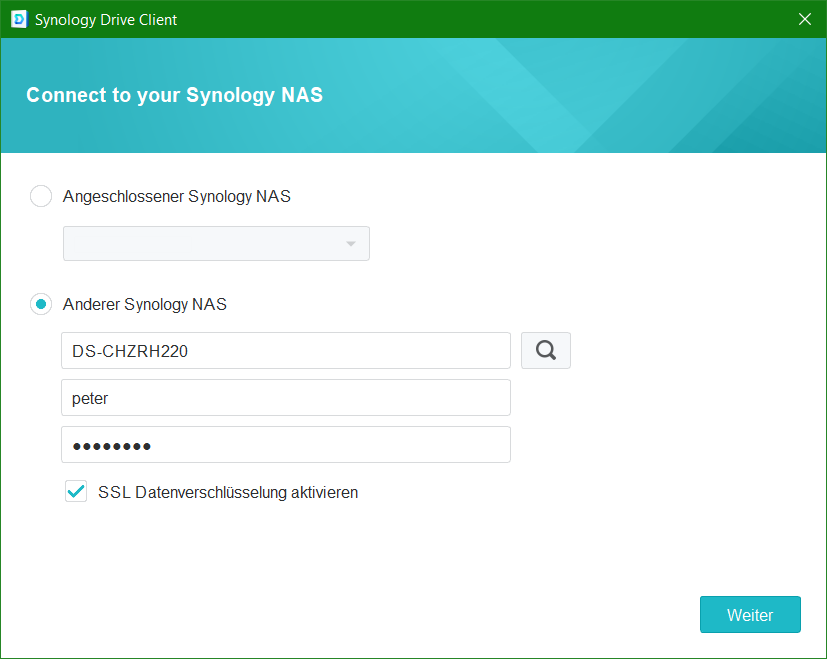
Choose Other Synology NAS and enter your domain name or QuickConnect ID followed by your user account and password.
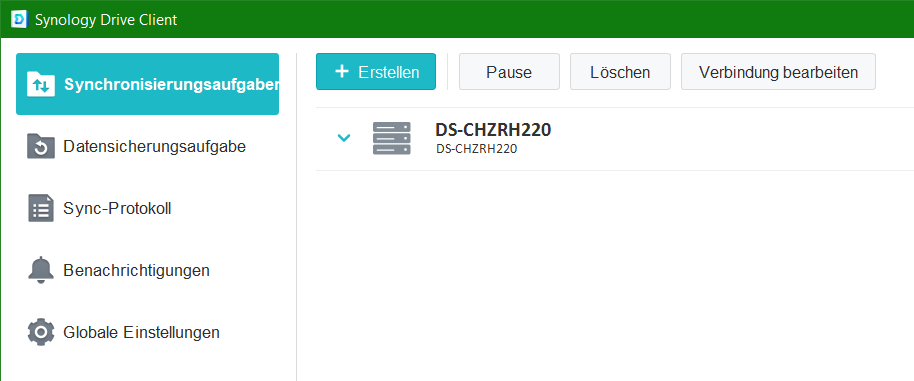
After the connection to the NAS has been established, select the folder to be synchronized with the Synology Drive Server.
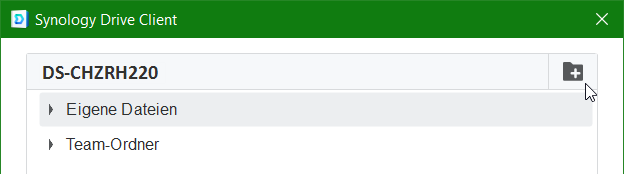
If you want to create several Drive folders or synchronize other existing ones, click on the small folder icon with the plus (+) in the upper right corner, here you enter the folder name that you want to synchronize.
A look at Extended should not be missed.
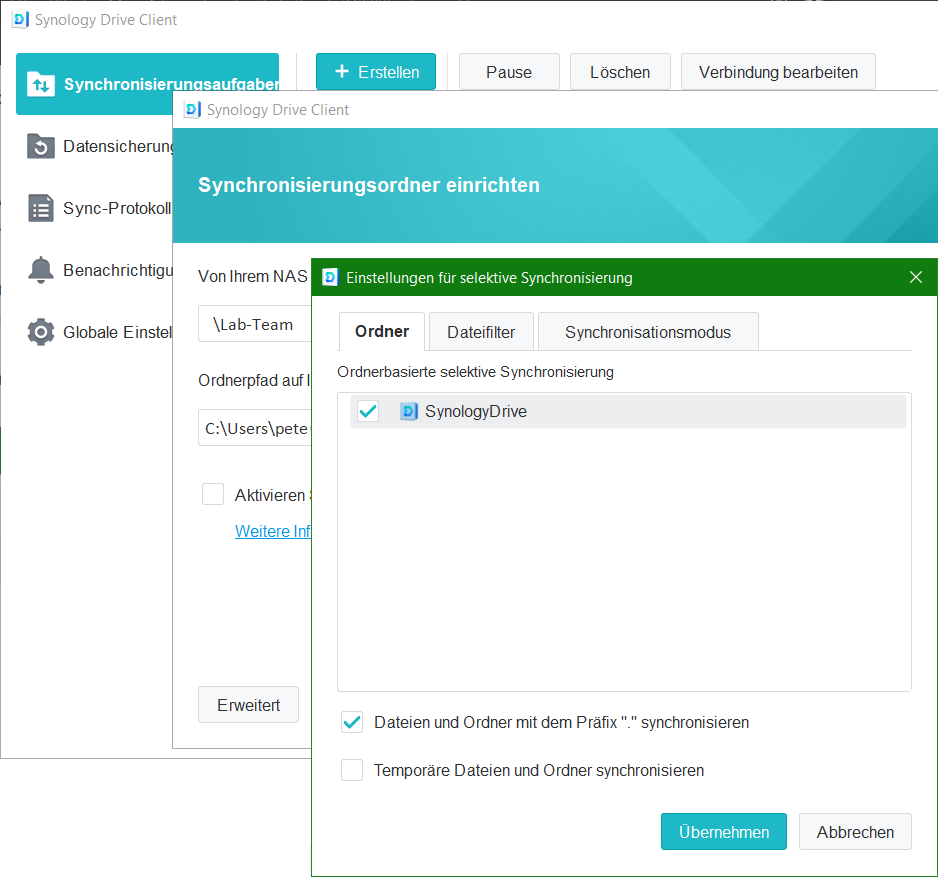
If you are also on the road with Linux, then check “Files and Folders with the prefix (.) synchronizing” is well worth it.
It must be ensured that the folder you want to synchronize comes under the desired path. By default, the “Create empty folder Drive” checkbox is selected.
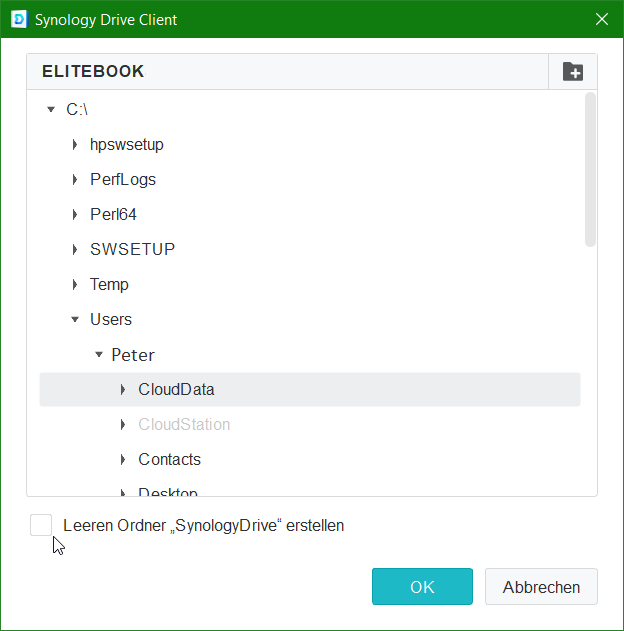
In practice, the simpler procedure proves to be preferred by creating the folder beforehand, which you only need to select afterwards.
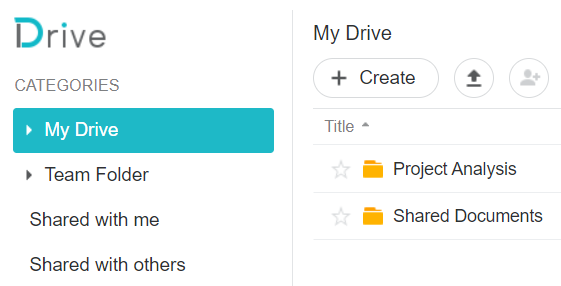
If you go to Synology Drive in DSM, additional folders can be created with +Create, it is important that you log in to the DSM with the same user account as you log in to the Drive Server.
In order to use Synology Drive, the user must have the permission to go to Control Panel in DSM => User & Group => Edit your user => applications, here enable Synology Drive Allow.
From the DSM app Synology Drive, additional folders can be created that can also be shared with other users with a share, folders and files can be uploaded and downloaded, moved, renamed and copied.
Upgrade from Cloud Station to Synology Drive
To use Synology Drive, the NAS must meet the requirements, the list of available models lists the models that support Synology Drive.
Note: Both the Synology Drive Server package and the Synology Drive Client desktop application cannot be downgraded. After it is installed, the original Cloud Station is replaced, you can only reinstall Cloud Station if you uninstall Synology Drive first. Synology Drive 3.0 does not support Cloud Station applications (Cloud Station Server, Cloud Station Drive, Cloud Station Backup, Cloud Station ShareSync, or DS cloud). It should upgrade to the corresponding counterparts in Synology Drive 3.0 to ensure compatibility. Synology NAS models manufactured after July 2019 or devices running DSM 7.0 and later no longer support Cloud Station Server.
Important! Before updating to the Synology Drive Client desktop application, it is necessary to make sure that the NAS model is supported by Synology Drive 3.0 with DSM 7.0, downgrade to Cloud Station is not possible.
If using Cloud Station, the folders and files will keep during removing Cloud Station.
After installation, you will find Synology Drive Admin Console, Synology Drive, and Synology Drive ShareSync in DSM. Synology Drive Admin Console can be used to configure the settings and check the client list. Synology Drive ShareSync can be used to create synchronization tasks between Synology Drive servers.
The desktop utility that provides file syncing and personal computer backup services on multiple client computers to a centralized server, Synology Drive Server.
Command Line
Download Links For Version 7.5.2.16111
Download Links For Version 2.0.4
Info
last updated 3/13/2025 12:00:00 AM
Publisher:
Synology
License:
Proprietary
Dependencies
No dependency information
Share
Synology Drive provides robust personal cloud storage combined with powerful file sync and backup capabilities. With strong security, flexible access controls, and competitive performance, it is a leading alternative to closed commercial options like Dropbox or OneDrive.
This comprehensive guide will teach you how to:
- Install and configure Synology Drive Server
- Access files from desktop, mobile, and web
- Sync folders across devices
- Backup precious data
- Share with other users
- Administer advanced settings
Whether evaluating it for home use or business implementation, you‘ll have all the knowledge needed to master Synology Drive.
Disclosure: I am a full stack software developer and Unix/Linux systems engineer with over 15 years of experience designing and supporting cloud platforms and networks. I leverage several Synology NAS units extensively for my own personal media management and backups.
The Rise of Private Cloud Storage
While public cloud services provide ease and accessibility unmatched by homegrown options, growing privacy and security concerns have fueled a demand for personal cloud solutions allowing complete data ownership.
Analyst firm MarketsandMarkets predicts the personal and home cloud market will reach $78.8 billion by 2026, largely driven by mobile access, BYOD adoption in businesses, and remote workforce trends.
For those uncomfortable storing their life memories and mission critical documents with Google, Amazon, Microsoft, or Dropbox – hosted NAS platforms like Synology‘s DiskStation offer a compelling alternative.
You retain physical possession of your data while still gaining convenient features like:
- Access files from any device or location
- Automated backups
- File version tracking
- Secure link sharing
- Remote photo/video streams
- Document collaboration
And with top-notch hardware packed full of modern technology like NVMe caching, powerful processors, and loads of high-speed RAM – home cloud servers often match or exceed commercial offerings in speed and responsiveness.
Now let‘s examine how Synology Drive specifically delivers private cloud capabilities.
Synology Drive Architecture
The main components that make up a Synology Drive implementation are:
- Synology NAS: This is the on-premises server providing storage capacity and running the Synology Drive software + data services.
- Desktop client: Installable on Windows, MacOS, and Linux for syncing local folders to the NAS.
- Mobile apps: iOS and Android access + management from phones and tablets.
- Web portal: Browser based file management UI with sharing options.
- User accounts: Personal storage allocation and access controls.
The desktop clients and mobile apps handle:
- Secure login to user accounts
- Real time syncing
- Scheduled backups
- File restoration/versioning
- Some sharing capabilities
But they rely on the Synology NAS and Drive server package to:
- Store primary data copies
- Manage metadata
- Handle link sharing
- Coordinate team permissions
- Keep version history
Many components like search indexing also run directly on the NAS to optimize performance.
So while end users primarily interact via the desktop/mobile apps – the centralized Synology server ties it all together!
Next I‘ll walk through getting that server setup…
Installing Synology Drive Server
The first step is installing the Synology Drive Server package on your DiskStation NAS within DSM.
- Login to DSM
- Launch the Package Center
- Search for Synology Drive Server
- Click Install

Several package dependencies need to be downloaded and set up so installation takes 1-3 minutes.
Tip: For smooth rollout, a wired 1GbE network link from NAS to your router or switch is recommended. Wireless or lower speed connections may bottleneck transfers for client syncing and backups.
Once done your Synology NAS is now primed to be the host for all Synology Drive capabilities!
Before users can start uploading data, we need to configure storage allotments.
Enabling Personal Storage Quotas
A key advantage over conventional cloud storage is Synology Drive allows creating isolated personal folders for each useraccount rather than one giant shared pool.
But we must first enable this personal storage space, called user home services, in DSM:
- Go to Control Panel > User and Group
- Switch to the Advanced tab
- Check Enable user home service
- Assign disk volume for storage
- Click Apply

Now every user added to DSM will get a personal Synology Drive folder provisioned during account creation!
Custom storage limits can also be defined per user by editing the accounts after creation, preventing any one person from hogging all the space.
Next let‘s setup some user accounts and try accessing this personal storage.
Creating User Accounts
With storage quotas prepped, we can start building out real users.
- Go to Control Panel > User
- Click Create
- Fill in user details
- Assign Synology Drive storage quota
- Click Next to finish
Repeat for any additional users you want to grant access.
Recommendation: Start with just 1-2 admin users to test before rolling out more widely. And setup 2-factor authentication for enhanced security.
Now let‘s login and check things out!
Accessing Web Portal
Users have a couple different options for interfacing with Synology Drive – web browsers, desktop apps, mobile apps. Let‘s try the web first.
- Login to DSM
- Click the Synology Drive icon

This will launch the browser based UI allowing you to:
- Upload/download files
- Create folders
- Share links with expiration dates
- Preview documents
Everything works right from Safari, Chrome, Firefox and others without any client software installation. Nice for quick edits or lookups!
But for keeping large folders in sync across multiple devices, the desktop clients add several capabilities.
Downloading Desktop Client
You can download Windows, macOS, and Linux desktop clients directly within the DSM web portal:
- Click top right user menu
- Select Download Client
- Choose your operating system

But for scripted rollout, admins can grab installers directly from the Synology Download Center here.
Now I‘ll walk through client installation for both Windows and Linux systems.
Installing Client on Windows
- Run downloaded installer executable
- Click Yes to allow system modifications
- Accept license agreement
- Leave checked «Run Synology Drive after finishing Wizard»

Wait several minutes for the client to download supporting packages and configure itself.
Finally Synology Drive will launch automatically allowing you to start managing files!
Installing Client on Linux
I‘ll cover installing the client on Ubuntu 22.04 specifically.
First download the correct .deb package for your architecture via browser or:
wget https://global.download.synology.com/download/Tool/SynologyDriveClient/2.1.2-10292/Ubuntu/x86_64/synology-drive-client-2.1.2-10292.x86_64.debNext install it using your package manager:
sudo apt update
sudo apt install ./synology-drive-client-2.1.2-10292.x86_64.deb
Provide your sudo password when prompted.
Within 15 seconds Synology Drive finishes setting up and becomes available to launch via app grid!
Creating Sync Tasks
A key value of the desktop client is keeping selected folders in perfect sync between your local device and the server. Any files added, modified, or deleted on one get automatically reflected to the other.
Here is how to create a new sync task:
- Launch Synology Drive application
- Click Start Now
- Enter server details and login credentials
- Select Sync Task (or backup)
- Choose folder pair to sync between local device and NAS
- Customize sync settings as needed
- Confirm task

The client supports syncing multiple distinct folder pairs each with individual filters and controls. Pretty handy!
Now your NAS keeps an exact live copy of designated folders from your access device.
But preserving previous versions of files if accidentally deleted or corrupted takes us to our next feature…
Setting Up Backup Tasks
While sync tasks concentrate on keeping identical current copies – backups focus on protecting against loss by archiving older revisions.
Follow the same wizard, but choose backup task instead of sync task. Then configure:
- Which folders to backup
- Destination location on Synology Drive
- Schedule recurring backups (or backup continuously in real-time)
- Filters to exclude files like caches/temp/system

Now you get live syncing to enhance productivity plus backup archives protecting against disasters. Nice!
Next let‘s explore additional capabilities around sharing and collaboration…
Synology Drive Sharing and Collaboration
Users can share files directly from the DSM browser interface or desktop apps via right click menu.
Several modes are available:
- Private share – Allow access for specific DSM users or groups
- Public share – Generate open guest link without login

Permissions get defined at folder level, so entire projects can be exposed rather than individual files.
For an extra layer of security:
- Enforce password protection on shared links
- Set expiration dates so access automatically revokes
And combining Synology Drive with Synology Office means attached documents get live coauthoring abilities right from DSM!
So your NAS facilitates both backup/sync as well as internal collaboration and external sharing – no third party services required.
Now let‘s explore how admins gain tools to govern all this access…
Synology Drive Administration and Security
The Synology Drive Admin Console provides fine grained control over your environment. Get to it via DSM sidebar or directly at:
https://<NAS-IP>:5001Start by limiting application access to only internal networks using the Network tab if allowing external traffic beyond your LAN.

Then dive into the Share, Link, Versions etc sections tailoring things like:
| Capability | Customization |
|---|---|
| Storage location | Choose volume for metadata/logs |
| Team folders | Designate shareable network paths |
| Traffic protocol | Force HTTPS encryption |
| Public shares | Approval workflows/vetting |
| Version history | Restore previous file iterations |
So much flexibility to adapt Synology Drive to your unique needs!
Now even in smaller environments you retain IT-level control avoiding the one-size-fits-all limitations of mass market cloud vendors.
Synology Drive Tips and Tricks
Here are some pro troubleshooting ideas from my trials if running into issues:
«File copy taking forever» –
- Check network router QoS settings are not throttling NAS traffic
- Enable SMB multi-channel in NAS network settings for link aggregation to desktop
- For laptops try wired Ethernet instead of WiFi to eliminate radio congestion
«Mobile backups failing» –
- Toggle Auto Block Mode in firewall settings if allowing WAN access
- Grant explicit access to NAS ports 8000, 8001, 5001 from mobile carrier
- Enable mDNS services discovery across subnets
«Versions missing for Office files» –
- Install and activate Synology Office licenses
- Open documents via Office apps instead of downloading direct
- Versions capture at time of save rather than strictly timeline based
And when evaluating, use these hard numbers for capacity planning:
| File type | Average size |
|---|---|
| Photo | 4 MB |
| Office doc | 0.5 MB |
| Video, 1 min | 60 MB |
| Music, 5 min | 30 MB |
Hopefully these assorted tips help provide a smooth rollout!
Comparing to Alternatives
How does Synology Drive stack up vs other personal cloud solutions? Here is a high level comparison on metrics important for home and small business use cases.
| Platform | Base NAS Price | Traffic | Storage | Max Users |
|---|---|---|---|---|
| Synology Drive | $120+ | Private LAN | Up to 200TB+ | 200/groups |
| WD MyCloud | $130+ | Private WAN | Up to 64TB | 10 |
| Dropbox | – | Internet | 2TB+ | Unlimited |
| Google One | – | Internet | 2TB+ | 5 sharers |
Pricing is closest between Synology and WD NAS units. But WD uses RAID for redundancy instead of backing up to second NAS, offers less fine grain controls, and lacks competent photo management abilities Synology provides.
Of course Dropbox and Google One offer far simpler startup via any existing hardware. But they lack private LAN speeds, inflate costs for extra space, and expose your data to advertising interests.
If valuing data ownership and willing to learn basic NAS administration – Synology Drive hits a nice competitive middle ground on features and total cost of ownership!
Now for some final thoughts…
Conclusion
Synology Drive transforms a NAS into secure and high performance personal cloud storage accessible from all your devices. Desktop clients extend capabilities with seamless folder sync and backup to protect precious memories or work projects.
Yet you retain complete data ownership sidestepping increasingly questionable privacy practices among big public cloud providers. And avoid recurring subscription fees in the process!
With this guide you now possess all knowledge needed to evaluate if Synology Drive meets your home or business use case. Reach out with any other questions in planning your rollout!
В каждой семье или небольшом офисе есть компьютеры и мобильные устройства под управлением различных операционных систем. Перенос файлов между ними привычными методами трудно назвать удобной задачей. В особенности, если делать это приходится часто. Необходимость постоянно отвлекаться на перенос данных снижает эффективность работы. Да и настроение от этого не улучшается. К счастью, обо всех этих сложностях вы, при желании, сможете забыть уже завтра.
Если вы располагаете NAS-устройством от Synology, то сможете предоставить пользователям возможность работать с контентом посредством Windows-компьютеров, Mac, смартфонов и планшетов под управлением Android, а также iPhone и iPad. Очень удобное решение, особенно если учитывать, что синхронизация и доступ к контенту осуществляется через Finder вашего Mac и Проводник Windows, после установки клиента Synology Drive. Также можно использовать привычный веб-браузер и мобильное приложение для еще более простого взаимодействия . Все будет работать так, как будто бы вы располагаете одним большим компьютером со множеством дисплеев.
Synology Drive для Android можете скачать отсюда.
Версия для iOS скачивается тут.
В первую очередь нужно обновить DSM до последней версии. А уже после приступать к установке и настройке Synology Drive и Synology Office.
Установка и настройка Synology Drive
Содержание
- Установка и настройка Synology Drive
- Установка клиента Synology Drive на Mac
- Установка клиента Synology Drive на Windows
- Выбор оптимальных дисков для NAS
- Восстановление предыдущих версий синхронизированного файла
- Настройка Synology Office
- В заключение
Нужно открыть Центр пакетов, в строке поиска ввести «drive», после чего увидите ряд приложений, вам нужны:
- Synology Drive Server
- Synology Office

Так как для работы приложений требуется дополнительное программное обеспечение, может выходить уведомление о установке дополнительных программ, соглашайтесь.
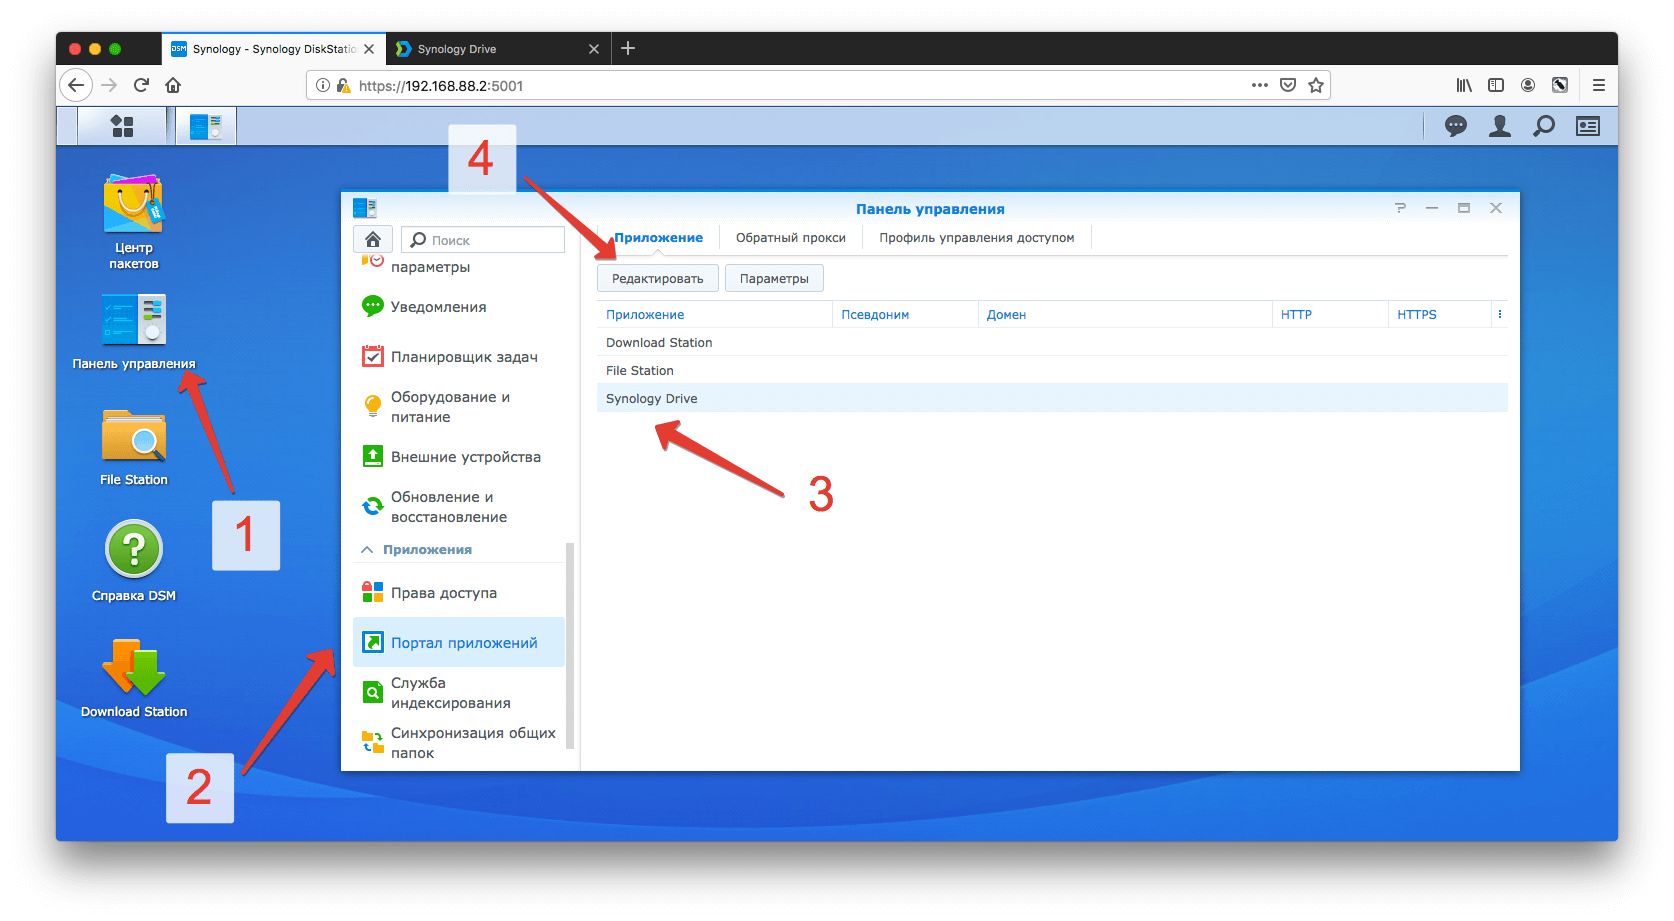
После установки нужно перейти в «Панель управления» – «Портал приложений», выделить строку Synology Drive и кликнуть «Редактировать»:
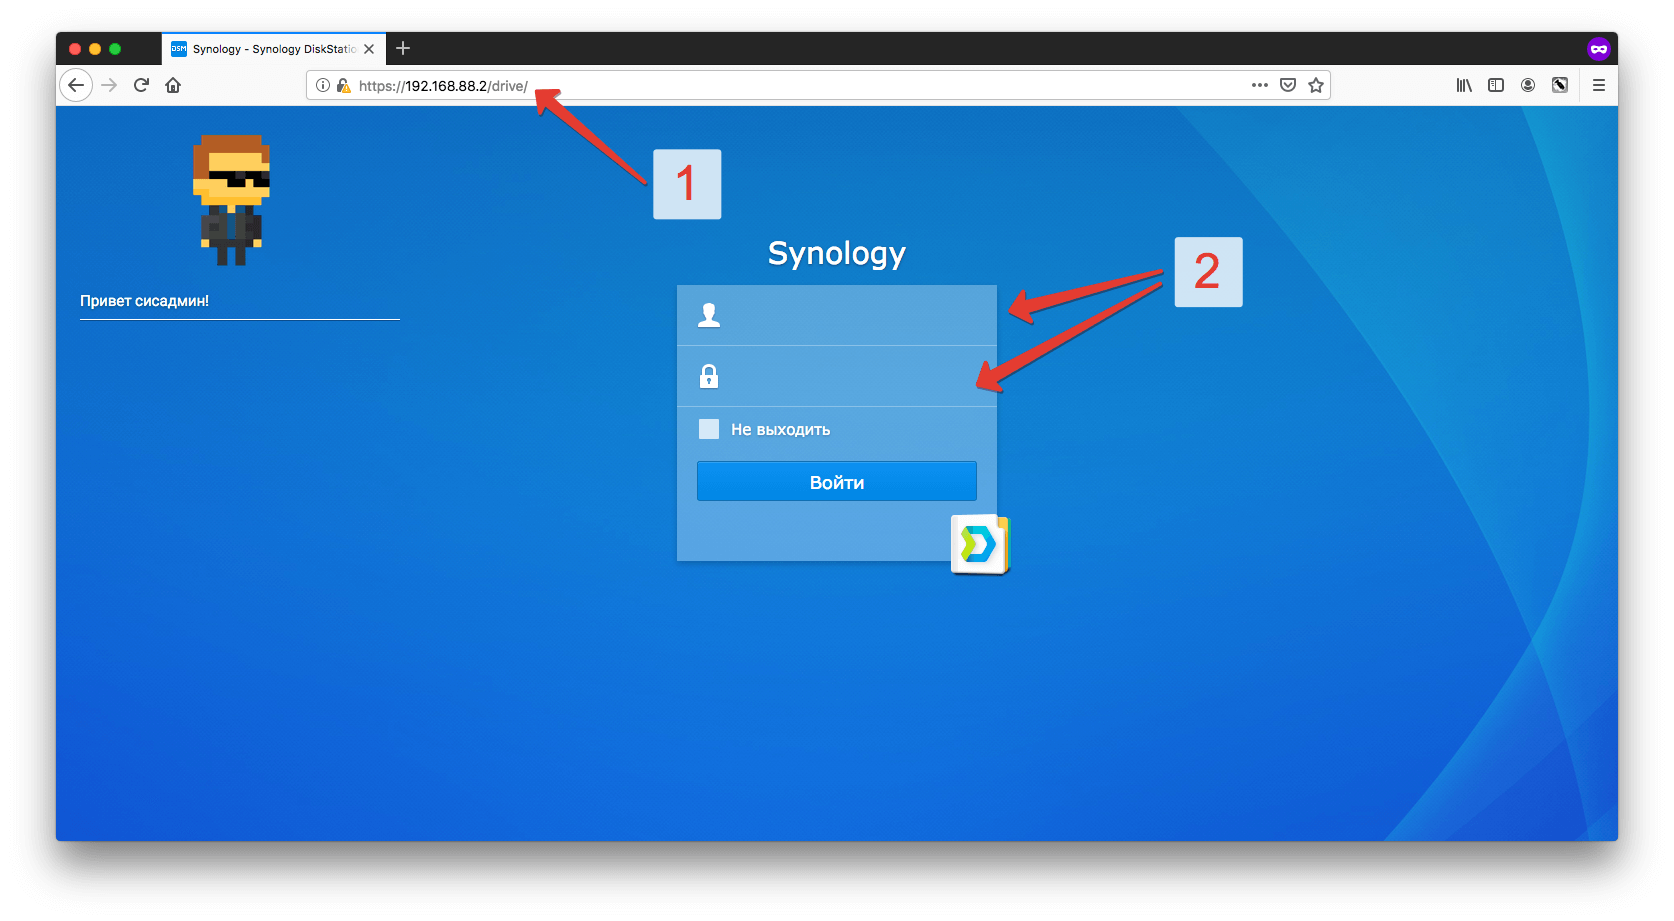
Откроется окно, в котором нужно поставить галочку «Включить пользовательский псевдоним», после чего сможете заходить на Synology Drive через браузер по прямой ссылке, например, в моем случае – https://192.168.88.2/drive

Перейдя в соседнюю вкладку, вы сможете настроить окно приветствия, задав заголовок, приветственное сообщение и загрузив собственный логотип:

Чтобы начать использовать все возможности Synology Drive, нужно перейти в «Основное меню» и кликнуть по «Консоли администрирования Synology Drive», далее выбрать раздел «Папка группы»:

Выбрав папку, к которой хотите настроить доступ и нажав кнопку «Включить», откроется окно с настройками. Тут можно выбрать какое количество версий файлов хранить и указать период очистки старых версий:

После внесения изменений нажмите «ОК» и переходите по ссылке, с /drive на конце. Потребуется ввести логин и пароль:
Для каждого пользователя Synology Drive вы можете создать отдельного пользователя в «Панели управления» – «Пользователь», задав нужные права.
После входа откроется окно такого вида:
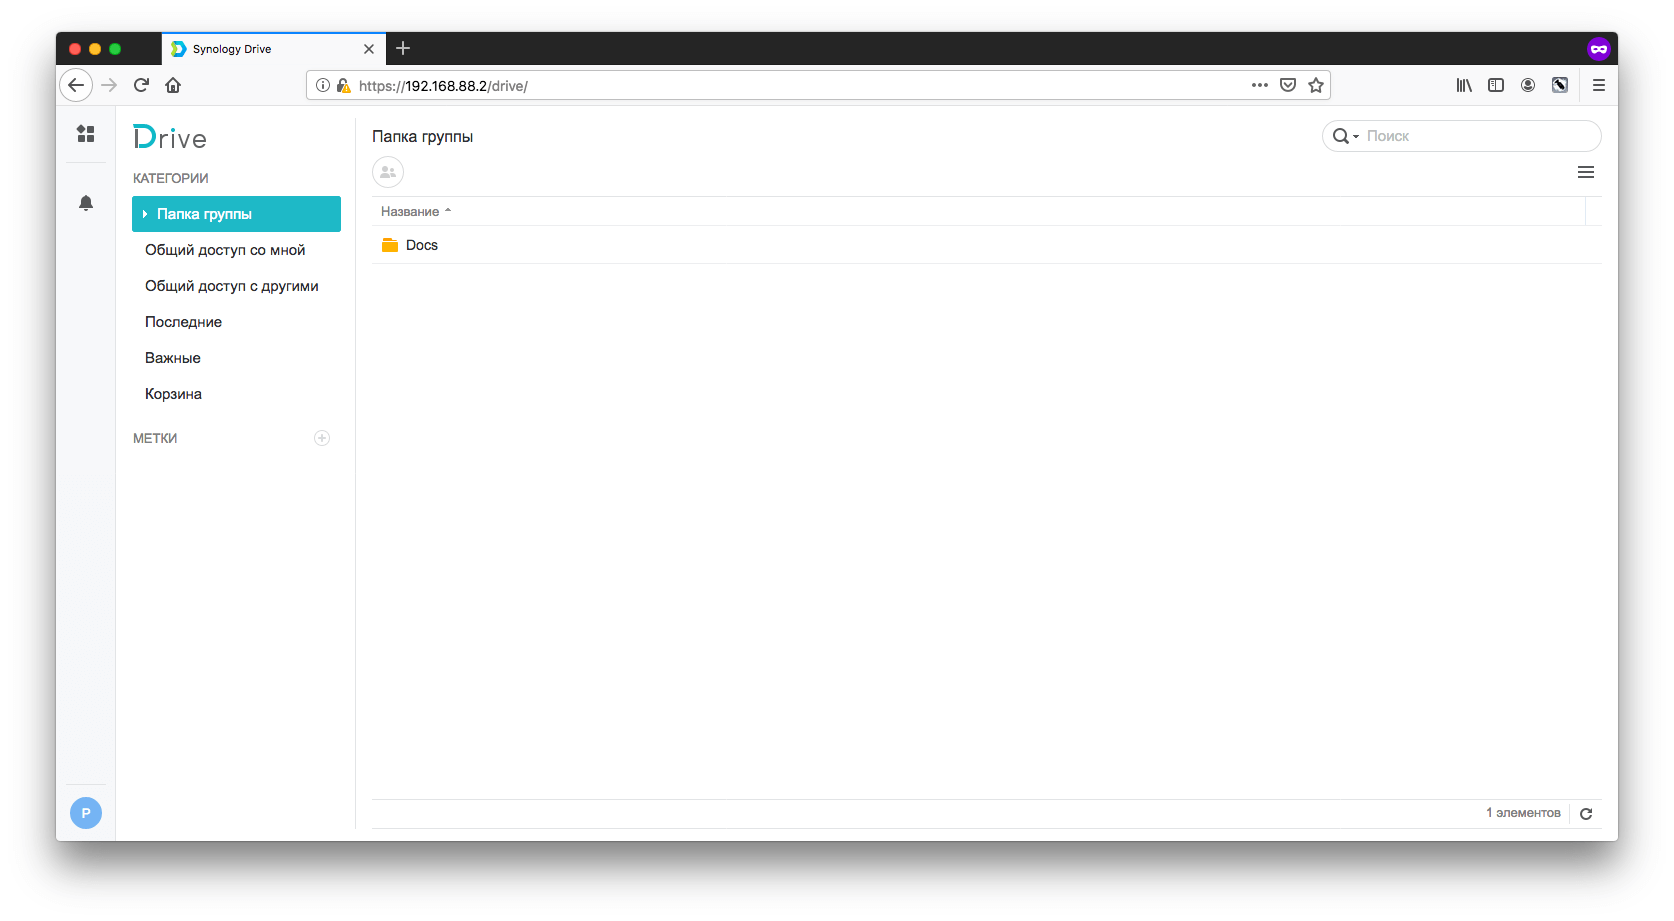
Где в левой части будет навигация по общим папкам, а в правой сами файлы. Этот вариант подойдет для тех, кому доступ к файлам не нужен на постоянной основе. Если же вы планируете работать с NAS не покладая рук, то обязательно установите клиент на компьютер.
Установка клиента Synology Drive на Mac
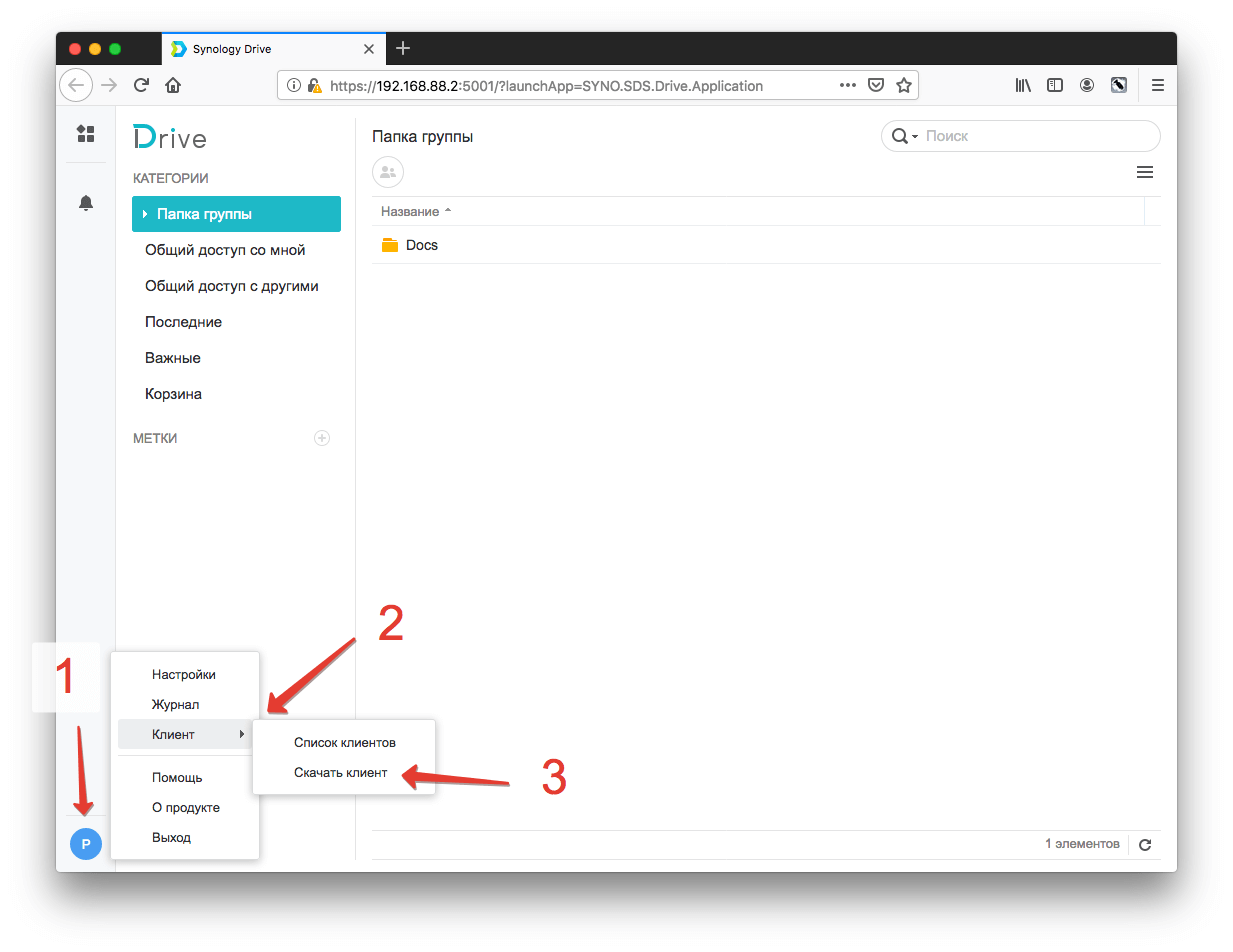
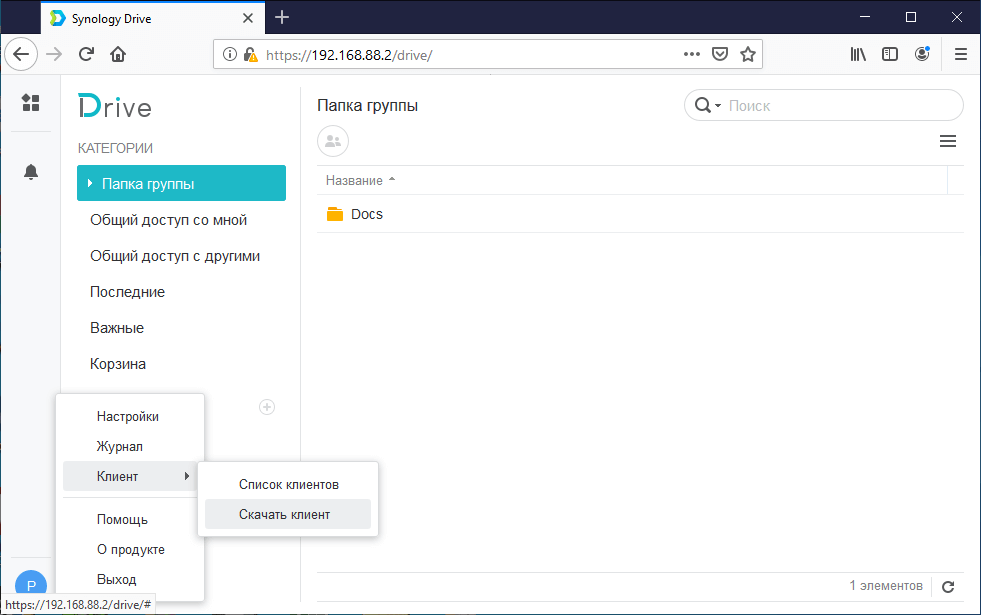
Открыв Synology Drive через браузер, кликните по иконке в левом нижнем углу, далее «Клиент» – «Скачать клиент»:
В открывшемся окне выбирайте «Для ПК»:

Откроется окно установки программы, проведите стандартную процедуру установки.
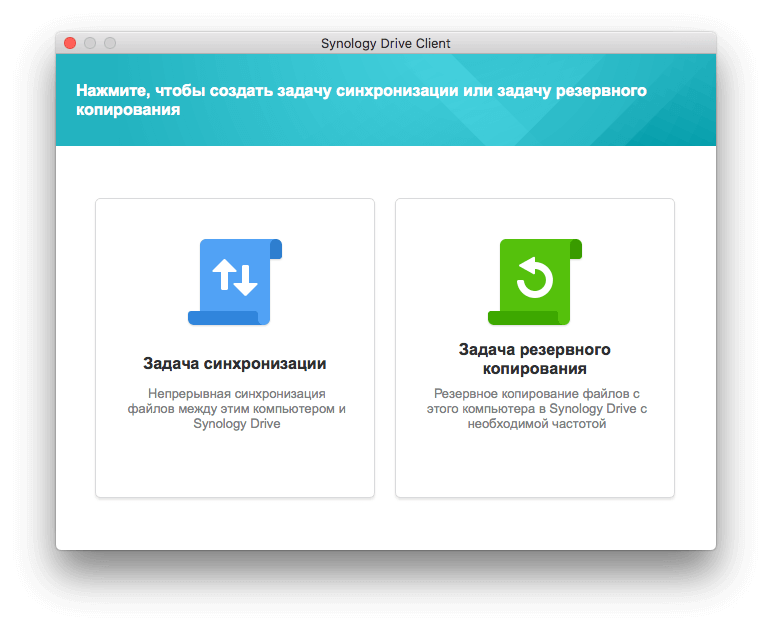
После запуска потребуется выбрать, что вам удобнее: постоянная синхронизация файлов с NAS от Synology или резервное копирование с заданной частотой:
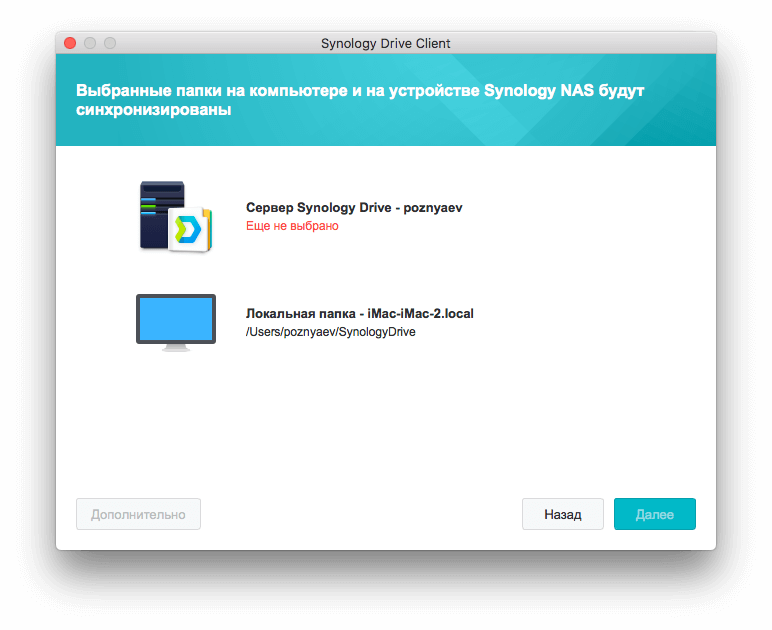
Далее – нужно указать папку для синхронизации на компьютере и вашем NAS:
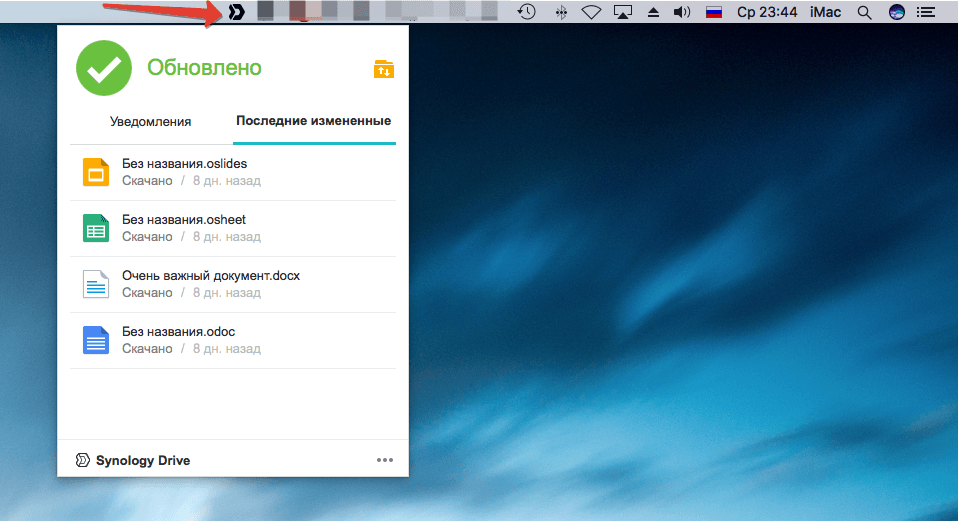
После установки клиент всегда будет доступен в строке навигации вашего Mac:
Перейдя в настройках в раздел «Синхронизация», можно увидеть папку, которая дублирует папку на NAS-устройстве:

Кликнув по кнопке «Правила синхронизации», сможете задавать разные сценарии синхронизации файлов между папкой на компьютере и NAS-устройством:
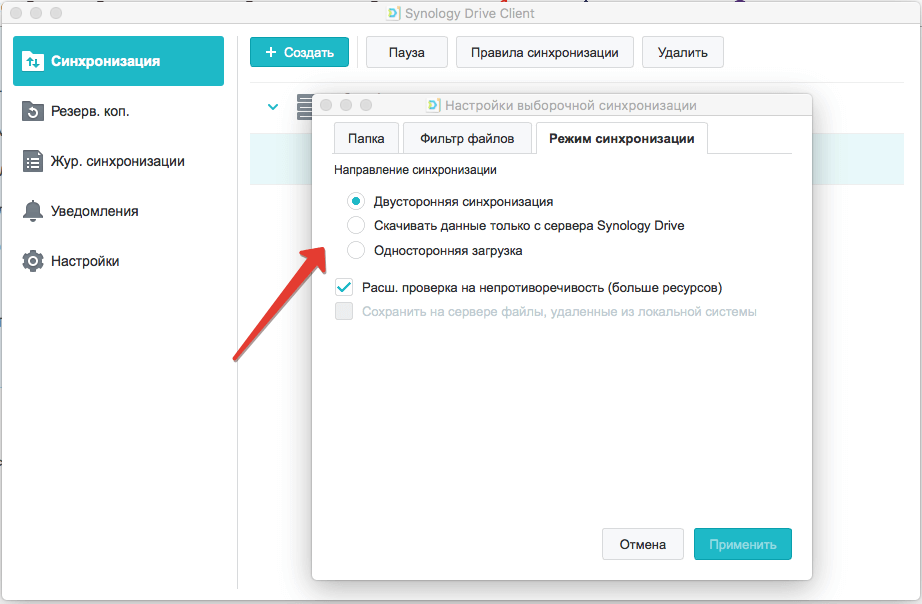
К примеру, если установлена двусторонняя синхронизация, то закинув в папку на компьютере любой файл, он автоматически про дублируется на Synology и наоборот:

Установка клиента Synology Drive на Windows
Процедура установки клиента под Windows аналогична процедуре под Mac, описанной выше. В начале зайдите на Drive Synology через браузер и скачайте клиент, версия для Windows начнет скачиваться автоматически:
Далее следует выбор «Версия для ПК» и стандартная установка:

Выбор оптимальных дисков для NAS
Для того, чтобы ваше устройство от Synology служило долго и радовало ни один год, стоит использовать специализированные накопители. Они должны обладать отказоустойчивостью 24/7, быть достаточно быстрыми и тихими, особенно, если используются в домашних условиях.
Для себя я выбрал диски от компании Seagate. Их серия IronWolf создана специально для NAS-систем и имеет все вышеперечисленные параметры. В них дополнительно реализована технология Health Management, которая позволит избежать потери данных, за счет того, что она позволяет предотвращать отрицательные последствия внешних воздействий на хранилища и накопители. С ее помощью можно проводить профилактическое резервное копирование по запросу системы . Самое приятное – устройства от Synology поддерживают эту технологию:

Как ее включить я описывал в данной статье: Обзор Synology DiskStation DS218 с дисками Seagate Ironwolf.
Восстановление предыдущих версий синхронизированного файла
Если, по ошибке, вы удалили важную информацию и сохранили файл, то благодаря Synology Drive всегда есть возможность восстановить предыдущую версию. Для этого кликните по файлу правой кнопкой мыши и выберите «Обзор предыдущих версий»:

После чего откроется окно со списком дней в которые были изменения и именем компьютера, с которого эти изменения вносили:
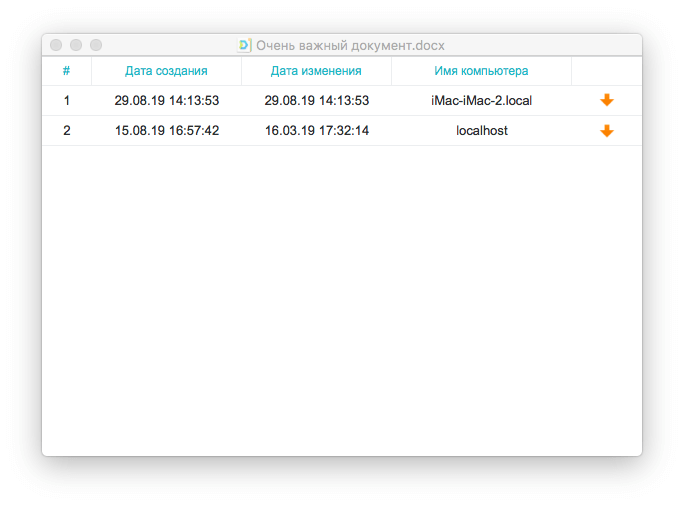
Далее вам останется выбрать нужную версию и указать путь для сохранения файла.
В Synology Drive версии 2.0 и выше стала доступна функция синхронизации по запросу. В отличие от стандартной синхронизации, которая создает дубли файлов на компьютерах, синхронизация по запросу копирует только списки файлов на локальные компьютеры. Сами файлы скачиваются на компьютеры только при обращении к ним, а именно открытии или изменении на компьютере. В настоящее время доступна в Windows 10 версии 1809 и выше.
Настройка Synology Office
Первое, что необходимо вам для комфортной работы — комплекс офисных инструментов. Synology Office, который мы устанавливали в NAS-устройство ранее, предназначен для совместного редактирования пользователями текстов, электронных таблиц и презентаций в Synology Drive.
В процессе работы над проектом вы сможете не только вносить правки в контент, но и обмениваться с родными или коллегами своими мыслями по поводу того, как сделать конечный результат лучше. Для этого предназначена функция создания интерактивных комментариев и чат Synology Chat, реализованный в качестве дополнительного плагина. Предусмотрена возможность шифрования информации. В этом случае файл может быть открыт только после ввода установленного вами пароля.
А сейчас рассмотрим работу Synology Office подробнее.
В верхней части находятся кнопки навигации. К примеру, кнопка в виде плюса позволяет создавать текстовые документы, электронные таблицы и слайды, а также создавать зашифрованные файлы, которые будут защищены паролем.
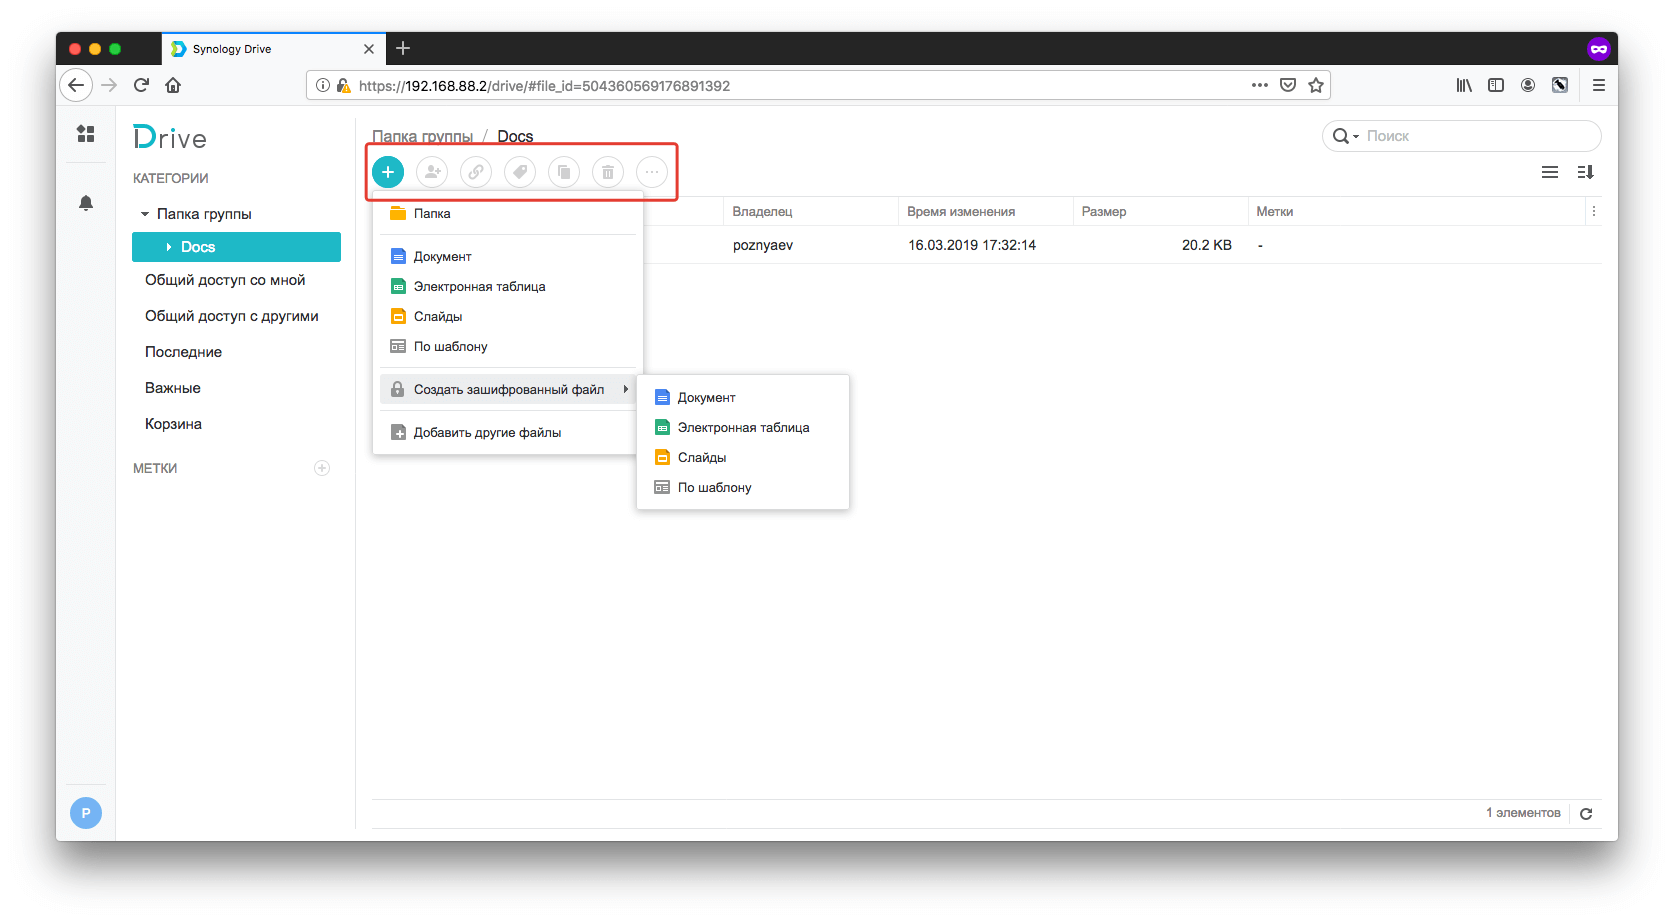
Остальные элементы, находящиеся правее плюса, становятся доступны после выделения конкретного файла. Благодаря им вы можете предоставить общий доступ конкретному пользователю или создать прямую ссылку на файл, также доступны возможности создания копии файла или его удаление.
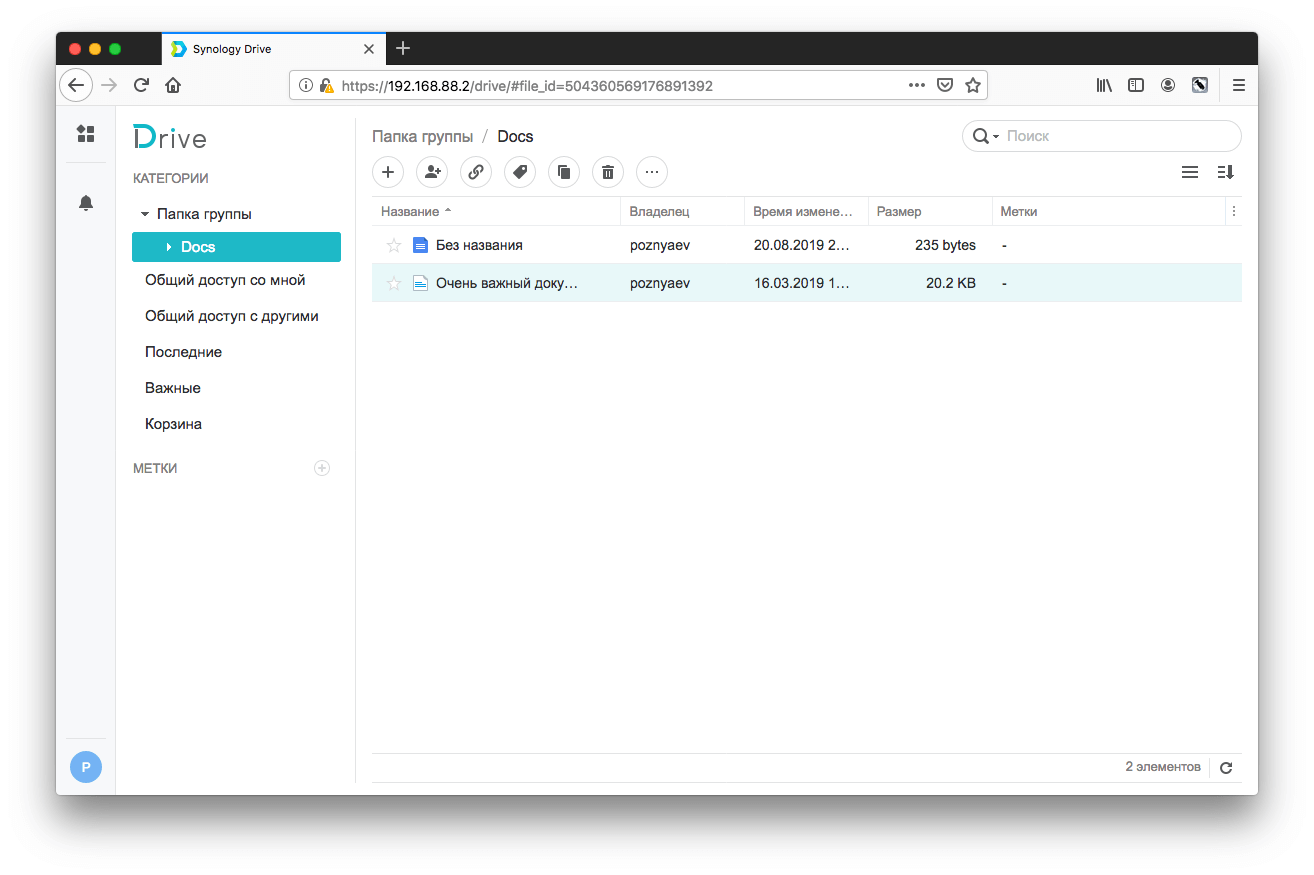
После создания документа, к примеру, в проводнике Windows или Finder вашего Mac, вы увидите файл с расширением .odoc:

А так файл отображается в Synology Drive:
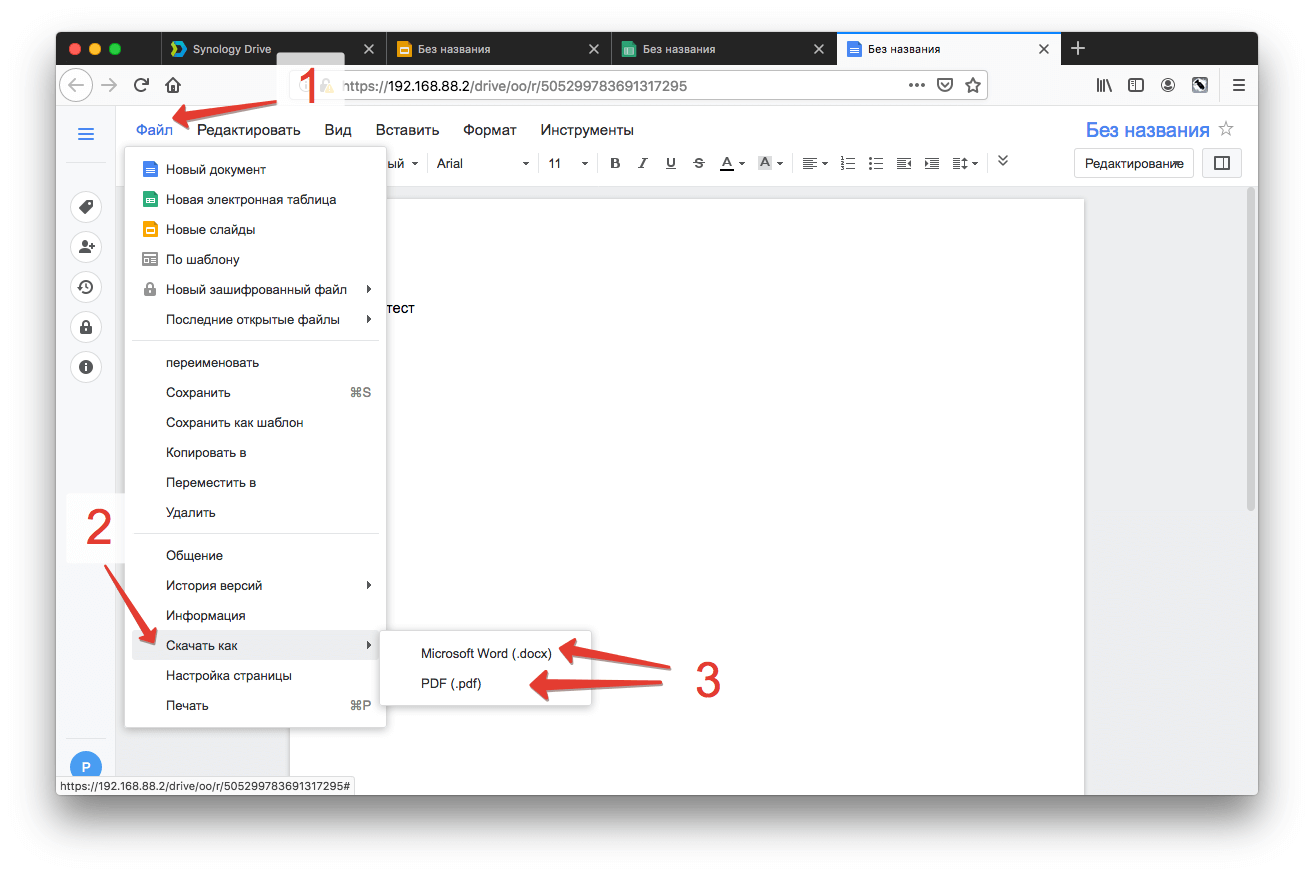
В будущем открыть его можно двойным кликом в самом Synology Drive или через Проводник/Finder. Во втором случае у вас автоматически откроется браузер:

Ничего не напоминает панель редактирования?

Думаю, проблем с ее использованием у вас не возникнет.
Аналогичным образом выглядит работа с электронными таблицами и слайдами.
Пример Электронных таблиц, созданных в Synology Drive:

Пример Слайдов, созданных в Synology Drive:

В любой момент вы можете сохранить документ или электронную таблицу в формате Microsoft или PDF.
В заключение
Предлагаемое Synology решение для комфортного хранения файлов и обмена ими — не просто емкий и более функциональный накопитель, а удобная современная платформа.
Compared to an external hard drive, NAS is a better backup device that offers centralized storage, data backup options, and a range of features for multiple users to access and share data over a network. Lots of NAS brands like Synology, QNAP, Asustor, TerraMaster, etc. are on the market. The former two are the most popular ones and the choice between Synology vs QNAP NAS is a matter of opinion.
But some prefer Synology because of its ample storage capacity, ease of use, data backup capabilities, and wide range of apps to meet various needs. Its file sharing, collaboration features, and simple management, such as user permissions, file locking, versioning, and Synology Drive Client, make it an ideal storage solution for both home and business users.
In this article, we are going to dive deep into its management interface, Synology Drive Client, about its features, pros and cons, and how to configure and use it to backup and restore Synology NAS in detail.
What is Synology Drive Client?
Synology Drive Client is a software for desktops that facilitates file synchronization, computer backup services, and data management for multiple client computers to a centralized server, Synology Drive Server.
With Synology Drive Client, you can schedule backup tasks to transfer your computer files to a Synology Drive server and generate versions of these files that can be retrieved or downloaded as required.
Compatibility:
-
Windows: 7 and above except Windows 10 on ARM and Windows Server versions.
-
MacOS: 10.14 and later 64-bit.
-
Ubuntu: 18.04 and later.
Features
-
File synchronization: Allows users to access, synchronize, and share files across multiple client computers and the Synology Drive server via file browser. This ensures that all the latest updates are available on all devices.
-
Backup tasks: Provides users with scheduled backup tasks to automate backups of important files and data to a Synology Drive server.
-
Versioning: Creates versions of backed-up files to retrieve and restore earlier versions of files.
-
Cross-platform support: Works with Windows, macOS, and Linux operating systems.
-
Customizable settings: Customizes backup modes in a continuous, manual, or scheduled way.
Pros
-
User-friendly interface: Has an intuitive interface that makes it easy to set up and manage backup tasks and file synchronization.
-
File sync: Creates up to 64 sync tasks for Windows to ensure that important data is available when needed with synchronization with My Drive, Team Folder, and Shared with me folders on Synology Drive Server and on-demand sync to reduce overhead.
-
Security: Blacklists file names, extensions, and maximum file sizes for each sync task while monitoring and logging file manipulations to identify potential security breaches and take corrective actions before any damage is done.
-
Flexible backup: Provides multiple backup modes to meet different business needs.
Cons
-
Requires a Synology Drive server: To use Synology Drive Client, users must have access to a Synology Drive server, which can be a limitation for some users.
-
Limited sync files and drive types: Syncs a maximum of 500,000 files and degrades performance if exceeds. And do not support certain file and drive types like .pst.
-
Limited backup and sync: One account can only have a single backup task, and you cannot select already synced folders or their parent/child folders for a sync task. Files within a mount point located in a local folder that is mounted via other file protocols may not be synced.
-
On-demand Sync: Cannot be used to sync local folders that have already been synced with Synology Drive’s On-demand Sync, OneDrive’s File On-Demand, or iCloud Drive, including their child folders. Similarly, root drive directories (e.g., C: and D:) and home directories (e.g., C:Users<username>) cannot be used as On-demand Sync folders.
How to Download and Install Synology Drive Client on Windows, Ubuntu, and Mac?
On Windows:
1. Download: log in to the Synology Drive web> click your account name> Client> Download client> For PC> select the Windows version> Save File.
2. Run the installer and click Yes> select a language and click OK> Next on the setup page.
3. Click I Agree on the license terms page and wait for the installation.
4. Select Run Synology Drive Client and click Finish.
On Ubuntu:
1. Download Synology Drive Client for Ubuntu on the download page and click Save File> OK.
2. Close the tabs and run the installation file.
3. Click Install and enter your user password.
4. Search the client in the application menu and click the icon.
Or after the package is downloaded, it resides in the ~/Downloads directory.
1. Update the cache for the APT package repository.
$ sudo apt update
2. Install the Synology Drive Client installer package.
$ sudo apt install ./Downloads/synology-drive-client-*.deb
3. Find the client in the application menu and click the icon to start it.
On Mac:
1. Visit the Synology download center and select the product type as NAS and choose your Synology product edition.
2. Click Desktop Utilities> Drive> Mac (dmg).
3. Double-click the installation file to open it and double-click the icon again.
4. Click Continue until it prompts for your username and password to install the software.
5. Click Close.
How to Set up Synology Drive Client?
1. Open the client and click Start Now.
2. Input the IP address, DNS name, or QuickConnect ID, your username, and password.
3. Check Enable SSL data transmission encryption optionally> Next.
4. Click Not Now if asked to switch to QuickConnect> Proceed Anyway.
5. Click Next on the synchronization page.
6. Choose to enable syncing files shared by others to your PC and edit them directly or Maybe later> Done.
7. Click Next to walk through the feature introduction.
How to Backup, Sync, and Restore Synology NAS with Drive Client?
Backup
1. Click Backup Task and Create Backup Task.
2. Select the Connected Synology NAS or input another QuickConnect ID, username, and password and click Next.
3. Choose the backup folders and destination. Click Select to change your backup destination and click Next. You can choose a folder from Synology Drive or click + to create a new one for backup and click OK.
4. Click Backup Rules in the bottom left to configure the task.
5. Exclude files with exceeding size or extensions from backup optionally and tick the desired backup options. Click Apply> Next.
6. Select the backup mode from continuous, manual, or scheduled backup and click Next.
7. See the summary and click Done.
Sync
1. Click Sync Task and click Next.
2. Choose your sync folders and location on your PC and click Change to select other folders.
3. Tick Enable On-demand Sync to save disk space on your computer optionally and click Done.
4. Click Advanced in the bottom left for further settings.
Specify the folders with max size, names, or designated extensions to not sync and choose the sync mode from two-way sync or one-way download/upload (deselect Keep locally deleted files on the server if you want to delete them on the server).
Choose Enable On-demand Sync to save disk space and Enable advanced consistency check to save time and resources in file comparison optionally.
5. Click Apply> Done.
Restore
1. Click Backup Task> Restore.
2. Choose the file to restore. Click Browse Previous Versions to see the historical file versions.
3. Click Time on top and choose a particular file version to Restore.
4. Download the file to a specific destination as needed.
Synology Drive Client Alternative
Synology Drive Client is a built-in backup and management utility for Synology users, however, it doesn’t contain more advanced backup features like incremental backup or data reduction techniques.
Vinchin Backup & Recovery is an ideal NAS backup alternative to Synology Drive Client. For one, it supports all NAS devices under NFS/CIFS protocols regardless of the brands like Synology, WD, Seagate, or QNAP; for another, it comes with various smart backup strategies as follows:
-
Wildcard filter to include or exclude backup files.
-
Full, Incremental, and Differential Backup.
-
Compress data without suffering its integrity.
-
Encrypt data transmission with SSL.
-
Multiple transfer and scan threads for speed.
-
Restore to the original or new path of NAS Share/File Server as needed.
-
Anti-ransomware backup encryption with AES-256 algorithm.
-
An offsite backup copy to save the day.
Besides that, the solution is also compatible with 12 virtualizations like VMware, Hyper-V, Xen, 6 databases, Linux & Windows files, and servers and manages all backups and jobs in a central console, download the 60-day free trial to explore more features.
NAS Backup
1. Go to NAS Backup> Backup to select the source files/folders and add a filter under Advanced.
2. Select the backup node and storage.
3. Configure the NAS backup strategies.
4. View the summary and submit the job, which will run based on the time set in the schedule.

In short
The blog covered different aspects of Synology Drive Client quite thoroughly including its features, advantages, flaws, uses, and a comprehensive backup alternative Vinchin Backup & Recovery that offers Synology users a smoother backup experience.