
Python is a versatile and widely used programming language that has become an essential tool for developers, data scientists, and researchers. With its simplicity, flexibility, and extensive libraries, Python has become the language of choice for various applications, from web development and data analysis to artificial intelligence and machine learning.
Knowing the version of Python installed on your system is crucial for various reasons. It helps ensure compatibility with libraries, frameworks, and third-party packages you might want to use in your projects. Additionally, some Python features and syntax may differ across versions, so being aware of the installed version can prevent potential issues and ensure smooth development. In this article, we’ll explore multiple methods to check the Python version on both Linux and Windows operating systems.
In this article, we’ll provide a comprehensive guide on how to check Python version in Linux and Windows operating systems. We’ll cover the different methods, including command-line instructions, and provide troubleshooting tips to help you overcome common issues.
Why Check the Python Version?
Before diving into the methods of checking Python versions, it’s essential to understand why it’s crucial to know the version of Python installed on your system. Here are a few reasons:
Compatibility
Different Python versions have varying levels of compatibility with libraries, frameworks, and third-party packages. Knowing the Python version ensures that you can use the required packages and libraries without compatibility issues.
Syntax Differences
Python syntax and features change across versions. For example, Python 2.x uses the print statement, while Python 3.x uses the print() function. Being aware of the installed version helps you write code that’s compatible with your Python version.
Deprecation and Removal of Features
As Python evolves, some features and modules are deprecated or removed. Knowing the Python version helps you avoid using deprecated features and plan for future updates.
Experience the power of Python Hosting
Ready to unlock the complete power of Python on Windows and Linux? Begin your development today with Ultahost’s Python hosting services!
Checking Python Version in Linux
Method 1: Using the Command Prompt
Linux is a popular operating system among developers. If you install Python in Ubuntu Linux, To check the Python version in Linux, you can use the following command:
python3 --version

Another similar command that you can use to check the Python version is mentioned below:
python3 -V

The output will display the Python version and any additional information, such as the build number or compilation date. If the command returns an error indicating that Python is not installed or recognized, you may need to install or update your Python installation.
Method 2: Using the Python Interpreter
Another method to see Python version is by launching the Python interpreter. Open your terminal and enter:
python3
Once the interpreter is running, Type the following command for Python version check:
import sys
print(sys.version)
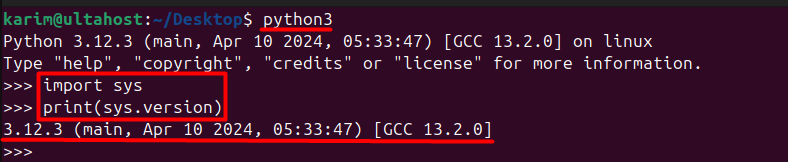
This will print the complete version information, including the build number, compiler details, and other relevant information.
To exit the Python interpreter, simply type exit() and press Enter.
While this method provides more detailed version information, it requires launching the Python interpreter, which may not be desirable in certain situations.
Method 1: Using the Command Prompt
If you install Python in Windows, you can find Python version in Windows using the command prompt. Open the Command Prompt cmd.exe and enter the Python version command:
python --version

Method 2: Using the Python Interpreter
Launch the Python interpreter by opening the Command Prompt and typing:
python
Once the interpreter is running, you can check the version by entering the following command:
import sys
print(sys.version)

This will display the complete version information, including the build number, compiler details, and other relevant information.
To exit the Python interpreter, type exit() and press Enter.
Troubleshooting Common Issues
When checking the Python version, you may encounter some common issues. Here are some troubleshooting tips to help you overcome them:
Python not Recognized:
If the command python –version returns an error indicating that Python is not recognized, check if Python is installed correctly and added to the system’s PATH environment variable.
Multiple Python Versions Installed
If you have multiple Python versions installed, you may need to specify the version you want to check. For example, if you have both Python 3.8 and Python 3.9 installed, you can check the version of Python 3.9 using the command python3.9 –version.
Python version not displayed: If the command python –version does not display the version information, try using the python -V command instead. This will display the version information in a more verbose format.
Best Practices for Managing Multiple Python Versions
If you work with multiple Python projects or environments, you may need to manage multiple Python versions on your system. Here are some best practices to help you manage multiple Python versions:
Use Virtual Environments:
Virtual environments allow you to create isolated Python environments for each project, which helps to avoid version conflicts and ensures that each project uses the correct Python version.
Use Version Managers:
Version managers like pyenv or conda allow you to easily install and manage multiple Python versions on your system.
Keep your Python Versions Up-to-Date:
Regularly update your Python versions to ensure you have the latest security patches and features.
Conclusion
In this article, we’ve explored multiple methods to check the Python version on both Linux and Windows operating systems. We’ve also discussed the importance of knowing the Python version, common issues you may encounter, and best practices for managing multiple Python versions.
By following the methods outlined in this article, you can easily check the Python version on your system and ensure that you’re using the correct version for your projects. Remember to keep your Python versions up-to-date and use virtual environments or version managers to manage multiple Python versions.
As Python evolves, keep yourself informed about new releases, features, best practices, and industry trends. With up-to-date installation research choose a trusted platform that aligns with your technical needs. With Ultahost’s Windows hosting, you can easily upgrade your resources as your needs grow with a few clicks.
FAQs
How do I check the Python version in Linux?
You can check the Python version in Linux by opening a terminal and typing python –version or python -V. Alternatively, you can also use python3 –version or python3 -V depending on your Python installation.
How can I determine the Python version in Windows?
In Windows, you can check the Python version by opening a command prompt and typing python –version or python -V. Similarly, you can use python3 –version or python3 -V if you have multiple Python installations.
Is there a command to display more detailed information about the Python installation?
Yes, you can use python -V (or python3 -V) to get the Python version, and python -VV (or python3 -VV) to display more detailed version information, including the Python compiler information and the build date.
What’s the difference between python and python3 commands?
The python command typically refers to the default Python 2.x installation on many systems, while python3 refers to Python 3.x. It’s recommended to use python3 for Python 3.x code, as Python 2.x is no longer supported.
How can I verify if Python is installed on my system?
You can check if Python is installed by running python –version or python -V in the terminal (or command prompt). If Python is installed, it will display the version number; otherwise, it will prompt an error indicating that the command is not recognized.
Home » KB » SysAdmin » How to Check Python Version in Linux, Mac, & Windows
Python is an object-oriented programming language used for web development, machine learning, and automation tasks. It comes in different versions that differ in compatibility, support lifecycle, performance, security, and features.
Certain applications may require a specific version of Python, so it is crucial to know which program version you have on your system and, if necessary, install a specific one.
In this tutorial, learn how to check the Python version on Windows, Linux, or macOS.
Prerequisites
- Access to a terminal window/command prompt.
- Python installed (see guides How to Install Python on Windows, How to Install Python on Ubuntu)
Which Python Versions Exist?
The primary Python branches are Python 2 and Python 3, and each has several versions. The latest version at the time this article was written was Python 3.12.1. Python 2’s final version is 2.7, which reached its end of life on January 1, 2020.
Python 2 is no longer supported, and users are strongly encouraged to migrate their code to Python 3 to ensure ongoing support and compatibility with the latest features and improvements.
When looking at the version number, there are usually three digits to read:
1. The major version — Python 3.12.1.
2. The minor version — Python 3.12.1.
3. The micro version — Python 3.12.1.
While major releases are not fully compatible, minor releases generally are. For example, version 3.12.1 should be compatible with 3.12.2. The final digit signifies the latest patches and updates.
Python 2.7 and 3.7 are different applications. Software written in one version often does not work correctly in another version. When using Python, it is essential to know which version an application requires and which version you have.
Note: Read our R vs Python comparison to learn more about these two popular programming languages in visualization, data science, and data analysis.
How to Check Python Version in Linux
Most modern Linux distributions come with Python preinstalled. To check which version is installed, open a terminal window and run the following command:
python3 --version
Since most Linux versions now use Python 3 by default, we use python3 in the command syntax. However, if you still use Python 2 for some applications, omit 3 from the command to check which Python 2 version you have installed.
How to Check Python Version in Windows
Windows installations do not come with Python preinstalled. However, if you have been using Python earlier but don’t remember which version, you can easily check which one is installed.
Open Windows Powershell or the Command Prompt, and run the following command:
python --versionIf you have Python installed, Powershell reports the version number.

How to Check Python Version in MacOS
If you are using a Mac, check the Python version by running the following command in the terminal:
python3 --version
The system reports the installed version.
Checking a System with Multiple Python Versions
Python 2 and Python 3 are different programs, allowing users to run Python 2 installations separately from Python 3 on the same system. Python 3 is not entirely backward compatible.
Most systems differentiate Python 2 as python and Python 3 as python3. If you do not have Python 2, your system may use the python command in place of python3, which can be seen from the Windows example.
However, in Linux and macOS, if you need to check Python 2 version, enter:
python --versionTo check the version of Python 3 software:
python3 --versionNote: Python does not have a built-in upgrade system. You need to download the latest version and install it.
How to Check Python Version in Script
When writing an application, include a mechanism that checks the Python version before execution, as this helps prevent crashes and resolve potential incompatibilities. Follow the steps below to create a Python script that checks the program version:
1. Open a text editor and paste the following code:
import sys
if not sys.version_info.major == 3 and sys.version_info.minor >= 10:
    print("Python 3.10 or higher is required.")
    print("You are using Python {}.{}.".format(sys.version_info.major, sys.version_info.minor))
    sys.exit(1)
else:
    print("You're good to go!")
    print("You are using Python {}.{}.".format(sys.version_info.major, sys.version_info.minor))
You can replace the version number with your own prerequisite.
2. Save the script with a .py extension and run it with python3. For example:

When the script runs, it tests to see if Python 3.10 is installed. After testing, it sends a notification and displays the current Python version.
Conclusion
You now know how to check the Python version in several operating systems. Checking the Python version is crucial for ensuring compatibility with specific libraries and functionalities.
If you want to learn how to upgrade Python to a newer version on Windows, macOS, and Linux, check out our article on how to upgrade Python.
Was this article helpful?
YesNo
Время на прочтение8 мин
Количество просмотров9.4K
Общее представление о Synology
Synology является производителем сетевых систем хранения данных для организаций и домашних пользователей. Продукты от Synology это программно-аппаратные комплексы. В интернете много обзор на их устройства для домашнего применения. Часто их рекомендуют фотографам, видеомонтажёрам и всем остальным пользователям, которым требуется хранить данные и иметь к ним доступ в режиме 24 на 7.
Программно-аппаратные комплексы состоят из следующих элементов: сетевое хранилище, например такие модели, как: DS220+, DS720+, DS920+ и т.д. и программное обеспечение: операционная система DSM (на текущий момент версия 7.1) и различные модули, входящие в составе, например такие, как: Photos, Contacts, Download Station, Docker, Surveillance Station и другие. Часть из модулей имеет мобильные приложения и ими можно пользоваться с iOS или Android устройства.
Photos – модуль позволяет закачивать фотографии с телефона / планшета / компьютера, просматривать их, делиться ими с пользователями Synology и давать прямые ссылки в интернете при соответствующей настройке сетевого хранилища.
Contacts – приложение позволяет хранить контакты с разных устройств. На iOS синхронизация контактов происходит через встроенные инструменты мобильной ОС. На Android для синхронизации контактов потребуется платное приложение DAVx5.
Download Station – программа создана для скачивания торрентов.
Docker – согласно базы знаний Synology является виртуализированной средой для создания и запуска приложений в изолированном контейнере.
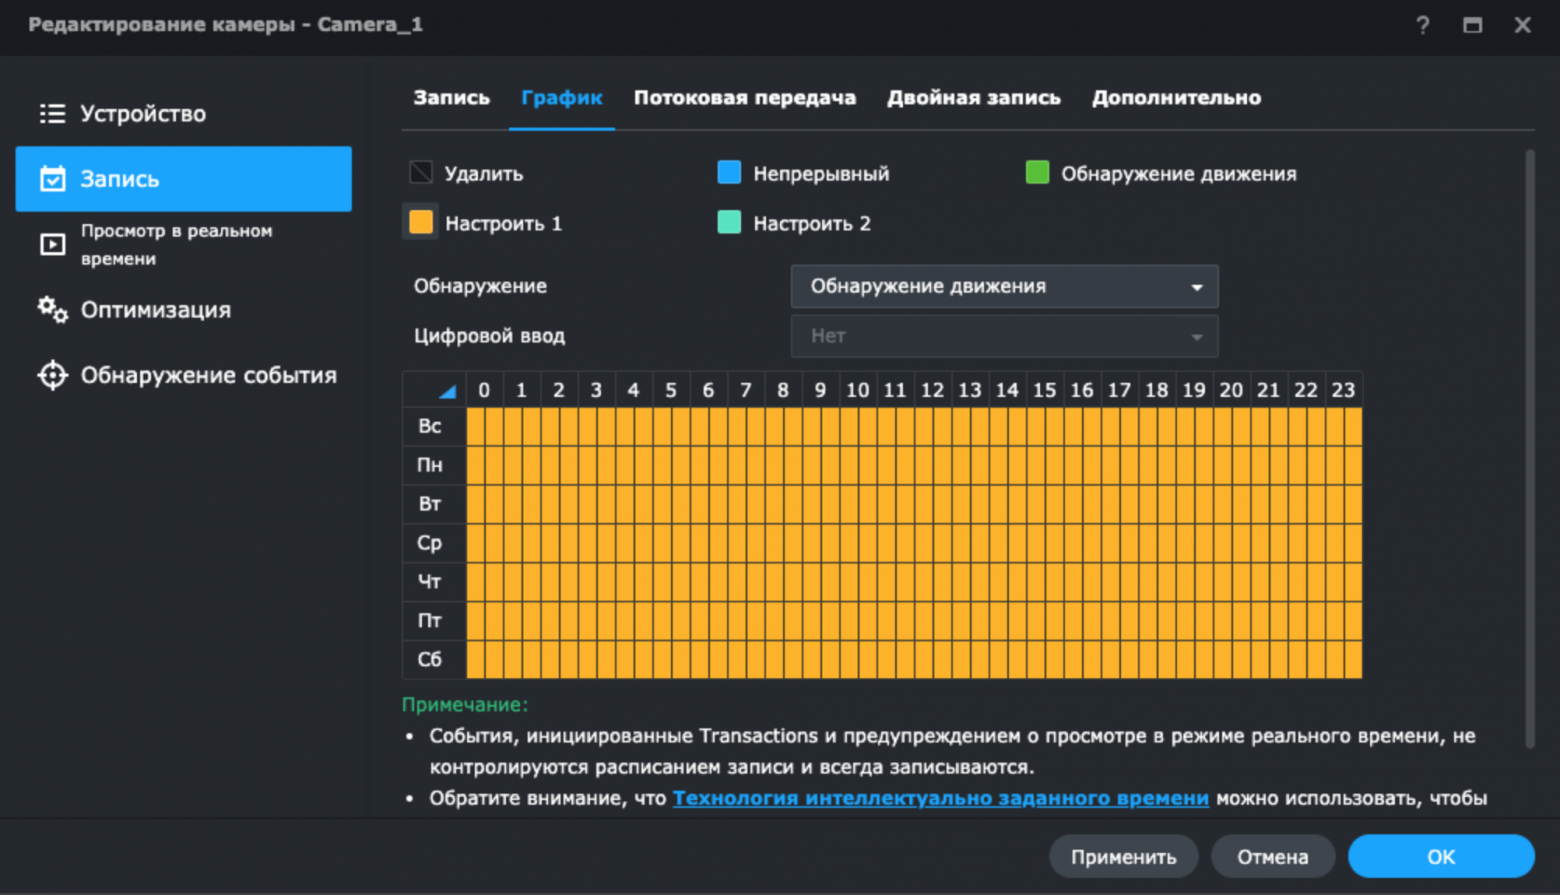
Surveillance Station (далее – Станция видеонаблюдения) – модуль позволяет настроить видеонаблюдение через различные камеры. На официальном сайте приводится полный перечень поддерживаемых камер видеонаблюдения. К примеру, в комплекте с DS920+ идет лицензия на подключение двух камер, если необходимо подключить больше двух, то следует докупать лицензии на каждую дополнительную камеру. Управлять Станцией возможно тремя способами: через приложение для ПК и Mac, через браузер и через мобильное приложение DSCam. В приложении для ПК имеется возможность настройки записи видеокамеры по расписанию. Например, возможно настроить срабатывание записи на движение в режиме 24 часа 7 дней в неделю на обнаружение движения.
После этой настройки камера будет записывать видео при обнаружении движения и присылать уведомления через мобильное приложение.
В приложении для ПК и DSCam имеется возможно включения и выключения режима Home mode. Например, через включение режима происходит отключение расписание записи на обнаружение движения и прекращение получения уведомлений в мобильном приложении. Тем самым через режим Home mode включается и выключается режим охраны на Станции видеонаблюдения.

Решение задачи по управлению Станцией видеонаблюдения, находящейся внутри локальной сети без доступа к интернет, через Telegram
Однако применение мобильного приложения усложняется при расположении Сетевого хранилища внутри домашней сети без прямого доступа в Интернет. При этом условии для включения/выключения режима Home mode необходимо подключаться к домашней сети через VPN, что усложняет управление Станцией видеонаблюдения. Также для просмотра видеопотока с камеры видеонаблюдения при срабатывании датчика движения необходимо вначале подключиться к VPN-сети, а после открыть DSCam для просмотра видеопотока в режиме реального времени.
Для управления Станцией без подключения к VPN-сети возможно с помощью применения языка Python, Telegram-бота, Docker и WebAPI Станции. Это позволит узнавать текущее состояние режима охраны, включать и выключать его через Home mode. Получать фотографии от камеры видеонаблюдения по запросу из Telegram.
В статье не будет освещен процесс создания Telegram-бота, через Bot_Father, так как данной информации много на просторах Сети.
Согласно документации к WebAPI Станции существуют основные параметры запросов «api», «_sid», «method», «version» все остальные параметры являются уточняющими к каждому виду запроса.
Авторизация для разных целей происходит по разным портам. Для переключения режима Home mode авторизация осуществляется по адресу Станции видеонаблюдения http://192.168.1.3:9900/webapi/auth.cgi. Примером запроса на авторизацию в станции видеонаблюдения может быть:
requests.get( 'http://192.168.1.3:9900/webapi/auth.cgi',
             params={'api': 'SYNO.API.Auth', 'method': 'login',
                     'version': '7', 'account': 'Test',
                     'passwd': 'RL2wXbx9', 'session': 'SurveillanceStation',
                     'format': 'cookie12'})
Ответ будет следующим:
{'data': {'account': 'Test',
          'device_id': 'qLDB5jfX7sxfdqws5MzCABW52jFKpxXiAbFE7QVzrdECrIvPDqR412355',
          'ik_message': '', 'is_portal_port': False,
          'sid': 'YxJx0PM0BGVlSgbgOfaN1zxmgXmxDaTD6WE1PYl47qohuGFobsLl7Eh0Y_s6MGBfW12356',
          'synotoken': '--------'}, 'success': True}
Для авторизации последующих запросов необходима информация из поля «sid» через метод json()[‘data’][‘sid’]
Для получения фотографии от камеры видеонаблюдения авторизация происходит по адресу Сетевого хранилища http://192.168.1.3:5000/webapi/entry.cgi с передачей основных и вспомогательных параметров аналогично Станции видеонаблюдения. Для создания фотографии следует определить ID камеры видеонаблюдения для этого следует воспользоваться методом List, через следующий запрос
requests.get('http://192.168.1.3:5000/webapi/entry.cgi',
             params={'api': 'SYNO.SurveillanceStation.Camera',
                     '_sid': 'ответ поля sid в запросе на авторизацию',
                     'version': '9', 'method': 'List' })
В ответе будет указан в том числе id всех камер видеонаблюдения с привязкой к IP адресам. В данном примере используется только одна камера с ip-адресом 192.168.5.120, id 7.
{'data': {'cameras': [{'DINum': 0, 'DONum': 0, 'audioCodec': 0,
                       'channel': '1', 'connectionOverSSL': False,
                       'dsId': 0, 'enableLowProfile': True,
                       'enableRecordingKeepDays': True,
                       'enableRecordingKeepSize': False,
                       'enableSRTP': False, 'fov': '',
                       'highProfileStreamNo': 1,
                       'id': 7,
                       'idOnRecServer': 0,
                       'ip': '192.168.5.120',
                       'lowProfileStreamNo': 1, 'mediumProfileStreamNo': 1,
                       'model': 'Generic_HIKVISION', 'newName': 'Camera_1',
                       'port': 80, 'postRecordTime': 5, 'preRecordTime': 5,
                       'recordTime': 30, 'recordingKeepDays': 30,
                       'recordingKeepSize': '10', 'status': 1,
                       'stream1': {'bitrateCtrl': 2,
                                   'constantBitrate': '3000', 'fps': 25, 'quality': '5', 'resolution': '2688x1520'},
                       'tvStandard': 0, 'vendor': 'HIKVISION', 'videoCodec': 6, 'videoMode': ''}]},
 'success': True}
Приведем код конфигурационного файла и файла Telegram-бота.
Код конфигурационного файла conf.py
user_id = [1234567, 2134567, 31234567]
token = 'Токен бота'
Код файла Telegram-бота bot_2.py
import conf
import telebot
import requests
import time
import os

token = conf.token
bot = telebot.TeleBot(token)

def auth(chatid):
    for i in conf.user_id:
        if i == chatid:
            return True
    return False


def get_snapshot():
    take_snapshot = requests.get(
        'http://192.168.1.3:5000/webapi/entry.cgi',
        params={'api': 'SYNO.SurveillanceStation.SnapShot', '_sid': auth_syn,
                'version': '1', 'method': 'TakeSnapshot', 'camId': '7',
                'dsId': '0', 'blSave': 'true'
                })
    time.sleep(1)
    return (url_photo + '/' + sorted(os.listdir(url_photo))[-1])

auth_syn = requests.get(
    'http://192.168.1.3:5000/webapi/entry.cgi',
    params={'api': 'SYNO.API.Auth',
            'version': '7', 'method': 'login', 'account': 'test', 'passwd': 'RL2wXbx9'
            }).json()['data']['sid']
auth_surv = requests.get(
    'http://192.168.1.3:9900/webapi/auth.cgi',
    params={'api': 'SYNO.API.Auth',
            'method': 'login', 'version': '7', 'account': 'Test', 'passwd': 'RL2wXbx9',
            'session': 'SurveillanceStation', 'format': 'cookie12'
            }).json()['data']['sid']

url_surv = "http://192.168.1.3:9900/webapi/entry.cgi"

url_photo = '/camera'
mes_start = ('Основные команды: \n'
             '/sec - состояние охраны \n'
             '/sec_on - включить охрану \n'
             '/sec_off - выключить охрану \n'
             '/photo - сделать фото')

@bot.message_handler(commands=['start'])
def start(message):
    if auth(message.chat.id):
        bot.send_message(message.chat.id, mes_start)


@bot.message_handler(commands=['sec'])
def sec(message):
    if auth(message.chat.id):
        home_mode_info = requests.get(url_surv,
                                      params={'_sid': auth_surv, 'api': 'SYNO.SurveillanceStation.HomeMode',
                                              'version': '1', 'method': 'GetInfo'}).json()['data']['on']
        if home_mode_info:
            bot.send_message(message.chat.id, "Охрана выключена")
        else:
            bot.send_message(message.chat.id, "Охрана включена")


@bot.message_handler(commands=['sec_on'])
def sec_on(message):
    if auth(message.chat.id):
        home_mode_off = requests.get(url_surv,
                                     params={'_sid': auth_surv, 'api': 'SYNO.SurveillanceStation.HomeMode',
                                             'version': '1', 'method': 'Switch', 'on': 'false'}).json()['success']
        if home_mode_off:
            bot.send_message(message.chat.id, "Охрана гаража включена")
        else:
            bot.send_message(message.chat.id, "Ошибка постановки в охрану")


@bot.message_handler(commands=['sec_off'])
def sec_on(message):
    if auth(message.chat.id):
        home_mode_on = requests.get(url_surv,
                                    params={'_sid': auth_surv, 'api': 'SYNO.SurveillanceStation.HomeMode',
                                            'version': '1', 'method': 'Switch', 'on': 'true'}).json()['success']
        if home_mode_on:
            bot.send_message(message.chat.id, "Охрана гаража выключена")
        else:
            bot.send_message(message.chat.id, "Ошибка снятия гаража с охраны")


@bot.message_handler(commands=['photo'])
def photo(message):
    if auth(message.chat.id):
        bot.send_photo(message.chat.id, photo=open(get_snapshot(), 'rb'))


@bot.message_handler(content_types=['text'])
def other_mes(message):
    if auth(message.chat.id):
        bot.send_message(message.chat.id, mes_start)


bot.infinity_polling()
Коротко рассмотрим основные элементы кода.
В отдельном файле conf.py перечислим id пользователей Telegram, которые смогут управлять режимом охраны, а также пропишем токен бота.
В функции def auth(chatid): происходит идентификации пользователя, от которого получено сообщение.
В функции def get_snapshot(): происходит создание фотографии от камеры видеонаблюдения, результатом работы функции является путь на Сетевом хранилище до последней фотографии, которая позже будет отправлена в телеграмм.
В переменных auth_syn и auth_surv осуществляется авторизация на Сетевом хранилище и Станции видеонаблюдения.
В переменной home_mode_info определяется текущее состояние режима Home mode. Если Home mode включен, то телеграмм бот пришлет ответ, что охрана выключена, если Home Mode выключен, то охрана включена.
В переменных home_mode_off и home_mode_on представлено выключение и включение режима Home mode и соответственно режима охраны.
Запуск Telegram-бота в Docker
Рассмотрим каким образом осуществляется запуск телеграмм-бота в Docker на Сетевом хранилище Synology.
-
Необходимо установить Docker, как стандартное ПО
-
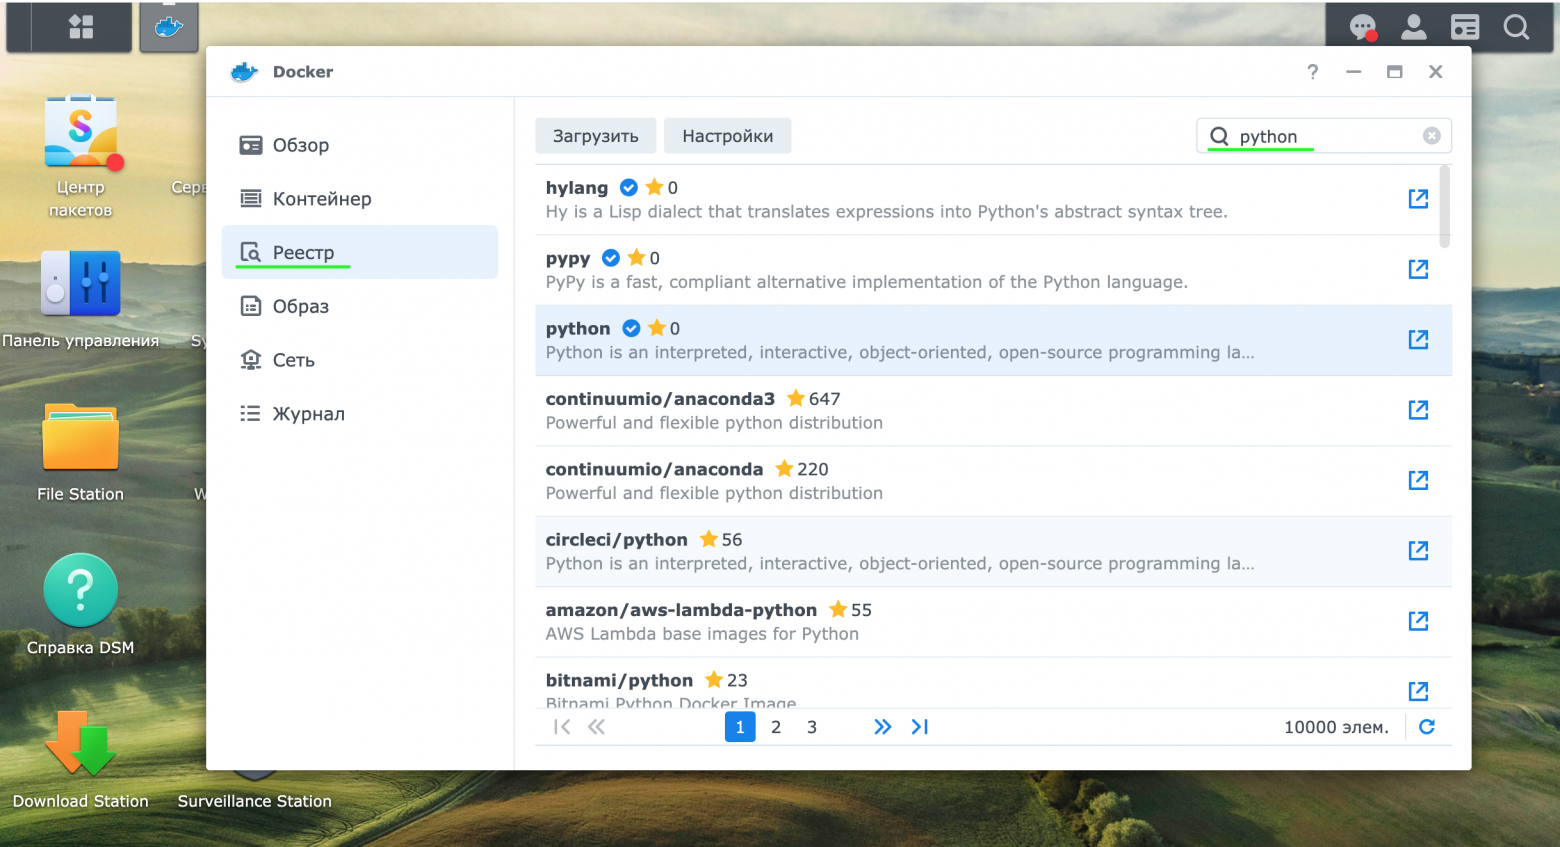
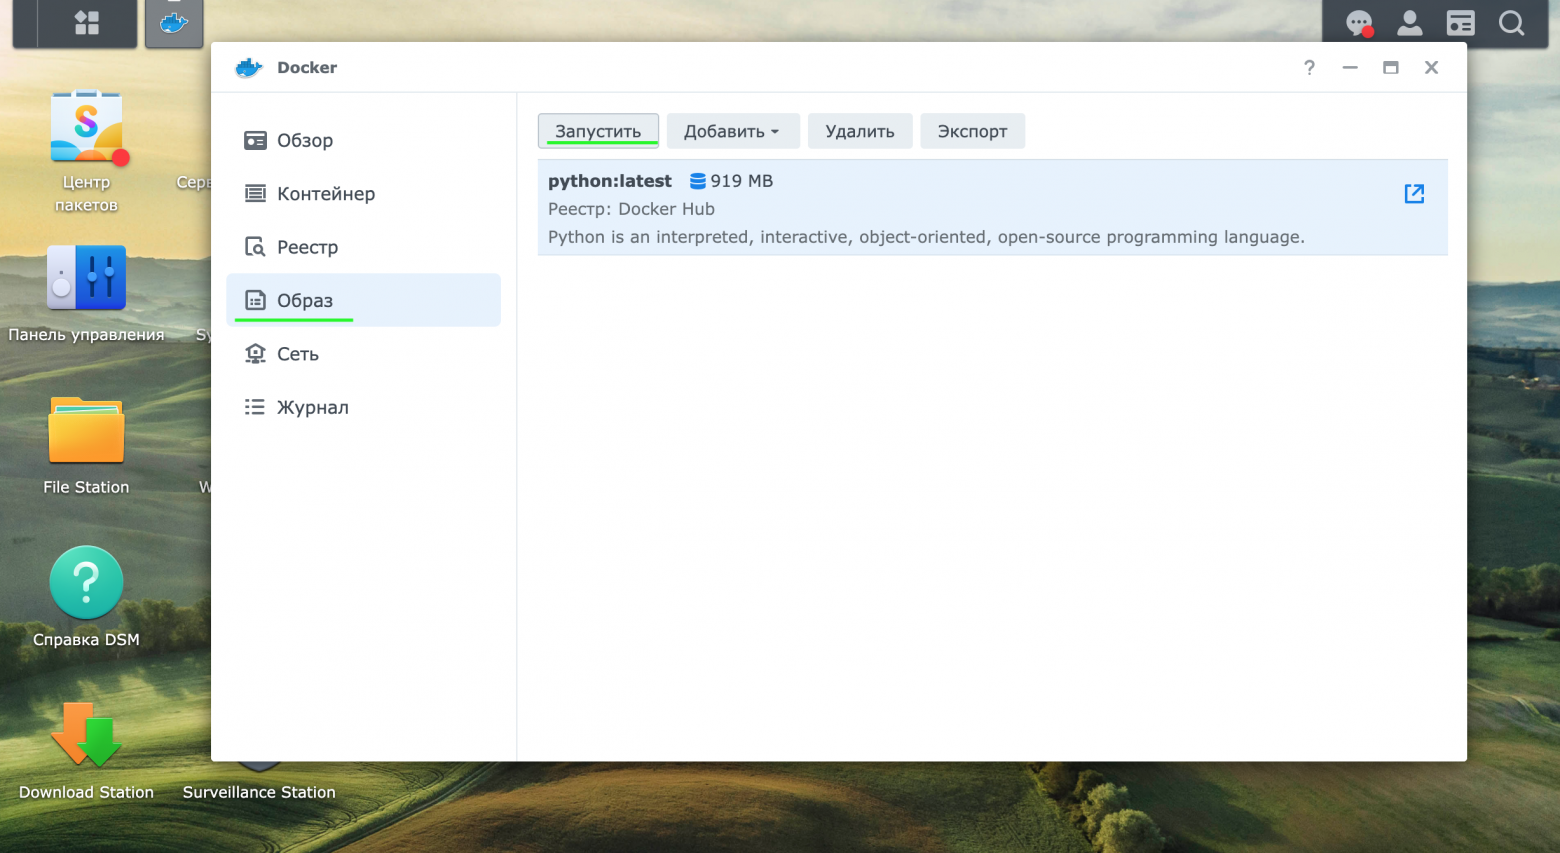
В разделе реестр скачать контейнер python.
-
В разделе образ начать процесс по созданию контейнера (далее – Контейнер), в нашем примере он будет называться bot_synology.
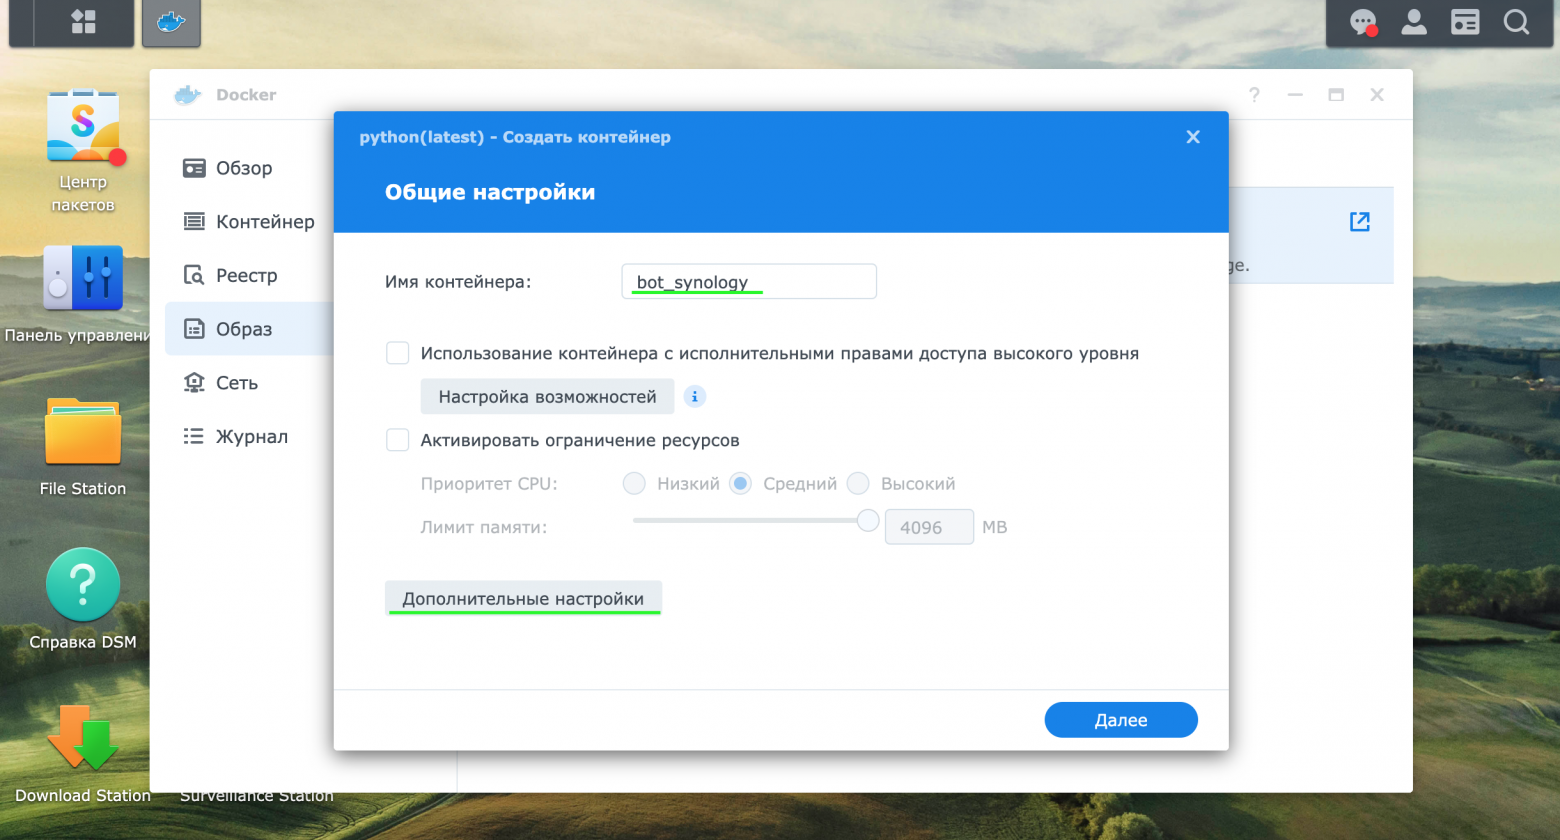
-
В разделе дополнительные настройки и в подразделе том указать пути до следующих папок:
1) папка с файлами телеграмм бота. Путь на Сетевом хранилище «/homes/Test/bot_synology» для контейнера будет соответствовать «/bot».
2) папка с файлами фотографий с камеры. Путь на Сетевом хранилище «/surveillance/@Snapshot» для Контейнера будет соответствовать «/camera».

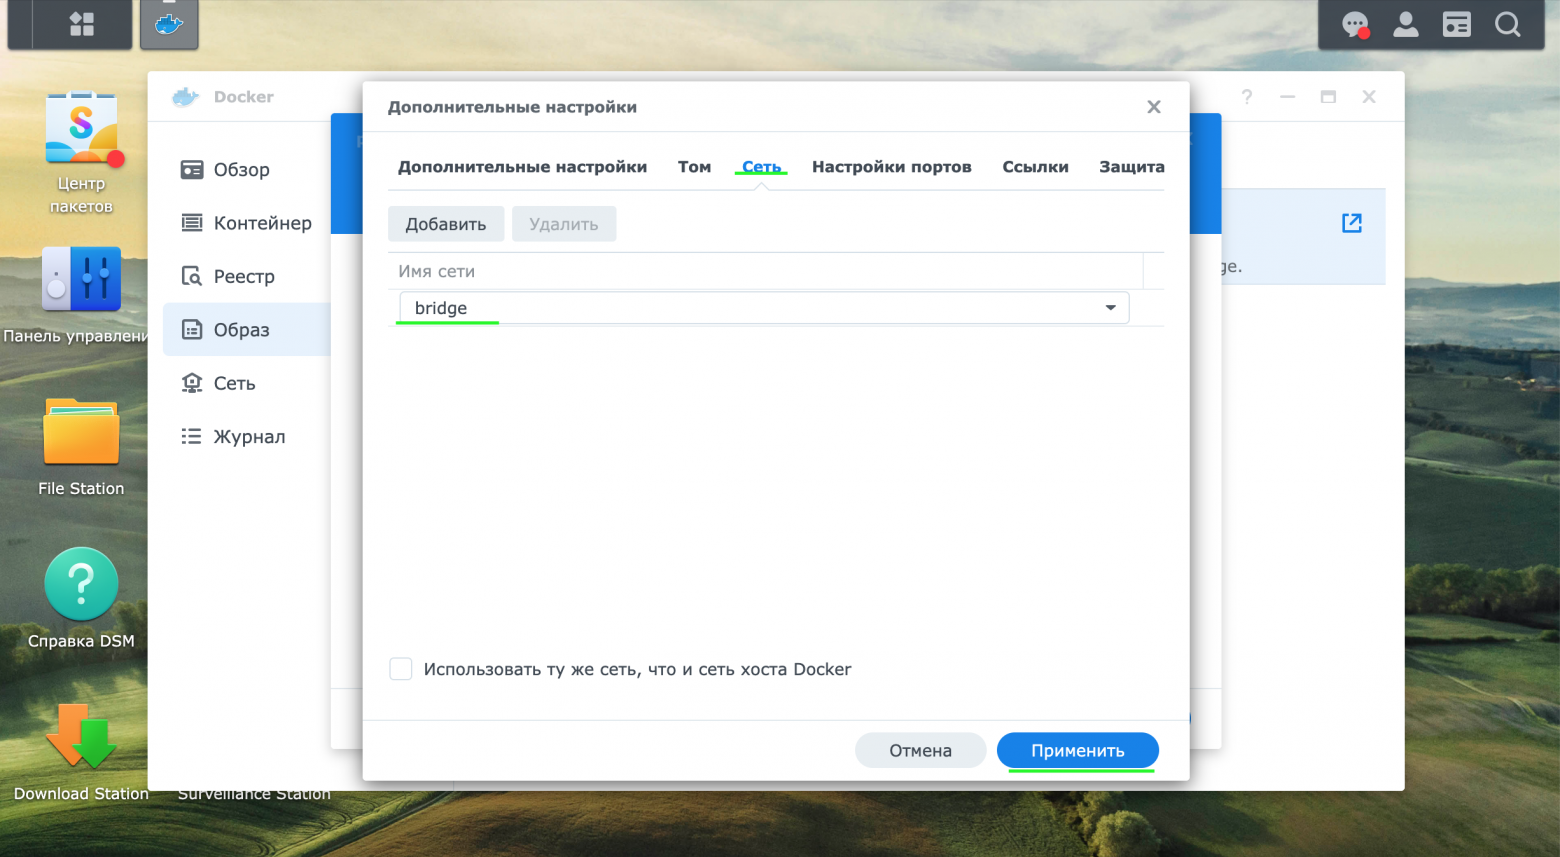
В разделе сеть оставить настройки по умолчанию (скриншот 7)
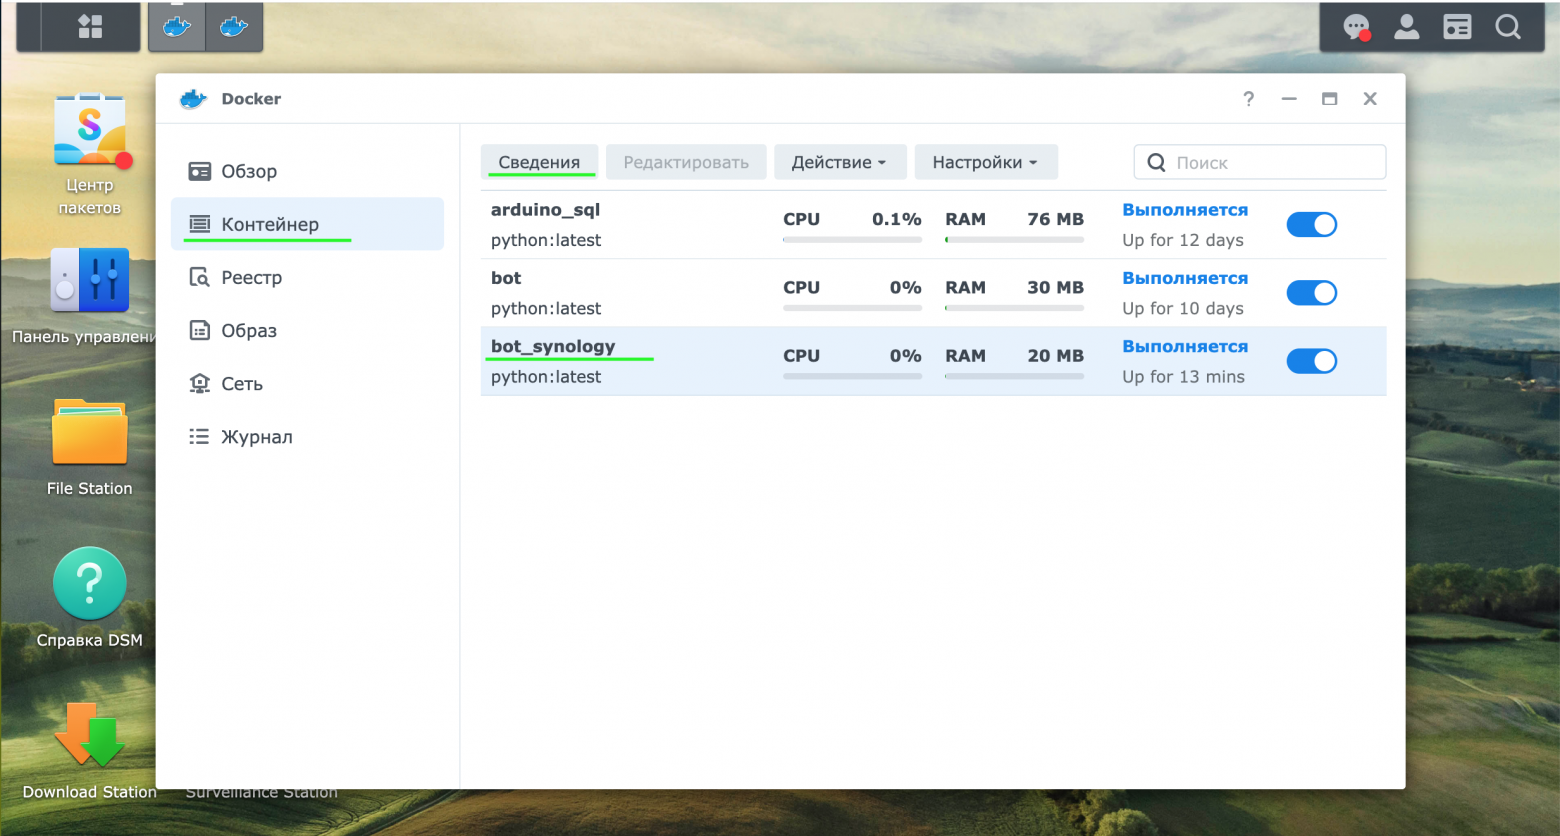
-
Далее создать и запустить Контейнер.
После создания Контейнера необходимо скопировать файлы бота по ранее указанному адресу: «/homes/Test/bot_synology» любым удобным способом, например, по протоколу SMB.
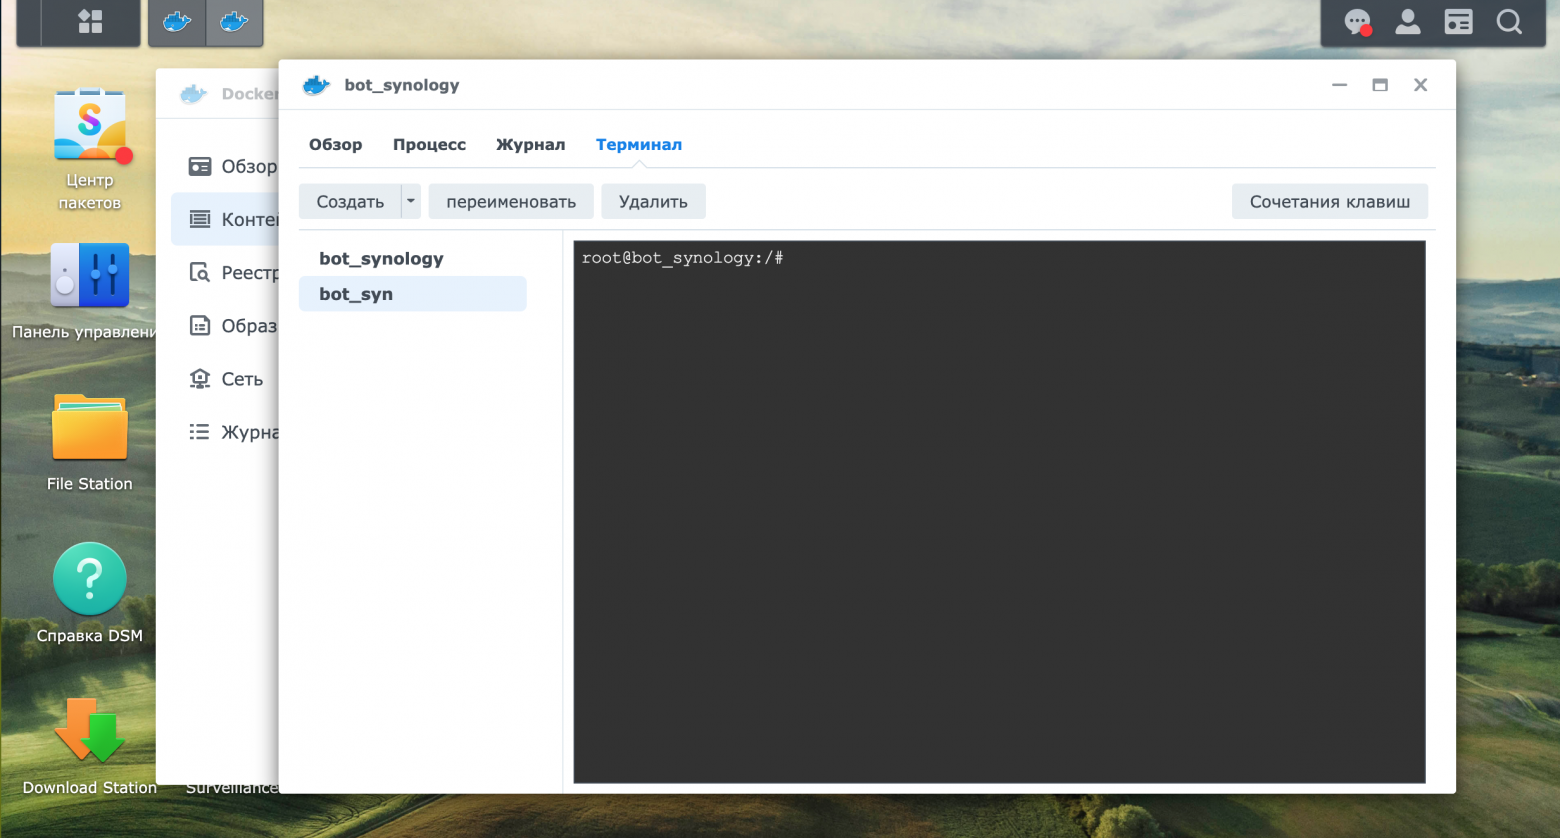
Откроем сведения о Контейнере и перейдем в раздел Терминал.
В разделе терминал создадим еще один терминал, который автоматически будет назван bash. Через команду Переименовать переименуем Терминал bash в bot_syn. В котором можно будет вводить команды.
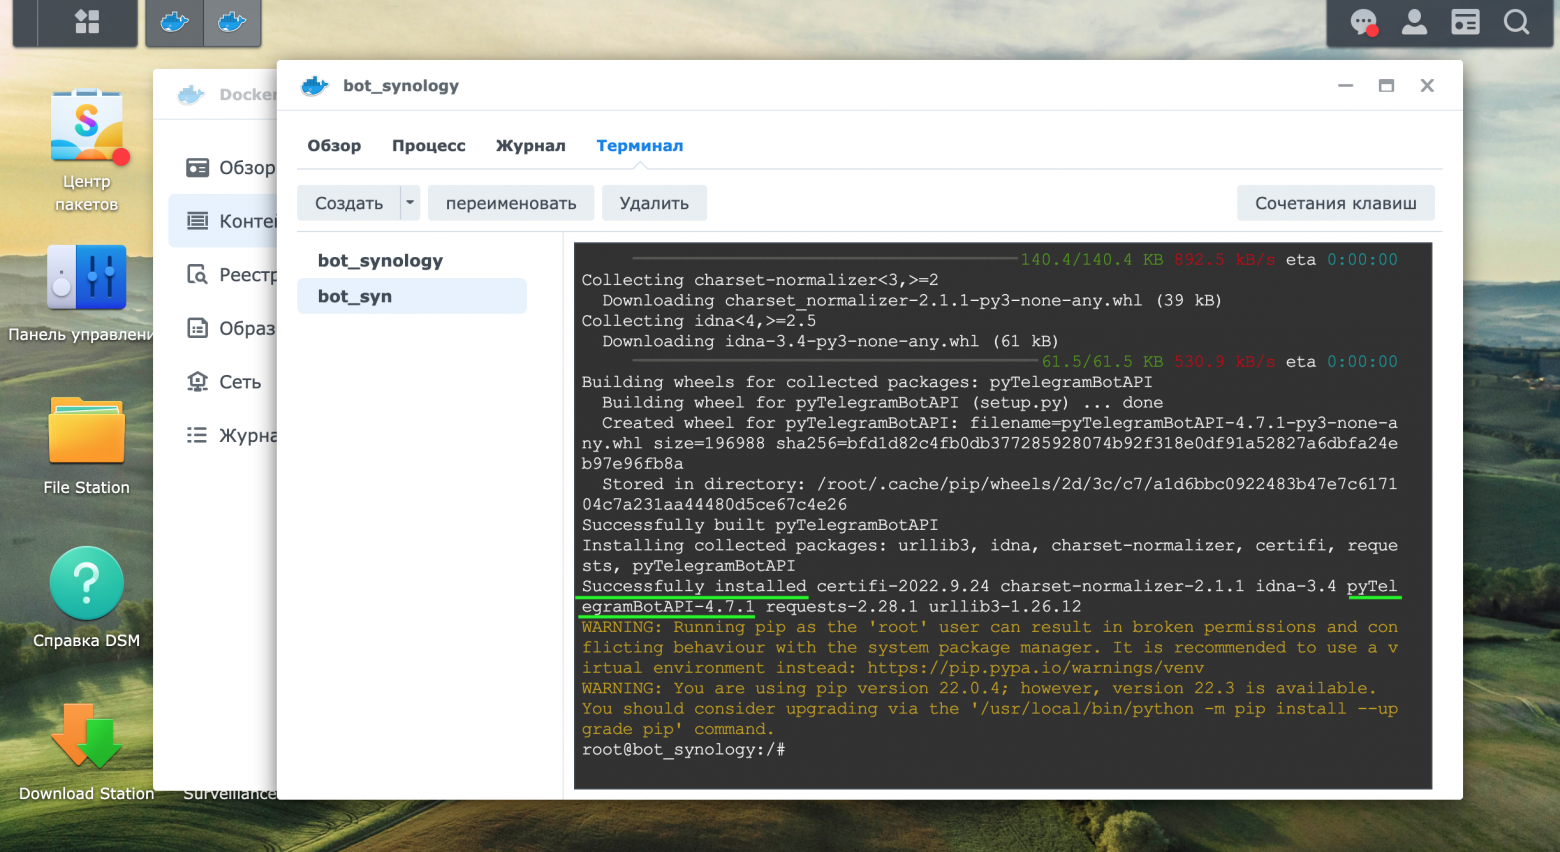
Установим модуль pyTelegramBotAPI в Контейнере через команду «pip install pyTelergamBotAPI». Об успешном выполнении команды будет выведена информация, представленная на скриншоте ниже.
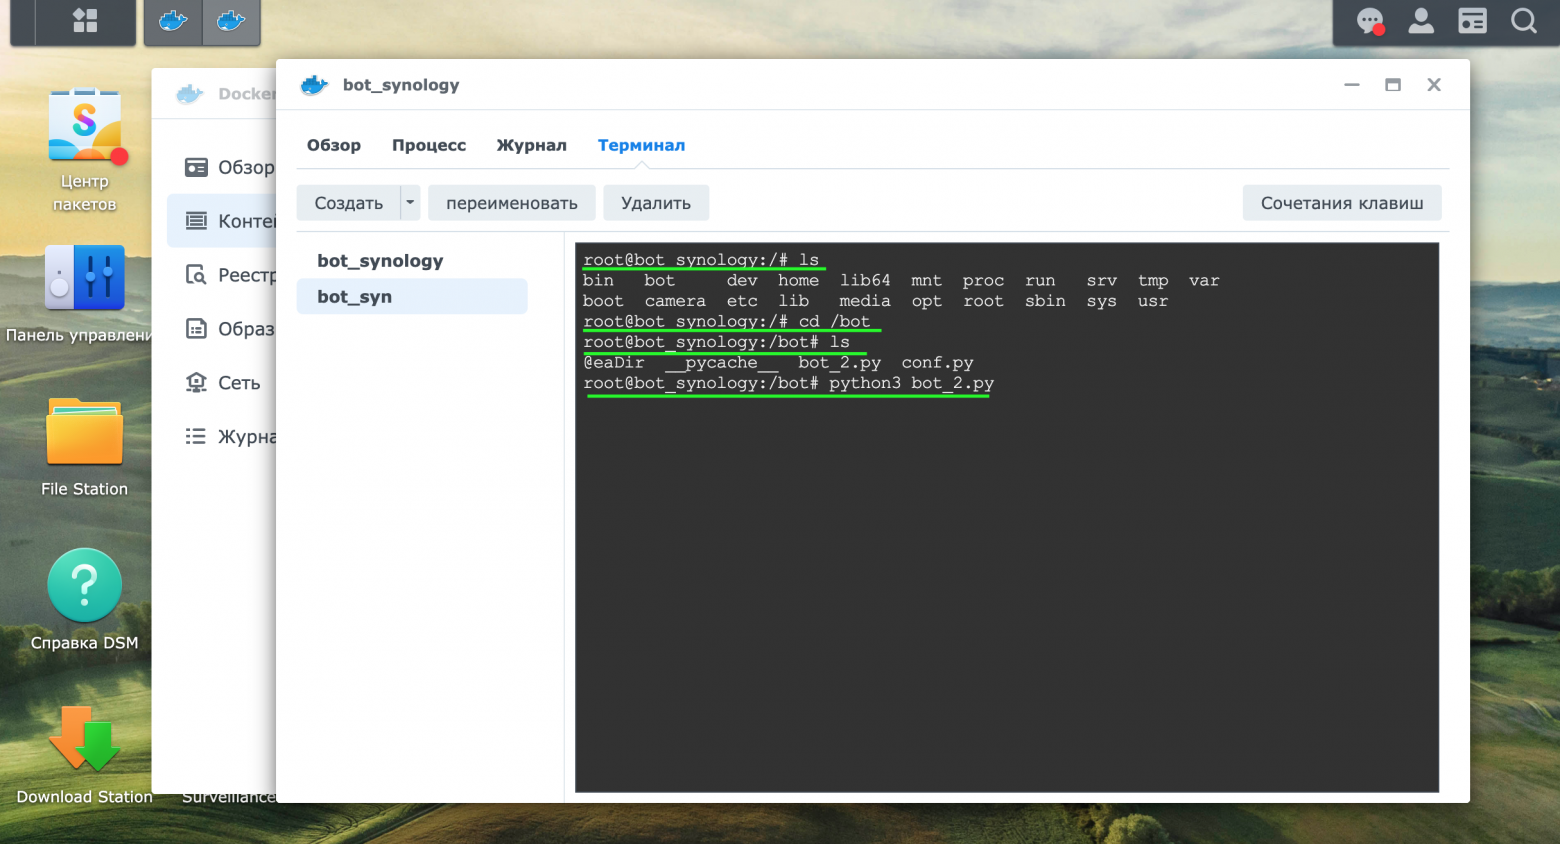
Осуществим запуск телеграмм-бота, через панель управления Контейнером. Зайдем в раздел Терминал и с помощью команды ls увидим папки, в том числе добавленные ранее папки bot и camera.
С помощью команды «cd /bot» перейдем в папку.
Просмотрим имеющиеся файлы в паке bot через команду ls. В папке находится два файла bot_2.py и conf.py, которые мы создали ранее.
Через команду «python3 bot_2.py» осуществим запуск телеграмм-бота.
Рассмотрим работу бота.
Отправим команду /start
Получим ответ с основным командами бота
Команда /sec – отображает текущее состояние охраны
Команда /sec_on – включает режим охраны
Команда /sec_off – выключает режим охраны
Команда /photo – делает фотографию с камеры и присылает в чат с ботом для оперативного просмотра информации от камеры.
Подводя итог констатируем, что задача по управлению Станцией видеонаблюдения, находящейся внутри сети без подключения к ней через VPN, с помощью телеграмм-бота решена. Недостатком данного решения является то, что изменение режима охраны происходит на всех камерах, что негативно скажется на охранной функции, если камеры установлены на разных объектах.
В будущих статьях возможно описать получений уведомлений о срабатывании датчика движения с камеры с отправкой фотографий через Телеграмм, а также управлением режимом охраны каждой конкретной камеры.
Список использованных источников
-
Инструкция по WebAPI Synology Surveillance
-
Статья Python + Telegram
You can find the documents and files regarding the operating system, packages, desktop utilities and so on for your Synology product to enjoy the latest and versatile features.
Please select the product category and the corresponding model you use.
Contact Us
Get help on technical issues and questions.
-
Learn More
Security
See how Synology strives to provide a safer and more secure environment.
-
Security Advisory
Spare Parts
Find replacement parts for your Synology products here.
-
Learn More
By Shittu Olumide
Python is a versatile and widely used programming language known for its simplicity and readability.
With its ever-evolving nature, different versions of Python are often released, each offering new features, enhancements, and bug fixes.
As a Python developer, it is crucial to be aware of the Python version you are using, as it determines the compatibility of libraries, syntax, and functionalities.
In this article, we will explore various methods to check the Python version installed on your system. Whether you are a beginner starting your Python journey or an experienced developer working on a project, knowing your Python version is the first step towards ensuring smooth execution and compatibility.
We will dive into the command-line approaches to determine the Python version. By the end of this article, you will be equipped with the knowledge to effortlessly check your Python version and make informed decisions regarding the tools and libraries you can utilize.
To check the Python version on a Mac, you can follow these steps:
Open the Terminal application on your Mac:
You can find the terminal by navigating to «Applications» -> «Utilities» -> «Terminal«, or by using Spotlight search (Cmd + Space) and typing «Terminal«.
Once the Terminal is open, you will see a command prompt where you can enter commands. Type the following command and press Enter:
python --version
This command will display the Python version installed on your Mac. For example, if you have Python 3.9.2 installed, it will display something like:
Python 3.9.2
The version number will vary depending on the specific Python installation on your system.
Alternative methods for Mac
If the python --version command does not work, try using the python3 command instead. Python 3 is the latest major version of Python, and some systems have both Python 2 and Python 3 installed.
To check the Python 3 version, enter the following command and press Enter:
python3 --version
This command will display the Python 3 version installed on your Mac.
Another way to check the Python version is by using the sys module within the Python interpreter. In the Terminal, type the following command and press Enter to start the Python interpreter:
python
This will launch the Python interpreter, and you will see a new prompt (>>>) indicating that you can enter Python commands.
Within the Python interpreter, type the following command and press Enter:
import sys
print(sys.version)
This will print the detailed Python version information, including the version number and additional details such as the build number and the date of the Python installation.
After checking the Python version, you can exit the Python interpreter by typing exit() and pressing Enter, or by pressing Ctrl + Z followed by Enter.
By following these steps, you will be able to check the Python version installed on your Mac using the Terminal application.
How to Check Python Version in Windows
To check the Python version on a Windows operating system, you can follow these detailed steps:
Open the Command Prompt:
- Press the Windows key on your keyboard.
- Type «cmd» (without quotes) in the search bar.
- Click on the «Command Prompt» app from the search results. This will open the Command Prompt window.
Check if Python is installed:
In the Command Prompt window, type the following command and press Enter:
python --version
If Python is installed on your system, it will display the version number. For example, «Python 3.9.2«.
If Python is not installed, you will see an error message stating that the command is not recognized. In this case, you need to install Python before proceeding.
Verify the Python installation location (optional):
In the Command Prompt, type the following command and press Enter:
where python
This command will display the path of the Python executable file. By default, Python is installed in the «C:\PythonXX» directory, where «XX» represents the version number.
If the command doesn’t return any result, it means Python is not installed or not added to the system’s PATH environment variable.
Check the Python version using the Python interpreter:
In the Command Prompt, type the following command and press Enter:
python
This will launch the Python interpreter, displaying the Python version information at the top. For example, «Python 3.9.2 (tags/v3.9.2:1a79785, Feb 22 2021, 12:26:58)«.
To exit the Python interpreter, you can type exit() and press Enter.
Check the Python version using IDLE (optional):
IDLE is an integrated development environment that comes bundled with Python.
In the Command Prompt, type the following command and press Enter:
idle
This will launch the IDLE Python Shell, which will display the Python version information at the top. For example, «Python 3.9.2 (tags/v3.9.2:1a79785, Feb 22 2021, 12:26:58)«.
To exit the IDLE Python Shell, you can go to the «File» menu and choose «Exit» or simply close the window.
By following these steps, you can easily check the Python version installed on your Windows system using the Command Prompt or Python interpreter.
How to Check Python Version in Linux
Open a terminal:
Launch the terminal application on your Linux system. You can typically find it in the applications menu or by using a keyboard shortcut such as Ctrl+Alt+T.
In the terminal, type the following command and press Enter:
python --version
This command will display the Python version installed on your system.
Note: Some Linux distributions, such as Ubuntu, may have both Python 2 and Python 3 installed. In that case, the above command may display the version of Python 2. To check the version of Python 3, you can use the following command:
python3 --version
Check the output:
After executing the command, the terminal will display the Python version installed on your system. It will typically be in the format «Python x.y.z», where x, y, and z represent the major, minor, and micro versions respectively.
For example, the output might be:
Python  3.9.2


This means Python version 3.9.2 is installed on your Linux system.

### Verify the installation:

To verify that the Python version displayed is correct, you can also enter the Python interactive shell by typing the following command and pressing Enter:

```bash
python
This will open the Python shell, where you can interactively execute Python commands.
Check the version from the Python shell:
In the Python shell, you can confirm the version by typing the following command and pressing Enter:
import sys
print(sys.version)
The output will display detailed information about the Python version, including the version number, build information, and additional details.
Exit the Python shell
To exit the Python shell, you can type exit() or press Ctrl+D.
By following these steps, you can easily check the Python version installed on your Linux system.
Conclusion
By following the instructions provided in this article, you can easily check your Python version whether you use Mac, Windows, or Linux. This will help you write your Python programs confidently.
Remember to consult the relevant documentation or community resources if you encounter any issues or if you are using non-standard Python distributions or virtual environments.
As Python continues to evolve, staying updated with the installed Python version becomes increasingly important. This knowledge lets you to take advantage of new features and improvements introduced in newer Python releases while ensuring compatibility with existing codebases.
Let’s connect on Twitter and on LinkedIn. You can also subscribe to my YouTube channel.
Happy Coding!
Learn to code for free. freeCodeCamp’s open source curriculum has helped more than 40,000 people get jobs as developers. Get started