
Article: 100008039
Last Published: 2022-11-02
Ratings: 3 4
Problem
This article provides instructions for installing the Backup Exec Agent for Windows on a remote machine.
The Remote Agent for Windows Servers (RAWS) has been renamed to Agent for Windows (AWS) in Backup Exec 15 and above.
Error Message
UMI Code: V-225-285
Solution
Click on the desired method to see the installation instructions for the Agent for Windows Systems (AWS):
Automated (Push) Installation (to be performed from the Backup Exec media server).
Local (manual) installation (to be performed on each remote machine).
In Backup Exec, it is possible to install the Agent for Windows locally with a Graphical User Interface (GUI).
Silent (command line) installation (to be performed on each remote machine).
Command line scripts setupaa.cmd (OS 32-bit) and setupaax64.cmd (OS 64-bit) for a command line installation.
Automated (Push) Installation of Backup Exec Agent for Windows
There are two methods to perform an Automated (Push) installation of the Agent for Windows:
From the Backup and Restore tab (recommended):
- Open the Backup Exec console — go to the Backup and Restore tab.
- Select Add (from the ribbon menu) — select Microsoft Windows computer — click Next.
- Select ‘Allow Backup Exec to establish a trust with the servers.’ — click Next.
- Browse / Add a server name(s) — then click Next.
- Select/Add a System logon account — click Next.
- Select «Upgrade the Veritas Backup Exec Agent for windows to the current version automatically» (if Agent for Windows is not installed/up to date).
Note: ‘Restart the remote computer automatically after installing the Veritas Backup Exec Agent for Windows when a restart is required’ should only be selected if down time has been planned or is not problematic for the target server(s).
- Click Install to begin setup.
- Click Finish to complete the installation..
By clicking on the Backup Exec button:
- Open the Backup Exec console on the media server.
- Click on the round Backup Exec button which is located to the left of the Home tab.
- Go to Installation and Licensing — select Install Agents and Backup Exec Servers on Other Servers.
- On the Remote Computers section — select Add
- Choose Add a Single Computer (if remote agent needs to be installed on only one machine).
OR
- Choose Add Multiple Computers with the Same Settings (to select multiple servers for remote agent installation).
Note: The box Save the server list for future remote install sessions enables the names of all of the remote computers and their credentials to be added automatically the next time Backup Exec or any of its options need to be installed to these remote computers.
- Choose Add a Single Computer (if remote agent needs to be installed on only one machine).
- On the Select the Remote Product screen — select Agent for Windows and click Next.
- On the Add Single Computer / Choose Remote Computers screen:
- When selecting Add a Single Computer:
- Enter the Remote Computer name / select Browse Remote Computers to select a remote machine.
- Enter the Remote computer credentials (type the user name and password of an account that has administrative rights on the server).
- Click Next.
OR
- Enter the Remote Computer name / select Browse Remote Computers to select a remote machine.
- When Selecting Add Multiple Computers with the Same Settings
- Enter the Remote computer name / Browse to select a remote computer — click on Add to List
NOTE: Repeat the above steps to select multiple servers for remote agent installation.
- Enter the Remote Install Credentials (type the user name and password of the account that has administrative rights on the servers).
- Click Next.
- Enter the Remote computer name / Browse to select a remote computer — click on Add to List
- When selecting Add a Single Computer:
- The destination location for Remote Agent install files can be changed under the Destination Folder section if required.
- On the Remote Agent Publishing screen:
- Check the box which says ‘Enable remote agent to publish the IP address and name of the remote computer and the version of the Remote Agent to media server’.
- Click Add and enter the Media Server name or IP address (or both) and press OK.
- Click Next.
- Check the box which says ‘Enable remote agent to publish the IP address and name of the remote computer and the version of the Remote Agent to media server’.
- Click Next when the screen shows Ready to install the Agent for Windows beside the server name(s).
- Click Install to begin the installation.
- Wait for the installation to complete and click Finish.
- An SSL trust relationship will need to be established after a manual installation of the Agent for Windows. This is explained in the following article:
How to establish trust for remote servers in Backup Exec 15 and above
Click here to go back to the top of this article.
Local (manual) installation using the GUI method
When automated (push) installation of the AWS fails it may be necessary to perform a local installation.
Listed below are two methods to perform a Local (manual) installation of Agent for Windows:
Using the RAWS32/RAWSX64 folder located on Backup Exec media server (recommended):
- Copy the Agents folder which includes the «RAWS32 or RAWSX64″, DotNetFx, VCRedist, and MSXML (if it exists) folders, from the Media Server to a drive on a remote computer.
NOTE: The default path for the above mentioned folder is ‘X:\Program Files\Symantec\Backup Exec\Agents’ or ‘X:\Program Files\Veritas\Backup Exec\Agents» (‘X’ is the drive letter where Backup Exec is installed.)
For Remote Agent installation on:
- 32-bit system: Use the RAWS32 folder.
- 64-bit system: Use the RAWSX64 folder.
- Go to the remote computer and open the RAWS32 or RAWSX64 directory which was copied from the media server.
- Run Setup.exe
Note: It is also recommended to right-click on the Setup.exe file and select ‘Run as Administrator‘ to avoid any access issues during the installation process. Turn off User Access Control (UAC) for Windows 2008, Vista or 7. - Click Next on the Welcome screen.
- Select Local Install and click Next.
- Select ‘Agent for Windows’ — click Next.
Note: The destination location for the Remote Agent install files can be changed if desired by clicking on the ‘Change’ button.
- On the Remote Agent publishing screen:
- Check the box which says ‘Enable remote agent to publish the IP address and name of the remote computer and the version of the Remote Agent to media server’.
- Click Add and enter the Media Server name or IP address (or both) and press OK.
- Click Next.
- Check the box which says ‘Enable remote agent to publish the IP address and name of the remote computer and the version of the Remote Agent to media server’.
- Click Install to begin the installation.
- Wait for the Installation to complete and click Finish.
- An SSL trust will need to be established after a manual installation of Agent for Windows. This is explained in the article below:
How to establish trust for remote servers in Backup Exec 15 and above
Click here to go back to top.
Silent (command line) Installation
- Copy the Agents folder from the Backup Exec media server’s installation folder (by default located in C:\Program Files\Symantec\Backup Exec\Agents on the media server or C:/Program Files/Veritas/Backup Exec/Agents) to the root of the C: drive on the remote server. Verify it contains the folders «RAWS32 or RAWSX64″, DotNetFx, VCRedist, and MSXML (if it exists). To perform the steps below, you will be using these following folders:
- RAWS32: For a 32-bit (x86) Windows System.
- RAWSX64: For a 64-bit Windows System.
- On the remote server, go to the command prompt (click Start — Run — cmd):
- Browse to the RAWS folder which was copied on the local drive using DOS commands.
- In the command prompt window type setupaa.cmd (for 32-bit OS) or setupaax64.cmd (for 64-bit OS) and press enter to install Agent for Windows.
Note: Installation of AOFO is no longer required. If the operating system is Windows Server 2003 or above, it will use the Microsoft VSS provider for the Advanced Open File Option.
OR
- Browse to the RAWS folder which was copied on the local drive using DOS commands.
- On the remote server, open the RAWS folder which was copied on the local drive:
- Double-click on setupaa.cmd (for 32-bit OS) or setupaax64.cmd (for 64-bit OS) to install Agent for Windows.
Note: On Windows Server 2008, Windows Vista or Windows 7, right-click on Setupaa.cmd and select Run as administrator.
Installation of AOFO is no longer required. If the operating system is Windows Server 2003 or above, it will use the Microsoft VSS provider for the Advanced Option File Option.
- The command prompt will appear blank for a period between a few seconds and a couple of minutes while the remote agent installs.
- Once completed, the command prompt cursor will appear awaiting further input.
- To check if the Agent for Windows was installed: Go to the Windows services console (Start — Run — Services.msc), and see if the Backup Exec Remote Agent for Windows service is present and started.
- An SSL trust will need to be established after a manual installation of the Agent for Windows. This is explained in the article below:
How to establish trust for remote servers in Backup Exec 15 and above
- To check if the Agent for Windows was installed: Go to the Windows services console (Start — Run — Services.msc), and see if the Backup Exec Remote Agent for Windows service is present and started.
- Double-click on setupaa.cmd (for 32-bit OS) or setupaax64.cmd (for 64-bit OS) to install Agent for Windows.
Click here to go back to top.
How to install Backup Exec Remote Agent for Windows
How to install Backup Exec Remote Agent for Windows Servers (RAWS) and/or Advanced Open File Option (AOFO) for Backup Exec 11d — 2010 R3.
We can install BE Agent in 3 way. Please follow the below instructions on how to install Backup Exec Remote Agent for Windows System (RAWS):
1. Automated (push) Installation. (to be performed from the Backup Exec media server)
2. Local (manual) installation. (to be performed on the remote machine)
3. Silent (command line) installation. (to be performed on the remote machine)
1. Automated (Push) Installation of RAWS:
- On the media server, open the Backup Exec console.
- Go to Tools — Install Agents & Media Servers on Other Servers
Note:
For Backup Exec 11d / 10.x go to Tools — Install Remote Agents.
- On the ‘Remote Install’ / ‘Remote Server’ section perform one of the following to add remote servers:
- For Backup Exec 11d — 12.5:
- Right-click Windows Remote Agents and select Add Remote computer
- Click on the drop down menu under Add
OR
- For Backup Exec 2010 / 2010 R2 / 2010 R3
- Choose Add a Single Server (If Remote Agent needs to be installed on only one server)
- Choose Add Multiple Servers with the Same Settings (To select multiple servers for Remote Agent Installation)
Note: The Box Save the server list for future remote installation sessions enables the names of all the remote computers and their credentials to be added automatically the next time Backup Exec or any of its options need to be installed to these remote computers.
- From the Select the Remote Product under Choose the Product to Install: Select Remote Agent for Windows Systems
- On the Choose Remote Server(s) screen:
- When selecting Add a Single Server:
- Enter the Remote Server Name
- Enter the Remote Install Credentials (type the user name and password of the account that has administrative rights on Server)
OR
- When selecting Add Multiple Servers with the Same Settings
- Enter the Remote Server Name
- Click Add to List
Note: Repeat above two steps to add multiple servers - Enter Remote Install Credentials (type the user name and password of the account that has administrative rights on all the Servers).
- Check the box for ‘Remote Agent for Windows Systems‘ and/or ‘Advanced Open File Option‘.
Note:
- Installation of an Advanced Open File Option may require a reboot to finish the installation.
- The destination location for Remote Agent install files can be changed if required.
- AOFO installation is not applicable for Windows Server 2008, Windows Vista or Windows 7.
- On the Remote Agent publishing screen:
- Check the box which says ‘Enable remote agent to publish the IP address and name of the remote computer and the version of the Remote Agent to media server‘
- Click Add and enter the Media Server name or IP address (or both) and press OK.
- Click Next.
- Click Next when the screen shows Ready to install the Remote Agent for Windows Systemsbeside the server name(s)
- Click Install to begin the installation.
- Wait for the installation to complete and click Finish
IMPORTANT:
For Backup Exec 2010 R3, a SSL trust will need to be established after a manual install of Remote Agent. This can be done by following instructions on the below technote:How To Enable and Troubleshoot SSL Certificates in Backup Exec 2010 R3 — www.symantec.com/docs/TECH158716
2. Local (manual) installation of RAWS:
When automated (push) installation of the RAWS fails it may be necessary to perform a local installation.
A local (manual) installation of the Remote Agent for Windows Systems (RAWS) and Advanced Open File Option (AOFO) can be performed by following the steps below:
- Copy the RAWS32 or RAWSX64 and MSXML (for Backup Exec 2010 / 2010 R2 / 2010 R3) folder(s) from the Media Server to the remote computers local drive.
Note: - The default path for the above mentioned folders is ‘X:\Program Files\Symantec\Backup Exec\Agents‘ (‘X’ is the drive letter where Backup Exec is installed)
- For Remote Agent installation on:
- 32-bit system: Copy the RAWS32 folder.
- 64-bit system: Copy the RAWSX64 folder.
- Go to the remote computer and open the RAWS32 or RAWSX64 directory which is copied on the remote server.
- Double-click on Setup.exe file.
Note: - Turn off User Access Control (UAC) for Windows 2008, Vista or 7.
- It is recommended to right-click on Setup.exe file and select ‘Run as Administrator’ to avoid any access issues during the installation process.
- Click Next on the Welcome screen.
- Select Local Install and click Next.
- Check the box for ‘Remote Agent for Windows Systems‘ and/or ‘Advanced Open File Option
Note:
- Installation of an Advanced Open File Option may require a reboot to finish the installation.
- AOFO installation is not applicable for Windows Server 2008, Windows Vista or Windows 7.
- The destination location for Remote Agent install files can be changed if required by clicking on the ‘Change‘ button.
- On the Remote Agent publishing screen:
- Check the box which says ‘Enable remote agent to publish the IP address and name of the remote computer and the version of the Remote Agent to media server‘
- Click Add and Enter the Media Server name or IP address (or both) and press OK.
- Click Next.

- Click Install to begin the installation.
- Wait for the Installation to complete and Click Finish.

IMPORTANT:
For Backup Exec 2010 R3, a SSL trust will need to be established after a manual install of Remote Agent. This can be done by following instructions on the below technote:How To Enable and Troubleshoot SSL Certificates in Backup Exec 2010 R3 — www.symantec.com/docs/TECH158716
3. Silent (command line) installation of RAWS:
To perform a command line install of the RAWS or AOFO on a remote Windows server, follow the instructions given below:
Note: If Backup Exec 10.x (or prior) for Windows 2000/2003 version of the Open File Option (OFO) or the Remote Agent is installed on the remote server, uninstall the OFO and the Remote Agent through Control Panel — Add/Remove Programs, and then reboot the server to continue.
- Copy one of the following sub-folders from the Backup Exec media server’s installation folder (by default located in C:\Program Files\Symantec\Backup Exec\) to the root of the C: drive on the remote server.
- RAWS32: For a 32-bit (x86) Windows System.
- RAWSX64: For a 64-bit Windows System.
- RAWSIA64: For a 64-bit Windows System for Itanium Processors. (Does not apply to Backup Exec 12.5 and above)
- On the remote server, go to the command prompt (click Start — Run — cmd) :
- Browse to the RAWS folder which was copied on the local drive using DOS commands.
- In the command prompt window type setupaa.cmd (for 32-bit OS) or setupaax64.cmd(for 64-bit OS) and press enter to install RAWS only.
OR - Type setupaofo.cmd to install AOFO and RAWS together.
Note: - Installation of an Advanced Open File Option may required a reboot to finish the installation.
- AOFO installation is not applicable for Windows Server 2008, Windows Vista or Windows 7.
OR
- On the remote server, open the RAWS folder which was copied on the local drive:
- Double-click on setupaa.cmd (for 32-bit OS) or setupaax64.cmd (for 64-bit OS) to install RAWS only.
- Double-click on setupaofo.cmd to install AOFO and RAWS together.
Note: - AOFO installation is not applicable for Windows Server 2008, Windows Vista or Windows 7.
- On Windows Server 2008, Windows Vista or Windows 7, right-click on Setupaa.cmd and Run as administrator.
- Installation of an Advanced Open File option may require a reboot to finish the installation.
- The command prompt will appear blank between a few seconds and a couple of minutes while the remote agent installs.
- Once completed, the command prompt cursor will appear awaiting further input.
- To check if the RAWS was installed go to the Windows services console (Start — Run — Services.msc), and see if the Backup Exec Remote Agent for Windows Servers service is present and started.
- To check if AOFO is installed:
- Open Computer Management
- Click System Tools — System Information — Software Environment — Drivers.
- Select any driver listed in the right pane and press the «V» key on the keyboard.
- Look for the driver vsp.sys, which is the Volume Snapshot Provider Kernel Driver. This should be started.
IMPORTANT:
For Backup Exec 2010 R3, a SSL trust will need to be established after a manual install of Remote Agent. This can be done by following instructions on the below technote:How To Enable and Troubleshoot SSL Certificates in Backup Exec 2010 R3 — www.symantec.com/docs/TECH158716
Popular posts from this blog
Veeam Guest Agent is not started
Backup Technology: — Veeam Issue: — Veeam job failed with below error message. ——————- VMware Tools are not running. Guest processing skipped. Failed to prepare guest for hot backup. Error: Veeam Guest Agent is not started ——————- Cause :- — VM might be rebooted or down during backup job running. — Veeam run time agent service stuck on VM server. — VSS writers might be in failed status. Solution :- 1. Login to the effected VM and verity the uptime. If the VM is rebooted during backup job running then it will completed successfully in next retry attempt or next run. or 2. If you found any VSS writers are in failed status then reboot the server to resolve VSS writers issue. or 3. If Veeam run time agent service “VeeamVssSupport” stuck or not deleted after the veeam job completed then you need to delete the serv…
VeeamVssSupport Service not found
Backup Technology:- VEEAM Issue: — Backup job failed with below error message. Error: Cannot register management service. Service name: [VeeamVssSupport]. Cannot create service. Machine: [x.x.x.x]. The specified service has been marked for deletion. Code:1072 Cannot create service. Win32 error:The specified service has been marked for deletion. Code: 1072. Error: Cannot register management service. Service name: [VeeamVssSupport]. Cannot create service. Machine: [x.x.x.x]. The specified service has been marked for deletion. Code:1072 Cannot create service. Win32 error:The specified service has been marked for deletion. Code: 1072. Vvv Cause: — The VeeamVssSupport service cannot be installed because it was never uninstalled. It was marked for deletion instead of being deleted. It cannot be removed, but will be removed automatically when the guest OS reboots. Typically this is due to one of the following programs being open at the time the deletion command w…
Veem job Failed to prepare guest for freeze, wait timeout 900 sec
Backup Technology: Veeam Sometimes Veeam backup jobs failed on VM with below error message continuously. Failed to prepare guest for host backup. Error: VSSControl: Failed to prepare guest for freeze, wait timeout 900 sec Error: VSSControl: Failed to prepare guest for freeze, wait timeout 900 sec We need to follow the below steps to resolve the issue. Cause: This issue typically involves a very active transactional application running in the virtual machine, and it is taking longer than expected per the default timeout to freeze the I/O for this application/VM Solution You can change this timeout by modifying the value in the registry of the server where Veeam Backup & Replication is installed as follows: 1. Go to Veeam registry path HKEY_LOCAL_MACHINE\SOFTWARE\VeeaM\Veeam Backup and Replication. 2. Add a DWORD (32-bit) value named VssPreparationT…
1364
.0
Symantec Backup Exec� 12 for Windows Servers
Build
Last Updated: January 11, 2008
Copyright � 2008 Symantec Corporation. All rights reserved. Symantec, the Symantec Logo, and Backup Exec are trademarks or registered trademarks of Symantec Corporation or its affiliates in the U.S. and other countries. Other names may be trademarks of their respective owners.
The Licensed Software and Documentation are deemed to be «commercial computer software� and �commercial computer software documentation� as defined in FAR Sections 12.212 and DFARS Section 227.7202.
This document contains release notes for Backup Exec and contains information that may not be in the Administrator’s Guide. The information in this document is more current than information in the Administrator’s Guide. If information in this file conflicts with the Administrator’s Guide, the information in this file is correct.
For the most current information on Symantec Corporation products and services, please visit our Web site at http://www.symantec.com/. All hyperlinks in Symantec products and documentation lead to English-language
Web sites.
Contents
-
What’s New In Backup Exec 12
-
What’s New In Backup Exec 12 Agents and Options
-
Backup Exec Installation Notes
-
Installation Messages and Tips
-
Features No Longer Supported by Backup Exec
-
Settings Not Migrated when Upgrading Backup Exec
-
Hardware and Driver Notes
-
-
General Backup Exec Notes
-
Backup Exec Utility (BEutility.exe) Notes
-
Cluster-aware Backup Exec Notes
-
Backup Exec
License Assessment Tool -
Backup Exec Agents and Options Notes
-
Exchange Agent Notes
-
Central Admin Server Option (CASO) Notes
-
Intelligent Disaster Recovery (IDR) Option Notes
-
Oracle Agent Notes
-
DB2 Agent Notes
-
Desktop and Laptop Option Notes
-
Remote Agent for Linux or UNIX Servers Notes
-
Remote Agent for Macintosh Systems
-
Advanced Open File Option Notes
-
Advanced Disk-based Backup Option Notes
-
Remote Agent for Windows Systems Notes
-
Enterprise Vault Agent Notes
-
NDMP Option Notes
-
Using_Backup
Exec, CPS,_and_DLO_with_Symantec_Endpoint_Protection
-
Back to top
What’s New in Backup Exec 12
Backup Exec for Windows Servers 12 includes the following new features and capabilities:
Support for Microsoft Windows Server 2008
Lets you do the following:
-
Back up and restore IIS, encrypted volumes, compressed volumes, and terminal services.
-
Back up and restore Active Directory, which includes Read-only domain controllers (RODC), and restartable Active Directory domain services.
-
Protect NTFS for Windows Server 2008.
-
Use the Windows Server 2008 new implementation of Next Generation TCP/IP networking.
-
Support the Windows Limited User Access mode. To comply with Windows security, you may be prompted for Administrator privileges to access some restricted components. This prompting can occur if you are not logged in as the built-in administrator on Windows Vista/Server 2008 when you use the Backup Exec user interface.
-
Use the volumes that run Windows BitLocker Drive Encryption.
Support for the Server Core installation option of Windows Server 2008
Lets you install the Backup Exec Remote Agent for Windows Systems on the Server Core installation for backup and restore operations. The Remote Agent also installs the Remote Agent Utility command line applet. This applet lets you monitor Backup Exec operations on the remote computer.
You cannot install Backup Exec media servers on Server Core computers.
The following Backup Exec Agents are not supported on a Server Core installation:
-
Agent for Microsoft Exchange Server
-
Agent for Microsoft SharePoint
-
Agent for Microsoft SQL Server
VSS snapshot availability for Windows Vista/Server 2008 volumes
Performs a VSS snapshot backup, by default, for volume resource data on Windows Vista/Server 2008 computers. You are not required to configure the snapshot
for the Advanced Open File Option (AOFO).
Support for Microsoft Virtual Server
Backs up Virtual Server data by using Microsoft�s Volume Shadow Copy Service (VSS). Backup Exec takes a snapshot of the Virtual Server Host while applications and services run. The host in turn takes snapshots of all the guest virtual machines it contains.
Support for the T10 hardware encryption standard
Provides additional options to secure your data.
Support for hardware failure trending
Provides a new report named Media Errors. You can use this report to detect a failing tape or tape device.
Support for larger block sizes for select tape devices
Provides the ability to choose a block size that is larger than 64K for select tape devices. This support may increase performance in the devices that are designed to support this capability.
Evaluate options after installing Backup Exec
You can add license keys or evaluate Backup Exec agents and
options at any time after the core product has been licensed. Each agent and
option has its own independent evaluation period.
You can also view which agents and options are available for evaluation and how much time is left in each individual evaluation period.
Integration with Symantec Endpoint Protection
Lets Symantec Endpoint Protection users monitor the Security Summary in the Backup Exec Job Monitor. You can configure Backup Exec to automatically back up important data when the Symantec ThreatCon level is elevated.
Link to the Symantec Technical Support Web site from alerts
Provides access to the technical notes that are related to alerts. A Unique Message Identifier (UMI) code, which is a hyperlink to the Symantec Technical Support Web site, appears on some alerts.
History of operations on each media
Enables additional device and media audit log categories by default. The Device and Media audit log lists operations that have been applied to a piece of media. This information can help you to understand how Backup Exec operations have affected a particular piece of media. It can also help you to track and maintain your media.
The following Device and Media audit log categories are enabled:
-
Delete Media
-
Erase Media (Long)
-
Erase Media (Quick)
-
Format Media
-
Format Media (WORM)
-
Label Media
-
Move Media
-
Overwrite Media
-
Media Set
Improved Calendar view
Provides the following features through the Calendar tab on the Job Monitor:
-
The month and week views list job counts and job instances. You can see at a glance what the scheduled work load may be for any day.
-
The day view provides a graphical view of the scheduled work load, and lists jobs for that day in chronological order.
-
A preview pane provides more information for each job. This information includes the final status, the rate and byte count for job histories, and when the next run of a scheduled job occurs.
Alert to renew your Backup Exec support and software maintenance contract
Sends an alert to remind you to renew your Backup Exec support contracts, which provide technical support and upgrade assurance, before the contracts expire.
If your support contracts expire, your entitlement to phone support also expires. Automatic upgrades of software versions are no longer sent automatically for the products that protect your critical business information.
Backup Exec License Assessment Tool
Helps you determine if you have sufficient licenses for your Backup Exec configuration. The License Assessment Tool creates a report that lets you compare the number of resources with the number of license keys.
Advanced Open File Option (AOFO) and Intelligent Disaster Recovery Option (IDR)
The Advanced Open File Option (AOFO) and Intelligent Disaster Recovery Option (IDR) are now included in the core version of Backup Exec and the Remote Agent for Windows Systems. You do not need separate license keys for AOFO and IDR. You can disregard the topics in the Administrator�s Guide that reference license keys for AOFO and IDR. After you install AOFO, restart the computer.
Back to top
What’s New in Backup Exec 12 Agents and Options
Backup Exec 12 agents and options include the following new features and capabilities:
Backup Exec Agent for Enterprise Vault
Backup Exec 12 includes a new agent for Enterprise Vault. The Backup Exec Agent for Enterprise Vault provides robust data protection for key Enterprise Vault items such as sites, servers, databases, indexes, and vault partitions. The Enterprise Vault Agent can help provide a disaster recovery solution for Enterprise Vault archived data. Recovery of the archived data is not dependent on the archive source, such as Exchange Server or a specific file system. The Enterprise Vault Agent supports Symantec Enterprise Vault versions 7.0 SP1 and later with service packs as applicable.
Advanced Disk-based Backup Option Enhancements
You can enable the Backup Exec Granular Recovery Technology (GRT) option for offhost backups of Exchange resources. When you select the GRT option for a backup, Backup Exec collects additional information for the catalog. This information lets you restore individual mailboxes, mail messages, and public folders from Information Store backups.
Desktop and Laptop Option Enhancements
Support for Microsoft Windows Server 2008 lets you do the following:
-
Install the DLO Administration Console on a computer that runs Microsoft Windows Server 2008. In addition, the following services can run on a computer where Windows Server 2008 is installed:
-
DLO Administration Server
-
DLO Maintenance Server
-
Support for Microsoft Windows Vista lets you do the following:
-
Install both the Desktop Agent and the Change Log Service on a computer that runs Microsoft Windows Vista.
-
Run the DLO Administration Console on a computer that meets the following criteria:
-
Runs Microsoft Windows Vista
-
Runs the Backup Exec Remote Administration Console
Then, you can use the DLO Administration Console to connect to a Backup Exec and DLO media server.
-
New pre-defined folders for backup selections accommodates the following folders in the Windows Vista Backup Selections dialog box:
-
Pictures
-
Music
-
Video
Back to top
Backup Exec Installation Notes
Installation Messages and Tips
The following notes provide information about installing Backup Exec 12:
-
You can install the Backup Exec database to an instance of
SQL Server through the Windows 2008 Firewall. However, you must add the
SQLBrowser.exe file name to the Windows 2008 Firewall exceptions list before
you begin the Backup Exec installation.
The SQLBrowser.exe can be found in the following path:C:\Program Files\Microsoft SQL Server\90\Shared\sqlbrowser.exe.Note: You may have a different installation path depending on where you installed SQL Server 2005. Ensure that you start the SQL Browser service on the SQL Server computer, and that the service startup type is set to Automatic.
-
Backup Exec now includes a license key or keys that you
must enter on the Enter License Keys pane during the Backup Exec
installation. To purchase additional agents and options, go to the following
URL:http://www.symantecstore.com/backupsmb
If you upgrade to Backup Exec 12, you must register
serial numbers with Symantec to receive license keys. To register serial
numbers, go to the following URL:https://licensing.symantec.com/
-
During the Backup Exec installation, on the Enter License Keys pane, you can click a link to purchase Backup Exec or additional agents and options. If you cannot click this link
using a mouse or you cannot access it using a keyboard, you can access these Web sites
from a different computer. -
If you run Backup Exec 12 on a media server that runs Windows XP and you upgrade the operating system to Windows Vista, you must uninstall Backup Exec. Backup Exec does not support media servers on Windows Vista.
-
Windows Resource Protection (WRP) prevents backup and restore jobs from functioning normally on computers that run Windows Vista. Although Backup Exec can complete backup and restore jobs, your performance may suffer. Refer to the following Microsoft article for more information and to obtain a hotfix that will resolve this issue:
http://support.microsoft.com/kb/935606.
Because WRP affects the Windows Installer, you should install the hotfix prior to installing Backup Exec agents or options on a computer that runs Windows Vista.
-
To push-install Backup Exec or its options to a computer that runs Windows Vista/Server 2008, you must enable File and Printer Sharing and Windows Management Instrumentation (WMI) on the Windows Firewall Exceptions list. If you install RAWS on a Windows Vista/Server 2008 computer, you can use an Active Directory installation or use the Backup Exec installation CD to perform a local install. If you use either of these installation methods, you do not need to enable File and Printer Sharing and Windows Management Instrumentation (WMI) on the Windows Firewall Exceptions list.
For more information, refer to your Microsoft Windows documentation.
-
To push-install Backup Exec or its options to a computer that runs Windows XP Pro SP2/Server 2003 SP1, you must enable File and Printer Sharing on the Windows Firewall Exceptions list and enable the «Allow remote administration exception» group policy.
For more information, refer to your Microsoft Windows documentation.
-
Symantec recommends that to install RAWS on a Windows Vista/Server 2008 computer, use an Active Directory installation or use the Backup Exec installation CD to perform a local install. If you use either of these installation methods, you do not need to enable File and Printer Sharing and Windows Management Instrumentation (WMI) on the Windows Firewall Exceptions list
for the push-installation. -
If you install Backup Exec on a Windows Server 2008 Read-only domain controller (RODC), you cannot install or use SQL Express/2005 on the RODC. You must select a SQL instance that is on a remote computer.
-
To push-install the following software to a computer that runs Symantec Endpoint Protection (SEP) version 11.0 or later, you must configure SEP to share files and printers. Sharing files and printers is turned off by default.
-
Backup Exec for Windows Servers
-
Remote Agent for Windows Systems
-
Continuous Protection Agent (CPA)
For more information about how to enable SEP to share files and printers, see the Administrator’s Guide for Symantec Endpoint Protection.
-
-
If you install Backup Exec on a Veritas Cluster Server node that runs Microsoft Exchange, that node must be offline at the time of installation. If you keep Exchange online during installation, services do not start properly. If you want to use the SQL Express database that is included with Backup Exec, you must switch the Exchange group to another node or take it offline. Otherwise the installation of SQL Express cannot complete successfully.
-
If installation fails due to a SQL Express installation error, refer to the section about setup issues in the Microsoft SQL Server 2005 Express Edition readme:
http://support.microsoft.com/kb/910229.
-
An error (error code 2) may occur when you install SQL Express in an environment with the following conditions:
-
Active Directory is installed on a computer that is running Windows Server 2008.
-
The computer belongs to a root domain that uses a short domain name such as «first.com».
To avoid this error, install SQL Express to a child domain such as «second.first.com», or use an instance of SQL Server instead of SQL Express.
-
-
If the SQL Server 2000 instance is on the same server that you install Backup Exec on, the service account for the instance must have full permissions to the destination folder where Backup Exec is installed.
-
If you install Storage Foundation for Windows Servers High Availability Administrative Console (SFWSHAAC) components on a central administration server, you must restart the central administration server after the installation completes.
-
If you perform a remote or push-install, and you specify a domain, you must enter an existing Backup Exec service account. New accounts are not granted proper rights for domains. If you are creating a local account, you can specify a new service account.
-
When you install Backup Exec, or when you install tape device drivers from Backup Exec, a Microsoft message may appear that indicates one of the following:
-
The software that you are about to install does not contain a Microsoft digital signature
-
Windows can’t verify the publisher of this driver software
-
The software has not passed Windows Logo testing
Symantec recommends that you choose the response on the Microsoft message dialog box that allows the Symantec driver software to continue being installed.
To prevent this message from appearing, you can change the policy setting. However, if you change the policy setting to ‘silently succeed’, it can allow other driver software to be installed without any warning.
Refer to the following Microsoft article:
http://support.microsoft.com/default.aspx?scid=KB;en-us;298503&
-
-
User-created folders that are in the Backup Exec installation folder or subfolders are deleted when you install Backup Exec 12. If you want to keep the folders, copy them to another location before you install Backup Exec 12. Files that are created with the Create CD option are not removed when Backup Exec is uninstalled. These files can safely be deleted using Windows Explorer.
Back to Top
Features No Longer Supported by Backup Exec
The following features are not supported by Backup Exec 12:
-
Backup Exec Web Administration Console (BEWAC)
-
Backup Exec ServerFree Option
-
ExecView
-
Microsoft Exchange Server 5.5 is no longer supported, but existing jobs for Exchange 5.5 can continue to run
-
Exchange mailbox-level backup (legacy mailbox support) is not supported for Exchange 2007
-
Windows Explorer integration
-
Windows NT 4
-
GRFS Agents, which are the legacy agents that were shipped
at no charge, including the Backup Exec Agent for Oracle Server, the Backup Exec Macintosh Agent, and the Backup Exec Agent for UNIX -
Backup Exec Agent for Microsoft Data Protection Manager
-
Symantec Volume Snapshot Provider (VSP) is not supported on Windows Server 2008
-
Microsoft Removable Storage Manager
-
Backup Exec agents and options are no longer supported on Itanium-based computers with this release of Backup Exec. Continued use of the Itanium Remote Agent for Windows from prior versions is at the user’s own risk. If agents and options that are already installed on Itanium-based computers are used, the Backup Exec’s Intelligent Disaster Recovery option is no longer supported. Note that support for these agents and options will be provided on a best-effort basis only.
Back to Top
Settings Not Migrated when Upgrading Backup Exec
The following settings are not migrated when you upgrade Backup Exec to version 12:
-
Active Directory Application Mode and System State components now appear in the Backup Selections list directly under the computer name that appears under All Resources. They no longer are listed under Shadow Copy Components. As a result, Backup Exec 10d jobs that back up these components are not automatically migrated to new backup jobs when you upgrade to Backup Exec 12. You must manually edit the selection lists that contain these components, delete the existing references to them, and then add them again as new selections.
-
Backup Exec versions 10.5 and earlier stored report images using a proprietary file format native to the Crystal Decisions product, Crystal Reports. You could view these stored images with the Crystal Reports module that was installed with Backup Exec. Report images for Backup Exec versions 11d and later are stored in an XML format that is compatible with Microsoft’s ReportViewer control. The ReportViewer control is included with the .NET framework versions 2.0 and later. Backup Exec versions 11d and later do not support the Crystal Reports format. Any existing report that needs to be saved must be rendered into PDF or another general format and saved independently before you upgrade to version 11d or later.
Back to Top
Hardware and Driver Notes
The compatibility lists contain the latest information about supported and unsupported hardware and software and is updated regularly. Before installing or upgrading Backup Exec, review the current compatibility list to confirm the compatibility of your hardware and software. You can find the current compatibility list on the Symantec Support Web site at:
http://entsupport.symantec.com/menu_ddProduct_BEWNT_view_CL.htm
If you don’t find your hardware or software listed, or if you have questions about the information in the compatibility list, please contact Symantec Support.
Back to top
General Backup Exec Notes
The following notes detail general information about using
Backup Exec 12
-
During startup, Microsoft .NET components that are
included in Backup Exec access the Internet to verify Microsoft�s digital
signatures. If no Internet connection is available, this activity
significantly delays Backup Exec startup.To avoid this delay, you can disable digital signature verification from the
Windows Control Panel. See Microsoft documentation for more information.This procedure turns off verification for all .NET applications. For
security purposes, re-check the �Check for publisher�s certificate
revocation� option when Internet access is restored to the computer. -
You must install Symantec Endpoint Protection Manager (SEPM) on the media server to enable integration features between Backup Exec and SEPM. Additionally, if Internet Explorer’s Trusted sites security level is set to High, you must add the following URL as a trusted site on the IE Security tab:
http://securityresponse.symantec.com/avcenter
When you add the URL, you ensure proper functionality between SEPM and Backup Exec.
-
Symantec Best Practice documents detail the best ways to use Backup Exec in production environments. You can find the Best Practice documents on the Symantec Support Web site at:
http://entsupport.symantec.com/docs/285779.
-
For the Japanese version only: When you use Microsoft Outlook Client 2000 or 2002 to view SMTP email notification messages, the subject line may not appear correctly. Use Microsoft Outlook Client 2003 or Microsoft Outlook Express to view email notification messages.
-
When you browse remote restore selections, you may receive an informational message that the Backup Exec Remote Agent must be installed. This message may appear even though the agent is installed. You can ignore this message. Click OK to safely continue.
-
Running Windows 2003 Service Pack 1 or Windows XP Service Pack 2 results in the following:
-
Remote backup and restores may require manual configuration.
-
When the Remote Agent for Windows or NetWare Systems runs, it automatically creates an exclusion in the Microsoft firewall.
For more information, refer to the following TechNote:
http://entsupport.symantec.com/docs/270139
Additional information can also be found on the Microsoft Web site.
-
-
When protecting a server running Veritas Cluster Server 4.3 by Symantec, and a virtual file share resource is manually failed over or taken offline while backup job preprocessing is occurring, the backup job stops responding.
-
Backup Exec reserves port 3527. For instructions on how to configure Backup Exec to use a port other than 3527, refer to the following TechNote:
http://entsupport.symantec.com/docs/274583
-
When Windows Internet Name Service (WINS) is installed and the WINS data directory (%SystemRoot%\system32\wins) is backed up, non-snapshot backups result in a job status of «Completed with Exceptions».
-
For Windows 2000, this job status is because the wins.mdb (WINS database), winstmp.mdb (temporary), and J50*.log (transaction logs) files are in use. Since WINS cannot be directly protected by a volume backup, you can continue to use the WINS management console in conjunction with a volume backup to protect WINS as documented by Microsoft.
-
For Windows 2003, this job status is because the winstmp.mdb (temporary) file is in use. WINS is protected by the WINS VSS Writer via the Backup Exec Shadow Copy Components resource so the backup error is benign and you can ignore it.
-
-
Data encryption is not supported when you duplicate backup sets that were created with versions of Backup Exec prior to 11d.
-
In Microsoft Windows Vista/Server 2008, the default locations of user data has changed. To ensure backward compatibility with previous Windows platforms, the operating systems create special junctions. These junctions redirect access from one directory to another. For example, %SystemDrive%\Documents and Settings is now a junction that points to %SystemDrive%\Users.
For more information about which directories have changed in Windows Vista/Server 2008, go to the following URL:
http://entsupport.symantec.com/docs/288283
Backup Exec must be able to back up and restore these junctions but it does not need to traverse them to back up the computer. Backup Exec version 11d and later detects the new junctions but does not cross them, even if you select the backup option, Back up files and directories by following junction points.
If you upgrade your operating system to Windows Vista/Server 2008, examine existing selection lists. Change references to old directories to reflect the new directory structure. Doing so helps ensure that your data is backed up correctly.
-
If you upgrade from Backup Exec 11d build 7170.10 or earlier, the upgrade automatically unchecks the Automatically clear alert after X days check box. This option appears in the alert categories LiveUpdate Information and LiveUpdate Warning. Any LiveUpdate information or warning alerts that were generated before you upgraded Backup Exec are retained until you manually clear them. The upgrade also resets all of the options in the LiveUpdate Information or LiveUpdate Warning alert categories to the original Backup Exec defaults.
-
You can run the Backup Exec License Assessment Tool from a command line. You configure the License Assessment Tool’s language in one of three ways:
-
Use a -Lang switch and a base language name parameter to launch the application in the language you specify. You can use any of the following base language name
parameters:Language
Base Language Name Parameter
Chinese (Simplified)
ZH
Chinese (Traditional)
CH
English
EN
French
FR
German
DE
Italian
IT
Japanese
JP
Korean
KO
Spanish
ES
-
Use a -Lang switch without a base language name parameter to prompt a dialog box that lets you select a language for the application.
-
Use the License Assessment Tool executable without a language switch. The application uses the same language as the computer’s operating system.
You must have the proper system fonts installed on a computer for the selected language to display correctly in the Backup Exec License Assessment Tool.
-
-
About Microsoft Distributed File System (DFS) Protection
Microsoft’s Distributed File System (DFS) feature consists of Namespace technology and Replication technology.
Namespace technologies include DFS Namespace (DFSN) for Microsoft Windows 2003 SP1 and newer, and DFS for Microsoft Windows 2003 and older. The Namespace technologies provide a virtual file system view of grouped shared folders from distributed servers.
Replication technologies include DFS Replication (DFSR) for Microsoft Windows 2003 R2 and newer, and File Replication Service (FRS) for Microsoft Windows 2003 and older. The Replication technologies provide scheduled replication, bandwidth throttling, compression, and conflict resolution.
The Microsoft DFS feature requires protection of configuration settings and file system data for which Backup Exec uses different data protection methods.
-
About protecting Distributed File System Namespace Technology Configurations
Standalone DFS or DFSN configurations are protected by a System State Registry backup of the server hosting the DFS root. Domain DFS or DFSN configurations are protected by a System State Registry backup of the target system, and an Active Directory backup of the Domain Controller that hosts the DFS root. In addition, target shares on remote servers must also be protected by a System State Registry backup.
NOTE: Active Directory Granular Restore Technology cannot be used to restore domain DFS or DFSN configurations.
-
About protecting Distributed File System Namespace Technology Data
For configurations that do not use Microsoft replication technologies, the shared data must be protected by performing a file system volume backup of the data on the target server.
For configurations that use Microsoft replication technologies, see the following sections:
-
About protecting Distributed File System Replication Technology Configurations
To protect DFSR and FRS configurations, run a System State Registry and Active Directory backup of the Domain Controller that hosts the replicated data.
IMPORTANT: Active Directory Granular Restore Technology cannot be used to restore DFSR or FRS configurations.
-
About protecting Distributed File System Replication Technology Data
For configurations that use DFSR, you can protect the replicated data by running a Shadow Copy Components Distributed File System Replication backup of the replicated data on any server that is hosting the replicated data.
For configurations that use FRS, you can protect the replicated data by running a file system volume backup of the replicated data on any server that is hosting the replicated data.
-
-
-
When you run an off-host backup of the following versions of Veritas Storage Foundation for Windows (VSFW) that are installed on a 64-bit computer, the error code V-79-57344-34110 appears.
-
Veritas Storage Foundation for Windows version 4.3 with Maintenance Packs 1 or 2
-
To resolve this issue, update your Storage Foundation for Windows software using the following link:
http://entsupport.symantec.com/umi/v-79-57344-34110
-
Backup performance can be seriously degraded if you use LUN
libraries attached to a Windows Server 2008. Instead of a backup rate of
hundreds of MB per minute, you could experience a backup rate of 3 to 4 MB
per minute. To resolve this issue, set the AutoRun registry key associated
with both the tape drive and the associated library to 0 using the following
link:
http://support.microsoft.com/kb/842411
-
You can find detailed information about Backup Exec’s
Microsoft Windows Server Certification status at the following link:
http://entsupport.symantec.com/umi/V-269-11
Back to top
Backup Exec Utility (BEutility.exe) Notes
The following notes detail information about using the Backup Exec Utility (BEutility.exe) with Backup Exec 12:
-
Do not place Backup Exec cluster nodes in the same Media Server Group as the virtual Backup Exec server. If a function is run on a Media Server Group that contains cluster nodes and contains the virtual Backup Exec server, Backup Exec Utility has problems when it tries to modify the virtual Backup Exec server.
-
The operation Move Primary SAN SSO Server moves all SAN SSO secondary servers to a new primary SAN SSO server. The operation then changes the previous primary server to a secondary server of the new primary server.
This operation does not support moving a primary SAN SSO server that has a remote user-defined instance. The BKUPEXEC instance cannot be installed locally on the primary SAN SSO server. In this situation, to move all of the secondary servers to a new primary server, you must do the following:
-
Change all of the secondary servers of the current primary server to standalone media servers. To perform this operation, use the Backup Exec Utility operation Remove Primary SAN SSO Server.
-
Then, change the standalone media servers to secondary servers of the new primary server. Use the Backup Exec Utility operation Set Primary SAN SSO Server.
-
To change the current primary server to a secondary server of the new primary server, do the following:
-
Uninstall Backup Exec on the current primary server.
-
Reinstall Backup Exec.
-
On the current primary server, run the Backup Exec Utility operation Set Primary SAN SSO Server.
-
-
-
The Move Central Administration Server operation moves all managed media servers of the current central administration server to a new central administration server. The operation also changes the current central administration server to a managed media server that belongs to the new central administration server. However, if the new central administration server is also a SAN SSO primary server, then the current central administration server is changed to a SAN SSO secondary server of the new SAN SSO primary server.
This operation does not support moving a central administration server that is also a SAN SSO primary sever if it has a remote user-defined instance. The BKUPEXEC instance cannot be installed locally on the primary SAN SSO server.
In this situation, you must do the following:
-
Change all of the managed media servers that belong to the current central administration server to standalone media servers. To perform this operation, use the Backup Exec Utility operation Remove Primary SAN SSO Server.
-
Then, change the standalone media servers to managed media servers that belong to the new central administration server. Use the Backup Exec Utility operation Set Central Administration Server.
-
To change the current central administration server to a managed media server that belongs to the new central administration server, uninstall Backup Exec on the current administration server. Then reinstall Backup Exec. On the current primary server, run the Backup Exec Utility operation Set Central Administration Server.
-
Back to top
Cluster-aware Backup Exec Notes
The following notes detail information about using cluster-aware Backup Exec 12:
-
Due to a limitation in Windows Server 2008, when you
uncluster Backup Exec and the Desktop and Laptop Option, all file share
resources remain in the cluster. If you want to remove the file share
resources, you must manually delete them. -
When Exchange 2000 or 2003 servers are clustered in an active/active configuration, if the same node controls both virtual Exchange servers, all individual mailboxes from both servers are displayed under the mailbox icon for each virtual server. If both mailbox icons are selected for backup, each mailbox is backed up twice. To display the mailboxes for each server correctly and prevent a redundant mailbox backup, make both virtual Exchange servers active on separate nodes.
-
If a failover occurs during a backup that uses the Incremental — Changed Files — Reset Archive Bit backup method, Backup Exec skips the data that was backed up before the failover when the job is restarted on the failover node. In addition, catalog files are not generated for the data that was backed up before the failover.
To prevent possible loss of data in failover situations, Symantec recommends that you use the Incremental — Using modified time backup method instead of the Incremental — Changed Files — Reset Archive Bit method.
-
When browsing servers, icons for both virtual and non-virtual servers appear identical until an icon for the virtual server is expanded.
-
If you shut down a media server with an active Backup Exec cluster node, other SAN servers may be prevented from accessing SAN libraries and drives. Use the cluster manager to either take the active node offline or move the active node to another node in the cluster before you shut down the media server.
-
To use CASO in a Veritas Cluster Server environment, you must install Veritas Cluster Server Client. Then, manually copy the vcsapi_mt.dll file from «cluster server\bin» on one of the VCS nodes to «cluster manager\vssapi» on the central administration server.
-
If the system drive is a mount point in Veritas Cluster Server, it displays under the virtual server. To back up the system drive, select it under the Virtual Server.
-
If the Backup Exec group contains a clustered SQL Server instance that Backup Exec uses, you must add a dependency to the Backup Exec Device and Media Service.
Do the following:
-
Ensure that the Backup Exec cluster resources are offline. You cannot add the dependency if the resources are online.
-
Open the Cluster Administrator.
-
Right-click the Backup Exec Device and Media Service.
-
Select Modify.
-
Under available resources, select the SQL Server service and add it to the dependencies list.
-
Click OK twice to save the changes.
These steps may vary on clusters on Windows Server 2008.
-
Back to top
Backup Exec
License Assessment Tool
-
Running the License Assessment Tool does not ensure license compliance. For
more information about licenses, contact your reseller, or go to the
following URL:
https://licensing.symantec.com
-
The License Assessment Tool does not support license key scans for some
Backup Exec options. These options may be displayed in the license key scan
report, but the number of license keys for each option is not included.
The following Backup Exec options are not supported for license key scans:
-
Desktop and Laptop Option
-
Central Admin Server Option
-
Advanced Disk-based Option
-
SAN Shared Storage Option
-
Intelligent Disaster Recovery for NetWare Servers
-
Open File Option for NetWare Servers
-
Backup Exec System Recovery
-
Symantec LiveState Recovery
-
Backup Exec Continuous Protection Server
Back to top
Backup Exec Agents and Options Notes
Exchange Agent Notes
Currently, Microsoft does not provide a Microsoft Exchange
Server MAPI Client and Collaboration Data Objects (MAPI/CDO) package for Windows
Server 2008. Therefore, if you enable the Granular Recovery Technology (GRT)
option for an Exchange 2007 server backup, keep in mind the following:
-
You cannot restore individual items to an Exchange 2007
server that runs on Windows Server 2008. -
If the backup media is tape, you cannot browse individual
items from Exchange 2007 servers that run on Windows Server 2008.
When Microsoft provides an updated MAPI/CDO package, these
operations will be supported.
For more information, see the following link:
http://entsupport.symantec.com/umi/V-79-57344-4615
On Windows Small Business Server 2003, the Microsoft Exchange Server 2003 VSS Writer is disabled, which causes snapshot backups for Exchange 2003 to fail. To successfully perform an Exchange 2003 snapshot backup, review the following Microsoft Knowledge Base article:
http://support.microsoft.com/default.aspx?scid=kb;EN-US;Q838183
This issue must be resolved to perform a successful restore job using the Intelligent Disaster Recovery option.
When you install Microsoft Exchange Tools 2007 and Backup Exec
together on a media server, Exchange Tools 2007 must be installed first. If you install Backup Exec before Exchange Tools, you must
restart the media server after you finish the Exchange Tools installation.
To back up a Microsoft Exchange Server 2007 Service Pack 1 CCR
cluster database from the passive node, you must enable remote streaming backup
in the registry on both the active and passive nodes. Refer to the following
topic in the Exchange 2007 SP1 Help file for instructions on how to enable
remote streaming backup:
Using Backup to Back Up and Restore Exchange Data
To back up a CCR cluster database without enabling remote streaming backup,
select the ‘Back up from the active copy only (job fails if not available)’
option from the Microsoft Exchange tabbed page of the backup job or
template properties.
Back to top
Central Admin Server Option (CASO) Notes
The following notes detail information about using Central Admin Server Option (CASO) with Backup Exec 12:
-
In a CASO environment, only NetBIOS computer names are supported for managed media server and central administration server names. You cannot enter fully qualified domain names or IP addresses as server names.
-
If you change the system time on either the managed media server or the central administration server, you must restart the Backup Exec services before Backup Exec can process the time change.
-
If you receive error 1065 «Database specified does not exist» after you install a managed media server and specify a central administration server, the problem is usually caused when UDP traffic is blocked on the network between the central administration server and the managed media server. For more information about using Backup Exec across firewalls, refer to the Central Admin Server Option Appendix, in the Symantec Backup Exec for Windows Servers Administrator’s Guide.
-
When you perform a rolling upgrade in a CASO environment, upgrade the components in the following order:
The central administration server
All of the managed media servers
All of the Remote Agents for Windows Systems
-
To perform a rolling upgrade, all of the managed media servers must be running Backup Exec 11d (build
7170.10) or later. -
You can upgrade the central administration server to Backup Exec 12
without upgrading the Backup Exec version on each managed media server.
However, for communications to continue with the central administration
server, each managed media server must run Backup Exec 11d build 7170.10 or
later. In addition, each computer that you want to back up must run one of the
following versions of the Backup Exec Remote Agent:-
Remote Agent 10d for Windows Systems with hotfix 19 or 24, or service pack 2 or later
-
Remote Agent 11d for Windows Systems
-
Remote Agent 12 for Windows Systems
-
-
During a rolling upgrade, Backup Exec 11d managed media servers cannot back up resources on which the Backup Exec 12 Remote Agent for Windows Systems is installed. Since the central administration server is upgraded with the 12 Remote Agent for Windows Systems, resources on the central administration server cannot be backed up by 11d managed media servers.
-
You must upgrade managed media servers to Backup Exec 11d (build
7170.10 or later) before backup jobs for System State can be delegated to them. -
When you restore an Oracle database in a CASO
environment, you must restore using the managed media server that did the
original database backup. You can select the managed media server that did
the original backup from the Device and Media pane under the Restore Job
Properties page.
Back to top
Intelligent Disaster Recovery (IDR) Option Notes
The following notes detail information about using Intelligent Disaster (IDR) with Backup Exec version 12:
-
On Windows 2000, to avoid issues when using IDR to recover dynamic disks that are managed by Veritas Volume Manager by Symantec or Microsoft’s Logical Disk Manager, create a nonbootable IDR ISO image.
Do the following to create the image:
-
In the Intelligent Disaster Recovery Preparation wizard, select the option Create nonbootable disaster recovery CD image.
-
Burn the .ISO image to a CD.
-
Reinstall the operating system. Install Volume Manager if it was on the computer when the backup for IDR was created.
-
Run the IDR recovery application (bedrwiz.exe) from the SYSTEM32\BKUPEXEC\ directory on the CD.
-
Follow the prompts on the IDR Wizard to complete the recovery.
-
-
When you create IDR CDs and tape images for Windows 2000/XP/2003, you can also enter the path to an existing ISO image file for the operating system that you are protecting. This does not apply to IDR boot images for Windows Vista or later operating systems.
-
The IDR recovery process does not automatically recreate the volumes on dynamic disks in Windows 2000 operating systems. However, you can still manually convert the basic disks to dynamic disks and create the dynamic volumes by using the Disk Management console application in IDR.
-
Tapes that were created with non-Symantec drivers using block sizes greater than 64 KB cannot be used with the Backup Exec Intelligent Disaster Recovery Option. In this case, you must perform a manual recovery of the system, install the device driver that was used to perform the backup, reinstall Backup Exec, and then recover the system.
-
If the SQL database that is used for Backup Exec resides on a remote SQL server, then the system database files used by IDR also reside on the remote SQL server. When you perform a full IDR backup, you must include IDR files such as master$4idr, Model$4idr, and MSDB$4idr from the remote SQL server. Otherwise, the files are not available for recovery. You must also back up the bedb.bak file to restore your Backup Exec database.
-
The IDR process on a cluster node does not restore the quorum data to the quorum drive. To restore the quorum data, run clrest.exe from the command line. This command moves the data from the default location to the quorum drive. The clrest.exe utility is in the Backup Exec installation directory. Use the format:
clrest [-f] path [drive letter]
-
If you use Windows 2000 and you recover data from USB-based backup-to-disk devices, such as Iomega REV devices, you must provide the Windows 2000 service pack 4 integrated CD when you create the IDR CDs.
-
During manual remote IDR, if you recover system state, shadow copy components, the utility partition, or the EFI system partition backup set, you must enter the following names in the Restore to drive field on the File Redirection dialog box:
-
file://<system-1>/Shadow?Copy?Components
-
file://<system-1>/System?State
-
file://<computer name>/<Utility Partition>
-
file://<computer name>/EFI<System Partition>
where <computer name> is the current name of the system that you are recovering.
You must also enter the newly created temporary IDR user logon account in the Server logon account field on the File Redirection dialog box.
-
-
During automated remote IDR, if the encryption key for an encrypted backup set that you want to restore is not found on the media server, a temporary encryption key is created. You are prompted to provide a pass phrase for this key. The temporary encryption key is removed from the media server after the IDR wizard quits.
-
When you run an automated recovery of a Vista computer that
spans a volume across two identical hard drives, an error occurs. IDR cannot
create the required partitions during the recovery process. You can manually
create the partitions and assign drive letters using Disk Management when
the IDR Recovery Wizard prompts you.
Back to top
Oracle Agent Notes
The following notes detail information about using the Oracle Agent with Backup Exec 12:
-
The Backup Exec Agent for Oracle on Windows or Linux Servers does not support multiple Oracle database versions that are installed on the same computer.
-
When an Oracle database backup job is in progress, you cannot view restore selections until the backup job completes. After the backup job completes, press F5 to refresh the user interface and view restore selections.
-
If a Backup Exec restore of tablespaces or datafiles fails, and the RMAN output shows that a tablespace or datafile cannot be taken offline, you must shut down the database. Then, mount the database and run the job again.
-
If you use Oracle Real Application Cluster, you must manually open the database after an offline backup.
-
For Oracle Real Application Cluster, all instances must be in the same state before any operation. For backup jobs, instances must be all MOUNTED or all OPEN. For restore jobs, instances must be all STARTED or all MOUNTED or all OPEN.
-
When you view the Oracle Archived logs node in the Backup Exec View by Resource pane on the Restore Job Properties dialog box, you view the archived transaction logs of the current Oracle database.This is not a view of the Backup Exec catalog entries for any archived transaction logs that you previously backed up.
Back to top
DB2 Agent Notes
The following notes detail information about using the DB2 Agent with Backup Exec 12:
-
Redirected restores of the DMS containers and/or SMS containers are not supported when:
-
The database restore is redirected to another database.
-
The database that you select to restore to does not exist.
The DB2 Agent supports redirecting the restore of containers to the same database if the database already exists when the restore is performed.
-
-
During a file system backup, online DB2 database files that are included in the selection list are not automatically excluded. You must manually exclude the datafiles of an online DB2 database from the selection list.
Back to top
Desktop and Laptop Option (DLO) Notes
The following notes detail information about using the Desktop and Laptop Option (DLO) with Backup Exec 12:
-
You can push-install DLO through a firewall to a Windows XP
Professional computer that runs Service Pack 2. Before you begin the
push-install, enable the group policy called �Allow remote administration
exception� on the destination Windows XP computer. See your Windows
documentation for more information.You also can push-install DLO through a firewall to a Windows
Server 2008 computer. Before you begin the push-install, enable Print and
File Sharing, along with Windows Management Instrumentation (WMI) on the
destination computer’s Windows Firewall Exception list. See your Windows
documentation for more information.
-
If you install DLO after Backup Exec has been clustered, you must rerun the cluster configuration wizard. Backup Exec can then determine that DLO is present and can reconfigure the Backup Exec group to account for it.
-
Installation of DLO to Veritas Cluster Server is not supported.
-
DLO has moved user-specific registry keys to the HKCU area of the registry.
-
To upgrade DLO to version 12 using the command line, you must be running Backup Exec DLO 10d SP1 or higher.
-
You must set TRANSFORMS to use the 1028.mst file if you
use Traditional Chinese (Taiwan) as the default language when you manually
push-install DLO.
Back to top
Remote Agent for Linux or UNIX Servers (RALUS) Notes
The following notes detail information about using the Remote Agent for Linux or UNIX Servers (RALUS) with Backup Exec 12:
-
When the system location is set to a non-English language character set on the destination server on which you want to install RALUS, some characters may not appear correctly in the terminal session during the installation. You can try changing to another location setting of the same language to try to resolve this issue.
-
If you use NFS version 3, RALUS always follows mount points even if the option Follow remote mount points is not selected. You can force the use of version 2 by creating the mount point with the option nfsvers=2.
-
Using an IP address instead of a computer name to browse a Linux Open Enterprise Server (OES) computer is not supported. Update the media server host file to browse a Linux OES computer that cannot be resolved through DNS.
-
You cannot perform a cross-platform restore of HP/UX file system backups that have compression or encryption enabled. These backups must be restored to their respective platforms.
-
If the RALUS Installer cannot install the remote agent, and the following error is reported in the installralus.log file:
VxIF::Error:: Unable to uncompress files. HASH(0x8711e8)->{GUNZIP} not found on <hostname>
then install the GNU data compression utility (‘gzip/gunzip’) on the computer on which you want to install the remote agent to support the uncompressing of the RALUS platform-specific packages. The utility is available at:
http://www.gzip.org
-
The RALUS installer supports the Traditional Chinese locale
setting (EUC, big5 encodings) only on Linux platforms. On all other
platforms, the RALUS installer displays the Traditional Chinese locale
setting in English.
Back to top
Remote Agent for Macintosh Systems (RAMS) Notes
When the system location is set to a non-English language character set on the destination server on which you want to install RAMS, some characters may not appear correctly in the terminal session during the installation. You can try changing to another location setting of the same language to try to resolve this issue.
Back to top
Advanced Open File Option Notes
The following notes detail information about using the Advanced Open File Option with Backup Exec 12:
-
When you use Hitachi’s VSS provider with dynamic disks, you must configure AOFO to use the hardware manufacture’s technology. Go to the Snapshot provider field on the AOFO Backup Job Properties dialog box. Select Hardware — use technology provided by hardware manufacturer.
-
Symantec Volume Snapshot Provider (VSP) is not supported on Windows
Vista/Server 2008. -
Backup Exec 10d Advanced Open File Option (AOFO) snapshot backup jobs that use Microsoft’s Volume Shadow Copy Service (VSS) are not cross-platform compatible. You must restore Backup Exec 10d 32-bit snapshot backups that use VSS to a 32-bit platform. You must restore Backup Exec 10d 64-bit snapshot backups that use VSS to a 64-bit platform. You cannot use Backup Exec 10d to restore 11d or 12 backups. Backup Exec 11d and 12 snapshot backups that use VSS are compatible with any platform.
Back to top
Advanced Disk-based Backup Option Notes
The following notes detail information about using the Advanced Disk-based Backup Option with Backup Exec 12:
-
When you use the Hitachi VSS provider for the Advanced Disk-based Backup Option, if you upgrade a basic disk to a dynamic disk, you must manually split and then recreate the Hitachi snapshot pair. See your Hitachi documentation for details.
-
Synthetic backup is not supported for a remote resource that is in a different time zone than the media server.
-
Offhost backup does not support volumes that run Windows Bitlocker Driver Encryption.
Back to top
Remote Agent for Windows Systems Notes
The following notes detail information about using the Remote Agent for Windows Systems with Backup Exec 12:
-
When you restore the Windows Vista System State, Backup Exec may create the following temporary directory on the Windows Vista computer:
%SystemRoot%\Registration\F52E2DD5-CE7D-4e54-8766-EE08A709C28E
After the restore job finishes, you can delete the directory.
-
When you uninstall the Backup Exec Remote Agent, you may encounter a message box that presents a list of applications that you should close before you continue the uninstall process. If the list contains only the following, you can ignore the message and continue the uninstall process.
Backup Exec Setup Launcher
Backup Exec Log Server
Backup Exec Remote Agent for Windows SystemsIf additional applications do appear, close all applications except the ones that are listed above before continuing the uninstall process.
Back to top
Enterprise Vault Agent Notes
You must use either the Enterprise Vault service account or its Windows Domain Admin account when you configure Enterprise Vault backup or restore jobs. The Enterprise Vault server and related computers reside in the domain that is associated with these accounts.
To configure the Enterprise Vault service account, see your Enterprise Vault documentation.
If the Enterprise Vault backup or restore job fails with an access denied error, check the account credentials that you use for the job.
Back to top
NDMP Option Notes
Select the option Restore without writing data to disk (Verify data without doing a restore) to test the validity of the data that you select for the restore job. This option does not write the data to the hard drive (applies to NetApp devices only).
Back to top
Using Backup Exec, CPS, and DLO with Symantec Endpoint Protection
-
To push-install the following software to a computer that runs Symantec Endpoint Protection (SEP) version 11.0 or later, you must configure SEP to share files and printers. Sharing files and printers is turned off by default.
-
Backup Exec for Windows Servers
-
Remote Agent for Windows Systems
-
Continuous Protection Agent (CPA)
For more information about how to enable SEP to share files and printers, see the Administrator’s Guide for Symantec Endpoint Protection.
-
-
You must install Symantec Endpoint Protection Manager (SEPM) on the media server to enable integration features between Backup Exec and SEPM. Additionally, if Internet Explorer’s Trusted sites security level is set to High, you must add the following URL as a trusted site on the IE Security tab:
http://securityresponse.symantec.com/avcenter
When you add the URL, you ensure proper functionality between SEPM and Backup Exec.
- To integrate Backup Exec and Symantec
Endpoint Protection, the media server must be connected to the internet. If
the following message appears, there may not be an internet connection:«Backup jobs and policy templates cannot specify to use the Symantec
ThreatCon Level option unless the Symantec Endpoint Protection Manager
product is installed on the Backup Exec media server.»
-
When you install Symantec Endpoint Protection (SEP) and the Continuous Management Service component of Continuous Protection Server (CPS) on a media server, a network port conflict occurs. Reconfigure SEP to use a network port other than port 8443.
-
The Backup Exec Desktop and Laptop Option (DLO) also uses the Continuous Management Service. Therefore, the network port 8443 conflict also occurs when DLO, SEP, and CPS are installed on a media server.
-
If you have SEP installed on a remote server, the remote server may block the network ports CPS uses. To install CPS remotely or to run a CPS backup job, you must enable the CPS network ports in the SEP firewall rules. For more information about which ports to enable, refer to the
Symantec Backup Exec Continuous Protection Server Administrator’s Guide.
Back to top
Табл. W-1
Параметры состояния для утилиты Remote Agent Utility
Описание
Элемент
Указывает, запускается ли утилита Remote Agent Utility
при входе в систему
Запускать утилиту Remote
Agent Utility при входе в
систему
Указывает, с какой периодичностью утилита Remote
Agent Utility должна обновлять состояние компьютера.
По умолчанию обновление выполняется каждые 5
секунд.
Интервал обновления
Имя сервера резервного копирования,
обрабатывающего текущую операцию.
Сервер резервного
копирования
Обрабатываемый носитель или общий каталог.
Исходное расположение
Имя текущего обрабатываемого каталога, папки или
базы данных (в зависимости от конкретного агента).
Текущая папка
Имя обрабатываемого текущего файла.
Текущий файл
Просмотр состояния операций на удаленном компьютере на панели
задач
Пользователь может просмотреть состояние операций на удаленном
компьютере.
Возможны следующие значения:
■
Выполняется задание резервного копирования
■
Выполняется задание восстановления
■
Выполняются задания резервного копирования и восстановления
■
Создание моментальной копии
■
На компьютере не запущена служба клиента Backup Exec Beremote.exe
■
Простой
Как просмотреть состояние операций на удаленном компьютере
◆
Наведите курсор на значок Удаленного агента в системной области
задач.
2271
Symantec Backup Exec Remote Agent for Windows Systems
Сведения об утилите Remote Agent Utility for Windows Systems

Автоматический запуск программы Remote Agent Utility на
удаленном компьютере
Программу Remote Agent Utility можно настроить так, чтобы она
автоматически запускалась при каждом входе пользователя в систему
удаленного компьютера.
См.
«Параметры состояния для утилиты Remote Agent Utility «
на стр. 2270.
Как автоматически запустить программу Remote Agent Utility на удаленном
компьютере
1
На компьютере удаленного агента выберите Пуск > Программы >
Symantec Backup Exec > Backup Exec 2010 Remote Agent Utility.
Если утилита Remote Agent Utility уже запущена, можно дважды
щелкнуть на ее значке на панели задач.
2
Перейдите на вкладку Состояние.
3
Включите переключатель Запускать программу Remote Agent Utility
при входе в систему.
4
Нажмите OK.
Настройка интервала обновления на удаленном компьютере
Пользователь может указать, с какой периодичностью утилита Remote Agent
Utility должна обновлять состояние компьютера.
См.
«Параметры состояния для утилиты Remote Agent Utility «
на стр. 2270.
Как настроить интервал обновления на удаленном компьютере
1
На компьютере удаленного агента выберите Пуск > Программы >
Symantec Backup Exec > Backup Exec 2010 Remote Agent Utility.
Если утилита Remote Agent Utility уже запущена, можно дважды
щелкнуть на ее значке на панели задач.
2
Перейдите на вкладку Состояние.
3
В поле Интервал обновления введите время для обновления состояния
в секундах.
4
Нажмите OK.
Symantec Backup Exec Remote Agent for Windows Systems
Сведения об утилите Remote Agent Utility for Windows Systems
2272
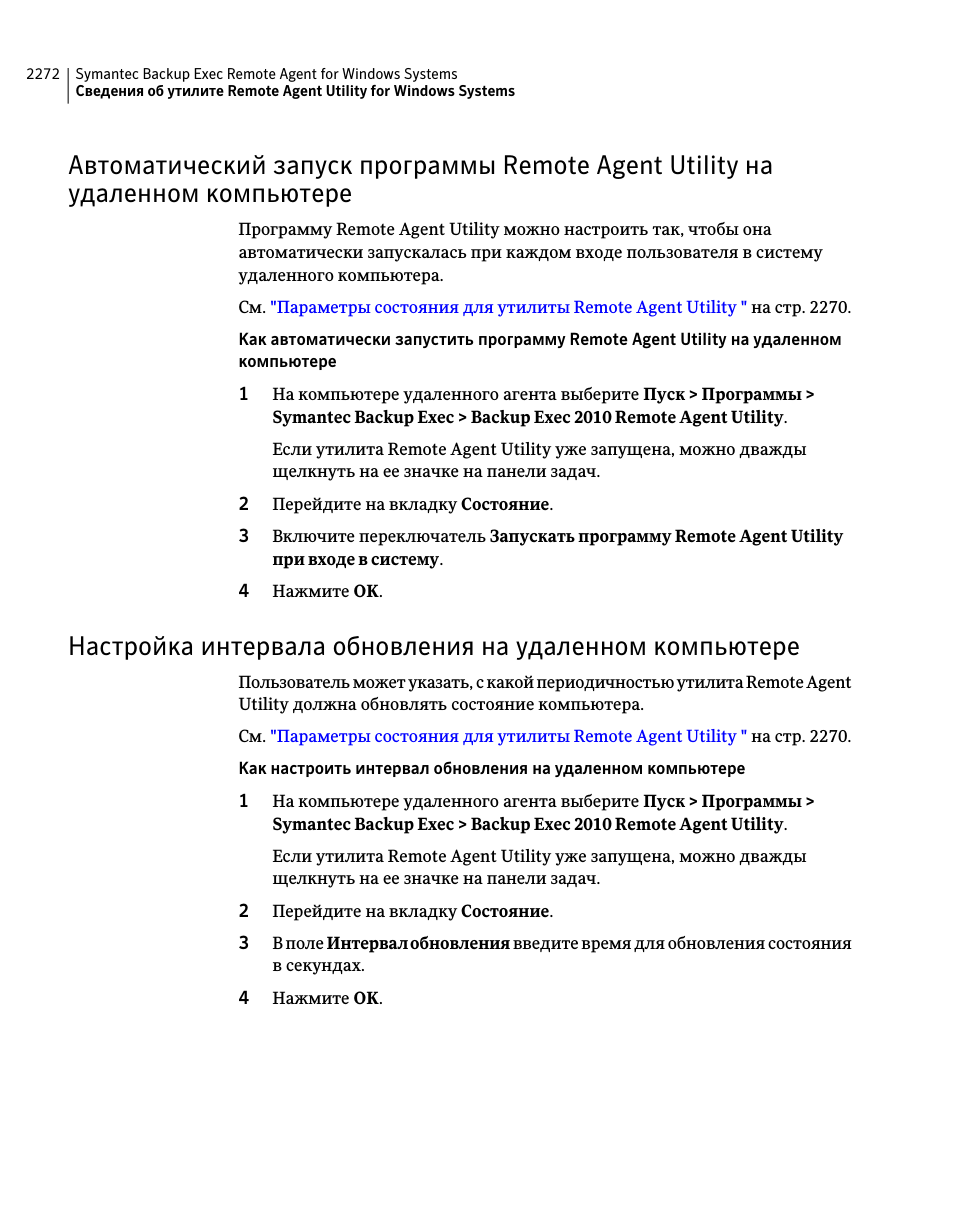
На серверах резервного копирования, Серверах резервного копирования, Резервного копирования
Page 2273 Support chat
- Image
- Text
Сведения о публикации Remote Agent for Windows Systems на
серверах резервного копирования
С помощью Remote Agent Utility можно задать, изменить или удалить имена
и IP-адреса серверов резервного копирования, на которых должны
публиковаться сведения об удаленном компьютере Windows. На всех
серверах резервного копирования, указанных в списке на вкладке
«Публикация», удаленный компьютер будет показан в узле «Избранные
ресурсы» дерева выбора ресурсов.
Удаленный агент публикует такую информацию, как номер своей версии
и IP-адрес удаленного компьютера. Используя опубликованный IP-адрес
удаленного компьютера, сервер резервного копирования может
подключиться к этому компьютеру и узнать его состояние, даже если он
находится в неизвестном домене.
Для каждого сервера резервного копирования, выбранного для публикации,
можно выбрать локальную сеть, которая будет применяться для выполнения
операций с удаленным компьютером. Использование в заданиях
определенной локальной сети вместо общей корпоративной сети позволяет
изолировать трафик операций резервного копирования, для того чтобы эти
операции не влияли на работу других подключенных сетей.
См.
«Выбор сети резервного копирования»
на стр. 461.
См.
«Сведения о серверах резервного копирования, на которых Remote Agent
for Windows Systems может публиковать данные»
на стр. 2273.
См.
«Изменение информации о сервере резервного копирования, на котором
публикует данные агент Remote Agent for Windows Systems «
на стр. 2276.
См.
«Удаление серверов резервного копирования, на которых Remote Agent
for Windows Systems может публиковать данные»
на стр. 2277.
Сведения о серверах резервного копирования, на которых
Remote Agent for Windows Systems может публиковать
данные
С помощью программы Remote Agent Utility можно добавить сервер
резервного копирования, на котором удаленный агент сможет публиковать
информацию.
См.
«Сведения о публикации Remote Agent for Windows Systems на серверах
резервного копирования»
на стр. 2273.
См.
«Узел избранных ресурсов в списке ресурсов для резервного
копирования»
на стр. 324.
2273
Symantec Backup Exec Remote Agent for Windows Systems
Сведения об утилите Remote Agent Utility for Windows Systems

См.
«Добавление системы Windows в узел «Избранные ресурсы» в списке
ресурсов для резервного копирования»
на стр. 325.
См.
«Удаление системы Windows из узла «Избранные ресурсы» в списке
ресурсов для резервного копирования»
на стр. 327.
См.
«Просмотр состояния операций на удаленном компьютере в Remote
Agent Utility»
на стр. 2270.
Как добавить серверы резервного копирования, на которых удаленный агент
сможет публиковать информацию
1
На компьютере удаленного агента выберите Пуск > Программы >
Symantec Backup Exec > Backup Exec 2010 Remote Agent Utility.
Когда работает утилита Remote Agent Utility, на системной панели задач
показан ее значок. Дважды щелкните на этом значке, чтобы открыть
утилиту.
2
Откройте вкладку Публикация.
3
Выберите необходимые параметры.
См.
«Параметры публикации утилиты Remote Agent Utility»
на стр. 2274.
4
Нажмите OK.
Параметры публикации утилиты Remote Agent Utility
В следующей таблице перечислены параметры публикации, которые можно
указать для утилиты Remote Agent Utility.
См.
«Сведения о серверах резервного копирования, на которых Remote Agent
for Windows Systems может публиковать данные»
на стр. 2273.
Symantec Backup Exec Remote Agent for Windows Systems
Сведения об утилите Remote Agent Utility for Windows Systems
2274

Табл. W-2
Параметры публикации утилиты Remote Agent Utility
Описание
Элемент
Указывает, может ли удаленный агент отправлять
информацию о себе, например, версию и IP-адрес, всем
серверам резервного копирования в списке. Удаленный
агент будет показан на этих серверах резервного
копирования в узлах «Избранные ресурсы» и «Домены»
в дереве выбора ресурсов.
По умолчанию в этот список добавляется имя сервера
резервного копирования, с которого удаленный агент
был установлен методом целевой рассылки. Если
удаленный агент установлен на одном компьютере с
сервером резервного копирования, то этот сервер будет
указан как 127.0.0.1.
Для того чтобы запретить отправлять информацию
всем серверам резервного копирования, отмените выбор
пункта Разрешить удаленному агенту публиковать
информацию на серверах резервного копирования из
списка. Список серверов резервного копирования будет
сохранен, однако удаленный агент не будет отправлять
им информацию о себе.
Разрешить удаленному
агенту публиковать
информацию на серверах
резервного копирования
из списка
Указывает, с какой периодичностью удаленный агент
должен отправлять информацию о своем состоянии
серверам резервного копирования из приведенного
списка. По умолчанию интервал составляет 240 минут.
Это рекомендуемое значение, которое обеспечивает
адекватный баланс между скоростью реакции системы
и объемом сетевого трафика. Максимальный интервал
составляет 720 минут.
Интервал публикации
Включает параметры, позволяющие добавить, изменить
или удалить серверы списка серверов резервного
копирования.
Этот параметр показан при первом запуске Remote Agent
Utility.
Изменить параметры
Позволяет добавить имя или IP-адрес сервера
резервного копирования в список.
Добавить
Позволяет изменить имя или адрес в списке серверов
резервного копирования.
Изменить
2275
Symantec Backup Exec Remote Agent for Windows Systems
Сведения об утилите Remote Agent Utility for Windows Systems

Описание
Элемент
Позволяет удалить имя или IP-адрес сервера резервного
копирования из списка. Удаленный агент перестанет
публиковать информацию на этом сервере. Удаленный
компьютер станет недоступен для выбора в узле
«Избранные ресурсы» на сервере резервного
копирования.
Исключить
Показывает имена, которые используются при
публикации данного удаленного компьютера. Имена
указаны в «Избранных ресурсах» сервера резервного
копирования.
Это могут быть следующие имена:
■
Полное доменное имя.
■
Имя компьютера.
■
Имя компьютера NetBIOS.
■
Имена виртуальной службы, которые присваиваются
ресурсам кластера, расположенным на удаленном
компьютере.
■
Имя Oracle RMAN Real Application Cluster (RAC), или
виртуальное имя, которое присваивается
компьютеру с приложением Oracle в среде RAC. Это
имя указывается на сервере резервного копирования
в узле Oracle RAC дерева выбора ресурсов.
Публикуемые имена
агента
Изменение информации о сервере резервного
копирования, на котором публикует данные агент Remote
Agent for Windows Systems
С помощью программы Remote Agent Utility можно изменить имя или
IP-адрес сервера резервного копирования, на котором удаленный агент
сможет публиковать информацию.
См.
«Сведения о публикации Remote Agent for Windows Systems на серверах
резервного копирования»
на стр. 2273.
Как изменить информацию о сервере резервного копирования
1
На компьютере удаленного агента выберите Пуск > Программы >
Symantec Backup Exec > Backup Exec 2010 Remote Agent Utility.
Когда работает утилита Remote Agent Utility, на системной панели задач
показан ее значок. Дважды щелкните на этом значке, чтобы открыть
утилиту.
2
Откройте вкладку Публикация.
Symantec Backup Exec Remote Agent for Windows Systems
Сведения об утилите Remote Agent Utility for Windows Systems
2276

Настройка доступа к базе данных, For windows systems может публиковать данные
Page 2277 Support chat
- Image
- Text
3
Выберите в списке сервер резервного копирования, который требуется
изменить:
4
Нажмите кнопку Изменить.
5
Измените имя или IP-адрес сервера резервного копирования.
6
Нажмите OK.
Удаление серверов резервного копирования, на которых
Remote Agent for Windows Systems может публиковать
данные
С помощью программы Remote Agent Utility можно удалить сервер
резервного копирования, чтобы удаленный не публиковал на нем
информацию.
См.
«Сведения о публикации Remote Agent for Windows Systems на серверах
резервного копирования»
на стр. 2273.
Как удалить серверы резервного копирования, на которых удаленный агент
может публиковать информацию
1
На компьютере удаленного агента выберите Пуск > Программы >
Symantec Backup Exec > Backup Exec 2010 Remote Agent Utility.
Когда работает утилита Remote Agent Utility, на системной панели задач
показан ее значок. Дважды щелкните на этом значке, чтобы открыть
утилиту.
2
Откройте вкладку Публикация.
3
Выберите в списке сервер резервного копирования, который требуется
удалить.
4
Нажмите OK.
Настройка доступа к базе данных
Можно настроить доступ к базе данных, чтобы включить идентификацию
для сервера резервного копирования в операциях Oracle и DB2.
См.
«Настройка идентификационных данных на сервере резервного
копирования для операций Oracle»
на стр. 1550.
См.
«Добавление имени сервера и учетной записи DB2 в аутентификации
на сервере резервного копирования.»
на стр. 1128.
2277
Symantec Backup Exec Remote Agent for Windows Systems
Настройка доступа к базе данных

Как настроить доступ к базе данных
1
На компьютере удаленного агента выберите Пуск > Программы >
Symantec Backup Exec > Backup Exec 2010 Remote Agent Utility.
2
Откройте вкладку Доступ к базе данных.
3
Для того чтобы внести изменения, нажмите Изменить параметры.
4
Выберите необходимые параметры.
См.
«Параметры доступа к базе данных для утилиты Remote Agent Utility
«
на стр. 2278.
5
Нажмите OK.
6
На сервере резервного копирования добавьте имя сервера Oracle или
DB2 и имя пользователя, указанные на вкладке «Доступ к базе данных»,
в список идентифицированных пользователей.
Параметры доступа к базе данных для утилиты Remote Agent Utility
В следующей таблице перечислены параметры доступа к базе данных,
которые можно указать для утилиты Remote Agent Utility.
См.
«Настройка доступа к базе данных»
на стр. 2277.
Табл. W-3
Параметры доступа к базе данных для утилиты Remote Agent
Utility
Описание
Элемент
Задает идентификационные данные,
которые сервер резервного копирования
будет применять для выполнения всех
операций на серверах Oracle и DB2,
включая те, которые запускаются DBA.
Эти идентификационные данные
применяются сервером резервного
копирования и для идентификации на
серверах Oracle и DB2.
Включите эту опцию, чтобы разрешить
выполнение операций DB2 и Oracle с
участием сервера резервного
копирования и данного компьютера.
Включить идентификацию сервера
резервного копирования в операциях с
Oracle и DB2
Symantec Backup Exec Remote Agent for Windows Systems
Настройка доступа к базе данных
2278

Описание
Элемент
Задает имя пользователя, у которого есть
права администратора компьютера. Это
имя учетной записи будет применяться
сервером резервного копирования для
подключения к данному компьютеру.
Если имя пользователя будет содержать
IP-адрес или полное имя компьютера, то
утилита удаленного агента не сможет
проверить правильность этого имени.
Если указаны неверные
идентификационные данные, то во время
выполнения задания резервного
копирования или восстановления может
возникнуть ошибка «Не удалось
подключиться к ресурсу».
Данное имя компьютера и имя учетной
записи необходимо добавить в список
идентифицированных пользователей
серверов Oracle и DB2 на сервере
резервного копирования. Если во время
резервного копирования ресурсов Oracle
возникнет ошибка идентификации, то
задание резервного копирования не будет
выполнено. Если ошибка идентификации
произойдет при выборе наборов данных
резервного копирования для задания
восстановления, то эти наборы станут
недоступны. В этом случае для
восстановления данных потребуется
запустить задание восстановления от
имени DBA.
Имя пользователя
Указывает пароль учетной записи для
входа в систему.
Примечание:
По соображениям защиты
идентификационные данные не
сохраняются на удаленном компьютере.
Пароль
Еще раз введите пароль для его
подтверждения.
Подтверждение пароля
2279
Symantec Backup Exec Remote Agent for Windows Systems
Настройка доступа к базе данных

Описание
Элемент
Указывает полное имя компьютера или
IP-адрес для операций с участием
удаленного компьютера и сервера
резервного копирования. Во всех
операциях DB2 должен применяться
одинаковый формат имени.
Например, если в операциях резервного
копирования указывается IP-адрес
компьютера, то и в операциях
восстановления следует задавать
IP-адрес. Если в операциях резервного
копирования указывается полное имя
компьютера, то и в операциях
восстановления следует задавать полное
имя.
Использовать в операциях с Oracle и DB2
полное имя компьютера или IP-адрес
Указывает полное имя или IP-адрес
компьютера.
Полные имена компьютеров должны
соответствовать следующим правилам:
■
Число символов каждой метки (текста
между точками) не превышает 63.
■
Общее число символов с учетом точек,
но без учета символов \\, не
превышает 254.
■
Имя не должно содержать следующие
символы: * < > ? ¦.
Имя или IP-адрес
Указывает порт, применяемый для
установления соединений между данным
компьютером и сервером резервного
копирования при выполнении операций
Oracle или DB2. По умолчанию
применяется порт 5633.
При изменении номера порта на этом
компьютере его необходимо изменить и
на сервере резервного копирования.
После этого необходимо перезапустить
службу Backup Exec Job Engine Service на
сервере резервного копирования.
Использовать в операциях с Oracle и DB2
нестандартный порт для подключения
к серверу резервного копирования
Symantec Backup Exec Remote Agent for Windows Systems
Настройка доступа к базе данных
2280

33:07
Symantec Backup Exec 2014: синтетическое резервное копирование
02:11
How to setup a backup job in Symantec Backup Exec 2012
04:45
2 Config Tape library
30:56
Symantec Backup Exec 2014 — Использование Windows- и Linux-серверов для хранения резервных копий
34:35
Symantec Backup Exec 2014 — Восстановление после сбоя
07:07
Off-Host Backup with BackupExec
02:24
How to configure Backup To Disk in Symantec Backup Exec 2010
Press the button for help
Symantec Backup Exec Agent for Windows Systems
Due to Broadcom acquisition of Symantec, orders may be delayed. Please contact us for details.
Symantec Products
Symantec Backup Exec 2012 Agent For Windows
Symantec Backup Exec 2012 Agent For Windows Standard License Essential, 1 Year
BAND-S: Price Per Server.
#MLJXWZF0-EI1ES
Get a Quote!
Backup Exec 2012 Agent For Windows Standard License Essential, 3 Year
BAND-S: Price Per Server.
#MLJXWZF0-EI3ES
Get a Quote!
Backup Exec 2012 Agent For Windows Competitive Upgrade License Essential, 1 Year
BAND-S: Price Per Server. *Competitive Upgrade Price. Requires exiting competitive solution to qualify.
#MLJXWZC0-EI1ES
Get a Quote!
Backup Exec 2012 Agent For Windows Competitive Upgrade License Essential, 3 Year
BAND-S: Price Per Server. *Competitive Upgrade Price. Requires exiting competitive solution to qualify.
#MLJXWZC0-EI3ES
Get a Quote!
Backup Exec 2012 Agent For Windows Version Upgrade License Essential, 1 Year
BAND-S: Price Per Server.
#MLJXWZU0-EI1ES
Get a Quote!
Backup Exec 2012 Agent For Windows Version Upgrade License Essential, 3 Year
BAND-S: Price Per Server.
#MLJXWZU0-EI3ES
Get a Quote!
Symantec Backup Exec 2012 Agent For Windows Small Business Edition Licenses
Backup Exec 2012 Agent For Windows Small Business Edition Standard License Essential, 1 Year
BAND-S: Price Per Server.
#0HXCWZF0-EI1ES
Get a Quote!
Backup Exec 2012 Agent For Windows Small Business Edition Standard License Essential, 3 Year
BAND-S: Price Per Server.
#0HXCWZF0-EI3ES
Get a Quote!
Symantec Backup Exec 2012 Agent For Windows Small Business Edition Competitive Upgrade License Essential, 1 Year
BAND-S: Price Per Server. *Competitive Upgrade Price. Requires exiting competitive solution to qualify.
#0HXCWZC0-EI1ES
Get a Quote!
Symantec Backup Exec 2012 Agent For Windows Small Business Edition Competitive Upgrade License Essential, 3 Year
BAND-S: Price Per Server. *Competitive Upgrade Price. Requires exiting competitive solution to qualify.
#0HXCWZC0-EI3ES
Get a Quote!
Backup Exec 2012 Agent For Windows Small Business Edition Version Upgrade License Essential, 3 Year
BAND-S: Price Per Server.
#0HXCWZU0-EI3ES
Get a Quote!
Backup Exec 2012 is one integrated product that protects virtual and physical environments, simplifies both backup and disaster recovery, and offers unmatched recovery capabilities. Powered by Symantec V-Ray technology, Backup Exec 2012 restores entire servers, critical Microsoft applications, and VMware or Microsoft Hyper-V virtual environments to dramatically minimize business downtime.
Backup Exec Agent for Windows
The Symantec Backup Exec Agent for Windows provides support for on-line non-disruptive backup of Windows operating systems.
This agent data protection offering for Backup Exec customers and further ensures high-performance data protection for remote Windows servers and includes Open File protection and Simplified Disaster Recovery. This Agent optimizes data transfers for 32-bit and 64-bit remote Windows servers with exclusive Agent Accelerator technology that provides source-level compression and distributed processing at the client. Open files are protected with the Advanced Open File capability built into the Agent for Windows. This capability integrates with VSS to protect open files in multiple volumes and ensures files on local or remote servers are protected while in use.
Backup Exec Agent for Windows for Small Business Server Edition
The agent expands network-wide data protection and optimizes data transfers for 32-bit and 64-bit remote Windows servers running Microsoft applications (Exchange, SQL, Active Directory, SharePoint). Exclusive Agent Accelerator technology helps optimize backup and recovery performance by providing source-level compression and distributed processing at the client.
This complete recovery solution quickly recovers granular objects directly into the application without a reboot, or to another location; while also enabling restores of full systems (physical or virtual), quickly getting your business back on track.