
Последнее обновление: 31.10.2015
Для ввода и редактирования текста предназначены текстовые поля — элемент TextBox. Так же как и у элемента Label текст элемента TextBox
можно установить или получить с помощью свойства Text.
По умолчанию при переносе элемента с панели инструментов создается однострочное текстовое поле. Для отображения больших объемов информации в
текстовом поле нужно использовать его свойства Multiline и ScrollBars.
При установке для свойства Multiline значения true, все избыточные символы, которые выходят за границы поля, будут переноситься на
новую строку.
Кроме того, можно сделать прокрутку текстового поля, установив для его свойства ScrollBars одно из значений:
-
None: без прокруток (по умолчанию)
-
Horizontal: создает горизонтальную прокрутку при длине строки, превышающей ширину текстового поля
-
Vertical: создает вертикальную прокрутку, если строки не помещаются в текстовом поле
-
Both: создает вертикальную и горизонтальную прокрутку
Автозаполнение текстового поля
Элемент TextBox обладает достаточными возможностями для создания автозаполняемого поля. Для этого нам надо привязать свойство
AutoCompleteCustomSource элемента TextBox к некоторой коллекции, из которой берутся данные для заполнения поля.
Итак, добавим на форму текстовое поле и пропишем в код события загрузки следующие строки:
public partial class Form1 : Form
{
    public Form1()
    {
        InitializeComponent();
        AutoCompleteStringCollection source = new AutoCompleteStringCollection()
        {
            "Кузнецов",
            "Иванов",
            "Петров",
            "Кустов"
        };
        textBox1.AutoCompleteCustomSource = source;
        textBox1.AutoCompleteMode = AutoCompleteMode.SuggestAppend;
        textBox1.AutoCompleteSource = AutoCompleteSource.CustomSource;
    }
}
Режим автодополнения, представленный свойством AutoCompleteMode, имеет несколько возможных значений:
-
None: отсутствие автодополнения
-
Suggest: предлагает варианты для ввода, но не дополняет
-
Append: дополняет введенное значение до строки из списка, но не предлагает варианты для выбора
-
SuggestAppend: одновременно и предлагает варианты для автодополнения, и дополняет введенное пользователем значение
Перенос по словам
Чтобы текст в элементе TextBox переносился по словам, надо установить свойство WordWrap равным true. То есть если одно
слово не умещается на строке, то но переносится на следующую. Данное свойство будет работать только для многострочных текстовых полей.
Ввод пароля
Также данный элемент имеет свойства, которые позволяют сделать из него поле для ввода пароля. Так, для этого надо использовать PasswordChar
и UseSystemPasswordChar.
Свойство PasswordChar по умолчанию не имеет значение, если мы установим в качестве него какой-нибудь символ, то этот символ будут отображаться
при вводе любых символов в текстовое поле.
Свойство UseSystemPasswordChar имеет похожее действие. Если мы установим его значение в true, то вместо введенных символов
в текстовом поле будет отображаться знак пароля, принятый в системе, например, точка.
Событие TextChanged
Из всех событий элемента TextBox следует отметить событие TextChanged, которое срабатывает при изменении текста в элементе. Например, поместим
на форму кроме текстового поля метку и сделаем так, чтобы при изменении текста в текстовом поле также менялся текст на метке:
public partial class Form1 : Form
{
    public Form1()
    {
        InitializeComponent();

        textBox1.TextChanged += textBox1_TextChanged;
    }

    private void textBox1_TextChanged(object sender, EventArgs e)
    {
        label1.Text = textBox1.Text;
    }
}
Last Updated :
25 Mar, 2025
In Windows forms, TextBox plays an important role. With the help of TextBox, the user can enter data in the application, it can be of a single line or multiple lines. The TextBox is a class and it is defined under System.Windows.Forms namespace.
Ways to Create a TextBox In Windows Forms
There are mainly two ways to create a TextBox in Windows forms which are mentioned below.
- Drag and drop (Design-Time)
- Custom TextBox (Run-Time)
Drag and drop (Design-Time)
This is the easiest way to create a TextBox in Windows Forms using Visual Studio we just have to open the toolbox and drag and drop the text box on the form in the designer and further we can change the appearance of the TextBox using the properties. Follow these steps to create a TextBox.
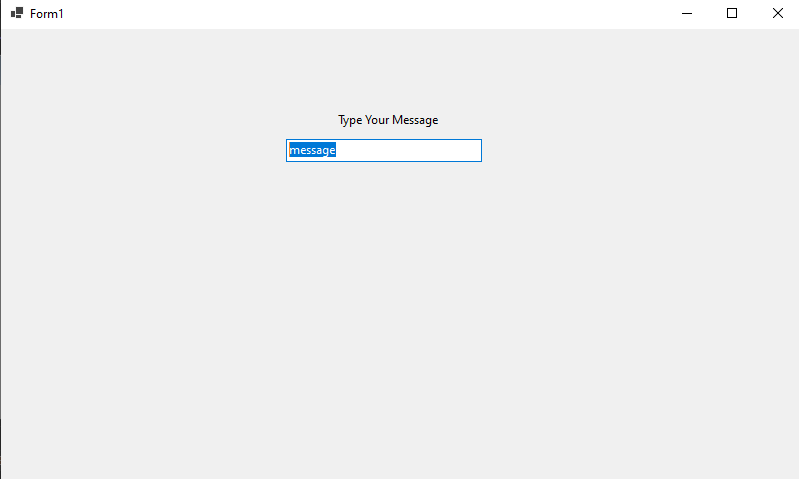
Step 1: Now locate the project with the name here we are using the default name which is Form1 and it will open a form in the editor that we can further modify.
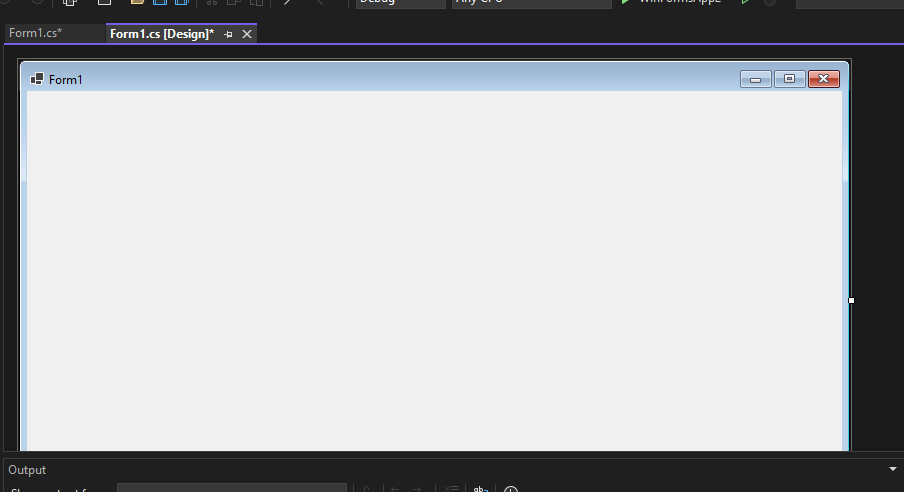
In the image, we have two files that are open one Design and there is Form1.cs these two play a major role. We use the Form 1.cs file for the custom logic.
Step 2: Now open a Toolbox go to the view > Toolbox or ctrl + alt + x.
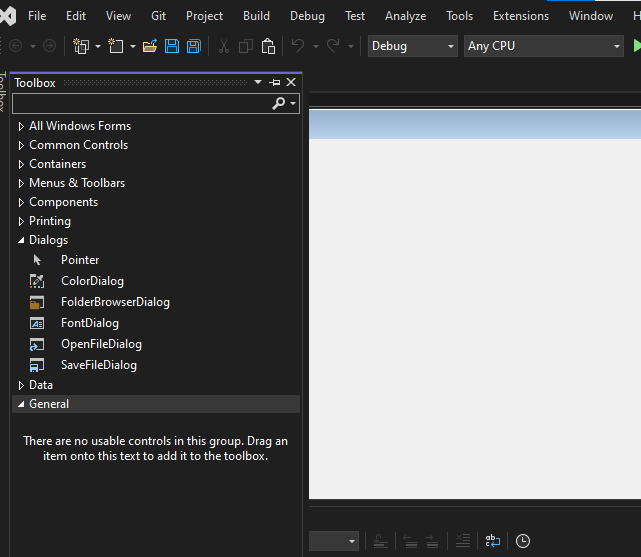
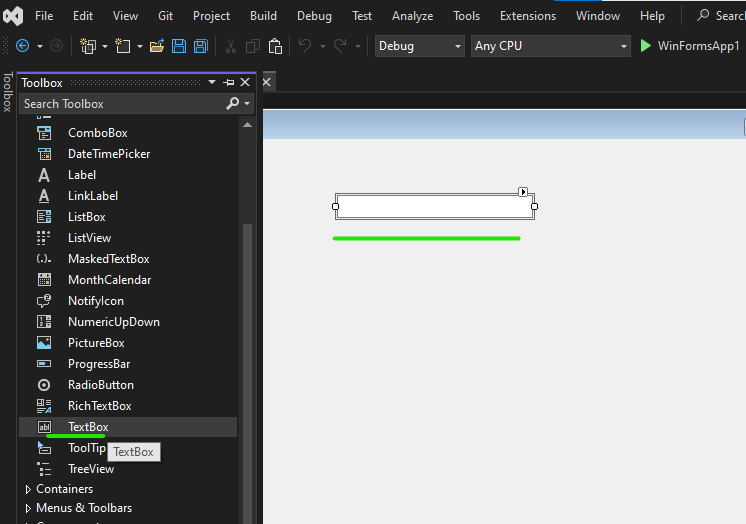
Step 3. Now open the common controls and drag and drop the TextBox on the form where we want to it be placed.
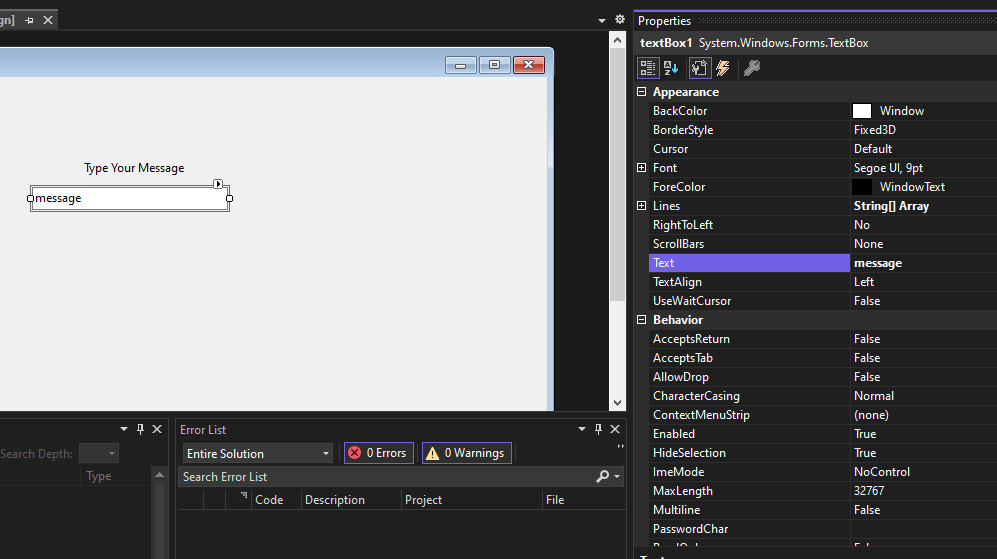
Step 4. Now open the properties of the TextBox press right-click on the TextBox and it will open the properties solution explorer now we can change the button appearance of the textbox and also add different properties like default text.
Output:
Custom TextBox (Run Time)
In this method, we are going to modify the Form1.cs file and add custom code modification in C# with the help of the TextBox class. The following steps show how to create a TextBox dynamically:
Step 1: Create a textbox using the TextBox() constructor provided by the TextBox class.
// Creating textbox
TextBox Mytextbox = new TextBox();
Step 2: After creating TextBox, set the properties of the TextBox provided by the TextBox class.
// Set location of the textbox
Mytextbox.Location = new Point(187, 51);
// Set background color of the textbox
Mytextbox.BackColor = Color.LightGray;
// Set the foreground color of the textbox
Mytextbox.ForeColor = Color.DarkOliveGreen;
// Set the size of the textbox
Mytextbox.AutoSize = true;
// Set the name of the textbox
Mytextbox.Name = «text_box1»;
Step 3: And last add this textbox control to form using Add() method.
// Add this textbox to form
this.Controls.Add(Mytextbox);
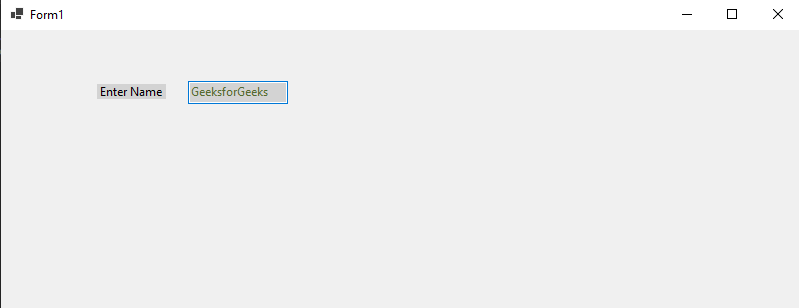
Step 4: Now double-click on the form in Design and it will open the Form1.cs file where code is written in C#. Here the program file is Form 1.cs Now write this code in Form1.cs file
Form1.cs file:
C#
namespace WinFormsApp1
{
    public partial class Form1 : Form
    {
        public Form1()
        {
            InitializeComponent();
        }

        private void Form1_Load(object sender, EventArgs e)
        {
            // Creating and setting the properties of Label
            Label myLabel = new Label();
            myLabel.Location = new Point(96, 54);
            myLabel.Text = "Enter Your Name";
            myLabel.AutoSize = true;
            myLabel.BackColor = Color.LightGray;

            // Add this label to form
            this.Controls.Add(myLabel);

            // Creating and setting the properties of TextBox
            TextBox myTextBox = new TextBox();
            myTextBox.Location = new Point(187, 51);
            myTextBox.BackColor = Color.LightGray;
            myTextBox.ForeColor = Color.DarkOliveGreen;
            myTextBox.AutoSize = true;
            myTextBox.Name = "textBox1";

            // Add this textbox to form
            this.Controls.Add(myTextBox);
        }
    }
}
Output:
Properties
| Property | Description |
|---|---|
| Text | This property is used to set the text inside the TextBox. |
| TextAlign | It is used to Set or get the alignment of the text inside the TextBox for example left, centre, and right. |
| MaxLength | Used to set or get the maximum number of characters the user can type into the TextBox. |
| Multiline | This is used to set or determine whether the TextBox allows multiple lines of text. If press enter it allows you to write in the next line. |
| PasswordChar | It is used to set or get the character used to hide text used where showing the password characters. |
| ReadOnly | This property is used to set or get whether the TextBox is read-only (users can’t edit the text). |
| WordWrap | Sets or gets whether the text automatically moves to the next line when it’s too long for the box (only for multiline). |
| ScrollBars | Sets or gets which type of scroll bars (horizontal, vertical, both, or none) appear in the TextBox. |
| Dock | Sets or gets how the TextBox is positioned in its container (e.g., fill, top, left). |
| Anchor | Sets or gets which edges of the parent container the TextBox should stay anchored to when resized. |
| BorderStyle | Sets or gets the style of the border around the TextBox (e.g., solid line, 3D, no border). |
| Enabled | Sets or gets whether the TextBox is enabled (if false, users can’t interact with it). |
| Focused | This is the commonly used property to check if the TextBox currently has focus if it is selected. |
| Font | Sets or gets the font used for the text (like size and style). |
| ForeColor | Sets or gets the colour of the text inside the TextBox. |
| BackColor | Sets or gets the background colour of the TextBox. |
| AcceptsReturn | Sets whether pressing the Enter key adds a new line (used for multi-line TextBox). |
| HideSelection | Sets whether selected text is hidden when the TextBox loses focus. |
| SelectionStart | It is used to set from where the selected text starts in the TextBox. |
| SelectionLength | This property gets or sets the length of the selected text. |
| ShortcutsEnabled | It sets the keyboard shortcuts such as copy (Ctrl + C) or paste (Ctrl + P). |
| Clear() | This property is used to clear the text inside the TextBox. |
| SelectAll() | We can use this property to select all the text inside the TextBox. |
Поле ввода текста (TextBox)
Доброго времени суток! В этом уроке я кратко расскажу о таком элементе графического интерфейса, как поле ввода текста (TextBox). Расскажу о самых важных, на начальном этапе, свойствах, событиях и методах данного контрола.
И так, поля ввода текста предназначены для получения от пользователя тестовых данных. Таким образом, этот элемент интерфейса нужен скорее для ввода информации, но может быть использован и для её вывода.
Контрол TextBox расположен на панели инструментов в группе «Стандартные элементы управления» (или «Common Controls» в англоязычной версии Visual Studio), как показано на рисунке ниже.
Элемент TextBox на панели элементов Visual Studio
По традиции, начну с описаний основных свойств элемента.
Основные свойства
Name — задает уникальное имя для поля ввода текста (специфическое свойство, необходимо, для работы с элементом из кода).
BorderStile — задает рамку вокруг поля ввода, может иметь одно из представленных в таблице ниже значений.
| Значение | Краткое описание |
|---|---|
| None | Рамки вокруг поля ввода нет |
| FixedSingle | Простая рамка из одинарной линии |
| Fixed3D | 3D рамка вокруг поля ввода |
Enabled — разрешает или запрещает доступ к элементу, если указать значение true, то поле ввода будет доступно для пользователя (он сможет вводить текст), значение false — наоборот, запрещает доступ.
MaxLenght — задает максимально допустимое для ввода количество символов.
Multiline — разрешает или запрещает многострочный режим ввода, если значение установлено в true, то поле ввода считается многострочным, если false — однострочным.
PasswordChar — если задать свойству какой-нибудь символ, то введенные пользователем символы, визуально (и только визуально, а не по факту), будут заменяться на него (например, при вводе пароля, введенные символы отображаются как звездочки, т.е. «*»).
ReadOnly — если установлено в true, то редактировать текст в поле ввода, пользователю нельзя, если установлено в false текст доступен для редактирования.
Text — предназначено для установки текста в поле ввода или получения введенного пользователем текста.
TextAlign — устанавливает выравнивание введенного текста, возможные значения представлены в таблице ниже.
| Значение | Краткое описание |
|---|---|
| Left | Текст выравнивается по левому краю |
| Right | Текст выравнивается по центру |
| Center | Текст выравнивается по правому краю |
Visible — позволят скрыть текстовое поле, если установлено в false. Для отображения элемента снова, нужно установить этому свойству значение true.
Основные методы
AppendText — добавляет текст (указанный в качестве аргумента) к уже введенному в поле тексту.
Clear — очищает поле ввода (удаляет весь текст).
Copy — копирует выделенный текст в буфер обмена.
Cut — вырезает выделенный текст из буфера обмена.
Past — вставляет текст из буфера обмена в поле ввода (в позицию, в которую установлен курсор).
Hide — скрывает поле ввода.
Show — показывает поле ввода (скрытое до этого).
А вот пример окна с различными полями ввода текста:
Пример окна с различными полями ввода текста
Основные события данного контрола в этом уроке я описывать не стал, так как необходимость в их использовании появляется на более продвинутых уровнях программирования.
А в следующем уроке, будет практика использования элементов интерфейса, который были описаны в этом и предыдущих уроках!
A TextBox control accepts user input on a Form. In this article, I will discuss how to create a TextBox control in Windows Forms at design time as well as run time. After that, I will continue discussing various properties and methods available for the TextBox control.
Creating a TextBox
We can create a TextBox control using a Forms designer at design-time or using the TextBox class in code at run-time (also known as dynamically).
To create a TextBox control at design-time, you simply drag and drop a TextBox control from Toolbox to a Form in Visual Studio. After you drag and drop a TextBox on a Form, the TextBox looks like Figure 1. Once a TextBox is on the Form, you can move it around and resize it using the mouse and set its properties and events.
Figure 1
Creating a TextBox control at run-time is merely a work of creating an instance of the TextBox class, setting its properties, and adding the TextBox class to the Form controls.
The first step to creating a dynamic TextBox is to create an instance of the TextBox class. The following code snippet creates a TextBox control object.
// Create a TextBox object
TextBox dynamicTextBox = newTextBox();
In the next step, you may set the properties of a TextBox control. The following code snippet sets the background color, foreground color, Text, Name, and Font properties of a TextBox.
// Set background and foreground
dynamicTextBox.BackColor = Color.Red;
dynamicTextBox.ForeColor = Color.Blue;
dynamicTextBox.Text = "I am Dynamic TextBox";
dynamicTextBox.Name = "DynamicTextBox";
dynamicTextBox.Font = new Font("Georgia", 16);
Once a TextBox control is ready with its properties, the next step is to add the TextBox control to the Form. To do so, we use Form.Controls.Add method. The following code snippet adds a TextBox control to the current Form.
Controls.Add(dynamicTextBox);
Setting TextBox Properties
After you place a TextBox control on a Form, the next step is to set properties.
The easiest way to set properties is from the Properties Window. You can open the Properties window by pressing F4 or clicking on a control and selecting the Properties menu item. The Properties window looks like Figure 2.
Figure 2
Location, Height, Width, and Size
The Location property takes a Point that specifies the starting position of the TextBox on a Form. The Size property specifies the size of the control. We can also use the Width and Height property instead of the Size property. The following code snippet sets the Location, Width, and Height properties of a TextBox control.
// Set TextBox properties
dynamicTextBox.Location = newPoint(20, 150);
dynamicTextBox.Height = 40;
dynamicTextBox.Width = 300;
Multiline TextBox
By default, a TextBox control accepts input in a single line only. To make it multi-line, you need to set the Multiline property to true. By default, the Multiline property is false.
When you drag and drop a TextBox control from Toolbox to a Form, you cannot change the height of a TextBox control.
But if you select a TextBox control click on the Tasks handle and check MultiLine CheckBox, you will see height resizing grip handles are available on a TextBox and you can resize the height of a control.

You can do this dynamically by setting the Multiline property to true.
// Make TextBox multiline
dynamicTextBox.Multiline = true;
Background, Foreground, BorderStyle
BackColor and ForeColor properties are used to set the background and foreground colors of a TextBox respectively. If you click on these properties in the Properties window, the Color Dialog pops up.
Alternatively, you can set background and foreground colors at run-time. The following code snippet sets BackColor and ForeColor properties.
// Set background and foreground
dynamicTextBox.BackColor = Color.Red;
dynamicTextBox.ForeColor = Color.Blue;
You can also set the border style of a TextBox by using the BorderStyle property. The BorderStyle property is represented by a BorderStyle enumeration that has three values – FixedSingle, Fixed3D, and None. The default value of the border style is Fixed3D. The following code snippet sets the border style of a TextBox to FixedSingle.
dynamicTextBox.BorderStyle = BorderStyle.FixedSingle; Name
Name property represents a unique name of a TextBox control. It is used to access the control in the code. The following code snippet sets and gets the name and text of a TextBox control.
dynamicTextBox.Name = "DynamicTextBox";
string name = dynamicTextBox.Name;
Text, TextAlign, and TextLength
The text property of a TextBox represents the current text of a TextBox control. The TextAlign property represents text alignment that can be Left, Center, or Right. The TextLength property returns the length of a TextBox contents.
The following code snippet sets the Text and TextAlign properties and gets the size of a TextBox control.
dynamicTextBox.Text = "I am Dynamic TextBox";
dynamicTextBox.TextAlign = HorizontalAlignment.Center;
int size = dynamicTextBox.TextLength;
Append Text
One way to append text to a TextBox is simply to set the Text property to current text plus new text you would want to append something like this.
textBox1.Text += " Appended text"; TextBox also has the ApendText method to do the same. The AppendText method appends text at the end of a TextBox. The following code snippet uses the AppendText method to append text to the textBox1 contents.
textBox1.AppendText(" Appended text");AcceptsReturn and AcceptsTab
In a Multiline TextBox control, you need to press CTRL+ENTER to create a new line. The AcceptsReturn property sets TextBox control to move to a new line by simply pressing ENTER key. By default, the AcceptsReturn property of a TextBox control is false.
// accepts ENTER key
dynamicTextBox.AcceptsReturn = true;
If a TextBox control is set to multiline, the AcceptsTab property is used to set it so the TextBox control accepts the TAB key. If this property is not set, pressing the TAB key simply move to the next control on a Form. By default, the AcceptsTab property value of a TextBox control is false.
// accepts TAB key
dynamicTextBox.AcceptsTab = true;
WordWrap
If the WordWrap property is true, the text in the TextBox control automatically wraps to the next line if required. If. If this property is set to true, horizontal scroll bars are not displayed regardless of the ScrollBars property setting.
// Wordwrap
dynamicTextBox.WordWrap = true;
ScrollBars
A Multiline TextBox control can have scrollbars. The ScrollBars property of TextBox control is used to show scrollbars on a control. The ScrollBars property is represented by a ScrollBars enumeration that has four values – Both, Vertical, Horizontal, and None.
The following code snippet makes both vertical and horizontal scrollbars active on a TextBox control and they will be visible when the scrolling is needed on a TextBox control.
dynamicTextBox.ScrollBars = ScrollBars.Both; Font
Font property represents the font of text of a TextBox control. If you click on the Font property in the Properties window, you will see the Font name, size, and other font options. The following code snippet sets the Font property at run-time.
dynamicTextBox.Font = newFont("Georgia", 16); Password Character and Character Casing
PasswordChar property is used to apply masking on a TextBox when you need to use it for password input and know what password to be readable. For example, you can place a star (*) for password characters.
The following code snippet sets a dollar ($) symbol as any character entered in a TextBox.
dynamicTextBox.PasswordChar = '$'; UseSystemPasswordChar property is used to full default system password If the UseSystemPasswordChar is set to true, the default system password character is used and any character set by PasswordChar is ignored.
CharacterCasing property of TextBox sets the case of text in a TextBox, It has three values – Upper, Lower, and Normal.
dynamicTextBox.CharacterCasing = CharacterCasing.Upper; Read TextBox Contents
The simplest way of reading TextBox control contents is using the Text property. The following code snippet reads the contents of a TextBox in a string.
string textBoxContents = dynamicTextBox.Text; In a multiline TextBox, if the TextBox contents are separated by multiple lines and you want to read the contents of a TextBox line by line, you can use the Lines property of the TextBox. The Lines property returns an array of strings where each element of the returned array is a line.
The following code snippet reads a TextBox contents line by line.
string [] textBoxLines = dynamicTextBox.Lines;
foreach (string line in textBoxLines)
{
   MessageBox.Show(line);
}
Maximum Length
You can restrict the number of characters in a TextBox control by setting the MaxLength property. The following code snippet sets the maximum length of a TextBox to 50 characters.
dynamicTextBox.ReadOnly = true;
dynamicTextBox.MaxLength = 50;
ReadOnly
You can make a TextBox control read-only (non-editable) by setting the ReadOnly property to true. The following code snippet sets the ReadOnly property to true.
dynamicTextBox.ReadOnly = true; Enabling and Disabling Shortcuts
ShortcutsEnabled property of TextBox is used to enable or disable shortcuts. By default, shortcuts are enabled. The following code snippet disables shortcuts in a TextBox.
dynamicTextBox.ShortcutsEnabled = false; ShortcutsEnabled property applies to the following shortcut key combinations
- CTRL+Z
- CTRL+E
- CTRL+C
- CTRL+Y
- CTRL+X
- CTRL+BACKSPACE
- CTRL+V
- CTRL+DELETE
- CTRL+A
- SHIFT+DELETE
- CTRL+L
- SHIFT+INSERT
- CTRL+R
Selection in TextBox
SelectedText property returns the selected text in a TextBox control.
string selectedText = dynamicTextBox.SelectedText;
You may also use SelectionStart and SelectionLength properties to get and set the selected text in a TextBox. The SelectionStart property represents the starting index of the selected text and the SelectionLength property represents the number of characters to be selected after the starting character. The following code snippet sets the selection on a TextBox.
dynamicTextBox.SelectionStart = 10;
dynamicTextBox.SelectionLength = 20;
Clear, SelectAll, and DeselectAll
Clear method removes the contents of a TextBox. The following code snippet uses the Clear method to clear the contents of a TextBox.
textBox1.Clear(); TextBox class provides SelectAll and DeselectAll methods to select and deselect all text of a TextBox control. The following code snippet shows how to use SelectAll and DeselectAll methods.
privatevoid selectAllToolStripMenuItem_Click(object sender, EventArgs e) {
    if (textBox1.TextLength > 0) textBox1.SelectAll();
}
privatevoid deselectAllToolStripMenuItem_Click(object sender, EventArgs e) {
    if (textBox1.TextLength > 0) textBox1.DeselectAll();
}
Cut, Copy, Paste, Undo Operations in TextBox
TextBox class provides Cut, Copy, Paste, and Undo methods to cut, copy, paste, and undo clipboard operations. The following code snippet shows how to use the Cut, Copy, Paste, and Undo methods.
private void cutToolStripMenuItem_Click(object sender, EventArgs e)
{
    if (textBox1.SelectionLength > 0)
        textBox1.Cut();
}
private void copyToolStripMenuItem_Click(object sender, EventArgs e)
{
    if (textBox1.SelectionLength > 0)
        textBox1.Copy();
}
private void pasteToolStripMenuItem_Click(object sender, EventArgs e)
{
    if (Clipboard.GetDataObject().GetDataPresent(DataFormats.Text))
    {
        textBox1.Paste();
    }
}
private void undoToolStripMenuItem_Click(object sender, EventArgs e)
{
    if (textBox1.CanUndo)
    {
        textBox1.Undo();
        textBox1.ClearUndo();
    }
}
Summary
A TextBox control accepts user input on a Form. In this article, we discussed how to create a TextBox control in Windows Forms at design time as well as run time. After that, we saw how to use various properties and methods.
- Details
- Written by David Corrales
- Last Updated: 13 June 2016
- Created: 13 June 2011
- Hits: 75056
TextBox [System.Windows.Forms.TextBox]
Creates a text box for displaying text and collecting user input in text format.
- MSDN Page: System.Windows.Forms.TextBox
- Default Event: TextChanged
Tip: Because many of the properties of Textbox objects are inherited from the TextBoxBase class, these properties are available on other controls that are derived from TextBoxBase, including MaskedTextBox and RichTextBox.
Need to scroll to the end of a textbox? Try this Textbox tip!
Important Properties
| • Text | Get, set, change the text in a textbox |
| • Font | Determine the style and size of the textbox text |
| • Multiline | Resize and allow multiple lines of text |
| • ReadOnly | Determines whether the user can change Textbox text |
| • MaxLength | Maximum characters a user can enter |
| • WordWrap | Enables/disables word wrap |
| • ScrollBars | Determines which scroll bars are enabled |
| • UseSystemPasswordChar | Displays a character instead of typed text |
| • AutoCompleteMode | Determines the text completion behavior |
| • AutoCompleteSource | Specifies the data source for the auto-complete strings |
| • AutoCompleteCustomSource | Specifies auto-complete values |
Important Methods
| • AppendText | Appends text to the text in the text box |
Important Events
| • TextChanged | event: Occurs when the value of the Text property changes |
Important Properties
Text property: Manages the text in the textbox
Use the Text property to get, set, and change the text in the textbox.
- MSDN page: Text
- Value type: System.String
- Default value: (None)
Get the text in a textbox. This can be text that a user typed in the textbox or text that your script added to the textbox.
Set the text in a textbox. This command makes text appear in the textbox.
$textbox1.Text = "Display this text"
Display cmdlet output in a textbox. Be sure to format the content into string output.
$textboxProcess.Text = Get-Process | Format-Table | Out-String
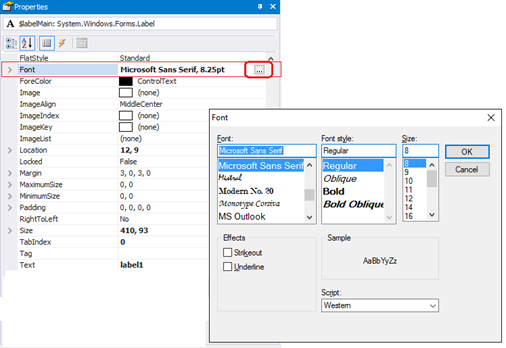
Font property: Determines the style and size of the text in the textbox
Use the Font property to get, set, or change the font of text in the Textbox.
- MSDN page: Font
- Value Type: System.Drawing.Font
- Default: Microsoft Sans Serif 8.25
To display Windows PowerShell output correctly aligned, use a monospace font, such as Courier New, Consolas, or Lucida Console.
Output in Microsoft Sans Serif:
Same output in Lucida Console:
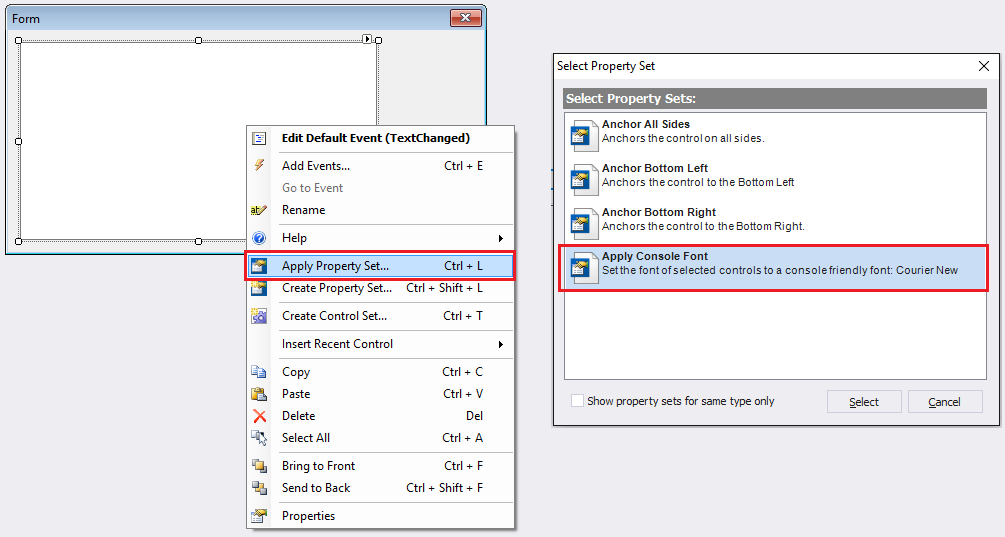
Tip: To set the font to display Windows PowerShell output, right-click the textbox, click Apply Property Set, and then click Apply Console Font.
To set the font easily, in the Properties pane for the Label, in the Font row, click the ellipsis (…) and then use the Font selector.
To display the properties of the Font object, in the Properties pane, click the Font group arrow.
To script a font change, set the Font property to a string with the Font name, size, and style.
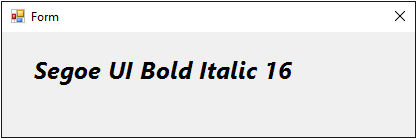
$labelMain.Font = 'Segoe UI, 15.75pt, style=Bold, Italic'
To determine other properties of the font, create a System.Drawing.Font object.
$ClickFont = [System.Drawing.Font]::new('Microsoft Sans Serif', 8.25, [System.Drawing.FontStyle]::Regular)
$ClickedFont = [System.Drawing.Font]::new('Segoe UI', 16, [System.Drawing.FontStyle]::Italic)

$labelMain_Click={
    if ($labelMain.Text -eq 'Click')
    {
        $labelMain.Text = 'Clicked'
        $labelMain.Font = $ClickedFont
    }
    else
    {
        $labelMain.Text = 'Click'
        $labelMain.Font = $ClickFont
    }
}
Tips:
- To enlarge the label automatically to fit its contents, set the AutoSize property of the Label to $True.
- When scripting a font, be sure to set the Font property of the Label. The Text property of the Label does not have a Font property.
Multiline property: Resize and permit multiple lines of text
Use the Multiline property to resize a textbox or allow you or the user to type multiple lines of text in the textbox. By default, the textbox is single line.
- MSDN page: Multiline
- Value type: System.Boolean (True, False)
- Default value: False
For example, the following images show a single-line (Multiline=$False) and multi-line (Multiline = $True) textbox.
Single Line TextBox:
Multi-Line TextBox:
ReadOnly property: Determines whether the user can change Textbox text
Use the ReadOnly property when you want to display text and prevent the user from changing the contents.
- MSDN page: ReadOnly
- Value type: System.Boolean (True, False)
- Default value: False
Important: When the ReadOnly property is True, the TextBox background is grey, the text is black, and changes to the ForeColor (text color) property have no effect. To change the color of the Textbox background and make changes to the ForeColor property effective, use a RichTextBox or change the BackColor property.
MaxLength property: Maximum characters a user can enter
Use MaxLength property to specify the maximum number of characters that an end-user can enter into the textbox, such as when a user name or password has a length limit. The MaxLength property value does not limit that the text that you (as the designer) or your script can enter in the textbox.
- MSDN page: MaxLength
- Value type: System.Int32
- Default value: 32767
WordWrap property: Enables/disables word wrap
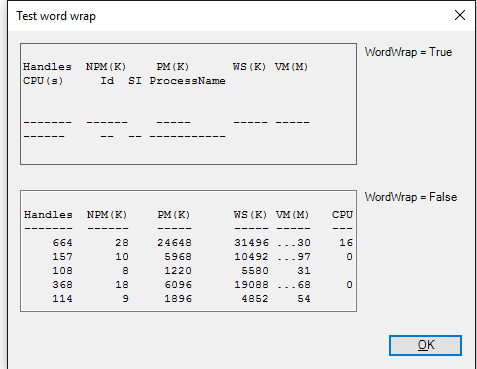
When WordWrap is $True, lines of text that exceed the length of a multiline textbox are restarted on the next line. Set the value of WordWrap to $False when you do not want to alter the formatting of the text, such as text in Windows PowerShell output.
- MSDN page: WordWrap
- Value type: System.Boolean (True, False)
- Default value: True
WordWrap has no effect on single-line textboxes, but it is equally effective on text that the end-user types and text that the scripts assigns to the textbox. When word-wrapping isn’t useful, consider resizing the textbox to fit the text.
ScrollBars property: Determines which scroll bars are enabled
Use the ScrollBars property to enable and disable horizontal and vertical scroll bars on multiline textboxes.
- MSDN page: ScrollBars
- Value type: System.Windows.Forms.Scrollbars enumeration
- Default value: None
Valid values:
None
No scroll bars are shown.
Horizontal
Only horizontal scroll bars are shown.
Vertical
Only vertical scroll bars are shown.
Both
Both horizontal and vertical scroll bars are shown.
NOTE: Scroll bars are active only when the text exceeds the horizontal or vertical dimension of the textbox.
UseSystemPasswordChar property: Displays a character instead of typed text
Use the UseSystemPasswordChar property to mask characters that are typed into the textbox. Instead of the typed character, a character selected by the operating system, typically *, appears. To set the character, use the PasswordChar property. When both are set, UseSystemPasswordChar takes precedence.
- MSDN page: UseSystemPasswordChar
- Value type: System.Boolean (True, False)
- Default value: False
Auto Complete Properties:
Use the following properties to manage the built-in auto-complete features of a TextBox.
AutoCompleteMode property: Determines the text completion behavior
Use the AutoCompleteMode property to select how the auto-completion occurs.
- MSDN page: AutoCompleteMode
- Value type: System.Windows.Forms.AutoCompleteMode
- Default value: None
Valid values :
- Append
- Appends the remainder of the most likely candidate string to the existing characters, highlighting the appended characters.
- Suggest
- Displays the auxiliary drop-down list associated with the edit control. This drop-down is populated with one or more suggested completion strings.
SuggestAppend- Appends both Suggest and Append options.
None (Default)- Disables automatic completion.
AutoCompleteSource property: Specifies the data source for auto-completing
Use the AutoCompleteSource property to specify the source of the data used to complete text in a textbox. You can use a custom list of words or select a built in source, such as the file system.
- MSDN page: AutoCompleteSource
- Value type: System.Windows.Forms.AutoCompleteSource enumeration
- Default value: None
Valid values:
FileSystem
Uses the file system as the source. The field auto-completes file and folder names.
HistoryList
Auto-completes Uniform Resource Locators (URLs) in the history list.
RecentlyUsedList
Auto-completes recently used Uniform Resource Locators (URLs).
AllUrl
Combines HistoryList and RecentlyUsedList contents.
AllSystemSources
Combines FileSystem and AllUrl sources. This is the default value when AutoCompleteMode is set to a value other than Default.
FileSystemDirectories
Auto-completes only file system directory names, not file names.
CustomSource
Auto-completes the strings specified by the AutoCompleteCustomSource property.
None (Default)
Does not specify an auto-complete source. This is the default value of AutoCompleteSource.
ListItems
Applies only to the ComboBox control. Specifies that the items of the ComboBox represent the source.
AutoCompleteCustomSource property: Specifies auto-complete values
Use the AutoCompleteCustomSource property to define your own list of auto-complete strings. This list is used when the value of the AutoCompleteSource property value is CustomSource.
- MSDN page: AutoCompleteCustomSource
- Value type: System.Windows.Forms.AutoCompleteStringCollection
- Default value: None
In this example, the auto-complete source is a list of computer names in the Computers.txt file. The AddRange method adds a collection of items.
$computers = Get-Content C:\computers.txt"
$textbox1.AutoCompleteCustomSource.AddRange($computers)
Important Methods
AppendText method: Appends text to the text in the text box
Use the AppendText method to add strings to the value of the Text property of a text box. It is more efficient than using the += operator.
Note: The AppendText method is defined in the TextBoxBase class and is inherited by its child classes, Textbox, MaskedTextBox, and RichTextBox, and their child classes, such as DataGridTextBox.
- MSDN page: AppendText
- Value type: System.String
- Default value: None
In this example, we use the AppendText method of the Textbox to add a year to a list of years in the textbox.
$textboxOutput.Text = "2012, 2014, 2015"
if (Test-Path "$env:ProgramFiles\*\PowerShell Studio 2016")
{
    $textboxOutput.AppendText(", 2016`r`n")
}
Important Events
TextChanged event: Occurs when the value of the Text property changes
Use the TextChanged event to respond to a user entering, deleting, or changing the Text in a Textbox.
- MSDN page: TextChanged
- Default value: None
For example, this event handler enables the $buttonSubmit button when the text in the $textboxUser textbox is not an empty string.
$textboxUser_TextChanged = {
    $buttonSubmit.Enabled = $textboxUser.Text -ne ''
}
How to scroll to the end of a TextBox:
This tip explains how to position the cursor at the end of the $textbox1 textbox, that is, to the right of text typed in the box.
$textbox1.SelectionStart = $textbox1.Text.Length
$textbox1.ScrollToCaret()
The first command uses the SelectionStart property of the Textbox to set the starting point of the text at the position of the last character of text in the $textbox1 Textbox. The second command uses the ScrollToCarat method to place the cursor at the SelectionStart value location.