
How to Fix Svchost.exe High Network Usage
The svchost.exe (Service Host or SvcHost) process allows Windows to host services. If you noticed that Svchost.exe causes high Network usage, read this article to fix that.

Svchost is a system process that hosts multiple Windows services simultaneously. When you open Task Manager, you can see that many Service Host processes are running. Services hosted by Service Host are usually assigned to various groups in which they are related.
If every service ran under one Service Host process, a single service crash could take down the entire Windows operating system. Therefore, the Service Hosts process enables Windows to run smoothly and avoid any problems.
The svchost.exe process is an important part of the Windows operating system and is necessary for Windows to run properly. As mentioned, however, it can cause high network usage, and this is normal behavior.
You cannot disable or remove this process — doing so could do more damage than good. There is, however, an alternative solution to this problem that you can apply to the operating system. Read the guide below for details.
Video Showing How to Fix Svchost.exe High Network Usage:
Table of Contents:
- Introduction
- Disable BITS
- Scan Your System for Malware
- Video Showing How to Fix Svchost.exe High Network Usage
Download Computer Malware Repair Tool
It is recommended to run a free scan with Combo Cleaner — a tool to detect viruses and malware on your device. You will need to purchase the full version to remove infections. Free trial available. Combo Cleaner is owned and operated by Rcs Lt, the parent company of PCRisk.com read more.
Disable BITS
Many users who have encountered high Network usage caused by the svchost.exe process report that disabling the BITS (Background Intelligent Transfer Service) solved the problem, and the Network returned to normal.
Windows Services (also known as services.msc) are used to modify how Windows services run on your system. You can modify a service’s settings for security, troubleshooting, and performance-related reasons. Background Intelligence Transfer Service (BITS) transfers files in the background using idle network bandwidth.
The downside of stopping this service from running is that any applications that depend on BITS, such as Windows Update, will be unable to automatically download programs and other information. Nevertheless, you can do this manually and enable the service again when needed.
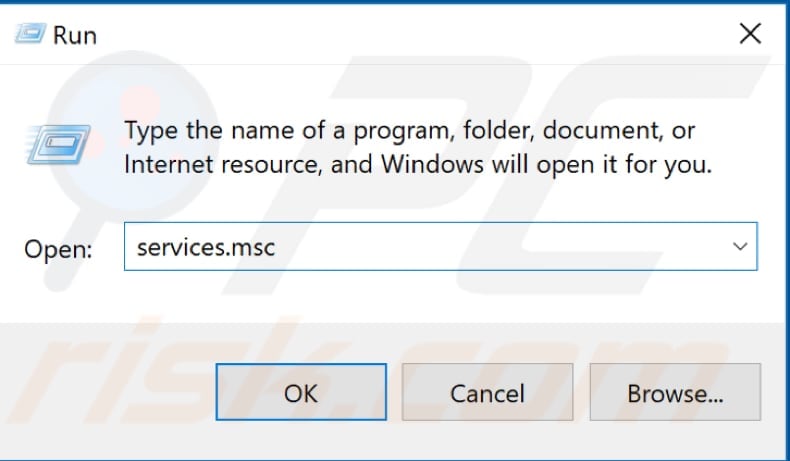
To disable BITS, open the Run dialog box. Press Windows (Win) key + R, or simply right-click Start and select «Run» from the contextual menu. Type «services.msc» in the Run dialog box and press Enter or click «OK».
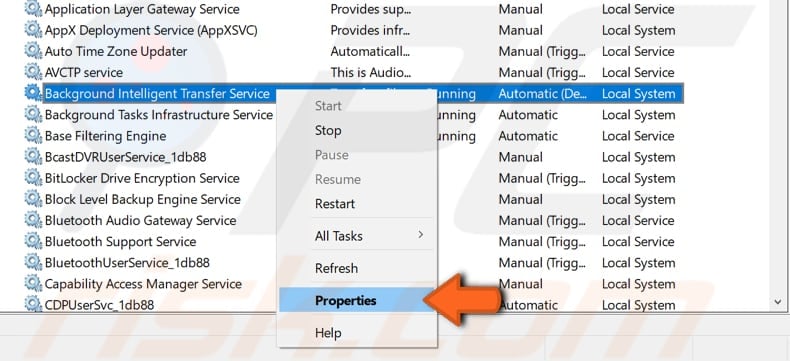
You will see a list of Windows services. Find Background Intelligent Transfer Service, right-click it, and select «Properties» from the contextual menu.
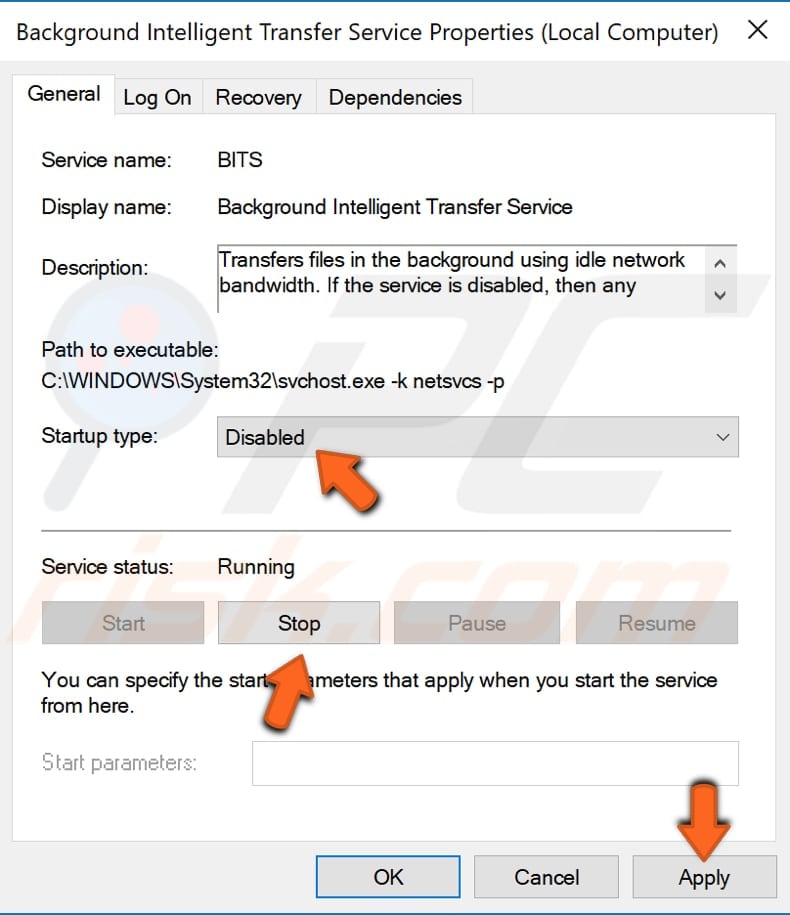
In the Background Intelligent Transfer Service Properties window, find and change the Startup type to «Disabled» and click the «Stop» button to stop the service from running. Click «Apply» to save the changes and close Services windows.
[Back to Table of Contents]
Scan your System For Malware
Your computer may be infected by malware or viruses, causing high Network usage through the svchsot.exe process. If this is the case, we recommend that you scan your system using antivirus software.
You can use Windows Defender (a built-in antivirus program), which protects your computer against viruses, spyware, and other malicious software. Alternatively, you can run other third-party antivirus software if installed.
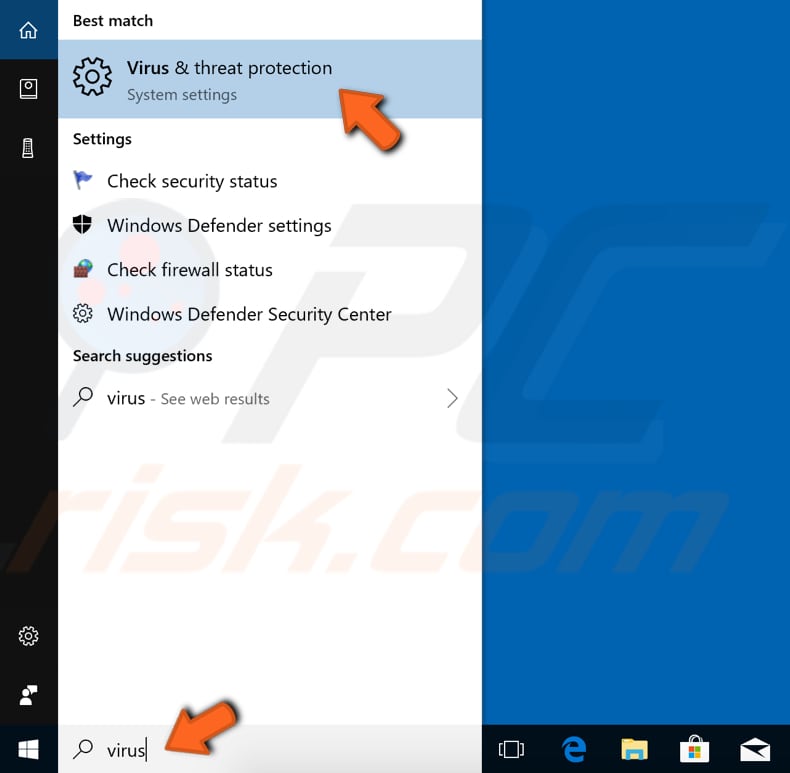
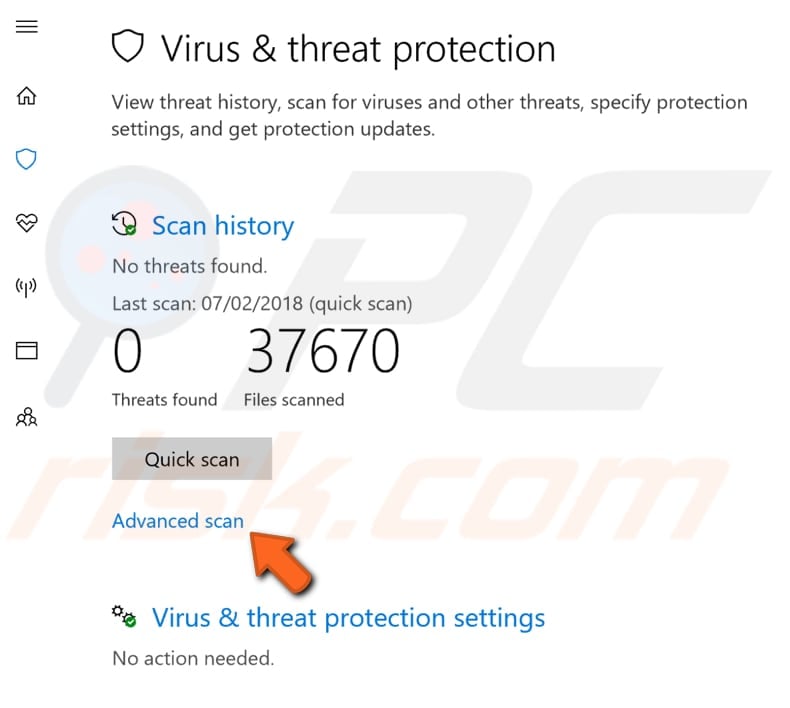
To run a full system scan using Windows Defender, type «virus» in Search and click on the «Virus & threat protection» result.
In the Virus & threat protection window, click «Advanced scan».
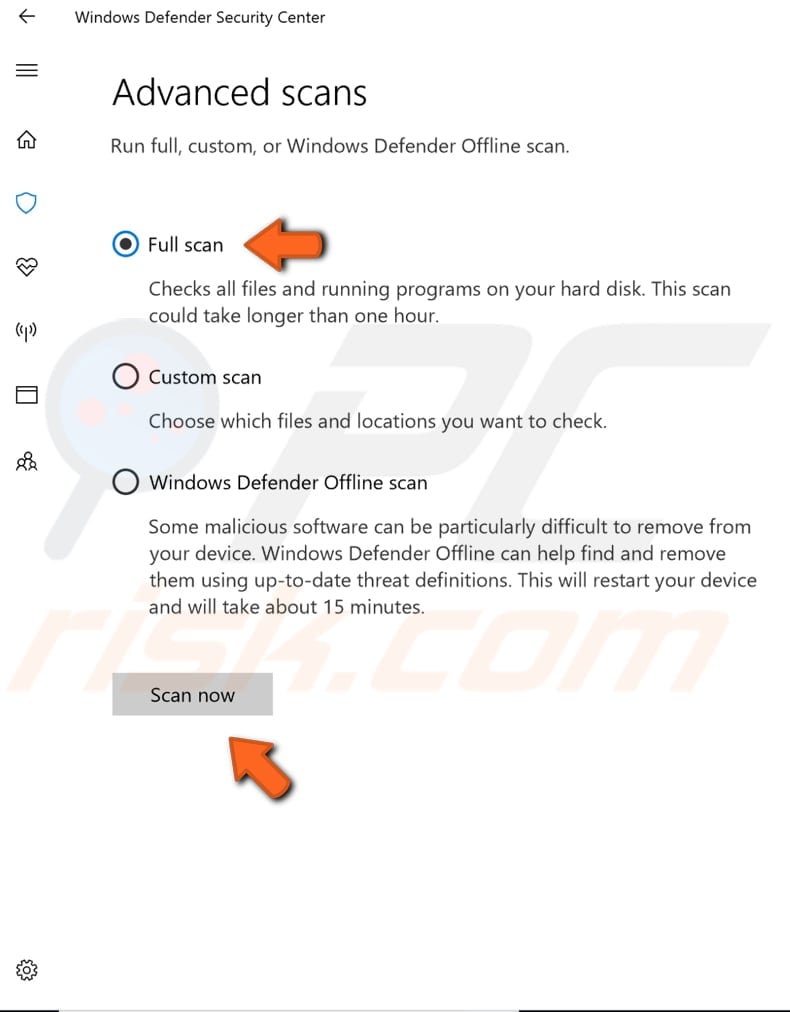
Select «Full scan» and click «Scan now». This will start scanning your system for malware. If there are any viruses found, delete them.
You can also choose a virus/malware scanner from our Top anti-malware list. The list consists of well-known top spyware removers and will help you choose the right software for your computer’s protection. Find the list at this link.
We hope that one of the above methods solved the problem and the scvhost.exe process is no longer causing high Network usage. If you know of other solutions to this problem not mentioned in our guide, please share them with us by leaving a comment below.
[Back to Top]
Rick Akura
In this guide, you will how to fix High Network Usage and Memory Leak Caused by svchost.exe (netsvcs) using different methods. Let’s get started.
Over time, Windows users have reported experiences with specific progress called svchost.exe (netsvcs) causing high network usage, memory leaks, and high CPU usage. This causes extreme slowdowns in computers, making your device sluggish and hard to use while also slowing down your internet speed.
Luckily, this devastating error isn’t impossible to fix. If you’re experiencing the issues mentioned above, give today’s article a read. We focus on exactly what the svchost.exe (netsvcs) process is, how it affects your computer, and how you can fix it’s large network, CPU and RAM usage.
What is svchost.exe (netsvcs)?
The svchost.exe process is called Service Host, which is a vital Windows Host Process in your system. It’s located in the C:\Windows\System32 folder, constantly running as an executable as many other Windows files depend on its presence.
Due to svchost.exe being a required system process, it may spike up the usage of various resources from time to time. However, there should never be a need for it to use a significantly large amount of your Network, RAM, or CPU. If you notice spikes that hog over 50% of these resources, something is wrong.
Is svchost.exe (netsvcs) a virus?
The svchost.exe (netsvcs) process itself is not a virus, malware, or dangerous application. It is a verified Windows file that’s required for your operating system to function.
However, in most cases, the high resource usage of svchost.exe is caused by malware or unwanted application. Such attacks run in the background and take advantage of the svchost.exe process to harm your device. This means that issues related to the process must be fixed immediately upon notice.
If your slowdowns are due to the svchost.exe process, follow the solutions described below to restore your computer and network to working order.
Fix issues related to svchost.exe (netsvcs)
Method 1: Run the Windows Update Troubleshooter
Many users noticed that the high network usage of the scvhost.exe process comes from Windows Update. You can easily check and fix this by running the integrated update troubleshooter in Windows 10.
- Open Settings by using the Windows + I keyboard shortcut or access it by clicking on the gear icon in the Start menu.
-
Click on the Update & Security tab.

- Choose Troubleshoot from the menu on the left-hand side.
-
Scroll down and select Windows Update, then click on Detect problems and apply the fixes (or Run the troubleshooter) and allow the troubleshooter to do its job.
- Once the troubleshooter finishes running, reboot your system. You should be able to see whether this method worked when testing your network speed again.


Method 2: Clear your Event Viewer logs
Simply clearing your Event Viewer logs may just save you from hours of troubleshooting. Follow the steps below to see if this method helps your issue with the svchost.exe process.
- Press the Windows + R keys on your keyboard to open the Run utility.
-
Type in “eventvwr” without the quotation marks, and click the OK button. The Event Viewer window will open up.
- In the pane on the right, click on Windows Logs and expand the section to reveal all sub-items.
-
Right-click on Application (Log) and select Clear Log from the context menu.
- Click the Clear button.
- Repeat these steps for Setup Log, System Log, and Security Log to clear all logs.
- Restart your system and see if the high resource usage problem caused by svchost.exe still exists.

Method 3: Update Windows to the latest version
As Windows Update may be the culprit behind svchost.exe’s high resource usage, simply updating to the newest version release of Windows might help you fix things. As a bonus, you get access to new and exciting features, improved security, and more optimization.
- Open the Settings application using the Start menu or the Windows + I keyboard shortcut.
-
Click on Update & Security.
-
In the Windows Update tab, click on the Check for updates button.
- If a new update is found, click on the Install button.
- After your system successfully installs the newest Windows 10 update, test if your issues with the svchost.exe are still present.

Method 4: Scan your computer for malware
As we’ve discussed, a malware infection or virus may cause the svchost.exe process to start draining your CPU, RAM, and network. Windows users can quickly scan their devices for any active infection by using the integrated Windows Defender.
Note: Many third-party antivirus software can also be used to scan your device for malware. Steps vary from application to application, so make sure you follow the appropriate steps described on the official website of your antivirus.
- Open Settings by using the Windows + I keyboard shortcut or access it by clicking on the gear icon in the Start menu.
-
Click on the Update & Security tab.
-
Choose Windows Security from the left-side menu, then click on Open Windows Security.
-
Open the Virus and Threat Protection section (the icon is shaped like a shield).
- Click on Quick Scan or Advanced Scan, then wait for Windows Defender to finish scanning your device. It’ll report any findings and suggest the appropriate action to block and remove threats.
- Check if your issues with the svchost.exe are still present after removing malware from your computer.


Method 5: Disable the BITS and Wuauserv services
Sometimes, disabling the BITS (Background Intelligent Transfer Service) as well as the Wuauserv (Windows Update) service may help you resolve high CPU and RAM memory usage caused by svchost.exe.
- Press the Windows + R keys on your keyboard to open the Run utility.
-
Type in “services.msc” without the quotation marks, and click the OK button. The Services window will open up.
-
Locate the Background Intelligent Transfer Service. Right-click on it, then select Properties.
-
Set the Startup type to Disabled and hit the Apply button.
- Close the window by clicking on the OK button.
- Locate the Windows Update service and repeat the same steps to disable it.
- Reboot your system and check if the steps above fixed your high resource usage caused by the svchost.exe process.

Method 6: Delete the SoftwareDistribution folder
If none of the methods above have worked, you can still try to delete the SoftwareDistribution folder in an attempt to fix your issues. This method usually fixes high network usage.
- If you haven’t disabled the Windows Update service using our previous method, temporarily pause it:
- Press the Windows + R keys on your keyboard to open the Run utility.
- Type in “services.msc” without the quotation marks, and click the OK button. The Services window will open up.
- Locate the Windows Update service. Right-click on it, then select Stop.
-
Using the File Explorer, navigate to C:\Windows.
-
Select the SoftwareDistribution folder right-click on it. Hit the Delete option from the context menu.
- Restart your device and test if your issues are fixed.


We hope that this article was able to help you troubleshoot high network/CPU/RAM usage, memory leaks, and slowness caused by the svchost.exe process. You should notice a significant increase in the speed of your system, allowing you to get back in business.
You are here: Home / How to / Fix svchost.exe (netsvcs) High Network Usage Error
Are you facing the svchost.exe (netsvcs) high network usage issue? In this guide, I will walk you through the hacks to fix this error.
I know you are in trouble and struggling hard to resolve the high network usage issue. The high network usage issue is common to face and it might be caused by svchost.exe (netsvcs). Your internet speed is dropping down because the svchost.exe is consuming the internet at a great speed keeping it slow.
The CPU, Memory, Network and other systems usage can be monitored using the Windows Task Manager tool. The Network tab displays the network utilization on the current primary network including bandwidth use on the network. If the network is busy then you may get high network utilization (usage). Sometimes you might have noticed that network usage is high on your system, and is generally caused by the svchost.exe process.

First, let me tell you what is svchost.exe(netsvcs)?
Must Read: What is WSAPPX and how to fix High CPU and Disk Usage Issue?
What is svchost.exe (netsvcs)?
Svchost.exe is a generic and legitimate Windows process that is highly required to run the entire system in a healthy condition. The svchost.exe (Service Host or SvcHost) process allows Windows to host multiple Windows services at the same time.
You can see many Service Host processes running in the background when you open Task Manager. The services hosted especially by Service Host are usually assigned to various related groups. If every service sync with one Service Host process, then even a single service crash could affect the entire Windows operating system. Therefore, the Service Hosts process is essential to run Windows smoothly and to avoid any problems.
Svchost.exe(netsvcs) is using high network usage. Can I disable or remove it?
As I have explained earlier svchost.exe is an essential process to run any Windows Operating System smoothly. You shouldn’t disable or remove this process as this can hamper your entire Windows operating system.
I myself have troubleshot the svchost.exe (netsvcs) problem by following methods. Try out them one by one to resolve the error.
Troubleshooting methods to fix svchost.exe (netsvcs) High Network Usage
- BITS service should be disabled
- Event viewer logs should be cleared
- Look out for the culprit service and disable it
- Run the anti-virus
BITS service should be disabled
BITS (Background Intelligence Transfer Service) usually transfers the files in the background using idle network bandwidth. Many users have reported that disabling BITS (Background Intelligent Transfer Service) helps in resolving the issue as BITS uses an idle bandwidth to transfer updates for users. When you stop this service from running, the applications that depend on BITS such as Windows Update will set to manual mode and unable to automatically download programs and other information. When it is about the error svchost.exe causing high network usage, it is always recommended to disable BITS service. To disable BITS service follow the below steps one by one:
- Open the Run program by pressing Windows+R key together and type services .msc. Press OK to run the program.
 High Network Usage Error")
- Once the services.msc window opens, scroll down and search for Background Intelligent Transfer Service. Right-Click and choose on the Stop option.
 High Network Usage Error")
- Once again right-click on the Background Intelligent Transfer Service and select Properties option.
 High Network Usage Error")
- The Properties window will open and from the drop-down window navigate to Start-up type bar and select the disable option from the list and hit the OK button.
 High Network Usage Error")
- Once done restart the computer and check your internet speed.
Event viewer logs should be cleared
The major issue can be faced by the large log files in the Windows event viewer, therefore, clearing them will help to boost the internet speed.
- Search for Event Viewer in the start menu and run the program.
 High Network Usage Error")
- In the Event Viewer window on the left pane, locate and expand the Windows logo and then right-click on the Application folder and click on clear log option from the drop-down menu.
 High Network Usage Error")
- Follow the same step to clear the log from the respective sub-folders i.e security, Setup, System, Forwarded Events.
 High Network Usage Error")
- Once done restart the computer to save the changes and check out for the issue once again.
Look out for the culprit service and disable it
Svchost.exe is an essential file to run the windows services swiftly, therefore simply identifying the exact services and programs that are working under svchost.exe and disabling them or completely removing them will help in resolving the issue.
- Search for the task manager in the start menu and hit the Enter button.
 High Network Usage Error")
- Navigate to the “Processes tab” and locate the high usage exe.service.
 High Network Usage Error")
- Right-click on the exe.service and click on the Go to details.
- Find out which service is mainly using the high CPU. Perform a search and sequentially stop the service.
 High Network Usage Error")
- Once the process is done restart the computer and check the internet usage speed once again.
Run the Anti-virus
- One of the major causes of the high usage of internet usage is the presence of virus and malware. The presence of virus or malware causes a service like svchost.exe (netsvcs) to use a huge amount of RAM without letting the free RAM go.
- In such a condition, it is always advisable to run the Anti-virus scan in order to remove the virus from the computer.
Conclusion
All these solutions will definitely help in resolving the issue and are highly recommended for those systems that are suffering from svchost.exe (netsvcs) high network usage problem.
DeviceTricks is one such platform which has the potential to be your own helper. Stay tuned to our latest tutorials and follow us on our Facebook page. Write us back in our comment box for any such queries.
Service Host: Network Service is a Windows process that downloads updates on many computers. So, it is pretty obvious that it will take some network. But it should stop consuming the resources afterward. However, many users complain that Service Host Network Service is showing high network usage. Various reasons can cause the issue. In this article, we will talk about the issue and see what should be done to resolve it.

What is Service Host (svchost.exe)?
Service Host (svchost.exe) is a shared service process that is a shell for loading services from DLL files. Some of the processes that use it are:
- Local Service
- Network Service
- Local System
So if Network Service is using Service Host, then you will see it in the Task Manager as – Service Host: Network Service.
Read: What is Service Host Agent Activation Runtime process?
What is Service Host Network Service in Task Manager?
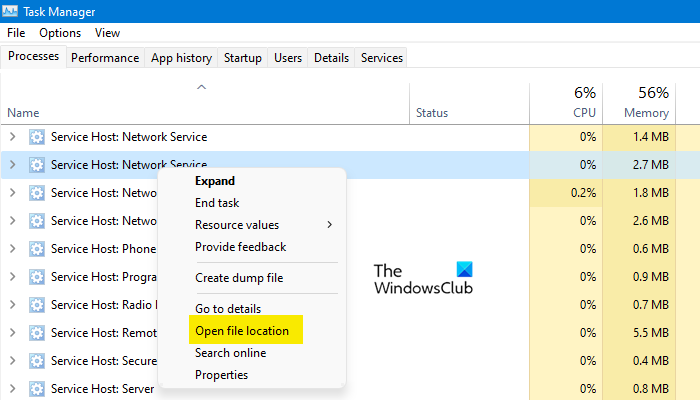
Service Host: Network Service is a genuine Windows. Service Host is used to hosting different operating system processes simultaneously. There are various host groups to organize services, and each one of them runs inside a different instance. Network Service is what allows them to stay connected. To know the location of the file, you need to right-click on it from the Task Manager and select Open file location. The location will be the following:
C:\Windows\System32
You can find the svchost.exe process at that very location.
If you are experiencing Service Host Network Service High network usage, then try the following solutions to resolve the error.
- End Task and Restart
- Disable Delivery Optimization
- Use Metered Connection
- Run Windows Update Troubleshooter
- Run Network Troubleshooters
- Repair System File Checker
- Use the Network Reset button
- Identify the app with high Data Usage and take suitable actions.
Let us talk about them in detail.
1] End Task and Restart
The first thing you need to do is kill the process and restart your computer. Open Task Manager by Ctrl + Shift + Esc, right-click on Service Host: Network Service, and select End Task. Then, reboot the system. This will stop the process that could have caused the problem.
2] Disable Delivery Optimization
Ending the task will surely resolve the problem, but on some systems, it was temporary and after restarting the system, the issue returns. What you need to do is turn off Delivery Optimization and see if that works.
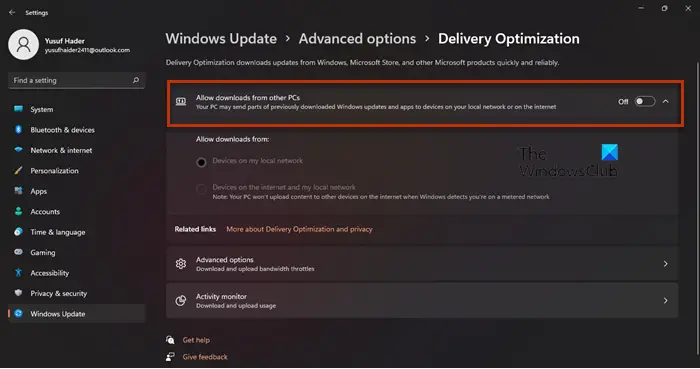
Delivery Optimization helps in updating the Operating System and the Windows Store apps. It also shares your system update with other computers over the Internet. It is not something that you should enable if you have limited data as it takes a lot of data. That is one of the reasons why Service Host Network Service is showing a high network usage. You need to follow the prescribed steps to disable Delivery Optimization.
Windows 11
- Open Settings.
- Click on Windows Updates.
- Go to Advanced Options > Delivery Optimization.
- Turn off the toggle of Allow downloads from other PCs.
Windows 10
- Open Settings.
- Go to Updates & Security > Delivery Optimization.
- Disable the toggle of Allow downloads from other PCs.
Hopefully, this will do the job for you.
Read: Service Host Delivery Optimization High Network, Disk or CPU usage
3] Use Metered Connection
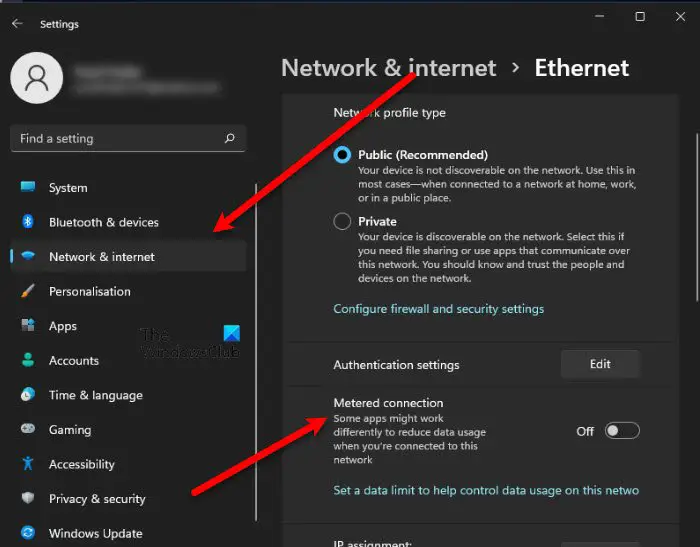
Metered Connection is something that you can use for limited data. It is something that stops some of the processes that could have taken a huge chunk of the data. These limitations can stop the service in question from slowing down your Internet. You should follow the prescribed steps to enable Metered Connections.
- Open Settings.
- Go to Network & internet > WiFi or Ethernet.
- Click Manage known networks.
- Select your network.
- Enable Metered connection.
Restart your computer and hopefully, it will do the job for you.
4] Run Windows Update Troubleshooter
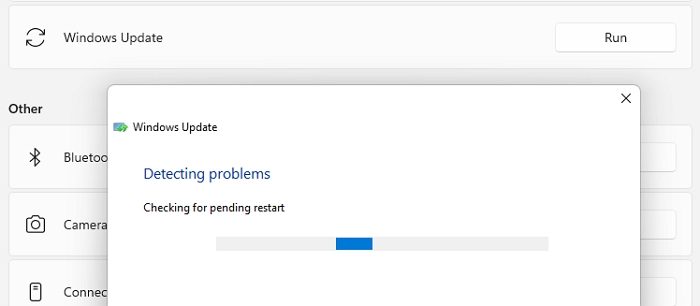
Since the issue is somewhat related to the Windows Update, we are going to run its troubleshooter and see if it works. You need to follow the given steps to do the same.
Windows 11
- Open Settings.
- Go to System > Troubleshoot.
- Click Other troubleshooters.
- Click on the Run button associated with Windows Update.
Windows 10
- Open Settings.
- Go to Update & Security > Troubleshoot > Other troubleshooters.
- Select Windows Update and click Run the troubleshooter.
Hopefully, this will do the job for you.
Read: Windows Update high CPU, Disk, Memory usage
5] Run Network Troubleshooters
Run the Network Troubleshooters and see if they help you resolve the issue.
6] Repair System File Checker
Corrupted system files are something that can be caused by various things. More often than not, it is the abrupt shutdowns and restarts, but there are various other reasons. However, it can be resolved, and we are going to show you how.
Open Command Prompt as an administrator and run the SFC scan:
sfc /scannow
Finally, check if the issue persists.
7] Use the Network Reset button
Use the Network Reset button to reset all network-related settings to default.
Read: What is Host Process for Windows Tasks or Service Host?
8] Identify the app with high Data Usage and take suitable actions
Check the Internet Data Usage on your computer. Identify the app with high Data Usage and take suitable action like maybe limiting its usage.
Why is my Service Host Network using so much network?
Service Host: Network Service is used by various Windows OS processes to engage in network-related activities. The Delivery Optimization service which allows other computers sharing the same host to download updates from your computer also uses it. and in this process, it could end up consuming high resources. So, if the feature is enabled, and the service is working, you will see a spike in network usage. However, that is not the only reason, corrupted system files, glitches, are some other causes of the same. So, without wasting any time, let us go to the troubleshooting guide.
Related links that may help you:
- Service Host SysMain causing High CPU and Memory usage.
- Service Host: State Repository Service high CPU usage.
- Service Host: Local System high CPU or Disk usage
- Service Host: Diagnostic Policy Service 100% Disk Usage.
Svchost.exe (netsvcs) is a Windows system process that is very necessary to keep the system functioning in a stable condition.
However, if it gets out of control, then it can eat up all your Internet speed for running Windows services.
In this guide, you will find step-by-step instructions to fix the broken svchost.exe.
What is svchost.exe (netsvcs)?
Before we begin fixing the issue at hand, it is good to know a little about svchost.exe (netsvcs).
It runs on your computer to host other individual services that Windows uses to perform various functions within the system.
Out of these individual services, netsvcs is also one, and it is important for your computer to run safely and be in stable condition. This ultimately means that netsvcs is an important part of your Windows and can neither be removed nor disabled.

So if this Windows service cannot be removed or disabled, how can we fix the problem? Fixing netsvcs can be a little tricky.
Below are a few effective ways in which you can fix your system’s high network usage issue.
Solution 1: Disable the BITS service
According to many users facing this problem, disabling the BITS (Background Intelligent Transfer Service) can actually solve this issue. It is because BITS uses the idle bandwidth to transfer updates for users.
However, considering the huge usage of the Internet by netsvcs, it is a smart move to disable it. Follow the instructions below to disable the BITS service on your computer.
- Press Windows Logo Key + R to open the Run application
- In the dialogue box, type services.msc and press Enter
- A window will open with a list of all the services running on your computer
- In the list of services, locate and right-click on the Background Intelligent Transfer Service and click on Stop
- Right-click on the Background Intelligent Transfer Service again and click on Properties
- A new window will be opened; from the drop-down menu, set the Start-up type to be Disabled
- Then click on Ok to save your settings and exit
- Once done, restart your computer
After the process is completed, check to see if the problem has been solved or not. If it hasn’t, then read the next solution.
Solution 2: Clear Event Viewer Logs
Many users also report that the svchost.exe high memory usage problem is caused by the large log files present in the Windows event viewer.
Therefore, clearing the event viewer logs is a good way to fix the problem.
Follow the steps below to clear the event viewer logs:
- Press Windows logo key + R to open the Run application
- Type msc in the dialogue box and then click Ok
- On the left pane, locate and expand Windows Logs
- Then right-click on the sub folders under it and then click on Clear Log
- Follow the last step for Application, Setup, Security, System and Forwarded events
Once done, restart your computer and check to see if the problem still exists or not. If the problem is still not solved, then try the next solution.
Solution 3: Find and Disable the culprit service
Svchost.exe is a process that is needed by many Windows services and programs in order to run.
Simply identifying the service or program that is working under svchost.exe and then disabling or completely removing it should definitely solve the high usage problem.
Follow the steps below to find the culprit service and then disable it:
- Right-click on the Task Bar and click on the Task Manager to open it
- Navigate to the Processes tab and locate the exe high usage service
- Right-click on it and then click on Go to details
Now try to find out which process is mainly using the CPU:
- Perform a search
- Try sequentially stopping the services
Now follow these steps:
- Choose a service
- Right-click on the service and then click Stop Service
Follow the steps below to disable the suspicious service:
- Press Windows logo key + R to open the Run application
- In the dialogue box, type msc and then press Enter
- In the Service Management window, select the service you want to disable and right-click on it, then choose Properties
- Set the Start-up type to be Disabled and then click Ok and then exit
- Restart your computer after the process is completed
Identifying and stopping the culprit service is a tricky process. However, if properly done, it can get rid of the high usage issue completely.
Complete the process, restart your computer, and then check to see whether the problem still exists. If it does, continue to the solution below.
Solution 4: Scan your computer for viruses and malware
One of the major causes of the svchost.exe problem is the occurrence of viruses and malware within the system. A virus or malware infection could cause a service, such as svchost.exe, to make use of a huge amount of RAM without letting the free RAM go.
If that’s the case, then it is best to scan the computer for any viruses or malware and then remove or quarantine them as soon as possible.
You can use any antivirus software to scan your computer and remove any viruses on your Windows computer.
However, some of the best antivirus software are:
- Kaspersky Free Antivirus
- Bitdefender Antivirus
- Avast Free Antivirus
- Microsoft Windows Defender
- AVG Free Antivirus
After scanning your computer and getting rid of any viruses or malware, restart your computer and check to see if the problem still exists.
If the other solutions do not work for you, this should definitely do the trick.
Conclusion — svchost.exe (netsvcs) network usage
Svchost.exe (netsvcs) on Windows 10 can be a huge problem with the computer memory being used up too much, the Internet working too slow, and the overall performance of the computer becoming super slow and sluggish.
The only way to temporarily fix the issue is to restart the computer.
However, this problem is commonly caused by a virus or malware infection or because of a single service automatically starting to use up all the network and memory on your computer.
All of the solutions mentioned in this guide are highly recommended for those computer systems suffering from a svchost.exe (netsvcs) high network usage problem.
Go through the solutions and try them and see if these are the fixes you have been looking for.
Petr is a serial tech entrepreneur and the CEO of Apro Software, a machine learning company. Whenever he’s not blogging about technology for itechgyan.com or softwarebattle.com, Petr enjoys playing sports and going to the movies. He’s also deeply interested about mediation, Buddhism and biohacking.