
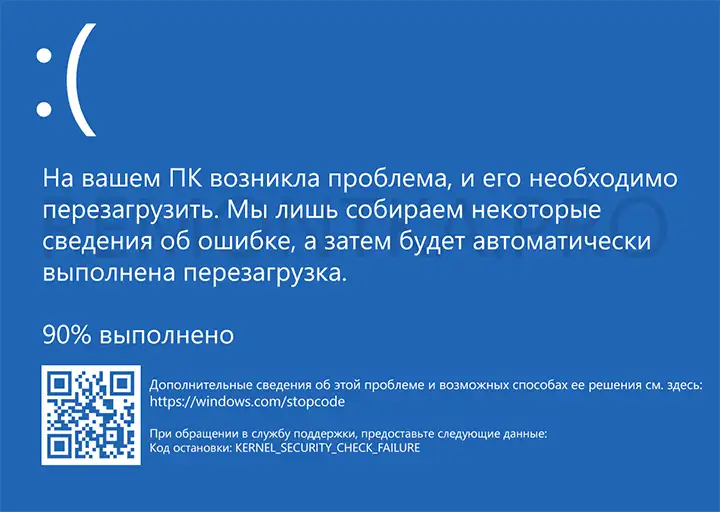
Синий экран с кодом KERNEL SECURITY CHECK FAILURE (0x00000139) в Windows 11 и Windows 10 может появляться при самых разных обстоятельствах: во время загрузки системы, при работе в браузере, подключении к Wi-Fi или подключении USB-устройства к компьютеру и точную причину бывает трудно установить, однако в некоторых случаях это возможно.
В этой инструкции подробно о возможных причинах ошибки KERNEL SECURITY CHECK FAILURE и способах её исправить в случае, если вы столкнулись с проблемой.
Диагностика причин синего экрана KERNEL SECURITY CHECK FAILURE
Вы можете попробовать выяснить какой модуль (драйвер) вызвал появление рассматриваемой ошибки. Лучше всего для этого использовать утилиту WinDbg от Microsoft. Конкретно для этой ошибки другая популярная утилита — BlueScreenView, не дает нужного объема информации.
Базовый вариант использования WinDbg для поиска причин ошибки KERNEL SECURITY CHECK FAILURE будет состоять из следующих шагов:
- Скачайте WinDbg из Microsoft Store или используя файл веб-установщика с сайта Майкрософт: https://aka.ms/windbg/download
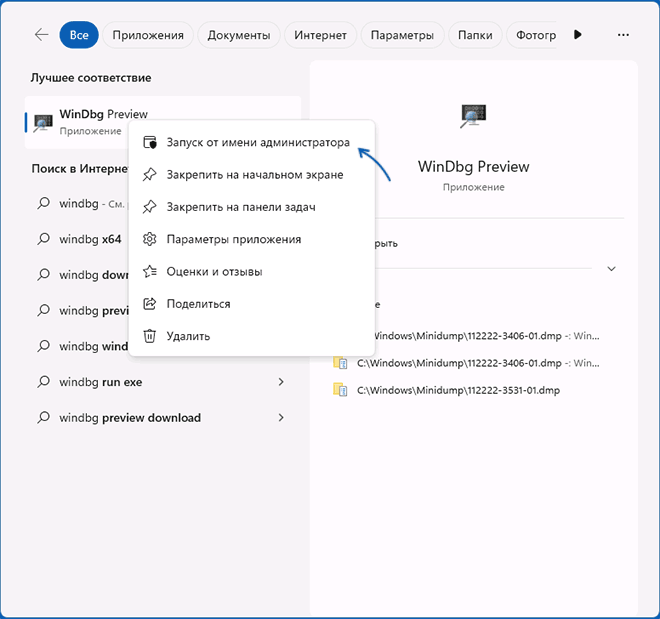
- Запустите программу, обязательно от имени администратора (правый клик по значку программы в меню Пуск или поиске на панели задач — «Запуск от имени администратора»).

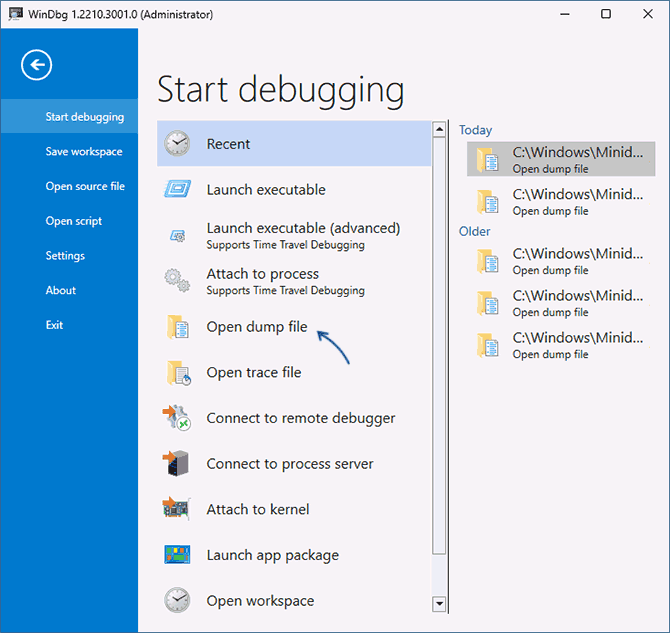
- В программе откройте меню «Файл» и выберите пункт «Open dump file» (Открыть файл дампа). Укажите путь к файлу дампа на нужную дату в папке C:\Windows\Minidump

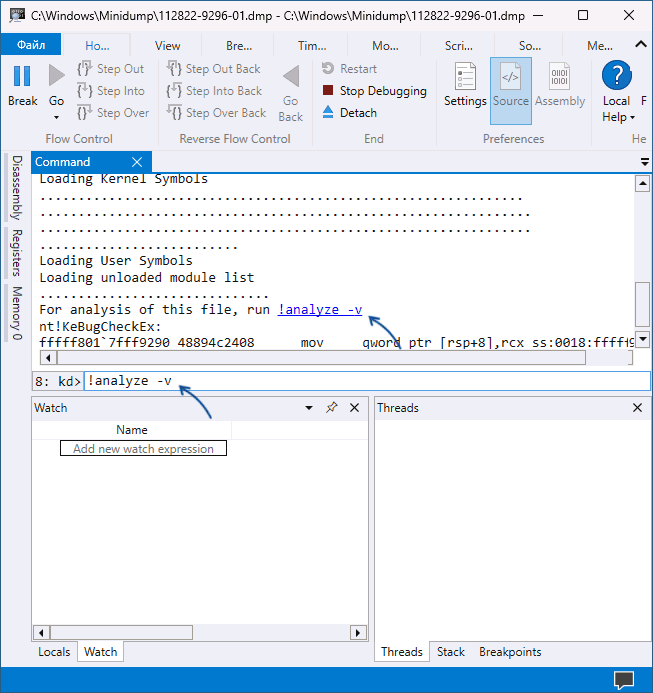
- После загрузки файла дампа введите
!analyze -v
в поле ввода команд и дождитесь завершения анализа, либо нажмите по ссылке с текстом команды в верхней панели.

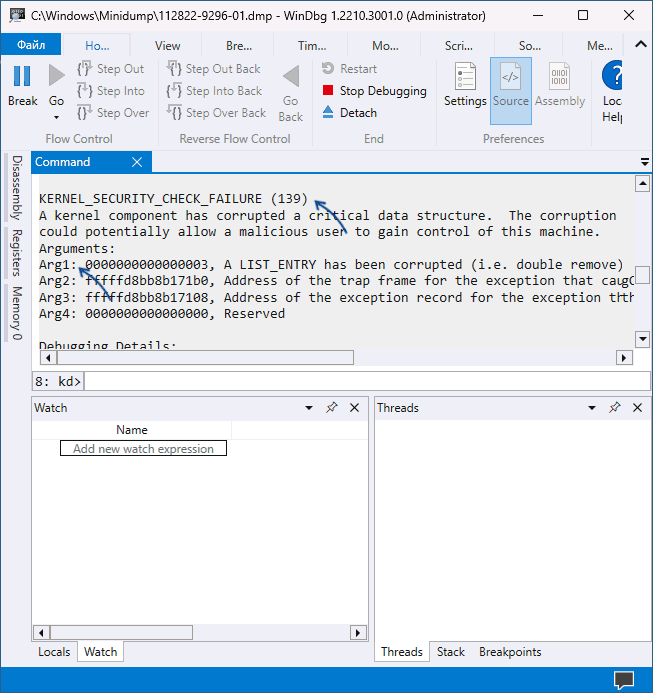
- В результате вы получите отчет о результатах анализа дампа файла. В верхней части его будет представлен код ошибки KERNEL SECURITY CHECK FAILURE 0x00000139, а также список аргументов: в первом из них (Arg1) помимо числового значения будет указана конкретная причина ошибки, обычно сложная для понимания рядовыми пользователями, но потенциально полезная для разработчиков. В случае значения 3 «A LIST_ENTRY was corrupted» для первого аргумента, наиболее вероятная причина — неправильная работа драйвера (но то же самое возможно и при других значениях).
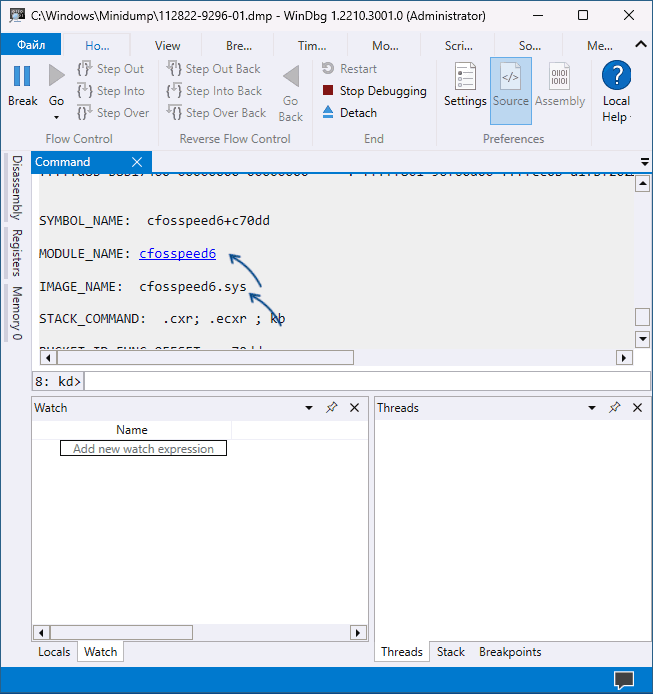
- Ниже в отчете вы сможете найти информацию о модуле, который вызвал сбой. Например, на скриншоте ниже — это файл драйвера .sys — если вы получили информацию об имени файла, её можно использовать на следующем шаге.

- Если выполнить поиск в Интернете по имени файла драйвера, можно найти что это за драйвер, к какому устройству или программе он относится (некоторые программы также устанавливают свои драйверы) и исходя из этого предпринять необходимые действия: удалить программу, заменить драйвер устройства на драйвер другой версии или от другого поставщика, удалить драйвер и отключить устройство, если оно не используется. Например, в примере на скриншотах сбой вызывал драйвер программного обеспечения для управления и оптимизации сетевых подключений, иногда поставляемого с материнскими картами MSI, но доступного для установки и на другие Windows-устройства.
Если модули, вызвавшие сбой постоянно меняются, либо относятся к системным файлам и драйверам Windows, есть большая вероятность, что причина синего экрана — сбои работы оперативной памяти, реже — ошибки обмена данными с диском, наличие вирусов (а иногда, наоборот — сторонних антивирусов). Об этих и других причинах и методах решения — в следующем разделе инструкции.
Быстрые способы исправить ошибку KERNEL SECURITY CHECK FAILURE
Если вы не готовы разбираться с конкретной причиной ошибки, а требуется быстрое и, возможно, рабочее решение, можно попробовать следующие варианты решения проблемы. Они «универсальны» для такого типа ошибок и часто один из них оказывается результативным.
Базовые способы исправить ошибку KERNEL SECURITY CHECK FAILURE и предотвратить появление синего экрана в дальнейшем включают в себя:
- Если к компьютеру в последнее время было подключено новое оборудование, проверьте, появляется ли синий экран вновь, если его отключить. Если в данном случае ошибка исчезает, попробуйте поэкспериментировать с драйверами устройства (установить другие версии драйверов с сайта производителя или сторонних источников).
- Если устанавливались новые модули памяти, проверьте, сохраняется ли ошибка, если их отключить и убедитесь, что материнская плата поддерживает текущую конфигурацию RAM (можно уточнить в официальном руководстве к вашей модели материнской платы). Также имеет смысл проверить оперативную память на ошибки.
- В случае, если в последнее время устанавливались новые драйверы, в том числе виртуальных программных устройств — попробуйте удалить их (или вернуть старую версию). Если выполнялась установка сторонних служб, например, при установке антивируса, попробуйте удалить программу, которая установила сторонние службы.
- Проверьте, нет ли в диспетчере устройств каких-либо устройств с ошибками (желтым восклицательным знаком). При наличии таких устройств, откройте свойства с описанием и кодом ошибки и попробуйте найти решение (в том числе с помощью поиска на этом сайте по коду ошибки). Если причина — отсутствие драйвера, установите его с официального сайта производителя материнской платы или ноутбука, даже если на официальном сайте доступен только драйвер для одной из предыдущих версий системы.
- Выполните проверку компьютера на вирусы, например с помощью Kaspersky Virus Removal Tool (не требует установки на компьютер). Ещё лучше использовать загрузочные антивирусные образы, то есть выполнять проверку с загрузочной флешки, например, таким инструментом как Dr.Web CureIt!
- При наличии точек восстановления системы на дату, когда ошибка не появлялась и при условии, что оборудование компьютера не менялось, попробуйте использовать их. Подробнее: Точки восстановления Windows 11 (подойдет и для Windows 10).
- Выполните проверку и восстановление целостности системных файлов Windows.
- Если ошибка возникает только при запуске определенной программы, попробуйте следующие варианты: добавление программы в исключения антивируса, установка другой версии программы или её скачивание и установку из другого источника.
- При появлении ошибки во время чистой установки Windows с флешки, попробуйте другой образ (желательно — оригинальный) и другой накопитель. Если это новый компьютер, также имеет смысл проверить оперативную память на ошибки, как это было указано во 2-м пункте, это можно сделать и с загрузочной флешки.
- Если ошибка появилась после переустановки Windows, установите оригинальные драйверы чипсета с сайта производителя материнской платы ПК или сайта вашего ноутбука, а также сопутствующие драйверы системного оборудования и управления электропитанием при их наличии (даже если на официальном сайте представлены только старые версии драйверов).
- В случае появления ошибки после установки обновлений Windows, попробуйте удалить их.
- Есть сообщения, что у некоторых пользователей проблему решает включение классического меню загрузки Windows. Чтобы попробовать, используйте команду
BCDEDIT /SET {DEFAULT} BOOTMENUPOLICY LEGACYв командной строке, запущенной от имени администратора.
- В редких случаях причиной проблемы могут оказаться ошибки чтения/записи HDD или SSD — из-за ошибок на диске (как проверить диск на ошибки), либо из-за проблем с его подключением, например, поврежденного SATA-кабеля.
Ещё один быстрый способ решения проблемы — исправление текущей установки Windows с помощью образа ISO, этот вариант срабатывает в большинстве случаев, если синий экран KERNEL SECURITY CHECK FAILURE стал появляться на уже установленной системе. Шаги будут следующими:
- Скачайте ISO образ с той же версией Windows (или более новой), которая у вас установлена и смонтируйте его в системе.
- Запустите файл setup.exe из подключенного образа и пройдите первые шаги в мастере установки.
- Выберите один из вариантов переустановки — с сохранением файлов, настроек и приложений или с сохранением только личных файлов.

- Подтвердите установку и дождитесь её завершения.

Надеюсь, один из предложенных вариантов помог разобраться в причинах проблемы и решить её. Будет отлично, если вы сможете поделиться в комментариях своим опытом решения рассмотренной проблемы.
Синий экран смерти с кодом 0x00000139 появляется при запуске компьютера после обновления ОС, установки нового аппаратного или программного обеспечения. На более современных версиях Windows, например, 8.1 и 10, данный BSoD идет без номера: он подписан как Kernel Security Check Failure.
Причины появления 0x00000139
- Несовместимость драйверов.
- Повреждение системных файлов.
- Проблемы с оперативной памятью компьютера.
- Неполадки с аппаратным обеспечением.
Методы решения 0x00000139
Метод №1 Обновление ОС Windows
Учитывая, что данный BSoD не блокирует доступ к системе — мы рекомендуем провести установку всех доступных обновлений для своей Windows. В довольно редких случаях отсутствие тех или иных апдейтов может вызывать появление BSoD’ов в определенных условиях.
Чтобы обновить свою Windows, вам нужно сделать следующее:
- нажмите ПКМ на Пуск и выберите пункт «Параметры»;
- перейдите в раздел «Обновление и безопасность»;
- далее перейдите в подраздел «Центр обновления Windows»;
- кликните на кнопку «Проверка наличия обновлений»;
- следуйте инструкциям на экране для установки всех доступных апдейтов;
- перезагрузите компьютер по окончанию процесса обновления.
Внимательно наблюдайте за загрузкой компьютера — ждите появления синего экрана смерти 0x00000139.
Метод №2 Запуск System File Checker
Повреждение системных файлов однозначно может привести к появлению BSoD’ов на компьютере пользователя. Чтобы восстановить поврежденные системные файлы, вам стоит воспользоваться системной утилитой System File Checker.
Для запуска SFC вам нужно сделать следующее:
- нажмите правой кнопкой мыши на Пуск;
- выберите из списка пункт «Командная строка (администратор)»;
- напишите команду sfc /scannow и нажмите Enter;
- подождите завершения сканирования (вы поймете, были ли что-то повреждено или нет);
- перезагрузите компьютер.
Ну что, получилось избавиться от 0x00000139? Если нет, то давайте двигаться дальше.
Метод №3 Проверка диска на ошибки
Синие экраны смерти частенько возникают из-за различных ошибок на диске пользователя. На подобные случаи как раз существует системное средство проверки диска, которое можно запустить через Командную строку. Попробуйте сделать следующее:
- откройте Командную строку теми же шагами, что были показаны ранее;
- напишите команду chkdsk C: /f /r /x и нажмите Enter;
- нажмите Y для согласия на перезагрузку компьютера и начала проверки диска.
На работу данного средства потребуется какое-то время. По завершению сканирования, исправления потенциальных ошибок и восстановления информации с поврежденных секторов вы войдете в Windows — посмотрите, появится ли BSoD 0x00000139.
Метод №4 Удаление проблемного драйвера
Некорректно работающие драйвера могут вызвать появление синего экрана смерти. Вам нужно проверить дамп памяти после возникновения BSoD с кодом 0x00000139 и понять, какой конкретно драйвер вызывает проблемы.
Для начала вам нужно убедиться, что в вашей системе настроено создание дампа памяти при возникновении критических ошибок. Сделайте следующее:
- нажмите Windows+S;
- пропишите запрос «Панель управления» и выберите найденный результат;
- перейдите в раздел «Система» (выберите в просмотре крупные значки);
- кликните на строчку «Дополнительные параметры системы»;
- нажмите на кнопку «Параметры…» в разделе «Загрузка и восстановление»;
- поставьте галочку возле опции «Записать событие в системный журнал»;
- в записи отладочной информации выберите «Малый дамп памяти»;
- примените изменения, перезагрузите компьютер и дождитесь появления BSoD 0x00000139.
Теперь давайте попытаемся прочитать с вами созданный дамп памяти. Для этого вам потребуется скачать небольшую утилиту BlueScreenView. Запустите ее и выберите свежий дамп памяти. Осмотрите выделенные красным элементы в нижней части окошка программы.
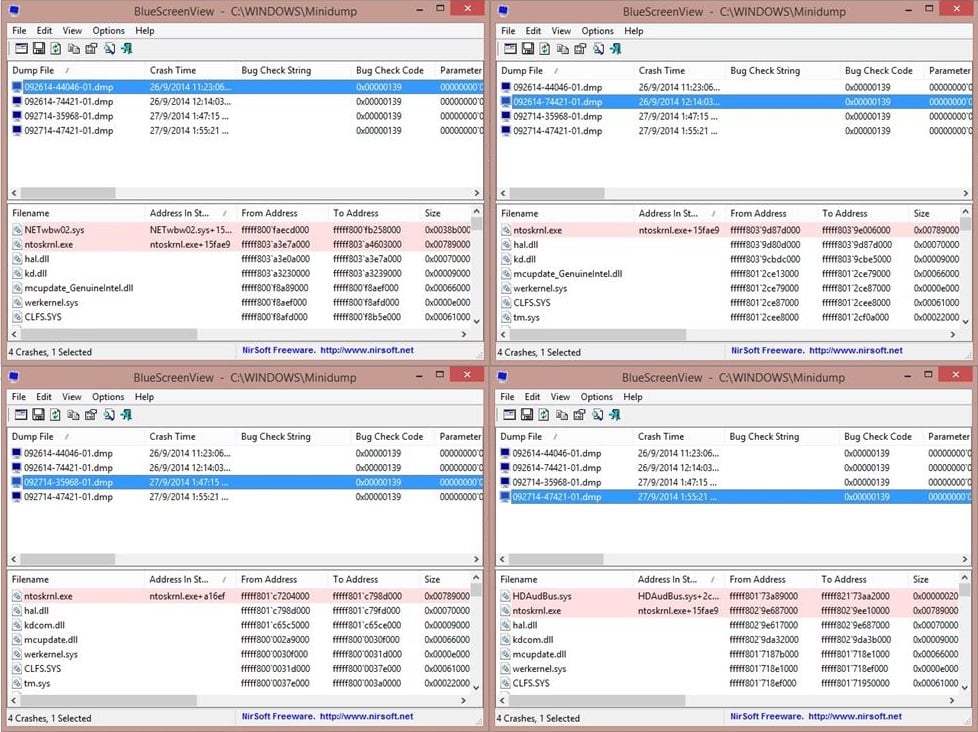
Все, что вам остается сделать — это пробить находку в Интернете и понять, чем конкретно она является. Возможно, это будет драйвер для вашего графического ускорителя или же драйвер для какого-то иного устройства, например, USB-колонок. Далее вам нужно переустановить, обновить или же и вовсе избавиться от этого драйвера. Тогда 0x00000139 должен исчезнуть.
Метод №5 Проверка оперативной памяти
Проблемы с оперативной памятью могут привести к самым разным ошибкам во время работы ОС. Вам необходимо проверить свою RAM при помощи средства проверки памяти Windows. Выполните следующее:
- нажмите Windows+S;
- пропишите «Средство проверки памяти» и выберите найденный результат;
- в появившемся окошке выберите опцию «Выполнить перезагрузку и проверку (рекомендуется)».
Далее ваш ПК перезагрузится и начнется проверка оперативной памяти. Данный процесс может занять довольно продолжительное время — все зависит исключительно от самого типа RAM и ее объема. Спокойно можете рассчитывать на 10 или 15 минут.
Как только проверка завершится, ваш компьютер перезагрузится еще раз и вы войдете в систему. В области уведомлений панели задач появится сводка проведенной проверки RAM. По ней вы поймете, появляется ли 0x00000139 из-за оперативки или нет.
Добрый день .
Что касается вопроса, пожалуйста, попробуйте следующий метод, чтобы устранить эту проблему:
Способ 1:
Я хотел бы предложить вам выполнить восстановление системы
Вы можете обратиться по ссылке:
windows.microsoft.com/en-US/windows7/products/features/system-restore
Способ 2:
Вы также можете попробовать выполнить проверку на вирусы и проверить. Обратитесь по ссылке.
windows.microsoft.com/en-US/windows/products/security-essentials
Способ 3:
Я хотел бы предложить вам выполнить sfc сканирования, чтобы проверить, отсутствующие или поврежденные системные файлы.
Запустите проверку системных файлов (sfc) сканирование исправить все поврежденные системные файлы. Чтобы сделать это, выполните действия, указанные в ссылке :
Как использовать средство проверки системных файлов для устранения неполадок отсутствующие или поврежденные системные файлы в Windows Vista или Windows 7
support.microsoft.com/kb/929833
Надеюсь, что помогает
Источник Здесь .
The Blue Screen Error 0x00000139 refers to the “KERNEL_SECURITY_CHECK_FAILURE” in Windows OS and this indicates that the kernel has detected a security violation. This mostly occurs when you are using some incompatible or outdated driver. Moreover, this may also occur when you incorrectly update a driver to its faulty update.
There are some other reasons as well that could trigger an error 0x139 on a Windows 11/10 PC. In this blog post, we have covered all these reasons along with five working ways applying which you may overcome this issue.

What Causes Error 0x139 KERNEL_SECURITY_CHECK_FAILURE?
This Kernel Security Check Failure Error 0x139 might occur when one or a combination of the following issues are met on your Windows PC –
- Outdated or Incompatible Drivers: The presence of faulty or outdated drivers may start causing conflicts. This, in turn, may trigger Kernel Security Check Failure Errors including, error 0x00000139.
- You have installed a buggy driver update: This error might also occur after you update some of your drivers with an incompatible update.
- Hardware failures: Blue Screen Errors mostly occur because of a failing hard disk or RAM. If that’s the case, you need to replace the faulty device with a new one.
- Malware Infection: The presence of problematic apps, especially free antivirus programs, may also trigger such issues on Windows PCs. Get rid of such applications from your computer and initiate SFC and DISM checks.
- Pending Windows Updates: If you have prevented Windows Updates from occurring automatically and there was some update that went uninstalled on your PC, this may also trigger this bug check error.
Whatever the problem is in your case, you may fix it by booting into Safe Mode on your PC and applying the fixes provided below. Let’s discuss the solutions in more detail –
Ways to Solve BugCheck Error 0x00000139 in Windows
Since this is a blue screen type error, you can’t boot into your device normally. So, boot your device into Safe Mode first and then attempt the following fixes to troubleshoot this Kernel error 0x139.
1. Update all your device drivers
This Kernel Security Check Failure Error 0x139 mostly occurs because of issues within your device drivers. There’s a possibility that some of your device drivers are outdated and require an immediate update. You may confirm the same via either Device Manager or Windows Update > Optional Updates.
Go to either of the above-mentioned places and check if any of your device drivers require an update. Device Manager is defunct these days, so you should directly check for driver or firmware updates over Windows Update. Here’s how to perform this task –
- Press Windows + I to launch Settings.
- Go to Windows Update from the left navigation and then Advanced options under More options.
- Scroll down to Additional options, and click Optional Updates under this.

- All pending updates for your system will be displayed here.
- Tick the checkboxes of all updates, and hit Download & Install.

- After the updates are downloaded successfully, the system will begin installing them one after another.
- Have patience and keep your device connected to a Power Source.
Only when all the updates are installed successfully, and your device boots up on its own, check if the Blue Screen Error 0x139 resolves now.
Note: Many a time, there are some issues with the device drivers, and yet Windows 11/10 doesn’t identify them on your behalf. In such cases, you are going blind with incompatible device drivers and may get into one or more BSOD Errors time and again.
2. Roll Back Recent Driver Updates
If you had recently updated some of your device drivers and this error 0x139 started occurring afterward, you must have installed some buggy updates. To overcome this issue then, you should roll back the recently updated drivers on Windows PC. Here’s how to carry out this process –
- Press Windows + X to launch the Power Menu and select Device Manager.
- On the next window, expand the section containing the recently updated drivers.
- Right-click on the specific driver and choose the Properties option.
- Head over to the Driver tab, and hit the Roll Back Driver button.

- After you successfully roll back the particular driver, click OK to confirm the recent changes on your computer.
- Close Device Manager and restart your Windows PC.
Hopefully, from the next login, you can log into your device without encountering the same bug check error 0x00000139.
3. Inspect your Hard disk and RAM
Blue Screen Errors may also occur when there are some bad sectors on your hard disk or when the RAM gets corrupted. Two separate tools can check both HDD and RAM on Windows PCs and let you know if they require any replacement.
Running CHKDSK:
- Launch Command Prompt as administrator first and when it launches, execute the below code on it.
chkdsk /f /r

- Since the root drive is already in use, the console will ask – “If you really want to initiate the disk checkup the next time your system restarts?”. Type “Y” without quotes and hit Enter.
- Close the Command Prompt and then restart your computer. The CHKDSK will launch next and start diagnosing your system for possible corruption within the hard disk.
- If there are any bad sectors on your hard drive, this tool will try repairing the same. However, if the issues are beyond repair, the same will be reported back to you.
Replace your hard disk if required, and this BSOD Error KERNEL_SECURITY_CHECK_FAILURE resolves in no time.
Inspecting Memory:
If the hard disk is all right and yet this error 0x00000139 is appearing, this must be because of corruption within your RAM. Use Memory Diagnostic Tool to diagnose and repair corruption within RAM. Here’s how to inspect Memory in Windows –
- Press Windows + R to launch the Run dialog.
- Type “MdSched” on it and hit OK.
- Windows Memory Diagnostic tool will start next.
- Click the first option i.e. Restart now and check for problems (recommended).

- Wait for this tool to find and resolve issues within your RAM.
- After this check is completed, you will get to know if there were indeed some issues with your Memory or not.
If required, replace the RAM as well and check whether this resolves the error 0x00000139 on your Windows PC.
4. Scan for Malware
If both the hard disk and Memory are all okay, this Blue Screen Error 0x00000139 must be the result of some malware attack on your computer. This happens mostly when you use some third-party free antivirus programs. Get rid of such apps from your Windows PC and enable Windows Security.
Assuming there was some file corruption owing to third-party antivirus interactions with the system files, you should next run the System File Checker tool. This tool will check for corruption within the system files and folders and have them repaired. Apart from fixing corrupt files and folders, this tool will also repair any missing files on your system.
Here’s how to proceed with this task –
- Boot your device into Safe mode first.
- Open the Run dialog by pressing Windows + R.
- Type CMD and press Ctrl + Shift + Enter keys altogether.
- The User Account Control window will prompt next, hit Yes to authorize accessing the CMD as administrator.
- Type the following near the blinking cursor and press Enter –
sfc /scannow
- Wait for the next 10-15 minutes while this tool checks and repairs the corrupt system files and folders on your PC.
After this scanning/repairing process is over, you may boot back into Windows normally and check if the Blue Screen Error 0x00000139 resolves this way.
5. Check for Windows Updates
One should always keep his/her Windows Operating System up to date by downloading and installing the recent patch updates. This, in turn, ensures your device meets all the security requirements to tackle the latest vulnerabilities and malware. Moreover, Microsoft also releases new updates catering the new issues and bug check errors.
You may download updates directly from Settings > Windows Update, or visit Microsoft’s Update Catalog and download the recent updates for your PC based on your system architecture.
Note: Here’s a detailed guide on how to install pending updates manually on Windows 11. For this, you must boot into Safe Mode with networking on your computer.
Conclusion
Hopefully, the above fixes will resolve the Blue Screen Error 0x00000139 on your Windows PC. However, if the error persists even after applying the above fixes, you should seek further assistance from a computer technician or Microsoft support to diagnose and resolve the issue.
0x00000139 refers to a bug check code that triggers Blue Screen Error KERNEL_SECURITY_CHECK_FAILURE. When Kernel Security Check Failure occurs, the system unexpectedly crashes and shows BSOD with the mentioned stop code. 139 bugcheck might appear because of malfunctioning drivers, system file corruption, malware infections, or a RAM problem.
There are various measures you can take for this 0x00000139 Windows 11 or 10 blue screen fix. To begin, consider upgrading all of your drivers, particularly those for graphics card and sound system, run a memory test to see if there are any problems with RAM, or clean boot to see whether any third-party apps or services are causing the error.
Stop code 0x00000139 Windows 11 Error Fix
Here is How to Fix Bugcheck 0x00000139 BSOD Blue Screen Error in Windows –
Way-1: Install Pending Windows Updates
Installing Windows updates contain bug fixes and patches that can quickly solve the stop code 0x00000139 Blue Screen problem. The issue is commonly triggered due to hardware and software difficulties, such as defective drivers or RAM issues, and system files crash.
If the BSOD is caused by a software problem, such as a bug or malfunction, upgrading to the most recent version of Windows can help. Here are the steps:
- Right-click on the Start button and select Settings.
- Navigate to Windows Update.
- Select Check for updates on the right side.
- Wait for the scanning of recent updates and click on Download & install.
- Restart your computer.
Dump File Location Windows 11 or 10
How to Configure System to Collect Memory Dump Files in Windows 11 or 10
Way-2: Check Disk for Errors
Another quick way to fix the bugcheck 0x00000139 Blue Screen in Windows is by looking or checking the disks for any errors or faults as they can occasionally lead to corrupted system files or defective sections on your hard drive. To do a disk check in Windows, follow these steps:
- Press – Winkey+S.
- Type – cmd.exe.
- Select – Run as administrator.
- Type the following command (this will resolve all logical faults on the disk):
chkdsk C: /f /r /x
- When the command asks, type in Y and hit Enter.
- To begin the scan, the computer will restart.
- After the command is executed, reboot your device.
See: How to Use Disk Error Checking in Windows 10, 8.
Way-3: Use System File Checker (SFC) to fix Windows blue screen Error
Yet to resolve this issue? It’s time to run an SFC scan as it can resolve the stop code 0x00000139, as the fault is sometimes caused by corrupted system files. SFC is nothing but a Windows application that allows users to search for and restore damaged or missing system files. To execute SFC in Windows, follow these steps:
- Press the Windows button and in the search box, type Command Prompt or cmd.
- Select Run as administrator.
- Click Yes when asked for permission.
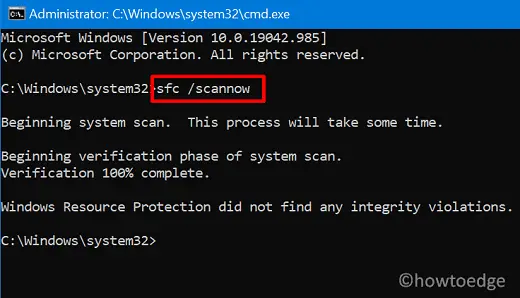
- When “Administrator: Command Prompt” appears, type the following command and press Enter:
sfc /scannow
- Wait until Windows completes the scan; it will identify any errors and remedy the issue.
Way-4: Check RAM with the Windows Memory Diagnostic tool
mdsched.exe is a built-in software included with Windows that gives users the ability to examine the memory of their computers for issues. The bugcheck 0x00000139 can occasionally be caused by malfunctioning RAM modules; therefore, using this utility to do a memory check may be able to resolve the blue screen that occurs when the problem occurs.
Following is a list of the steps that must be taken to use the Windows Memory Diagnostic tool:
- Click on Start and type mdsched.exe.
- In the search results, click the same.
- Select Restart now and check for problems in the Windows Memory Diagnostic box.
- The Memory Diagnostic program will launch immediately once your computer restarts. Depending on the quantity of your RAM and the speed of your computer, this operation may take some time to finish.
- When the scan is finished, your computer will restart and alert you of any discovered memory issues.
Read: Windows 10 – How to Detect RAM Issues with Windows Memory Diagnostic Tool.
Way-5: Identify Driver Issues with Verifier in Windows
The Driver Verifier is a crucial Windows utility tool that may be used to check for driver faults causing the Blue Screen of Death in Windows. After you enable the utility, Windows will do further checks on your drivers to uncover any flaws that may be causing Kernel security check failure 139 BSOD in your system.
It is important to remember that the Driver Verifier might place additional strain on your system, causing it to crash or become unstable. Here are the steps to use the tool in Windows:
- Type Verifier into the Windows search box and press Enter.
- If a User Account Control prompt appears, select Yes.
- Select Next after checking Create standard settings.
- Choose Automatically select unsigned drivers and click Next once again.
- Update all the found drivers by clicking Finish.
See: How to Identify if a Driver is Causing Issues in Windows 10 with Verifier.
Way-6: Run Anti-Virus Scan
The simplest way to resolve the BSOD 0x00000139 is to scan your computer for malware. Malware or viruses may cause a variety of Windows problems, including Blue Screen Windows 11 errors.
Using Windows Defender
- Press Windows key and type security.
- Select – Windows Security.
- Click – Virus & threat protection.
- Then click on Scan options link.
- Check the option – Full Scan.
- Click on Scan now.
- Then system will scan and take a bit longer hence stay cool and at last delete if any threats are found.
Through third-party antivirus
- Install a trustworthy anti-malware program (Such as Malwarebytes, Mcafee, Kaspersky, or others). You can take help from here: 5 Best Free Antivirus Software with Download link For Windows 10.
- Run a comprehensive system scan with the anti-malware program.
- If threats are discovered, follow the removal instructions.
- Restart your computer to see whether the error persists.
Way-7: Restore the Drivers to the Previous Version
Rolling back the drivers may also help as 0x00000139 fix your PC. The reason for restoring the drivers is the fact that updated driver sometimes becomes incompatible with the computer leading to such issues. Here’s how to revert:
- Press the – Windows key + X.
- Select – Device Manager.
- Locate the device driver that you believe is causing the problem (for example, the display driver).
- Right-click on that driver and select Properties from the context menu.
- Click the Driver tab in the “Properties” box.
- To finish the process, click Roll Back Driver and follow the directions.
- Finally, restart your PC.
Way-8: Use Advanced Startup Options
If none of the preceding alternatives has worked to resolve the 0x00000139 error in your Windows, you can try utilizing Advanced Startup Options and making bootable disks. Here’s how it’s done:
- Create Windows 10/11 bootable disk first, which you may get from the official Microsoft website.
- Connect the bootlace DVD or Flash drive to your PC after completing.
- Click Next in Windows Setup, then select Repair your Computer.
- Next, select Advanced options > Command Prompt > Troubleshoot.
- In the Command Prompt window, type in C: and press Enter
- Next, enter the following command and press Enter again:
BCDEDIT /SET {DEFAULT} BOOTMENUPOLICY LEGACY- Type in Exit and press Enter.
- When Command Prompt closes, go back a few steps until you locate the Select an option screen.
- Pick Continue booting into Windows.
We hope these 8 ways must have turned out to be extremely effective in fixing the error 0x00000139 Blue Screen in your Windows.
Methods:
Way-1: Install Pending Windows Updates
Way-2: Check Disk for Errors
Way-3: Use System File Checker (SFC) to fix Windows blue screen Error
Way-4: Check RAM with the Windows Memory Diagnostic tool
Way-5: Identify Driver Issues with Verifier in Windows
Way-6: Run Anti-Virus Scan
Way-7: Restore the Drivers to the Previous Version
Way-8: Use Advanced Startup Options
That’s all!!