
About the Windows XP boot process
This document outlines the basic components involved in the process of booting up a PC running Windows XP, covering the initial process involved in going from power up to loading NTLDR, and then the subsequent procedure and events involved in displaying the boot menu listing available OS entries and booting into the selected item.
Generic Boot Procedure
Before we can take a detailed look at the process by which Windows XP’s boot process works, it’s important to first understand the basic principles that precede any bootloader, starting with when the PC is first powered up. You can read up on a more detailed explanation of the standard BIOS boot-up sequence here, but the following is enough to get going with:
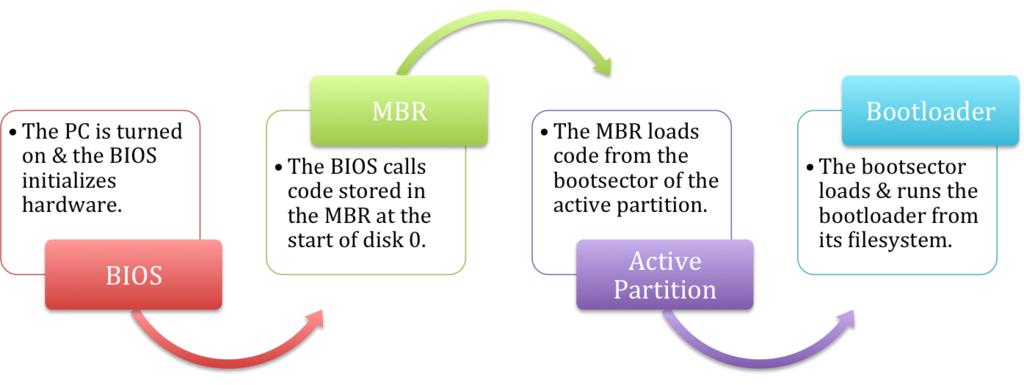
As can be seen, there is a chain of handoffs beginning at the time you power up your PC; starting from the BIOS, continuing through to the MBR, bootsector, and then, finally, the bootloader.
There are two different reasons for this seemingly-convoluted chain. The first is for portability: you can take out and replace any one of the components powering/facilitating these four steps without needing to replace the others, as all interactions are abstracted to a set of agreed-upon behaviors — and this is especially important because each of these individual layers is traditionally manufactured, written, designed, or developed by a different entity.
The second is a more technical limitation: the amount of space available for the executable bootloader code (read: how big and complicated the bootloader is allowed to be) is severely restricted in the first stages, and increases as you go up the ladder. For example, the MBR is a mere 512 bytes (actually, only 446 bytes once you exclude the partition table!) — in comparison, this paragraph alone is twice that! The bootsector is similarly restricted in size (though the exact limits depend on the filesystem of the active partition), and it’s only after you reach the final stage of the actual bootloader file that you’re free to write lengthy boot code.
This lengthy procedure is responsible for everything up to the point that the Windows XP bootloader, NTLDR (short for NT loader) is finally located and called by the code in the bootsector of the NTFS or FAT32 boot partition.
Windows XP Boot Components
Once the boot-related code in the bootsector of the active partition is called, it will search for a file called NTLDR in its root directory (the partition itself is expected to be of NTFS or FAT32 format). NTLDR itself, while traditionally given all the praise and glory, does not do its job alone and is, at best, only a third of the solution.
NTLDR
NTLDR is the name of the bootloader used by Microsoft Windows, starting from Windows NT and continuing through Windows 2000, Windows XP, and Windows Server 2003. With the release of Windows Vista, NTLDR is no longer used and is now supplanted by BOOTMGR, the new Windows bootloader. It’s normally located in the root directory of the active partition on the first boot drive. With typically Windows XP installations, this is usually C:\ and the same partition that Windows itself is installed to, though that definitely does not have to be the case. Especially in cases where more than one OS is installed on the same computer (on different partitions), NTLDR takes heavy advantage of this feature.
BOOT.INI
Boot.ini is a plain-text file located in the root of the active partition on the first boot drive. NTLDR reads boot configuration information from the boot.ini file, and uses it to display and then boot into the various operating systems. BOOT.INI1 can contain references to Windows NT-based operating systems (Windows NT, Windows 2000, Windows XP, Windows Server 2003) as well as entries pointing to “chainloaders” (bootloaders for other operating systems saved to a file) to load non-Windows OSes. This is where new operating systems are added to the bootloader and from where the boot options/parameters of existing entries may be modified or replaced.
NTDETECT.COM
The ntdetect.com file is part of NT-based operating systems of Windows and it’s used during boot up to detect hardware components needed to start the operating system. At the startup process the NTLDR starts and ntdetect.com collects hardware information that will be sent to the ntoskrnl.exe file (Windows kernel). NTDETECT.COM is found in all NT-based operating systems: Windows XP, 2003 and Windows Vista. It collects this type of hardware information:
- video adapters
- hardware date and time
- keyboards
- hard drives
- mouse
- and others (bus and adapter types, floppy disks etc.)
Information and configuration collected and generated by NTDETECT are passed along to the Windows NT kernel (ntoskrnl.exe) by NTLDR when an operating system is selected. While the Windows kernel has other means of identifying and communicating with the underlying hardware on your PC (via the HAL, or hardware abstraction layer), the information from NTDETECT is crucial in facilitating first access to the disks and other hardware.
Windows XP Boot Sequence
As mentioned above, NTLDR uses both BOOT.INI and NTDETECT.COM to ultimately load a Windows installation from a local disk. The following chart summarizes the boot procedure, highlighting the interactions between the various components of the Windows XP boot system:
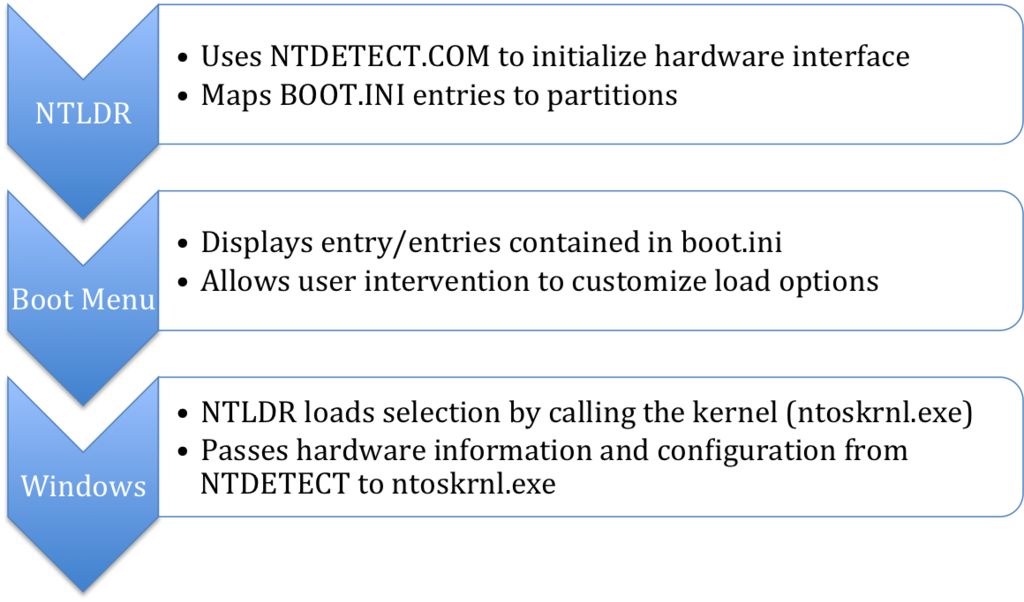
NTLDR uses BOOT.INI and NTDETECT.COM to show the NT boot menu and load Windows based on user selection.
Troubleshooting XP Boot Errors
If you have boot errors related to NTDETECT or NTLDR, check other fixes available on the Wiki:
- NTLDR is compressed
- NTDETECT failed
- NTOSKRNL.EXE is missing or corrupt
- Invalid BOOT.INI file
Support Links
- Easy Recovery Essentials for Windows – our repair and recovery disk.
It’s an easy-to-use and automated diagnostics disk. It’s available for Windows 8, Windows 7 and Windows Vista. It’s also available for Windows XP and Windows Server.
Read more at Windows Recovery Disks.
- The NeoSmart Support Forums, member-to-member technical support and troubleshooting.
- Get a discounted price on replacement setup and installation discs: Windows XP.
Applicable Systems
This Windows-related knowledgebase article applies to the following operating systems:
- Windows XP (all editions)
- Windows Server 2003 (all editions)
Propose an edit
-
Depending on the version of NTLDR used, boot.ini may or may not support UTF-16/UCS-2 (unicode, non-ASCII) encoding. ↩
With Windows XP, it’s possible to repair the Windows startup without completely reinstalling it. To do this, you must use the recovery console accessible from the installation CD or an USB installation key of Windows XP.
- Last Known Good Configuration
- Access the Recovery Console
- Rewrite the MBR
- Startup Repair
- Restore NTLDR
- Restore boot.ini file
- Repair filesystem
1. Last Known Good Configuration
When your Windows XP computer no longer boot (or doesn’t start correctly), a very easy option to use is the «Last Known Good Configuration» option.
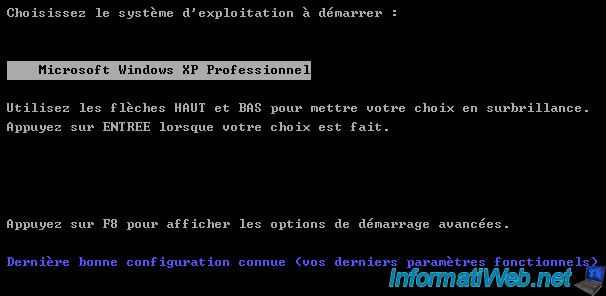
To do this, when you start your computer, press the F8 key several times to display the Windows XP advanced options menu.
In this menu, select the «Last Known Good Configuration (your most recent settings)» line with the arrows on your keyboard, then press Enter.

If Windows asks you to choose the operating system to start.
Just press Enter, since in most cases there is only one operating system installed on your computer.
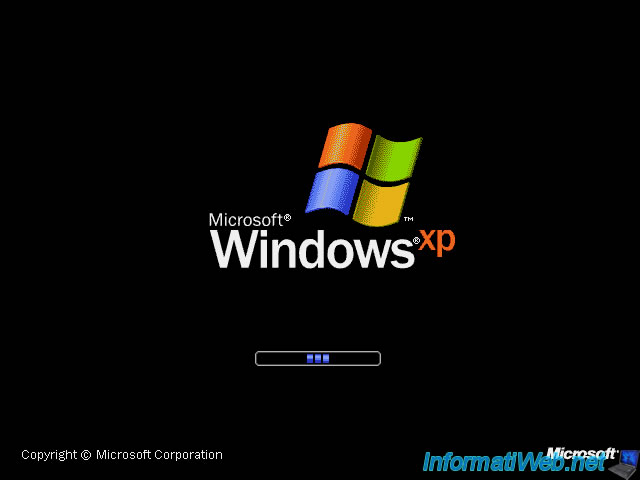
If this option works in your case, Windows XP will start without problem.
2. Access the Recovery Console
Configure your BIOS to boot from the CD/DVD drive. If you do not know how, read our tutorial «Change the BIOS boot order».
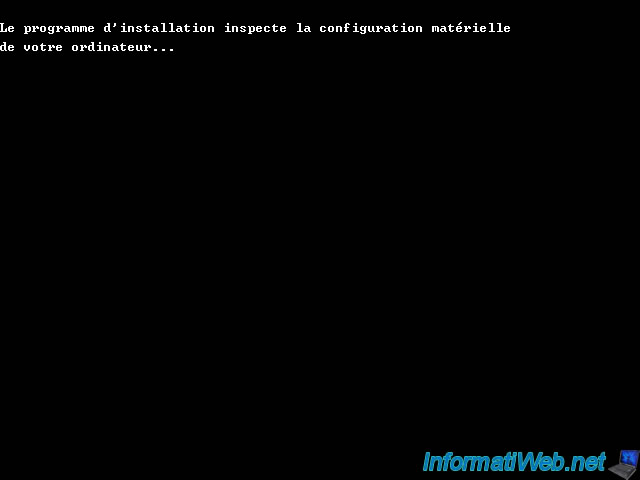
If the BIOS is configured correctly and the CD of «Windows XP» is in the CD/DVD, you should see a brief moment the message «Setup is inspecting your computer’s hardware configuration».
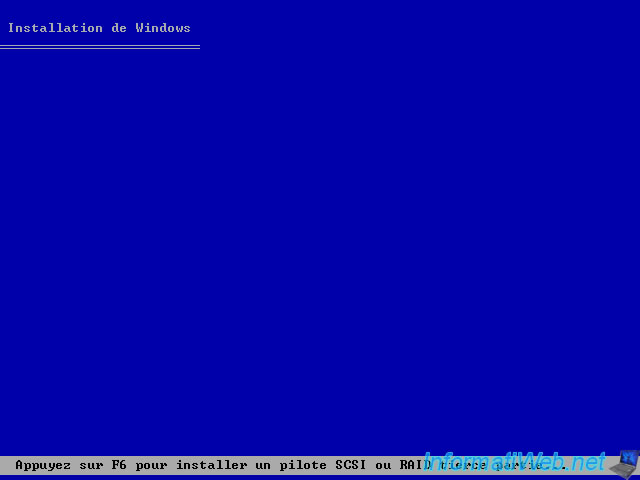
The use of SCSI hard disks or RAID is rare in individuals, but some do to improve performance and / or safety. In this case, it may be necessary to load a driver (driver English) for Windows XP can manage.
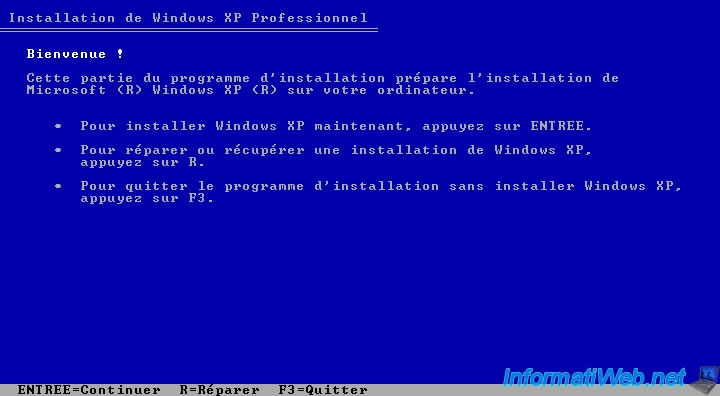
At the menu, press the «R» key.
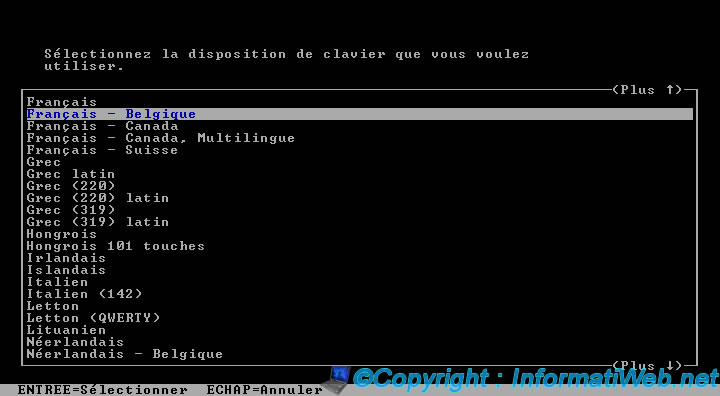
The Recovery Console is displayed. If you have any problems with the keyboard layout, press ENTER. For example, if your CD is in English, it is likely that the keyboard layout is QWERTY, it’ll have to choose your language by pressing the ENTER key.
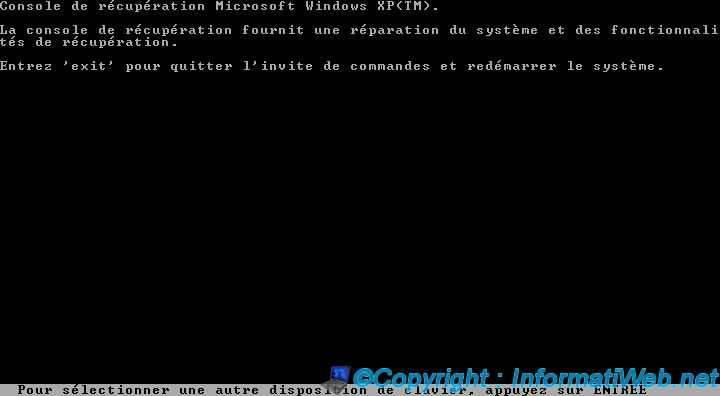
If you press the ENTER button, this screen will appear. Select the language of your choice thanks to the directional keys and confirm your choice by pressing the «ENTER» key.
The list of Windows installations detected are displayed. Select the installation you want to repair, indicating the corresponding number and then enter the password for the Administrator account.
Note : If the password is blank, just press ENTER.
Multiple installations of Windows can appear in the case of a Multiboot.
If you want to create a Multiboot, read our tutorial «Tuto MultiBoot (XP / Seven with GAG) — On a single hard disk» or «Tuto MultiBoot (XP / Seven with GAG) — On 2 hard drives».

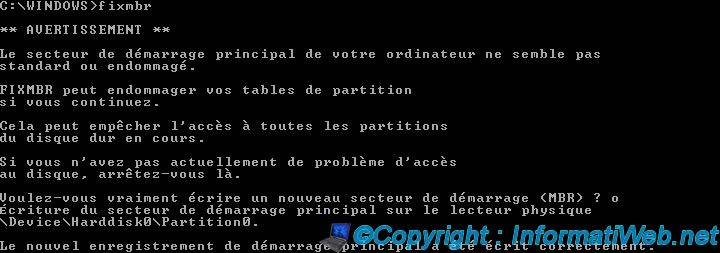
3. Rewrite the MBR
Warning : We don’t recommend using this command on a laptop as it may block access to the RECOVERY partition that allows you to restore your computer. The recovery partition present on laptops can restore the computer with all the programs installed in factories, drivers …
To restore the MBR, just type the command «fixmbr» and confirm by typing the letter «y».
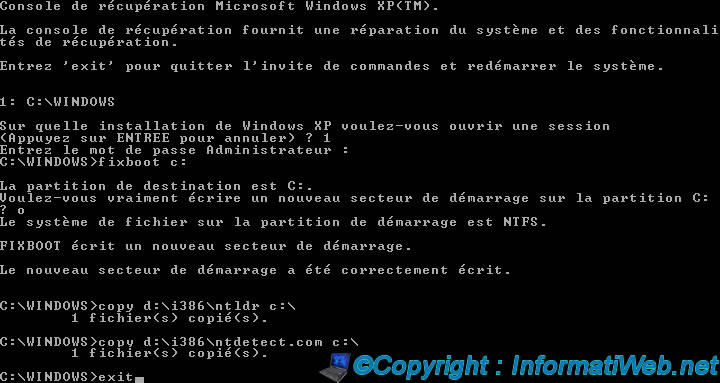
To repair the Windows XP startup, just type the command «fixboot» and confirm by typing the letter «y».

5. Restore NTLDR
If you get the message «NTLDR missing (NTLDR is missing). Press Ctrl + Alt + Del to restart» on Windows XP, restore it by typing these 3 commands :
— fixboot c:
— copy d:\i386\ntldr c:\
— copy d:\i386\ntdetect.com c:\
— exit (to exit and restart the computer)
Note: «d» is the letter of your CD / DVD drive and «c» represents the letter of the partition (where Windows is installed) on which to copy these files.
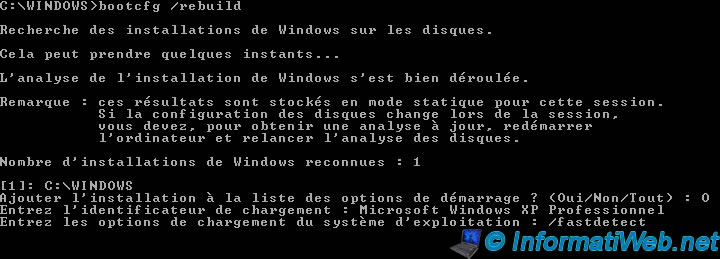
6. Restore boot.ini file
If the «Invalid BOOT.INI file» appears at boot of your computer, simply recreate it.
To do this, in the recovery console of Win. XP, type the command : bootcfg / rebuild
Then, answer questions :
- Add installation to boot list? (Yes/No/All) : Y (the Y letter in uppercase)
- Enter Load Identifier : Microsoft Windows XP Professional or Microsoft Windows XP
- Enter Operating System Load Options : /fastdetect
7. Repair filesystem
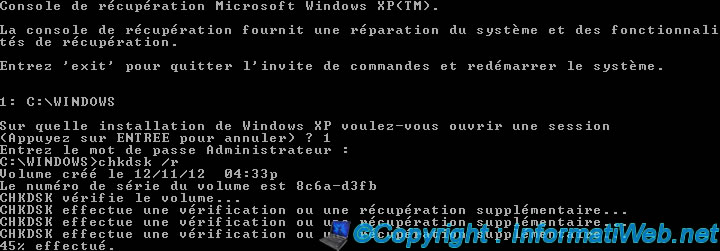
To repair the file system, use the command «chkdsk».
Type the following command to repair the file system and attempt recovery of bad sectors : chkdsk /r
Note : This process can be lengthy. Several hours may be required depending on the state of the file system on your hard drive.
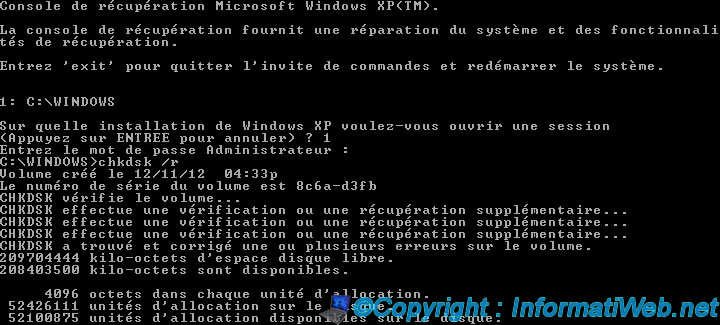
Once the file system repaired, you may need to go through the methods described above.
Здравствуйте Владимир! На моём компьютере имеется два жёстких диска, на первом HDD установлена Windows 10 со своим загрузчиком и совсем недавно я подсоединил ещё один HDD, на нём установлена Windows XP. Сейчас по умолчанию загружается только Windows 10, каким образом мне создать меню, с возможностью выбора для загрузки любой из установленных операционных систем: Windows 10 или Windows XP?
Создание загрузчика Windows XP и загрузочной записи о передачи управления загрузкой загрузчику NTLDR на скрытом разделе (Зарезервировано системой, объём 500 МБ) Windows 10
Автор Владимир!
Привет друзья! В этом случае, можно создать загрузчик Windows XP и загрузочную запись о передачи управления загрузкой загрузчику NTLDR на скрытом разделе (Зарезервировано системой, объём 500 МБ) Windows 10 или простыми словами — указать загрузчику Windows 10 на существование второй операционной системы на компьютере — Windows XP, после этого при включении компьютера будет выходить меню с выбором для загрузки Windows 10 и Windows XP. Сделать это можно двумя способами (покажу оба), в первом способе мы максимально избежим командной строки (подойдёт для начинающих), а во втором способе всё сделаем с помощью командной строки (подойдёт для опытных пользователей, предпочитающих работать в среде восстановления Windows (Windows RE) или в среде предустановки Windows (Windows PE)).
Статья написана для компьютеров с обычным БИОСом (не UEFI).
{banner_google1}
Смоделируем подобную ситуацию на моём компьютере.
Итак, в моём системном блоке был один жёсткий диск (Диск 0) размером 500 Гб с установленной Windows 10, затем я подсоединил второй жёсткий диск (Диск 1) размер 120 Гб с Windows XP.
На диске (C:) установлена Windows 10, а на диске (D:) установлена Windows XP. Загружается одна Windows 10, так как в БИОСе главным жёстким диском выставлен — Диск 0. Загрузчик Windows 10 находится на первом скрытом разделе — Зарезервировано системой. Исправен (Система, Активен, Основной раздел, объём 500 МБ). Если выставить в БИОСе главным жёстким диском — Диск 1, то будет загружаться одна Windows XP (изменять главенство жёстких дисков можно в БИОСе с помощью опции Hard Disk Drives, подробности в этой статье), но нам этого не нужно и мы хотим добиться того, что при включении компьютера будет выходить меню с выбором для загрузки Windows 10 или Windows XP.

Загружаемся в Windows 10, открываем командную строку от имени администратора и вводим команды:
bcdedit /create {ntldr} /d «Windows XP» (кавычки обязательны) данная команда создает в хранилище загрузки Windows 10 — хранилище для загрузки Windows XP, находящейся на диск (D:). /d — означает означает description (описание).
bcdedit /set {ntldr} device partition=D: (где D: буква раздела c Win XP), данная команда укажет загрузчику Windows 10 устройство расположения файлов загрузки Windows XP.
bcdedit /set {ntldr} path \ntldr (команда означает — установить параметр path (путь). \ntldr — для записи с идентификатором ntldr.
bcdedit /displayorder {ntldr} /addlast (команда добавит запись о выборе Windows XP в меню загрузки, /addlast в конце списка)

вводим команду bcdedit и смотрим содержимое хранилища загрузки Windows 10.
Как видим, у нас всё получилось и в хранилище загрузки Windows 10 внесена запись о Windows XP, которая находится на диске (D:).
Загрузчик прежних версий ОС Windows
————————
идентификатор {ntldr}
device partition=D:
path \ntldr
description Windows XP

{banner_google1}
Если сейчас перезагрузиться, то выйдет меню загрузки Win 10 и Win XP. Если выбрать Windows 10, то она загрузится, но если выбрать Windows XP, то она не загрузиться, так как файлов для загрузки Windows XP у нас в хранилище загрузки Windows 10 — (Зарезервировано системой. Исправен (Система, Активен, Основной раздел, объём 500 МБ) пока нет.

Включаем в операционной системе Win 10 отображение скрытых файлов и папок и отключаем скрывать защищённые системные файлы, затем идём на диск (D:) с установленной Windows XP и копируем файлы загрузчика Windows XP (boot.ini, NTDETECT.COM, ntldr),

затем присваиваем скрытому разделу (Зарезервировано системой, объём 500 МБ) любую букву диска, к примеру (M:),

после этого входим на скрытый раздел (M:) и вставляем скопированные файлы загрузчика Windows XP (boot.ini, NTDETECT.COM, ntldr).

Открываем файл boot.ini и редактируем в нём параметр rdisk.
Файл boot.ini в Windows XP содержит информацию, необходимую для загрузки OS, например, на каком именно жёстком диске и каком разделе этого диска находится операционная система и др.

Параметр rdisk, в файле boot.ini, определяет порядковый номер диска, который содержит загрузочный раздел (номера начинаются с нуля), то есть, если у вас два жёстких диска и операционная система находится на втором жёстком диске, то указан он должен быть так — rdisk(1). Нам с вами нужно указать загрузчику, что Windows XP находится на Диске 1 (D:), поэтому исправляем параметр rdisk(0) на rdisk(1).

{banner_google1}

Сохраняем изменения, произведённые нами в файле boot.ini.
Удаляем букву диска (M:) со скрытого раздела (Зарезервировано системой, объём 500 МБ).
Теперь перезагружаемся и в меню загрузки выбираем Windows XP, она прекрасно загружается, как и Windows 10.

После установки нового загрузчика, в Windows XP в проводнике появится раздел (Зарезервировано системой, объём 500 МБ), с него
удаляем букву так же как и Win 10.
Как всё сделать при помощи командной строки
Загружаемся в Windows 10, открываем командную строку от имени администратора и вводим команды:
bcdedit /create {ntldr} /d «Windows XP» (кавычки обязательны) данная команда создает в хранилище загрузки Windows 10 — хранилище для загрузки Windows XP, находящейся на диск (D:). /d — означает означает description (описание).
bcdedit /set {ntldr} device partition=D: (где D: буква раздела c Win XP), данная команда укажет загрузчику Windows 10 устройство расположения файлов загрузки Windows XP.
bcdedit /set {ntldr} path \ntldr (команда означает — установить параметр path (путь). \ntldr — для записи с идентификатором ntldr.
bcdedit /displayorder {ntldr} /addlast (команда добавит запись о выборе Windows XP в меню загрузки, /addlast в конце списка)
{banner_google1}
Вводим команды:
diskpart
lis vol (данная команда выводит список всех разделов, всех жёстких дисков, подключенных к компьютеру)
sel vol 1 (выбираем раздел — Зарезервировано системой, объём 500 МБ).
assign letter M (присваиваем разделу — Зарезервировано системой, объём 500 МБ — букву диска M)
exit
D: (входим на диск (D:))
attrib (данная команда выводит все файлы и атрибуты всех файлов, находящихся в текущем каталоге (D:))
xcopy boot.ini M: /h (копируем файл boot.ini на раздел M: (Зарезервировано системой, объём 500 МБ), ключ /h нужен для того, чтобы копировать скрытые и системные файлы)
xcopy ntdetect.com M: /h (копируем файл ntdetect.com на раздел M: (Зарезервировано системой, объём 500 МБ), ключ /h нужен для того, чтобы копировать скрытые и системные файлы)
xcopy ntldr M: /h (копируем файл ntldr на раздел M: (Зарезервировано системой, объём 500 МБ), ключ /h нужен для того, чтобы копировать скрытые и системные файлы)
M: (входим на диск (M:))
attrib (данная команда выводит все файлы и атрибуты всех файлов, находящихся в текущем каталоге (M:)). Видим, кроме файлов загрузчика Windows 10 (bootmgr), скопированные нами файлы загрузчика Windows XP (boot.ini, NTDETECT.COM, ntldr), имеющих атрибуты S «системный» и H «скрытый».
attrib boot.ini -s -h (снимаем атрибуты S «системный» и H «скрытый» с файла boot.ini).
Затем открываем «Управление дисками» и входим на раздел (M:), открываем файл boot.ini.
Параметр rdisk, в файле boot.ini, определяет порядковый номер диска, который содержит загрузочный раздел (номера начинаются с нуля), то есть если у вас два жёстких диска и операционная система находится на втором жёстком диске, то указан он должен быть так — rdisk(1). Нам с вами нужно указать загрузчику, что Windows XP находится на Диске 1 (D:), поэтому исправляем в параметр rdisk(0) на rdisk(1).
attrib boot.ini +s +h (присваиваем атрибуты S «системный» и H «скрытый» файлу boot.ini).
diskpart
sel vol M (выбираем раздел M: (Зарезервировано системой, объём 500 МБ))
remove (удаляем с него буку диска M:)
Всё!


Перезагружаемся и в меню загрузки выбираем Windows XP, она прекрасно загружается, как и Windows 10.
Статьи по этой теме:
1. Как установить Windows XP на компьютер с уже установленной Windows 10
2. Как восстановить загрузку Windows 10 после установки на компьютер второй системой Windows XP. Работаем в командной строке!
Chapter 1. Startup and Shutdown
Hacks 1-7
Possibly the most overlooked part of XP is the way people start up
and shut down their systems. How much do you
think about startup and shutdown? Probably not much. Press a button
to start your PC, click a few buttons to shut it down, and
that’s it.
In fact, there’s a lot you can do to get more
productive—and to have a little customization fun—when
using startup and shutdown. You can create boot menus and choose from
customized startup options; you can create your own boot screen; you
can perform automated tasks every time you shut down your PC; and you
can stop unnecessary programs and services from starting so that you
increase the speed of your PC. In this chapter,
you’ll learn all that, plus other ways to master and
customize system startup and shutdown.
Customize Multiboot Startup Options
Edit or create a startup menu that lets you
choose which operating system to boot into in multiboot systems, or
create a menu that lets you choose different startup options for your
single operating system if you have only XP installed.
If you’ve installed another operating system (in
addition to XP) on your system, your PC starts up with a multiboot
menu, which allows you to choose the operating system you want to
run. The menu stays live for 30 seconds, and a screen countdown tells
you how long you have to make a choice from the menu. After the 30
seconds elapse, it boots into your default operating system, which is
generally the last operating system you installed.
You can customize that multiboot menu and how your PC starts by
editing the boot.ini
file, a hidden system file, to control a
variety of startup options, including how long to display the menu,
which operating system should be the default, whether to use the XP
splash screen when XP starts, and similar features. And as
you’ll see later in this hack, you can also use the
file to create a startup menu that will allow you to choose from
different versions of your operating system—for example, one
that you’ll use for tracking down startup problems,
and another for starting in
Safe Mode.
The boot.ini file is a plain-text file found in
your root C:\ folder. You might not be able to
see it because it’s a system file, and if you can
see it, you might not be able to edit it because
it’s a read-only file. To make it visible, launch
Windows Explorer, choose View → Tools → Folder
Options → View, and select the Show Hidden Files and Folders
radio button. To make it a file you can edit, right-click it in
Windows Explorer, choose Properties, uncheck the Read-Only box, and
click OK.
Editing Files
To edit the
file, open it with a text editor such as Notepad. Following is a
typical boot.ini file for a PC that has two
operating systems installed on it—Windows XP Home Edition and
Windows 2000
Professional:
[boot loader]
timeout=30
default=multi(0)disk(0)rdisk(0)partition(1)\WINDOWS
[operating systems]
multi(0)disk(0)rdisk(0)partition(1)\WINDOWS="Microsoft Windows XP Home
Edition" /fastdetect
multi(0)disk(0)rdisk(0)partition(2)\WINNT="Windows 2000 Professional" /
fastdetect
As you can see, there are two sections in the file:
[boot
loader] and
[operating
systems]. To
customize your menu and startup options, edit the entries in each
section. Before editing boot.ini, make a copy of
it and save it under a different name (such as
boot.ini.old) so that you can revert to it if
you cause problems when you edit the file.
Following are details about how to edit the entries in each section:
[boot loader]
-
This section controls how the boot process works; it specifies the
default operating system and how long a user has to make a selection
from a boot menu, if a boot menu has been enabled. The
timeoutvalue specifies, in seconds, how long to
display the menu and wait for a selection before loading the default
operating system. If you want a delay of 15 seconds, for example,
enter15for the value. Use a value of
0if you want the default operating system to boot
immediately. If you want the menu to be displayed indefinitely and
stay on-screen until a selection is made, use a value of
-1. Thedefaultvalue specifies
which entry in the[operating
system]section is the default operating system.
(Thedefaultvalue is used even if there is only
one operating system in the[operating
system]section.) To change the default operating
system, edit the setting, in our example, to
default=multi(0)disk(0)rdisk(0)partition(2)\WINNT.So, in our example, if you change the menu settings so that the
screen appears for 10 seconds before loading the default operating
system, and the default operating system is Windows 2000
Professional, the section reads:[boot loader] timeout=10 default=multi(0)disk(0)rdisk(0)partition(2)\WINNT
[operating system]-
This section specifies which operating systems are present on the
computer, and detailed options for each one. XP uses theAdvanced RISC Computing (ARC)
path to specify the location of the boot partition. In our example,
the ARC path is:multi(0)disk(0)rdisk(0)partition(1)\WINDOWS
The first parameter, which identifies the disk controller, should be
0. The second parameter, the
diskparameter, should also be
0. Therdiskparameter
specifies the disk number on the controller that has the boot
partition. The numbers start at0. So, if you have
three hard disks installed and the second hard disk has the boot
partition, the setting isrdisk(1). The
partitionparameter identifies the partition
number of the boot partition. Partitions start with the number
1. The final section, which in our example is
\WINDOWS, specifies the path to the folder where
the operating system is installed.To the right of the ARC path in
the example is="Microsoft Windows XP
Home Edition»/fastdetect. The
words within quotes are what will appear on the boot menu next to the
entry. To customize the text on the menu you can change these words
to whatever you wish—for example, “My Favorite
Operating System.” The
/fastdetectswitch disables the detection of
serial and parallel devices, which allows for faster booting. The
detection of these devices isn’t normally required
in XP because the functions are performed by Plug and Play drivers,
so as a general rule it’s a good idea to use the
/fastdetectswitch. The
/fastdetectswitch is only one of many switches
that you can use in the boot.ini file to
customize how the operating system loads. Table 1-1 lists others you can use.
Table 1-1. Switches for boot.ini
|
Switch |
What it does |
|
|
Starts XP using the standard VGA driver. It’s most |
|
|
Logs information about the boot process to the |
|
|
Loads the debugger at boot, but the debugger remains inactive unless |
|
|
Loads the debugger at boot and runs it. |
|
|
Disables the detection of serial and parallel devices. |
|
|
Specifies the maximum amount of RAM that XP can use. |
|
|
Does not allow the XP splash screen to load during boot. |
|
|
Stops the debugger from loading. |
|
|
Forces XP to boot into the safe mode specified by the |
|
|
Displays the name of each driver as it loads and gives descriptions |
When you’ve finished editing the
boot.ini file, save it. The next time you start
your computer, its settings will go into effect.
In our example, if we want the menu to appear for 45 seconds, the
default operating system to be Windows 2000, and the XP splash screen
to be turned off when we choose to load XP, the
boot.ini file should look like this:
[boot loader]
timeout=45
default=multi(0)disk(0)rdisk(0)partition(2)\WINNT
[operating systems]
multi(0)disk(0)rdisk(0)partition(1)\WINDOWS="Microsoft Windows XP Home
Edition" /fastdetect /noguiboot
multi(0)disk(0)rdisk(0)partition(2)\WINNT="Windows 2000 Professional" /
fastdetect
Create a Startup Menu Even If You Have Only One Operating System
Even if you have only one operating
system, you can create a
boot menu that will let you choose to
load your operating system with different parameters. For example,
for menu choices, you might have your normal operating system; a mode
that lets you trace any startup problems; and Safe Mode. To give
yourself the option of operating systems with different parameters,
create separate entries for each new operating system choice. For
example, for the version of the operating system that traces
potential startup problems, you could create this entry:
multi(0)disk(0)rdisk(0)partition(1)\WINDOWS="Trace Problems XP Home Edition"
/fastdetect /bootlog /sos
This entry creates a startup log and displays information about the
drivers and other operating system information as it loads.
For the version of the operating system that loads in Safe Mode but
that still allows networking, you could create this entry:
multi(0)disk(0)rdisk(0)partition(1)\WINDOWS="Safe Start XP Home Edition" /
fastdetect /safeboot:network
The boot.ini file would look like this, assuming
that you want the menu to display for 30 seconds and you want normal
XP startup to be the default:
[boot loader]
timeout=30
default=multi(0)disk(0)rdisk(0)partition(1)\WINDOWS
[operating systems]
multi(0)disk(0)rdisk(0)partition(1)\WINDOWS="Microsoft Windows XP Home
Edition" /fastdetect
multi(0)disk(0)rdisk(0)partition(1)\WINDOWS="Trace Problems XP Home Edition"
/fastdetect /bootlog /sos
multi(0)disk(0)rdisk(0)partition(1)\WINDOWS="Safe Start XP Home Edition" /
fastdetect /safeboot:network
Tip
If you’re leery of using a text editor to edit
boot.ini directly, you can use the System
Configuration Utility
[Hack #4]
instead. Type msconfig at a command prompt or in
the Run box and click the BOOT.INI tab, shown in Figure 1-1. You’ll be able to add
several switches (but not as many as you can if you edit the
boot.ini file yourself using a text editor).
Figure 1-1. The System Configuration Utility
Change the Picture That Appears on the XP Startup Screen
You’re not stuck with
XP’s default splash logo on the startup screen; use
any picture or logo of your choosing.
One of the nice things
about XP is how malleable it is. Don’t like the way
it looks? No problem; change it. Take my splash screen,
please!
Warning
The techniques in this hack work only with versions of XP
before SP2. If you have SP2, they
won’t work, and they could harm your system. If you
have SP2 and want to
change your boot screen, your best bet is to use downloadable
software, such as Style XP from Tgtsoft at http://www.tgtsoft.com/download.php.
Many people, myself included, would prefer to see a more interesting
splash screen (also called the startup screen)
than the default gives you on startup. You can change your splash
screen to any of hundreds that have been created, or make one of your
own—for example, with your picture or company logo on it.
To choose from already created splash screens,
go to http://www.themexp.org and click Boot
Screens. You’ll find more than 1,000 of them,
organized by categories such as Sports, TV/Movies, and so on. I live
in wintry but civilized New England, and during the winter I like to
imagine myself in a far wilder place, so I use a picture of wolves in
the wilds of Alaska for my splash screen. You can see it pictured in
Figure 1-2. Nice way to greet the new day,
don’t you think?
Figure 1-2. My startup screen, which lets me imagine myself in the wilds of Alaska
Once you’ve found the image you want to use as your
splash screen, download it. It will be downloaded as a
.zip file. I create a general folder for all my
boot screen files, called C:\Bootscreens, and
then for each boot screen I download I create a new folder—in
this instance, C:\Bootscreens\Wild.
Warning
It’s possible that something will go wrong with your
new boot screen, so before making the change, create a
system restore point by choosing Control
Panel → Performance and Maintenance → System
Restore and following the instructions. If something goes wrong, you
can revert to that restore point.
Unzip the contents of the .zip file into the
folder. There will be one or more files, including
ReadMe files. The boot screen itself, however,
will be named ntoskrnl.exe. If you have XP
Service Pack 1 installed, you might have to use a different file,
named ntoskrnlSP1.exe, which might also be in
the downloaded .zip file. Check the
documentation of the file you download to make sure. If
you’re not sure if you have Service Pack 1
installed, it’s easy to find out. Right-click My
Computer and choose Properties → General. Your version of
the operating system will be displayed. If you have Service Pack 1,
it will say so on that screen.
The ntoskrnl.exe
file is an executable file that contains
the XP boot screen. During the boot process, XP executes this file,
found in C:\Windows\System32, which in turn
displays the boot screen graphic. So, to change your boot screen,
replace your existing ntoskrnl.exe file with the
one you just downloaded. But wait: there’s more.
Warning
Never download and use a boot screen that is packaged inside a
.exe file rather than a
.zip file, and that you install by running an
installation program. Always use .zip files and
install the boot screens manually, instead of using an installation
program. Many boot screen installation programs that change your boot
screen contain spyware that they install on your PC without telling
you, so stay away from them. For details about how to detect and kill
spyware, see
[Hack #34]
.
You might think that all you have to do is copy the new
ntoskrnl.exe over the existing one and then
restart your computer for the changes to take effect.
That’s not quite the case, though. First you have to
get around a feature of Windows XP that protects system files from
being overwritten.
Windows File Protection
automatically replaces certain files with the original XP version of
the file if they’ve been replaced, and
ntoskrnl.exe is one of those files. However, if
you make the change in Safe Mode, Windows File Protection
won’t kick in and you can safely copy the file.
Tip
Windows File Protection protects many other files, not just
ntoskrnl.exe. Also included are
.dll, .exe,
.fon, .ocx,
.sys, .tff, and, depending on your
system, other file types such as .ax,
.cpl, .cpx,
.dll, .exe,
.inf, .rsp, and
.tlb.
Reboot your PC and press F8 immediately to get into Safe Mode. Now go
to the C:\Windows\System32 folder and find the
ntoskrnl.exe file. Copy it to another folder or
rename it as a backup so that you can revert to it when you no longer
want to use your new boot screen, or if something goes wrong when you
install the new screen. Now copy the new
ntoskrnl.exe file into
C:\Windows\System32. (If you have to use the
ntoskrnlSP1.exe file, rename it to
ntoskrnl.exe first, and then copy it over.)
Reboot your computer again but don’t go into Safe
Mode this time. Now your new splash screen will appear every time you
start your PC. To revert to your old splash screen, repeat the steps,
copying your original ntoskrnl.exe file over
your new one.
Choose from Multiple Splash Screens on Startup
Depending on my mood, I might not want
to be greeted by huskies every morning. There are times when I want
to be greeted by the normal startup screen, and other times when I
want to see Andy Warhol’s famous painting of Marilyn
Monroe, or Al Pacino from the movie Scarface,
which are all available from http://www.themexp.org. So,
I’ve made a startup menu that lets me choose which
graphic should be my startup screen.
To create a startup menu, first download all the screens you want to
use. Then rename the ntoskrnl.exe or
ntoskrnlSP1.exe of each so that the filename
describes the screen—for example,
ntospacino.exe,
ntosmonroe.exe, and
ntosspongebob.exe. Copy them into
C:\Windows\System32. Don’t
touch the existing ntoskrnl.exe file there;
you’ll keep that as one of your options. Because
you’re not changing that file, you
don’t have to boot into Safe Mode to make any of
these changes.
Following the instructions in
[Hack #1]
, create a multiboot screen by
editing your boot.ini file. In the
[operating systems] section of the
boot.ini file, create a new entry for each
screen from which you want to choose. Copy the existing primary XP
entry and append
/kernel=
newbootscreenfilename.exe
to the end of it, where
newbootscreenfilename.exe is the filename
of the boot screen you want to use for that entry. Also edit the
description so that it describes the boot screen. For example, if the
primary entry is:
multi(0)disk(0)rdisk(0)partition(1)\WINDOWS="Microsoft Windows XP Home
Edition" /fastdetect
you would create this entry for the SpongeBob startup screen:
multi(0)disk(0)rdisk(0)partition(1)\WINDOWS="SpongeBob Startup Screen" /
fastdetect /kernel=ntosspongebob.exe
Create as many entries as you want in the [boot section. My boot.ini file
loader]
looks like this:
[operating systems]
multi(0)disk(0)rdisk(0)partition(1)\WINDOWS="Microsoft Windows XP Home
Edition" /fastdetect
multi(0)disk(0)rdisk(0)partition(1)\WINDOWS="SpongeBob Startup Screen" /
fastdetect /kernel=ntosspongebob.exe
multi(0)disk(0)rdisk(0)partition(1)\WINDOWS="Pacino Startup Screen" /
fastdetect /kernel=ntospacino.exe
multi(0)disk(0)rdisk(0)partition(1)\WINDOWS="Marilyn Monroe Startup Screen"
/fastdetect /kernel=ntosmonroe.exe
Whenever you start up XP now, you’ll be able to
choose from your normal startup screen or any of the others
you’ve put on the menu. If you have a laptop, for
example, you might set up a menu that lets you choose a businesslike
startup screen at work and a more entertaining one at home.
Build a Startup Screen from Any Graphic
So far, this hack has shown you how to
use a startup screen that someone else built. But
you’re not limited to that; you can turn any graphic
into a startup screen using BootXP (downloadable from http://www.bootxp.net). It’s
shareware and free to try, but it costs $7.95 if you decide to keep
using it.
The program will convert graphics from many different formats to a
boot screen graphic, then use it as your boot screen, or build a boot
menu for you so that you can choose from multiple boot screens. That
way, you don’t have to edit the
boot.ini file yourself.
It’s a surprisingly simple program to use. Select a
graphic that you want to use as a boot screen, and then click a
button to convert it to the 640 480-pixel, 16-color bitmap startup
screen standard. Preview the graphic, and if it’s
what you want, tell the program to set it as your boot screen. The
program provides a variety of options, including choosing a different
progress bar that alerts you that XP is loading, restoring your
original startup screen, or randomizing your boot screen so that it
randomly selects one you’ve created each time you
boot. You can also use the program to download already created
startup screens from http://www.bootxp.net.
Speed Up Boot and Shutdown Times
Shorten the time it takes for your desktop to
appear when you turn on your PC, and make XP shut down faster as
well.
No matter how fast your PC boots, it’s not fast
enough. Here are several hacks to get you right to your desktop as
quickly as possible after startup.
Perform a Boot Defragment
There’s a simple way to speed up XP startup: make
your system do a boot defragment, which will put all the boot files
next to one another on your hard disk. When
boot
files are in close proximity to one another, your system will start
faster.
On most systems, boot defragment should be enabled by default, but it
might not be on yours, or it might have been changed inadvertently.
To make sure that boot defragment is enabled on your system, run the
Registry Editor
[Hack #83]
and go
to:
HKEY_LOCAL_MACHINE\SOFTWARE\Microsoft\Dfrg\BootOptimizeFunction
Edit the Enable string value to
Y if it is not already set to
Y. Exit the Registry and reboot. The next time you
reboot, you’ll do a boot defragment.
Warning
I’ve found many web sites recommending a way of
speeding up boot times that might in fact slow down the amount of
time it takes to boot up and will probably slow down launching
applications as well. The tip recommends going to your
C:\WINDOWS\Prefetch directory and emptying it
every week. Windows uses this directory to speed up launching
applications. It analyzes the files you use during startup and the
applications you launch, and it creates an index to where those files
and applications are located on your hard disk. By using this index,
XP can launch files and applications faster. So, by emptying the
directory, you are most likely slowing down launching applications.
In my tests, I’ve also found that after emptying the
directory, it takes my PC a few seconds longer
to get to my desktop after bootup.
Hack Your BIOS for Faster Startups
When you turn on your PC, it goes through a set of startup procedures
in its BIOS before it gets to starting XP. So, if you speed up those
initial startup procedures, you’ll make your system
start faster.
You can speed up your startup procedures by changing the BIOS with
the built-in setup utility. How you run this utility varies from PC
to PC, but you typically get to it by pressing the Delete, F1, or F10
keys during startup. You’ll come to a menu with a
variety of choices. Here are the choices to make for faster system
startups:
- Quick Power On Self Test (POST)
-
When you choose this option, your system runs an abbreviated
POSTrather than the normal, lengthy one. - Boot Up Floppy Seek
-
Disable this option. When it’s enabled, your system
spends a few extra seconds looking for your floppy drive—a
relatively pointless procedure, especially considering how
infrequently you use your floppy drive. - Boot Delay
-
Some systems let you delay booting after you turn on your PC so that
your hard drive gets a chance to start spinning before bootup. Most
likely, you don’t need to have this boot delay, so
turn it off. If you run into problems, however, you can turn it back
on.
Fine-Tune Your Registry for Faster Startups
Over time, your
Registry can become
bloated with unused entries, slowing down your system startup because
your system loads them every time you start up your PC. Get a
Registry clean-up tool to delete unneeded Registry entries and speed
up startup times. Registry First Aid, shown in Figure 1-3, is an excellent Registry clean-up tool. It
combs your Registry for outdated and useless entries and then lets
you choose which entries to delete and which to keep. It also creates
a full Registry backup so that you can restore the Registry if you
run into a problem.
Figure 1-3. Cleaning the Registry with Registry First Aid
Registry First Aid is shareware and free to try, but it costs $21 if
you decide to keep using it. Download it from http://www.rosecitysoftware.com/Reg1Aid/index.html.
After you clean out your Registry, you might want to try compacting
it to get rid of unused space. The Registry Compactor, available from
http://www.rosecitysoftware.com/RegistryCompactor/index.html,
will do the trick. Compacting your Registry reduces its size and
decreases loading time. It’s shareware and free to
try, but it costs $19.95 if you decide to keep it.
Speed Up Shutdown Times
It’s not only startup times that
you’d like to speed up; you can also make sure that
your system shuts down faster. If shutting down XP takes what seems
to be an inordinate amount of time, here are a couple of steps you
can take to speed up the shutdown
process:
-
Don’t have XP clear your paging file at shutdown
For security reasons, you can have XP clear your paging file
(pagefile.sys) of its contents whenever you shut
down. Your paging file is used to store temporary files and data, but
when your system shuts down, information stays in the file. Some
people prefer to have the paging file cleared at shutdown because
sensitive information, such as unencrypted passwords, sometimes ends
up in the file. However, clearing the paging file can slow shutdown
times significantly, so if extreme security isn’t a
high priority, you might not want to clear it. To shut down XP
without clearing your paging file, run the Registry Editor and go to:
HKEY_LOCAL_MACHINE\SYSTEM\CurrentControlSet\Control\Session Manager\Memory Management
Change the value of ClearPageFileAtShutdown to
0. Close the Registry and restart your computer.
Whenever you turn off XP from now on, the paging file
won’t be cleared, and you should be able to shut
down more quickly.
-
Turn off unnecessary services
Services take time to shut down, so the fewer you run, the faster you
can shut down. For information on how to shut them down, see
[Hack #4]
instead.
Halt Startup Programs and Services
Increase your PC’s performance and speed
up startup times by shutting off applications and services that you
don’t need.
One of the best ways to speed up your
PC without having to spend money for extra RAM is to stop unnecessary
programs and services from running whenever you start your PC. When
too many programs and services run automatically every time you start
up your system, startup itself takes a long time, and too many
programs and services running simultaneously can bog down your CPU
and hog your memory.
Some programs, such as antivirus
software, should run automatically at startup and always run on your
computer. But many other programs, such as instant messenger
software, serve no purpose by being run at startup. And while you
need a variety of background services running on your PC for XP to
function, there are many unnecessary services that run on startup.
For example, on many systems, the Wireless Zero Configuration Service
runs to automatically configure a WiFi (802.11) network card, even
though no such card is present in the system.
Eliminating Programs That Run at
Startup
Stopping
programs from running at startup is a particularly daunting task
because there is no single place you can go to stop them all. Some
run because they’re put in the
Startup folder, others because
they’re part of logon scripts, still others because
of Registry settings, and so on. But with a little bit of
perseverance, you should be able to stop them from running.
Cleaning out the Startup
folder
Start by cleaning out your
Startup
folder. Find it in
C:\Documents and Settings\<User Name>\Start
Menu\Programs\Startup, where <User
Name> is your Windows logon name. Delete the shortcuts
of any programs you don’t want to run on startup. As
with any shortcuts, when you delete them, you’re
deleting only the shortcut, not the program itself. (You can also
clear out the startup items by going to Start → Programs
→ Startup and right-clicking items you want to remove.)
Next, clean out your Scheduled Tasks folder. Go
to C:\WINDOWS\Tasks, and delete the shortcuts of
any programs that you don’t want to run
all the programs in your Startup folder on an
as-needed basis. To stop XP from loading any programs in the
Startup folder, hold down the Shift key during
boot-up. No programs in the Startup folder will
run, but the items will still remain there so that they will start up
as they would normally the next time you boot.
Using the System
Configuration Utility
Taking
the previous steps will stop the
obvious programs from running at startup, but it
won’t kill them all. The best tool for disabling
hidden programs that run on startup is the Startup tab in the System
Configuration Utility, shown in Figure 1-4. To run
it, type msconfig at a command prompt or in the
Run box and press Enter. (If that doesn’t work,
first do a search for msconfig.exe, and then
when you find the file, double-click it.)
Figure 1-4. The Startup tab of the System Configuration
Utility
To stop a program from running at startup, go to the Startup
tab in this utility and uncheck the box next to the program. It can
sometimes be difficult to understand what programs are listed on the
Startup tab. Some, such as America Online, are clearly labeled. But
often, you’ll see a phrase or collection of letters,
such as fs20. That’s the name
of the running file—in this case,
fs20.exe, which is Free Surfer mk II, an
excellent free pop-up killer. As you can see from the picture,
I’ve chosen to let this useful tool run on startup.
To get more information about a listing, expand the
width of the Command column near the top of the Startup tab. Expand
it enough and you’ll see the startup command that
the program issues, including its location, such as
C:\Program Files\Free Surfer\fs20.exe.
The directory location should be another hint to help you
know the name of the program.
When stopping programs
from running at startup, it’s best to stop them one
at a time rather than in groups. You want to make sure that
you’re not causing any system problems by stopping
them. So, stop one and restart your PC. If it runs fine, stop another
and restart. Continue doing this until you’ve
cleared all the programs you don’t want to run
automatically.
Each time you uncheck a box and restart
your PC, you’ll get a warning, shown in Figure 1-5, stating that you’ve used the
System Configuration Utility to disable a program from starting
automatically. If you don’t want to see that
warning, disable it by checking the box in the dialog box itself.
Figure 1-5. Check the box to disable the
program warning
After
you’ve used the System Configuration Utility to
identify programs that run on startup, you might want to try
disabling them from with the programs themselves. So, run each
program that starts automatically, and see if you can find a setting
that allows you to halt it from running on startup.
Using the Registry to halt programs
running on startup
Even the
System Configuration Utility
won’t necessarily let you identify and kill all
programs that run on startup. You might also need to hack the
Registry to disable them. To do so, run the Registry Editor
[Hack #83]
and go to
HKEY_CURRENT_USER\Software\Microsoft\Windows\CurrentVersion\Run.
The right pane will contain a list of some of the programs that
automatically run at startup. The Data field tells you the path and
name of the executable so that you can determine what each program
is. Right-click any program you don’t want to run,
and choose Delete. That will kill any programs that run specific to
your logon. To kill programs that run for every user of the system,
go to
HKEY_LOCAL_MACHINE\SOFTWARE\Microsoft\Windows\CurrentVersion\Run
and follow the same instructions for deleting other programs you
don’t want to run at startup.
Disabling Services That Run
at Startup
Constantly running in the background
of XP are services—processes that help the
operating system run, or that provide support to applications. Many
of these services launch automatically at startup. While you need
many of them, there are also many that aren’t
required and that can slow down your system when they run in the
background.
You can disable services at startup by
using the System Configuration Utility, similar to the way you halt
programs from running at startup, except that you use the Services
tab instead of the Startup tab. But the System Configuration Utility
doesn’t necessarily list every service that launches
on startup. A bigger problem is that disabling services is more of a
shot in the dark than disabling programs. When you disable a program,
you can get a sense of what the program does. But when you disable a
service through the System Configuration Utility,
there’s often no way to know what it does.
A better way of disabling services at startup is via the
Services Computer Management Console,
shown in Figure 1-6. Run it by typing
services.msc at the command prompt. The Services
Computer Management Console includes a description of all services so
that you can know ahead of time whether a particular service is one
you want to turn off. It also lets you pause the service so that you
can test out your machine with the service off to see whether
it’s needed.
Figure 1-6. The Services Computer Management Console
After you run the
console, click the Extended tab. This view will show you a
description of each service in the left pane when you highlight the
service. The Startup Type column shows you which services launch on
startup—any services with
“Automatic” in that column. Click
that column to sort together all the services that automatically
launch on startup. Then highlight each service and read the
descriptions.
When you find a service you want to
disable, right-click it and choose Properties. In the Properties
dialog box that appears, choose Manual from the
“Startup type” drop-down list. The
service won’t start automatically from now on, but
you can start it manually via the console. If you want the service
disabled so that it can’t be run, choose Disabled.
To test the effects of turning off the service, turn off any services
you don’t want to run by clicking
“Stop the service” in the left
pane, or by right-clicking the service and choosing Stop.
Table 1-2 lists some common services you
might want to halt from running at
startup.
Table 1-2. Services you might want to turn off
|
Service |
What it does |
|
Portable Media Serial Number |
Retrieves the serial number of a portable music player |
|
Task |
Schedules unattended tasks to |
|
Uninterruptible Power Supply |
Manages an Uninterruptible Power Supply (UPS) connected to your |
|
Automatic |
Automatically checks for |
|
Telnet (service available on XP |
Allows a remote user to log |
|
Wireless Zero Configuration Service |
Automatically configures a WiFi (802.11) network card. Disable |
|
Messenger |
Turns off the Messenger service, which can be used to |
Create Multiple Startup Profiles with Advanced Startup Manager
If
you need to start different programs on startup, depending on what
you need to do on your PC, create different startup profiles with
this startup utility.
With the
hacks covered in this chapter, you can customize how XP starts up.
But there’s one thing these hacks
won’t be able to do for you—create different
startup profiles. For that, you need downloadable software.
Let’s say, for example, you have a laptop that
you sometimes run attached to a keyboard, monitor, and an always-on
Internet connection, and other times you travel with it, so it is not
connected to the Internet. When you use it when you travel, you use
it primarily in airplanes, airports, and other places where you
typically aren’t connected to the Internet. You also
run a piece of monitoring software that will send a signal to a call
center if your laptop is stolen. You don’t need to
run that software when you’re not on the road.
Ideally, you would have one set of programs that run
automatically at home and another set of programs that run when
you’re on the road. At home, you might want instant
messenger software and file sharing software to load at startup; on
the road, you don’t want that software to load
automatically, but you do want your monitoring software to load.
Advanced StartUp Manager—a piece of shareware
from Ray’s Lab (http://www.rayslab.com), shown in Figure 1-7—lets you create multiple startup
profiles so that you can have separate profiles for your laptop at
home and the road—or for any other purpose.
It’s free to try, but it costs $19.95 if you decide
to keep it.
Figure 1-7. Creating multiple
startup profiles with Advanced StartUp Manager
In addition to creating a
profile for traveling and one for home, you might want to create
other profiles. For example, when you want to play games,
you’ll want to start your system with a minimal
number of services and programs running in the background, so
you’ll create a profile that disables a variety of
services, such as the Indexing service, the Task Scheduler, and the
Themes service that lets you apply themes to your PC. If you
frequently need to troubleshoot your network, you’ll
want to create a network-troubleshooting profile that automatically
starts networking analysis software, such as Qcheck
[Hack #67]
.
To create a
profile, add all the programs you want to run on startup by having
them start from the Startup folder, the
Registry, or the Win.ini file. Where you want
them to start from is up to you. To add a program, just highlight
where you want it to run from, choose File → Add Program,
and choose the program’s executable file. You can
add switches, if you want, in the Flags field of the screen you use
to add the program. You can also choose whether the program should
run for just one specific user or for all users of the machine. To
delete a program from the profile, right-click it and choose Delete.
When you have built a profile with all the programs you
want to run at startup, save it by choosing File → Backup
Configuration as, and then choosing a name for the profile. Create as
many profiles as you want. To load a profile, choose File →
Open Backup, and choose the profile you want to load. After
you’ve loaded a profile, the next time you start
your computer it will load with that startup software. Be aware that
this means you can’t choose a profile when you boot
your system. You have to run Advanced StartUp Manager before you exit
XP, choose the profile you want to run next time you start XP, and
then exit.
See Also
-
OSL2000 (http://www.osloader.com) lets you boot from
up to 100 separate operating systems (including multiple copies of XP
or other versions of Windows), lets you boot from a second hard disk,
and offers a variety of other features, such as an automatic boot
timer. It’s shareware and free to try, but it costs
$25 if you decide to continue using it. -
For software to customize shutdowns, try ShutDown NOW!
(http://www.dworld.de/winsoft.htm). It gives
you just about every option you can imagine for shutdown. You can
specify applications to launch or documents to load automatically
before shutdown, schedule shutdowns, perform actions such as ejecting
and loading CDs on shutdown, empty directories on shutdown, and the
list goes on. It’s shareware and free to try, but if
you keep using it you’re expected to pay $19.50. -
For a free shutdown manager, try
Switch Off (http://yasoft.km.ru/eng/switchoff), a simple
shutdown utility that runs in your system tray. It lets you schedule
shutdowns and perform other tasks on shutdown, such as locking your
workstation, and it also lets you do any of them quickly from the
system tray. It’s not nearly as powerful as ShutDown
NOW!, but it’s free.
Miscellaneous Startup and Shutdown Hacks
Here’s a grab bag of ways to customize
the way you start up and shut down your system.
You can control the way you start up and shut down your PC in
many small ways. This grab bag of four hacks shows you the best of
them.
Create One-Click
Shutdown and Reboot Shortcuts
Turning off or rebooting
XP involves a several-step process: click the Start menu, choose Shut
Down, and then select Shut Down or Restart. If you want, however, you
can exit or reboot much more quickly, by creating a shortcut that
enables one-click shutdowns. You can also use the shortcut to
customize the shutdown or reboot—for example, by displaying a
specific message or automatically shutting down any programs that are
running.
First, create a shortcut on your desktop by
right-clicking the desktop, choosing New, and then choosing Shortcut.
The Create Shortcut Wizard appears. In the
box asking for the location of the shortcut, type
shutdown. After you create the shortcut,
double-clicking it will shut down your PC.
But you can
do much more with a shutdown shortcut than merely shut down your PC.
You can add any combination of several switches to do extra duty,
like this:
shutdown -r -t 01 -c "Rebooting your PC"
Double-clicking that shortcut will
reboot your PC after a one-second delay and display the message
“Rebooting your PC.” The
shutdown
command includes a variety of
switches you can use to customize it. Table 1-3
lists all of them and describes their use.
Table 1-3. Switches you can use with shutdown
|
Switch |
What it does |
|
|
Shuts down the PC. |
|
|
Logs off |
|
|
Indicates the duration of delay, in seconds, |
|
|
Displays a message in the System |
|
|
Forces any running applications to shut down. |
|
|
Reboots the PC. |
I use this technique to create two shutdown
shortcuts on my desktop—one for turning off my PC, and one for
rebooting. Here are the ones I use:
shutdown
-s -t 03 -c "See you later!" shutdown -r -t 03 -c "You can't get rid
of me that quickly!"
Automatically Turn On Num Lock, Scroll Lock,
and Caps Lock
When you start your
PC, Num Lock, Scroll Lock, and Caps Lock don’t
automatically toggle on. You can automatically turn each of them on
or off whenever your PC starts, for all accounts on the PC. As a
practical matter, most people probably want to have only Num Lock
automatically turned on, but this Registry hack allows you to force
any combination of keys on or off. Run the Registry Editor
[Hack #83]
and go to
HKEY_USERS\.Default\Control
Panel\Keyboard. Find the String
value InitialKeyboardIndicators. By default, it is
set to 0, which means that Num Lock, Scroll Lock,
and Caps Lock are all turned off. Set it to any of the following
values, depending on the combination of keys you want turned on or
off:
0
Turns off Num Lock, Caps Lock, and Scroll Lock
1
Turns on Caps Lock
2
Turns on Num Lock
3
Turns on Caps Lock and Num Lock
4
Turns on Scroll Lock
5
Turns on Caps Lock and Scroll Lock
6
Turns on Num Lock and Scroll Lock
7
Turns on Caps Lock, Num Lock, and Scroll Lock
Exit the Registry. When you restart, the new setting will take effect.
Stop Error Messages from Displaying on Startup
If you constantly see an
error message that
you can’t get rid of—for example, from a piece
of software that didn’t uninstall properly and
continues to give errors on startup—you can disable it from
displaying on startup. Run the Registry Editor and go to
HKEY_LOCAL
MACHINE\SYSTEM\CurrentControlSet\Control\Windows.
(This key holds a variety of Windows system settings, such as the
location of your system directory.) Create a new
DWORD called NoPopupsOnBoot and
give it a value of 1. Exit the Registry and reboot
for the setting to take effect. To disable it, either delete the
DWORD value or give it a value of
0.
Give More Time for Processes to Close at Shutdown
When you shut down Windows,
XP gives each process, service, or application 20 seconds to close
before the operating system turns off the computer. If the process,
service, or application doesn’t shut down within 20
seconds, a dialog box appears, prompting you to either wait 20 more
seconds, immediately end the process, service, or application, or
cancel shutdown.
If this dialog box appears frequently, you might be running an
application, service, or process that often takes more than 20
seconds to close. To solve the problem, you can increase the amount
of time that XP waits to display the dialog box so that the dialog
box will no longer appear. To do so, run the Registry Editor and go
to HKEY_CURRENT_USER\Control
Panel\Desktop. Look for the
String value
WaitToKillAppTimeout. Edit the value by entering
the amount of time you want XP to wait before displaying the dialog
box, in milliseconds. The default is 20000, or 20
seconds. If you want XP to wait 25 seconds, enter the value
25000. Exit the Registry and reboot.
Control User Logins by Hacking the Registry
Make better use of the XP login
screen.
If your
system contains more than one user account, or if
you’ve set up XP to require logins,
you’ll have to log in to XP before you can begin to
use it. But you needn’t stay with the default XP
login rules; you can use a single Registry key to customize how you
log in. For example, you can display custom text before login, and
you can remind anyone with an account on the PC to change their
password a certain number of days prior to the
password’s expiration.
To control logon options, run the Registry Editor
[Hack #83]
and go to the
HKEY_LOCAL_MACHINE\SOFTWARE\Microsoft\Windows subkey, which contains a variety
NT\CurrentVersion Winlogon
of logon settings (as well as some settings not having to do directly
with logons). Following are the most important values you can edit to
customize logons.
DontDisplayLastUserName
-
This setting lets you control how the system logon dialog box is
used. If thisStringvalue is present and set to
1, all users will have to enter both their
username and password to log on. If the value is
0, the name of the last user to log on will be
displayed in the system logon dialog box.
DefaultUserName
-
This
Stringvalue contains the name of the last
user who logged on. It will be displayed only if the
DontDisplayLastUserNamevalue is not present or is
set to0.
LegalNoticeCaption
-
This
Stringvalue, used in concert with the
LegalNoticeTextvalue, displays a dialog box prior
to logon that contains any text you want to display. (The text
doesn’t have to be a legal notice, but this value is
often used for that purpose.) The box has a title and text. The
LegalNoticeCaptionvalue will be the dialog
box’s title.
LegalNoticeText
-
This
Stringvalue, used in concert with
LegalNoticeCaption, contains the text that you
want to be displayed inside a dialog box displayed prior to logon.
PasswordExpiryWarning
-
This
DWORDvalue lets you display a warning
message to users a certain number of days before their passwords are
set to expire. It lets you determine how many days ahead of time the
warning should be issued. To edit the value, click the decimal button
and enter the number of days.
ShutdownWithoutLogon
-
This
Stringvalue enables or disables a button on
the XP logon dialog box that lets the system shut down. A value of
1enables the button (so that it is shown); a
value of0disables the button (so that it is not
shown).
Shell
-
This
Stringvalue really doesn’t
have to do with logons, but it’s one you should know
about. It determines the shell—the user interface—that
will be used by XP. The default isExplorer.exe,
but it can be another shell as well—for example, the Program
Manager from older Windows versions. Type in the name of the program;
for example,Progman.exefor the Program Manager,
orTaskman.exefor the Task Manager.
AutoRestartShell
-
This
DWORDvalue doesn’t have to
do with logons either, but it’s another good one to
know. It sets whether to automatically restart the Windows shell if
the shell crashes. A value of1automatically
restarts the shell. A value of0tells XP not to
restart the shell, forcing you to log off and then back on again to
restart it.
Now that your system’s startup and shutdown are
under control, let’s move on to the user interface.
F8 Boot Menu
Windows Advanced Options Menu — a list of Windows startup modes and troubleshooting tools for Windows XP at boot. Safe Mode is the most commonly accessed feature available on the Advanced Boot Options menu.
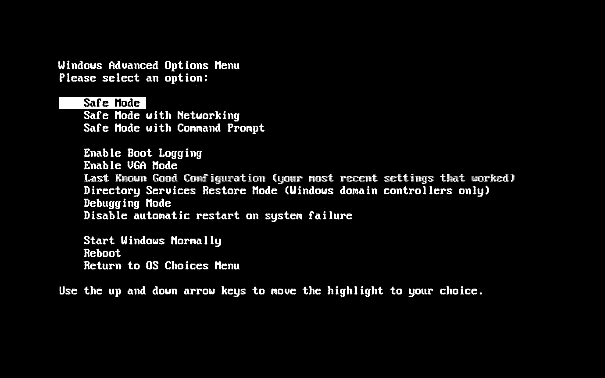
- Safe Mode
- Safe Mode with Networking
- Safe Mode with Command Prompt
- Enable Boot Logging
- Enable VGA Mode
- Last Known Good Configuration (your most recent settings that worked)
- Directory Services Restore Mode (Windows domain controllers only)
- Debugging Mode
- Disable automatic restart on system failure
- Start Windows Normally
- Reboot
- Return to OS Choices Menu
Safe Mode
A diagnostics mode where only the bare necessities are loaded, hopefully allowing Windows to start so you can make changes and perform diagnostics. Windows is started using only the minimum of drivers and services possible. The idea being that an offending driver or service that might be preventing Windows from loading properly will be skipped in this mode allowing for Windows to load.
Safe Mode with Command Prompt will load even less of the Windows GUI components so that just enough is provided for a window with a command shell is available.
Enable Boot Logging
Windows will attempt to load as normal, however, behind the scene there will be a log file created with each driver as it loads. You will notice Windows perhaps loading slightly slower than standard boot on a working system. On a system where a driver or service is preventing full boot, a study of the log might reveal that last driver that loaded properly along with the driver that caused the system to hang or fail to boot.
Look for the following log file:
- C:\WINDOWS\ntbtlog.txt
Last Known Good Configuration (your most recent settings that worked)
Windows is started by using the most recently saved system configuration information. This option is good for situations where you experienced a startup problem after a Windows update or software install. This boot option will undo any changes that caused problems in the CurrentControlSet registry key, which defines hardware and driver settings. The Last Known Good Configuration feature replaces the contents of the CurrentControlSet registry key with a backup copy that was last used to successfully start up the operating system. If this option fails the first time you try it, the option is not necessary to try again. Each boot replaces the backup and therefore after a second attempt the backup will also be problematic.
Debugging Mode
Otherwise known as Windows Kernel Debugging mode, this mode loads limited drivers and software to facilitate troubleshooting the Windows Startup routine.