
Have you been caught up in the Windows 10 Start menu critical error that crashes your Start menu, blocks your access to the installed apps and Settings, or freezes your computer? Take it easy! Read this page to stop such a critical error and fix the access problem.
The received error message should be like this:
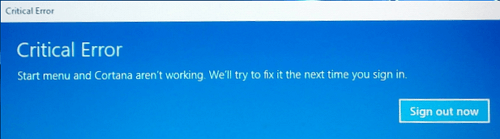
«Critical Error – Start menu and Cortana aren’t working. We’ll try to fix it the next time you sign in.»
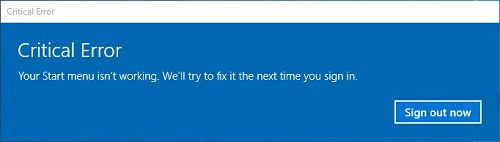
«Critical Error – Your Start menu isn’t working. We’ll try to fix it the next time you sign in.»
How to Fix Windows 10 Start Menu Critical Issue
When you first came across the Windows 10 Start button not working problem due to the critical error message, do not hesitate to refresh your computer once or twice, or directly turn it off and restart. That’s the safest and quickest way to determine how serious a problem you’re getting.
But many people are not lucky to tackle the critical error happening to the Start menu and Cortana so easily. Next, we have some general troubleshooting for you to move on.
Fix 1. Install the Recent Windows 10 Update
Since the critical error prevents you from accessing the Settings option in the Start, let’s pass round the Start and get to the place where the update is available.
Step 1. On your keyboard, press the Windows + R keys together to bring up the Run box, type ms-settings: in the empty box and press enter.

Step 2. On the Settings panel, click Update & security and then Check for updates. If you’re running Windows 10 version 1511, you should navigate to System > About > Version. Follow the wizard to install the most recent update that is currently available on your PC.
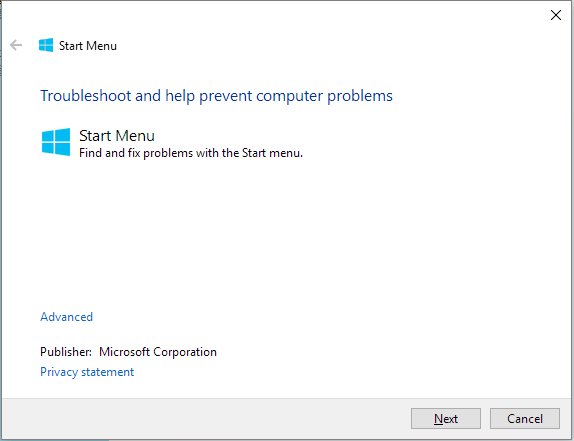
Fix 2. Download the Start Menu Troubleshooter
You should know that the Start menu issue is always there, accompanying each Windows 10 update, so you’re alone. And Microsoft has developed a troubleshooter to help at least temporarily find and fix problems with the Start menu. Click the download link for Start menu troubleshooter and run it as the wizard instructs.
Start Menu Troubleshooter Download
Fix 3. Boot Into Safe Mode and Then Return to Normal Mode
It seems that booting into safe mode works the most because quite a lot of users found that booting into safe mode and then returning into normal mode removes the critical error, though still a few of them said that it’s just a temporary fix, after some time the critical error came back again! Whatever, it’s worth a try.
Step 1. When Windows 10 starts, press Windows Key + L to log out.
Step 2. Click the «Power» button in the bottom right corner, hold «Shift» on your keyboard and click «Restart».
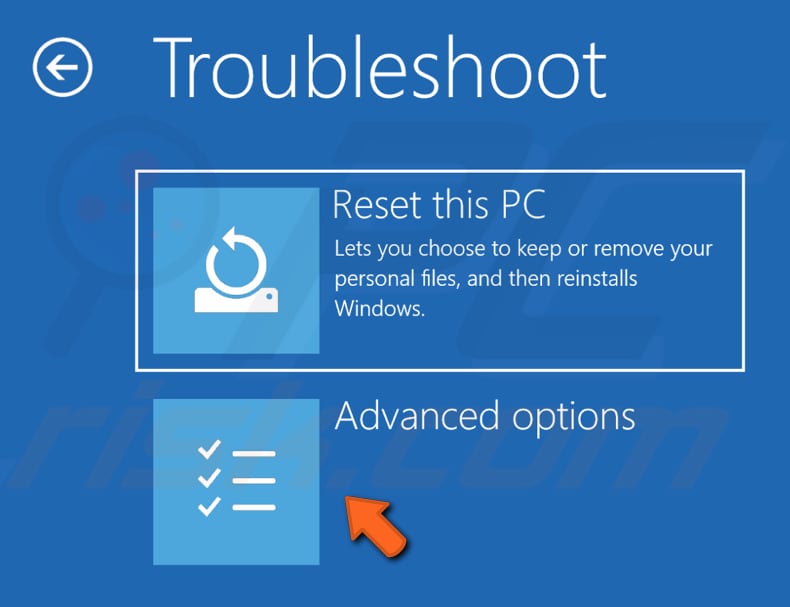
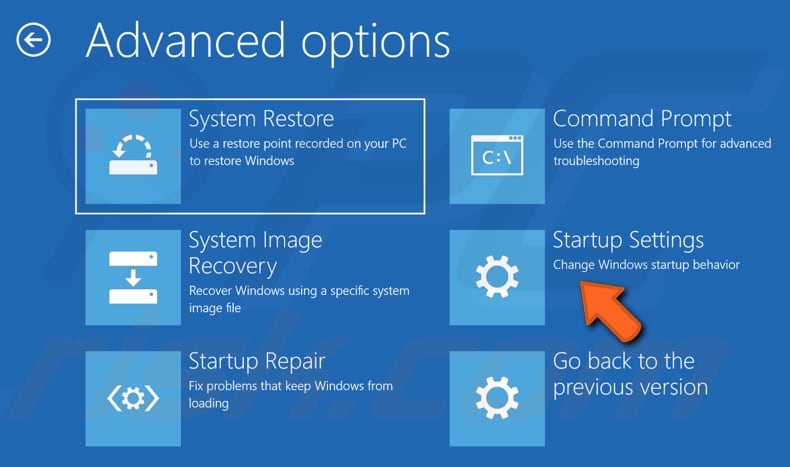
Step 3. Your computer should now restart to boot options. Go to «Troubleshoot» > «Advanced options» > «Startup Settings». Click the «Restart» button.
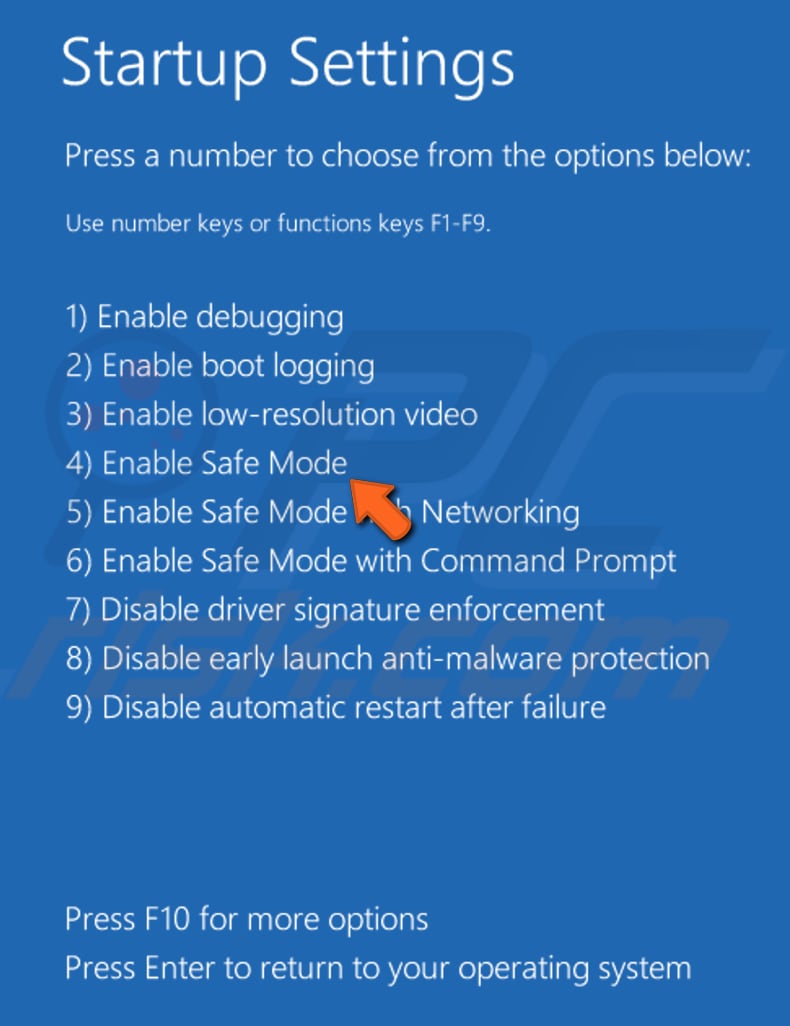
Step 4. Once your computer restarts again, press F5 to access «Safe Mode» with Networking.
Step 5. Just by entering the Safe Mode your problem should be resolved. All you have to do now is to restart your computer.
In addition to the three general ways of Start menu troubleshooting, be aware of your antivirus software, it’s said that third-party antivirus software is generating the critical error of the Start menu unnoticeably. Try to uninstall it and then reinstall.
Furthermore, there are some other suggestions from experienced users who solved their problem. The upcoming parts are somewhat higher-leveled, so you must show some patience and follow the detailed guide in earnest.
Fix 4. Restore System to an Earlier State Point
The last unexpected resolution has to be implemented if none of the solutions aforementioned solved the Start menu critical error in Windows 10. Comparing with the temporary fixes, restoring your computer to a previous version seems to be the most workable, especially you’re so fed up with the repeatedly crashing Start menu with the critical error prompt.
- Tip
- since revert your current operating system to an earlier state would erase data on the system drive, it’s highly advised for you to create a backup of C drive data, especially lots of installed applications. To quickly do a software backup without reinstalling, you can try EaseUS Todo PCTrans, the best PC transfer software to transfer applications on the C drive to a second drive. It’s the safest way to do a system restore with a backup at hand.
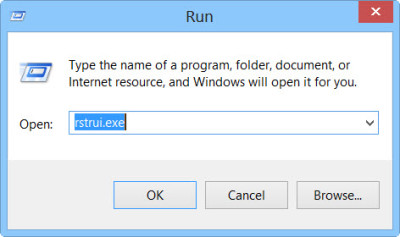
Step 1. Press Windows key + R to bring up the Run box and type rstrui.exe and hit Enter to open System Restore.
Step 2. The System Restore window will open. Click on Next.
Step 3. Select a Restore Point which you want to restore your computer to, and click Next.
Step 4. Follow the wizard to confirm all your selections to take effect.
КРИТИЧЕСКАЯ ОШИБКА МЕНЮ ПУСК НЕ РАБОТАЕТ WINDOWS 10
«Я пытаюсь быть спокойным, пока печатаю это — но я столкнулся с «Критическая Ошибка — Меню Пуск и Приложение Кортана не работают. Мы попытаемся исправить эту проблему при следующем выполнении входа» в течение последних ПЯТИ дней. Я не могу нормально работать, я не могу сосредоточиться, я разочарован в вас, парни из Microsoft, все эти ваши дурацкие программы, которые создают хаос в нашей жизни. Не могли бы вы сказать мне, что теперь делать?».
– вопрос к Microsoft
Критическая ошибка Windows 10 Критическая Ошибка Меню Пуск и Приложение Кортана не работают обычно возникает, когда часть ваших файлов и настроек повреждена. Это происходит потому, что вы установили или удалили какое-то неисправное программное обеспечение, оставив после себя его кэш и файлы. Многие пользователи Windows сообщали о подобных проблемах на множестве форумах, где обсуждают технические вопросы. Вот один из таких случаев:
- Часть 1: Что Вызывает Критическую Ошибку Меню Пуск?
- Часть 2: Как Восстановить Потерянные Данные с Компьютера с Критической Ошибкой Меню Пуск? HOT
-
Часть 3: Как Исправить Критическая Ошибка Меню Пуск не Работает?
- Решение 1: Войдите в безопасный режим и перезагрузите компьютер
- Решение 2: Создайте новую учетную запись администратора
- Решение 3: Временное Скрытие Кортаны с Панели Задач
- Решение 4: Отключите Internet Explorer
- Решение 5: Запустите проверку системного файла
- Решение 6: Обновление системы Windows
- Решение 7: Переустановите Сторонний Антивирус
- Решение 8: Загрузите Средство Устранение Ошибок Меню «Пуск»
- Решение 9: Переустановка Меню Пуск и Повторная Регистрация Cortana
- Устранение 10: Восстановление Системы
- Решение 11: Перезагрузка компьютера
Часть 1: Что Вызывает Критическую Ошибку Меню Пуск?
Критическая ошибка меню Пуск возникает, когда ОС завершает работу программы из-за внутренних проблем. Эти ошибки могут быть вызваны ошибками использования памяти, повреждением документов и так далее. Если вы выключите компьютер во время работы обновления, ваши файлы могут быть повреждены. Следует помнить, что эти проблемы могут повлиять на другие компоненты вашего ПО.
Таким образом, если у вас возникла эта ошибка » Критическая Ошибка — Меню Пуск и Приложение Кортана не работают. Мы попытаемся исправить эту проблему при следующем выполнении входа», и у вас есть выбор только выйти из системы, не выключайте компьютер.
Часть 2: Как Восстановить Потерянные Данные с Компьютера с Критической Ошибкой Меню Пуск?
Если у вас не работает меню пуск, и вы попытались выполнить все вышеперечисленные действия, то, скорее всего, ваши файлы пропали. Сброс компьютера приведет к стиранию данных на системном диске, что не является хорошим действием для многих пользователей.
Пользователям следует сохранять резервные копии данных. Но если вы пытались исправить ситуацию и у вас нет резервной копии, Tenorshare 4DDiG – это высокопроизводительный инструмент восстановления данных, который может восстановить любые потерянные или удаленные данные при различных инцидентах. Tenorshare 4DDiG может восстановить файлы любого типа буквально за считанные секунды с помощью всего нескольких кликов мыши. Вот как вы можете восстановить свои данные с помощью нашего профессионального инструмента:
- Поддерживает различные сценарии потери данных, например, компьютерные ошибки, случайное удаление, форматирование файлов, повреждение данных и т.д.
- Поддерживает 1000 типов файлов, включая фотографии, видео, аудио, документы и т.д.
- Поддерживает Windows 11/10/8.1/8/7.
- Поддерживает извлечения данных с флэш-накопителей Mac/USB, внешних жестких дисков, карт памяти, цифровых камер и т.д.
- Высочайший процент успеха и 100% безопасность.
- Выберите Местоположение
- Сканирование Диска
- Предварительный Просмотр и Восстановление Файлов
После установки откройте Tenorshare 4DDiG и на главном экране выберите место, где вы потеряли свои файлы, а затем нажмите кнопку Сканировать, чтобы продолжить.
4DDiG эффективно ищет потерянные файлы на выбранном диске в соответствии с вашими настройками. Вы можете переключиться с режима просмотра папок на режим просмотра файлов или просто использовать фильтр для поиска целевых файлов.
После того как файлы будут найдены, вы можете просмотреть и восстановить их в безопасное место на вашем компьютере. Не рекомендуется сохранять файлы обратно в туже папку, в которой они были потеряны, чтобы избежать перезаписи данных.
Часть 3: Как Исправить Критическая Ошибка Меню Пуск не Работает?
Решение 1: Войдите в безопасный режим и перезагрузите компьютер
- Нажмите клавиши Windows + L, чтобы выйти из системы, когда откроется окно Window 10.
- Продолжайте удерживать кнопку Shift на клавиатуре и нажмите кнопку питания, а затем «Перезагрузка».
- Сейчас ваш компьютер должен перезагрузиться и показать параметры загрузки. Перейдите в раздел «Дополнительные параметры» в меню «Устранение неполадок» и выберите » Дополнительные параметры загрузки».
- Нажмите кнопку «Перезагрузка», чтобы перезагрузить ваш компьютер.
- Когда он перезагрузится, нажмите F5, чтобы перейти в «Безопасный режим».
- После входа в безопасный режим ошибка Меню Пуск и Приложение Кортана не работают будут устранены. Все, что вам осталось сделать сейчас, это перезагрузить ваш компьютер.
Решение 2: Создайте новую учетную запись администратора
- Нажмите «Пуск», затем откройте «Настройки».
- Нажмите «Учетные записи» и перейдите к разделу «Семья и другие».
- Затем на этом этапе добавьте другого пользователя на этот ПК.
- Выберите оба варианта, запрашивающие информацию для входа в систему и учетную запись Microsoft.
- Задайте имя пользователя, придумайте хороший пароль и подсказку к паролю, а затем нажмите «Далее» и «Готово».
- Выйдите из системы, нажав на Значок Питания > «Выход».
- Войдите в систему под новой учетной записью, чтобы исправить ошибки меню Пуск в Windows 10.
Решение 3: Временное Скрытие Кортаны с Панели Задач
- На панели задач найдите значок Cortana.
- В левом верхнем углу приложения выберите три точки и откройте Настройки.
- Выберите сочетание клавиш и выключите его.
- Примените настройки, перезапустив систему.
- После перезагрузки выполните описанные выше действия еще раз, но выберите голосовую активацию и предоставьте ей разрешение.
- Выключите, пусть Кортана отреагирует на «Кортана».
Решение 4: Отключите Internet Explorer
Из раздела «Программы и функции» в Панели управления вы можете отключить Internet Explorer, выполнив следующее:
- Нажмите «Пуск» и перейдите в раздел «Приложения» из меню «Настройки».
- Выберите пункт «Дополнительные функции» и в списке функций найдите Internet Explorer 11.
- Нажмите на него, затем нажмите «Удалить».
- Подождите, затем появится сообщение о необходимости перезагрузки.
- Перезагрузите систему, чтобы исправить критическую ошибку меню Пуск в Windows 10.
Решение 5: Запустите проверку системного файла
- Откройте командную строку (с правами администратора) через меню опытного пользователя (Power User) или нажав Window + X на клавиатуре.
- Когда откроется окно, введите команду «sfc/scannow», чтобы запустить SFC на вашем ПК с Windows.
- SFC или System File Checker (служебная программа в Windows, которая проверяет наличие проблем с файлами на компьютере) должна подтвердить целостность каждого файла операционной системы на вашем ПК. Это может занять некоторое время.
Решение 6: Обновление системы Windows
- На клавиатуре нажмите одновременно клавиши Windows + R.
- Откроется окно «Выполнить», в котором нужно ввести «ms-settings: in» и затем нажать клавишу Enter.
- В окне настроек нажмите «Обновление и безопасность», а затем «Проверить наличие обновлений».
- Если у вас Windows 10 (1511), перейдите в раздел «О программе» на вкладке «Система» и проверьте «Версия». Следуйте указаниям помощника, чтобы установить последнюю версию, доступную в вашей системе.
Решение 7: Переустановите Сторонний Антивирус
Если на вашем компьютере установлено стороннее антивирусное ПО, удалите его с панели управления. После этого откройте программные файлы, из которых загружено ПО, и переустановите его, используя предыдущую процедуру. Это обновит вашу системную память и удалит все ненужные и проблемные окна запуска. Это в конечном итоге приведет к устранению критической ошибки Меню пуск не работает.
Решение 8: Загрузите Средство Устранение Ошибок Меню «Пуск»
Вскоре после выхода Windows 10, критическая ошибка «меню Пуск не работает» стала очень распространенной. После чего, Microsoft создала специальное средство устранения неполадок, которое вы всегда можете использовать в качестве средства резервного копирования.
Этот вариант работает лучше всего, если вы считаете, что ошибка вызвана из-за того, что вы не установили обновления. Вам следует загрузить средство устранения неполадок и запустить его, выполняя экранные советы по решению проблемы не работает меню пуск Windows 10.
Решение 9: Переустановка Меню Пуск и Повторная Регистрация Cortana
-
Нажмите клавиши X + Windows, чтобы открыть Windows PowerShell и введите
Get-AppxPackageMicrosoft.Windows.ShellExperienceHost | Foreach {Add-AppxPackage — DisableDevelopmentMode — Register «$($_.InstallLocation) AppXManifest.xml»}
- Нажмите Enter
-
Когда процесс завершится, введите следующее:
Get-AppxPackageMicrosoft.Windows.Cortana | Foreach {Add-AppxPackage — DisableDevelopmentMode — Register «$($_.InstallLocation) AppXManifest.xml»}
- Нажмите Enter и перезагрузите компьютер.
Решение 10: Восстановление Системы
- Нажмите одновременно клавиши X + Windows и перейдите в меню «Настройки».
- Выберите «Восстановление» после того, как откроется опция «Обновление и безопасность».
- Перейдите к опции «Расширенный запуск» и нажмите кнопку «Перезагрузить».
- Это перезапустит Windows, где вы увидите «Выберите опцию».
- Перейдите к опции дополнительных параметров «Устранение неполадок».
- Нажмите на «Восстановление системы».
Решение 11: Перезагрузка компьютера
- Нажмите одновременно клавиши X и Windows, чтобы открыть меню.
- Выберите в меню пункт «Настройки» и перейдите к пункту «Обновление и безопасность».
- Далее на левой панели выберите «Восстановление».
- Справа вы должны увидеть опцию » Вернуть компьютер в исходное состояние».
- Нажмите кнопку «Начать» и выберите «Сохранить мои документы», чтобы продолжить.
- Это действие вернет ваш компьютер к заводским настройкам и, надеюсь, станет решением критической ошибки Windows 10 Меню пуск.
Итог
Надеемся, вы узнали, как решить проблему меню пуск и приложение кортана не работают в Windows 10. Если вы потеряли данные во время процесса, мы рекомендуем вам обратиться за помощью к нашей профессиональной программе для восстановления данных, т.е. Tenorshare 4DDiG.
Tenorshare 4DDiG Data Recovery
4DDiG — это ваш непревзойденный выбор для восстановления всех потерянных данных на компьютере Windows / Mac после различных сценариев потери, таких как удаление, форматирование, RAW и т.д. с более высокой вероятностью успеха.
Скачать Бесплатно
Скачать Бесплатно
Купить Сейчас
Купить Сейчас
Since when Microsoft released Windows 10, bugs and problems has been always stuck to it like glue. Critical error is one of the among that mainly gestures toward the Start menu not working with the code. The issue commonly occurs because of corrupted files moreover deletion of important system components. Once affected, not only the Start menu stops working but also other exploration features like Cortana and Taskbar search may come with unusual behavior. However, if you are conflicting with any kind of search issues, this walkthrough will guide you on how to fix critical Error Start Menu in Windows 10.
You know Start Menu is one of the most useful components of Windows 10 because it let you access installed apps and settings as fast as one’s legs can carry one. The moment it stops its functionality, things become really complicated and makes you unable to run the PC effectively. Though critical error message comes up with a self-explanation fix that claims the issue will be eradicated after next sign-in, most of the time it really doesn’t work. Therefore, you need to try out other workarounds in order to settle upon the problem.
Solutions to critical error Start menu Windows 10
Here is how to fix: Critical Error Start Menu Windows 10 –
Note – Before jump into the solutions, make sure to take incremental backup in Windows 10 otherwise you may lose important data if anything goes wrong.
1] Restart Windows 10 – most basic solution
If you are fortunate enough, only restarting the PC will do the trick to fix start menu critical error. Steps are as follows –
-
- Press Alt+f4 hotkey in one go to invoke Shut down Windows wizard.
- Upon appearing, choose Restart using the drop-down menu residing beneath What do you want the computer to do?
- Thereafter, click the OK button to reboot the PC.
2] Run SFC /Scannow command line
As we said, missing or corrupt system is the main culprit that bring forward critical error start menu Windows 10. Hence, you need to utilize system file checking utility to settle down this issue. To do so –
- Click on the Taskbar Search icon (or box) and type in cmd.exe.
- Once the result becomes visible, choose Run as administrator from the right column.
- A UAC will prompt up seeking your permission, click Yes button to get along.
- On the black panel, type the following command line eventually hit Enter to execute the same –
sfc /scannow
- Now the utility will start scanning your full system to detect the existence of corrupted files. Wait patiently and let the system do its job. If the utility finds any corruption in your PC, it will be solved automatically. But, in case of experiencing “Windows Resource Protection found corrupt files but was unable to fix some (or all) of them” message, you need to execute DISM tool. For that, type the following line in the same window and hit Enter –
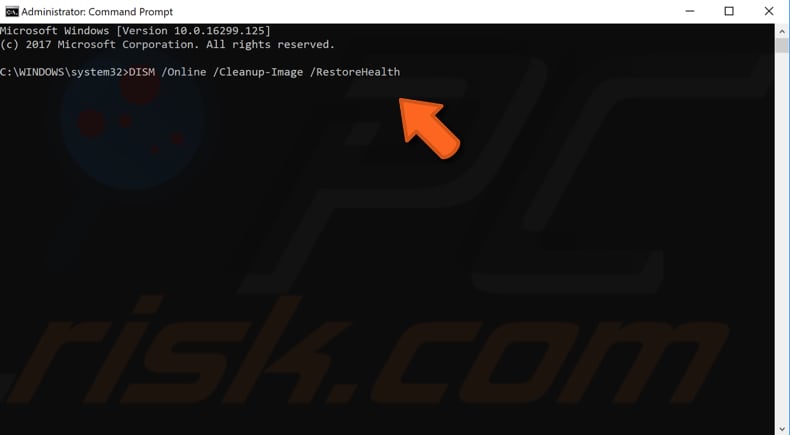
DISM /Online /Cleanup-Image /RestoreHealthThis command line will allow your operating system to download the correct image files and replace them with the faulty ones. Upon completion of full process, run the sfc /scannow once more and Restart your computer.
3] Uninstall a third-party antimalware program
Third-party antivirus sometimes prevents system components from continuing or being carried out properly. Furthermore, it often interferes with built-in antimalware and ends up causing many issues along with Windows 10 start menu critical error. Also, to stay away from such a situation, you should use one antivirus at a time. As Windows Security provides great protection, uninstalling the third-party one will be a pearl of wisdom. Here is how to proceed –
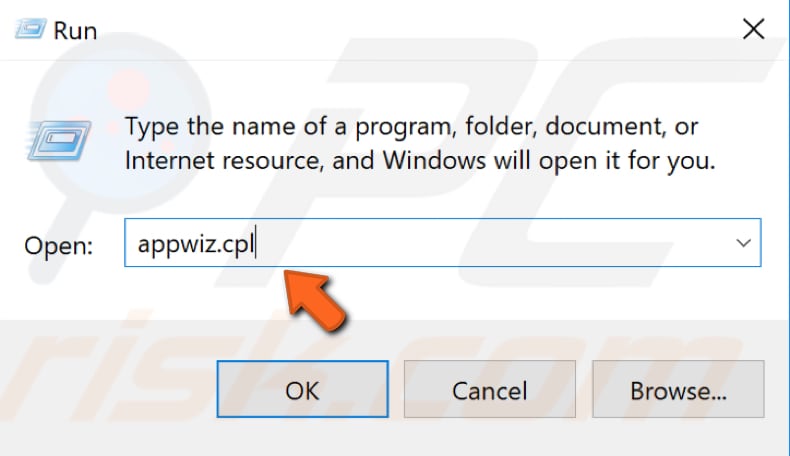
- Right-click on Start button and choose Run from the Power user menu.
- After showing up, type appwiz.cpl in the empty text bar and click OK.
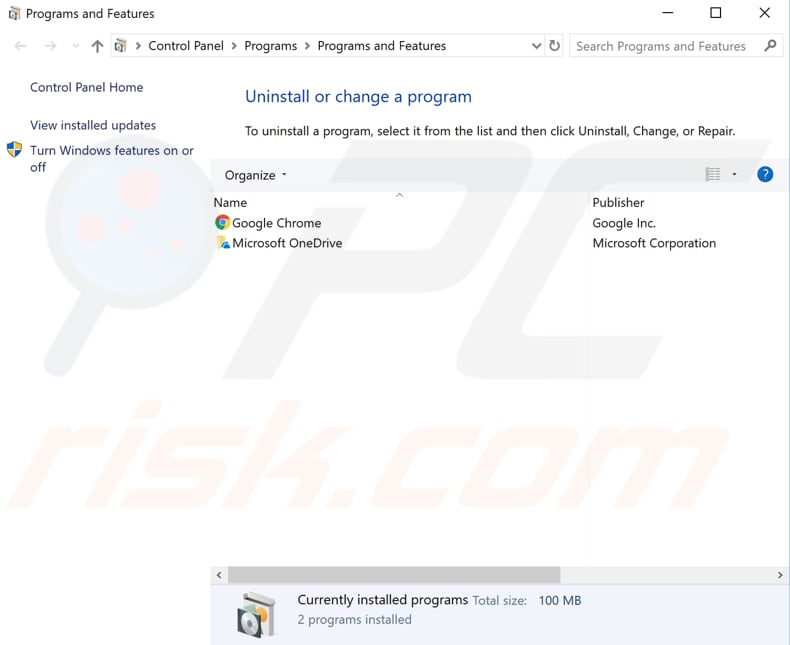
- On Programs and Features window, look for the third-party antivirus program.
- Once found, click on the same and hit the Uninstall button from the top ribbon.
- To wipe out the program fully, follow the on-screen instructions you come across.
4] Create a new user account and switch to it
Some unexpected changes automatically made to your system may also cause critical error start menu in Windows 10. In such a case, making an additional user account with administrative privileges is the best option for resolving the issue. Here is the process you need to follow –
- Right-click on an empty space of Taskbar and select Task Manager from the available list.
- When it comes into the view, make sure the wizard is expanded or else click More details.
- Now click on File and subsequently choose Run new task.
- On the forthcoming wizard, put PowerShell in the given text field and check the box assigned for Create this task with administrative privileges.
- Hit the OK button to open elevated PowerShell and upon showing up, you run the following cmdlet –
net user Username Password /add
- Here, in the place of Username and Password, provide the desired one for your afresh account.
- After putting the command perfectly, Press Enter key to execute it.
- Now, Restart Windows 10 using any usual way and when it powers up, choose the currently created account to sign in.
5] Run Start menu Troubleshooter
Microsoft provided a tool named Start menu Troubleshooter but recently it has removed the same from the database. Fortunately, Softpedia still offers the troubleshooter in the System Miscellaneous archive. The tool fixes Critical Error Start Menu in only a single click. Here is how to use it –
- First of all, navigate a trustable page to download Start menu troubleshooter.
- After the downloading process finishes, visit the Downloads folder and double-click the item you just got.
- When it becomes apparent, click Next button to troubleshoot Start menu related issue.
- After completion, apply the fix if the system suggests any.
6] Re-install Start menu
Critical error often shows up when the Start menu becomes corrupted and buggy. If so, you need to reinstall the app by executing a command in PowerShell. Here is the process –
- Press Windows key and Q to invoke Windows search.
- Type PowerShell in the search bar and when the result turns up, click Run as administrator from the right column.
- When a User Control Account becomes apparent, hit the Yes button.
- On PowerShell window, copy the following command line and paste it beside blinking PS C:\WINDOWS\system32> –
Get-appxpackage -all *shellexperience* -packagetype bundle |% {add-appxpackage -register -disabledevelopmentmode ($_.installlocation + “\appxmetadata\appxbundlemanifest.xml”)}
- Press Enter key.
- On completion, restart the PC.
7] Boot into the Safe mode
One of the most effortless ways to fix critical error start menu Windows 10 is entering into the Safe mode. For that, you need to go through the below steps –
- Open Run dialog box by pressing Win+R hotkey in one go.
- Type msconfig in the text bar and hit the Enter key.
- When System Configuration window comes into the sight, shift to its the Boot tab.
- Hover the cursor to Boot options area and check the box of Safe boot.
- When all the grayed out options become active, click the radio button assigned for Minimal.
- Thereafter, click the Apply button followed by clicking OK to save the changes.
- Now, press Alt+f4 eventually choose Restart using the drop-down menu and hit the OK button.
- Once the system completes its first cycle of rebooting, continuously press F8 key until the next page comes up.
- On the forthcoming page, select the Safe Mode option.
- Boot into Safe Mode on the subsequent move.
8] Take out the battery for a while
Surprisingly, many people affected with Windows 10 critical error reported that only removing the battery from the device solved the problem. It might sound awkward but still, you can give it a try. If your laptop has a concealed battery, skip this method and move to the next one.
- At first, shut down Windows 10 PC.
- Next, unplug the power cable and then remove the battery.
- Wait for 5-10 minutes and after that power up the device.
9] Disable Internet Explorer
In order to fix this issue, you need to disable Internet Explorer and for that, follow these steps –
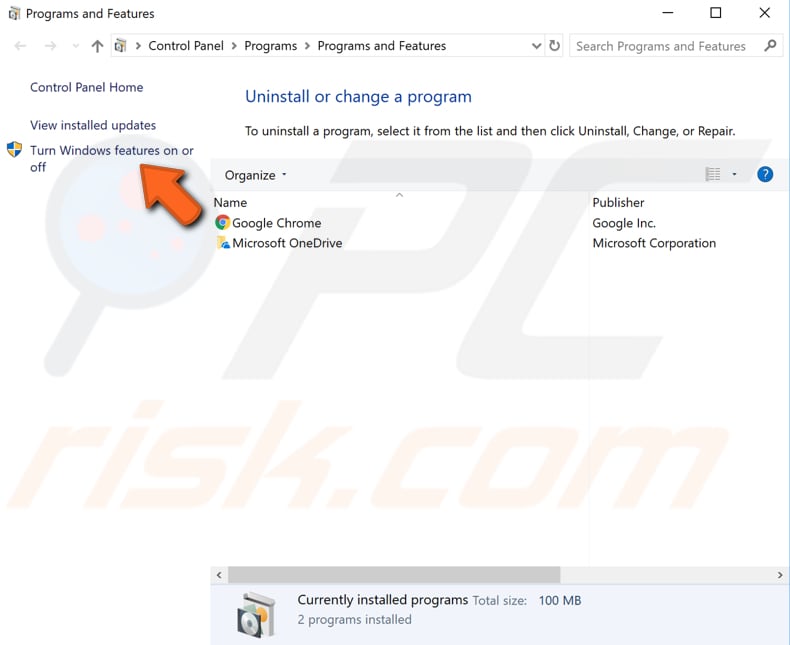
- Open Control Panel first and when it shows up, select Programs and Features from the available list.
- After being visible, click Turn Windows features on or off link from the left column.
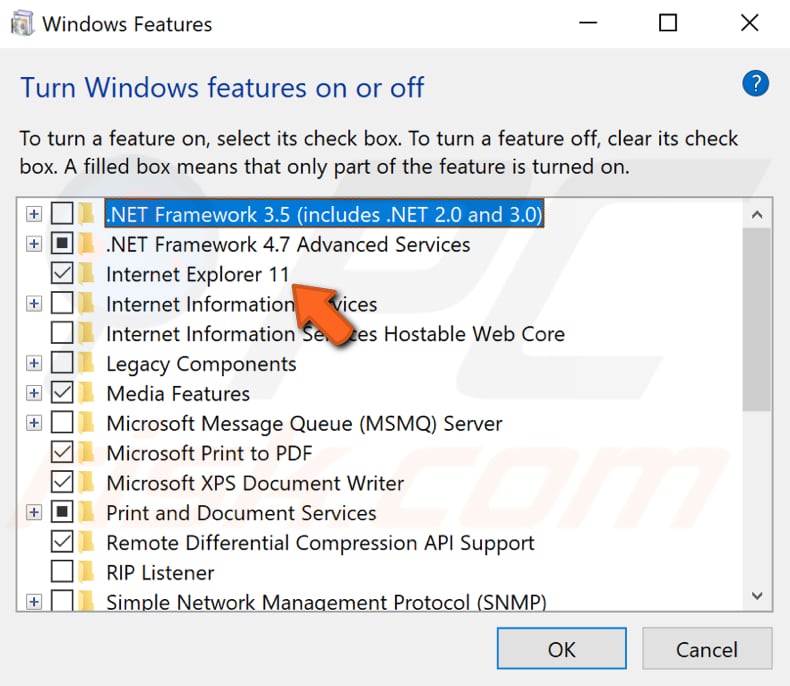
- A wizard will now come up named Windows Features, locate Internet Explorer 11 from there and uncheck the box located beside it.
- A warning message will roll out, click Yes to continue.
- Lastly, restart your computer and check if critical error start menu Windows 10 is resolved.
10] Obliterate TileDataLayer directory
A substantial number of people reported that Start menu critical error turns up just after connecting Microsoft account with the local one. In such an instance, you need to switch to a different administrator account and then wipe out TileDataLayer directory.
- At first, enable Administrator account that you will use to sign in next time.
- Then, press Windows logo + R together and put %localappdata% in the empty text field.
- Click OK button to head over to Local folder.
- On the current page, look for TileDataLayer folder, right-click on the same once found and select Delete.
- Now, restart the PC and this time sign in with the administrative account you have enabled in previous steps.
11] Update Windows 10
Usually, Microsoft provides updates on a regular interval that includes fixes of reported issues. So, there is a high chance of getting rid of check critical error start menu Windows 10 if you install the latest update. Here is how –
- Open Windows Settings app by pressing Win & I keys at the same time.
- When it comes into the view, locate Update & Security and click on it.
- After the subsequent page loads, shift to right pane and make a click on Check for updates button even though you see You’re up to date.
- If the system gets any available patch, click the Download button to initiate the process of getting them.
- At what time the downloading ends, the installation will start automatically.
- Keep your eyes on the screen for further instructions and follow them accordingly.
12] Put an end of Local Security Authority Process
To settle down Start menu critical error, you need to end the process of Local Security Authority (lsass.exe). To do so, the built-in Task Manager will be handy in this regard.
- Open Task Manager by pressing Ctrl + Shift + Esc.
- When it comes up with Processes tab opened, scroll down to locate Local Security Authority Process.
- Once found, right-click on it and choose End task.
- After that, close Task Manager and restart your computer. After powering up, check if critical error start menu Windows 10 still exists.
13] Perform a clean boot
Third-party programs often conflict with the function of Start menu and end up causing critical error. Therefore, performing a clean boot will be wise as it starts the computer with the necessary Microsoft apps only. By doing so, if you find out a third-party app is responsible for this, update the same or uninstall it to fix the issue permanently.
- Press Win+X and choose Run from the quick link menu.
- In its text bar, type control and click the OK button.
- When Control Panel becomes visible, set its View by option to small icons and choose Administrative Tools from the available options.
- On the upcoming page, locate System Configuration and double-clicking on the same.
- Next, click the radio button contrary to Selective startup and untick the box assigned for Load startup items.
- Now, jump to Services tab. Select the checkbox associated with Hide all Microsoft services and hit Disable all button.
- Thereafter, move to the Startup tab and click Open Task Manager link.
- When it shows up with Startup tab revealed, right-click on each item listed here and choose Disable for all.
- After doing so, go back to the System Configuration wizard and click the Apply button followed by OK to implement the changes.
14] Revert back to error-free state of your operating system
If the above methods didn’t provide success for you, the last thing you can do is using system restore. This will help your Windows OS to get back the previous state when the PC was working fine. Here is the process you need to follow –
- Unfold Windows search by clicking on the icon located in Taskbar.
- Type rstrui in the field and hit Enter.
- When System Restore wizard manifests itself, click Next button from the bottom.
- On the consequent page, select the last restore point and again hit Next.
- Finally, click the Finish button to initiate the procedure of restoring Windows.
Methods:
1] Restart Windows 10
2] Run sfc/ scannow command line
3] Uninstall third-party antimalware
4] Create a new user account and switch to it
5] Run Start menu Troubleshooter
6] Re-install Start menu
7] Boot into the Safe mode
8] Take out the battery for a while
9] Disable Internet Explorer
10] Obliterate TileDataLayer directory
11] Make your Windows 10 updated
12] Put an end of Local Security Authority Process
13 Perform a clean boot
14] Revert back to error-free state of your operating system
That’s all!!
How to Fix the ‘Start Menu Not Working’ Critical Error on Windows 10?
The Start Menu is a significant user interface element used in Microsoft Windows that sometimes stops working. This article shows how to fix your Windows Start Menu not working.
The Start Menu is one of the most useful and used components of the Windows 10 operating system. Having problems with Start Menu can severely affect your user experience.
That doesn’t mean that you can’t use your Windows at all, since there are various roundabouts how to access files, folders, and so on. However, this is not a problem that you can ignore.
If you’re getting a critical error that says «Critical Error – Start menu isn’t working,» we will show you how to fix this problem using different ways, and hopefully, it will help you resolve this error.
Table of Contents:
- Introduction
- Uninstall Dropbox
- Boot Into Safe Mode
- End Local Security Authority Process
- Hide Cortana
- Disable Internet Explorer
- Run Start Menu Troubleshooter
- Run SFC and DISM Scans
- Reset Your Windows 10
- Video Showing How to Fix ‘Start Menu Not Working’ Critical Error
Download Computer Malware Repair Tool
It is recommended to run a free scan with Combo Cleaner — a tool to detect viruses and malware on your device. You will need to purchase the full version to remove infections. Free trial available. Combo Cleaner is owned and operated by Rcs Lt, the parent company of PCRisk.com read more.
Uninstall Dropbox
Dropbox is a file hosting service operated by an American company that offers cloud storage, file synchronization, personal cloud, and client software. This program is a common cause of getting the «Start menu not working» error since many users reported that uninstalling this program helped fix this problem.
If you have Dropbox installed on your Windows, we recommend uninstalling it and see if it was the reason why you are having problems with Start Menu.
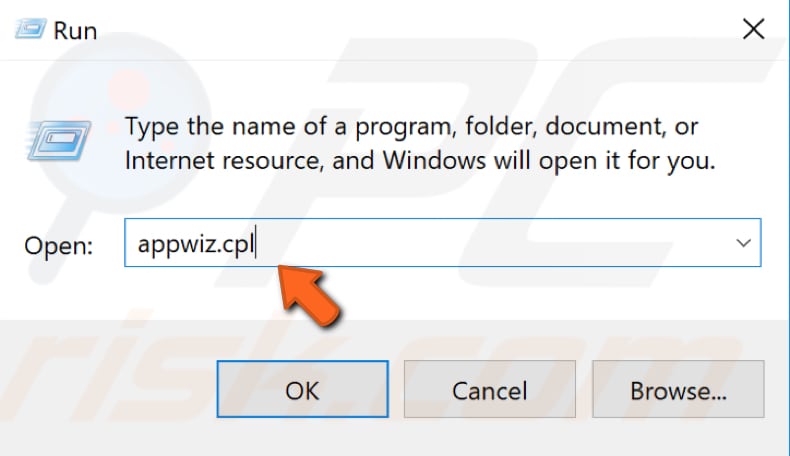
If your Start Menu is not working and you can’t access Control Panel the traditional way, press Windows Key + R, and Windows will open the Run dialog box. Type «appwiz.cpl» and press Enter on your keyboard to launch the Programs and Features window.
In the Programs and Features window, you will see a list of installed programs. Find Dropbox and uninstall it. Restart Windows to see if this helped to resolve the problem.
[Back to Table of Contents]
Boot Into Safe Mode
Safe Mode is a diagnostic start-up mode in Windows operating systems used to obtain limited access to Windows when the operating system does not start or function normally. One of the most common steps when troubleshooting a computer is to boot into Safe Mode.
Safe Mode starts Windows in a basic state, using a limited set of files and drivers. It can help to troubleshoot problems on your computer. If, for example, the problem does not occur in Safe Mode, this will confirm that the default settings and basic device drivers are not causing the issue.
It is quite common that booting Windows into Safe Mode helps fix this problem with the Start Menu. To boot into Safe Mode from Windows, press Windows Key + L. This will log you out from your local account. When on Sing In screen, click on the Power button and choose «Restart» while holding the Shift key on your keyboard. You can find other ways how to boot your Windows into Safe Mode here.

This will restart your Windows and open boot options. Select «Troubleshoot.»

In Troubleshoot menu, click on «Advanced options.»
In Advanced options, click on «Startup Settings.»
In Startup settings, click on «Restart,» which will restart your Windows, and you will be able to enable Safe Mode.

Press number 4 or F4 on your keyboard to boot your Windows into Safe Mode.
Restart your computer after booting into Safe mode and see if you still have problems with the Start Menu.
[Back to Table of Contents]
End Local Security Authority Process
Ending this process requires using Task Manager. Task manager is a system monitor program used to provide information about the processes and programs running on a computer and the general status of the computer. Some implementations can also be used to terminate processes and programs and change the processes’ priority.
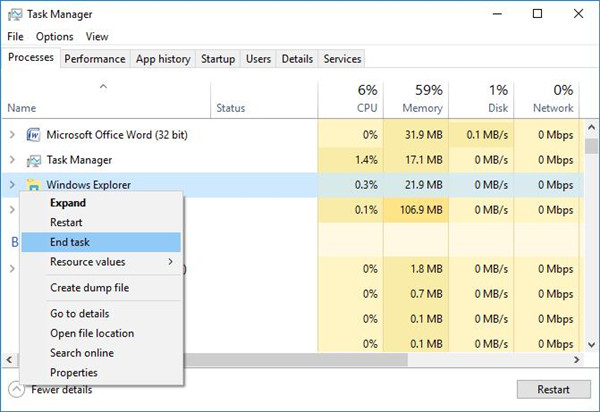
To open it, press Ctrl+Alt+Delete or Ctrl+Shift+Esc on your keyboard. When Task Manager is opened, click on the «Processes» tab and find «Local Security Authority Process.» Right-click on it and choose «End task» from the dropdown menu.
Close Task Manager and restart your computer to see if this helped you fix the «Start menu not working» error.

[Back to Table of Contents]
Hide Cortana
Cortana is a virtual assistant created by Microsoft, and sometimes hiding it helps resolve this problem with Start Menu. To hide Cortana, right-click on the Taskbar, select «Cortana,» and click on «Hidden.»
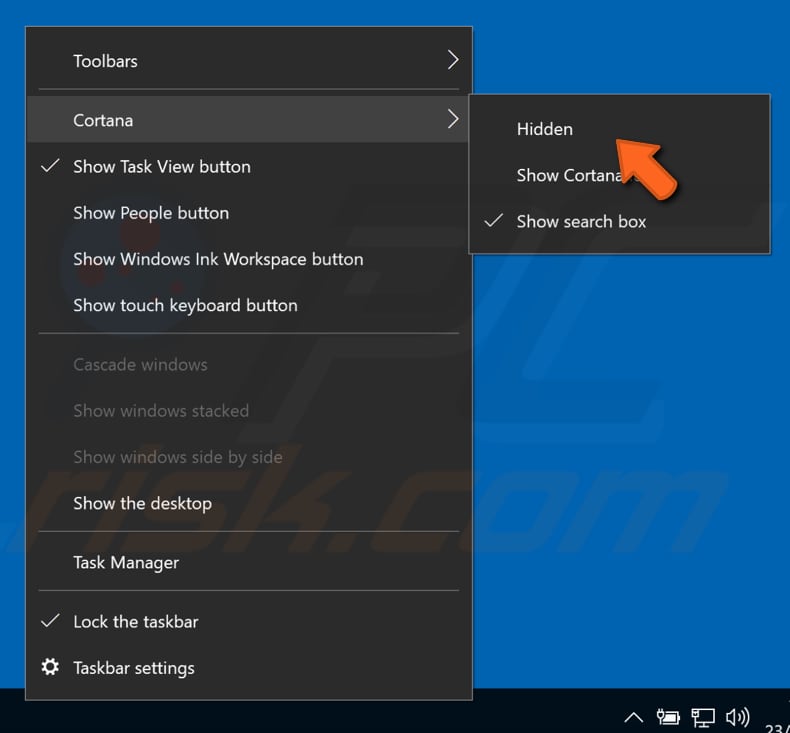
Turn Cortana on again. Right-click on your Taskbar and repeat the steps mentioned above. Change «Hidden» to «Show search box.» Restart your computer to see if it helped to resolve the problem.
[Back to Table of Contents]
Disable Internet Explorer
Sometimes it is the Internet Explorer that causes this problem. Try disabling Internet Explorer. To disable it, press Windows Key + R to open the Run dialog box. In the Run dialog box, type «appwiz.cpl» and press Enter to launch Programs and Features.
In the Programs and Features window, click on «Turn Windows features on or off.»
Find «Internet Explorer 11» on the list and unmark its checkbox. If you get a warning message, just click Yes. Click OK to save changes and restart your computer to see if this helped.
[Back to Table of Contents]
Microsoft has released a Start Menu Troubleshooter for Windows 10 that will troubleshoot and fix your Windows 10 Start Menu problems & issues automatically. Start Menu Troubleshooter will check if the Start Menu and Cortana are installed correctly and whether registry key permissions and database corruptions are in place etc. Install this troubleshooter and see if your problem can be fixed by it. You can download it here.
[Back to Table of Contents]
Run SFC and DISM Scans
System File Checker is a utility in Windows that allows users to scan for corruptions in Windows system files and restore corrupted files. This guide describes how to run the System File Checker tool (SFC.exe) to scan your system files and repair missing or corrupted system files. If a Windows Resource Protection (WRP) file is missing or is corrupted, Windows may not behave as expected. For example, some Windows functions may not work, or Windows may crash.
The «sfc /scannow» option is one of the several specific switches available in the SFC command, the Command Prompt command used to run System File Checker.
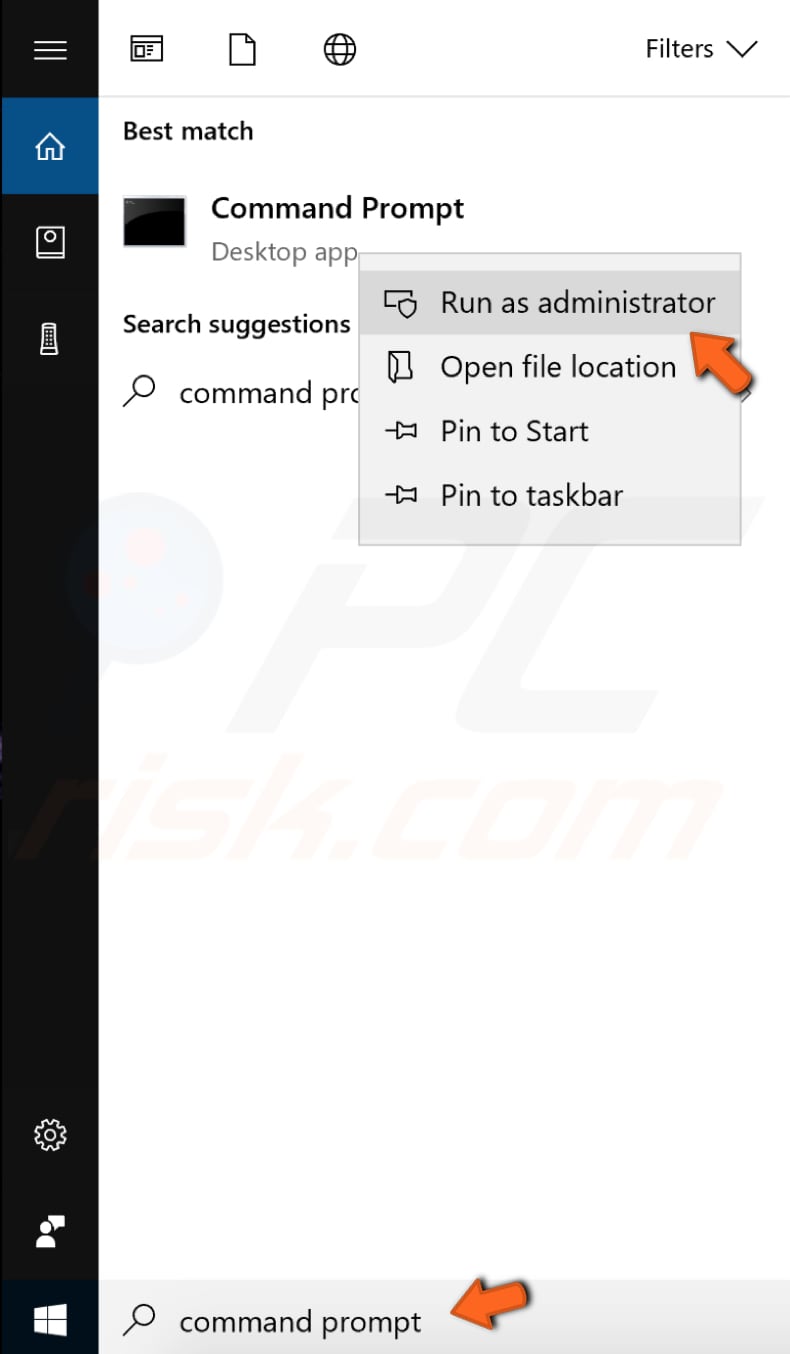
To run it, you need to open Command Prompt first. To open it, type «command prompt» in Search and then right-click on the «Command Prompt,» select «Run as administrator» from the dropdown menu to run Command Prompt with administrator privileges. You must run an elevated Command Prompt to be able to perform an SFC scan.
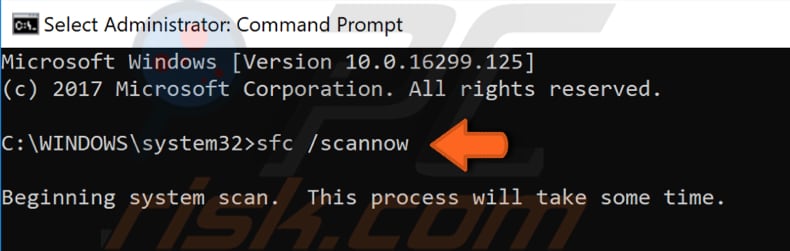
In opened Command Prompt window, type «sfc /scannow» and press Enter on your keyboard to execute this command. System File Checker will start, and it should take some time to complete the scan. It should take about 15 minutes. Wait for the scanning process to complete, and then restart your computer.
You might need to perform a DISM scan to fix the «Start menu not working problem.» DISM stands for Deployment Image Servicing and Management, and it can be used to repair and prepare Windows images, including the Windows Recovery Environment, Windows Setup, and Windows PE.
To run a DISM scan, you need to open Command Prompt as administrator again and type in this command: «DISM /Online /Cleanup-Image /RestoreHealth.» Press Enter on your keyboard to execute it.
Try restarting your computer after both tests and check if your Start Menu started working properly.
[Back to Table of Contents]
Reset Your Windows 10
This is the last thing you might want to do, but resetting your computer can help you fix this problem. Make sure that you tried out all of the methods mentioned above before going any further. By refreshing Windows 10, your downloaded files and applications might be deleted, so make sure to create a backup. To complete this step, you might need Windows 10 installation USB or DVD, so make sure to have one.
To reset your PC, press Windows Key + L to log out of your current account. When on Sing In screen, click on the Power button and choose «Restart» while holding the Shift key on your keyboard. This will restart your Windows and open boot options. Select «Troubleshoot.»
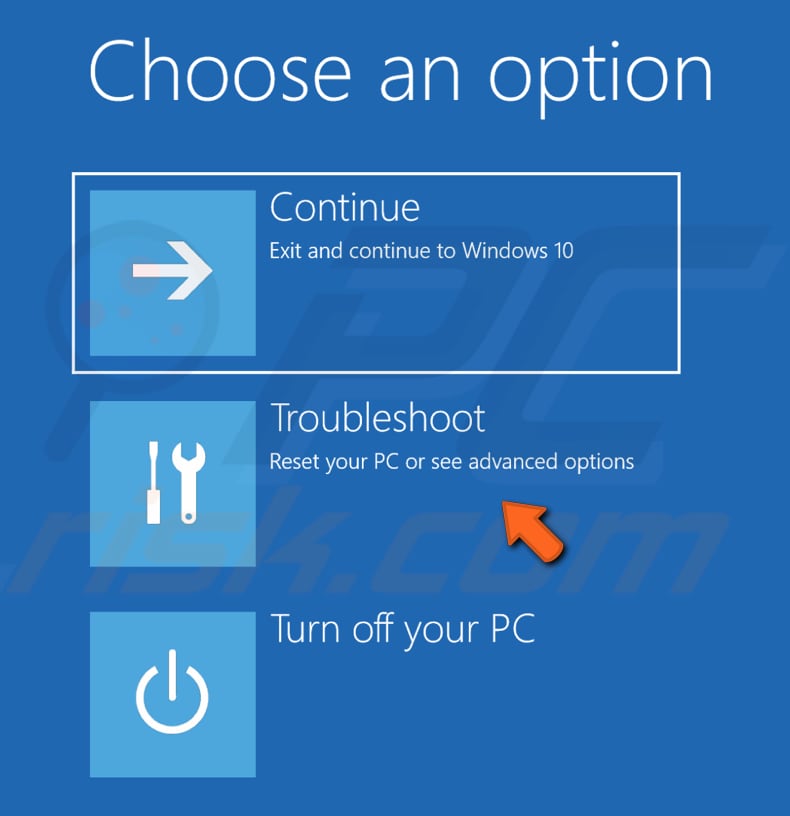
In Troubleshoot menu, select «Reset this PC» and follow the instructions.

We hope one of the methods described in our guide helped you fix the «Start menu not working» error.
[Back to Top]
Contents:
Start Menu Not Working Overview
Why Start Menu Not Working Occurs
19 Ways to Fix the Start Menu not Working Issue
Start Menu Not Working Overview
When Start menu does not work on Windows 10, it means you can’t do many things with the Windows key, such as opening programs on it or using the Windows shortcuts. Sometimes, you would also be reminded of the Critical error saying your Start menu is not working.
Now no matter your Start menu is not opening or is not working, it is possible that the Cortana or taskbar stops working, too.
Therefore, it is urgent for you to fix this dead Windows Start menu to recover this Start menu or button for your PC.
Why Start Menu Not Working Occurs
This Start menu or Cortana or Search not working problem in a large sense can be caused by corrupted drivers, files, and problematic settings. But it is difficult to pinpoint the real and exact reasons why the Start menu does not work along with the Cortana and Search.
All you can do is to scan for the problems with various tools. And on the basis of that, try some methods to fix this Start menu or button disappears or not working issue on Windows 10.
Fix the Start Menu not working or won’t open issue
For the users who have come across this Start menu not working or opening issue for the first time, there are many reasons that can causes it and many ways can fix it, so you should try to fix it patiently and earnestly.
Solutions:
- 1: Reboot Computer
- 2: Restart Windows Explorer
- 3: Repair Start Menu Automatically and Comprehensively
- 4: Create EnableXamlStartMenu DWord
- 5: Sign Out and Sign in Again
- 6: Run System File Checker
- 7: Run DISM Tool
- 8: Use Start Full Screen
- 9: Turn on and Turn off Tablet Mode
- 10: Run PowerShell
- 11: Configure Safe Boot
- 12: Run Start Menu Troubleshooter
- 13: Update Graphic and Audio Drivers
- 14: Reinstall Cortana
- 15: Edit Start Value in Registry Editor
- 16: Create a New Account
- 17: Do a Clean Boot
- 18: Uninstall Antivirus Applications
- 19: Reset the System
Solution 1: Reboot Computer
Nothing to do, just restart your computer. There are a lot of problems that can be solved after restarting the computer. When you restart your computer, Windows 10 will scan and configure your computer again. Probably, Start menu not responding disappeared just after the reboot.
Solution 2: Restart Windows Explorer
If you press start button but nothing happens, you can try to kill the Windows explorer process and restart it.
1. Right-click your mouse in the taskbar, then choose Task Manager.
2. In the process tab, find Windows Explorer, right-click it to select End Task.
3. Click File menu and select Run a New Task.
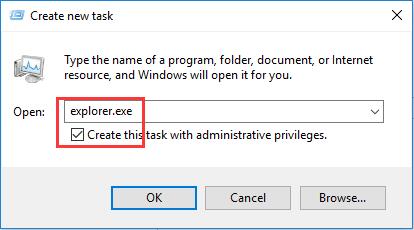
4. In the window, type explorer.exe and check the box of Create this task with administrative privileges.
After that, you can press the Windows button and access any programs now.
Solution 3: Repair Start Menu Automatically and Comprehensively
If you cringe at the thought to fix a critical error that start menu stops working on Windows 10, it is worth recommending taking advantage of Advanced SystemCare. This tool will help you deal with start menu error automatically. Also, it is capable of fixing Cortana errors, which can be the potential cause of the unavailable start menu.
For those users who want start menu style on Windows 10 though your PC is on Windows 10, Advanced SystemCare can also make it happen for you.
1. Download, install and run Advanced SystemCare.
2. Then locate Toolbox and find out MyWin10 to install it quickly.
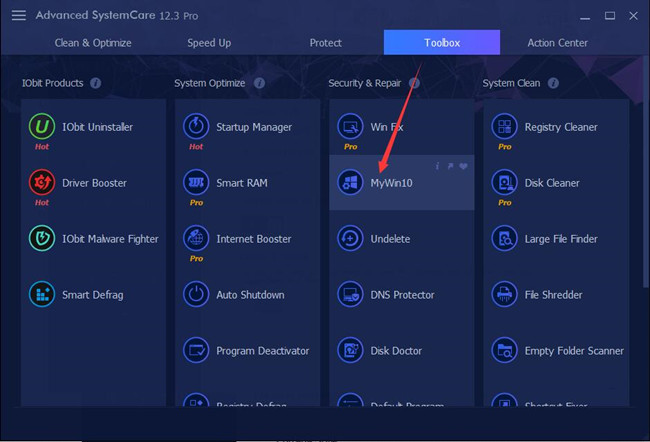
3. In IObit MyWin10, on the left pane, locate Fix problem and then on the right pane, choose to Repair Start Menu. Just hit Fix it Now.
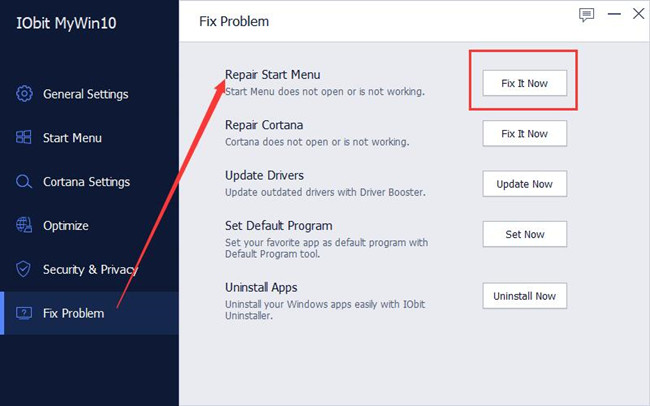
If needed, you may as well attempt to Repair Cortana to see if it helps to fix start menu not working on Windows 10. And for those who wish to go back to start menu Windows 7 style, Advanced SystemCare will help you achieve that as well.
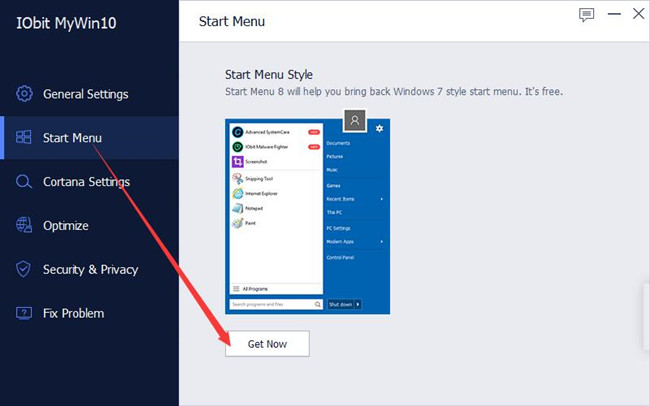
4. On the right side, choose Start Menu and then click Get Now on the right side to install the Start Menu of Windows 7 style.
Now, you can obviously see that your Start Menu works fine on Windows 10, some even with Windows 7 style if you want. There won’t be any Start menu doesn’t open or working error. But if your Start Menu fails to work, you need to go ahead for more targeted solutions.
Solution 4: Create EnableXamlStartMenu DWord
If you are newly installed the Windows 10, but the start menu cannot work properly or it is not showing up. And killing the explorer.exe has no effect. You can try to follow this way.
1. Press Ctrl+Alt+Del, in the blue window, choose Task Manager.
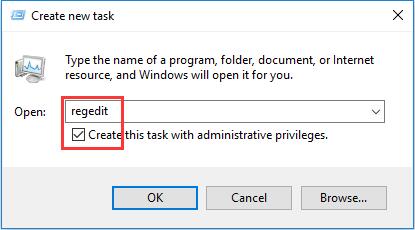
2. In task manager, click File > Run a New Task.
3. In the window, type regedit and check the box of Create this task with administrative privileges, then click OK.
4. Follow the path: HKEY_CURRENT_USER > Software > Microsoft > Windows > CurrentVersion > Explorer > Advanced.
5. On the right side, right-click your mouse in the blank area to create a DWord (32-bit) value and name it as EnableXamlStartMenu.
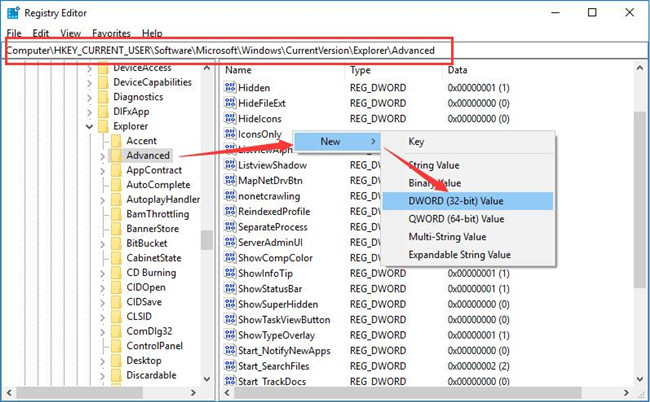
6. Close the Windows Registry Editor.
7. Follow the Solution 2 to restart Windows Explorer.
After you restart the Windows Explorer services, your start menu will change to normal and when you click or press it, the whole start menu will appear immediately.
Solution 5: Sign Out and Sign in Again
Some people reported that the simple signing out and then signing in solved their Windows 10 start menu not working error. If your Windows button won’t open, you can try this solution.
1. Press Ctrl + Alt + Del to open the security options window.
2. In the security options window, select Sign out.
3. After you sign out, then sign in the Windows 10 again.
Now test the start button again by clicking it to see if it works.
Solution 6: Run System File Checker
If the Windows button is out of work, maybe some system files are missing or corrupted, so you can run the System File Checker, which is developed by Microsoft Windows to scan for files and restore corruptions in Windows system files.
1. On task manager in taskbar, click File > Run a New Task.
2. Type cmd and select the option of Create this task with administrative privileges. Then click OK to open the command prompt. If the search box can work properly, you can open it with the search box.
3. Input SFC /scannow in Command Prompt. And then hit Enter to perform this command.
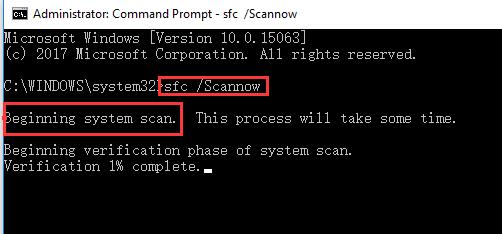
4. Windows System File Checker will begin a system scan, and if there are any erroneous files, it will replace the correct files with the incorrect ones for you on Windows 10.
5. Restart your PC after the scanning is done.
Now, you can find your Start menu can work well on Windows 10 without these corrupted files.
Solution 7: Use DISM Tool
Similar to system file checker, if checking for Windows 10 updates causes the Start Menu not working, you should run DISM tool.
DISM, short for Development Image and Servicing Management, is capable of repairing Windows 10 images. It has been said that the damaged images can also give rise to start menu out of work problem.
Now make full use of the DISM command-line utility to fix the start menu won’t open or stops working issue on Windows 10.
1. On task manager, click File > Run a New Task.
2. Type cmd and select the option of Create this task with administrative privileges. Then click OK to open the command prompt.
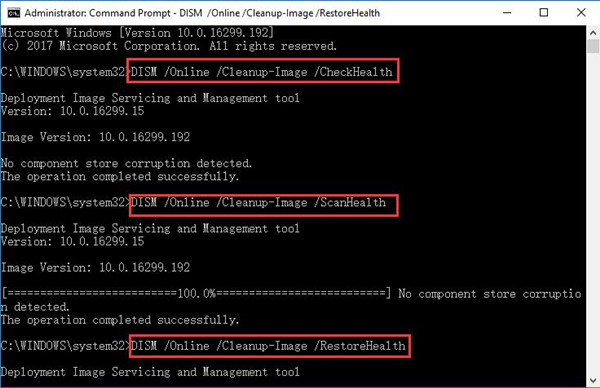
3. Copy and paste this following command at the Command Prompt and hit Enter to execute it.
DISM /Online /Cleanup-Image /CheckHealth
Or you can choose to perform another two commands below one by one as well. But they would take you some time.
DISM /Online /Cleanup-Image /ScanHealth
DISM /Online /Cleanup-Image /RestoreHealth
4. Restart your PC.
So long as the whole process is completed on Windows 10 command prompt, DISM would take advantage of Windows Update to help fix the Start menu does not work trouble. You are able to click the Start button and run it correctly.
There is no longer the Critical error Start menu or Cortana not working or not open problems on Windows 10.
Solution 8: Use Start Full Screen
Regarding your start menu or button out of work, you can decide to try various settings relevant to the Start menu. It is possible that you can recover it with different methods. Making Start menu to full-screen and then return the start menu to the normal status.
1. Right-click the desktop and select Personalize.
.
2. Under Start, slide to the right to open the option Use Start full screen.
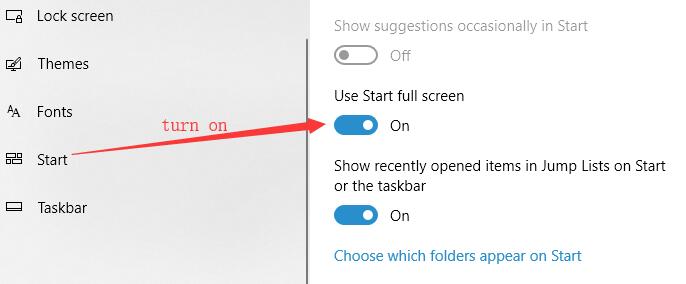
3. After you turned on full screen for start menu, the start button can be opened now. When you clicked the start button, all the start menu will pop up with full screen.
4. Goes back to Start tab, turn off the option of Use Start full screen.
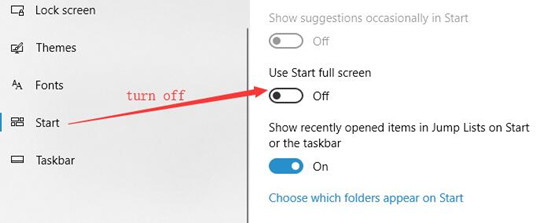
This time, when you click the Windows button, it will respond, and the previous start menu will appear.
Solution 9: Turn On and Turn Off Tablet Mode
This solution is the same as the start menu full screen. Turning on Tablet Mode will stretch the start menu to full screen. So, all the menu contents are already displayed.
After that, you can turn off the table mode. This will solve the start menu no response problem. Here is the tutorial with images: how to turn on tablet mode on Windows 10.
Solution 10: Run Windows PowerShell
The PowerShell command is used for task automation and configuration management. As for the critical error that Start menu does not work and all the applications in the start menu cannot open on Windows 10, you are suggested to run the PowerShell.
Normally, you can open the Task Manager from Start button. But now your Start button and Cortana are not working, you can only enter the task manager from the way below.
1. Right-click the Taskbar at the bottom of your desktop and select Task Manager from the list.
2. On the right top of the Task Manager, click File to Run new task.
Then the Create new task window would pop up at once.
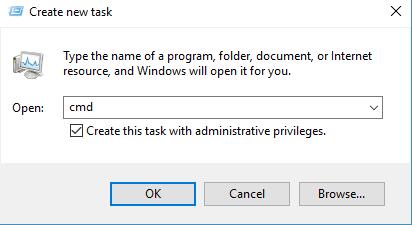
3. In Create new task window, enter PowerShell in the box and check the box of Create this task with administrative privileges. And then click OK.
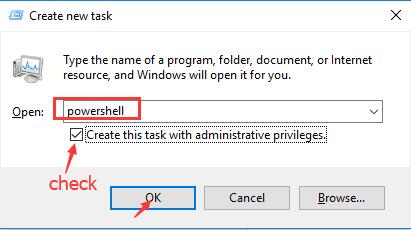
4. In Windows PowerShell window, copy and paste the following command in it.
Get-AppXPackage -AllUsers | Foreach {Add-AppxPackage -DisableDevelopmentMode -Register "$($_.InstallLocation)\AppXManifest.xml"}

Or if you are unable to perform the command above, choose to run this one instead:
Get-AppXPackage -Name Microsoft.Windows.Cortana | Foreach {Add-AppxPackage -DisableDevelopmentMode –Register "$($_.InstallLocation)\AppXManifest.xml"}
After re-registered the start menu, you can resolve the Start menu stops working problem especially after Windows anniversary update.
Solution 11: Configure Safe Boot
There is another condition that the start button and taskbar basic icons such as time, language, battery, etc. are out of work after upgrading the system to Windows 10.
When you click one of them, you should wait ten minutes or more to run them. So if your start menu and taskbar is in this case, you can follow the next way to solve it.
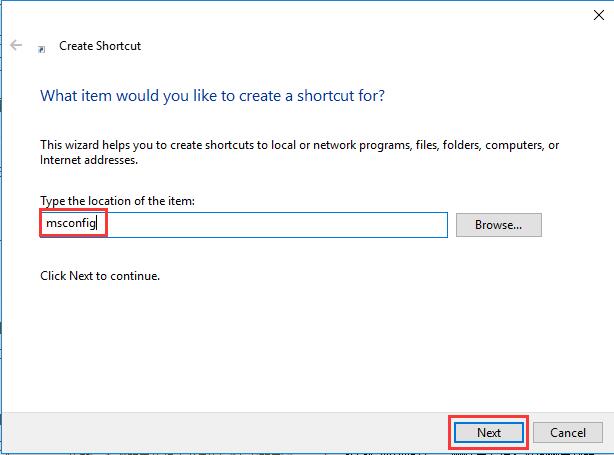
1. Right-click your mouse on the desktop. Then select New > Shortcut.
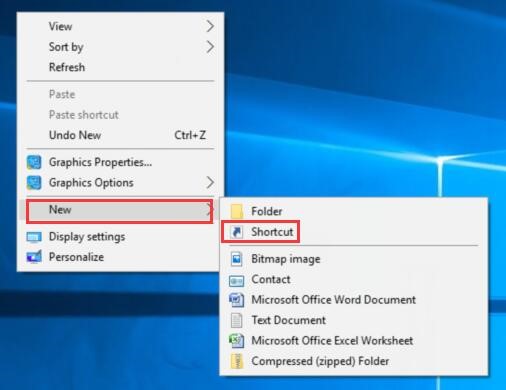
2. In the location address, type msconfig, then click Next.
3. Click Finish. After that, you will see an msconfig.exe shortcut in the desktop.
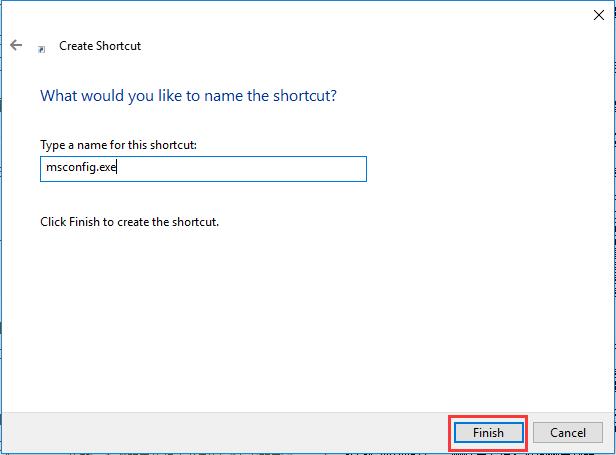
4. Double click it on the desktop to open the System configuration application.
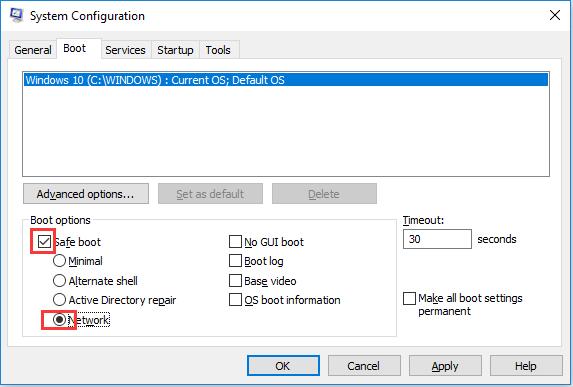
5. In Boot tab, select Safe boot and then check the box of Network. Then click Apply and OK.
6. Restart your computer by the pop-up reminding.
7. After you log in Windows 10, go to System configuration > Boot tab again.
8. Uncheck the Safe boot.
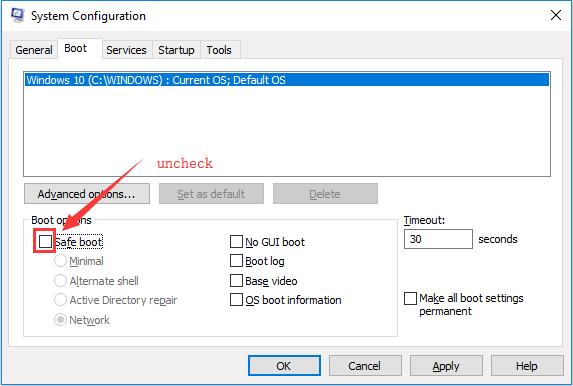
9. Restart the computer again.
Solution 12: Run Start Menu Troubleshooter
Windows 10 has a tool for you to troubleshoot different Start menu issues automatically. And it is safe and accessible to take advantage of it to tackle Start button problems. You can also know how to use the Microsoft Start Menu Troubleshooter here.
Now that there are some troubles making your Start menu not work or open on Windows 10, try to use this equipment to resolve it.
1. Download Start Menu troubleshooter. Here you are to download it from tenforums as the link from Microsoft official site is broken.
After installing this troubleshooter on your computer, the popping up windows will show you as below.
2. Check the box of Advanced repairs automatically to allow the Microsoft Start Menu Troubleshooter to solve the not opening or working start menu automatically.
Or you can also choose to uncheck the box of Advanced repairs automatically, then you can see the troubleshooting results and resolve the problems later.

3. Then click Next to further steps.
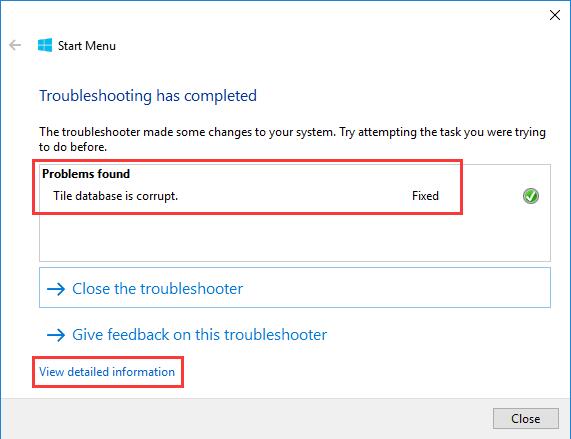
4. The Start Menu troubleshooter will have resolved your issue with the Start menu or button automatically. Then click View detailed information.
Here you can see from the screenshot that the Tile database is corrupt and it has been fixed by troubleshooter.
5. In Troubleshooting report interface, the issue found and potential issues that were checked will come into your sight.
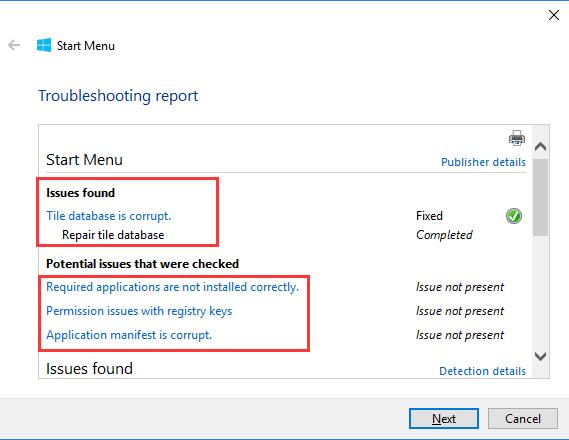
Now, it is obvious that things related to the start menu can be checked on Windows 10.
In some cases, this Start menu troubleshooter can fix these issues for the Start menu. May it suits your case and solve the Start menu not working or not opening problem for you on Windows 10.
If your search box doesn’t work with the start menu at the same time, you might also run search troubleshooter.
Solution 13: Update Graphic and Audio Drivers
After Windows 10 upgrade, some outdated or missing drivers may cause the critical error start menu isn’t working. Some people shared the solution to update the graphic driver and audio driver. So try to update the NVIDIA driver or Realtek HD audio driver.
Manually Update Drivers:
For updating the graphic driver and audio driver, you can go to the official site to download the latest drivers and then install it step by step. After that, reboot your computer to take effect.
Automatically Update Drivers:
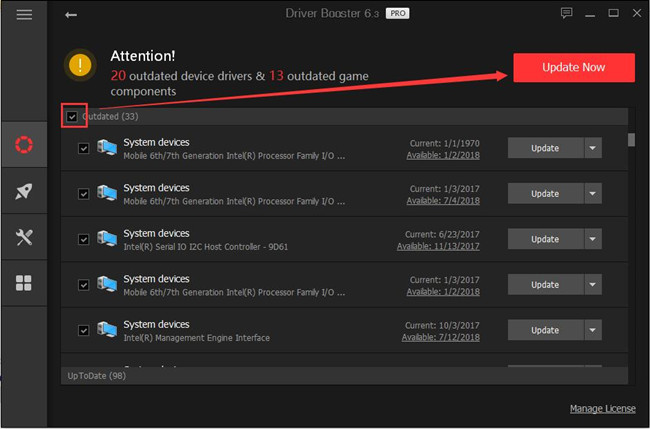
Driver Booster, an automatic driver downloading and updating tool, can help users to get the latest graphic driver, audio driver, USB driver, mouse driver etc. with one click. And as the best driver scanner, it can detect the most outdated and missing drivers for your computer.
1. Download, install and run Driver Booster on your computer.
2. Click Scan.

3. Click Update Now. Select all the item, and click Update Now. This will update the graphic driver and audio driver at the same time. You can also select the graphic driver to update it.
4. Restart computer.
After that, press the Windows key or click it again to test if the start menu can work.
Solution 14: Reinstall Cortana
Sometimes, if your start menu, Cortana and taskbar cannot work at the same time, maybe when you fixed the Cortana issue, the start menu does not work problem will also be solved. In the other side, the start menu troubleshooter may remind you that your Cortana has a problem.
1. In task manager, Click File > Run a New Task.
2. In Create new task window, enter PowerShell in the box and check the box of Create this task with administrative privileges. And then click OK.
3. Run this command from the PowerShell window:
Get-AppXPackage -Name Microsoft.Windows.Cortana | Foreach {Add-AppxPackage -DisableDevelopmentMo
de -Register "$($_.InstallLocation)\AppXManifest.xml"}
3. Press Enter.
After your Cortana is reinstalled, you will find the start menu and search box can open properly.
Solution 15: Edit Start Value in Registry Editor
When the start menu and search bar does not work in Windows 10, get it fix in the registry editor is proved by some people. Before you modify the registry, you should backup it at first.
Because the Windows key is out of work, so the fastest way to enter the registry is through the task manager.
1. Press Ctrl + Alt + Del, in the blue window, choose Task Manager.
2. In task manager, click File > Run a New Task.
3. In the window, type regedit and check the box of Create this task with administrative privileges, then click OK.
Locate here: HKEY_LOCAL_MACHINE\SYSTEM\CurrentControlSet\Services\WpnUserService.
4. In the right side, find Start item.
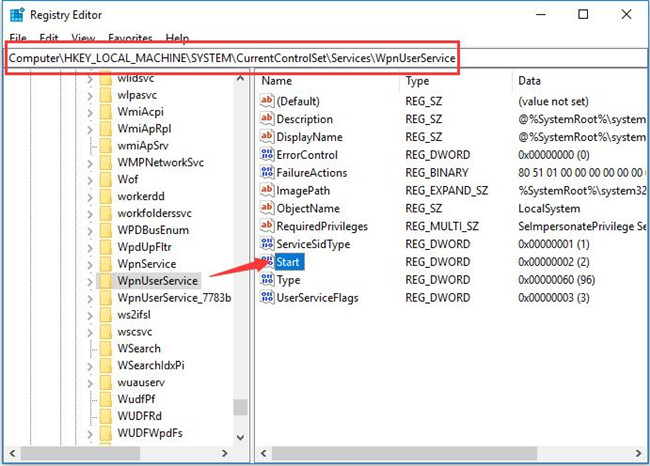
5. Double click to open it, then modify the value to 4, then click OK.
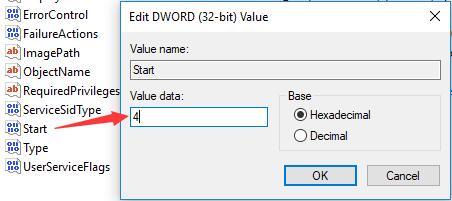
6. Reboot your computer to take effect.
Solution 16: Create a New Account
Naturally, when the start button is out of work with one account, you might as well manage to create a new user account and log on to Windows 10 to see if you can use the start button this time with this new account.
Under the circumstance where you cannot make use of the start menu, obey the procedures below to create a new user account.
1. On task manager in taskbar, click File > Run a New Task.
2. Type cmd and select the option of Create this task with administrative privileges. Then click OK to open the command prompt.
3. Copy and paste the following command in the Command Prompt.
net user newusername newpassword /add
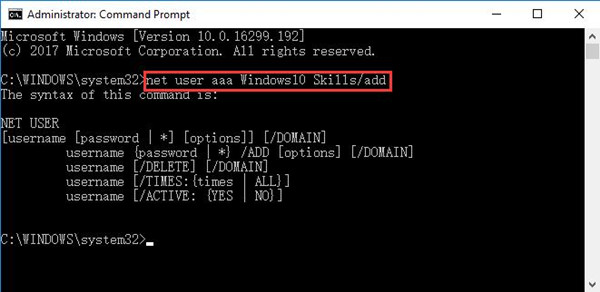
Here take the new username as aaa and the new password as Windows10 Skills. It is available you make the new username and new password as you like.
Then stroke Enter to execute this command.
4. Restart your PC.
With the new user account signing in, the now working Start Menu can back to normality. If everything is fixed, move your personal data and files to the new account.
Solution 17: Do a Clean Boot
For some users, maybe your start menu or button stops working that you have run too much software or programs. Consequently, it is advisable that you struggle to perform a clean boot and then login in again on Windows 10 to check if the Start menu is working correctly.
After you have done a clean boot in System Configuration, click the Start menu or button to see if it goes well this time. If it goes well, it means some software you have installed recently have caused your Start menu to work incorrectly on Windows 10.
Thus you are supposed to uninstall or remove some programs, such as Dropbox, and some anti-malware software.
Solution 18: Uninstall Antivirus Applications
If there is something wrong, for instance, the Windows button is not working on Windows 10, after you have installed such third-party software or programs as Dropbox or Avast or AVG, it is advisable that you try to remove or uninstall the software temporarily from your PC.
Go to Control Panel > Programs > Uninstall a program. Here you may as well View by Category.
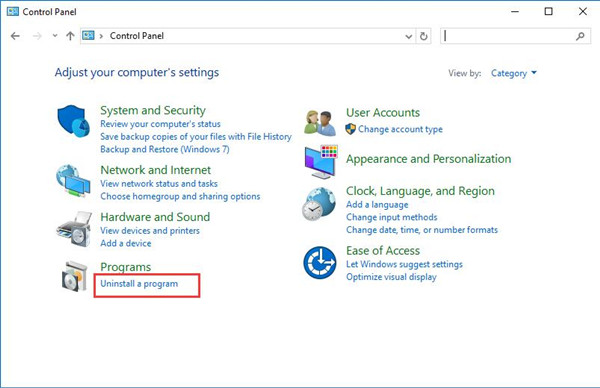
Then in Programs and Features window, right click the software or program to Uninstall it.
Now you will be prompted to reboot your computer to take effect. When you sign in again, you can check if you are enabled to use the Start button.
While if the start menu is still now working or cannot be opened on Windows 10, read on to solve this Windows 10 issue.
Solution 19: Reset the System
Only when all the methods above failed to solve the start menu not working issue are you recommended taking this way. For refreshing settings, Windows system can lead to files and data removed from Windows 10.
Before resetting your computer, you need to back up files for Windows 10.
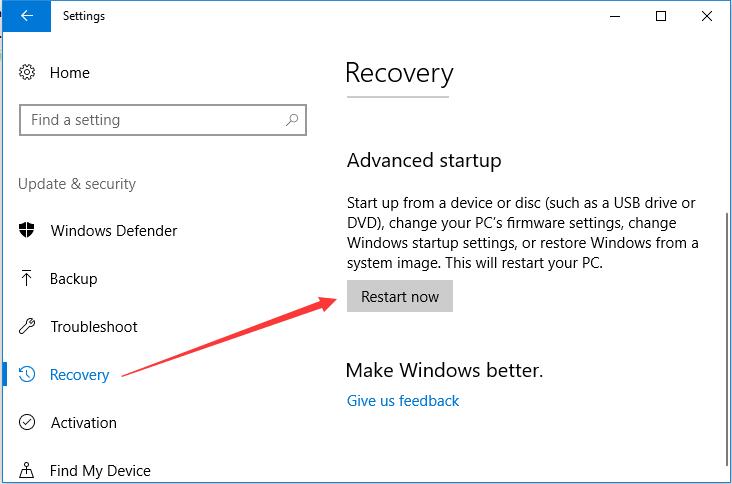
Go to Settings > Update & Security > Recovery > Advanced startup > Restart now.
Then go with the instructions in the window to reset the system for Windows 10. Hope this time, the start button and its menu not working issue can be fixed.
In a word, in respect of the problem that Start menu or button does not work or won’t open on Windows 10, many solutions are available for you. You can select one or more from this thread.
Related Articles:
Fix Function Key Not Working on Windows 11/10
How to Fix Windows PowerShell Missing from Start Menu
How to Customize Start Menu on Windows 11/10