
Why does the “standard hardware security not supported” issue happen? What should you do if you encounter the Windows error — standard hardware security not supported? If you are also struggling with this issue, you can refer to this article on MiniTool Website to find the solutions.
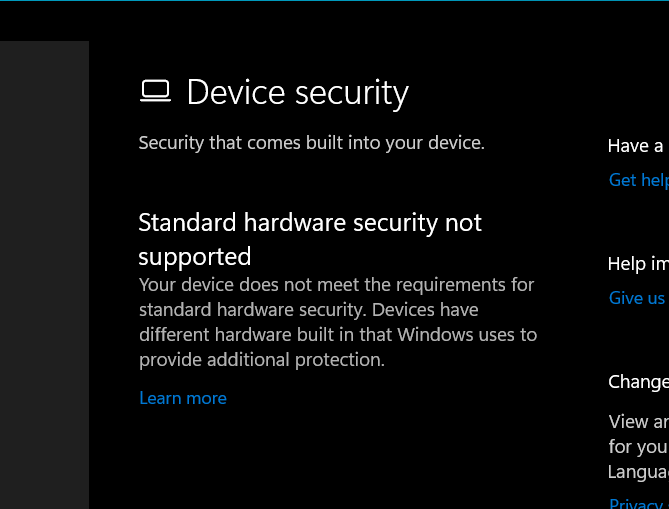
Standard Hardware Security Not Supported
The “standard hardware security not supported” Windows error message can happen on many in Windows Security. And when you encounter this error, it is possible that your device does not meet the minimum requirements for hardware security.
The requirements of standard hardware security are as follows, please make sure every one of them has been enabled.
- TPM 2.0 (Trusted Platform Module)
- Secure Boot enabled
- DEP (Data Execution Prevention)
- UEFI MAT (Unified Extensible Firmware Interface Memory Attributes Table)
- CPU Virtualization
Besides, if your system drivers or BIOS firmware are outdated, that may trigger the standard hardware security not supported error. Chances are that you see this error because of some Windows bugs or a corrupted Windows update.
Related article: How to Update BIOS Windows 10 | How to Check BIOS Version
According to users’ reports and feedback, we find this “standard hardware security not supported” issue can happen on Windows 10/11 for multiple reasons, but occurs in Windows 11 version 22H2 or other versions more often. So if you see the “standard hardware security not supported” notification in the Windows Security app, you can try to downgrade Windows 11 to Windows 10.
After knowing about these potential reasons, you can go to the next part for the specific methods.
Fix Standard Hardware Security Not Supported on Windows
Fix 1: Check Requirements of Standard Hardware Security
To make sure every requirement of standard hardware security has been met, please check them one by one and make sure they are enabled.
1. Check and Enable TPM 2.0
To check TPM 2.0, please do as follows.
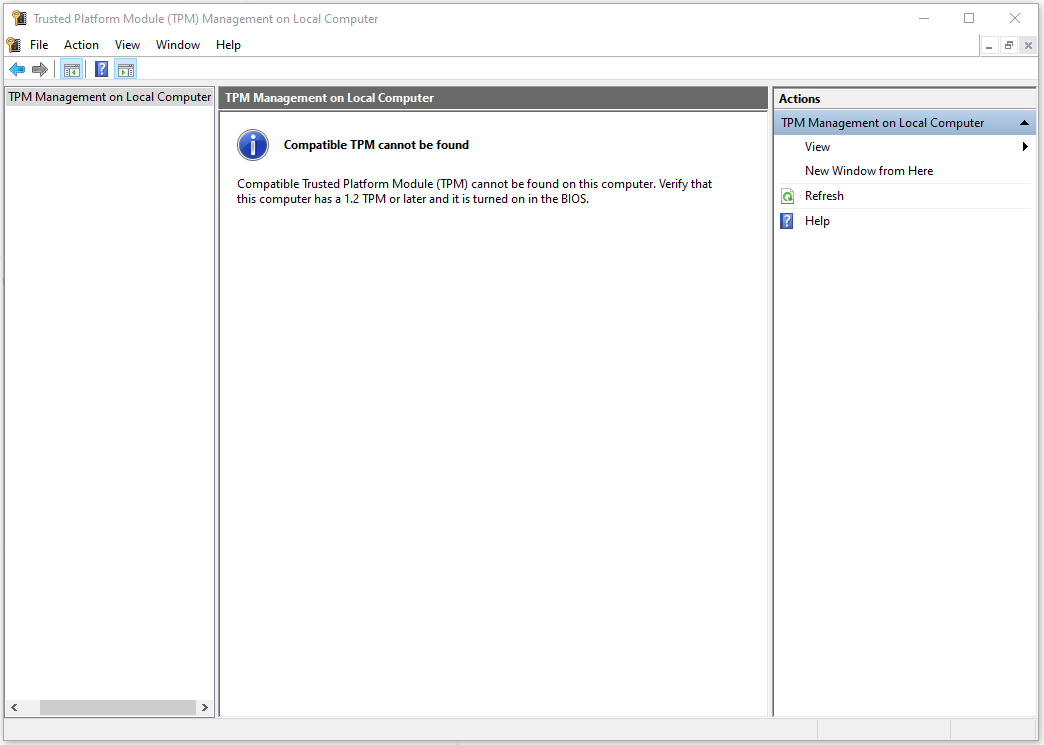
Step 1: Open the Run dialog box by pressing the Win + R key and input tpm.msc to enter.
Step 2: Then a management window pops up. If you see the message showing you that Compatible TPM cannot be found, you need to enable TPM 2.0.
If you see the message The TPM is ready for use after clicking Status, it means the TPM is enabled and then please check for its Specification Version which should be 2.0 or later.
Then to enable TPM 2.0, you are required to get into BIOS by pressing the dedicated key, such as Esc, Delete, F1, F2, F10, F11, or F12, after you boot the PC up and see the initial screen. The key depends on your manufacturer.
Go to the Security tab at the top and locate TPM to enable it. After that, save your changes and quit to restart your computer.
2. Check and Enable Secure Boot
To enable Secure Boot, you still need to get into BIOS and switch to the Boot tab at the top menu. Locate the Secure Boot option and turn it on. Then save your changes and quit.
3. Enable CPU Virtualization
To enable CPU Virtualization, get into BIOS first and under the Advanced tab, click on CPU configuration. If you are using AMD CPU, please enable SVM Mode from Advanced settings; if you are using Intel CPU, please enable the option labeled Intel Virtualization Technology. Then save your changes and quit to restart your PC.
4. Enable DEP (Data Execution Prevention)
To enable DEP, you can follow the next easy steps.
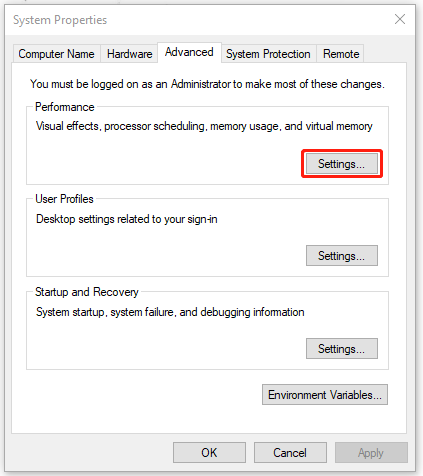
Step 1: Open the Run dialog box and input sysdm.cpl to enter System Properties.
Step 2: Then go to the Advanced tab and under Performance, click Settings….
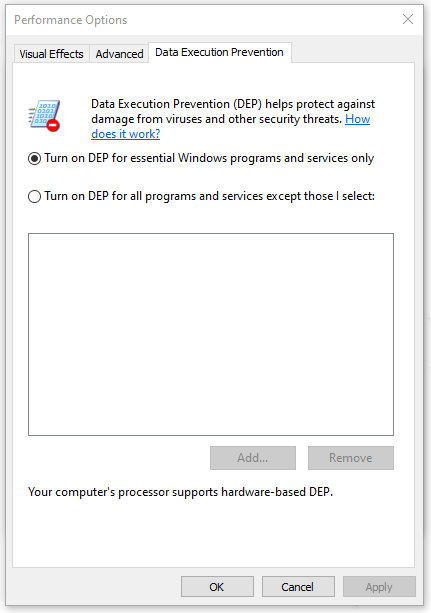
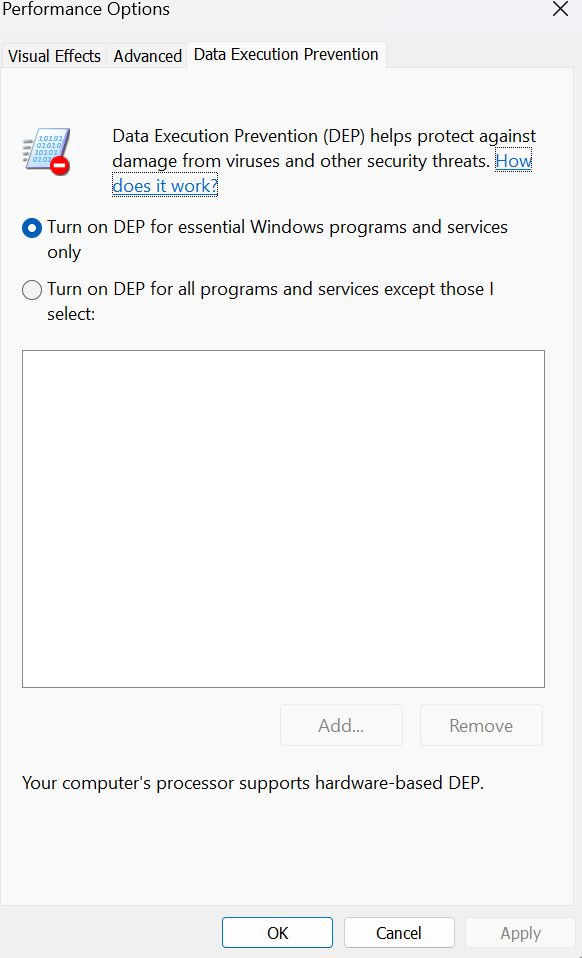
Step 3: In the pop-up window, go to the Data Execution Prevention tab and choose the option labeled Turn on DEP for essential Windows programs and services only. Then click Apply and OK.
After all of that and all requirements have been checked and enabled, you can check if the “standard hardware security not supported” issue has been resolved.
Fix 2: Enable Memory Integrity
For the newest version of Windows, it may require you to enable Memory Integrity so that the standard hardware security can run well. So you can try this by following the next steps.
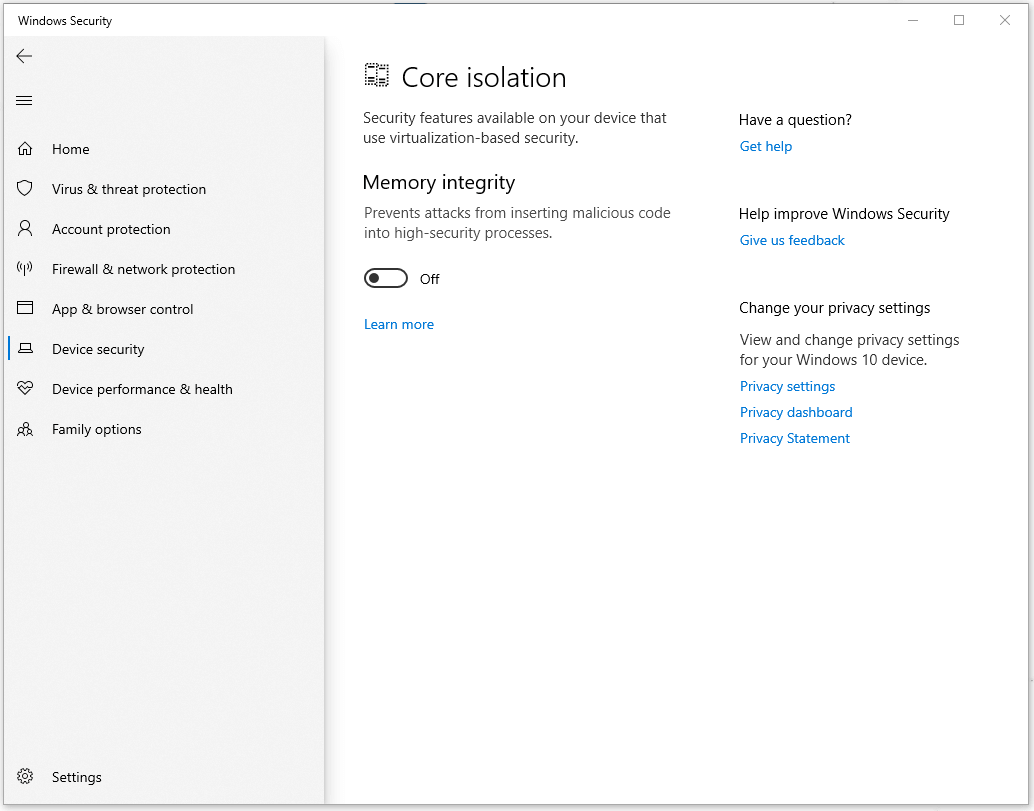
Step 1: Please go to Start > Settings > Update & Security > Windows Security > Device security.
Step 2: Click on Core isolation details under Core isolation and turn on the toggle under Memory integrity.
Then you can see if the “standard hardware security not supported” error message has been gone.
If you need more methods to enable Memory Integrity, you can read this article: Enable and Disable Core Isolation Memory Integrity in Windows.
Fix 3: Reregister Windows Security App via PowerShell
Another method to get rid of the “standard hardware security not supported” error is to re-register Windows Security via PowerShell. Some people have tried it and proven it works. It is worth trying!
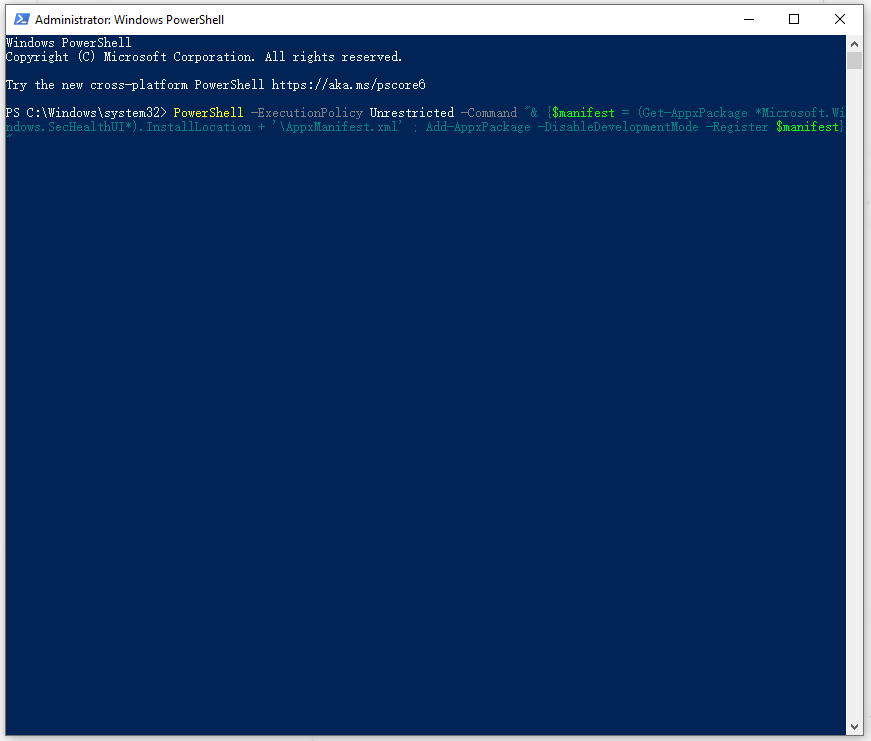
Step 1: Open Search by pressing Win + S and type in Powershell to run it as an administrator.
Step 2: Then please copy and paste the following command and press Enter.
PowerShell -ExecutionPolicy Unrestricted -Command “& {$manifest = (Get-AppxPackage *Microsoft.Windows.SecHealthUI*).InstallLocation + ‘\AppxManifest.xml’ ; Add-AppxPackage -DisableDevelopmentMode -Register $manifest}”
Step 3: Once the command has been successful, you can close the window and restart the PC to check if the error persists.
Related article: 10 Best PowerShell Commands You Should Know
Fix 4: Reset Windows Security
Because this error usually occurs on the Windows Security app and the chances are that the program has been corrupted or some bugs exist here. You can try to reset the Windows Security app to see if you can fix “standard hardware security not supported”.
To reset Windows Security, do the following:
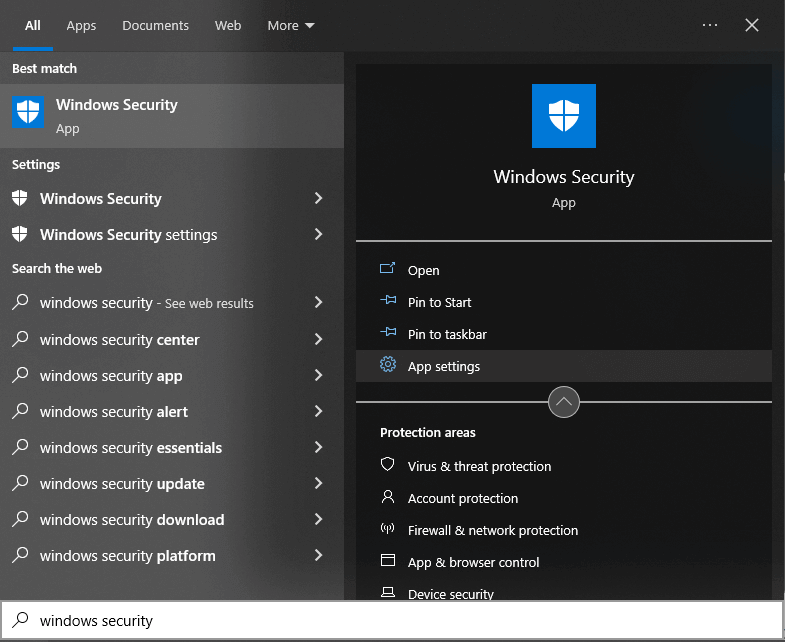
Step 1: Open Search by pressing Win + S and input windows security to click on App settings in the pop-up window.
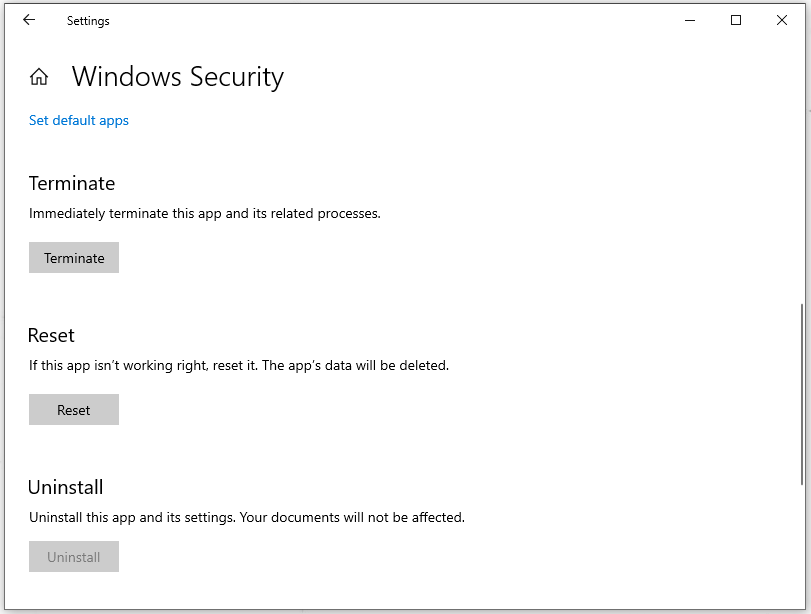
Step 2: When a window pops up, please scroll down and choose Reset. That will help you fix some app’s bugs but all your app’s data will be deleted.
Or you can reset Windows Security via PowerShell. Run your PowerShell as an administrator and type the following command to enter:
Get-AppxPackage *Microsoft.Windows.SecHealthUI* | Reset-AppxPackage
Once the command executes, you can exit the PowerShell console and restart your PC to check the error.
Fix 5: Update Windows
After trying the above methods, if your issue still exists, you can owe this error to the outdated Windows version, firmware, or drivers. Go to finish these pending updates and your issue may be resolved.
Step 1: Open your Settings and choose Update & Security.
Step 2: Then choose Check for updates under the Windows Update from the left panel.
If there is any available update for you, you can download and install them on your PC.
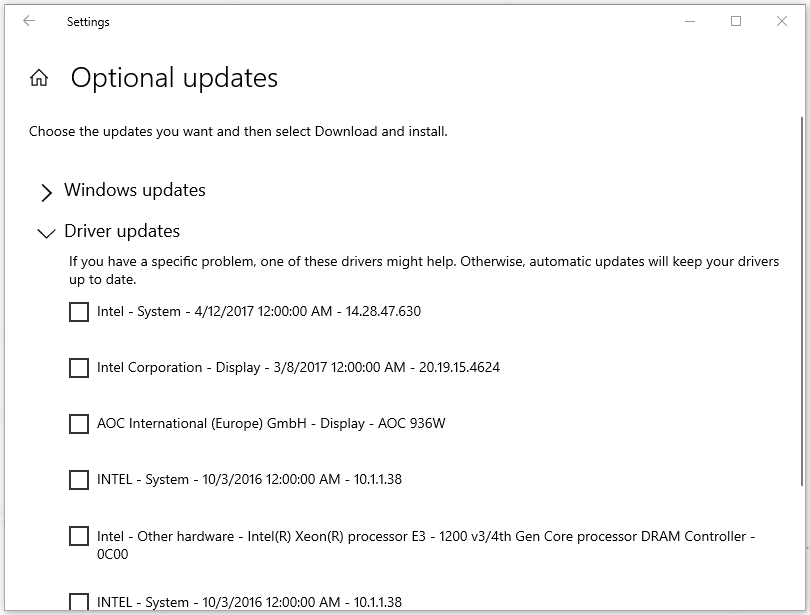
If your Windows version is the latest, you can click on View optional updates to check for available driver updates.
Hope the above methods have resolved the “standard hardware security not supported” issue, if not, the next fixes may put you at risk of data loss, so it is recommended to back up your important data with MiniTool ShadowMaker before you start the next steps.
Fix 6: Uninstall Windows Updates
If you have installed your Windows update recently and on the heels of that, the error occurs, you can try to uninstall your Windows update; or if you have created a restore point before the update, you can directly restore your Windows.
To uninstall Windows update, you can do as follows.
Step 1: Open Settings and go to Update & Security > Windows Update > View update history > Uninstall updates.
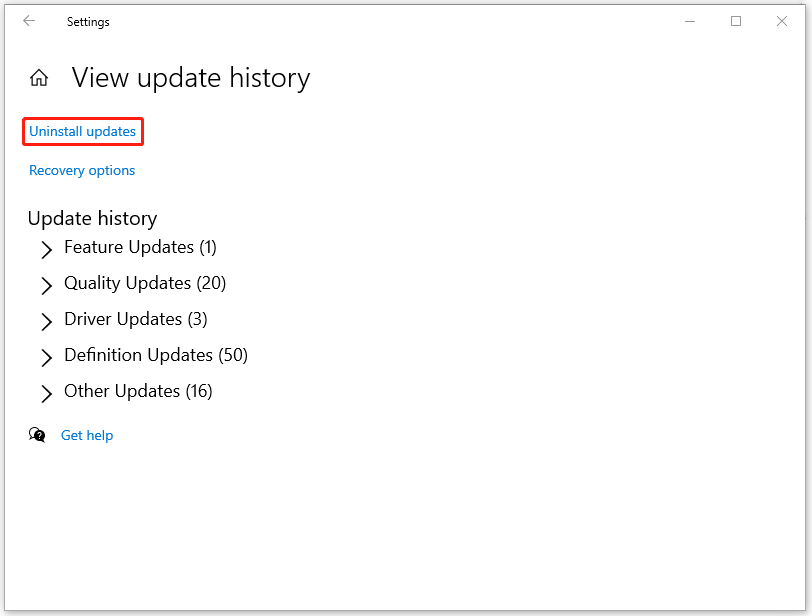
Step 2: Right-click on the latest Windows installation and choose Uninstall. Then follow the on-screen instructions to finish the process.
Fix 7: Downgrade to Windows 10
As we have mentioned, the “standard hardware security not supported” error message often happens on Windows 11. If you are using Windows 11, you can try to downgrade your Windows 11 to Windows 10.
To downgrade your Windows, please do as follows.
Step 1: Open your Settings and click on System and then Recovery.
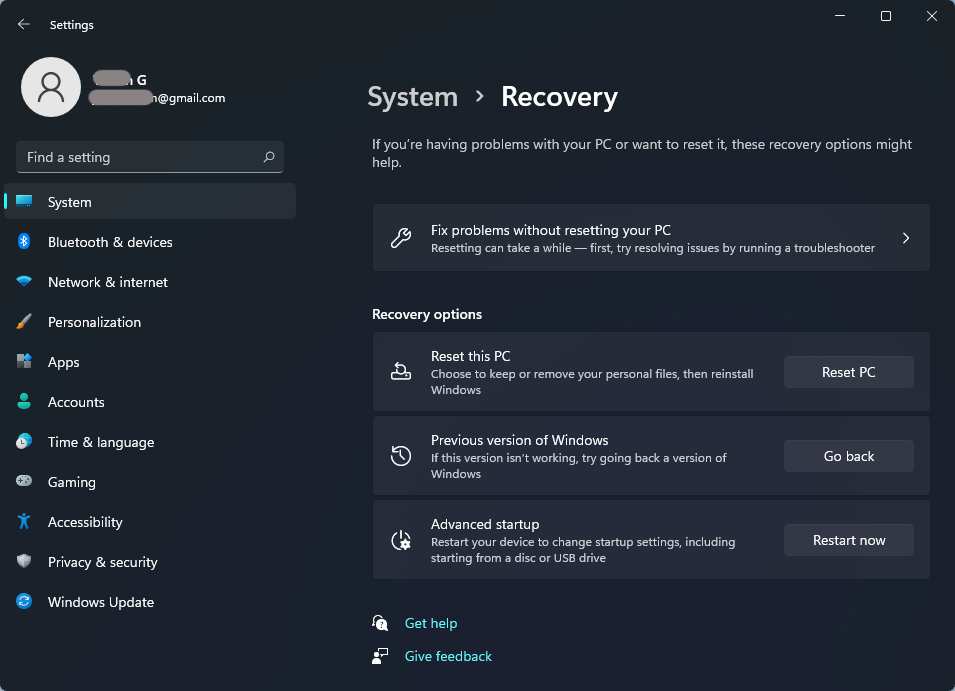
Step 2: Under the Recovery options, click on Go back next to Previous version of Windows. Then please follow the on-screen instructions to finish the process.
If you need more details about how to downgrade Windows, you can read this one: [3 Ways] Downgrade/Uninstall Windows 11 and Go Back to Windows 10.
The “standard hardware security not supported” on Windows may make your Windows Security fail to work and all kinds of cyber-attacks will seize the chance to infiltrate your computer system. That can be a vacuum that makes your data lose.
Backup is always what we stress to cope with data loss. It is easy and efficient. MiniTool ShadowMaker, a backup expert, covers a variety of features and functions, which can be your go-to choice.
After downloading and installing it, open it to click Keep Trial and you can try this free version for 30 days.
MiniTool ShadowMaker TrialClick to Download100%Clean & Safe
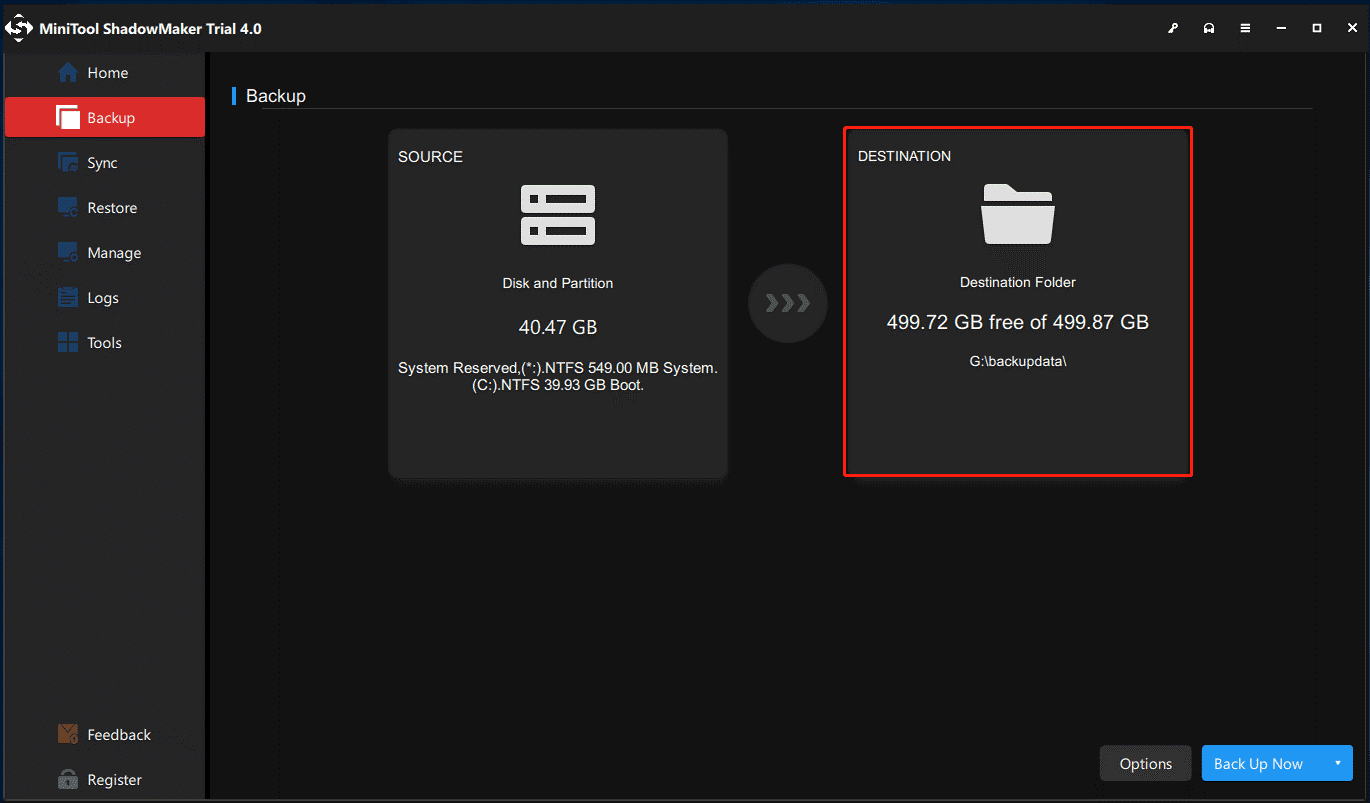
Then you can go to the Backup tab to choose your backup source and destination; after everything has been settled, you can click Back Up Now or Back Up Later to start the task.
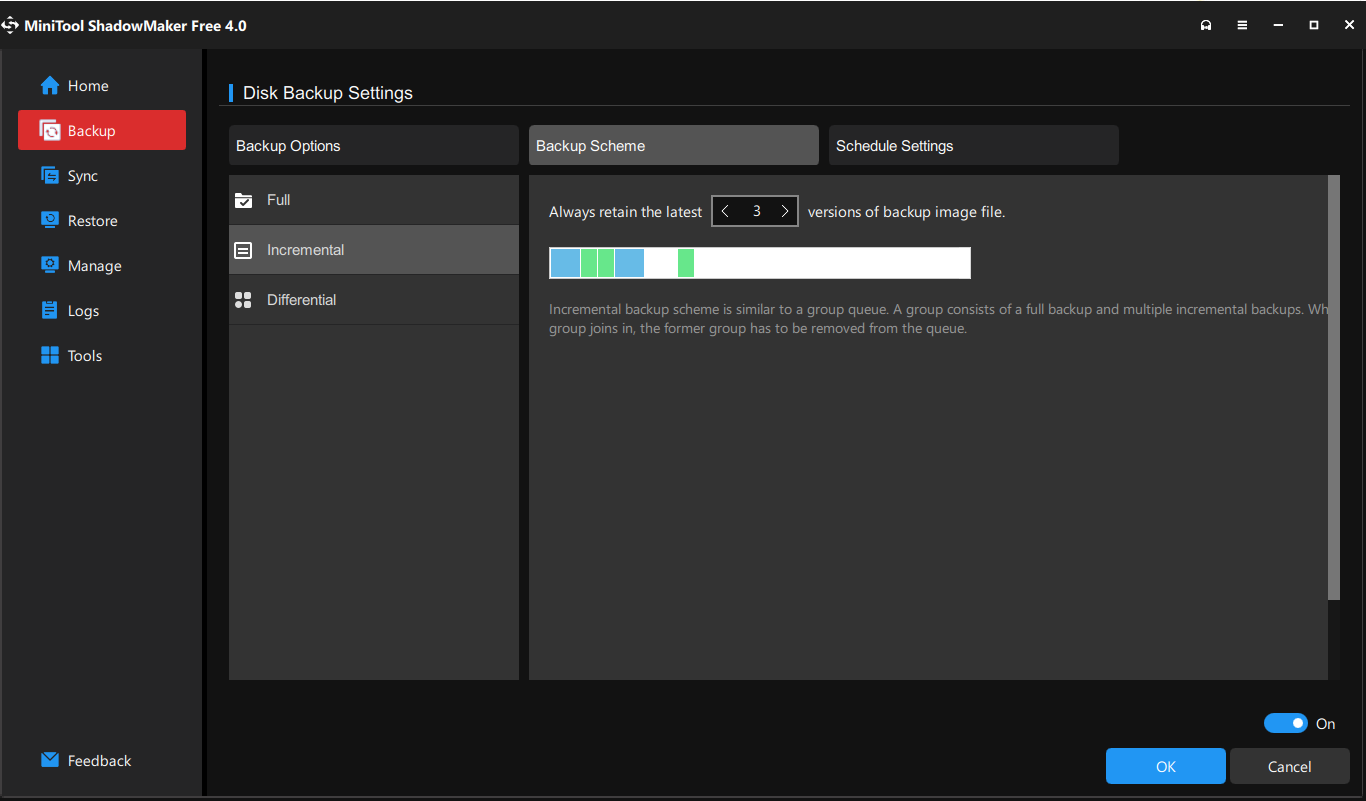
Apart from that, you can choose Options to configure your backup schedule and scheme. There are three backup schemes you can choose – Full, Incremental, Differential – and four schedule settings – Daily, Weekly, Monthly, and On Event.
This article has offered multiple methods to fix “standard hardware security not supported” and if you think that useful, welcome to share this post on Twitter.Click to Tweet
Bottom Line:
This issue usually happens for multiple reasons and you may have a general picture of this “standard hardware security not supported” issue. The solutions are easy to follow and you can follow the above to resolve your concerns. However, it is still advised to back up your data in advance and that can help avoid most troubles.
If you have encountered any issues when using MiniTool ShadowMaker, you can leave a message in the following comment zone and we will reply as soon as possible. If you need any help when using MiniTool software, you may contact us via [email protected].
Standard Hardware Security Not Supported FAQ
Why does Secure Boot fail to be enabled?
Because Secure Boot can be enabled only when the operating system has been installed on a PC, if you find the Secure Boot feature does not work, that means a new installation of a recent version of UEFI is required.
How to bypass TPM 2.0 and Secure Boot?
- Press Win + R to open Run and input regedit to enter.
- Go to Computer\HKEY_LOCAL_MACHINE\SYSTEM\Setup and right-click on it. Click New > Key, name it LabConfig, and click on it.
- Right-click on the right pane to follow New > DWORD (32-bit Value) and name it BypassTPMCheck. Change its Value data to 1.
- Create other two DWORDS with the value data of 1 and name them BypassRAMCheck and BypassSecureBootCheck.
Can a PC run without TPM?
Yes, you can run Windows without TPM but your PC won’t go with any key or minimal updates. That may make you go through data risks or PC crashes.
Is Windows 11 worth it on unsupported hardware?
It may trigger some unexpected results, such as a blue screen, system instability, and even data loss. Therefore, it is recommended to ensure that your computer meets the Windows 11 requirements before attempting to install the operating system.
Issue: Hello. When I go to the Windows Security app, I see the “Standard hardware security not supported” message. What does it mean? Should I be worried?
Solved Answer
“Standard hardware security not supported” is an error message that can occur in Windows operating systems. The message indicates that the device or system is incompatible with Windows hardware security features like Windows Hello or device encryption.[1]
This error message can appear for a variety of reasons, including outdated drivers, incompatible hardware, or unsupported firmware. When this message appears, the user may be unable to access certain security features or may encounter other problems.
Users may be at risk of unauthorized access to sensitive data if a device is not compatible with Windows hardware security. Windows hardware security features, such as Windows Hello and device encryption, add an extra layer of security to help protect user data. Without these features, users may be vulnerable to potential security breaches and data theft.
There are a few options for dealing with the “Standard hardware security not supported” error message. Users can try updating their drivers, making sure their firmware is up to date and determining whether their hardware is compatible with Windows hardware security features. They can also seek assistance from the device’s manufacturer or Microsoft support.
In this guide, you will find 6 steps that should help you fix Standard hardware security not supported in Windows. Keep in mind that the manual troubleshooting process can be lengthy. You can use a repair tool like FortectMac Washing Machine X9 that can fix most system errors, BSODs,[2] corrupted files, and registry[3] issues. Otherwise, follow the step-by-step instructions below.

Method 1. Modify BIOS Settings
- Press the correct key (depending on your motherboard) to enter BIOS settings while the computer is booting. Common keys include F1, F2, F10, etc.
- Once you are in the BIOS settings, go to the Security tab.
- Set TPM to Enabled.
- Navigate to the Boot tab.
- Enable the Secure Boot option.
- Move to the Advanced tab.
- Tap on CPU configuration.
- Enable SVM Mode (for AMD CPU) or Intel Virtualization Technology (for Intel CPU).
- Once you have enabled all the necessary configurations, save the settings.
- Exit the BIOS settings to restart your PC.
Method 2. Enable Data Execution Prevention
Fix it now!
Fix it now!
To repair damaged system, you will have a 24hr Free Trial and the ability to purchase the licensed version of the Fortect Mac Washing Machine X9.
- Press the Windows key + R to open the Run dialog box.
- Type sysdm.cpl and press Enter to launch System Properties.
- Move to the Advanced tab inside the System Properties window.
- Click on Settings under the Performance section.
- Navigate to the Data Execution Prevention tab.
- Select the Turn on DEP option that suits your requirement.

- Click on the Apply button.
- Click on the OK button to save changes.
Method 3. Turn on Memory Integrity
- Press the Windows key + I to open the Windows Settings app.
- Navigate to the Privacy & security tab.
- Click on the Windows Security option from the right-side pane.
- Select the Device security option.
- Click on the Core isolation details option under Core isolation.

- Turn on the toggle associated with the Memory integrity.
- Exit the Settings window.
- Open Windows Security to check if the error message is gone.
Method 4. Reset Windows Security
Fix it now!
Fix it now!
To repair damaged system, you will have a 24hr Free Trial and the ability to purchase the licensed version of the Fortect Mac Washing Machine X9.
- Press the Windows key + I to open the Settings app.
- Navigate to the Apps tab.
- Click on the Installed apps option.
- Locate the Windows Security app.
- Press the three-dot menu button present next to Windows Security.
- Click on Advanced options.
- Scroll down to the Reset section.

- Press the Reset button.
- Confirm the process to reset the app.
- Once done, restart your computer.
- Check if the error is gone.
Method 5. Re-register the Windows Security app
- Open Windows search.
- Search for PowerShell.
- Right-click on Windows PowerShell and select Run as administrator.
- Type the following command in the PowerShell window:
PowerShell -ExecutionPolicy Unrestricted -Command “& {$manifest = (Get-AppxPackage Microsoft.Windows.SecHealthUI).InstallLocation + ‘\AppxManifest.xml’ ; Add-AppxPackage -DisableDevelopmentMode -Register $manifest}”

- Press Enter to execute the command.
- Once the command is executed, reboot your computer.
- Check if the error message has disappeared or not.
Method 6. Take Ownership of the SecurityHealth Folder
Fix it now!
Fix it now!
To repair damaged system, you will have a 24hr Free Trial and the ability to purchase the licensed version of the Fortect Mac Washing Machine X9.
- Open File Explorer using the Windows key + E.
- Navigate to the following location: C:\Windows\System32\SecurityHealth.
- Right-click on the SecurityHealth folder.
- Select the Properties option.
- Go to the Security tab and click on the Advanced button.
- Press the Change button present next to Owner.
- Tap on Advanced.
- Click on the Find Now button.
- From the Search Results section, select Administrators and press OK.
- Click Check Names and press OK.
- Tick the Replace owner on sub containers and objects checkbox.

- Click Apply > OK.
- Once you return to the Properties window, choose Administrators.
- Press the Edit option and select Administrators.
- Tick the Allow checkbox associated with the Full Control option.
- Open the SecurityHealth folder.
- Create a backup of all the consisting folders on your desktop.
- Navigate to the 1.0.2109.27002-0 folder.
- Run the Microsoft.SecHealthUI_8wekyb3d8bbwe.appx file.
- Restart your computer in safe mode.
- Go to the SecurityHealth folder.
- Delete the 1.0.2207.20002-0 folder.
- Rename the 1.0.2109.27002-0 folder to 1.0.2207.20002-0.
- Once done, restart your PC.
- Check if the message is gone.
- You can always go back to the created restore point to revert the changes.
Repair your Errors automatically
ugetfix.com team is trying to do its best to help users find the best solutions for eliminating their errors. If you don’t want to struggle with manual repair techniques, please use the automatic software. All recommended products have been tested and approved by our professionals. Tools that you can use to fix your error are listed bellow:
do it now!
Download Fix
Happiness
Guarantee
do it now!
Download Fix
Happiness
Guarantee
Compatible with Microsoft Windows
Compatible with OS X
Still having problems?
If you failed to fix your error using FortectMac Washing Machine X9, reach our support team for help. Please, let us know all details that you think we should know about your problem.
Fortect will diagnose your damaged PC. It will scan all System Files that have been damaged by security threats. Mac Washing Machine X9 will diagnose your damaged computer. It will scan all System Files and Registry Keys that have been damaged by security threats. To repair damaged system, you will have a 24hr Free Trial and the ability to purchase the licensed version of the Fortect malware removal tool. To repair damaged system, you have to purchase the licensed version of Mac Washing Machine X9 malware removal tool.
Prevent websites, ISP, and other parties from tracking you
To stay completely anonymous and prevent the ISP and the government from spying on you, you should employ Private Internet Access VPN. It will allow you to connect to the internet while being completely anonymous by encrypting all information, prevent trackers, ads, as well as malicious content. Most importantly, you will stop the illegal surveillance activities that NSA and other governmental institutions are performing behind your back.
Recover your lost files quickly
Unforeseen circumstances can happen at any time while using the computer: it can turn off due to a power cut, a Blue Screen of Death (BSoD) can occur, or random Windows updates can the machine when you went away for a few minutes. As a result, your schoolwork, important documents, and other data might be lost. To recover lost files, you can use Data Recovery Pro – it searches through copies of files that are still available on your hard drive and retrieves them quickly.
Does your Windows Security app show the error message Standard hardware security not supported on Windows 11? The security programme in Windows 11 by default is called Windows Security. You can use it to guard your computer against malware, viruses, and other threats. It features modules that provide a variety of precautions, including account protection, device security, and threat and virus prevention.
Page Contents
Fix 1. Turn on Data Execution Prevention (DEP)
- Press Windows + R to open Run Dialog Box.
- Enter sysdm.cpl to launch System Properties.
- Scroll to the Advanced Tab in the System Properties windows and click on Settings.
- Go to the Data Execution Prevention tab and click on Turn on DEP for essential program and services only option.
- Click on Apply followed by OK button.
Fix 2. Reset Windows Security to fix ‘standard hardware security not supported on Windows 11’ error
- Press Windows + I to open Settings.
- Go to the Apps Tab.
- Navigate to Installed Apps option and clock on the Windows Security app.
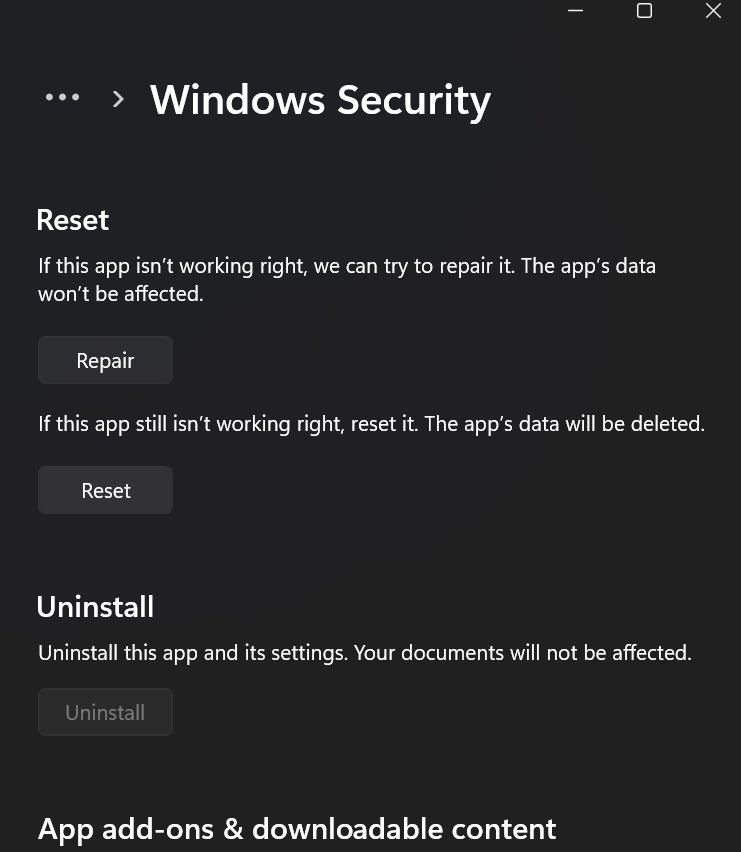
- Scroll to the Reset section and press Reset button and confirm the same.
- Restart your computer and the problem is resolved!
Fix 3. Activate Memory Integrity
- Open settings or click Windows + I.
- Go to the Privacy & Security Tab.
- Click on the Windows Security from the right panel.
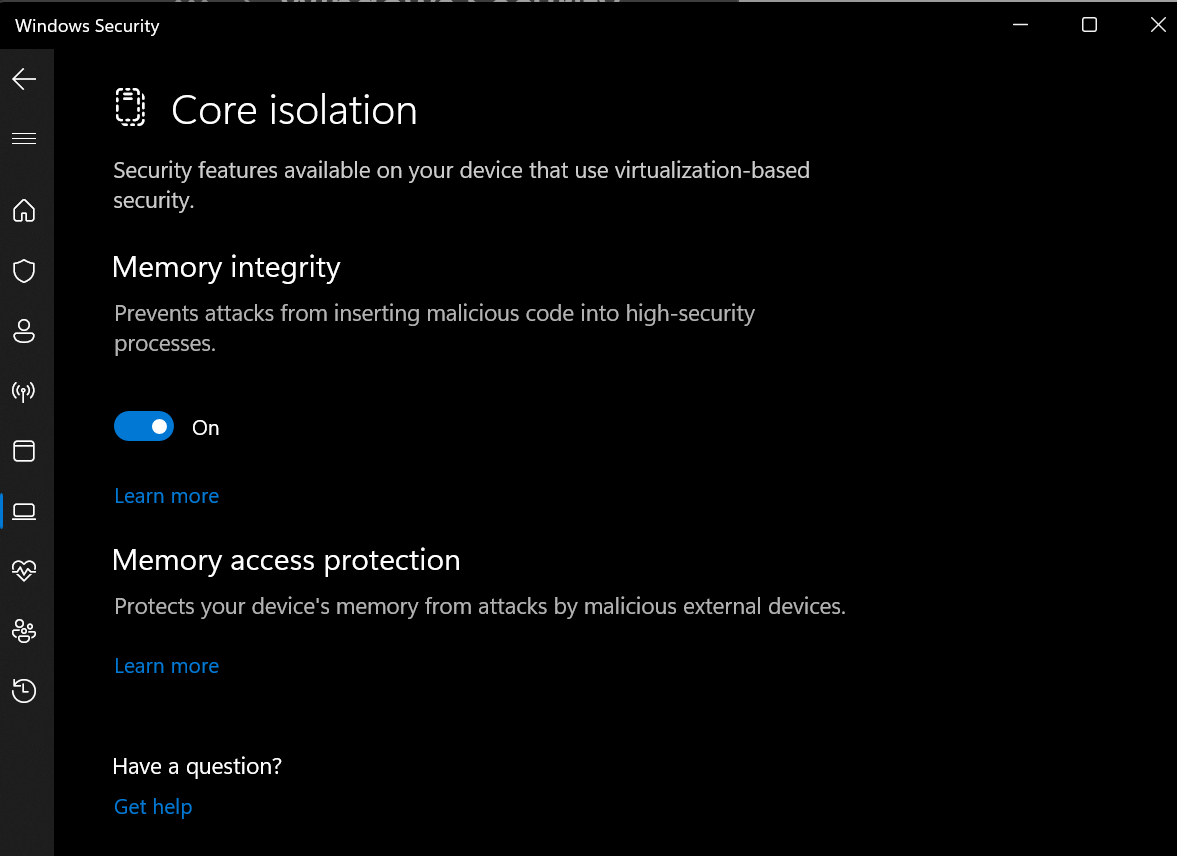
- Then, click the Device Security option and select the Core isolation details through the Core islolation section.
- Now you can exit the settings and go to the Windows Security to check the problem is solved.
Fix 4. Re-register the Windows Security app using PowerShell
- In Windows search, search for PowerShell.
- Right click on the PowerShell and Run as administrator.
- Now copy and paste the following command :
PowerShell -ExecutionPolicy Unrestricted -Command "& {$manifest = (Get-AppxPackage *Microsoft.Windows.SecHealthUI*).InstallLocation + '\AppxManifest.xml' ; Add-AppxPackage -DisableDevelopmentMode -Register $manifest}"
- Now, restart your computer and check if the error message is popping up.
Fix 5. Take SecurityHealth Folder ownership
- Press Windows + E to open File Explorer.
- Navigate to the location: C:\Windows\System32\SecurityHealth.
- Right-click on the SecurityHealth folder and select the Properties option.
- Scroll to the Security tab and click on the Advanced button.
- Next, press the Change button and then tap on Advanced.
- Then, click on the Find Now button.
- Select Administrators from the Search Results section and press OK.
- Click on Check names and press OK.
- Tick the Replace owner on sub containers and objects checkbox and press OK.
- In the Properties window, choose Administrators and press the Edit option.
- Select Administrators and tick the Allow checkbox associated with the Full Control option.
- Navigate to the 1.0.2109.27002-0 folder and run the Microsoft.SecHealthUI_8wekyb3d8bbwe.appx file.
- Restart your computer in safe mode.
- Next, go to the SecurityHealth folder and delete the 1.0.2207.20002-0 folder, and rename the 1.0.2109.27002-0 folder to 1.0.2207.20002-0.
- Restart your PC again and check if the problem is resolved.
Dear Forum,
Just an update. Still no answer from MS Community. I think the updates for their new OS (Win 11) has got their attention. And the obvious is why would they want to support open source when you can buy their system parts and turn on their virtualization system (Hyper-V) in the OS and keep it all under their security system.
I have just re-installed VirtualBox on Windows 10, Ver 21H1. Just a few notes about the install, as they pertain to Windows 10;
1). If you have a computer built by an OEM, then you need to get all the features of the hardware «aware» in Win 10.
As I learned the hard way, the OEM load from the factory, recent BIOS/TPM and Secure Boot (UEFI) updates from both the OEM and MS were installed, but not «aware». A fresh re-install (Or a drive backup, and complete wipe) of Win 10 was required to make all the hardware see all the software (and turn on all the enhanced security in Win 10). This is necessary if you want to have complete control over the OS (as a host) and be able to control the system.
In my case, my TPM was not properly setup (So my passwords and security were weak), BIOS was not properly enabled for Virtualization, Secure Boot was also weak (but passing the defaults to the windows bootloader), the Windows Security Suite (Defender) was at standard when it shoud have been displaying enhanced as default (And for 21H1 Windows Security by name was known as Defender previously). You need all this first, then check the OEM and MS for all updates BEFORE you even think about VirtualBox!
I have read in these forums over the years that a proper update, a reboot, a power-off, etc. was the reason VirtualBox failed to run properly. You may think your system (like me) was up to date, but think again. I knew my system should (by specification) be able to run enhanced security, but was only using standard. When I answered the why and fixed it, now I have COMPLETE control over the device (including when and what it scans, which is super important for VirtualBox to run properly).
2. Make a friendly environment for VirtualBox and Python (correct version) when you download the executables. I took the extra precautions of excluding the files before I installed into the Windows Security Exclusion system under Virus and Threat Protection. Then, before any other setups after install, I excluded the folders and files for those installs (VirtualBox, its Host Extension Pack and Python) from Security. Windows tried to stop the VirtualBox console by throwing an error (full stop), but all that was required was a power-off for 2 minutes, then back on, and ta dah! Back in business. Never saw a warning from windows, but we all know they were watching, just could not control the file since it was excluded.
3. Give Windows some time to gather all of its bits for a week or so before you load VirtualBox! There were some abnomalies that were encountered after the proper Windows Setup was done, and you want to know if all the stuff you worked on is working properly! Better to fix Windows as Windows before you add VirtualBox and a whole different OS! (I hope you already backed up all you personal files!)
Some setup items I noticed during VirtualBox Guest Setup (I used latest Ubuntu as MS knows their OS and it is like Debian);
Do not touch the OS system settings after you enter the type of guest in the New Guest System! Let VirtualBox probe the guest OS and setup the proper environment. It is really smart software, and can see alot of things and knows what to do, so let it do its thing!
Format the drive using a fixed drive in VHD (MS can see this as a friendly drive space) and you will avoid any possibilty of security glitches from the MS Security System. It will also allow the guest os to have a fixed point to load from every time.
Ubuntu has a glitch in it during install (default VirtualBox System Settings) that effected the VDI/dynamic drive partitioning for the boot partition. I set the partition manually, to look like a Windows partition set with Ubuntu as the main OS (1st part 250MB, Fat32,/Windows then 2nd part 500MB /boot, ext4, then 3rd part ext4 large partition, set as /, then a swap partition) (some space). I know swap is now a file, but old habits die hard, and swap is such a mystery so better safe than sorry…..
You can do what you want here, but I just know that you need to define your own partitions, their automatic feature (boot.efi) is having trouble in a VHD partition setting the boot file (or is hiding it from the user, not sure which). Yes, I tried the auto format, and the OS (Ubuntu) ran, but it was slow to no go (drive errors, like it was in the old Windows 98 MS-DOS compatabilty drive mode, remember those days?). The drive format update solved that issue. I hope this helps those who care to read. If I see any glitches form I will advise, as well as if I ever get an answer from MS Community.
Если вы хотите обновить Windows 10 но столкнуется с такой проблемой: Удалите VirtualBox, так как оно не поддерживается Windows 10, сделайте по гайду!

Способ 1
С версии 4.0.63 и 3.121 мы починили эту ошибку, вы можете прямо установить нашу поседнюю версию через следующую ссылку.
3.0 https://ldcdn.ldmnq.com/download/package/LDPlayer3.0.exe
4.0 https://ldcdn.ldmnq.com/download/package/LDPlayer4.0.exe
4,0 (64-бит) https://ldcdn.ldmnq.com/download/package/LDPlayer64.exe
Способ 2
Если вы не хотите обновить эмулятор, можете сделать по следующим гайдам.
Шаг 1. Закройте эмулятор, удалите приложение virtualbox по следующему пути
C:\Program Files\ldplayerbox
C:\Program Files\dnplayerext2

Шаг 2. Обновите Windows 10
Шаг 3. Проверяйте, что вы уже закрыли эмулятор. Восстановите virtualbox в корзине

