
For those new to Windows, a user profile is a directory containing settings and information related to a user. The profile directory includes a lot of folders, including Desktop, Documents, Contacts, and personal data such as Windows and application preferences. Since files and settings for each profile are private to that particular user, other users on the same computer can’t view another user’s profile unless that user is an administrator or member of the Administrators group.
Each user created on your PC will carry a profile folder in the “Users” folder on Windows system drive “C.” Each account will have a profile folder name similar to the account name in that User folder. Suppose we create a user account on our Windows 11 system with the username gearupwindows; Windows will automatically generate a profile folder in the “C:\Users” directory called “C:\Users\gearupwindows.”
How to Find a User Profile Name on Windows 11?
Suppose you have a lot of users on your computer, and after login, you forget which account you have logged in to. In such a case, you will get into trouble finding the user profile folder because it is the same as the user profile name. To find a user profile name on Windows 11, use the following steps:-
Step 1. First, bring up the Run command box by pressing Windows + R keys on the keyboard.
Step 2. After that, in the Run box, type the following and hit the Enter key on the keyboard:-
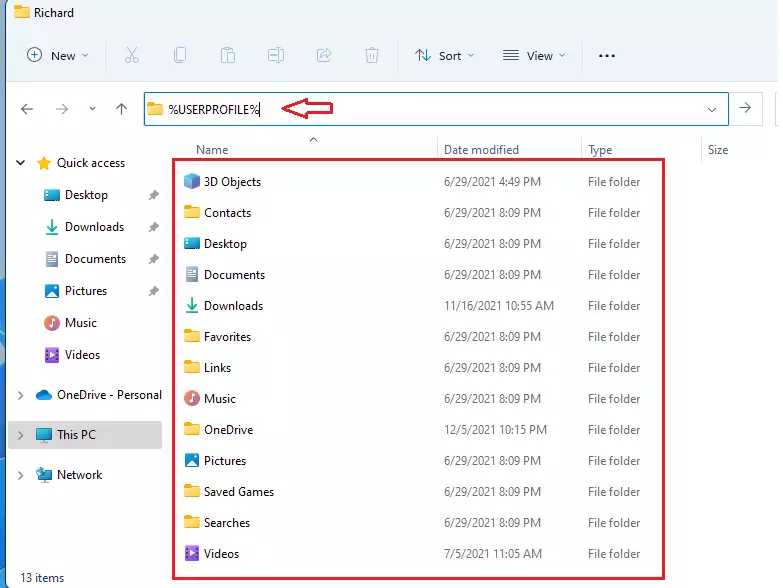
%USERPROFILE%
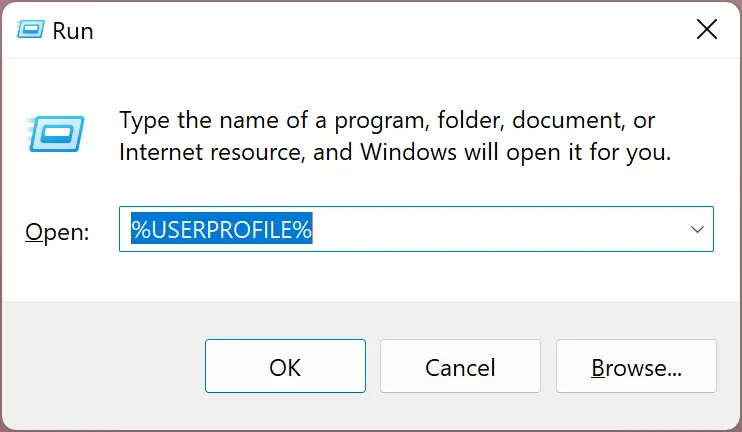
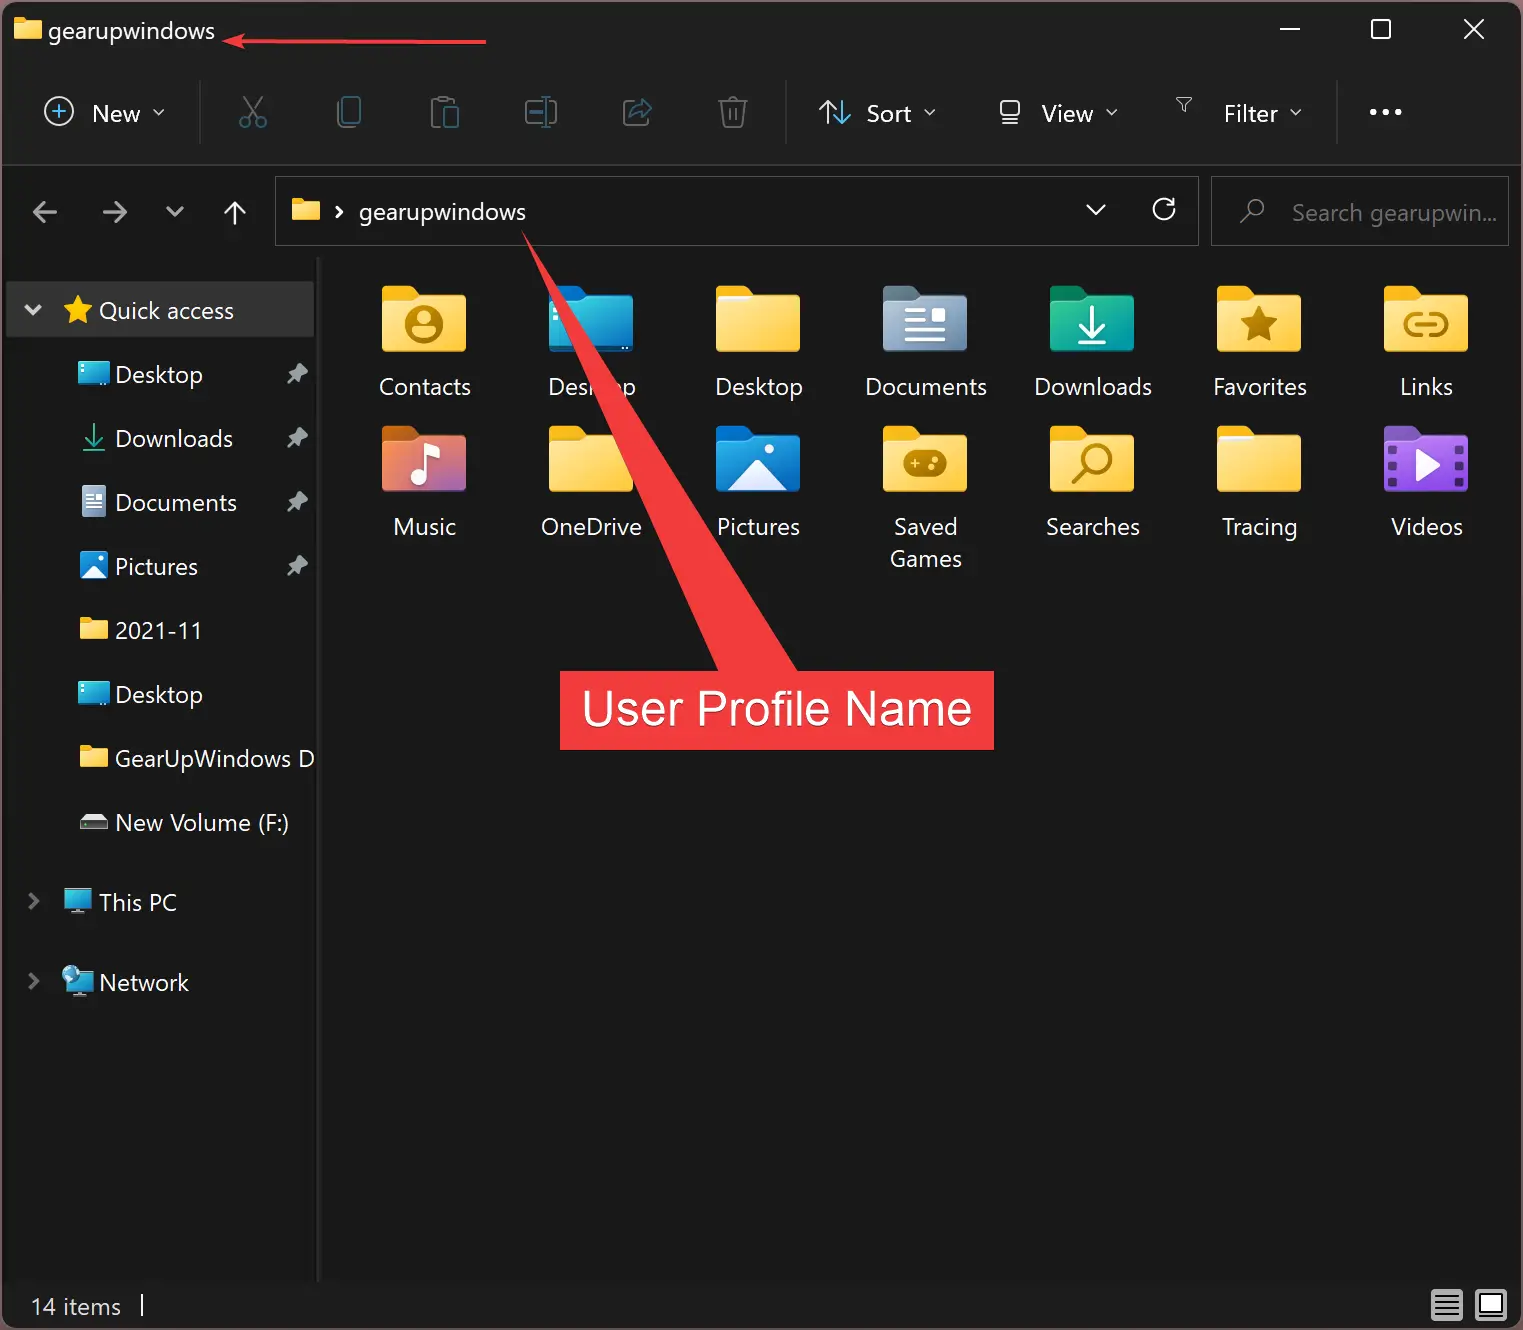
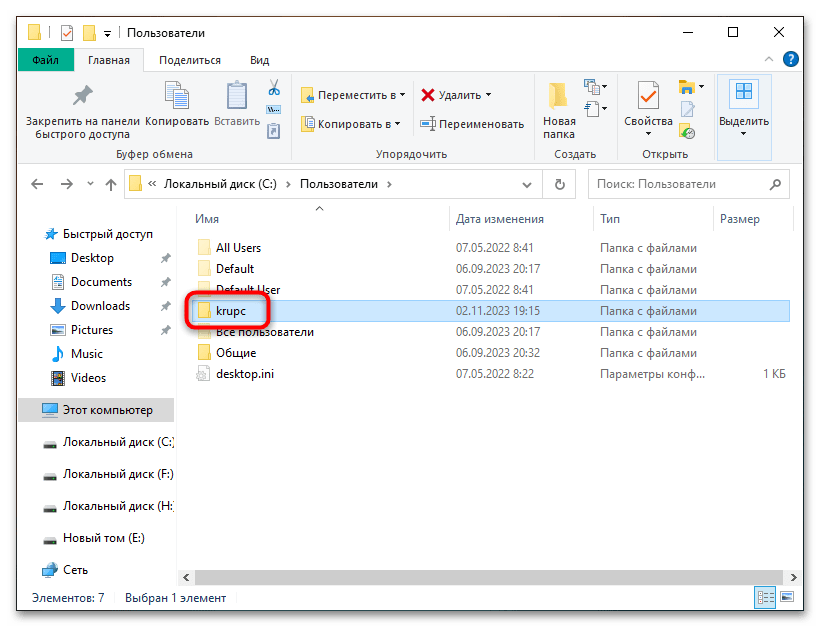
After completing the above steps, the current user profile folder will open up. You can read the user profile name in the title of the File Explorer address bar.
How to Open a User Profile Folder in Windows 11?
To open a user profile folder in Windows 11, do the following:-
Step 1. Very first, open File Explorer by pressing the Windows + E keys on the keyboard.
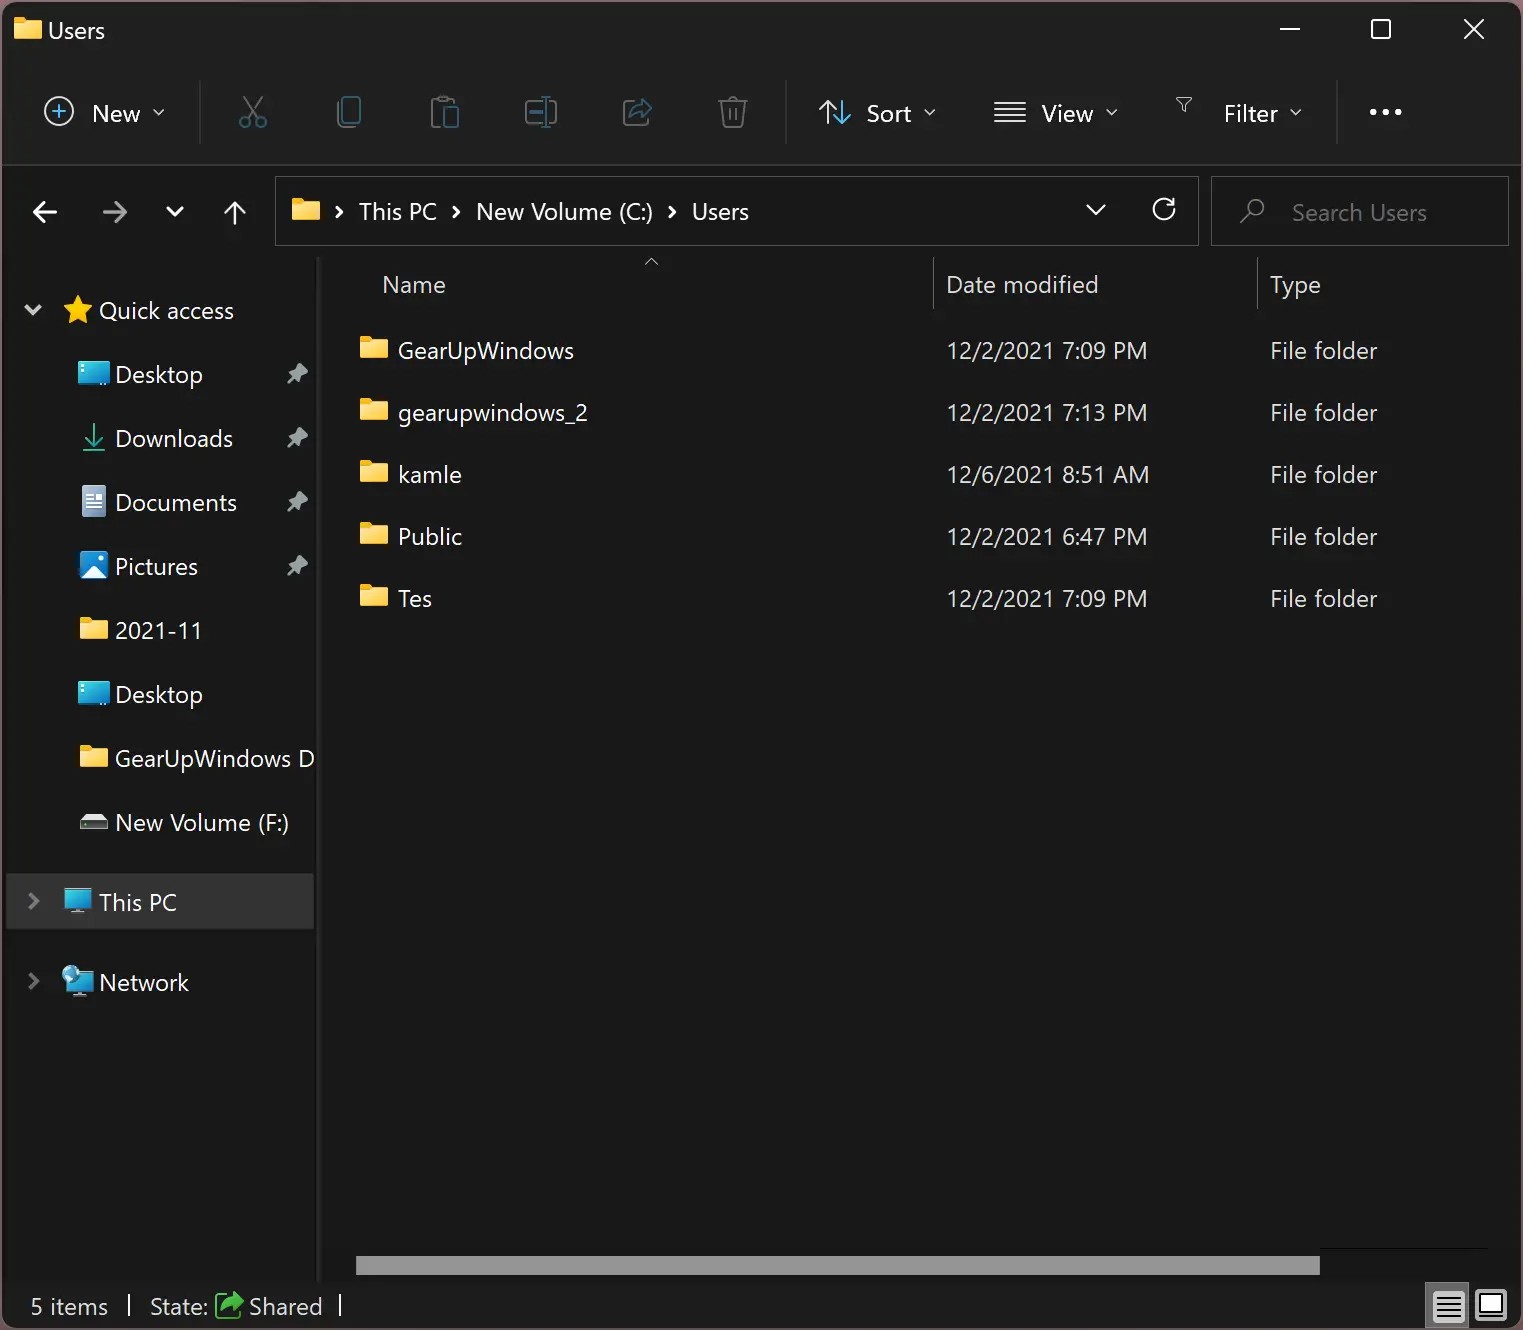
Step 2. After that, navigate to the “This PC > Local Disk (C:)> Users” folder. In this “Users” folder, you will find all users’ profiles are available in separate folders.
If you’re unsure what your username is, you can always get to your profile folder by doing the following:-
First, open the Run box by pressing Windows + R and then type %USERPROFILE% in the box. After that, hit the Enter key on the keyboard. Now, the current user account profile folder will open up.
Good luck.
Conclusion
In conclusion, user profiles are essential directories that contain various settings and information related to a user on a Windows system. These profiles are private and cannot be accessed by other users unless they have administrative privileges. Each user on a Windows system has a profile folder in the “Users” directory, with a name similar to the account name. Finding a user profile name and opening a user profile folder in Windows 11 is crucial to managing user data on the system. By following the steps outlined in this guide, users can easily locate and access their user profile folders in Windows 11.
This post describes to students and new users a thing or two about user profiles in Windows. In Windows, a user profile is a directory containing settings and information related to a user.
The profile directory may contain Desktop, Documents, and personal data such as Windows and application preferences.
Files and settings in each profile are private to that particular user. Users can not view another user’s profile unless that user is an administrator or a member of the administrator’s group.
Each user will have a profile folder in the Users folder on the Windows system drive Local Disk (C:). In the User folder, each account will have a profile folder name, the same name as the account name.
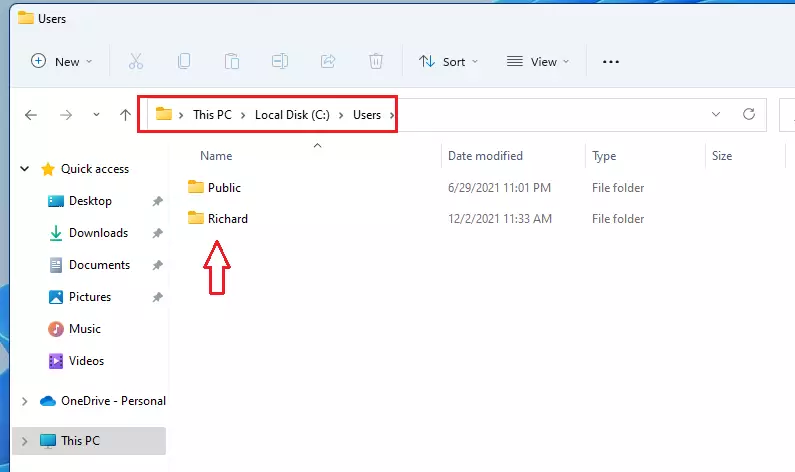
For example, an account with the username Richard will have a profile folder in the C:\Users directory called C:\Users\Richard.
In Windows, environment variables are words that contain the value of something. A user profile path has a variable %USERPROFILE%, which contains a path to a user profile folder. If you don’t know your user profile name, simply type the profile environment variable in File Explorer, and it will open your profile folder.
How to open a user profile folder in Windows 11
As mentioned above, a user profile folder contains folders, settings, and preferences about each account in Windows. A user profile stored on a computer is often unique to the computer on which it is stored.
In some environments, a user profile is stored on a network server, allowing users’ settings, folders, and preferences to be used on every computer the user logs on to, so there is a consistent view and settings.
To view your profile on a computer, open File Explorer and select This PC ==> Local Disk (C:) ==> Users folder. The Users folder is where your user profile folder will be.
If you’re unsure what your username or profile folder is, you can always get to your profile folder using the environment variable %USERPROFILE%.
Type the profile folder path environment variable in File Explorer and press Enter.
You will find all your profile folders and configuration settings when you do.
That should do it!
Conclusion:
- User profiles in Windows are essential for maintaining individual settings and preferences.
- Each user has a unique profile folder located in C:\Users with the same name as their account.
- The profile folder contains crucial personal data like Desktop and Documents.
- Environment variables, such as %USERPROFILE%, simplify accessing your profile folder in File Explorer.
- In network environments, profiles can be stored on servers for consistent access across multiple devices.
- Knowing how to navigate to your user profile is vital for managing your data and settings effectively.
Какие папки могут быть перенесены
В процессе установки операционной системы в разделе C: создается 5 или 6 папок, служащих для хранения файлов и настроек самой системы, а также файлов и настроек пользователя. Традиционный набор директорий системного тома представлен следующими папками:
- «Windows» – папка с файлами и драйверами операционной системы.
- «Program Files» и «Program Files (x86)» – папки, в которые устанавливаются 64- и 32-разрядные приложения.
- «PerfLogs» – каталог для хранения журналов производительности.
- «ProgramData» – папка для хранения пользовательских настроек некоторых штатных и сторонних приложений.
- «Users» – каталог, в котором хранятся профили учетных записей пользователей.
Из них перенесены на другой раздел могут быть только «ProgramData» и «Users», причем перенос первой связан с определенными рисками. Перенос каталога профилей пользователей также имеет риски, но они являются допустимыми, при этом лучше перемещать весь каталог «Users» («Пользователи»), а не отдельные расположенные в нем профили. Также следует отметить, что перенос пользовательских профилей имеет следующие ограничения:
- Целевой раздел не должен содержать другой операционной системы.
- Целевой раздел должен быть отформатирован в файловую систему NTFS.
- После переноса созданные в папках профилей символические ссылки будут по-прежнему указывать на старые расположения. В большинстве случаев это не критично, нарушена будет работа только старых приложений, обновления которых не выходили с 2007 года.
- Обновление Windows 11 до новой версии и полугодовой сборки станет невозможным. Функцию обновления придется отключить.
Способ 1: Файл ответов
Наиболее безопасным способом переноса пользовательских каталогов на другой раздел является установка с использованием режима аудита, среды WinRE или XML-файла ответов. Так как способ предполагает переустановку Windows 11, создайте загрузочную флешку с операционной системой, например в Rufus.
Скачать Rufus
Подробнее:
Как пользоваться Rufus
Установка Windows 11 через Rufus
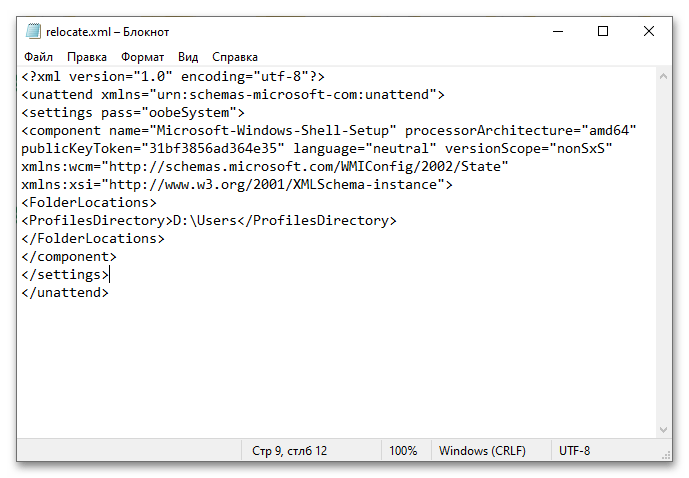
- Создайте файл ответов, из которого Windows 11 станет брать инструкции для переноса каталога профилей. Для этого создайте через любой текстовый редактор новый файл и вставьте в него следующий XML-код:
<?xml version="1.0" encoding="utf-8"?>

<unattend xmlns="urn:schemas-microsoft-com:unattend">

<settings pass="oobeSystem">

<component name="Microsoft-Windows-Shell-Setup" processorArchitecture="amd64" publicKeyToken="31bf3856ad364e35" language="neutral" versionScope="nonSxS" xmlns:wcm="http://schemas.microsoft.com/WMIConfig/2002/State" xmlns:xsi="http://www.w3.org/2001/XMLSchema-instance">

<FolderLocations>

<ProfilesDirectory>D:\Users</ProfilesDirectory>

</FolderLocations>

</component>

</settings>

</unattend>
- Отредактируйте, если необходимо, содержимое тега «ProfilesDirectory» – он содержит новое расположение папки «Users».
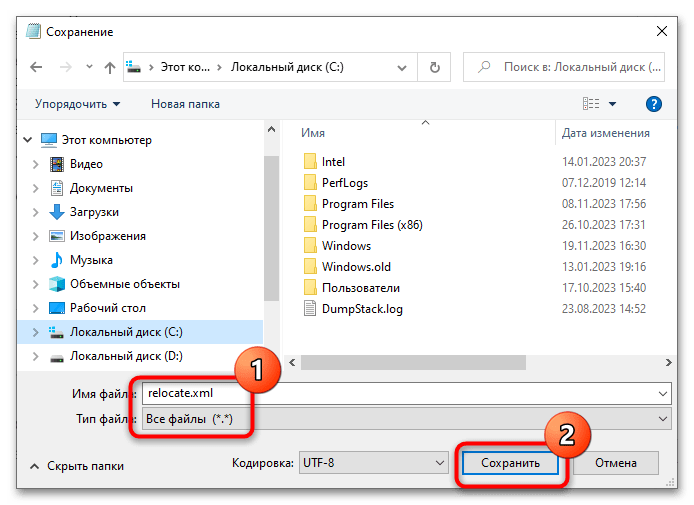
- Сохраните файл с произвольным названием, но обязательно с расширением XML. В данном примере файл ответов называется «relocate.xml».
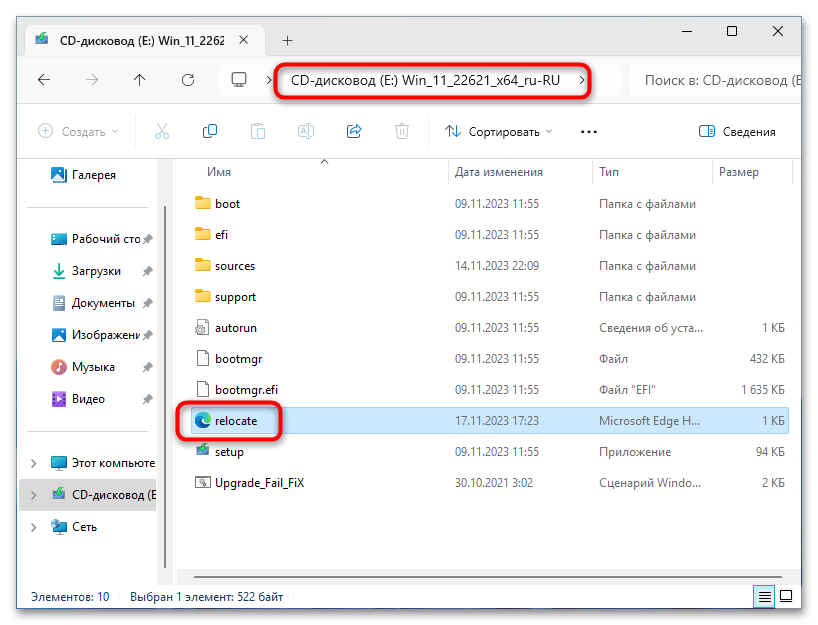
- Скопируйте файл XML в корень загрузочной флешки.
- Загрузите компьютер с установочной флешки и запустите процедуру установки Windows 11 как обычно.
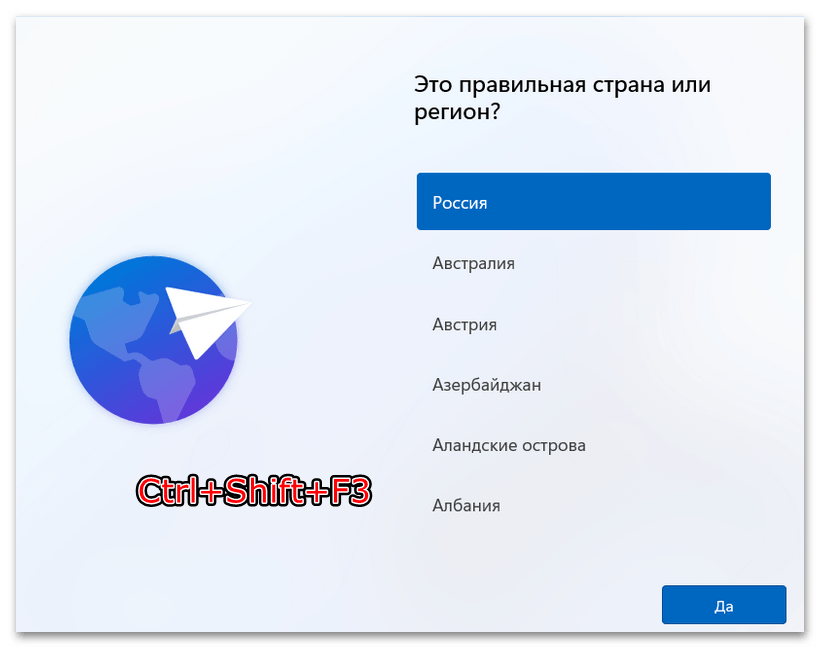
- На заключительном этапе установки, когда на экране появится предложение выбрать регион, нажмите клавиши «Ctrl + Shift + F3», чтобы войти в режим аудита.
- Компьютер будет перезагружен во встроенную учетную запись «Администратор»
- Когда на загрузившемся рабочем столе появится окошко утилиты «Sysprep», нажмите в нем кнопку «Отмена».
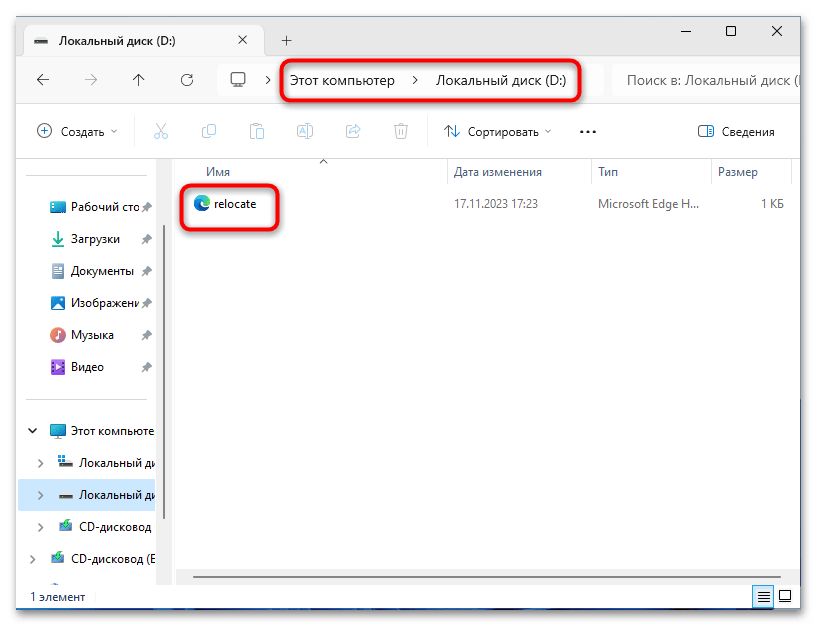
- Перейдите в корень подключенной загрузочной флешки и скопируйте файл ответа в любой пользовательский раздел, например в тот, куда переносится каталог профилей.
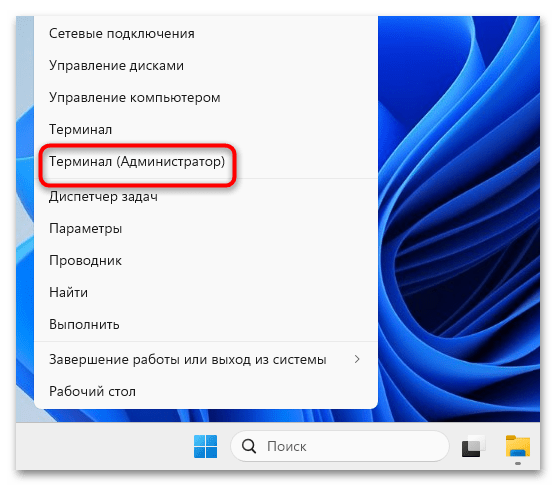
- Откройте от имени администратора классическую консоль «Терминал» или «PowerShell» из контекстного меню Пуск«».
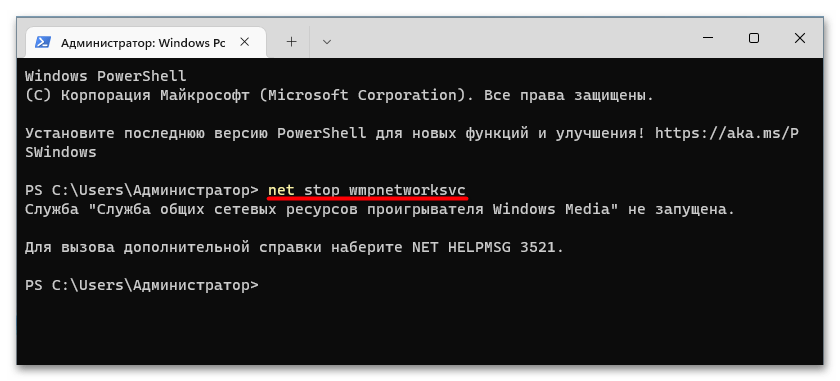
- Убедитесь, что «Служба общих сетевых ресурсов проигрывателя Windows Media » остановлена, для чего выполните команду ее остановки:
net stop wmpnetworksvc. - Запустите процедуру переноса каталога пользовательских профилей, выполнив тут же, в «PowerShell», команду
C:\Windows\system32\sysprep\sysprep.exe /oobe /reboot /unattend:D:\relocate.xml, в которой D:\relocate.xml – путь к файлу ответов на пользовательском разделе. - Если выполнение сценария не начнется сразу, нажмите в открывшемся окошке утилиты «Sysprep» кнопку «ОК». Обычно этого не требуется, и сразу после выполнения команды появится окошко с сообщением «Выполнение моделей Sysprep этапа очистки».
- Компьютер перезагрузится, после чего появится тот же экран настроек, в котором нужно будет выбрать регион, язык и прочие пользовательские настройки – стандартная процедура для установки и предварительной настройки операционной системы.

Если все пройдет удачно, папка «Users» с профилем пользователя окажется на разделе, указанном в файле ответов.
Способ 2: Символические ссылки
Описанным выше способом можно перенести папки профиля пользователей и в уже установленной системе, но он имеет ряд серьезных недостатков. После того как отработает утилита «Sysprep», вход в старую учетную запись станет невозможным, и Windows предложит создать новую учетную запись, войдя в которую, можно будет перенести часть данных из папок старого профиля в новый. В основном это пользовательские данные, что же касается большинства программ, их работа будет нарушена из-за несоответствий путей в реестре, которые по-прежнему будут указывать на старое расположение. Тем не менее папка профилей либо конкретный профиль могут быть перенесены без последствий – посредством создания символических ссылок. Ниже приведен пример переноса конкретного профиля, но тем же способом можно перенести всю папку «Users».
Так как папки профилей используются системой, она не позволит скопировать и тем более переместить их в работающей Windows. Для их перемещения нужно будет использовать загрузочный диск WinPE 11-10-8 Sergei Strelec с «Командной строкой» на борту.
Скачать WinPE 11-10-8 Sergei Strelec с официального сайта
- Скачайте образ WinPE 11-10-8 Sergei Strelec с сайта автора и запишите его на флешку средствами Rufus или другой программы для создания загрузочных флешек.
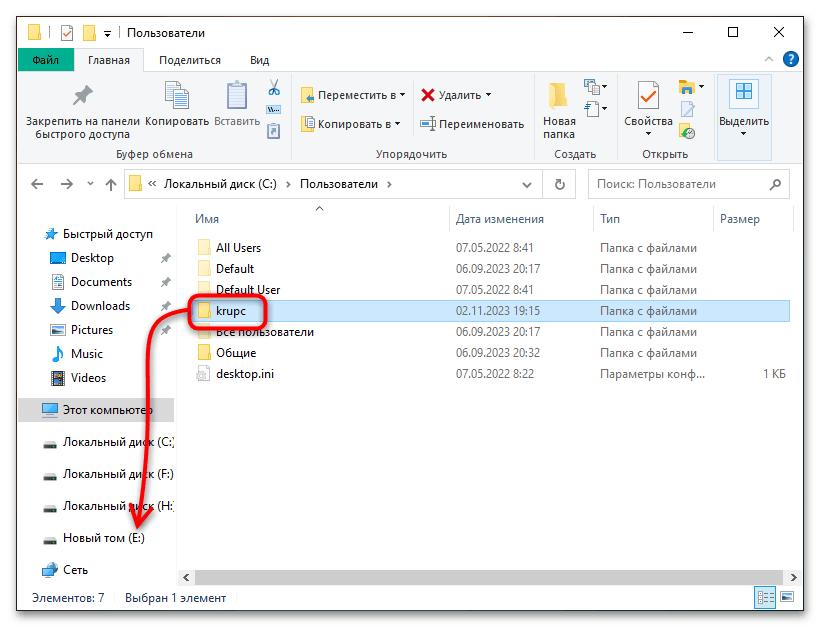
- Загрузив компьютер с LiveCD, перейдите во встроенном «Проводнике» в расположение
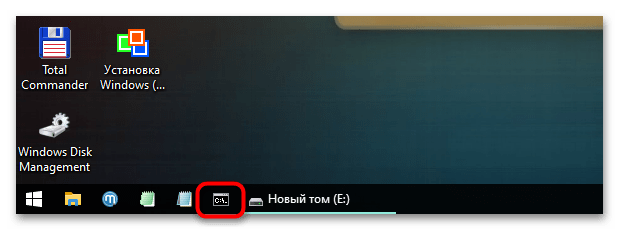
C:\Usersи скопируйте папку профиля нужного пользователя на другой раздел жесткого диска. Исходную папку удалите. - Запустите «Командную строку» с панели задач.
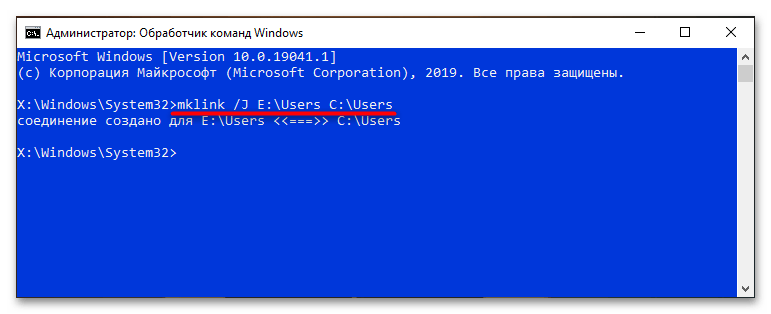
- Выполните команду создания символической ссылки
mklink /J C:\Users\Name D:\Name, где Name – название переносимой папки профиля, а «D» – буква раздела, на который она переносится. - Перейдите в расположение
C:\Usersи убедитесь, что в нем появилась папка с именем переносимого пользователя.
После этого можно будет загружать компьютер в обычном режиме и смотреть, что получилось. Все должно работать, хотя исключать, что какая-то из программ потеряет настройки или станет работать неправильно, тоже нельзя. И самое главное: хотя физически папка профиля станет находиться на другом разделе, Windows 11 по-прежнему будет считать, что она находится на диске C и занимает объем, который занимала раньше.
Следовательно, данный способ не является наилучшим решением, если возникла необходимость освободить место на системном разделе. При появлении такой нужды более правильным решением станет увеличение размера системного тома за счет уменьшения размера ближайшего пользовательского раздела с помощью соответствующих программ – менеджеров разделов.
Наша группа в TelegramПолезные советы и помощь
The User folder on Windows 10 is a folder created specifically for each user account that is configured on a Windows 10 system. The folder houses important library folders such as Documents, Pictures, and Downloads, and it also houses the Desktop folder. It’s also where the AppData folder resides. You can open the User Profile folder easily enough i.e., navigate to C:\Users and open your user older. If you’d like an easier way to access the user folder on Windows 10, here are three alternative methods.
Run box
Use the Win+R keyboard shortcut to open the run box. Enter either one of the following, and tap enter to open the User folder for the current user.
.
or
%USERPROFILE%
Navigation panel in File Explorer
Right-click an empty area on the navigation panel in File Explorer. From the context menu, select the ‘Show all folders’ and your user profile will be added as a location in the navigation bar.
Each time you open File Explorer, you will be able to quickly access it from the navigation panel. This method will add a few other folders to the navigation panel so, if you don’t want the clutter, visit your User profile folder, right-click it, and select the ‘Pin to Quick Access’ option instead.
Create a desktop shortcut or Start menu tile
Right-click in an empty area on the desktop and select New>Shortcut. In the ‘Location’ field, enter the complete path to your user profile folder. Click Next, and the name of the folder will automatically be added. You can use this shortcut to quickly open your User folder, or you can right-click it and select the Pin to Start option to pin it as a tile to the Start menu. If you choose to pin the folder to the Start menu, you can delete the shortcut on your desktop once the tile has been pinned.
Remember that all user folders reside in the following location and the folder is really just a simple folder. There’s nothing especially extraordinary about it which means you can access it in any other way that you access a frequently used folder. You can, for example, also pin the user folder to the File Explorer jumplist.
C:\Users
If you have admin rights on a system, you can use the shortcut method to quickly access the user profile folder of another user though you might still be prompted to authenticate with the admin password. The other two methods won’t work for other user folders but the shortcut method will.

Fatima Wahab
Fatima has been writing for AddictiveTips for six years. She began as a junior writer and has been working as the Editor in Chief since 2014.
Fatima gets an adrenaline rush from figuring out how technology works, and how to manipulate it. A well-designed app, something that solves a common everyday problem and looks
ср, 05/31/2006 — 08:42 — admin
Указание пути к профилю пользователя в учетной записи
Добавить путь расположения профиля пользователя к учетной записи можно с помощью вкладки Профиль окна свойств пользователя, открытого для определенной учетной записи в. окне оснастки Локальные пользователи и группы (или Active Directory — пользователи и компьютеры). Перейдите на вкладку Профиль и добавьте путь к профилю пользователя (рис. 11.3).
В учетной записи следует указать полный путь к профилю пользователя:
\\серъер\имя_общего_ресурса\имя_профиля
В качестве общего ресурса может выступать любая папка, к которой следует организовать общий доступ для группы Все (Everyone). В качестве имени профиля следует указать имя папки профиля данного пользователя (это может быть любая папка на общем ресурсе, в которой будет храниться про-
филь). Путь профиля пользователя может указывать на любой сервер. Это не обязательно должен быть контроллер домена. Когда пользователь регистрируется в сети, Windows 2000 Server проверяет, указан ли в его учетной записи путь профиля. Если путь указан, система находит соответствующий профиль.
|
Рис. 11.3. Вкладка Профиль (Profile) окна свойств учетной записи |
- Версия для печати