
How to Install OpenSSH Server/Client on Windows Server 2016 1607 or Before
OpenSSH is the premier connectivity tool for remote login with the SSH protocol. It encrypts all traffic to eliminate eavesdropping, connection hijacking, and other attacks. In addition, OpenSSH provides a large suite of secure tunneling capabilities, several authentication methods, and sophisticated configuration options. Installation of OpenSSH server/client on Windows 2016 1709 onward is really easy. its just few powershell commands away from using it but for older versions it can be a time wasting activity. The easiest way to install is still very long but I would to wrap in few basic steps:
Download OpenSSH
First you need to Download OpenSSH using the attached URL. A zip file will be downloaded on your desired system. Unzip it and copy it under Windows\system32 directory.
Open PowerShell ISE
Open PowerShell ISE with administrative privileges so that you can run the desired commands without any problem. Change the directory to c:\windows\system32\openssh
Run the Commands
First you need to modify the required permission so run the under given command from OpenSSh Directory. The commands are given in the picture below:

Run the commands in the given order and OpenSSH server will be installed on the Windows Server 2016 1607 or earlier version.
Environment Variables
Copy the directory path and set the system environment variables so that the commands can work without giving the exact path. You can use PowerShell commands to set the path or go to system settings and manually set the path.
Start the services
Change the service startup type from manual to automatic and start the service to use OpenSSH server.
Windows Firewall Settings
SSH works on TCP port 22 so you need to open in-bound port in Windows firewall so that in-coming connections can be accepted. Opening firewall port is pretty simple and I think there is no need to share any command or process to do it.
Thanks for visiting. I hope you like the post.
В современных версиях Windows уже есть встроенный SSH сервер на базе пакета OpenSSH. В этой статье мы покажем, как установить и настроить OpenSSH сервер в Windows 10/11 и Windows Server 2022/2019 и подключиться к нему удаленно по защищенному SSH протоколу (как к Linux).
Содержание:
- Установка сервера OpenSSH в Windows
- Настройка SSH сервера в Windows
- Sshd_config: Конфигурационный файл сервера OpenSSH
- Подключение по SSH к Windows компьютеру
- Логи SSH подключений в Windows
Установка сервера OpenSSH в Windows
Пакет OpenSSH Server включен в современные версии Windows 10 (начиная с 1803), Windows 11 и Windows Server 2022/2019 в виде Feature on Demand (FoD). Для установки сервера OpenSSH достаточно выполнить PowerShell команду:
Get-WindowsCapability -Online | Where-Object Name -like ‘OpenSSH.Server*’ | Add-WindowsCapability –Online
Или при помощи команды DISM:
dism /Online /Add-Capability /CapabilityName:OpenSSH.Server~~~~0.0.1.0
Если ваш компьютер подключен к интернету, пакет OpenSSH.Server будет скачан и установлен в Windows.
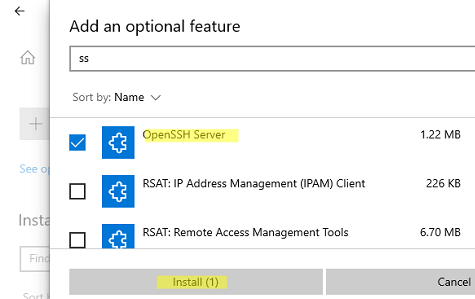
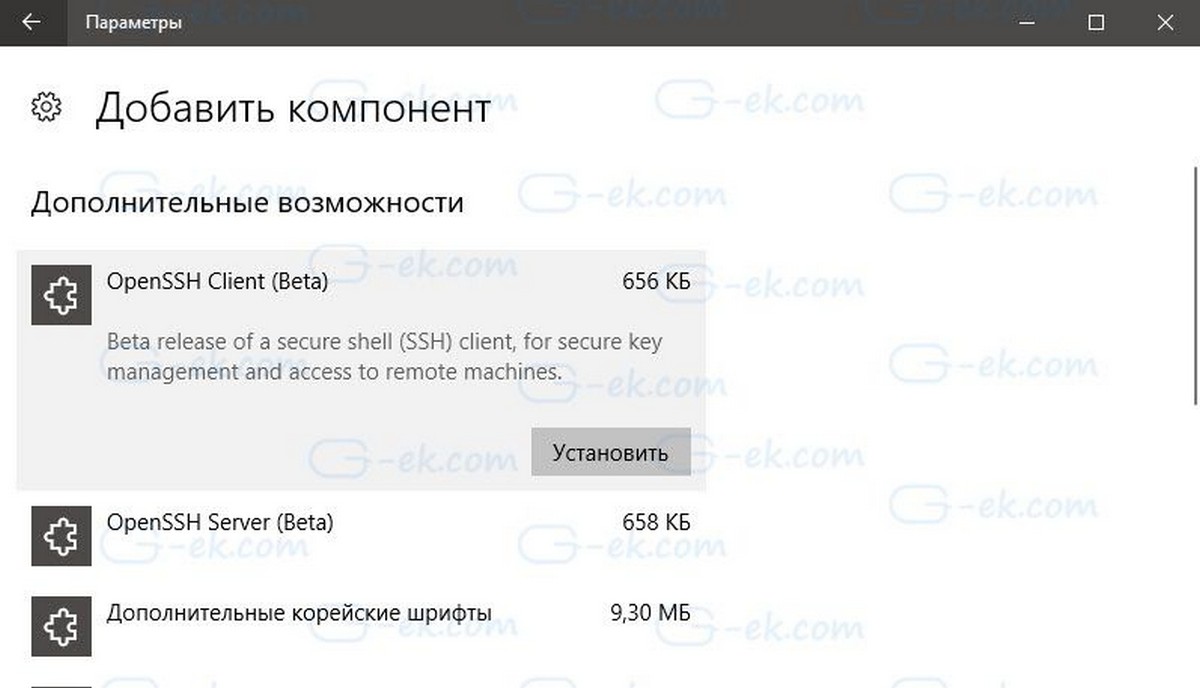
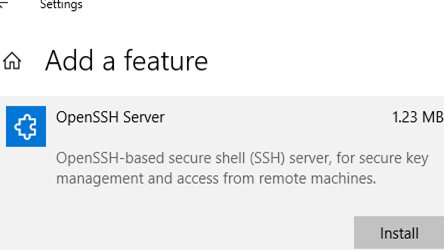
Также вы можете установить сервер OpenSSH в Windows через современную панель Параметры (Settings -> Apps and features -> Optional features -> Add a feature, Приложения -> Управление дополнительными компонентами -> Добавить компонент. Найдите в списке OpenSSH Server и нажмите кнопку Install).
На изолированных от интернета компьютерах вы можете установить компонент с ISO образа Features On Demand (доступен в личном кабинете на сайте Microsoft: MSDN или my.visualstudio.com). Скачайте диск, извлеките его содержимое в папку c:\FOD (достаточно распаковать извлечь файл
OpenSSH-Server-Package~31bf3856ad364e35~amd64~~.cab
), выполните установку из локального репозитория:
Add-WindowsCapability -Name OpenSSH.Server~~~~0.0.1.0 -Online -Source c:\FOD
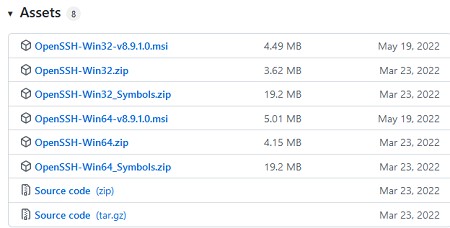
Также доступен MSI установщик OpenSSH для Windows в официальном репозитории Microsoft на GitHub (https://github.com/PowerShell/Win32-OpenSSH/releases/). Например, для Windows 10 x64 нужно скачать и установить пакет OpenSSH-Win64-v8.9.1.0.msi. Следующая PowerShell команда скачает MSI файл и установит клиент и сервер OpenSSH:
Invoke-WebRequest https://github.com/PowerShell/Win32-OpenSSH/releases/download/v8.9.1.0p1-Beta/OpenSSH-Win64-v8.9.1.0.msi -OutFile $HOME\Downloads\OpenSSH-Win64-v8.9.1.0.msi -UseBasicParsing
msiexec /i c:\users\root\downloads\OpenSSH-Win64-v8.9.1.0.msi
Также вы можете вручную установить OpenSSH сервер в предыдущих версиях Windows (Windows 8.1, Windows Server 2016/2012R2). Пример установки Win32-OpenSSH есть в статье “Настройка SFTP сервера (SSH FTP) в Windows”.
Чтобы проверить, что OpenSSH сервер установлен, выполните:
Get-WindowsCapability -Online | ? Name -like 'OpenSSH.Ser*'
State : Installed

Настройка SSH сервера в Windows
После установки сервера OpenSSH в Windows добавляются две службы:
- ssh-agent (OpenSSH Authentication Agent) – можно использовать для управления закрытыми ключами если вы настроили SSH аутентификацию по ключам;
- sshd (OpenSSH SSH Server) – собственно сам SSH сервер.
Вам нужно изменить тип запуска службы sshd на автоматический и запустить службу с помощью PowerShell:
Set-Service -Name sshd -StartupType 'Automatic'
Start-Service sshd

С помощью nestat убедитесь, что теперь в системе запущен SSH сервер и ждет подключений на порту TCP:22 :
netstat -na| find ":22"

Проверьте, что включено правило брандмауэра (Windows Defender Firewall), разрешающее входящие подключения к Windows по порту TCP/22.
Get-NetFirewallRule -Name *OpenSSH-Server* |select Name, DisplayName, Description, Enabled
Name DisplayName Description Enabled
---- ----------- ----------- -------
OpenSSH-Server-In-TCP OpenSSH SSH Server (sshd) Inbound rule for OpenSSH SSH Server (sshd) True

Если правило отключено (состоянии Enabled=False) или отсутствует, вы можете создать новое входящее правило командой New-NetFirewallRule:
New-NetFirewallRule -Name sshd -DisplayName 'OpenSSH Server (sshd)' -Enabled True -Direction Inbound -Protocol TCP -Action Allow -LocalPort 22
Рассмотрим, где храниться основные компоненты OpenSSH:
- Исполняемые файлы OpenSSH Server находятся в каталоге
C:\Windows\System32\OpenSSH\
(sshd.exe, ssh.exe, ssh-keygen.exe, sftp.exe и т.д.) - Конфигурационный файл sshd_config (создается после первого запуска службы):
C:\ProgramData\ssh - Файлы authorized_keys и ssh ключи можно хранить в профиле пользователей:
%USERPROFILE%\.ssh\
Sshd_config: Конфигурационный файл сервера OpenSSH
Настройки сервере OpenSSH хранятся в конфигурационном файле %programdata%\ssh\sshd_config. Это обычный текстовый файл с набором директив. Для редактирования можно использовать любой текстовый редактор (я предпочитаю notepad++). Можно открыть с помощью обычного блокнота:
start-process notepad C:\Programdata\ssh\sshd_config
Например, чтобы запретить SSH подключение для определенного доменного пользователя (и всех пользователей указанного домена), добавьте в конце файле директивы:
DenyUsers winitpro\[email protected]
DenyUsers corp\*
Чтобы разрешить подключение только для определенной доменной группы:
AllowGroups winitpro\sshadmins
Либо можете разрешить доступ для локальной группы:
AllowGroups sshadmins
По умолчанию могут к openssh могут подключаться все пользователи Windows. Директивы обрабатываются в следующем порядке: DenyUsers, AllowUsers, DenyGroups,AllowGroups.
Можно запретить вход под учетными записями с правами администратора, в этом случае для выполнения привилегированных действий в SSH сессии нужно делать runas.
DenyGroups Administrators
Следующие директивы разрешают SSH доступ по ключам (SSH аутентификации в Windows с помощью ключей описана в отдельной статье) и по паролю:
PubkeyAuthentication yes
PasswordAuthentication yes
Вы можете изменить стандартный SSH порт TCP/22, на котором принимает подключения OpenSSH в конфигурационном файле sshd_config в директиве Port.
После любых изменений в конфигурационном файле sshd_config нужно перезапускать службу sshd:
restart-service sshd
Подключение по SSH к Windows компьютеру
Теперь вы можете попробовать подключиться к своей Windows 10 через SSH клиент (в этом примере я использую putty).
Вы можете использовать встроенный SSH клиентом Windows для подключения к удаленному хосту. Для этого нужно в командной строке выполнить команду:
ssh [email protected]
В этом примере
alexbel
– имя пользователя на удаленном Windows компьютере, и 192.168.31.102 – IP адрес или DNS имя компьютера.
Обратите внимание что можно использовать следующие форматы имен пользователей Windows при подключении через SSH:
-
alex@server1
– локальный пользователь Windows -
[email protected]@server1
–пользователь Active Directory (в виде UPN) или аккаунт Microsoft/ Azure(Microsoft 365) -
winitpro\alex@server1
– NetBIOS формат имени
В домене Active Directory можно использовать Kerberos аутентификацию в SSH. Для этого в sshd_config нужно включить параметр:
GSSAPIAuthentication yes
После этого можно прозрачно подключать к SSH сервер с Windows компьютера в домене из сессии доменного подключается. В этом случае пароль пользователя не указывается и выполняется SSO аутентификация через Kerberos:
ssh -K server1
При первом подключении появится стандартный запрос на добавление узла в список известных SSH хостов.
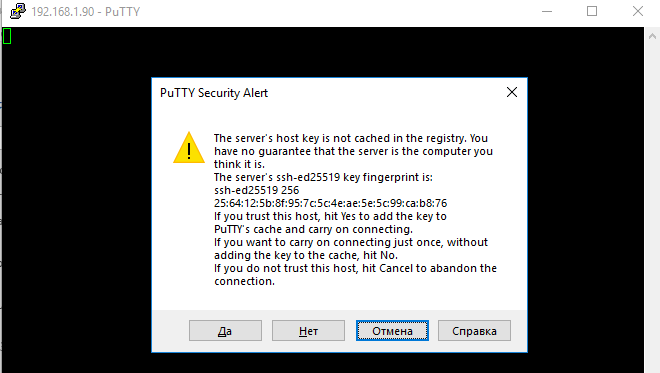
Нажимаем Да, и в открывшееся окне авторизуемся под пользователем Windows.
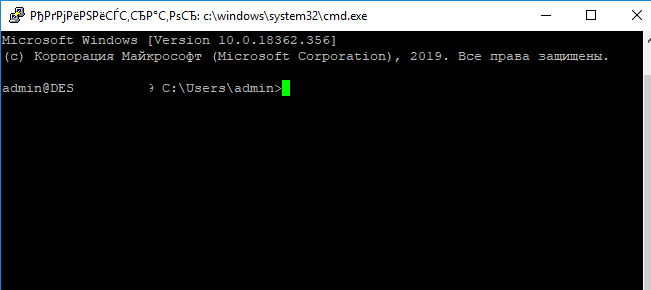
При успешном подключении запускается командная оболочка cmd.exe со строкой-приглашением.
admin@win10tst C:\Users\admin>
В командной строке вы можете выполнять различные команды, запускать скрипты и программы.
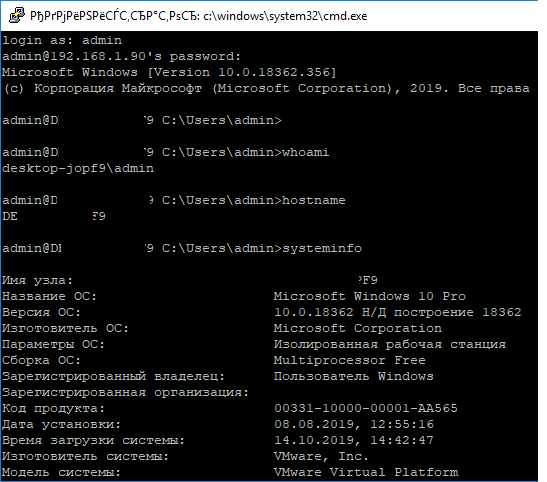
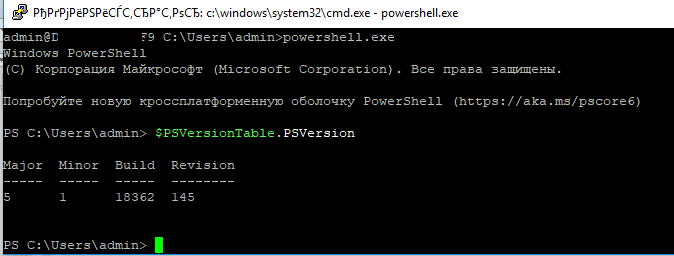
Я предпочитаю работать в командной строке PowerShell. Чтобы запустить интерпретатор PowerShell, выполните:
powershell.exe
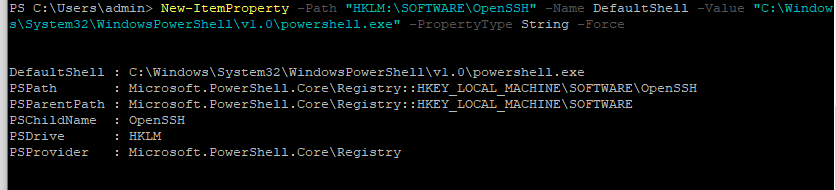
Чтобы изменить командную оболочку (Shell) по умолчанию в OpenSSH с cmd.exe на PowerShell, внесите изменение в реестр такой командой:
New-ItemProperty -Path "HKLM:\SOFTWARE\OpenSSH" -Name DefaultShell -Value "C:\Windows\System32\WindowsPowerShell\v1.0\powershell.exe" -PropertyType String –Force
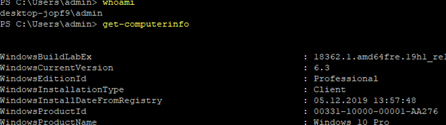
Осталось перезапустить SSH подключение и убедиться, что при подключении используется командный интерпретатор PowerShell (об этом свидетельствует приглашение
PS C:\Users\admin>
).
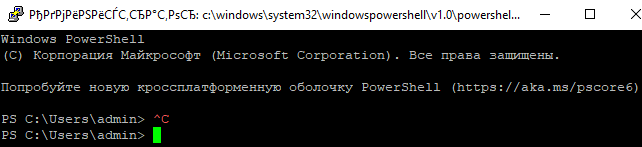
В SSH сессии запустилась командная строка PowerShell, в которой работают привычные функции: авто дополнение, раскраска модулем PSReadLine, история команд и т.д. Если текущий пользователь входит в группу локальных администраторов, то все команды в его сессии выполняются с повышенными правами даже при включенном UAC.
Логи SSH подключений в Windows
В Windows логи подключений к SSH серверу по-умолчанию пишутся не в текстовые файлы, а в отдельный журнал событий через Event Tracing for Windows (ETW). Откройте консоль Event Viewer (
eventvwr.msc
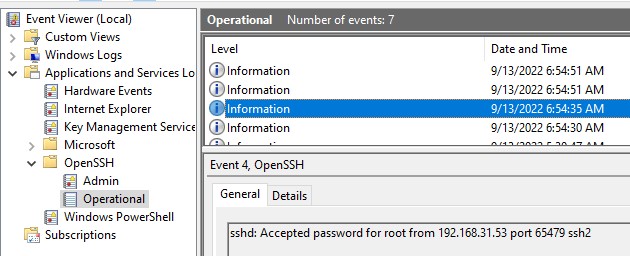
>) и перейдите в раздел Application and services logs -> OpenSSH -> Operational.
При успешном подключении с помощью к SSH серверу с помощью пароля в журнале появится событие:
EventID: 4
sshd: Accepted password for root from 192.168.31.53 port 65479 ssh2
Если была выполнена аутентификация с помощью SSH ключа, событие будет выглядеть так:
sshd: Accepted publickey for locadm from 192.168.31.53 port 55772 ssh2: ED25519 SHA256:FEHDEC/J72Fb2zC2oJNb45678967kghH43h3bBl31ldPs
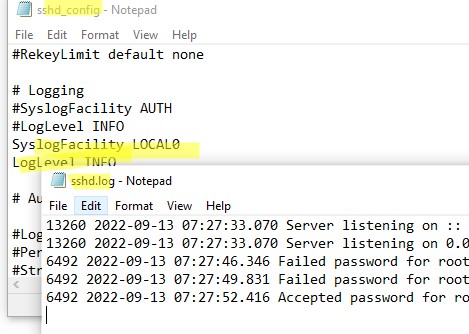
Если вы хотите, чтобы логи писались в локальный текстовый файл, нужно в файле sshd_config включить параметры:
SyslogFacility LOCAL0
LogLevel INFO
Перезапустите службу sshd и провеьте, что теперь логи SSH сервера пишутся в файл C:\ProgramData\ssh\logs\sshd.log
Starting with Windows 10 build 1709, Windows integrates a port of OpenSSH, client and server.
This note describes how to install and configure the OpenSSH server sshd
and run PowerShell scripts on a remote Windows server, from a Unix system,
using SSH and public key authentication (no password).
Prerequisites: We need the Windows Local Security Policy Editor (secpol.msc).
On Windows 10 Home edition, this tool is not present and you need to install it
first. See instructions here.
Installing OpenSSH
This is done from the Windows Settings interface.
- Windows Start Menu =>
- Settings =>
- Apps & features =>
- Manage optional features =>
- Add a feature =>
- OpenSSH Server (Beta)
Server configuration fixup
Probably because of being in beta stage, the OpenSSH server does not work out of the box and
need some configuration cleanup.
Run the Windows Local Security Policy Editor
- Type
secpol.mscin the Search box near the start menu => - Local Policies =>
- User Rights Assignment =>
- Add
NT Service\sshdto «Log on as a service» and «Replace a process level token«.
Run a PowerShell windows as administrator.
cd C:\WINDOWS\system32\OpenSSH
Generate the SSH host private keys.
.\ssh-keygen -A
In old versions of Windows 10, the key files are created in the same directory
as SSH commands (C:\WINDOWS\system32\OpenSSH). In more recent versions, the
key files are created in C:\ProgramData\ssh, which must be created first:
mkdir $env:PROGRAMDATA\ssh
.\ssh-keygen -A
This creates a pair of files named ssh_host_ed25519_key(private key) and
ssh_host_ed25519_key.pub (public key). The security of the private key file
needs to be fixed.
icacls .\ssh_host_ed25519_key /setowner `"NT SERVICE\sshd`"
icacls .\ssh_host_ed25519_key /grant `"NT SERVICE\sshd`":`(R`)
Check the current ACL’s of the file:
icacls .\ssh_host_ed25519_key
Verify if any other user is granted some access. Only system accounts
and sshd should be allowed. Otherwise, the sshd server will consider
the host key as vulnerable and will refuse to start. It is probable that
one or more other user is listed, typically your own user account. You
must remove every other DOMAIN\USER using:
icacls .\ssh_host_ed25519_key /remove `"DOMAIN\USER`"
Allow sshd to write in the Logs directory.
icacls .\Logs /grant `"NT SERVICE\sshd`":`(F`)
Create a FireWall rule to allow incoming connections on port 22, the SSH port.
New-NetFirewallRule -Name sshd -DisplayName 'OpenSSH Server (sshd)' -Enabled True -Direction Inbound -Protocol TCP -Action Allow -LocalPort 22
Before modifying the configuration file sshd_config, you need to fix its
protections. By default, it is controlled by the Trusted Installer and
no-one, not even an administrator account, can modify it.
takeown /f sshd_config
icacls .\sshd_config /remove "NT SERVICE\TrustedInstaller"
icacls .\sshd_config /grant `"BUILTIN\Administrators`":`(F`)
icacls .\sshd_config /grant `"NT SERVICE\sshd`":`(R`)
Note: The actual name of the Administrators group depends on the locale.
On a French system, the group is named Administrateurs. Quite a silly idea…
Modify the configuration file sshd_config using a text editor running
with elevated privileges.
The following lines shall be uncommented and modified when necessary:
PubkeyAuthentication yes
AuthorizedKeysFile .ssh/authorized_keys
PidFile C:/WINDOWS/system32/OpenSSH/Logs/sshd.pid
PubkeyAcceptedKeyTypes ssh-ed25519*
In case of problem later, you can activate debug traces in the sshd
log file by changing the following line:
LogLevel INFO
into:
LogLevel DEBUG
Now configure the sshd service to automatically start on boot.
And start it now.
Set-Service sshd -StartupType Automatic
Set-Service ssh-agent -StartupType Automatic
Start-Service sshd
User configuration on the Windows server
To allow public key authentication, each user has to create the same type
of authorized_keys file as on any Unix system. On Windows, the name
of the file is C:\Users\_user_name_\.ssh\authorized_keys.
Create the .ssh subdirectory and the authorized_keys file with the
list of allowed public keys.
The protection of the authorized_keys file must be manually
adjusted. Open a PowerShell window using your own user account.
icacls .\.ssh /grant `"NT SERVICE\sshd`":`(R`)
icacls .\.ssh\authorized_keys /grant `"NT SERVICE\sshd`":`(R`)
User configuration on the Unix clients
For some strange reason, the Windows sshd server does not accept RSA public
key authentication. Only ED25519 is allowed. Most Unix systems (and PuTTY on
Windows) use RSA keys for SSH authentication. Your public RSA key on the Unix
system, typically found in file .ssh/id_rsa.pub, will not be accepted by
the Windows sshd, even if you copy it into your .ssh\authorized_keys.
You need to create a second SSH key pair, of type ED25519, on the Unix client.
$ ssh-keygen -t ed25519
Generating public/private ed25519 key pair.
Enter file in which to save the key (.ssh/id_ed25519):
...
The public key from file .ssh/id_ed25519.pub shall be copied into your
.ssh\authorized_keys on the Windows server.
Each time you want to log in to the Windows server from the Unix system,
we may specify the private key file to be used:
$ ssh -i $HOME/.ssh/id_ed25519 user-name@windows-host-name
But, in practice, ssh tries all its private keys in sequence until one
is accepted by the server (we can see that using ssh -vv to enable very
verbose traces while connecting). So, we may in fact simply log in as usual:
$ ssh user-name@windows-host-name
Now you can log in from your remote Unix systems using public
key authentication and no password. The default shell is cmd.exe.
Как вы уже знаете, Windows 10 включает в себя встроенное программное обеспечение SSH — как клиент, так и сервер! Это очень полезно, когда вам нужно быстро получить доступ к серверу Linux. Все может быть сделано всего за несколько кликов, без установки дополнительного программного обеспечения.
На компьютерах с Windows, бесплатное ПО PuTTY является стандартом де-факто, когда дело доходит до SSH и Telnet. В Windows 10 Microsoft, наконец, прислушалась к просьбам пользователей после нескольких лет ожиданий, Microsoft добавила поддержку протокола OpenSSH в версии обновления Fall Creators.
На момент написания статьи программное обеспечение OpenSSH, включенное в Windows 10, находится на стадии BETA. Это означает, что у него могут быть небольшие проблемы с стабильностью.
Предоставленный клиент SSH похож на клиент Linux. На первый взгляд, он поддерживает те же функции, что и его аналог * NIX. Это консольное приложение, поэтому вы можете запустить его с помощью командной строки. Давайте включим его.
Как включить клиент OpenSSH в Windows 10.
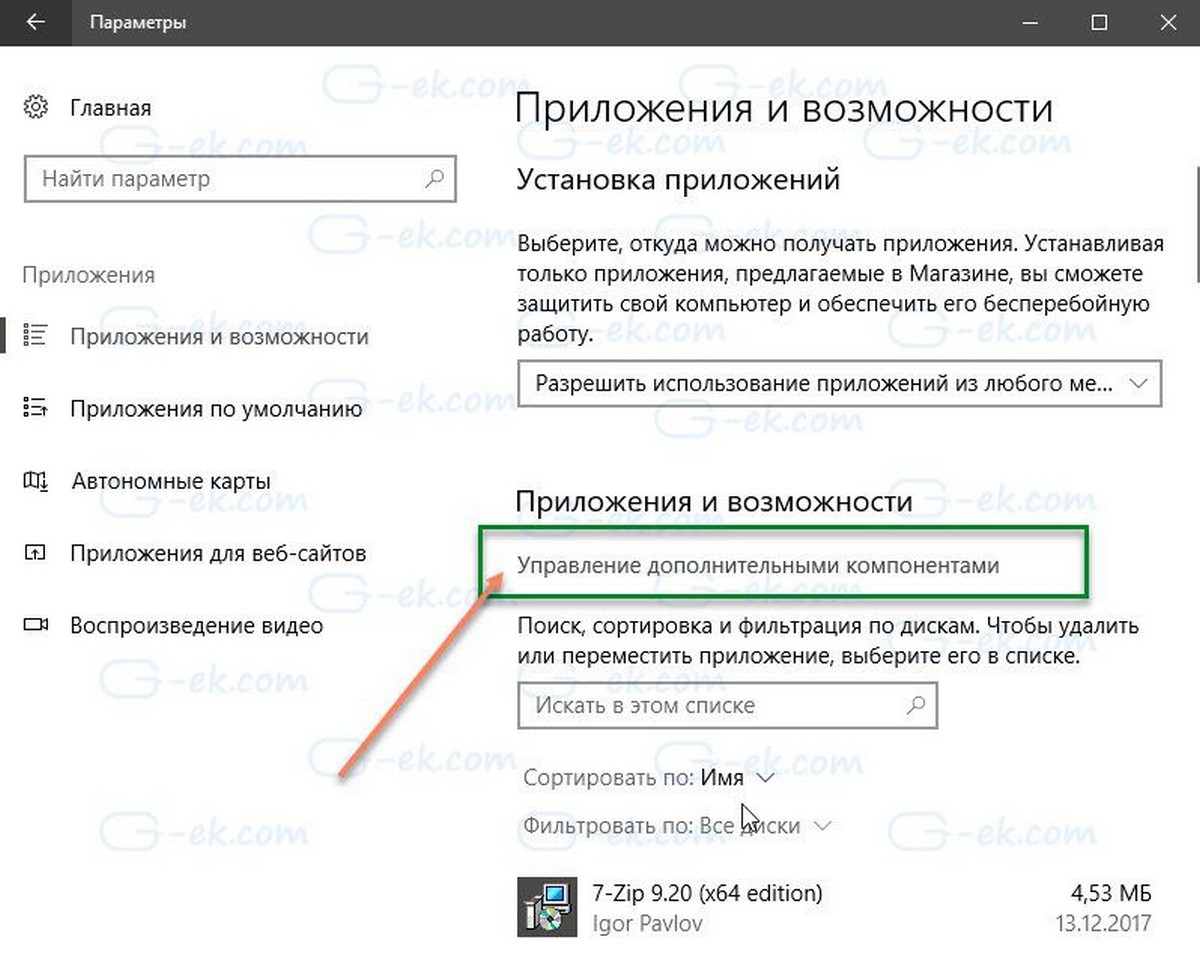
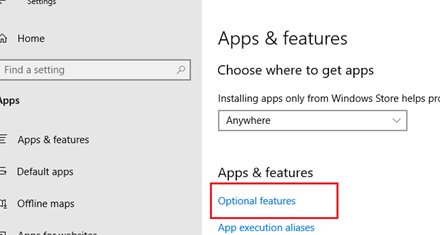
- Откройте приложение «Параметры» и перейдите в «Приложения» → «Приложения и возможности».
- Справа нажмите «Управление дополнительными компонентами».
- На следующей странице нажмите кнопку «Добавить компонент».
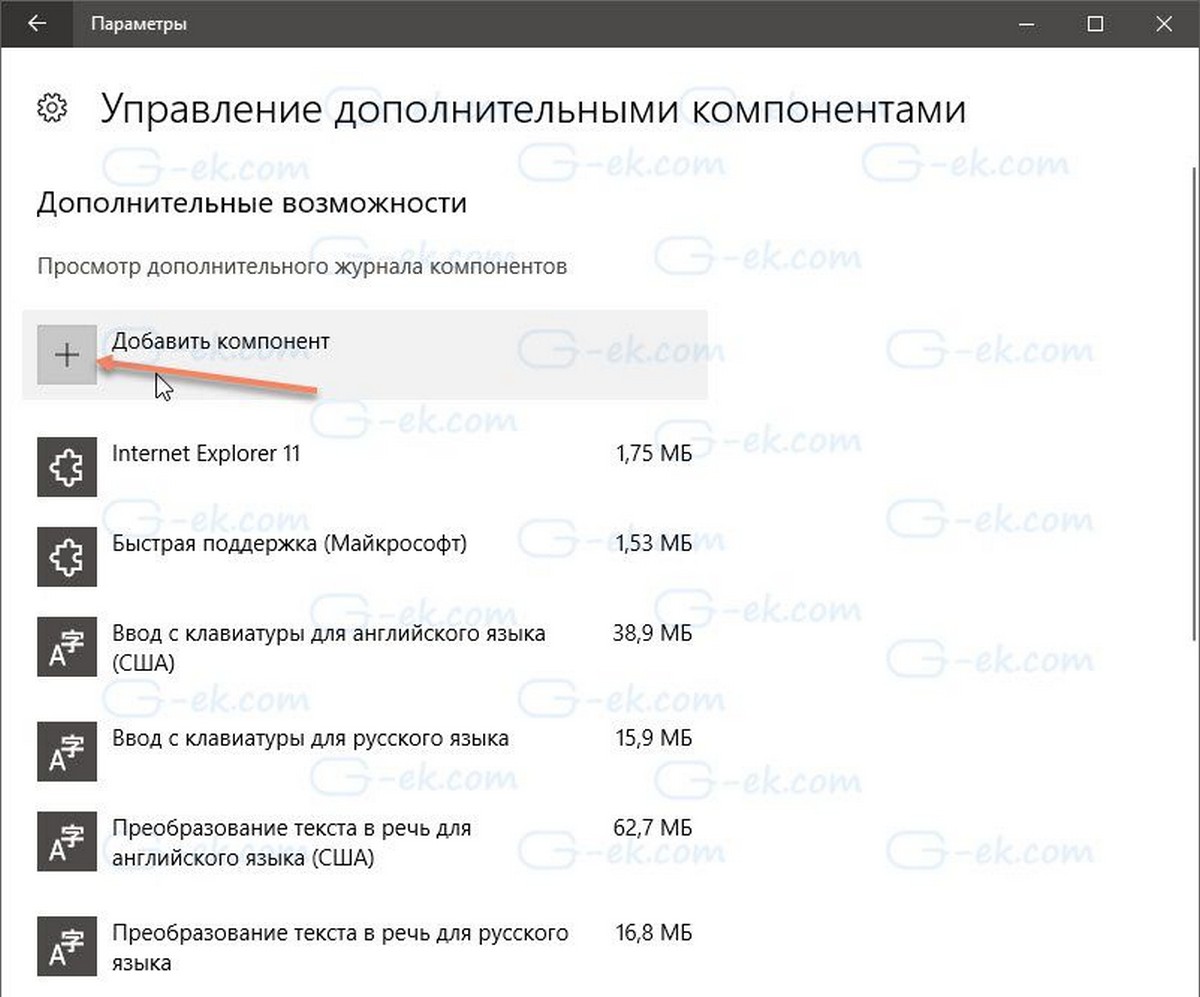
- В списке компонентов выберите OpenSSH Client и нажмите кнопку «Установить».
Включить клиент OpenSSH в Windows 10
Это установит клиентское ПО OpenSSH в Windows 10. Его файлы находятся в папке c:\windows\system32\Openssh. Помимо клиента SSH, папка содержит следующие клиентские инструменты:
- scp.exe
- sftp.exe
- SSH-add.exe
- SSH-agent.exe
- SSH-keygen.exe
- ssh.exe
- и конфигурационный файл «sshd_config».
- Перезагрузите Windows 10, В противном случае вам придется ввести полный путь к этим файлам, чтобы использовать их.
Попытка запустить ssh без перезапуска приводит к этой типичной ошибке.
PS C:\> ssh
sshd : The term ‘ssh’ is not recognized as the name of a cmdlet, function, script file, or operable program. Check the spelling of the name, or if a path was included, verify that the path is correct and try again.
At line:1 char:1
+ sshd
+ ~~~~
+ CategoryInfo : ObjectNotFound: (ssh:String) [], CommandNotFoundException
+ FullyQualifiedErrorId : CommandNotFoundException
После того, как вы перезагрузили, результат стал более обнадеживающим.
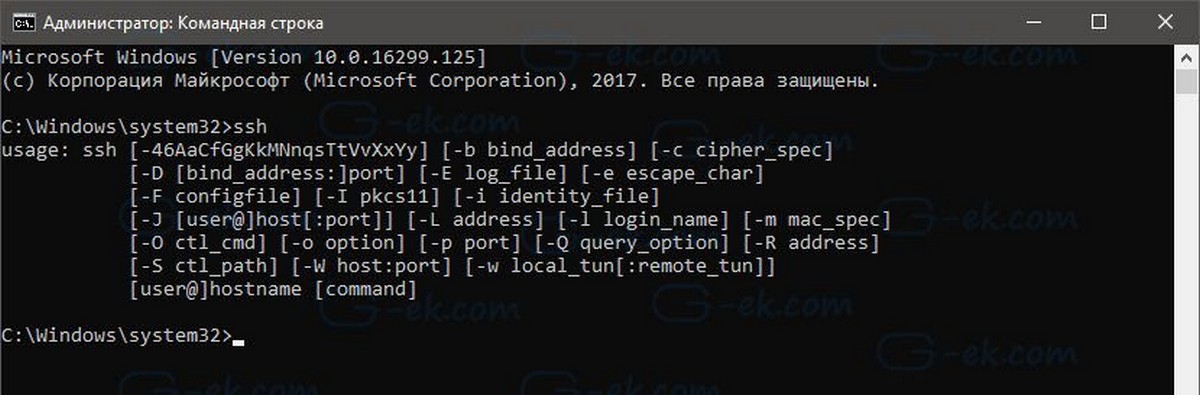
PS C:\> ssh
usage: ssh [-46AaCfGgKkMNnqsTtVvXxYy] [-b bind_address] [-c cipher_spec]
[-D [bind_address:]port] [-E log_file] [-e escape_char]
[-F configfile] [-I pkcs11] [-i identity_file]
[-J [user@]host[:port]] [-L address] [-l login_name] [-m mac_spec]
[-O ctl_cmd] [-o option] [-p port] [-Q query_option] [-R address]
[-S ctl_path] [-W host:port] [-w local_tun[:remote_tun]]
[user@]hostname [command]
Также вы можете установить клиент SSH с помощью PowerShell.
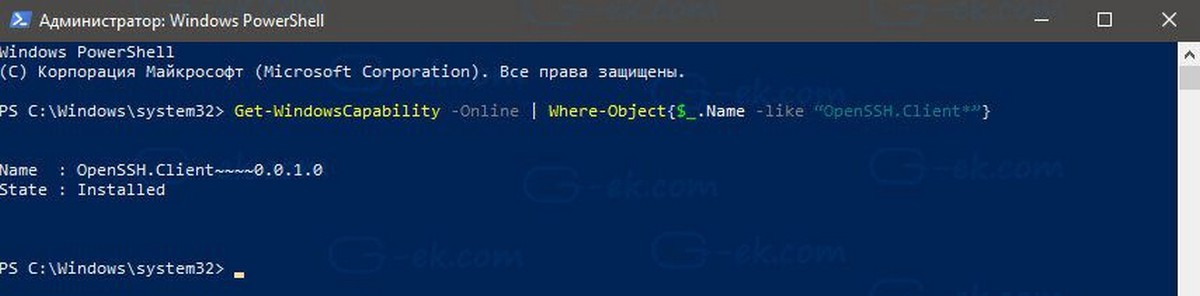
Откройте PowerShell от имени Администратора и выполните следующую команду и перезагрузите систему:
Get-WindowsCapability -Online | Where-Object{$_.Name -like “OpenSSH.Client*”}
Теперь вы можете попробовать SSH в действии.
- Откройте новое окно командной строки.
- Введите команду ssh, используя следующий синтаксис:
Например подключение к серверу CentOS 7
ssh username@171.16.1.10
Результат будет следующим:
ssh username@171.16.1.10
The authenticity of host ‘171.16.1.10 (171.16.1.10)’ can’t be established.
ED42519 key fingerprint is SHA256:REMOVED.
Are you sure you want to continue connecting (yes/no)? yes
Warning: Permanently added ‘171.16.1.10’ (ED42519) to the list of known hosts.
username@171.16.1.10’s password:
Last login: Tue Oct 31 00:23:33 2017 from 10.22.202.6
[username@centos ~]$ uname -a
Linux centos 3.10.0-514.10.2.el7.x86_64 #1 SMP Fri Mar 3 00:04:05 UTC 2017 x86_64 x86_64 x86_64 GNU/Linux
Встроенный клиент почти идентичен традиционному SSH-клиенту из пакета OpenSSH, доступного в Linux. И имеет ту же самую консоль. Это очень полезно, когда вам нужно изменить какой-либо параметр конфигурации или перезапустить демон. Если вы используете для управления ПК Linux из командной строки, вы найдете это полезным.
Тем не менее, есть еще много ситуаций, когда добрый старый PuTTY выигрывает гонку. Как по мне, встроенное ПО OpenSSH хорошо работает для базовых функций, если вы не хотите устанавливать PuTTY на ПК. Это также полезно, если вы профессиональный пользователь Linux, который наизусть знает все параметры клиента SSH.
В последних билдах Windows 10 появился встроенный SSH сервер и клиент на базе OpenSSH. Это значит, что теперь вы можете удаленно подключаться к компьютеру Windows 10/11 (Windows Server 2019/2022) с помощью любого SSH клиента, как к Linux. В этой статье мы покажем, как настроить OpenSSH в Windows 10 и подключится к нему с помощью putty или любого другого SSH клиента.
Убедитесь, что ваша версия Windows 10 1809 или выше. Проще всего это сделать, выполнив команду:
winver
Совет. Если у вас более старая версия Windows 10 вы можете обновить ее через Windows Update или с помощью ISO образа с более новой версией Windows 10 (можно создать его с помощью Media Creation Tool). Если вы не хотите обновлять Windows 10, вы можете вручную установить порт OpenSSH для Windows с GitHub — Win32-OpenSSH (https://github.com/PowerShell/Win32-OpenSSH).
Вы можете включить OpenSSH сервера в Windows 10 через панель Параметры:
- Перейдите в Settings -> Apps -> Optional features;

- Нажмите Add a feature, выберите OpenSSH Server и нажмите Install;

Также вы можете установить sshd сервер в Windows с помощью PowerShell:
Add-WindowsCapability -Online -Name OpenSSH.Server*

Или с помощью DISM:
dism /Online /Add-Capability /CapabilityName:OpenSSH.Server~~~~0.0.1.0
Если вы хотите убедитесь, что OpenSSH сервер установлен, выполните следующую команду:
Get-WindowsCapability -Online | ? Name -like 'OpenSSH.Server*'
Name : OpenSSH.Server~~~~0.0.1.0
State : Installed

Проверьте статус служб ssh-agent и sshd с помощью командлета Get-Service:
Get-Service -Name *ssh*

Как вы видите, обе службы находятся в состоянии Stopped и не добавлены в автозагрузку. Чтобы запустить службы и настроить для них автозапуск, выполните команды:
Start-Service sshd
Set-Service -Name sshd -StartupType 'Automatic'
Start-Service ‘ssh-agent’
Set-Service -Name ‘ssh-agent’ -StartupType 'Automatic'

Также нужно разрешить входящие подключения на порт TCP 22 в Windows Defender Firewall:
netsh advfirewall firewall add rule name="SSHD service" dir=in action=allow protocol=TCP localport=22
Теперь вы можете подключиться к Windows 10 с помощью любого SSH клиента. Для подключения из Linux используете команду:
ssh -p 22 admin@192.168.1.90
где, admin – имя локального пользователя Windows, под которым вы хотите подключиться
192.168.1.90 – ip адрес вашего компьютера с Windows 10
После этого откроется окно командной строки Windows.
Совет. Чтобы вместо оболочки cmd.exe при подключении к Windows 10 через SSH запускалась консоль PoweShell, нужно выполнить команду:
New-ItemProperty -Path "HKLM:\SOFTWARE\OpenSSH" -Name DefaultShell -Value "C:\Windows\System32\WindowsPowerShell\v1.0\powershell.exe" -PropertyType String –Force
Так вы измените оболочку, которая стартует через OpenSSH. Теперь при подключении к Windows по SSH у вас будет сразу открываться консоль PowerShell вместо командной строки cmd.exe.
Если вы хотите использовать key-based ssh authentification вместо парольной аутентификации, нужно на вашем клиенте сгенерировать ключ с помощью ssh-keygen.exe.
Затем содержимое файла id_rsa.pub нужно скопировать в файл c:\users\admin\.ssh\authorized_keys в Windows 10.
После этого вы сможете подключаться с вашего Linux клиента к Windows 10 без пароля. Используйте команду:
ssh -l admin@192.168.1.90
Вы можете настроить различные параметры OpenSSH сервера в Windows с помощью конфигурационного файла %programdata%\ssh\sshd_config
Например, вы можете отключить аутентификацию по паролю и разрешить вход только по ключу:
PubkeyAuthentication yes
PasswordAuthentication no