
How to use Windows Explorer to access remote file over SSH
What do you need
- WSL2 with Ubuntu installed on Windows 10 OS. I have Ubuntu 20.04 installed but I believe any other Linux distros may work the same.
How to
-
Open Wsl2 terminal create mount folder in home directory. I created a folder name “~/sshfs”. (Folder in Windows’ host doesn’t work in my experiment)
-
Open /etc/fuse.conf. Uncomment the following line.
-
Mount the folder using
sshfs -o allow_other,default_permissions serverUser@serverAddress:/home/folderToMount ~/sshfs -
cd to the folder and open Windows Explorer using the command
-
Enjoy Window’s gui over Linux Server.
Learn to leverage SSH Filesystem (SSHFS) on Microsoft Windows devices with this comprehensive guide. While our previous blog covered SSHFS usage on MacOS, this article shifts the spotlight to Windows. Discover the power of SSHFS for seamlessly mounting remote drives from Windows, Linux machines, and top cloud platforms like Amazon Web Services (AWS), Microsoft Azure, and Google Cloud. With SSHFS, data transmission occurs via the secure SSH protocol, utilizing TCP connection over port 22 to ensure dependable and efficient data transfer. Elevate your cross-device and cross-cloud file management with SSHFS.
Introduction
SSHFS uses the SSH protocol to mount a filesystem over SSH. This method is a quick and easy to get a filesystem up and running since most modern computers have SSH enabled by default. In order to use SSHFS on Microsoft Windows we are going to use SSHFS-Win which is an SSHFS port to Windows which uses Cygwin for the POSIX environment and WinFsp for FUSE functionality.
Installation
In order to use SSHFS on Windows we need to install the following packages:
-
WinFsp
-
SSHFS-Win
We can use the Windows Package Manager (winget) to easily install both packages from the Windows Terminal.
If you are unsure if you have the Windows Package Manager installed I have a blog post that goes over the verification, installation, and usage of winget. Before we install these packages let’s learn more about them using the winget show command after which we can use winget install.
WinFsp
WinFsp is a tool that allows developers and software engineers to to write their own file systems (Windows drives) as user mode programs and without Windows kernel programming knowledge. WinFsp is similar to FUSE (Filesystem in Userspace) for Linux and other UNIX-like systems.
winget show -e --id "WinFsp.WinFsp"
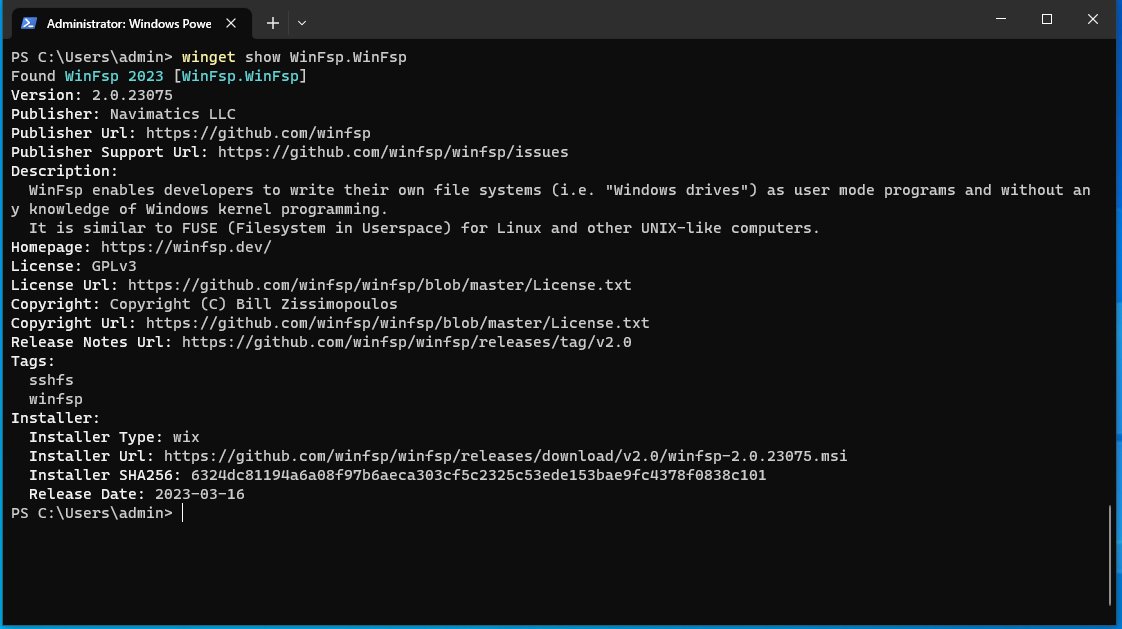
winget show WinFsp.WinFsp output
We can install the WinFsp.WinFsp package using the winget install command.
winget install -e --id "WinFsp.WinFsp"

winget install WinFsp.WinFsp output
Once WinFsp is installed we can proceed to installing SSHFS-Win.
SSHFS-Win
SSHFS-Win is a port of SSHFS to Windows as we learned in the introduction SSHFS-Win uses Cygwin and WinFsp. Let’s inspect the sshfs-win package using the winget show command.

winget show SSHFS-Win.SSHFS-Win output
We can install the SSHFS-Win.SSHFS-Win package using the winget install command.
winget install -e --id "SSHFS-Win.SSHFS-Win"

winget install SSHFS-Win.SSHFS-Win output
Once we’ve installed the WinFsp and SSHFS-Win packages we can proceed to use SSHFS to mount an external drive over SSH.
Mount an SSHFS Drive on Windows
Mounting an SSHFS drive on Windows is as simple as mapping a drive using Windows Explorer or a PowerShell terminal.
Adding an SSHFS Drive with Windows Explorer
In order to mount an SSHFS drive through Windows Explorer open Windows Explorer and right click This PC > Map network drive

Select This PC > Map network drive in Windows Explorer
After this a Windows dialog will appear, in this window we need to specify the Drive to mount to as well as the external SSHFS Folder. In order to do so we need the username, host, and remote directory to mount.

Specify the Drive & remote SSHFS Folder to mount
We may be asked to provide a password when connecting to the remote machine.

Windows Security password prompt when connecting
Once successfully mounted we’ll be able to see the newly mounted drive in Windows Explorer.

Mounted SSHFS drive in Windows Explorer
We have just successfully demonstrated mounting an SSHFS Drive using Windows Explorer, this drive is mounted over an SSH connection, awesome!
Adding an SSHFS Drive with PowerShell
In addition to mounting an SSHFS drive with Windows Explorer we can use do so through a PowerShell terminal with the net use command.
net use X: \\sshfs\gothburz@172.16.186.163/sshfs
Be sure to change the username@host/path string to correspond with your own environment.
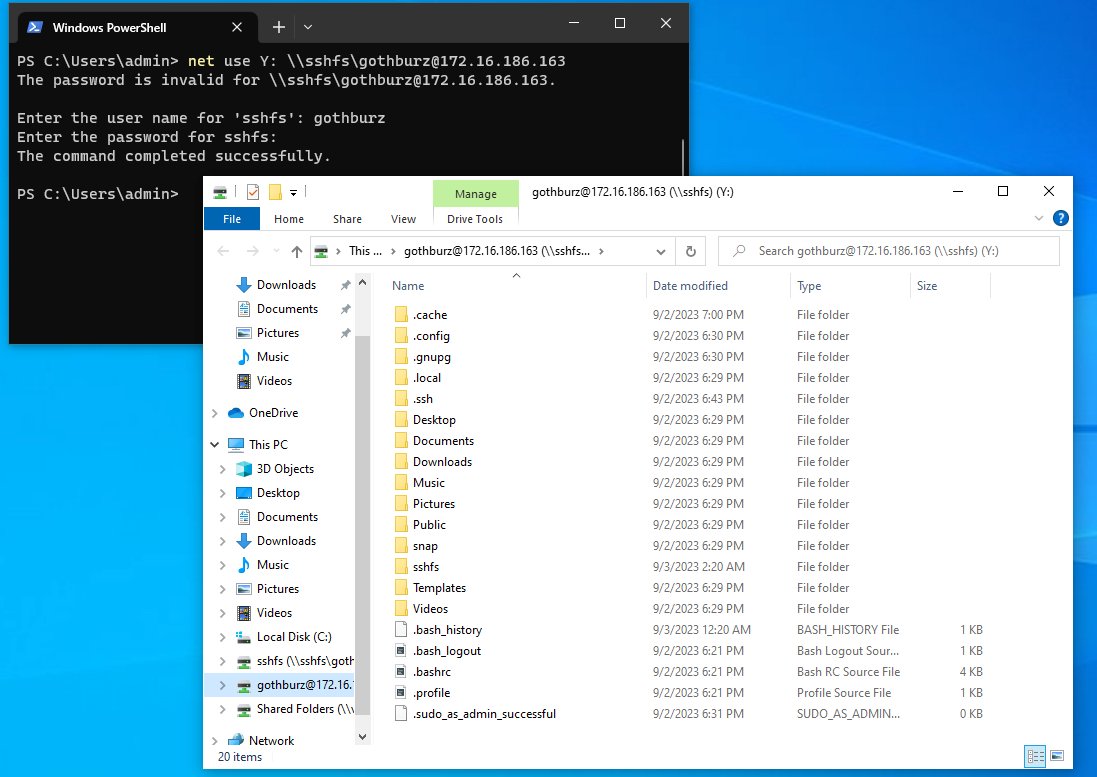
Mounting an SSHFS drive using the net use command

Confirming SSHFS drive mount with the ls command
When using the net use command to mount an SSHFS drive, you may be asked to enter a password to authenticate to the remote host. Once successfully mounted you’ll see a new Windows Explorer pop up with your newly mounted drive, fantastic!
If you you’d like to unmount the drive with net use you can use the following command along with the drive letter.

Using net use to delete a drive
Conclusion
In conclusion, this comprehensive guide highlights the usage of the SSH Filesystem (SSHFS) on Microsoft Windows devices. While our previous blog delved into SSHFS usage on MacOS, this article has provided a detailed exploration of leveraging SSHFS on Windows systems. By harnessing the capabilities of SSHFS, users can experience the seamless and convenient mounting of remote drives from a variety of sources, including Windows, Linux machines, and leading cloud platforms such as Amazon Web Services (AWS), Microsoft Azure, and Google Cloud.
I hope you found this article insightful, if you need any help using SSHFS on Windows feel free to message me on social media and see you in the next post. 
We first came across Swish earlier this year but it failed to work on Windows 7. The latest version (0.4.1) released recently, however, works seamlessly with Windows 7 32-bit OS. So what is Swish? It is basically a Windows Explorer extension through which you can access your remote files over SSH /SFTP connection.
We all know that, by default, mapping a network location in Windows Explorer uses FTP connection which is not secure. Swish wants to change all that by making connections more secure.
Once installed, you will find the Swish icon in “My Computer”. Double-click this icon to view all secure connections.

To make a new connection, click “Add SFTP Connection” and a new dialog window will appear where you have to specify the details of the computer and account you would like to connect to. Don’t forget to enter the path, if you want root access, enter “/”.

Now open this newly created connection and it will ask you to verify the host key before asking for the password. Once the correct password is specified, you will be logged in instantly and can start managing your remote files just like you manage your local ones.
Swish integrates seamlessly in Windows Explorer, supporting drag & drop transfer, and complete file management (renaming, deleting, etc).

64-bit OS is not supported at the moment. Testing was done on Windows 7 32-bit system.
Download Swish (Product page only lists version 0.4.0, get latest 0.4.1 from here)

Table of Contents
PowerShell Remote Connection with SSH
The built-in SSH client appeared in Windows 10 and Windows Server 2019. It can be used to securely connect to Linux/UNIX servers, VMWare ESXi hosts and other devices instead of Putty. The native Windows SSH client is based on the OpenSSH port and is preinstalled in Windows starting from Windows 10 build 1809.
We can use SSH in PowerShell to establish a remote connection to another computer or server. This can be between Windows computers or Windows-Linux and vice versa.
The most common way to use SSH in PowerShell is as an SSH Client. Assuming that you keep your Windows up-to-date you should have SSH enabled by default. You can simply check it by opening PowerShell and type the following command:
# type ssh and press enter
ssh

# Result:
usage: ssh [-46AaCfGgKkMNnqsTtVvXxYy] [-B bind_interface]
           [-b bind_address] [-c cipher_spec] [-D [bind_address:]port]
           [-E log_file] [-e escape_char] [-F configfile] [-I pkcs11]
           [-i identity_file] [-J [user@]host[:port]] [-L address]
           [-l login_name] [-m mac_spec] [-O ctl_cmd] [-o option] [-p port]
           [-Q query_option] [-R address] [-S ctl_path] [-W host:port]
           [-w local_tun[:remote_tun]] destination [command]
You can check the OpenSSH client is installed or not:
Get-WindowsCapability -Online | ? Name -like 'OpenSSH.Client*'# Output
Name : OpenSSH.Client~~~~0.0.1.0
State : InstalledIf not (State: Not Present), you can install it using the following PowerShell command:
Add-WindowsCapability -Online -Name OpenSSH.Client*Password-based authentication
With PowerShell open you can connect to a remote server or network device with a single command:
ssh <username>@<host_ip_address>When you connect to a machine using SSH. For the first time you will need to accept the host’s key. Just type yes then hit Enter.
PS C:\> ssh [email protected]

The authenticity of host '10.10.6.22 (10.10.6.22)' can't be established.
ED25519 key fingerprint is SHA256:DFhYvYIS0O+SNI53un5Cbn4WB3YbxP6USGKbSp/XPEA.
This key is not known by any other names
Are you sure you want to continue connecting (yes/no/[fingerprint])? yes
Warning: Permanently added '10.10.6.22' (ED25519) to the list of known hosts.

[email protected]'s password:
Welcome to Ubuntu 22.04.1 LTS (GNU/Linux 6.2.0-33-generic x86_64)

 * Documentation:  https://help.ubuntu.com
 * Management:     https://landscape.canonical.com
 * Support:        https://ubuntu.com/advantage

206 updates can be applied immediately.
1 of these updates is a standard security update.
To see these additional updates run: apt list --upgradable

Last login: Sun Oct  1 04:19:29 2023 from 10.10.5.52
leo@ub22:~$
If you have SSH running on a different port than the default port 22, then you can change the port number with the -p flag:
ssh <username>@<host_ip_address> -P <port_number>

#For example
ssh [email protected] -p 2222
Key-based authentication
Alternatively, we can authenticate using public-private keys. The advantage of this method :
- More secure because using keys instead of clear text password.
- Supports multiple encryption protocols.
- Secure private keys using passphrase.
- Automation authentication flow with ssh agent to manage all private keys.
Create a SSH Key Pair for SSH Authentication
1. First, launch a PowerShell window.
2. Inside PowerShell, run the ssh-keygen command. The -t parameter tells OpenSSH what type of SSH key should be created. Here we go with the rsa type.
Generating public/private rsa key pair.
Enter file in which to save the key (C:\Users\admin/.ssh/id_rsa):
Enter passphrase (empty for no passphrase):
Enter same passphrase again:
Your identification has been saved in C:\Users\admin/.ssh/id_rsa
Your public key has been saved in C:\Users\admin/.ssh/id_rsa.pub
The key fingerprint is:
SHA256:VW5ljf///nCFNw6ts450VISE/F+hx9dlgvtY9xZW1E0 admin@win11
The key's randomart image is:
+---[RSA 3072]----+
|          . +o+*E|
|           =.++.B|
|          . +.o==|
|         . ..o+**|
|        S    *=+O|
|            o =o*|
|           . +.oo|
|          . o oo.|
|           ..o .*|
+----[SHA256]-----+
3. A new folder named .ssh will be created within your user’s home folder (C:\Users<username>\.ssh). Two files have been created inside that folder.
The difference between the two is the file extension (which is not shown by default in Windows Explorer).
- The id_rsa file without extension is the private key – which you should guard like your own wallet. It can also be password-protected (as prompted in the ssh-keygen command above).
- The id_rsa.pub file is the public counterpart of your private key. It needs to be installed on the target server(s) where you want to login using SSH.
Launch SSH agent (optional)
Note
Note: When creating a key pair, if you don’t use keyphrase to protect the private key. You can skip this section.
A SSH agent is a small program which runs in the background and loads your private key with the password into memory. This allows to use the ssh command without always having to enter the passphrase again.
You can check whether the service is already running or not:
PS C:\> Get-Service ssh-agent

Status   Name               DisplayName
------   ----               -----------
Stopped  ssh-agent          OpenSSH Authentication Agent
Then enter the following commands in the administrator PowerShell window:
Get-Service ssh-agent | Set-Service -StartupType Manual
Start-Service ssh-agent
Get-Service ssh-agent
Status Name DisplayName
------ ---- -----------
Running ssh-agent OpenSSH Authentication AgentThe ssh-agent is now running. use ssh-add to load your own private key into the SSH agent:
ssh-add $env:USERPROFILE\.ssh\id_rsa#Output
Identity added: C:\Users\admin\.ssh\id_rsa (admin@win11)Install the public key on the remote server
1. Remember the mentioned public key? Now it is time to look at the contents. Using the Windows Explorer, navigate to your .ssh folder. Or you can use Get-Content cmdlet to get its content.
Get-Content $env:USERPROFILE\.ssh\id_rsa.pub2. Open the id_rsa.pub file with a text editor. Notepad will do. This shows the content of the public key, which is a long line of a text:
ssh-rsa AAAAB3NzaC1yc2EAAAADAQABAAABgQC5786CyQZizFqWs/YLCOFcougR1wZBG2yHFjswSACeJMO8DV3lGPjmOXMLf5z2QQy1mZHUW7t9J7EWzDj54lr7VNd+CwW2Jo0inRAP3+IzxcELwYBwJmfSj+KbWMsJF7Q8zden4t8G1jlFXE1Md8O3JUH4MyM4W7Ze9QmOy1fp8OftCyx4LPTWgbC1eqtwmck5AZgrfa8039E61LH+dKapcvgj5DgAE8Kco8zg/2RZBGrRWfa8FANr3fcfdaFN0mH3xQpcgO8/EfJhzTDmBVlFa2I5pkAFHHMvjcSWzK9fUzTIaPYWm+nNTQl/KSuW1kZi3sVfzcfCXEkUrCKAqc1OOQK8nvCm4578yCpb0gS6ge/VLGp5ZpUeOsvtN0JckGT6MBSr7VfheVABueflCm/hj9Nmouvf/oQfdjs4g+too99+ZJpIv6IWJHY4Kd2HettwnvwCam97KaEKEvIpyTQTjMhnQXPCKsPAk2sqH1VM9CwfyPfDoHZv4XqBLK3j+QM= admin@win113. SSH to the remote server. This time, you still need to use password authentication.
4. Create a new file named ~/.ssh/authorized_keys on the remote server using your favorite text editor.
mkdir ~/.ssh
nano ~/.ssh/authorized_keys
Note
Note: ~ stands for user’s home folder
5. Copy content of the public key from notepad to the newly created file.
6. Check then enable public key Authentication if it not enabled yet. The settings for OpenSSH server is located in /etc/ssh/sshd_config.
sudo nano /etc/ssh/sshd_config7. Finally, restart the SSH service.
sudo systemctl resrart sshConnect to a remote SSH server
Now that we have created a key, enabled ssh agent and placed the public key on the target server, we can initiate a ssh connection.
В Windows 10 и Windows Server 2019 появился встроенный SSH клиент, который вы можете использовать для подключения к *Nix серверам, ESXi хостам и другим устройствам по защищенному протоколу, вместо Putty, MTPuTTY или других сторонних SSH клиентов. Встроенный SSH клиент Windows основан на порте OpenSSH и предустановлен в ОС, начиная с Windows 10 1809.
Содержание:
- Установка клиента OpenSSH в Windows 10
- Как использовать SSH клиенте в Windows 10?
- SCP: копирование файлов из/в Windows через SSH
Установка клиента OpenSSH в Windows 10
Клиент OpenSSH входит в состав Features on Demand Windows 10 (как и RSAT). Клиент SSH установлен по умолчанию в Windows Server 2019 и Windows 10 1809 и более новых билдах.
Проверьте, что SSH клиент установлен:
Get-WindowsCapability -Online | ? Name -like 'OpenSSH.Client*'

В нашем примере клиент OpenSSH установлен (статус: State: Installed).
Если SSH клиент отсутствует (State: Not Present), его можно установить:
- С помощью команды PowerShell:
Add-WindowsCapability -Online -Name OpenSSH.Client* - С помощью DISM:
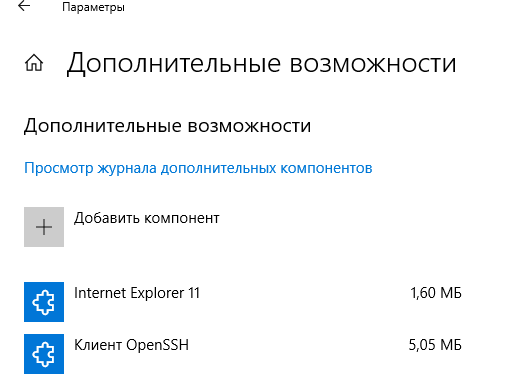
dism /Online /Add-Capability /CapabilityName:OpenSSH.Client~~~~0.0.1.0 - Через Параметры -> Приложения -> Дополнительные возможности -> Добавить компонент. Найдите в списке Клиент OpenSSH и нажмите кнопку Установить.
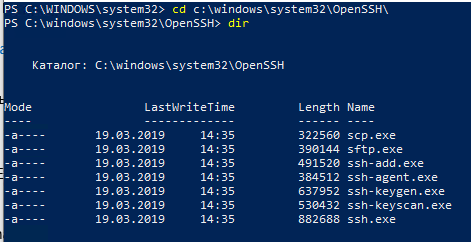
]Бинарные файлы OpenSSH находятся в каталоге c:\windows\system32\OpenSSH\.
- ssh.exe – это исполняемый файл клиента SSH;
- scp.exe – утилита для копирования файлов в SSH сессии;
- ssh-keygen.exe – утилита для генерации ключей аутентификации;
- ssh-agent.exe – используется для управления ключами;
- ssh-add.exe – добавление ключа в базу ssh-агента.
Вы можете установить OpenSSH и в предыдущих версиях Windows – просто скачайте и установите Win32-OpenSSH с GitHub (есть пример в статье “Настройка SSH FTP в Windows”).
Как использовать SSH клиенте в Windows 10?
Чтобы запустить SSH клиент, запустите командную строку
PowerShell
или
cmd.exe
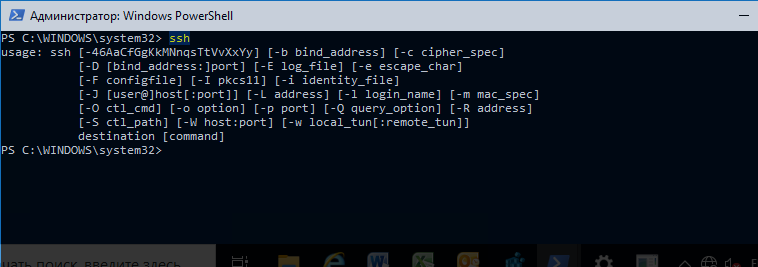
. Выведите доступные параметры и синтаксис утилиты ssh.exe, набрав команду:
ssh
usage: ssh [-46AaCfGgKkMNnqsTtVvXxYy] [-b bind_address] [-c cipher_spec]
[-D [bind_address:]port] [-E log_file] [-e escape_char]
[-F configfile] [-I pkcs11] [-i identity_file]
[-J [user@]host[:port]] [-L address] [-l login_name] [-m mac_spec]
[-O ctl_cmd] [-o option] [-p port] [-Q query_option] [-R address]
[-S ctl_path] [-W host:port] [-w local_tun[:remote_tun]]
destination [command]
Для подключения к удаленному серверу по SSH используется команда:
ssh username@host
Если SSH сервер запущен на нестандартном порту, отличном от TCP/22, можно указать номер порта:
ssh username@host -p port
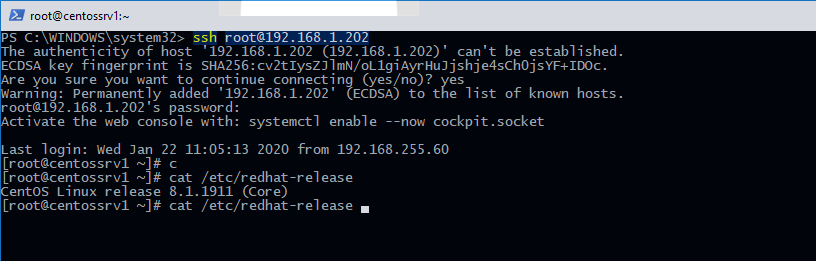
Например, чтобы подключиться к Linux хосту с IP адресом 192.168.1.202 под root, выполните:
ssh [email protected]
При первом подключении появится запрос на добавление ключа хоста в доверенные, наберите yes -> Enter (при этом отпечаток ключа хоста добавляется в файл C:\Users\username\.ssh\known_hosts).
Затем появится запрос пароля указанной учетной записи, укажите пароль root, после чего должна открытся консоль удаленного Linux сервера (в моем примере на удаленном сервере установлен CentOS 8).
С помощью SSH вы можете подключаться не только к *Nix подобным ОС, но и к Windows. В одной из предыдущих статей мы показали, как настроить OpenSSH сервер на Windows 10 и подключиться к нему с другого компьютера Windows с помощью SSH клиента.
Если вы используете SSH аутентификацию по RSA ключам (см. пример с настройкой SSH аутентификации по ключам в Windows), вы можете указать путь к файлу с закрытым ключом в клиенте SSH так:
ssh [email protected] -i "C:\Users\username\.ssh\id_rsa"
Также вы можете добавить ваш закрытый ключ в SSH-Agent. Сначала нужно включить службу ssh-agent и настроить ее автозапуск:
set-service ssh-agent StartupType ‘Automatic’
Start-Service ssh-agent
Добавим ваш закрытый ключ в базу ssh-agent:
ssh-add "C:\Users\username\.ssh\id_rsa"
Теперь вы можете подключиться к серверу по SSH без указания пути к RSA ключу, он будет использоваться автоматически. Пароль для подключения не запрашивается (если только вы не защитили ваш RSA ключ отдельным паролем):
ssh [email protected]
Еще несколько полезных аргументов SSH:
-
-C
– сжимать трафик между клиентом и сервером (полезно на медленных и нестабильных подключениях); -
-v
– вывод подробной информации обо всех действия клиента ssh; -
-R
/
-L
– можно использовать для проброса портов через SSH туннель.
SCP: копирование файлов из/в Windows через SSH
С помощью утилиты scp.exe, которая входит в состав пакета клиента SSH, вы можете скопировать файл с вашего компьютера на SSH сервер:
scp.exe "E:\ISO\CentOS-8.1.1911-x86_64.iso" [email protected]:/home

Можно рекурсивно скопировать все содержимое каталога:
scp -r E:\ISO\ [email protected]:/home
И наоборот, вы можете скопировать файл с удаленного сервера на ваш компьютер:
scp.exe [email protected]:/home/CentOS-8.1.1911-x86_64.iso e:\tmp
Если вы настроите аутентификацию по RSA ключам, то при копировании файлов не будет появляться запрос на ввод пароля для подключения к SSH серверу. Это удобно, когда вам нужно настроить автоматическое копирование файлов по расписанию.
Итак, теперь вы можете прямо из Windows 10 подключаться к SSH серверам, копировать файлы с помощью scp без установки сторонних приложений и утилит.