
Online document publishing is dominated by the PDF format. Regardless of what type of file you download; a brochure, a magazine, a report, a prospectus, chances are high that it will be in the PDF format. A PDF document will look the same no matter what device or app you view it on and it will print the same no matter what device you print it from.
PDF isn’t the only format that does this. There is also the XPS file format.
XPS files
Microsoft developed the XPS file format to rival PDF. The format didn’t quite take off but that’s not to say you will never run into an XPS file ever. To create an XPS file, you need a document editor that can save to this format. Microsoft Office apps can all save to the XPS format but they cannot read it once the file has been created. Neither can any modern browser but you will find that some PDF readers support the format.
XPS viewer – Sumatra PDF reader
A good PDF reader will support the XPS format. There are lots of great third-party PDF readers that you can try. We suggest you give Sumatra PDF Reader a try. It’s free, has an installable and portable version, and it supports the XPS file format.
- Download Sumatra PDF reader (select any version of your choice).
- Install and run Sumatra PDF reader.
- Drag & drop the XPS file onto the app and it will open.
XPS viewer – Google Drive
If you do not want to install an app to view an XPS file, go with Google Drive. You can upload the XPS file to Google drive and it will display its contents.
- Visit Google Drive and sign in with your account.
- Click the New button and select File Upload.
- Select the XPS file and wait for it to upload.
- Double-click to open the file in Google Drive and it will open.
XPS viewer – Windows 10 stock app
Windows 10 used to come with its own XPS viewer app. Unfortunately, Microsoft decided to discontinue it. Newer versions of Windows 10 won’t have the app installed out of the box but you can still install it.
- Open the Settings app with the Win+I keyboard shortcut.
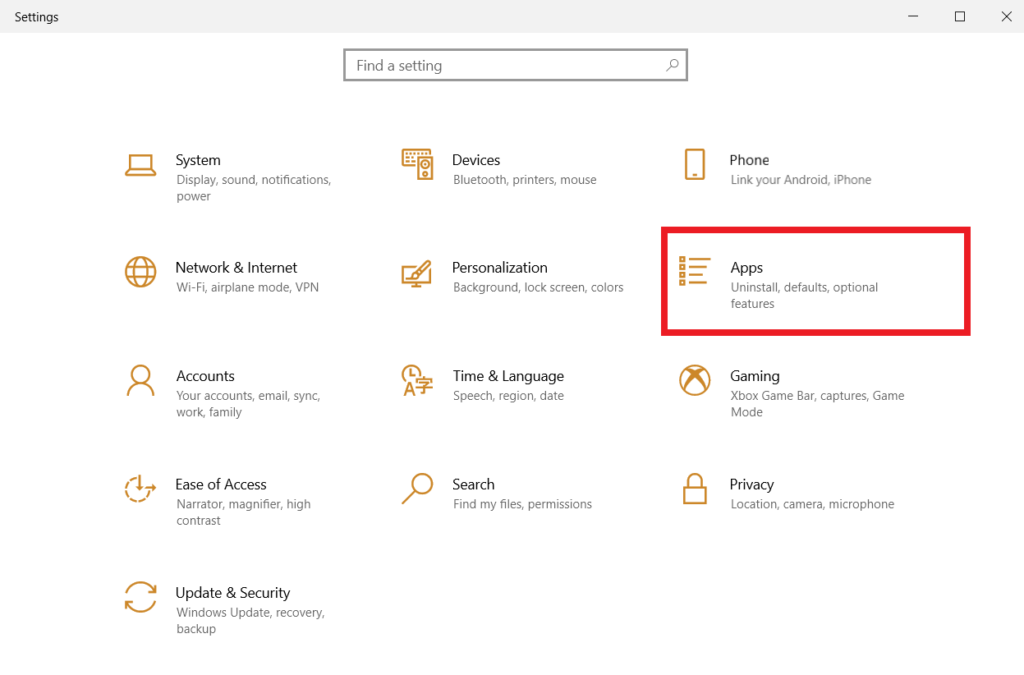
- Go to Apps.
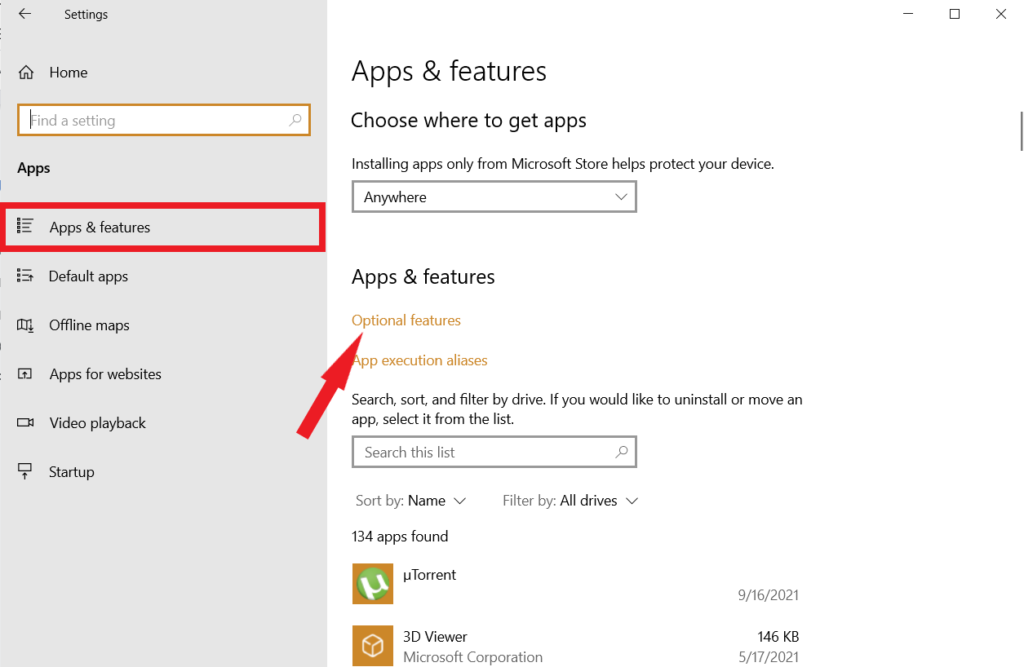
- Select the Apps & Features tab.
- Click Optional features.
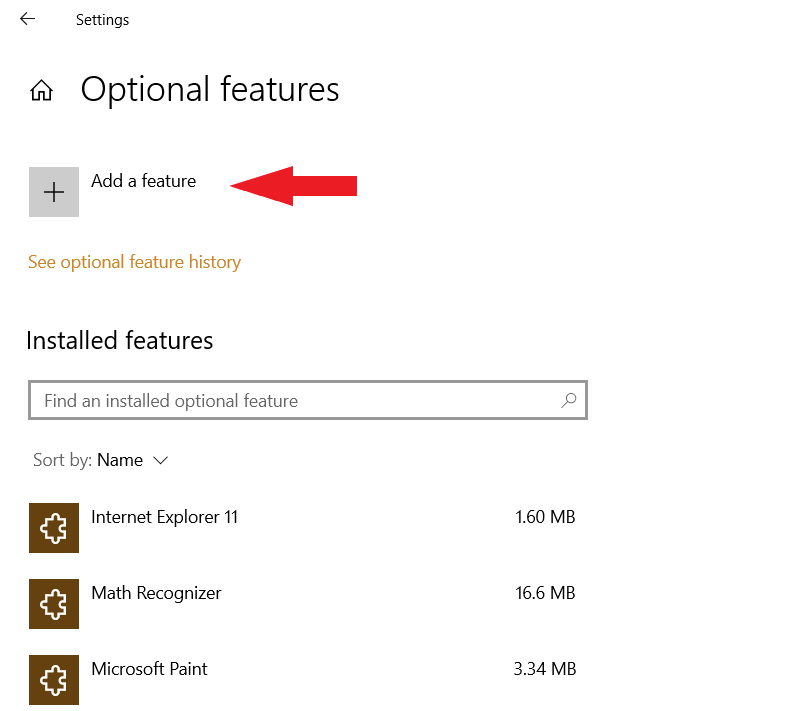
- Click Add a feature.
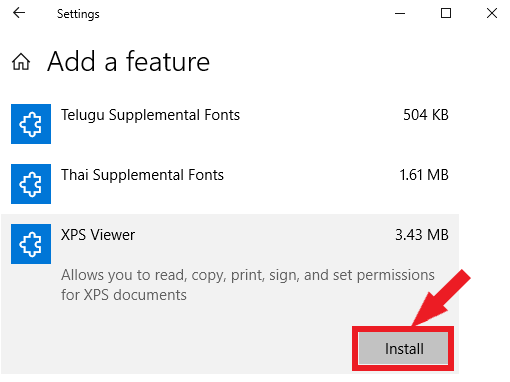
- Select XPS viewer from the list.
- Select Install (installation takes some time).
- Once installed, right-click an XPS file and select Open with.
- Select XPS viewer from the context menu to open the file.
Conclusion
XPS doesn’t enjoy wide support, not even with Microsoft’s own products. Unless this changes, the format is unlikely to become more common. With our tests, we found that the stock Windows 10 XPS viewer was often unable to open certain types of XPS files, even those that were created in Microsoft Word. Sumatra PDF reader on the other hand was able to handle the format without issue, regardless of what the document contained. If you’re looking to open an XPS file, and you don’t want to use the suggested apps here, look for a good PDF viewer and it should be able to do the job.

Fatima Wahab
Fatima has been writing for AddictiveTips for six years. She began as a junior writer and has been working as the Editor in Chief since 2014.
Fatima gets an adrenaline rush from figuring out how technology works, and how to manipulate it. A well-designed app, something that solves a common everyday problem and looks
Wondering how to enable XPS Viewer on Windows 10?
XPS is a file format similar to PDF that Microsoft released with the Windows Vista update in 2007. There wasn’t a big difference between the two in terms of features and interface, except that PDF offers enhanced portability.
Unfortunately, not many people were fans of XPS, and the company eventually abandoned the format. With the Windows 10 version 1803 update, users could no longer view XPS files unless the computer was upgraded from version 1709.
So, if you’ve set up a new device or performed a clean installation, XPS Viewer would not be available on your computer anymore. Lucky for you, we’ve compiled a list of methods to reinstall or enable the app even if Windows no longer supports it.
So, let’s get to it right away!
1. Enable XPS Viewer on Windows 10 via Settings.
You need dedicated viewing software to read, print, or change the permissions of any file format. Since the latest system update has disabled the XPS Viewer, you’d have to reinstall it to view such files on your computer again.
Here’s how you can do that using Windows Settings:
- First, press Windows+i on your keyboard or type ’settings’ on the search bar to enter Settings.
- Now, from the multiple options appearing on your screen, select Apps.
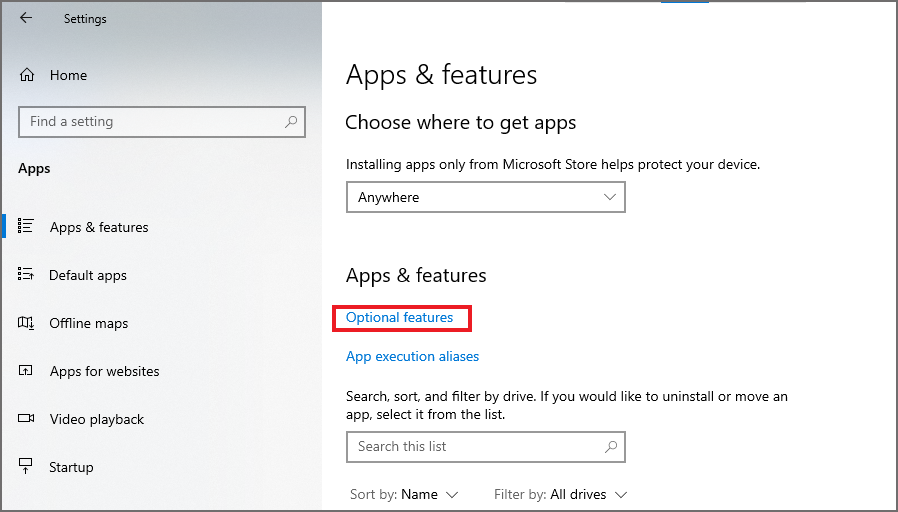
- From the panel on the left side, click on Apps & features tab.
- From there, go to Optional Features under Apps & features on the right panel.
- Then, you’ll come across a list of features already enabled on your computer with an Add a feature option at the top-left corner of the window. Click on it.
- Use the search bar or scroll down to find XPS Viewer, then select it.
- Finally, click the Install button, and your computer will start downloading the feature.
Once downloaded, you should be able to open an XPS or OXPS file easily.
2. Use Command Prompt To Enable XPS Viewer.
Sometimes, users are unable to find the XPS Viewer listed when scrolling through the list of features in the Settings. Other times, the feature fails to install on your computer.
Whatever the reason, you don’t have to worry. Another method to enable XPS Viewer on Windows 10 is done through the Command Prompt. To do so, you’ll need to run the software as an administrator.
Here are the steps you need to follow:
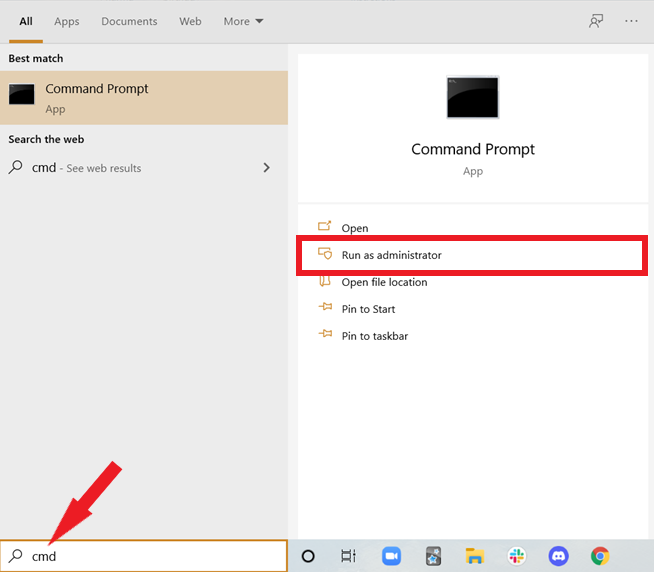
- To begin, open the Start menu by clicking on the Windows icon located at the bottom-left of the screen or by pressing the Windows key on your keyboard.
- Now, type cmd in the search bar.
- Then, click on the Run as administrator option to run the app under full rights.
- When the Command Prompt window opens, type the following command and press Enter.
Dism /Online /Add-Capability /CapabilityName:XPS.Viewer~~~~0.0.1.0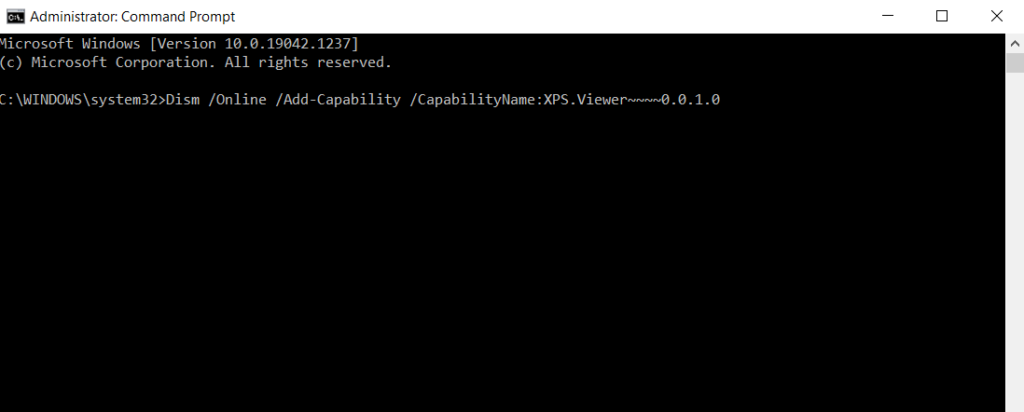
After that, XPS Viewer should get installed on your computer.
3. Use Windows Powershell To Enable XPS Viewer.
If you’re an old Windows user, you must be familiar with Windows PowerShell. It was first released in 2006 and is quite similar to Command Prompt. You can use this automation software to enable XPS Viewer.
Simply input the required command in the associated scripting language to perform the task.
These are the steps you should follow:
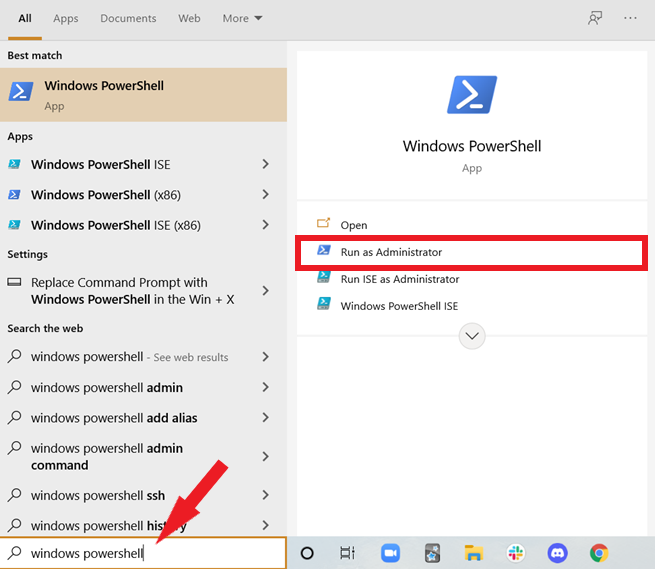
- Start by pressing Windows key+i or directly click on the Search Bar at the bottom left of the screen.
- Then, type Microsoft Powershell so that a list of options appears on the right panel.
- From there, click on Run as administrator since you need special permissions to perform tasks.
- When the app opens and you come across the PowerShell console, type the following command:
dism / Online / Add-Capability /CapabilityName:XPS.Viewer~~~~0.0.1.0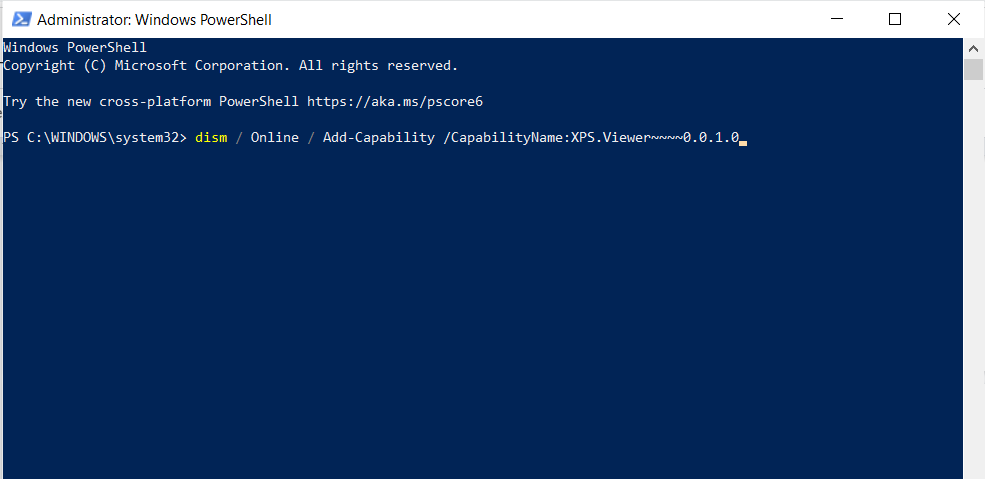
- Finally, press Enter to begin the installation.
XPS Viewer will then be downloaded on your computer and can easily be accessed on the Desktop.
4. Enable XPS Viewer From Windows Update.
If your computer has Windows 10 Pro or Windows Enterprise, the method to install XPS Viewer can be pretty different. Moreover, you’ll need to alter a few more settings in the Group Policy Editor if the computer you’re using belongs to a domain.
This is what you need to do:
- To start, type ’Run’ in the search box and click Open. You can also press the Windows key and R simultaneously as a shortcut.
- When the Run command box opens, type gpedit.msc and click OK.

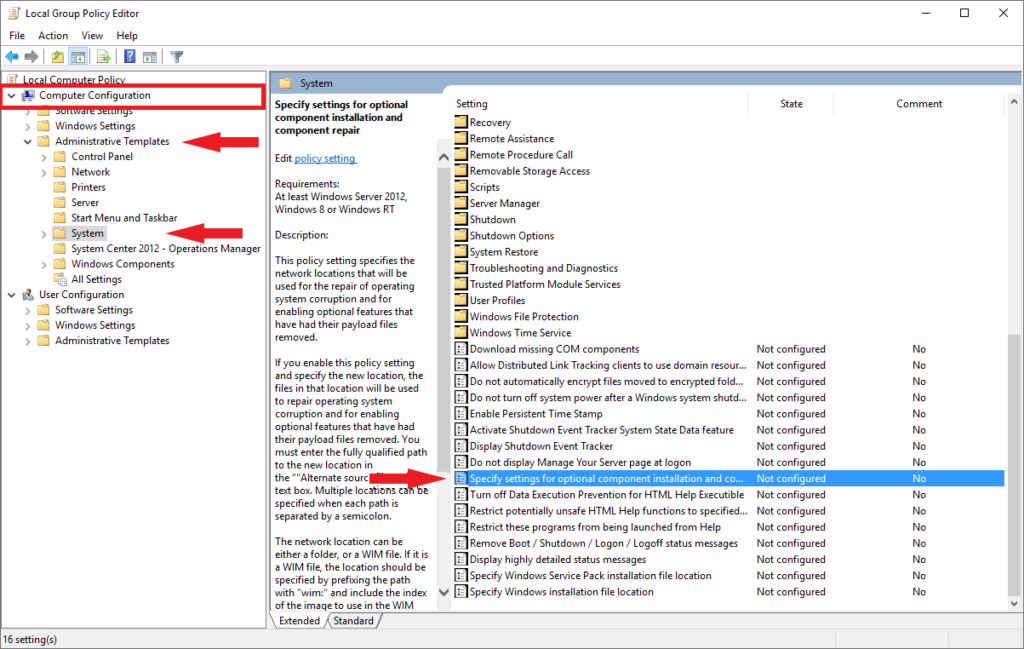
- Scroll down the left pane and click on the drop-down arrow of Computer Configuration.
- Now, click on Administrative Templates and then on System.
- Then, select Specify settings for optional component installation and component repair on the right pane.
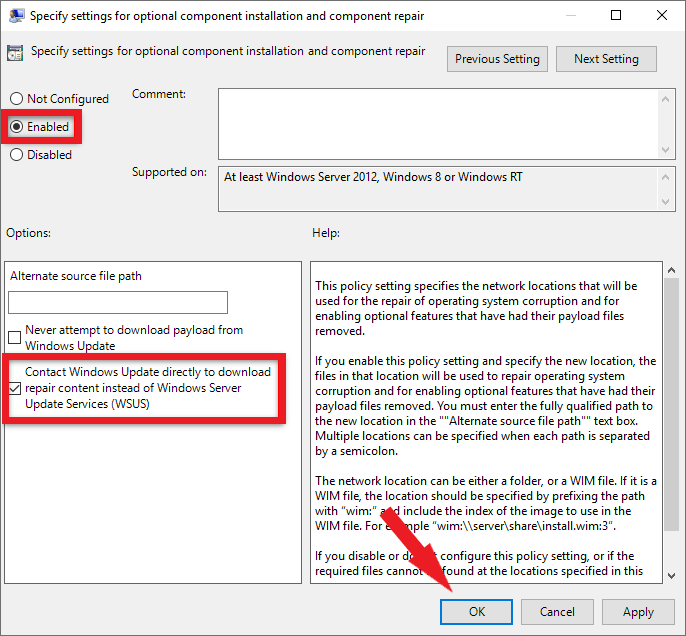
- In the next window, select Enabled and check the box that says Download repair content and optional features directly from Windows Update instead of Windows Server Update Services (WSUS).
- Finally, click on Apply, then OK, and restart your computer.
You can then install the XPS Viewer like you would on any other computer with Windows 10.
5. Use Microsoft XPS Document Writer (MXDW).
Microsoft XPS Document Writer is a driver installed in Windows OS. You can use this to protect the XPS files’ content and print the documents even when Microsoft doesn’t support the format.
You need to enable the driver manually by following the steps below:
- First, type ’Control Panel’ in the search bar and click Open.
- Then, select Programs at the bottom-left of the window.
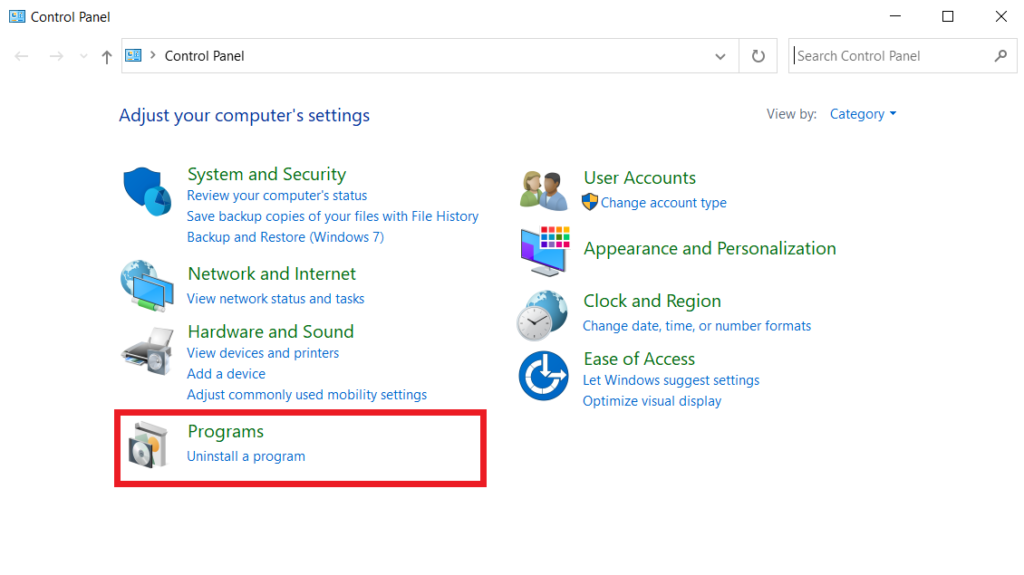
- From there, go to Programs and Features.
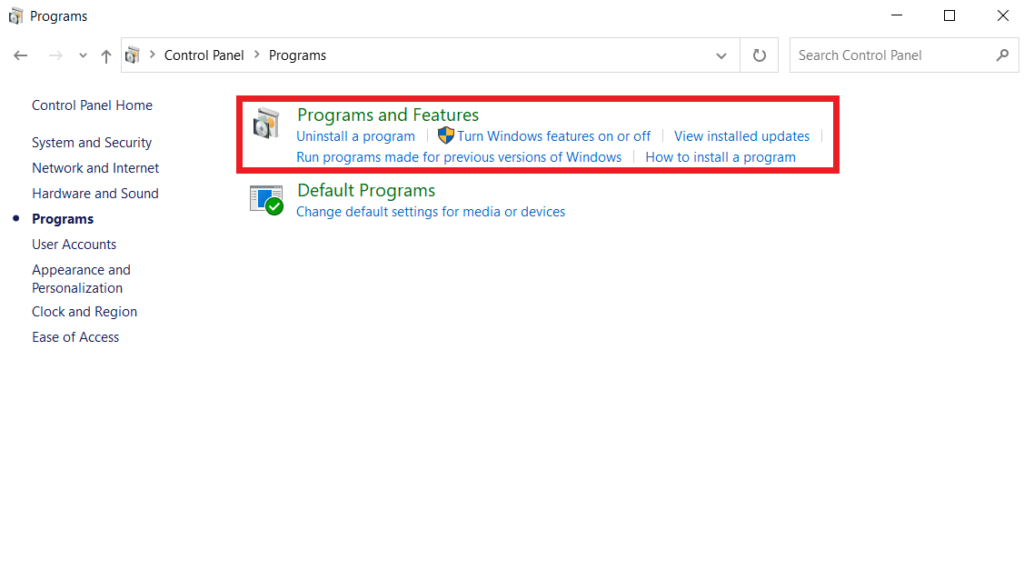
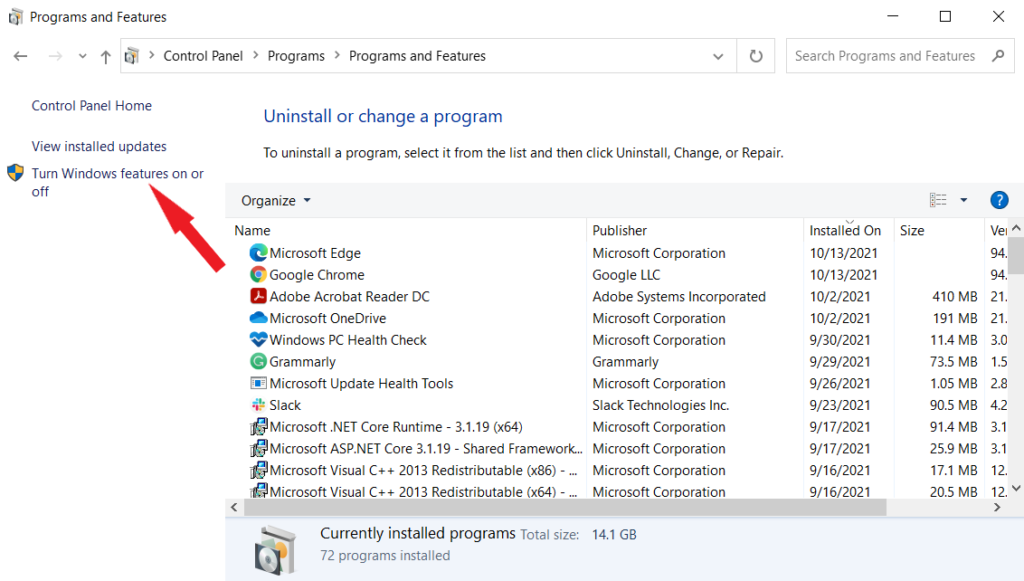
- Now, from the left pane, select Turn Windows Features on or off.
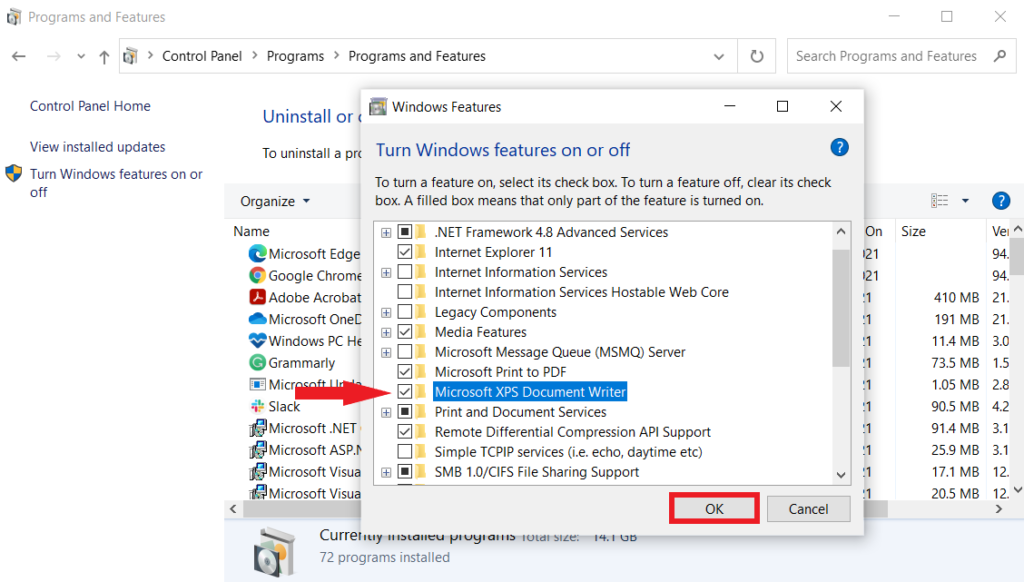
- Finally, a pop-up window will open. Scroll down and check the box next to Microsoft XPS Document Writer and click OK.
It will take only a couple of seconds for the MXDW to get installed. After that, a Print to XPS option will appear in print pages, and you can select it to save files in XPS format.
6. Use PDF Converter.
Although Microsoft no longer supports the XPS Viewer, you can still easily install it using one of the above methods. However, since there will be no more maintenance or updates on the program, it’s better to convert your XPS files to PDF format, so they remain readable even if the XPS Viewer crashes.
Here’s how to do it:
- First, right-click on the file you wish to convert and select Open with XPS Viewer.
- Then, click on the Printer icon at the top panel or press Ctrl+P on your keyboard.
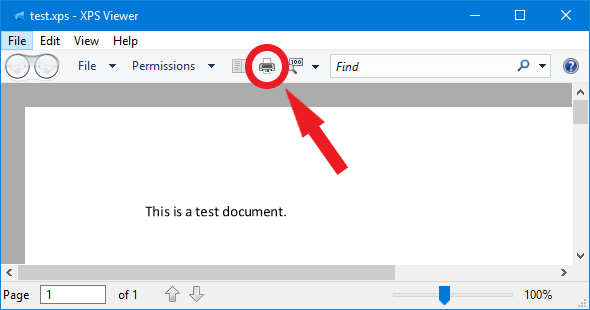
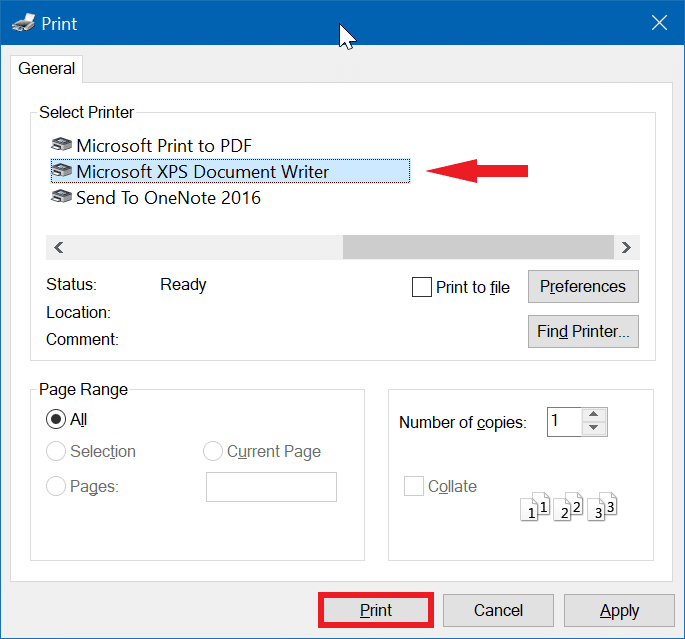
- A selection box will then appear on your screen. From there, in the General tab, go to Microsoft Print to PDF under Select Printer.
- Lastly, click the Print button.
This will convert the format of your XPS file to PDF. Repeat the steps to convert the remaining files on your computer.
There you have it! A complete guide on how to enable XPS Viewer on Windows 10. Hopefully, at least one of the methods has proven to be successful. If you still have any confusion, leave a comment down below, and we’ll do our best to help you through it.
If this guide helped you, please share it. 🙂
-
Aimen Choudhry is an architecture student who has always been fascinated by science. She now finds her therapy researching and writing about the latest technology and the issues that come alongside. Otherwise, you’ll find her playing video games, listening to music, or watching fantasy/sci-fi movies.
View all posts
The XPS file format was developed by Microsoft as opposed to the PDF file format. It is quite possible that many of you have encountered an XPS file that cannot be used, or even opened. For those who wish to create or use XPS documents, this post may prove useful for understanding what XPS is, what XPS Viewer is, and how to use it.
Table of Contents
You may have tried using an XML file, but are unable to open it since your operating system does not find a supporting application, and may see something like this:

Allow us to shed some light on what XPS is all about.
What is XPS file
XPS stands for XML Paper Specification. Microsoft developed this format in order to compete with Portable Document Format (PDF). However, it was not as popular as expected. The XML documents can contain regular text as well as additional information about the content, such as its layout and appearance.
The purpose behind the creation of XPS was to eliminate the use of paper in an attempt by Microsoft to go green.
An XPS file may have an extension .xps or .oxps (OpenXPS).
What is XPS Viewer
XPS Viewer is a free-to-use application by Microsoft for using and viewing XPS files and documents. It used to come preinstalled with Windows 10 up until version 1803 was released. Since it was not in demand, it was given as an optional application that users can install manually when and if required.
With XPS Viewer, you can save copies of a file, digitally sign them, manage permissions, and search through them. The application supports a number of file formats:
- .XPS
- .OXPS
Download and Install XPS Viewer on Windows 11/10
Installing the XPS Viewer on Windows 11 and 10 is pretty much the same; some layouts may be a bit different.
Here is how you can install XPS Viewer on Windows 11:
You have now successfully installed XPS Viewer.
How to use XPS Viewer
You can launch the application by searching for it in Windows Search, or the Start menu.

Alternatively, you can also type in xpsrchvw in Run or Command Prompt to launch XPS Viewer.
To open an XPS document, click on File from the top menu in the XPS Viewer, and click Open. You can then browse the saved XPS file and select it to open it in XPS Viewer.

Once a document is open, you can then save its copies, or change its permissions by clicking on the Permissions menu from the top, and then clicking Set permissions.

You can also convert an XPS file to PDF format. To do so, simply click on the Print button at the top of the app, and then select Print to PDF. Click OK to save the document as a PDF file.

Since XPS Viewer is a tiny application, it cannot do much of anything else, except for what we have already discussed.
How to remove XPS Viewer
If you are no longer in need of the XPS Viewer, you can just as easily remove it from your computer. Here is how:
- Open the Settings app, click App on the left, and then click Optional features on the right side of the window. Here, scroll down and click on XPS Viewer in the right-side pane. Once expanded, click Uninstall.

- The XPS Viewer app will then be immediately uninstalled. You can confirm this by running through the installed applications list on the Optional features page.

Microsoft XPS Document Writer (MXDW)
Microsoft XPS Document Writer is another hidden gem in both Windows 11 and 10. Similar to the method of creating a PDF document while printing and selecting the option Print to PDF, MXDW provides the same option, but for XPS.

This feature has to be enabled manually through Optional Features. To do so, type in appwiz.cpl in Run, and then click Turn Windows features on or off on the left.

In the pop-up window, scroll down and check the box next to “Microsoft XPS Document Writer,” then click Ok.

MXDW will now be installed in a few seconds. You should now be able to see the option to Print to XPS on the print pages, which you can select to save files in .xps format.
In case you8 ever feel like turning off the feature, simply uncheck the box next to “Microsoft XPS Document Writer” on the Windows Features page.
XPS Viewer alternatives
There are other methods available on the internet that can be used instead of XPS Viewer. Some are applications that can be installed, whilst others provide an online web view.
GroupDocs
GroupDocs is a quick and free online tool to help you view your XPS and OXPS files. All that is required is for you to drag and drop your file, and it will convert and display it for you.
To use GroupDocs, open their webpage in any browser and simply drop your file over the given area.

SumatraPDF
SumatraPDF is a downloadable application that can be used to view almost any document. This includes .xps, .oxps, and .pdf.

Google Drive
Google Drive is an excellent tool as it also supports XPS formatting. All you need to do is upload the file to Google Drive and you can then view it easily.
Open Google Drive, click New, and then click File Upload from the drop-down menu.

Now browse to upload the XPS file. Once uploaded, click on it to view it within the browser directly from Google Drive.

Verdict
Not many people use the XPS format anymore. However, there can be certain scenarios where you already have an XPS document but have no idea how to access its content.
We hope that this blog post helps you understand everything there is to know about XPS and its associated applications.
Microsoft has finally retired its support for the XPS file format and removed the XPS Viewer app on new installations. Since Windows 10 April 2018 Update (version 1803) the XPS Viewer app is no longer available on Windows. In simple words, Windows 10 and 11 do not support XPS file viewer.
People come to me asking: How do I open an XPS file in Windows? What programs can open XPS files?
Most people probably don’t even know what XPS files are all about and why they’re used. So let’s start from the basics.
Table of Content:
- What is an XPS File?
- What is an XPS Viewer?
- How do I Open an XPS File in Windows 10/11?
- How Do I Convert An Xps File To Pdf?
- How to Use Google Drive to Convert XPS File to PDF on Mac?
What is an XPS File?
XPS( XML Paper Specification ) is a file format introduced by Microsoft as a competitor for Adobe’s PDF files. XPS file format was introduced with Windows Vista and despite not being very popular, it continued to ship with Windows 7 and Windows 8.1.
A .xps file contains information about a document’s structure and content, including its layout and appearance. An XPS file can contain one or more pages.
What is an XPS Viewer?
The Windows XPS Viewer is a tool that lets you view and edit XPS file formats. This software can be used in a variety of formats and can be easily created on any Windows-based computer program.
How do I Open an XPS File in Windows 10/11?
However, if you still deal with XPS files or have one saved in XPS format, Windows 10/11 still comes with a default XPS viewer. So, in this article, we will show you how to view XPS files and documents on a Windows 10/11 computer. Let’s check out.
Method 1: Enable XPS Viewer on Windows 10
Method 2: Install XPS Viewer Using RUN Command
Method 3: Try Installing XPS Files Reader
Method 4: Open XPS Files Using Google Drive
Method 5: Convert XPS Files to PDF Format
Method 1: Enable XPS Viewer on Windows 10
- Open the Settings app.
- Go to Apps, and click the Optional features link.
- Choose to Add a feature.
- Select XPS Viewer from the list.
- Click the Install button.
Method 2: Install XPS Viewer Using RUN Command
If you are unable to access Windows 10’s settings page, you can try implementing this method. In this method, we will be using the RUN Dialog box on Windows 10 to install the XPS viewer application.
Step 1: Click on the ‘Windows + R’ button to open the Run dialog box from the list.
Step 2: Type in ‘xpsrchvw’ and hit the Enter button.
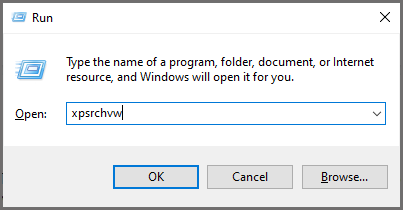
That’s it! Now you can directly open the XPS files using the above command. This command will activate the XPS viewer of your Windows 10/11 computer.
Method 3: Try Installing XPS Files Reader
You can install a third-party application to open an XPS file in Windows 10/11. Here is a list of applications that will open XPS files.
- Free XPS Viewer
- XPS Annotator
- Sumatra PDF
- MuPDF
- Danet Studio
Method 4: Open XPS Files Using Google Drive
If you are not willing to install a third-party app to view an XPS file, go with Google Drive. Just by uploading the XPS file to Google Drive, you can access the contents of the XPS file.
Step 1: Open Google Drive and sign in with your account.
Step 2: Click the New button and select File Upload.
Step 3: Select the XPS file and wait for it to upload.
Step 4: Double-click to open the file in Google Drive and it will open.
Method 5: Convert XPS Files to PDF Format
In case you are still not able to view the XPS file, you can convert XPS files to PDF. Next, let’s learn how to convert an XPS file to a PDF.
How Do I Convert An Xps File To Pdf?
You can print from the drop-down menu in the XPS view application by clicking on File.
Step 1: Click on Microsoft Print to PDF in the dialogue box to print.
Step 2: Print by clicking on the Print button.
Step 3: Your new PDF should be located where you want it.
If you are using a Mac and need to convert XPS to PDF, then follow the next method.
How to Use Google Drive to Convert XPS File to PDF on Mac?
Using Google Drive, you can easily convert XPS files to PDF files on Mac by using the following steps.
Step 1: Go to Google Drive.
Step 2: Upload the XPS or OXPS file to your Google Drive.
Step 3: Double-click the document, and now you can preview it.
Step 4: Click the Print icon in the top right corner, which will take you to a new tab. There is also a Print icon on the page opened in the new tab. Click the icon.
Step 5: Now you should find the Save as PDF option. Choose to save all or selected pages of your XPS or OXPS document to PDF format.
Step 6: Click Save.
Step 7: In the dialogue box that appears, click Save.
This method is a little bit complicated, but it does work.
Hope this article helped you in viewing the XPS file. If you are a regular user of XPS files you might face a situation like deletion of XPS or if you have already deleted or lost your XPS file due to any reason, and want to recover deleted XPS files. Don’t worry there are various software’s to restore XPS files but the most suggested software by industry experts to get back lost XPS documents is the Yodot Files Recovery tool.
XPS, which stands for XML Paper Specification, is a file format developed by Microsoft as a competitor to Adobe’s PDF (Portable Document Format). It was introduced with Windows Vista and continued to be supported in Windows 7 and Windows 8.1. The primary purpose of XPS is to provide a standardized way of representing electronic documents, ensuring consistent formatting and layout across different devices and software applications.
Key features and reasons for using XPS include:
- Document Structure and Content: XPS files encapsulate information about a document’s structure and content. This includes details about layout, fonts, images, and other elements that contribute to the document’s appearance.
- Consistency Across Platforms: Similar to PDF, XPS is designed to maintain document consistency across various platforms and applications. This ensures that the document will look the same regardless of the device or software used to view it.
- Print Capabilities: XPS is optimized for printing, allowing documents to be printed with high fidelity. This makes it a suitable format for documents intended for physical reproduction.
- Digital Signatures: XPS supports digital signatures, enhancing document security and integrity. Digital signatures can be used to verify the authenticity of the document and ensure that it has not been altered.
- XPS Viewer: Microsoft provides the XPS Viewer tool, allowing users to view and edit XPS files. The viewer facilitates easy access to the content and layout of XPS documents.
Despite these features, XPS has not achieved the same level of widespread adoption as PDF. PDF remains the more commonly used format for sharing and presenting electronic documents, partly due to its long-established presence and support across various platforms and devices.
Microsoft has phased out support for the XPS file format, and the XPS Viewer app is no longer included in new installations since the Windows 10 April 2018 Update (version 1803). In essence, Windows 10 and 11 do not accommodate the XPS file viewer.
I often encounter queries such as “How do I open an XPS file in Windows?” and “What programs can open XPS files?” Many individuals might not be familiar with the purpose of XPS files and their usage, so let’s see how to install XPS Viewer in Windows 10:
- Using your keyboard, click Win+I to open the Windows Settings

- The Windows Settings will open, click on System

- From the left pane menu, click on Optional Features

- Click on Add a feature

- A list of optional features that you add will be displayed

- In the search bar, type xps and choose XPS Viewer , then click Install

- Installing the XPS Viewer feature will start

- Once the installation is completed, the XPS Viewer feature will be listed under the Optional Features

That’s it, you can close the Windows Settings now.
To open XPS Viewer, click on Start and type xps

Tarek Majdalani is an accomplished Windows Expert-IT Pro MVP, honored by Microsoft for eight consecutive years from 2007-2015. Holding a B.E. in Computer Engineering from the Lebanese American University, he pursued further education while working, earning various certificates showcased in his MVP profile. Tarek is currently serving as the Director of Engineering & Technology at Alrai Media Group in Kuwait. Since 2006, he has been actively contributing to the community by writing tutorials featuring tips and tricks, amassing over 300 tutorials on diverse systems.