
WordPad — это текстовый редактор для создания и редактирования документов. В отличие от блокнота, документы WordPad могут содержать различное форматирование и графические объекты, при этом можно вставить объекты (картинки или другие документы) в документ WordPad или связать их с ним.

Окно WordPad
Создание, открытие и сохранение документов
-
Откройте редактор WordPad. Для этого нажмите кнопку Пуск. В поле поиска введите WordPad, а затем в списке результатов выберите пункт WordPad.
-
Для создания, открытия или сохранения документов используйте описанные ниже команды.
Задача Действие Создание нового документа
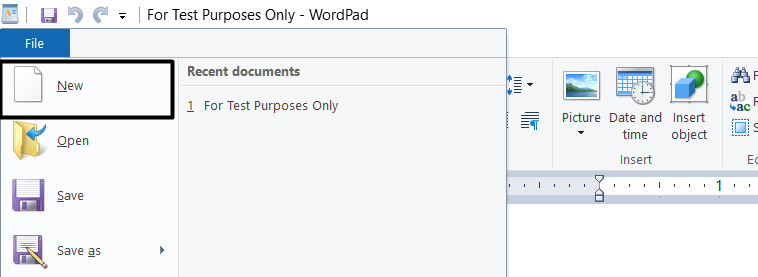
Нажмите кнопку меню WordPad и затем выберите пункт Создать.
Открытие документа
Нажмите кнопку меню WordPad, затем выберите пункт Открыть.
Сохранение документа
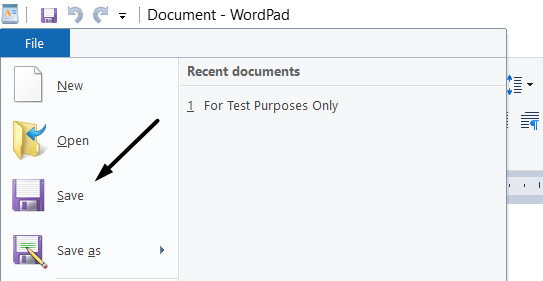
Нажмите кнопку меню WordPad, затем выберите пункт Сохранить.
Сохранение документа с другим именем или в другом формате
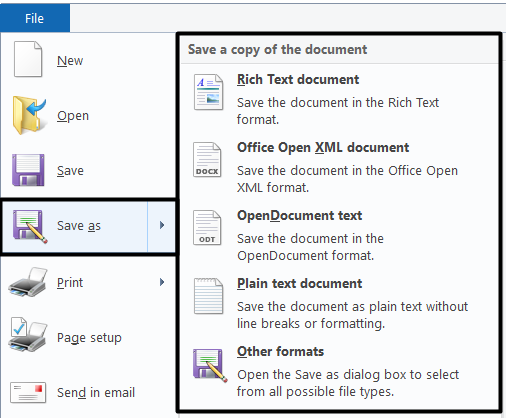
Нажмите кнопку меню WordPad, наведите указатель мыши на пункт Сохранить как, затем выберите формат, в котором нужно сохранить документ.
Примечание
В WordPad можно открывать и сохранять текстовые документы (TXT-файлы), текстовые документы с форматированием (RTF-файлы), документы в формате Word (DOCX-файлы) и документы в формате OpenDocument Text (ODT-файлы). Документы других форматов открываются в виду обычного текста и могут отображаться неправильно.
Форматирование документов
Форматированием называется способ отображения и размещения текста в документе. Для изменения форматирования в документе можно использовать ленту, расположенную непосредственно под строкой заголовка. Например, можно выбирать разнообразные шрифты и их размеры, придавая тексту практически любой цвет. Несложно изменить и выравнивание документа.
-
Откройте редактор WordPad. Для этого нажмите кнопку Пуск. В поле поиска введите WordPad, а затем в списке результатов выберите пункт WordPad.
-
Для изменения форматирования документа используйте описанные ниже команды.
Задача Действие Изменение вида текста в документе
Выделите текст, который нужно изменить, затем воспользуйтесь кнопками на вкладке Главная в группе Шрифт. Чтобы посмотреть описание функции каждой кнопки, наведите на кнопку указатель мыши.
Изменение выравнивания текста в документе
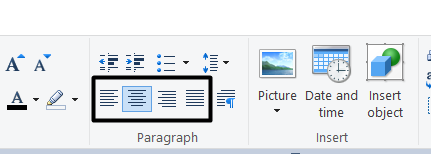
Выделите текст, который нужно изменить, затем воспользуйтесь кнопками на вкладке Главная в группе Абзац. Чтобы посмотреть описание функции каждой кнопки, наведите на кнопку указатель мыши.
Вставка дат и картинок в документы
-
Откройте редактор WordPad. Для этого нажмите кнопку Пуск. В поле поиска введите WordPad, а затем в списке результатов выберите пункт WordPad.
-
Для вставки даты или картинки используйте описанные ниже команды.
Задача Действие Вставка текущей даты
-
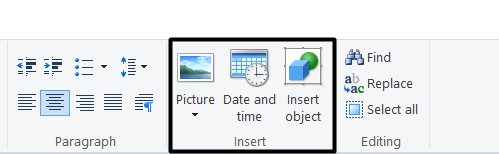
На вкладке Главная в группе Вставка щелкните Дата и время.
-
Выберите требуемый формат и нажмите кнопку ОК.
Вставка картинки
-
На вкладке Главная в группе Вставка щелкните Рисунок.
-
Найдите картинку, которую хотите вставить, и нажмите кнопкуОткрыть.
Вставка рисунка
-
На вкладке Главная в группе Вставка щелкните Рисунок Paint.
-
Создайте рисунок, который хотите вставить, и закройте приложение Paint.
-
Просмотр документов
-
Откройте редактор WordPad. Для этого нажмите кнопку Пуск. В поле поиска введите WordPad, а затем в списке результатов выберите пункт WordPad.
-
Для просмотра документов используйте описанные ниже команды.
Задача Действие Увеличение или уменьшение масштаба
На вкладке Вид в группе Масштаб щелкните Увеличить или Уменьшить.
Просмотр фактического размера документа
На вкладке Вид в группе Масштаб щелкните 100%.
Отображение линейки
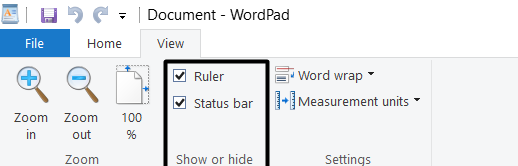
На вкладке Вид в группе Отобразить или скрыть установите флажок Линейка.
Отображение строки состояния
На вкладке Вид в группе Отобразить или скрыть установите флажок Строка состояния.
Изменение параметров переноса по словам
На вкладке Вид в группе Параметры щелкните Перенос по словам и затем выберите требуемый параметр.
Изменение единицы измерения для линейки
На вкладке Вид в группе Параметры щелкните Единицы измерения и затем выберите требуемые единицы измерения.
Совет
Для увеличения или уменьшения масштаба документа также можно нажать кнопку Увеличить или Уменьшить на ползунке Масштаб, расположенном в правом нижнем углу окна.
Ползунок изменения масштаба
Изменение полей страницы
-
Откройте редактор WordPad. Для этого нажмите кнопку Пуск. В поле поиска введите WordPad, а затем в списке результатов выберите пункт WordPad.
-
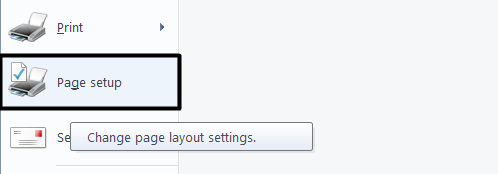
Нажмите кнопку меню WordPad , щелкните Параметры страницы и затем выберите требуемые параметры.
Печать документов
-
Откройте редактор WordPad. Для этого нажмите кнопку Пуск. В поле поиска введите WordPad, а затем в списке результатов выберите пункт WordPad.
-
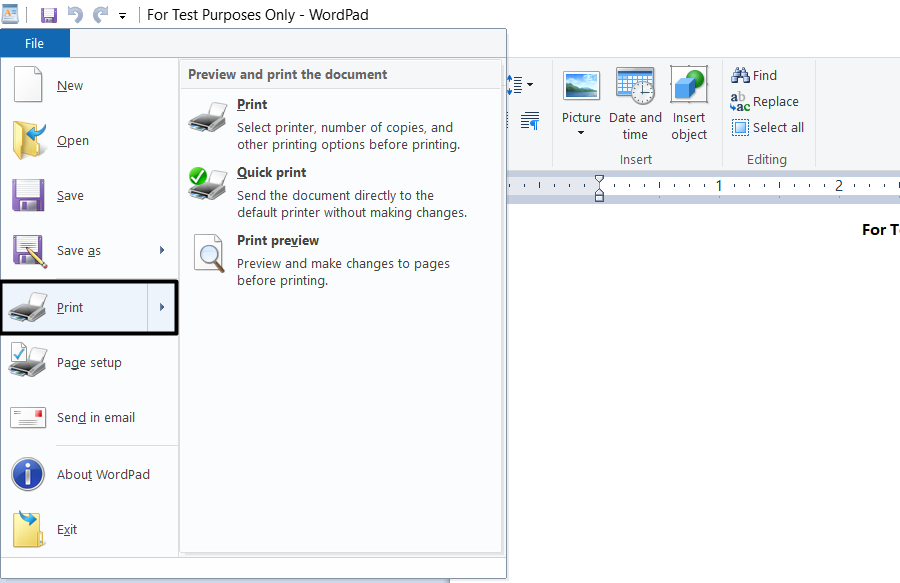
Нажмите кнопку меню WordPad , щелкните Печать и затем выберите требуемые параметры.
Примечание.
Перед печатью можно с помощью функции предварительного просмотра посмотреть, как будет выглядеть документ. Для предварительного просмотра нажмите кнопку меню WordPad, наведите указатель на пункт Печать и выберите Предварительный просмотр. По завершении просмотра документа щелкните Закрыть окно предварительного просмотра.
The WordPad program has been in Windows since the beginning, but many of us still don’t know how to use it at its best. We have always assumed that NotePad and WordPad share the same functions. But that’s not true. Like Notepad, WordPad is a text editor, but it has some advanced formatting options that let us create text documents like letters, reports, notes, etc.
It’s an upgraded version of NotePad and a simplified version of MS Word. Anyone who has used Microsoft Word can easily use WordPad without the need for any tutorial. But those who are new to Windows will need some guidance. Thus, in this guide, we’ve talked about every feature of WordPad in a detailed manner. So, you can learn WordPad properly and become better at using it.
What Is WordPad In Windows 11?
WordPad is a basic text editor in Windows that lets us create text documents, like reports, letters, notes, etc., using its formatting features. It allows us to change the text size, font, color, alignment, and more to make the document look good and professional. WordPad comes with all versions of Windows and can be found easily by following some easy steps.
How To Open WordPad in Windows 11
Here in this section, we’ve explained four ways to open the WordPad app in Windows 11. You can follow any of the mentioned methods to launch WordPad on your Windows 11 PC.
From the Windows Start Menu
The first way to open WordPad on Windows 11 is from the Windows Start Menu. Follow the below-mentioned steps to open WordPad from the Windows Start Menu:
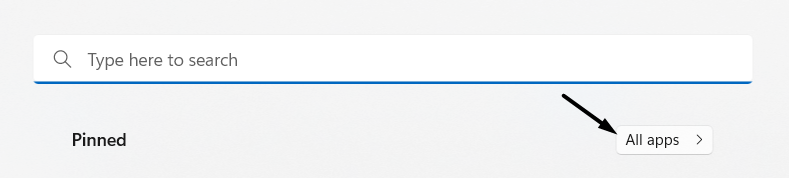
1. First, click on Start in the Windows taskbar to open the Windows Start Menu and click on All Apps on the top.
2. Now, search for the Windows Tools in the All Apps section and click on it to open the program on the system.
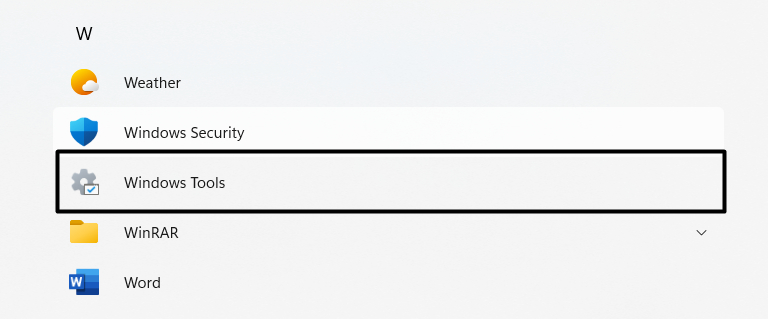
3. Next, look for WordPad in the Windows Tools section and click on it to open the WordPad program on the PC.

Using Windows Search Box
Another easy way to open the WordPad app on Windows 11 is using the Windows Search Box. So, follow the below-mentioned steps to open the WordPad program using the Search Box:
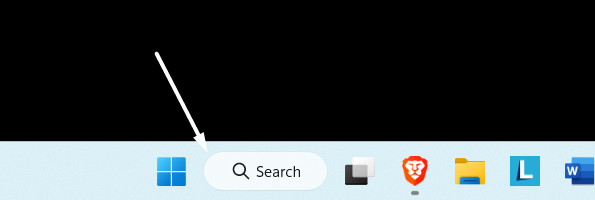
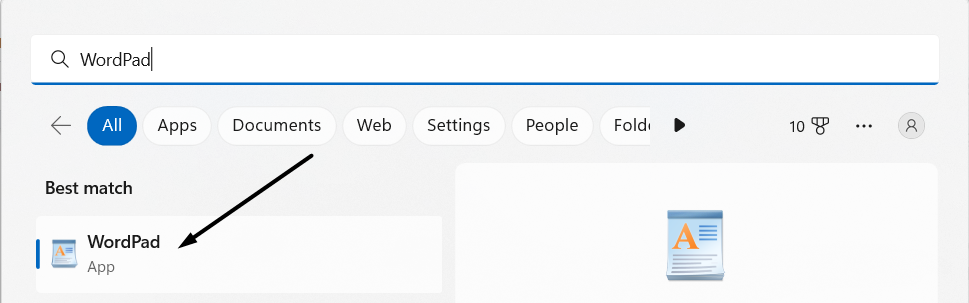
1. To start, click on Magnifying Glass in the Windows Taskbar to open the Windows Search Bar instantly.
2. Now, type WordPad in the Search Box and select the WordPad app from the Best match section to launch it.
Via Run
You must be using Run to open programs like Windows Media Player, File Explorer, etc but you can also use the Run utility to open the WordPad app. Follow the below-mentioned steps to do so.
1. Open the Run utility on your Windows 11 PC with the Windows + R shortcut and type wordpad.exe in the Run Box.
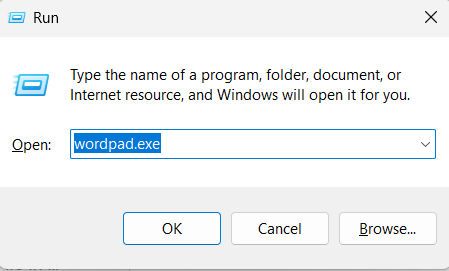
2. Next, press the Enter key to launch the WordPad app on the PC, and you can now use it to create documents.
From Contextual Menu
The last method to open the WordPad app on a Windows 11 PC is from the Contextual Menu that appears after right-clicking on the desktop. You can follow the below-mentioned steps to know the exact process to do the same:
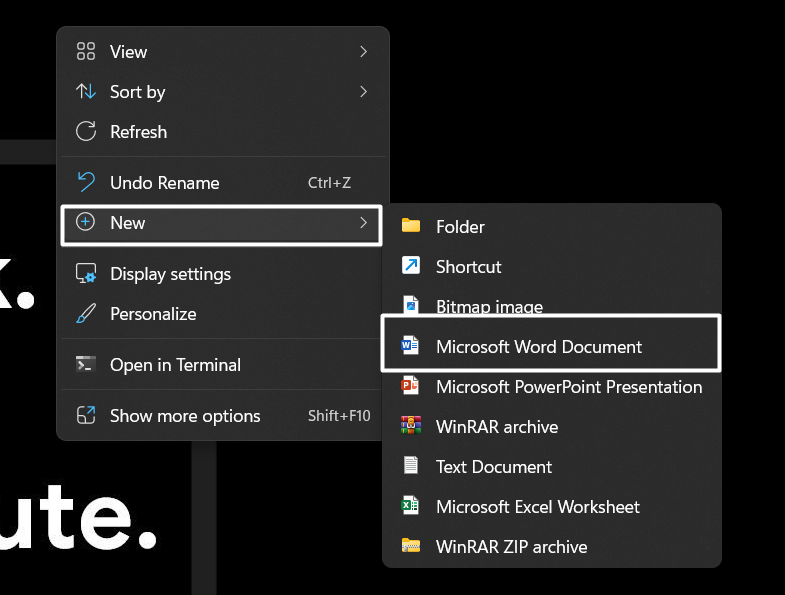
1. To start, right-click on the blank space on the desktop, hover the arrow on New, and select Microsoft Word Document from the contextual menu.
2. Now, enter a name for the new Microsoft Word document and press the Enter key on the keyboard to save the file.
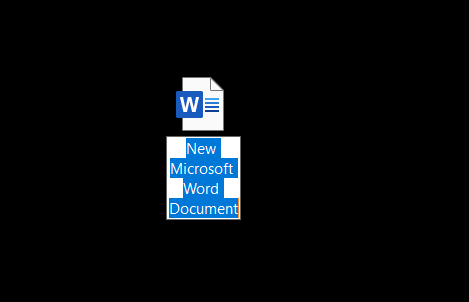
3. Next, right-click on the newly created Microsoft Word file, hover the arrow on Open with, and click on Choose another app.
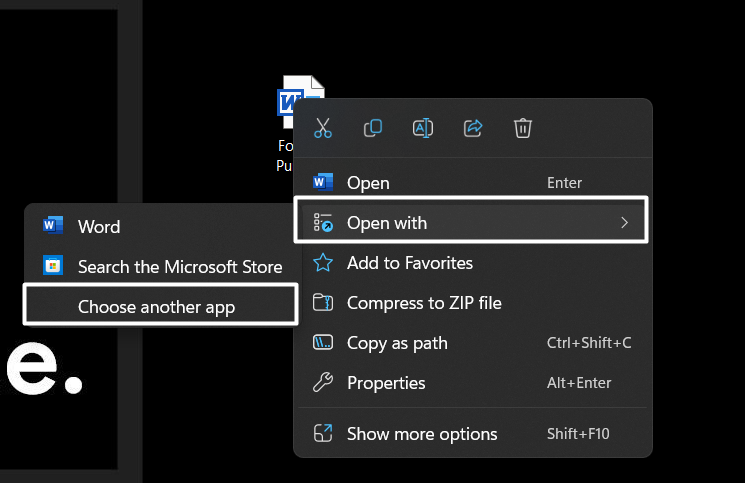
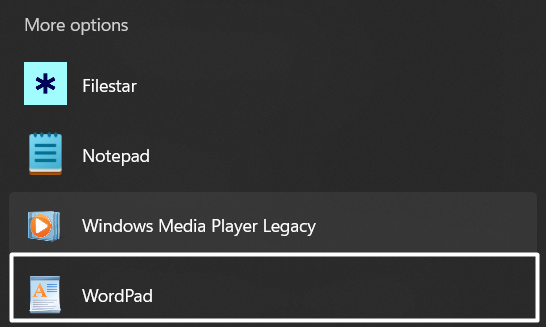
4. Lastly, choose the WordPad app from the More Options section and open the WordPad program.
How to Open Existing or Create New Files in WordPad
Before you move forward, you need to learn how to create a new document and open an existing document in the WordPad program. You can’t use other functions without opening a document in WordPad. Thus, in this section, we’ve explained how you can open an existing document or create a new document in WordPad.
How To Open an Existing File in WordPad
You can follow the below-mentioned steps to open an existing RTF, DOCX, and TXT document in the WordPad program:
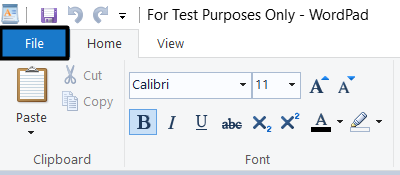
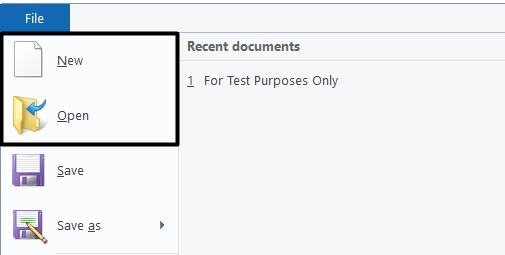
1. First, open the WordPad app on your Windows 11 PC, and click on File at the top of the WordPad program.
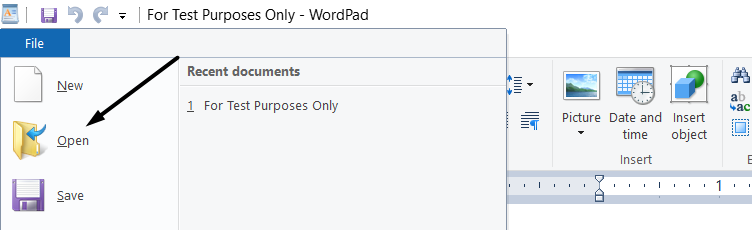
2. Now, click on Open in the dropdown menu and select the file that you want to open in the WordPad program.
Pro Tip: You can also open an existing RTF document in the WordPad program using the Ctrl + O keyboard shortcut.
How To Open a New File in WordPad
You can follow the below-mentioned steps to create or open a new RTF (Rich Text Format) document in the WordPad program:
1. To start, open the WordPad program, and click on the File option at the top left corner of the WordPad program.
2. Lastly, click on the New option in the dropdown menu, and it’ll open a blank document on the current window.
Pro Tip: You can also open a new or blank document in the WordPad app by pressing the Ctrl + N keyboard combination.
All WordPad Menus Explained
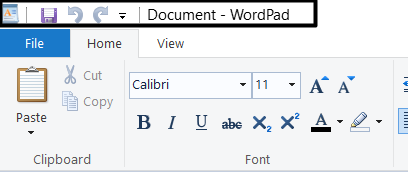
Once you open the WordPad program, you’ll see four menus at the top: Ribbon menu, File menu, Home menu, and View menu. All menus include multiple different options, and all have different purposes.
Some options in the menus are self-explanatory. Whereas some options require a detailed introduction to understand them in a proper manner. Here in this section, we’ve explained all the options present in all menus in detail.
WordPad Top Ribbon Menu Explained
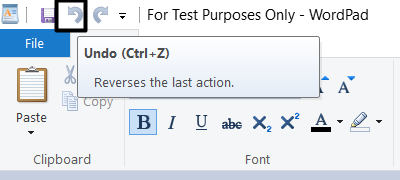
The first menu we see on the top of the WordPad program is the ribbon menu. The ribbon menu includes four options: Save, Undo, Redo, and Customize Quick Access Toolbar. All the options have different uses, and it’s necessary to know about them. You can read this section to know the use of each option in the ribbon menu.
Save: The Save option in the ribbon menu lets us save the active or opened document in WordPad. It’s one of the most important functions of the WordPad. You can also save a document by pressing the Ctrl + S keyboard shortcut.
Undo: The Undo option lets us reverse the last action in WordPad. You can also do the same by pressing the Ctrl + Z key combination.
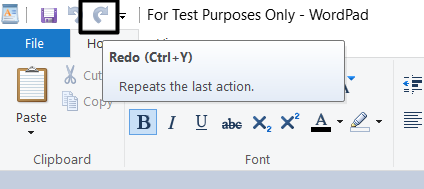
Redo: The Redo option is quite the opposite of the Undo option. We use the Undo option to restore previously done actions. For instance, if you deleted a word in the document, you can use the Redo option to get it back. You can also use the Redo option by pressing the Ctrl + Y shortcut.
Quick Access Toolbar: You’ll also see the Customize Quick Access Toolbar next to the Redo option. This option will let you customize the top ribbon menu. You can select which option should be present in the ribbon menu and which not.
WordPad File Menu Explained
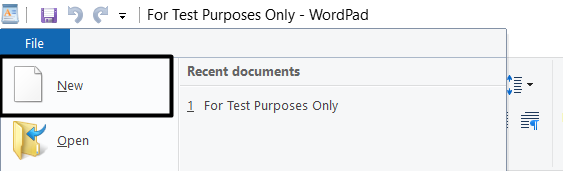
Underneath the top ribbon menu, you’ll see the File menu. The File menu includes nine options and the Recent documents section on the right side. The Recent documents section shows all the files you’ve opened in the WordPad app. You can also open documents from the Recent documents section for easy access. This was about the Recent documents section. Let’s now talk about the other nine options in the File menu.
New: The New option in the menu lets us create a new document, which we can edit and save on the PC. It simply opens a new blank document in the WordPad app. You can also create a new file using the Ctrl + N key combination.
Open: The Open option lets you open an existing RTF, DOCS, and TXT document in the program. Some users also use the Ctrl + O keyboard shortcut to open an existing file. You can also try the same shortcut.
Save: The Save option is used to save the active file in the WordPad program. This way, you won’t lose the recent changes we made to the file. You can also use the Ctrl + S keyboard shortcut to save the document.
Save as: The Save As option comes in handy when replacing an existing document with a new one. However, it deletes the existing document because it overwrites it with a new one. It is also used to save the new document in a different format, like Rich Text, Open XML, Simple Text, etc.
Print: You can understand the use of this option by its name itself. The Print option is used to print the active document using the default printer. When you hover the arrow on the Print option, it shows three options: Print, Quick Print, and Print Preview.
The Quick Print lets you quickly print the document without opening the preview pane. In the end, the Print Preview option allows us to preview the document before printing.
Page Setup: The Page Setup option in the menu lets you change the page size of the document. You can choose from various page sizes, such as A4, A3, Letter, Legal, Executive, etc. Besides this, you can adjust the page margin from the Page Setup section.
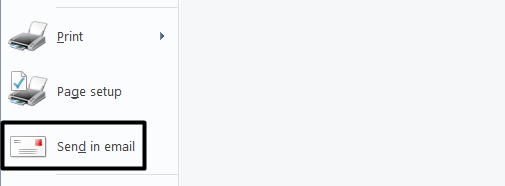
Send In Email: You can use the Send In Email option to send the document directly to the recipient via email. This way, you don’t need to download the document on the system. Simply click on the option and share it with anyone you want.
WordPad Home Menu Explained
The Home Menu will be divided into four sections: Clipboard, Font, Paragraph, Insert, and Editing. Each section includes different options, and most of them are formatting options, like italic, bold, fonts, indent, etc. Here in this section, we’ve explained all four sections and their options in detail. So, follow us to know more.
Clipboard
The Clipboard section features three options: Paste, Cut, and Copy. Since you use these functions daily while browsing or writing, you must be familiar with them. The Cut (Ctrl + X) option copies a particular text in the clipboard and removes it from the current location.
Whereas Copy (Ctrl + C) enables you to copy a specific text, it doesn’t remove the existing text. You can delete it manually using the Backspace or Delete keys on the keyboard. In the end, Paste (Ctrl + V) allows to paste the copied text to any document you want.
Font
The Font section includes some options that let us make the document’s text look more professional. It includes twelve options, and we’ve explained them in detail in this section.
Font Picker: The first option you get in the Font section is the Font Selector, which lets you change the font style. You can click on the downward arrow next to the Font Picker to view all the available fonts. Surprisingly, you can choose from 150+ fonts. Also, you can upload our customized fonts from the Settings app. Head to the mentioned path to upload a custom font:
Settings > Personalization > Fonts > Browser & install fonts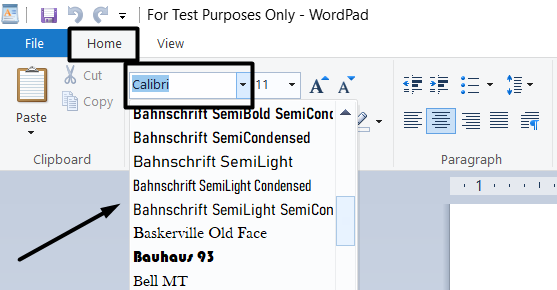
Font Size Picker: WordPad also allows to change the size of the text to make it easy to read and scan for readers. By default, the size would be set to 11. You can keep the font size as small as 8 and as large as 1638.4. Once you select the font size from the dropdown, the change will reflect immediately in the document.
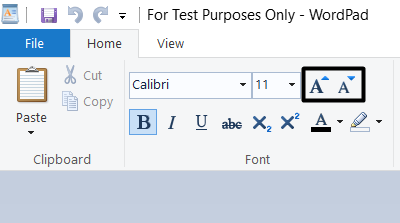
Grow Font & Shrink Font: As the name suggests, the Grow font option lets you increase the font size. On the other hand, the Shrink font option is used to reduce the font size.
These options come in use when you want to keep the font size either higher than 72 or lower than 8. This is because the Font Size Picker doesn’t allow to choose font sizes below and beyond the mentioned font size.
Change Typography: Here, typography refers to four options: Bold, Italic, Underline, and Strikethrough. All four options help make the text look better. The Bold option makes the text heavier. It adds a new layer to the text, which makes it look aggressive. The Italic option changes the text font to italic but it doesn’t change the font family. Underline and Strikethrough are the easiest to understand.
The Underline option draws a line below the selected text. At the same time, Strikethrough cuts the text from the middle with a horizontal line. You can also use these options with keyboard shortcuts. We’ve mentioned those shortcuts in the table below.

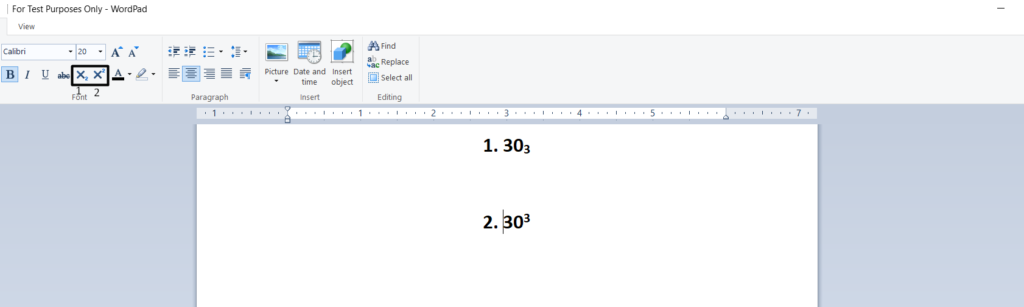
Subscript & Superscript: The Subscript and Superscript option might be new to you. Let us explain this to you in layman’s language. Subscript makes the text smaller and lower than the regular text.
Whereas the Superscript is the opposite of this. It draws the text smaller and higher than usual. These options mostly come in use at the time of writing values or powers to the numbers. Please check the mentioned image attached below for better clarification.
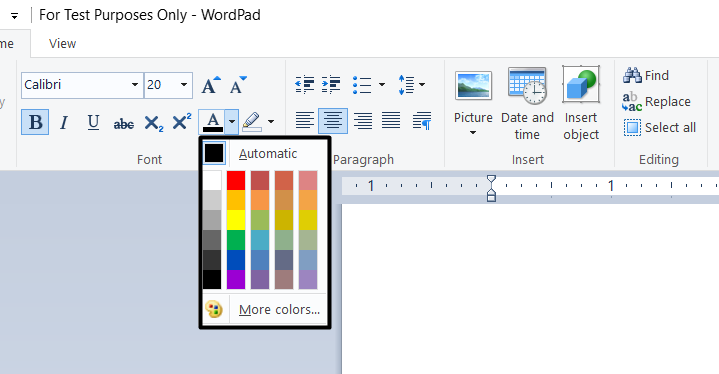
Text Color Picker: The Text Color Picker lets you choose the best color for the selected text to make it look pleasing. By default, the color would be set to Black but you can choose from a wide range of colors and also create your own color combinations.
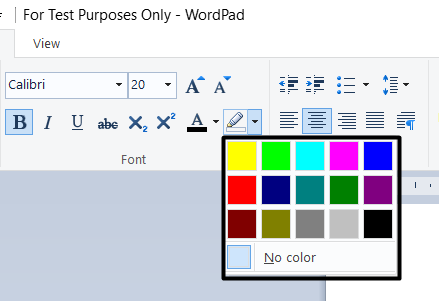
Text Highlighter: Thanks to technology, you can now highlight texts in WordPad as you do in books in real-life. You can highlight the text with fifteen color choices, including Yellow and Green. So, highlight the important part of the document to focus more on it.
Paragraph
The Paragraph section lets you work on the formatting of the text in the document. So the document looks well-organized and neat. The Paragraph section includes a lot of options. Let’s not wait anymore and learn more about all the options.
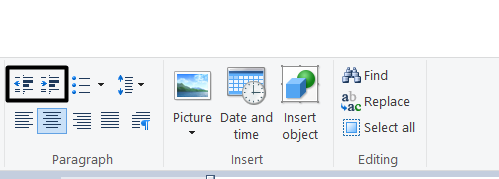
Increase Indent & Decrease Indent: Indentation refers to increasing/decreasing the distance between the text and the margin of the document. You can choose indentation values according to how your document should look.
The Increase indent option lets you increase the indent level of the paragraph. On the other hand, the Decrease indent option is the opposite of it.
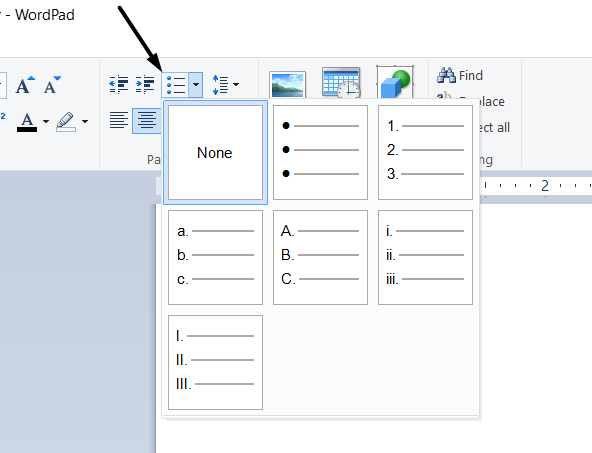
Start a list: When you click on the Start a list option, it automatically creates a new bullet list. You can choose the type of list you want to create by clicking on the downward arrow. It lets you choose from different types of list formats, such as Bullet List, Numbered List, Alphabet List, Roman Numeral List, and much more.
Line Spacing: To make the text look well formatted, WordPad lets you change the line spacing between the text. You can modify the vertical space between the lines of text in your document using the Line spacing option. This ensures that the text looks neat, which can make it easier to read for readers.

Text Alignment: The proper text alignment is necessary to make the document look professional and clean. WordPad offers some text customization and alignment options that let you align the text to the extreme left, bottom, right, and both left and right. You can also do all this with the help of shortcuts. Simply keep the arrow on any alignment option, and you’ll see the shortcut there.
Insert
The Insert section allows to add extra elements to the documents. It includes three options: Picture, Date and time, and Insert object. All these can be understood by their name and barely need an introduction. In short, the Picture option lets you add an image to the document.
Whereas the Date and time option lets you show the date and time in the document. In the end, the Insert object option enables you to add different objects to the document, like Excel Sheet, Excel Chart, Worksheet, etc.
Editing
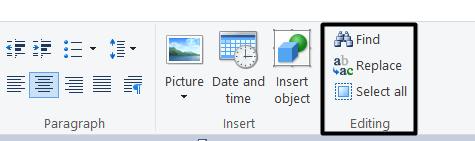
The Editing section is one of the most important sections of the View menu. It features three options: Find, Replace and Select all. Most of you know the use of these three options. Let’s recall once again. The Find option lets you find a particular word or sentence in the document. You can also open the Find dialog box using the Ctrl + F key combination.
The Replace option lets you replace a word or sentence in the document with another word or sentence. An easy way to open the Replace dialog box is by pressing the Ctrl and H keys simultaneously. At last, the Select all option lets you select all the content in the document in one go. You can access the Select all option using the Ctrl + A keyboard shortcut.
WordPad View Menu Explained
The last menu that remains out of all is the View menu. This menu lets you modify your WordPad user interface. For instance, you can enable/disable WordWrap, Status, Bar Ruler, etc. It’s divided into three different sections: Zoom, Show or hide, and Settings. All three sections have different options. It’s time to know about all the options in detail in this section.
Zoom
You’ll find three options in the Zoom section: Zoom in, Zoom out, and 100%. As you all know, the Zoom in option lets you take a close view of the document. Furthermore, the Zoom out option allows you to view the entire document at a reduced size.
When you use the Zoom out option, the text becomes smaller and difficult to read. Lastly, the 100% option in the Zoom section automatically adjusts the sheet size according to the monitor size.
Show Or Hide
In the Show or hide section, you’ll see two options: Ruler and Status Bar. Both are essential elements of the WordPad app. You can see the Ruler at the top of the page. It helps you change the document format and the text’s alignment.
On the other hand, the Status Bar can be found at the bottom of the document. It’s used to know the status of the document, word count, etc. The Show or hide section allows to enable/disable the Ruler and Status Bar in WordPad.
Settings
The Settings section will have two options: Word Wrap and Measurement units. Here’s a short introduction if you don’t know the use of WordWrap. WordWrap is a function that automatically moves the cursor to the next line once it reaches the end of the line. From this section, you can select whether you want to keep the Word Wrap enabled or disabled. This section also lets you change the measurement units of the Ruler.
So, these were the main menus of the WordPad app. We hope all the WordPad menus are clear to you now.
Basic WordPad Text Editing Functions
Here in this section, we’ve talked about everything you can do in WordPad. We suggest reading this section until the end to learn more about its other functions in detail.
How To Cut, Copy, Or Paste In WordPad
Most of you would know about these functions as you use them in daily life. We are still recalling them for you, so keep reading. The Cut option comes in handy when you want to copy a text from one document and paste it into another document. But it removes the text from the current document or location.
You can also cut text using the Ctrl + X keyboard combination. The Copy option works the same as the Cut option but doesn’t remove the text from the document. You can use the Copy function by simply pressing the Ctrl + C keyboard shortcut. On the other hand, Paste lets you paste the copied text into another document.
How To Change Fonts and Font Size In WordPad
Of course! You may want to make your document look appealing as well as easy to read and scan for readers. In that case, you can change the font and size to do the same. WordPad allows to choose from hundreds of font options. In this section, we’ve demonstrated how to change the text font and size.
1. First, open the WordPad app on your Windows 11 PC, and create a new or open an existing document.
2. Now, select the text, look for the Font Picker in the Font section and click on the dropdown arrow next to it to get the list of all available fonts.
3. After that, select the font you want to keep for the selected text. Once done, the changes will appear immediately.
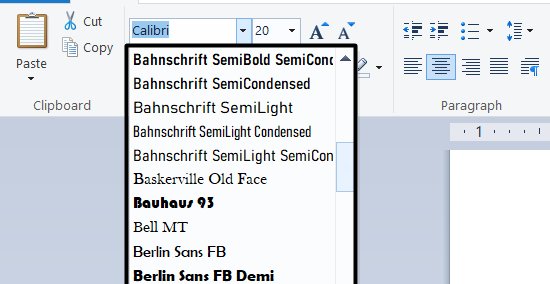
4. Finally, click on the dropdown arrow next to Font Size Picker and select the font size that makes the document easy to scan.
How To Subscript and Superscript In WordPad
Previously in the article, we already explained the meaning and use of the Subscript and Superscript options. Here in this section, we’ve explained how to use the Subscript and Superscript options:
1. To start, open the WordPad program on your Windows 11 PC and create a new document or open an existing one.
2. Once the document is opened, select the text that you want to Subscript and move to the Font section of the Home menu.
3. Now, look for the Subscript option in the Font section, and click on it to Subscript the selected text instantly.
4. Or, you’ll find the Superscript option next to the Subscript option. Simply click on it to Superscript the text.
How To Change Text And Background Colors In WordPad
Many writers like to change the text color of their text while working to make it look appealing and highlighting. WordPad is a basic text editor that also allows to change the text color and background. Follow the below-mentioned steps to change the text color and text background color with ease:
1. First, launch the WordPad app on your Windows 11 PC, open an existing document, and select the text you want to customize.
2. Once the text is selected, search for the Color Picker in the Font section and click on the dropdown arrow next to it to open the color tray.
3. By default, the text color would be set to Black. You can choose the color you want from the color tray.
4. Lastly, to change the background color, click on the Text Highlight Color option in the Font section and choose the background color you want to set.
How To Increase or Decrease Indents In WordPad
In one of the previous sections, we already explained the use of the Indent feature. So, we won’t repeat the same thing. If you want to increase the indent, click on Increase indent in the Paragraph section.
On the other hand, if you want to decrease the indent level, click on Decrease indent. By default, the indent level would be set to Zero (0). You can change the indentation settings from the Paragraph dialog.
How To Add Spell Checker In WordPad
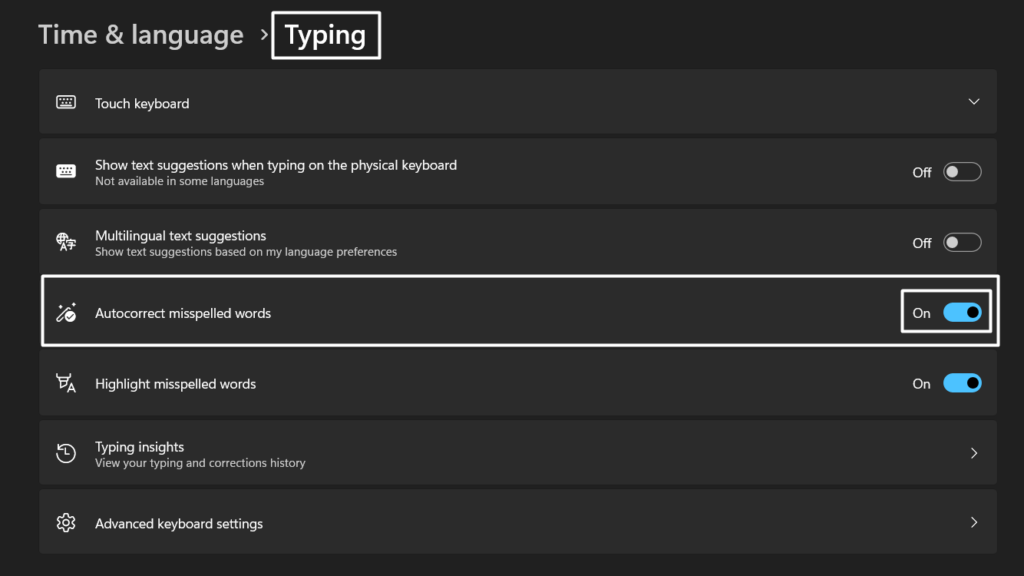
Sadly, WordPad doesn’t have a built-in auto spell checker, which can check spelling mistakes in your documents and highlight them. But Windows has an integrated spelling checker, which highlights the wrong spelling at the time of writing.
Sometimes, it also autocorrects them. You need to enable the Auto-correct misspelled words option in the Keyboard settings to allow the spell checker to work system-wide. So, follow us along to enable the Auto-correct misspelled words option in Windows 11:
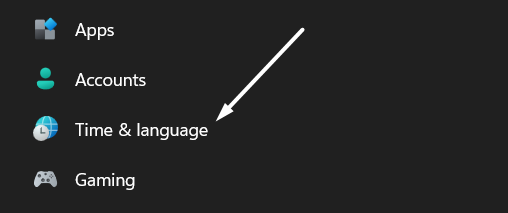
1. First, open Settings on your Windows 11 PC using the Windows + I keyboard shortcut and move to the Time & language section from the left sidebar.
2. Now, click on Keyboard in the Time & language section to open all the keyboard-related settings. Lastly, enable the Auto-correct misspelled words toggle.
How To Save As A WordPad File
Once you’ve finished working on the document, it’s necessary to save it on the system. Otherwise, you’ll lose all the progress, and all your efforts will be drowned in the water. It’s simple to save a document in the WordPad app.
1. If you want to save a new file, open the File menu, and click on Save as.
2. Now, type a new name for the file in the File name text box and click Save.
3. On the other hand, if you want to save an existing document, simply select the Save option from the File menu. The changes will save instantly. You can also do the same by pressing the Ctrl and S key combinations.
How To Print In WordPad
You can use WordPad to write scripts, letters, applications, reports, and more. If you’re using the WordPad app for creating scripts or reports, you might also want to get a printout of that. The best part is that you can easily print the document directly from the WordPad app. It’s too easy to do, and the below-mentioned steps explain the same with ease:
1. To start, open WordPad on your Windows 11 PC, and open the File menu by clicking on File in the top menu.
2. Next, click on the Print option in the dropdown menu and select the printer you want to use to take out the prints.
Tip: You can also open the Windows Operating System window by pressing the Ctrl + P keyboard combination.
3. Now, select whether the print should be in Portrait orientation or Landscape orientation from the Orientation dropdown.
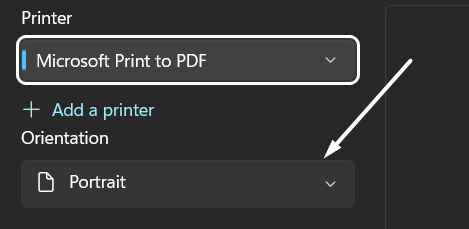
4. In the end, uncheck the Let the app change my printing preferences checkbox and click the Print button.

WordPad Keyboard Shortcuts
Using keyboard shortcuts is a great way to increase efficiency at work and complete tasks faster. You can also use keyboard shortcuts while using WordPad to execute some tasks in a few seconds. Thus, in this section, we’ve mentioned some keyboard shortcuts that you can use while using WordPad. Have a look at the shortcuts below:
| Keyboard Shortcut | Actions Performed |
| Ctrl + N | To open a new blank document on the current window. |
| Ctrl + O | To open the “Open” dialogue box to select a file |
| Ctrl + C | To copy a selected text in the clipboard |
| Ctrl + V | To paste a copied text into a document |
| Ctrl + S | To save the recent changes made in the document |
| Ctrl + Z | To reverse the last action |
| Ctrl + Y | To repeat the last action |
| Ctrl + X | To cut a selected text |
| Ctrl + P | To open the “Print” dialogue box |
| Ctrl + B | To make a selected text heavier |
| Alt + F4 | To close the WordPad program (Note: Only works when the document is saved.) |
| Ctrl + I | To italicize the selected text or word |
| Ctrl + A | To select the entire content present in the document |
| Ctrl + L | To align the selected text to the left |
| Ctrl + E | To align the selected text to the center |
| Ctrl + R | To align the selected text to the right |
| Ctrl + J | To justify the selected text |
| Ctrl + U | To underline the selected text |
| Ctrl + Shift + = | To make the selected text superscript |
| Ctrl + = | To make the selected text subscript |
| Ctrl + 1 | To set the document line spacing to 1 |
| Ctrl + 2 | To set the double-line spacing |
| Ctrl + 5 | To set the document line spacing to 1.5 |
| Ctrl + Shift +L | To create a bullet list |
| Shift + F10 | To display the shortcut menu on the current window |
| F1 | To open “help with WordPad in Windows 11” search results in Bing.com |
| Ctrl + Home | To move the cursor to the beginning of the file |
| Ctrl + End | To move the cursor to the end of the file |
| Ctrl + F | To open the “Find” dialogue box |
Frequently Asked Questions
How Do I Use WordPad?
You need to start by opening the WordPad app on your Windows 11 PC. Once the app is opened, click on the File option in the top menu and select New from the secondary menu. You’ll now see a blank document on the screen, which you can use to pen down ideas and thoughts, make letters, etc.
Why Is My WordPad Not Working?
There could be varied reasons for the ill-functioning of the WordPad app. Yet, the most common reason is the bugs within the app. In that case, we suggest updating the PC to the latest Windows build. You can also try restarting the PC.
How Do You Edit a WordPad Document?
You can start editing a document right after opening it in WordPad. To open an existing document in WordPad, click on File in the top menu and select the Open option from the dropdown. Lastly, choose an RTF, Docx, or TXT file that you want to open in WordPad and click Open. The selected file will now open in the WordPad app.
Can You Reinstall WordPad?
Windows allows you to uninstall the WordPad program from the system. But it doesn’t give the option to install the program back on the system.
WordPad Is Too Easy To Use, Even For Beginners
It’s so easy to use WordPad in Windows 11. Don’t you feel the same? In this guide, we explained every feature of WordPad in detail. Our main purpose for creating this guide was to make WordPad simple for you, and we hope we made it.
Do let us know which part of the guide helped you the most. Also, share the guide with your fellow mates who recently switched to Windows and are facing difficulties using the WordPad app.
Плеер:
YouTube
Вконтакте
Из данного урока ребята узнают, что такое текстовый редактор, как запустить программу WordPad и как с ней работать, что такое форматирование текста, что называется шрифтом, как сделать выравнивание текста. Целями урока являются развитие компьютерной грамотности, формирование навыков индивидуальной работы за компьютером в текстовом редакторе WordPad, а также развитие творческих способностей учащихся. На протяжении урока дети смогут сами отформатировать небольшой отрывок из стихотворения «Зимнее утро» Александра Сергеевича Пушкина.

В конце видеоурока ученики узнают, как сохранить сделанную работу и как закрыть программу.
Текстовый редактор — это специальная программа для работы с текстом. Текстовый редактор WordPad предназначен для работы с небольшими документами.
Чтобы запустить программу WordPad необходимо нажать на кнопку «Пуск», в списке программ выбрать папку «Стандартные — Windows», и в появившемся списке найти программу WordPad.
В программе есть рабочая область. Текст, который набирается с помощью клавиатуры, отображается именно в этой рабочей области.
В программе также есть строка состояния, строка заголовка и две вкладки: «Главная» и «Вид», каждая со своими панелями инструментов. С помощью панели инструментов на вкладке «Главная» можно отформатировать шрифт или абзац, а также другие функции.

Форматирование — это изменение внешнего вида текста на компьютере. Чтобы отформатировать текст, например, слово, его необходимо сначала выделить. Для выделения выбранного слова, надо навести курсор мыши на начало этого слова, а затем, нажав и удерживая левую кнопку мыши, переместить курсор до конца нужного места.
Когда хотят изменить то, как выглядят буквы, цифры или другие знаки текста, то говорят, что надо изменить шрифт. Шрифт — это определённое начертание знаков, например, букв и цифр, их общее изображение и размер.
На панели инструментов вкладки «Главная» есть кнопки, с помощью которых текст можно разместить посередине, справа или слева. Это называется выравниванием текста.
Для сохранения документа нажимаем на кнопку «Файл», затем нажимаем кнопку «Сохранить как…». В появившемся окне выбираем папку для сохранения, затем находим поле, которое называется «Имя файла» и вводим название документа. После нажимаем на кнопку «Сохранить».
Источник статьи
Автор24
— учеба по твоим правилам
Программа WordPad стала стандартной программой операционной системы Windows с версии Windows 95. Текстовый процессор WordPad значительно уступает многофункциональным пакетам обработки текста, подобным Microsoft Word, и предназначен для подготовки документов с простым форматированием.
Преимуществом текстовых процессоров перед текстовыми редакторами является возможность форматирования текста.
Форматирование текста включает настройку:
- макета страницы;
- структуры документа;
- параметров абзаца;
- параметров заголовков.
Простейший однооконный текстовый процессор WordPad входит в стандартную комплектацию операционной системы Windows, таким образом запускается он из папки Стандартные: Пуск – Все программы – Стандартные – WordPad.
В сравнении с текстовым редактором Блокнот набор инструментов текстового процессора WordPad намного богаче.
В отличие от текстовых редакторов, в документах WordPad можно изменять различные шрифты, размеры и цветовое форматирование текста, выполнять вставку различных объектов: рисунков, чертежей, диаграмм, видеоклипов, музыки и звуковых эффектов.
Рассмотрим программу WordPad операционной системы Windows 7
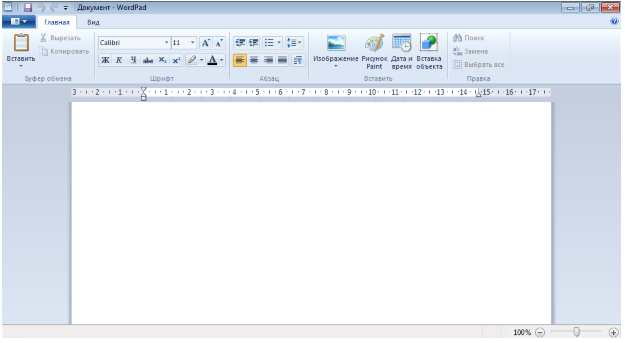
Рисунок 1.
В строке заголовка (верхняя часть панели) можно настроить панель быстрого доступа:
Рисунок 2.
«Текстовый процессор WordPad» 👇
В программе WordPad в Windows 7 почти вся панель панель инструментов объединена в одну вкладку «Главная».
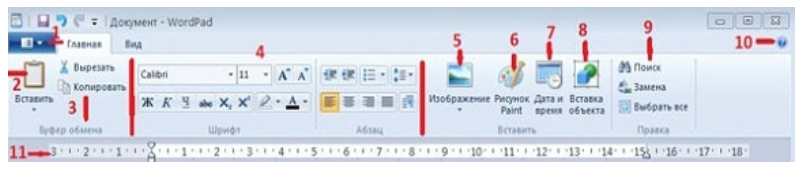
Рисунок 3.
Опишем каждый из элементов, обозначенный на рисунке цифрами 1–11.
Действия с документами
1 – Меню:
Рисунок 4.
– выводит вкладку со всеми доступными действиями, которые можно выполнять в создаваемых документах.
Рисунок 5.
С помощью этой вкладки можно:
- Создать новый документ;
- Открыть уже созданный документ;
- Сохранить изменения в созданном документе;
- Сохранить как… новый документ – используется для сохранения в нужном формате или в другом месте;
- Печать – кроме выполнения печати можно посмотреть как будет выглядеть страница после печати (команда Предварительный просмотр);
- Параметры страницы для изменения параметров разметки страницы:
- формат бумаги (А1–А4 и нестандартные форматы);
- ориентация: книжная или альбомная;
- поля – интервалы между текстом и краями печатного листа.
- Отправить по электронной почте для отправки копии документа по электронной почте в качестве вложения;
- О программе – информация о разработчике программы WordPad;
- Выход.
Буфер обмена
2 – Вставить для вставки скопированного фрагмента текста;
3 –Вырезать и Копировать – с помощью кнопок можно вырезать и скопировать выделенный текстом.
Шрифт и Абзац
4 – набор инструментов для форматирования абзаца.
Для удобства работы с большим документом его принято разбивать на разделы, которые в свою очередь могут быть разбиты на параграфы, параграфы – на части и т.д. Таким образом, создается многоуровневая структура документа. Для обеспечения удобства чтения такого документа каждый уровень принято оформлять в одном стиле.
Наименьшей структурной единицей форматированного текста является абзац, которым может быть и заголовок. Каждому абзацу может быть присвоен свой стиль.
Основные элементы стиля:
- гарнитура шрифта;
- размер шрифта (кегль);
- начертание шрифта;
- метод выравнивания (по левому краю, по правому краю, по центру и по ширине).
Вставить
- 5 – вставка изображения, которое предварительно было сохранено на компьютере;
-
6 – вставка рисунка, сделанного в Paint, в документ WordPad. После нажатия на эту кнопку откроется программа Paint, в которой нужно создать рисунок.
Сохранять документы с рисунком, вставленным из Paint, нужно в формате .rtf. - 7 – вставка даты и времени на место курсора. Программа дает возможность выбрать формат даты и времени из нескольких вариантов.
- 8 – вставка объекта, созданного во внешних приложениях. Например, Adobe Acrobat Document, CorelDRAW, Microsoft Excel и др. После нажатия кнопки открывается окно выбора папки с документом.
Правка
Меню Правка, обозначенное на рисунке цифрой 9, содержит команды Поиск (поиск введенных символов в документе), Замена (поиск и замена одних введенных пользователем символов на другие), Выбрать все (выделение всего содержимого документа).
- 10 – выводит справку WordPad.
- 11 – под панелями инструментов расположена линейка, с помощью которой удобно отслеживать размеры отступов и абзацев, размеров полей и т.д.
Строка состояния в нижней части окна отображает информацию о текущем состоянии документа или программы, подсказку о значении текущего пункта меню.
Основная часть окна – рабочая область, в которой создается документ.
WordPad is a text-editing program available in the Microsoft Windows operating system.
Follow these step-by-step instructions to use WordPad
This article assumes that you have a PC with Windows 10 installed.
There are several way to locate this app on your computer. This is the easiest.
Click on the Search button/icon on the task bar (next to the Start button) and
type in WordPad. Then click on the matching result, which should be
at the top of the list.
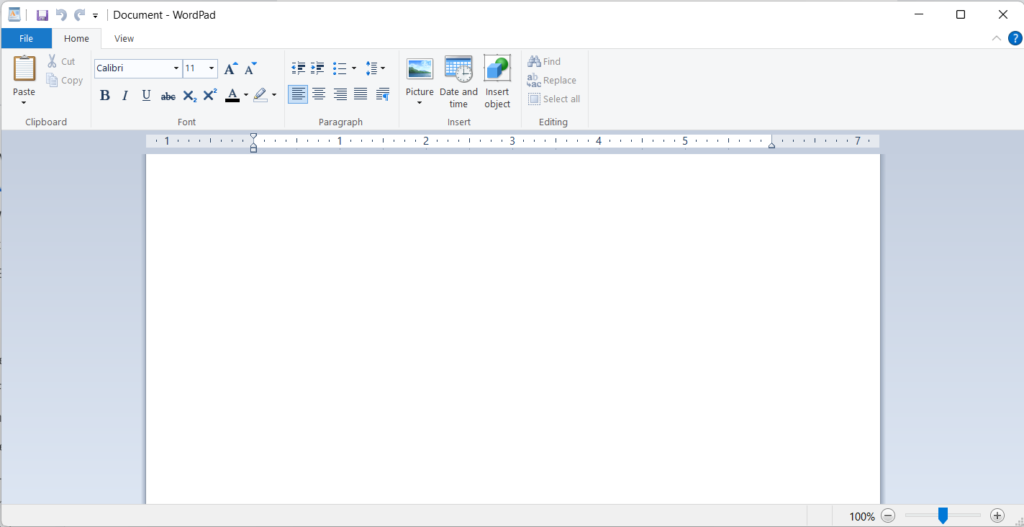
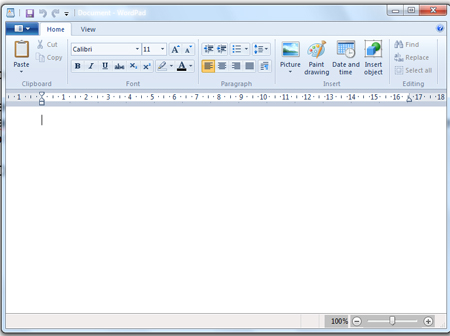
Step 1: Open WordPad. The screen should look like this:
Step 2: You’re now going to choose a font – the design in which the letters you’ll be typing will appear.
In the third row from the top of the screen, you’ll see a box with a name in it (in this example, ‘Calibri’) and a little downward-pointing arrow. The arrow indicates that this is a drop-down list. When you click on the arrow a list will drop down.
This particular list consists of all the fonts that you can choose to create your document. Scroll down the list and you’ll find even more fonts.
Let’s assume that you’d like to use the ‘Arial’ font. Click Arial on the list. The name will now appear in the box at the top of the screen.
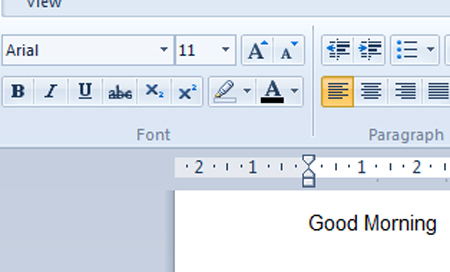
Step 3: Type ‘Good Morning’ and press the ‘Enter’ key. Have a look at what you’ve done.
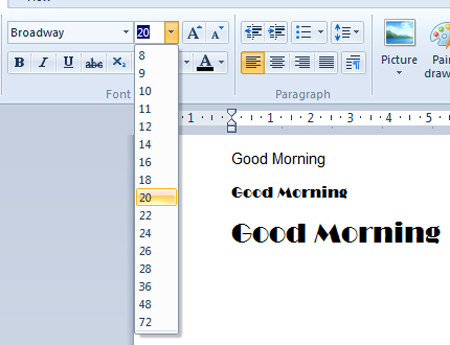
Step 4: Choose another font, type ‘Good Morning’ again and press ‘Enter’. Now compare the two. Here we’ve chosen ‘Broadway’ as the second font.
Step 5: You can also change the size of the letters. Next to the font box near the top of the screen, you’ll find another box containing a number (’11′ in this example). As you did with the font box arrow, click the arrow in this box. A drop-down list appears that consists of numbers. These are the numbers of ‘points’ that letters are measured in. By selecting a bigger or smaller number, you can choose how big to make your writing.
Click ’20′ and type ‘Good Morning’ again.
Step 6: Here’s a shortcut to changing the size of your letters. Next to the number box you’ll see two squares, each one containing a letter ‘A’, one bigger than the other (see right).
If you click on the button with the bigger ‘A’, the size of your text will get bigger. If you click on the other button, it will become smaller.
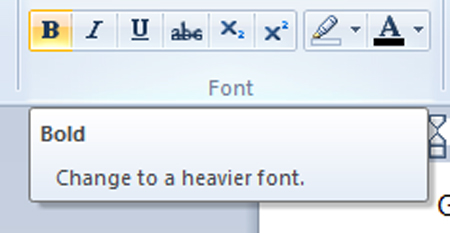
Step 7: Now experiment with the font tools, which you’ll find under the font box. They are:
- B bold
- I italic
- U underline
- abc strike through
- subscript (a letter or figure written below the line)
- superscript (a letter or figure written above the line)
plus the highlighting tool and the font colour tool, both of which you need to click to cause a drop-down list to appear.
If you place your cursor over each of the buttons, a description of what it does opens. Below you can see what ‘B’ stands for:
Try out each font tool. Below we’ve changed the font back to Arial, size 16, and then tried each button in turn.
Step 8: Now try WordPad’s aligning tools. These push text to one margin or the other (‘align left’ and ‘align right’), centre each line (‘centre align’) or make both sides straight.
To the right of the box containing the font colour tool, you’ll see a row of four similar boxes with lines representing text arranged in four different ways:
Place your cursor over each one for a description, then try them. Highlight some text by clicking on it three times in quick succession. Then click on one of the aligning tools to see where the text moves to.
These tools are very handy for such jobs as centring a title or placing an address on the right. Here’s what happens with ‘Good Morning’ by clicking on each of the first three boxes:

Step 9: To the right of the aligning tools, you’ll find four insert tools.
With these, you click to insert a picture from a file, draw a picture to insert in your document, automatically insert the date and time or add a particular object. Try experimenting with them.
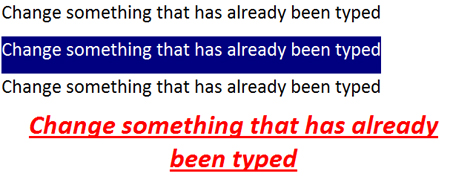
Step 10: You can change the way a word looks after you’ve typed it. Simply double-click on it to highlight it – it turns blue to show that it’s been selected.

You can now use any of the tools above to change the word – for instance, changing its font or size.

While it was selected, ‘something’ was changed to a 36 point size and made bold, underlined and red!
Step 11: You can also change a paragraph. If you triple-click within one, this will highlight it entirely. You can then change its size and colour, make it italic and underline and centre it:
Step 12: One of the most important things to learn to do with your work in WordPad is to save it. That way, you can turn off the computer and later go back to what you’d done. But you really should save your work every few minutes. Then, if there’s a power cut, you’ll lose only a few minutes’ work.
To save, go to the top left-hand corner of the WordPad screen and click the arrow in the blue box (indicated here with the yellow arrow):
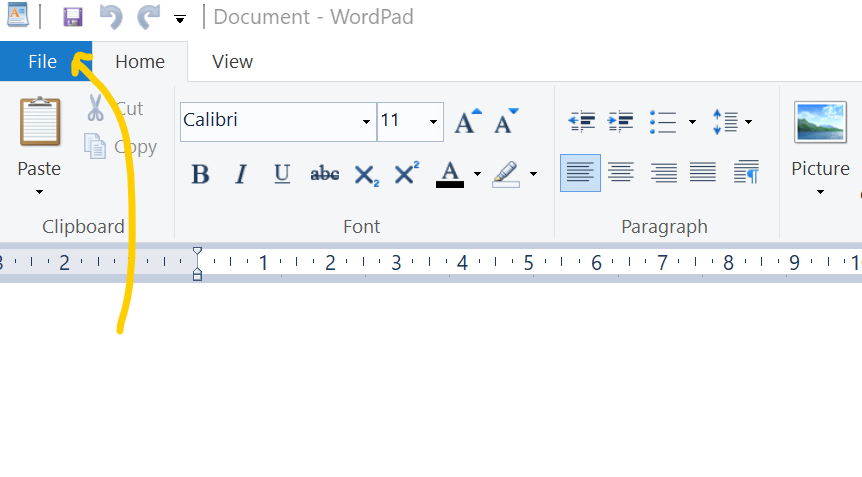
The ‘File’ drop-down list appears. Now click Save. This saves the document exactly as it is.
Step 13: There’s another way of saving your work – by using the ‘Save as’ option. If you use this, you can change some of the document’s attributes – its name or its format, for instance.
To use ‘Save as’, place your cursor over Save as. A new menu appears to the right. Move your cursor straight to the right on to this and click Rich Text document. (‘Rich Text’ is a format that allows you to embed images and other things.) The name of your document will now end with ‘.rtf’.
The ‘Documents library’ now appears. This is where your saved document will be kept. In the box below the main screen, headed ‘File name’, type in a name for your document. Here, ‘First attempt’ is the file name:

It’s important that a document’s name relates to its content – for example, ‘letter to bank’ – so that you can find it again later.
Now click Save to keep this document in the Documents library.
Step 19: Finally, as well as saving your document in digital form within your computer, you can also print it. Open the ‘File’ drop-down list again and, this time, select Print. Then, moving your cursor to the new menu on the right, click Quick print:
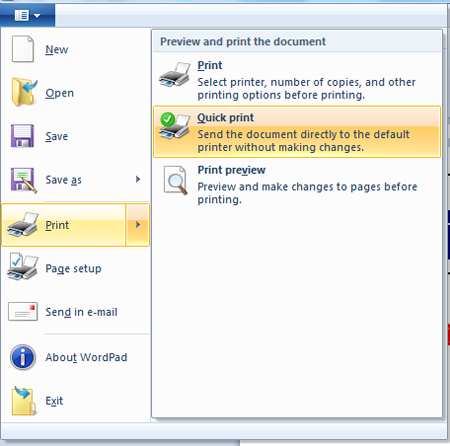
As long as your printer is set up and turned on, your document will print.
Last updated November 2023