
Все способы:
- Вариант 1: Стандартные системные средства
- Способ 1: Перетаскивание
- Способ 2: Горячие клавиши
- Вариант 2: Стороннее программное обеспечение
- Способ 1: Microsoft PowerToys FancyZones
- Способ 2: WindowGrid
- Вариант 3: Фирменное приложение от производителя мониторов
- Вопросы и ответы: 2
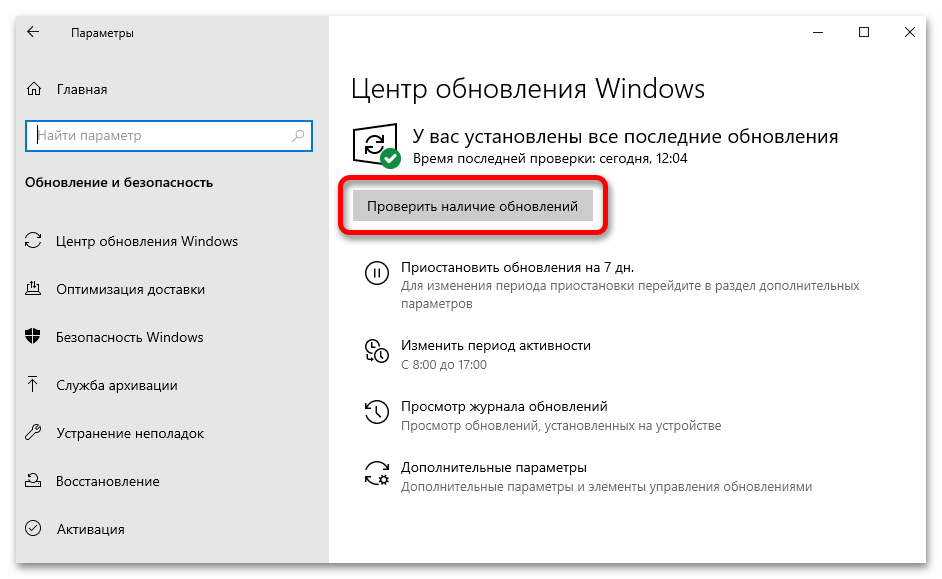
Важно! Некоторое из рассмотренного в статье программного обеспечения может работать некорректно с определенной версией операционной системы. Каждый способ был проверен на Windows 10 сборки 21H2 (19044.1466). В случае возникновения проблем рекомендуем проверить наличие актуальных обновлений и при необходимости выполнить их установку. На эту тему у нас опубликован отдельный материал, с которым и следует ознакомиться.
Подробнее: Как обновить Windows 10 до последней версии
Вариант 1: Стандартные системные средства
По умолчанию в операционной системе выставлены настройки, обеспечивающие автоматическое растягивание активного окна при перетаскивании его к краям экрана или использовании специальных горячих клавиш. Это обеспечивает возможность удобного менеджмента рабочей области. Но если озвученные параметры были изменены, описанные ниже способы разделения экрана на две части не будут работать. В связи с этим потребуется произвести предварительную настройку.
-
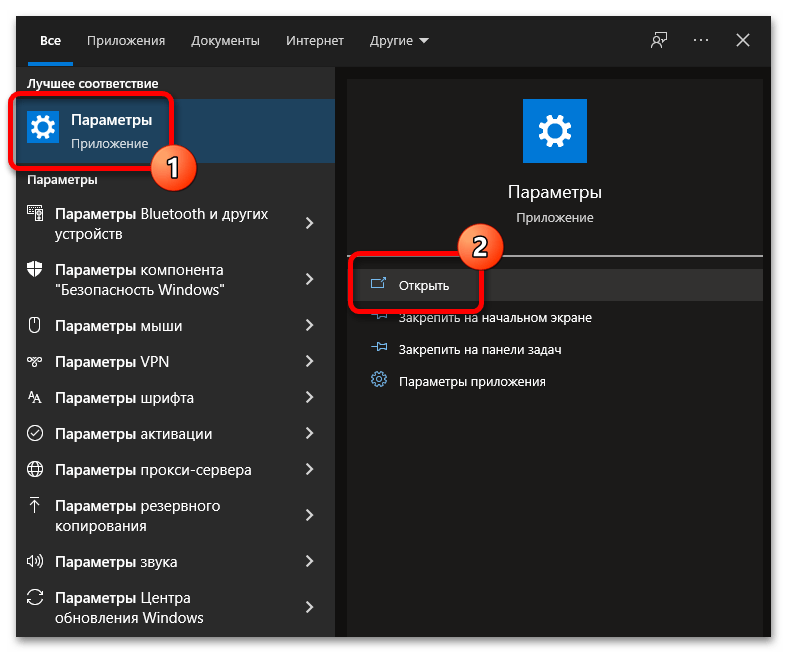
Откройте окно системных параметров, воспользовавшись комбинацией Win + I или произведя инициализацию компонента посредством поискового запроса. В последнем случае кликните по соответствующей области на панели задач, введите в поле запрос
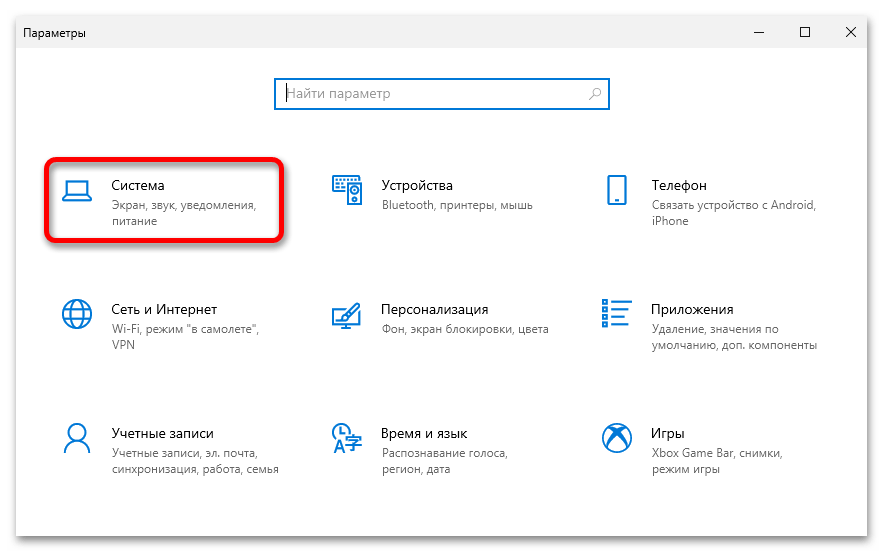
параметрыи нажмите по одноименному приложению в результатах выдачи. - Перейдите в раздел «Система».
- Воспользовавшись навигацией на боковой панели слева, откройте вкладку «Многозадачность» и установите переключатель «Прикрепить окна» в активное положение. При необходимости активируйте дополнительные опции, расположенные ниже.
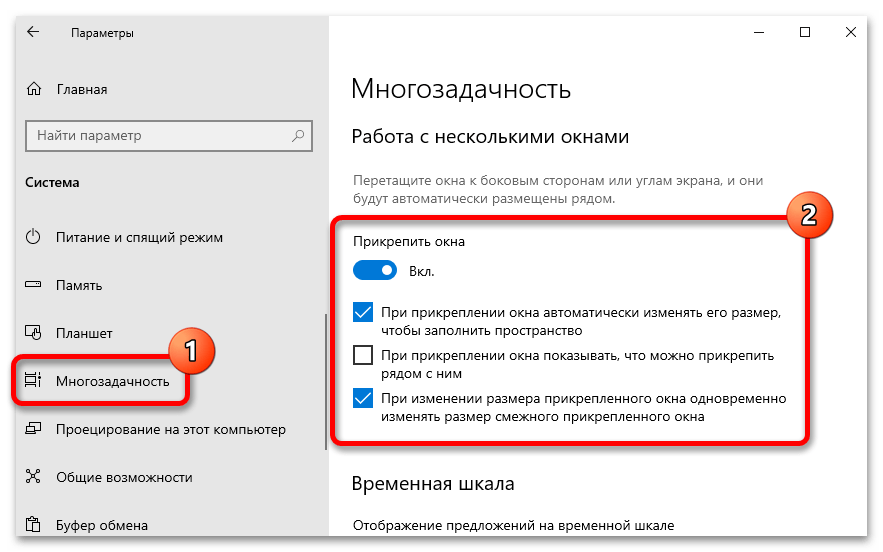
Теперь разделение экрана в операционной системе будет активно и можно переходить к рассмотрению штатных средств, описанных далее.
Способ 1: Перетаскивание
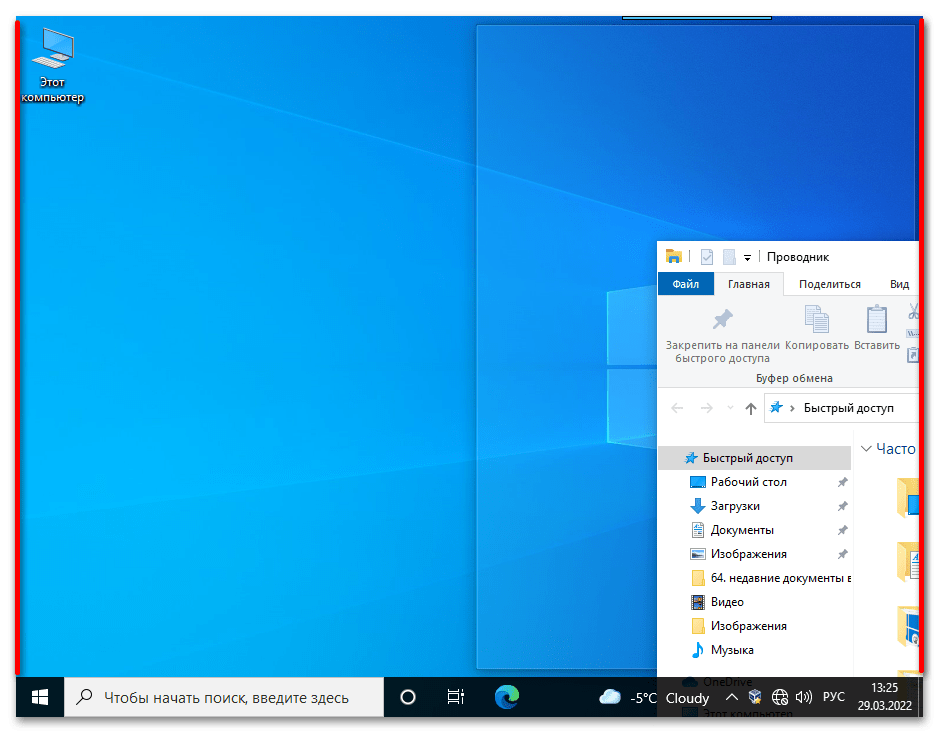
Быстро разделить экран на две части в Windows 10 можно посредством стандартного перетаскивания. Для этого достаточно навести курсор на заголовок активного окна, зажать левую кнопку мыши (ЛКМ) и перетащить его к правому или противоположному краю рабочего стола. Появится полупрозрачная рамка, обозначающая границы новой области отображения, которые по умолчанию всегда располагаются ровно посередине. Останется только отпустить кнопку мыши, чтобы завершить операцию.
Чтобы оставшуюся область свободного рабочего стола заполнить другим окном, над ним следует провести такие же манипуляции. Стоит отметить, что элементы можно размещать поверх других, таким образом образуя множество слоев.
Способ 2: Горячие клавиши
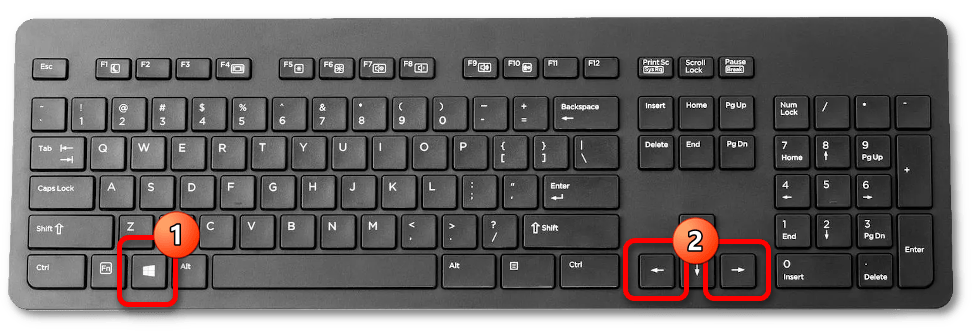
Подобные вышеописанным манипуляции можно произвести без использования компьютерной мыши — с помощью сочетания клавиш на клавиатуре. Делается это следующим образом: выберите окно, которое необходимо растянуть на половину экрана, зажмите клавишу Win и определите направление перемещения с помощью стрелок ← и →.
Обратите внимание! Таким образом можно управлять только тем окном, которое было активно перед нажатием горячих клавиш, учитывайте это каждый раз перед выполнением инструкции.
Вариант 2: Стороннее программное обеспечение
Если штатных средств разделения экрана на две части недостаточно, можно воспользоваться дополнительным программным обеспечением, которое, помимо прочего, предоставляет дополнительные функции для гибкой настройки менеджмента рабочего пространства.
Способ 1: Microsoft PowerToys FancyZones
Microsoft PowerToys — средство от разработчиков операционной системы, которое не было включено в пакет штатного программного обеспечения. Скачать его можно непосредственно с официального репозитория на GitHub, доступного по следующей ссылке.
Скачать Microsoft PowerToys с официального сайта
Если установка приложения вызвала трудности, есть альтернативный способ, предполагающий выполнение специальной команды в интерактивной оболочке PowerShell:
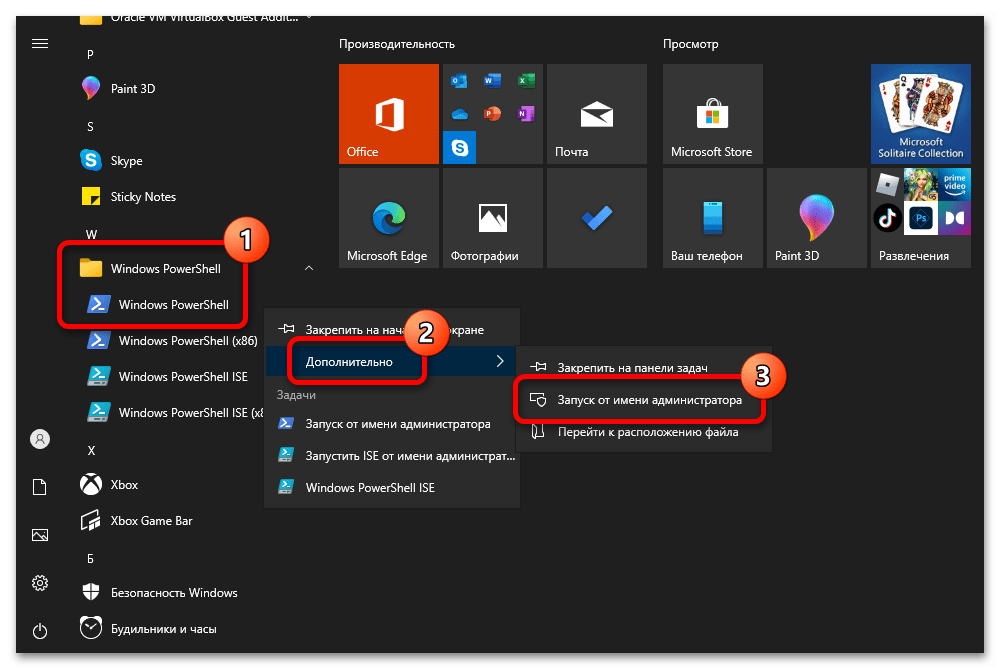
- Вызовите меню «Пуск» и в списке всех приложений спуститесь до папки с названием «Windows PowerShell». Разверните ее, щелкните правой кнопкой мыши по приложению «Windows PowerShell». В появившемся контекстном меню наведите курсор на пункт «Дополнительно», после чего выберите опцию «Запуск от имени администратора».
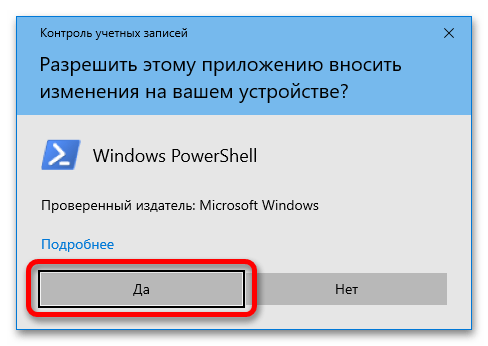
- В диалоговом окне, которое появится после этого, подтвердите предоставление повышенных привилегий, кликнув по кнопке «Да».
-
Вставьте в появившееся окно консоли код, указанный ниже, после чего нажмите Enter для его выполнения:
winget install Microsoft.PowerToys -s winget - Дождитесь завершения процедуры инсталляции, после чего запустите приложение, найдя его ярлык в меню «Пуск».


В приложении собрано множество инструментов для изменения стандартных параметров ОС с возможностью добавления новых функций. Чтобы вручную настроить разделение экрана на две части, выполните следующие действия:
- Воспользовавшись навигацией на боковой панели слева, которую при необходимости можно вызвать с помощью функциональной кнопки, перейдите во вкладку «FancyZones».
- Сразу активируйте переключатель «Включить FancyZones». Затем кликните по пункту «Запуск редактора макета».
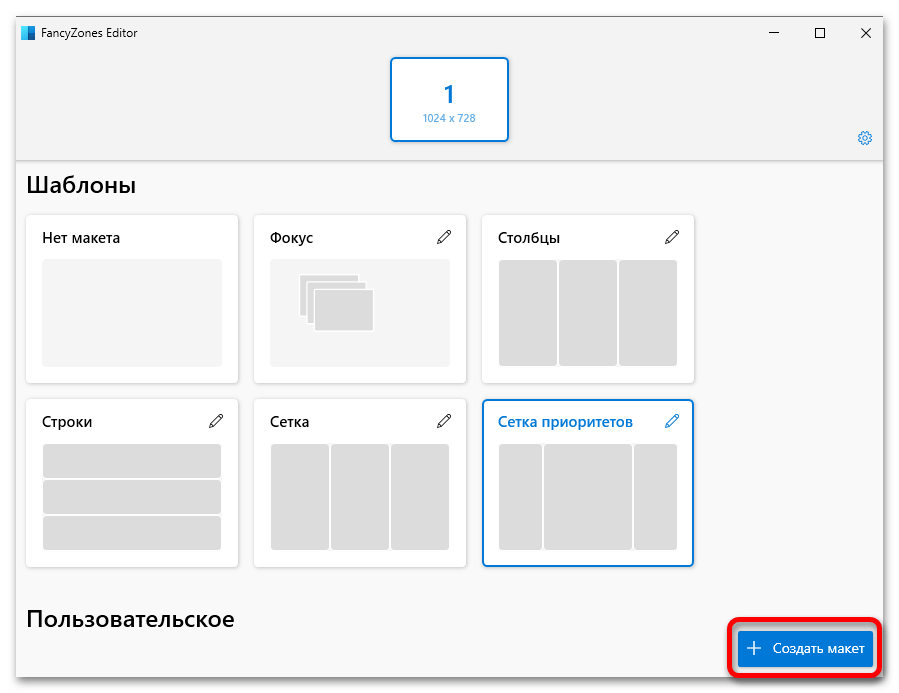
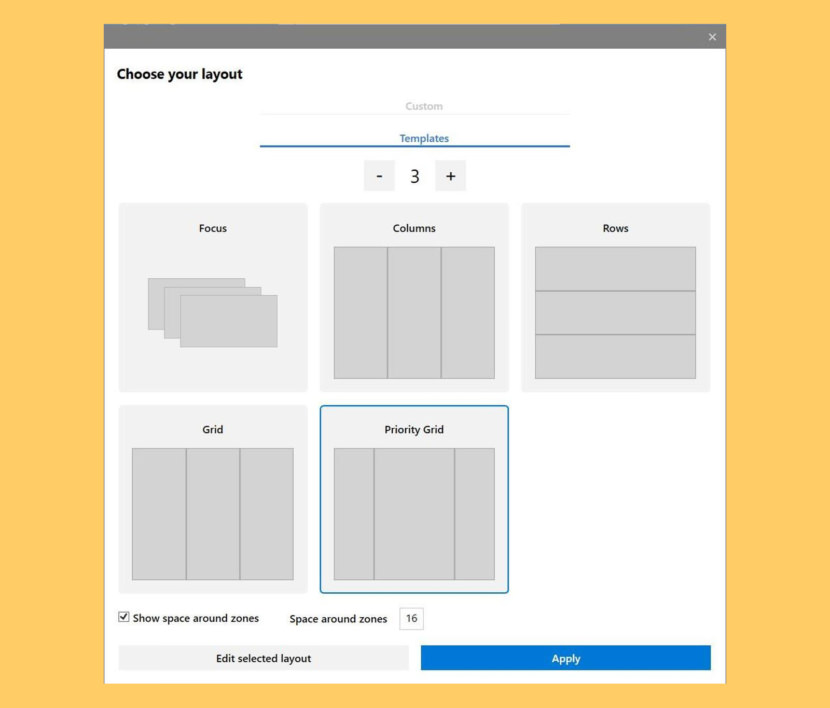
- После появления нового окна с предустановленными шаблонами щелкните по кнопке «Создать макет».
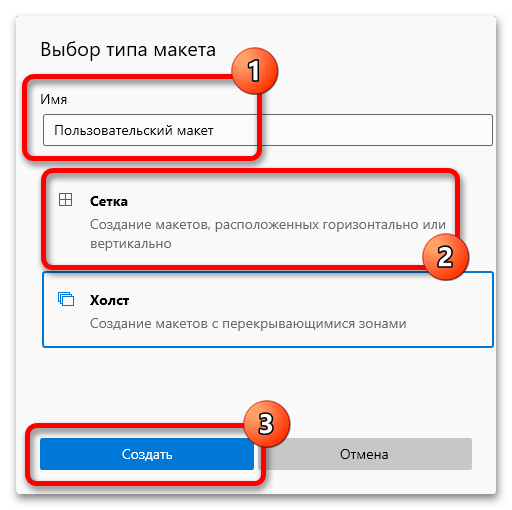
- В поле «Имя» введите произвольное название собственного шаблона, затем выделите пункт «Холст» и нажмите «Создать».
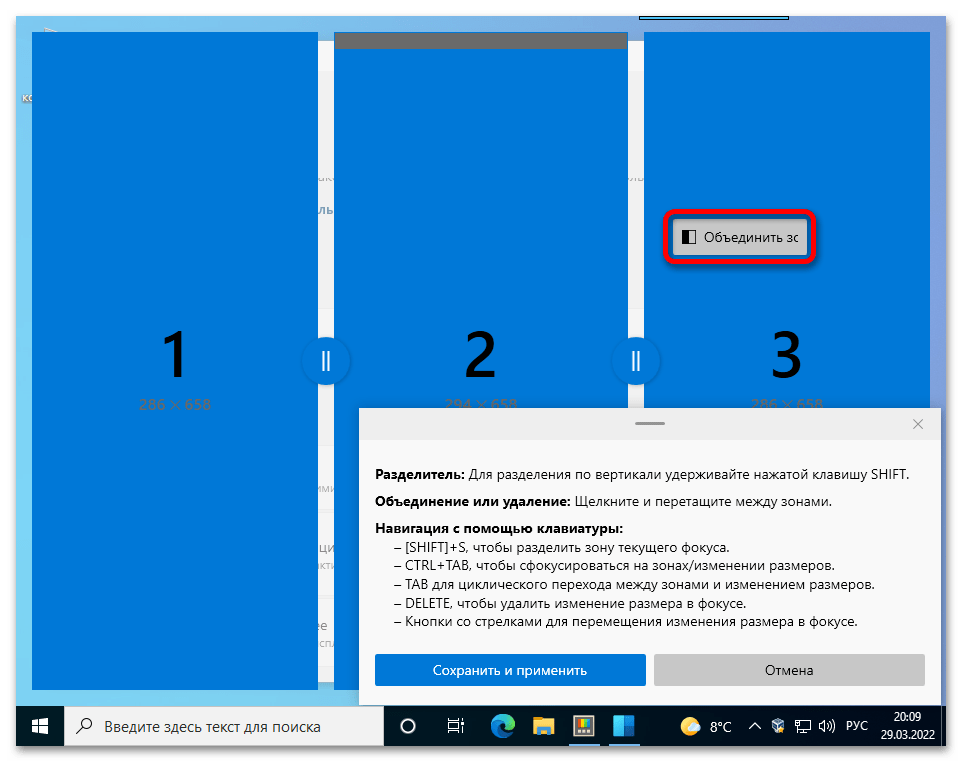
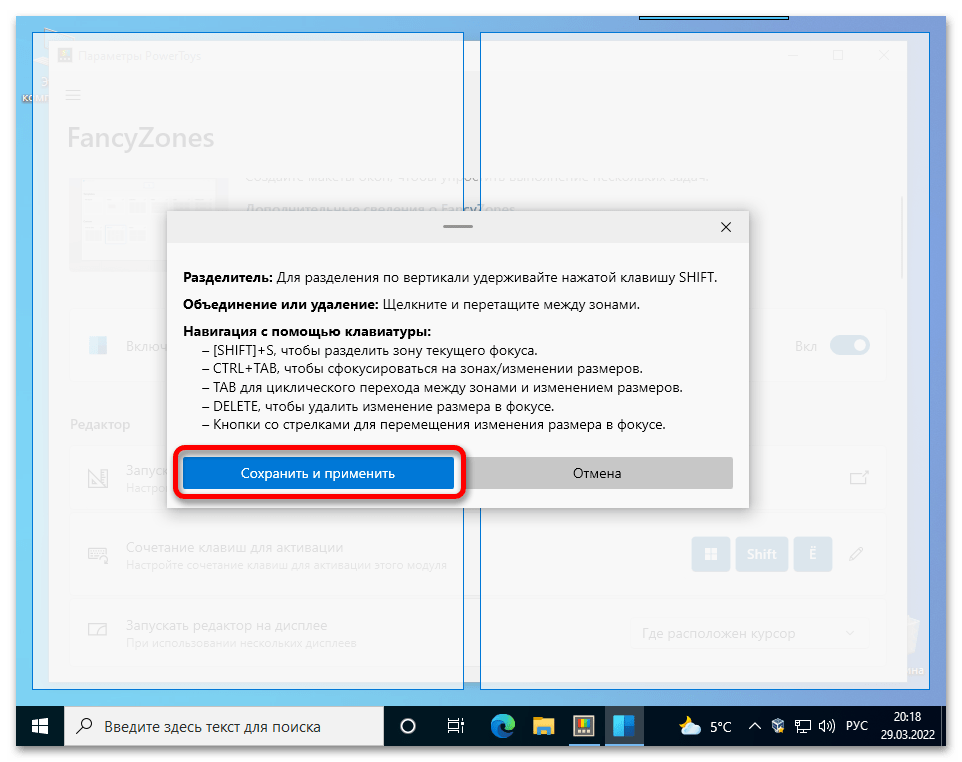
- Ознакомьтесь с основными функциями редактирования макета во всплывающем диалоговом окне, после чего, зажав ЛКМ, выделите все три предустановленные области экрана. Затем кликните по появившейся опции «Объединить зоны».
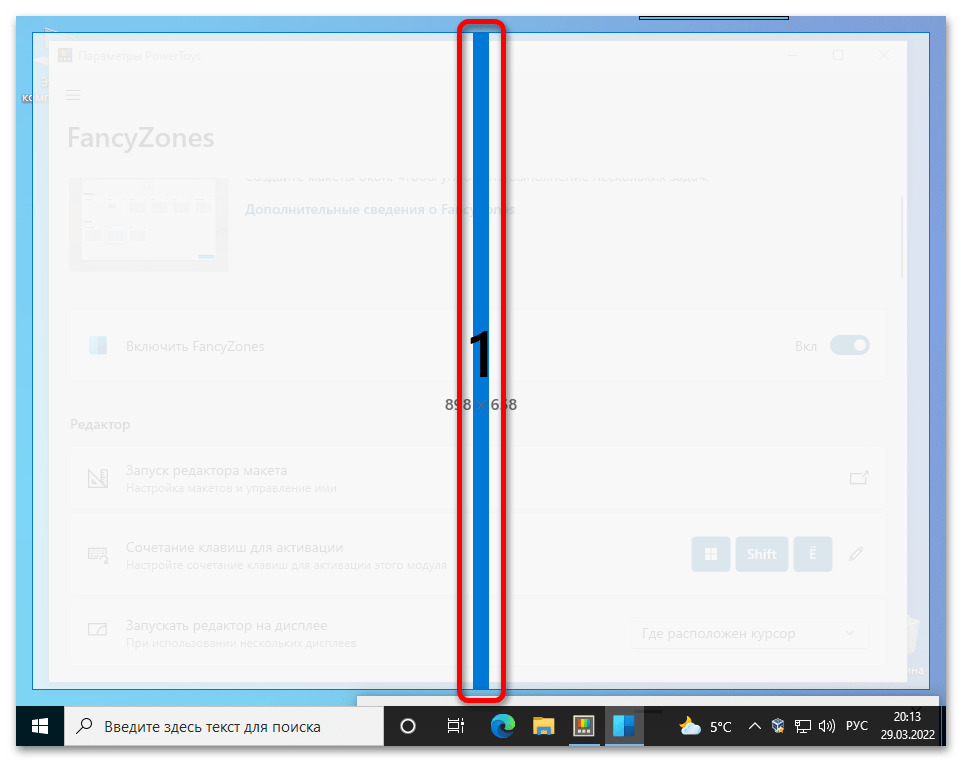
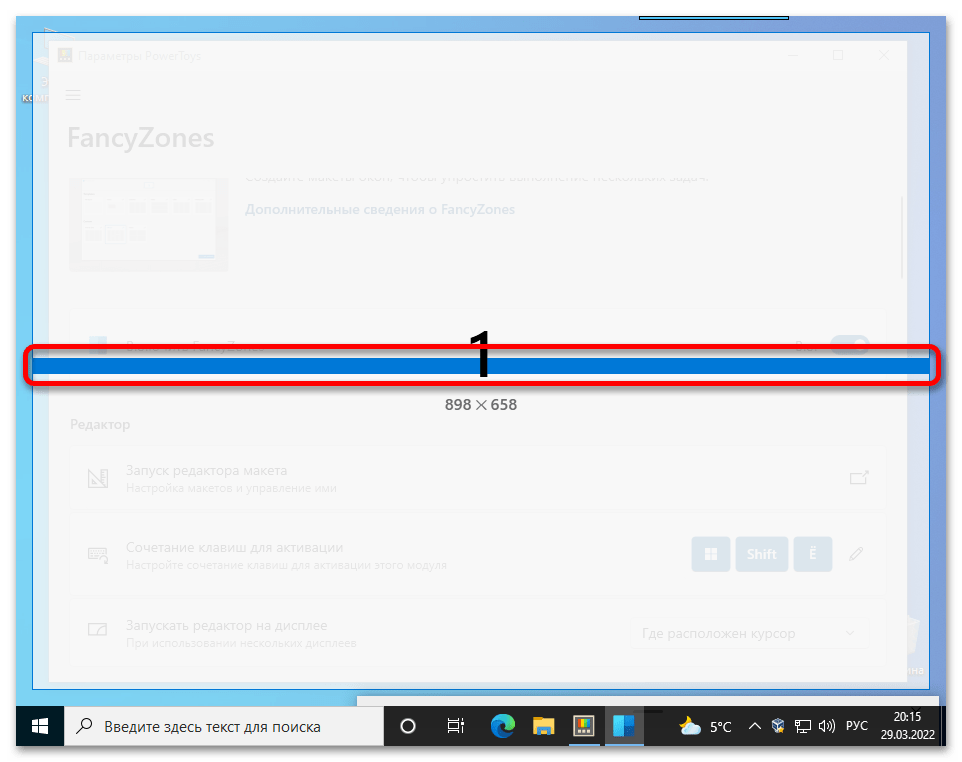
- После появления одной большой зоны на весь экран, управляя мышкой, установите вертикальный разделитель в том месте, где будет находиться граница двух областей рабочего стола. Затем щелкните левой кнопкой.
- Если необходимо установить горизонтальный разделитель, тогда зажмите клавишу Shift и проделайте такие же действия.
- Произведя все необходимые настройки, нажмите в диалоговом окне по кнопке «Сохранить и применить».
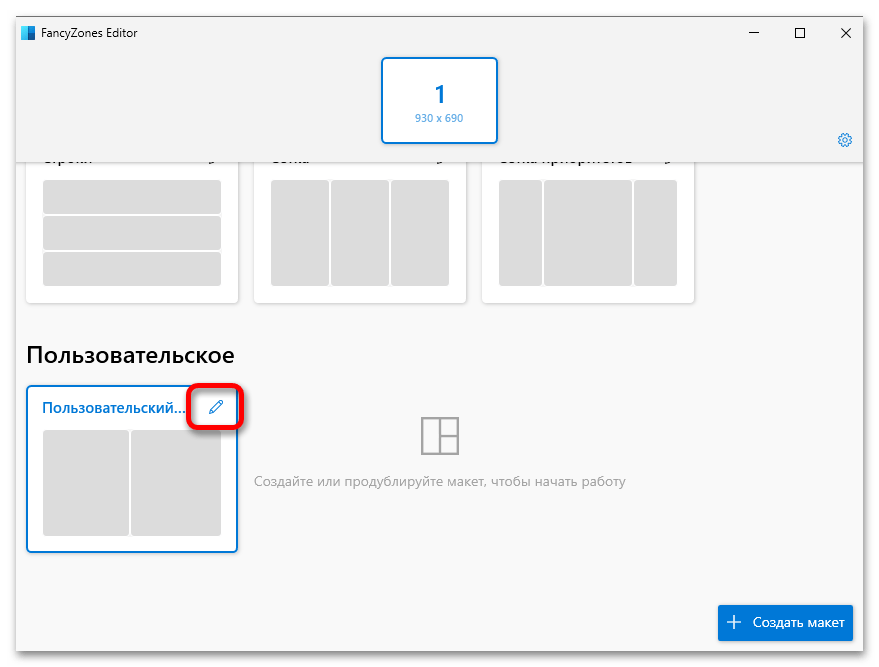
- Вернувшись в меню редактора шаблонов, выделите созданный макет в разделе «Пользовательское» и нажмите на пиктограмму карандаша, расположенную в верхнем правом углу.
-
В новом меню воспользуйтесь счетчиками «Пространство вокруг зон» и «Расстояние выделения», чтобы обозначить в пикселях четкие границы разделения экрана на две части. После этого нажмите «Сохранить».

Обратите внимание! Изменения границ зон макета можно наблюдать сразу же на заднем фоне, чтобы иметь представления о конечном результате настройки.


Чтобы воспользоваться макетом, необходимо зажать ЛКМ на заголовке активного окна и, удерживая клавишу Shift, навести курсор на одну из появившихся областей. Затем останется только отпустить кнопку мыши, чтобы произвести изменение размеров элемента.

Примечание: В разделе FancyZones приложения Microsoft PowerToys есть множество дополнительных функций и опций, ознакомиться с которыми тоже не будет лишним. Они позволяют настроить множество параметров отображения областей рабочего стола, что улучшит менеджмент свободного пространства на экране.
Способ 2: WindowGrid
WindowGrid — утилита, добавляющая функцию удобного выбора размера окна в отведенной заранее области. Есть портативная версия, не требующая установки на компьютер.
Скачать WindowGrid с официального сайта
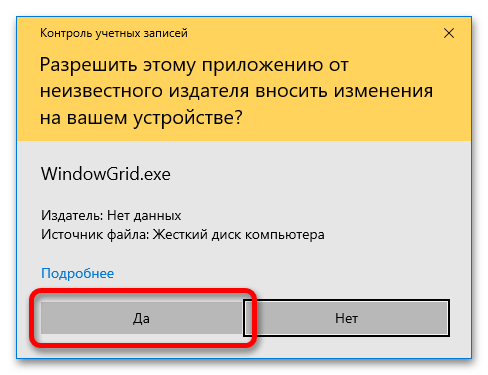
- Распакуйте скачанный с официального сайта архив в любое место и запустите исполняемый файл «WindowGrid.exe». В появившемся диалоговом окне кликните по кнопке «Да», чтобы предоставить утилите права администратора.
-
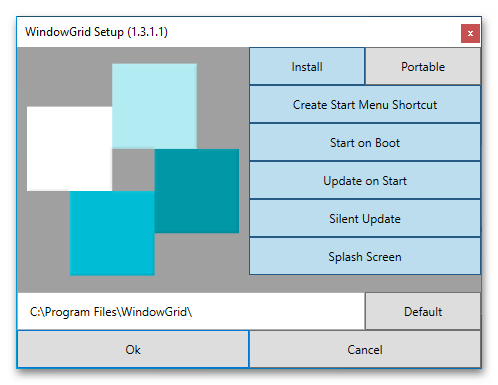
После отображения запроса «Would you like to run the setup for WindowGrid» щелкните «Да», если хотите установить программу на компьютер, или «Нет» для запуска портативной версии.
В первом случае откроется дополнительное окно, в котором необходимо будет настроить параметры инсталляции и нажать по кнопке «ОК». После этого программа распакует свои данные и автоматически запустится.
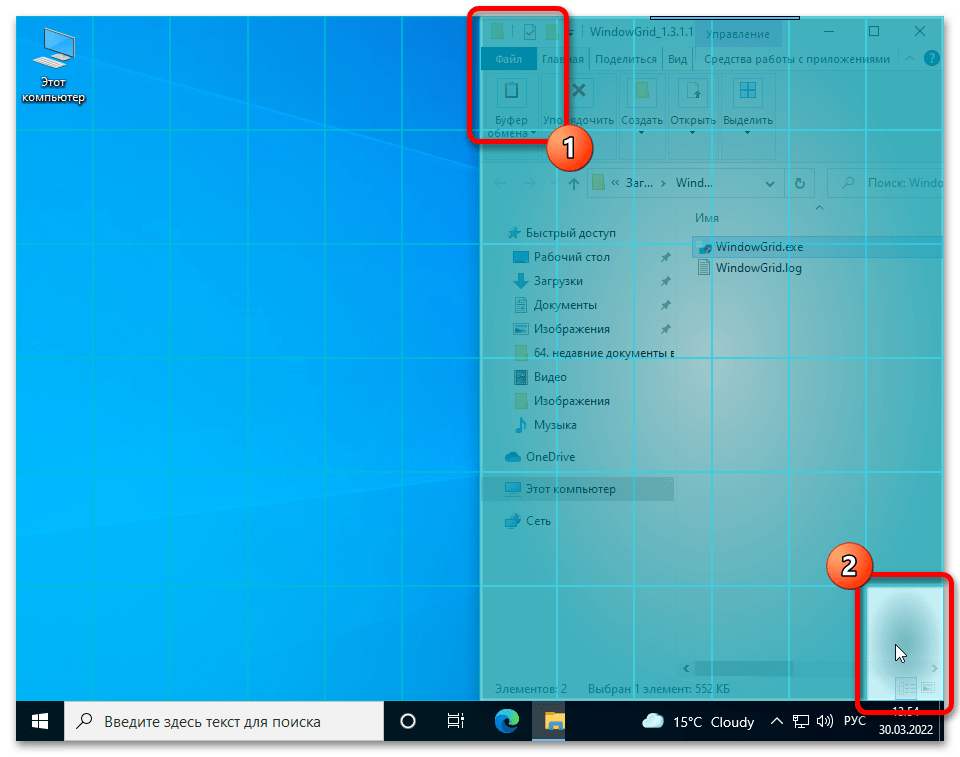
- Откройте любое окно и, зажав ЛКМ, перемещайте его по экрану, после чего начните дополнительно удерживать правую кнопку мыши (ПКМ), чтобы появилась сетка размеров, показанная на изображении ниже.
- Установите курсор в ту клетку, в которой будет располагаться один из углов окна, а затем отпустите ПКМ и переместите стрелочку на экране в другую область, чтобы задать окончательный размер. Отпустите после этого все кнопки мыши.

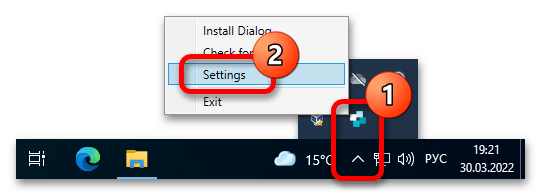
Таким образом в удобной интерактивной форме можно быстро разделить экран на две части, но это не все доступные возможности. Приложение позволяет задать персонализированные настройки — для этого раскройте системный трей, кликните правой кнопкой мыши по иконке утилиты и выберите опцию «Settings».
Откроется окно со списком параметров, в котором особый интерес представляют два поля в блоке «Dimensions». Посредством изменения этих значений можно увеличивать или уменьшать число делений сетки на клетки, что позволяет более гибко настроить размер каждого окна при редактировании его границ.

Примечание: Рекомендуем также ознакомиться с остальными параметрами в окне настроек, так как путем их изменения можно скорректировать особенности визуализации разбиения рабочего стола.
Вариант 3: Фирменное приложение от производителя мониторов
Некоторое программное обеспечение от производителей мониторов и ноутбуков тоже может содержать специальные функции для менеджмента рабочего стола с возможностью его разделения. Универсальной инструкции по использованию каждой такой программы дать невозможно, так как все они имеют отличный друг от друга интерфейс. Важно самостоятельно разобраться во всех предоставляемых параметрах и попытаться найти нужный.
Ниже представлен список фирменных приложений от крупных производителей со ссылками на страницы их скачивания в официальных источниках.
- Dell Display Manager;
- Samsung Easy Setting Box;
- Acer Display Widget;
- LG 4-Screen Split / LG ScreenSplit;
- MSI Display Kit.
Наша группа в TelegramПолезные советы и помощь
How to split your laptop or desktop PC Screen / 4K Monitor in Windows or macOS for better productivity? Microsoft Windows 10 and Apple macOS already have this feature built into them, just drag your window to any corner of the screen and it will automatically snap, resize and fit half of the screen. The only problem is, what if you need to fit 5 or 6 windows into a screen?
Continue ➤ 10 Free Screen Capturing Tools For Windows, Mac & Linux
How to split your Laptop or PC Screen/Monitor in Windows? Here’s a complete list of software that enables you to split your computer screen monitor into two or more so that they can view two applications side-by-side. This split screen software works across dual monitors too, it will also split your wallpapers so you can have a different wallpaper on each monitor.
Above is a short video showing how to take advantage of the new Apple’s macOS El Capitan feature called “Spilt Screen” where you can have 2 windows placed side by side automatically.
1. WindowsGrid

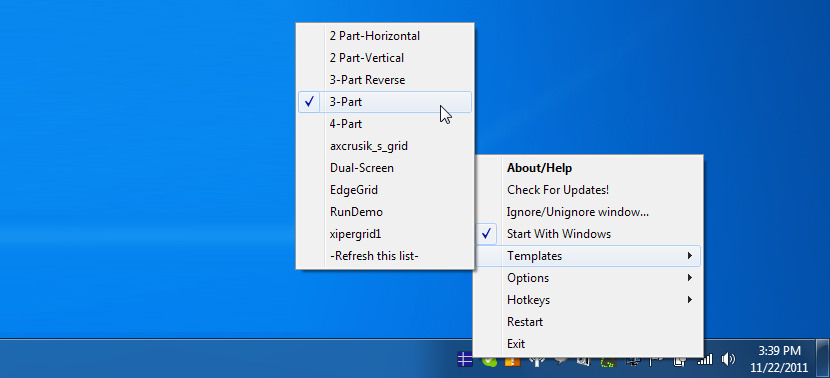
WindowGrid is a modern window management program that allows the user to quickly and easily layout their windows on a dynamic grid. WindowGrid gives functionality to the normally useless right mouse button when moving a window. Doing this will enable the grid snap mode.
2. GridMove
GridMove is a program that aims at making windows management easier. It helps you with this task by defining a visual grid on your desktop, to which you can easily snap windows. This program comes bundled with some predefined grid templates, that can be easily swapped, but also has ways of creating custom grids or sharing grids made by others.
GridMove makes moving windows, resizing windows, displaying them on cascade or on mosaic, making them on top or anything you can think of as easy as drag and drop.
3. AltDrag
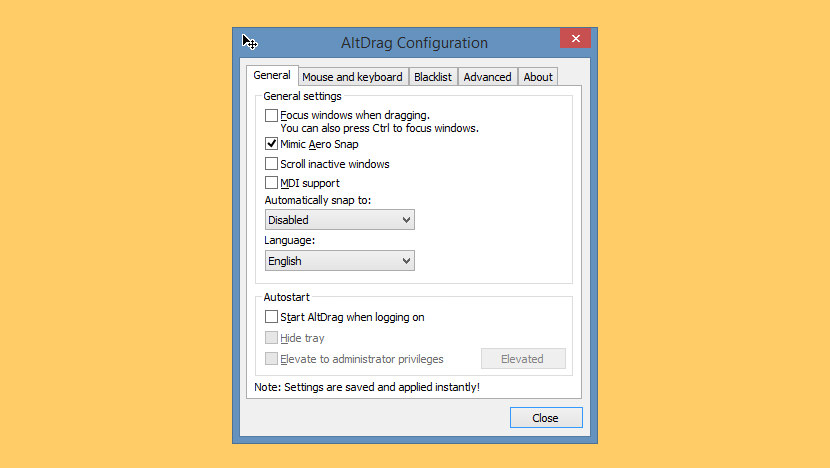
AltDrag gives you the ability to move and resize windows in a new way. After starting AltDrag, you can simply hold down the Alt key and then click and drag any window. This behavior already exists in Linux, macOS and Windows 10 operating systems, and AltDrag was made with the mission to copy that behavior to the older Windows platform, and then to further expand it with new intuitive functionality.
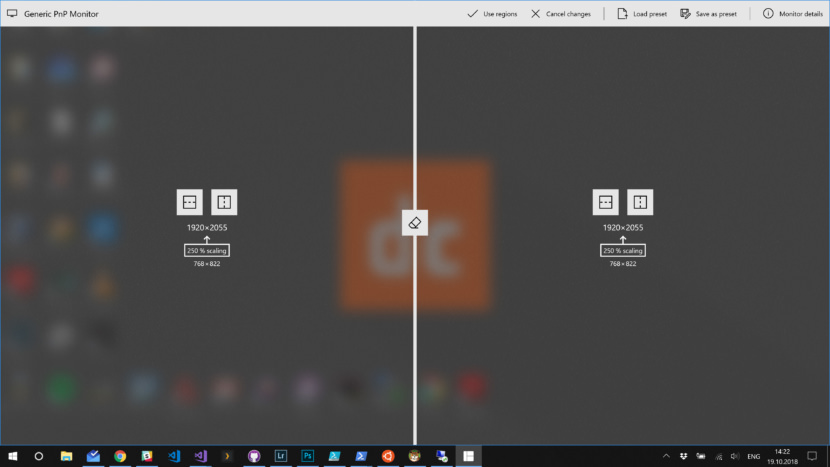
4. UltraView Desktop Manager
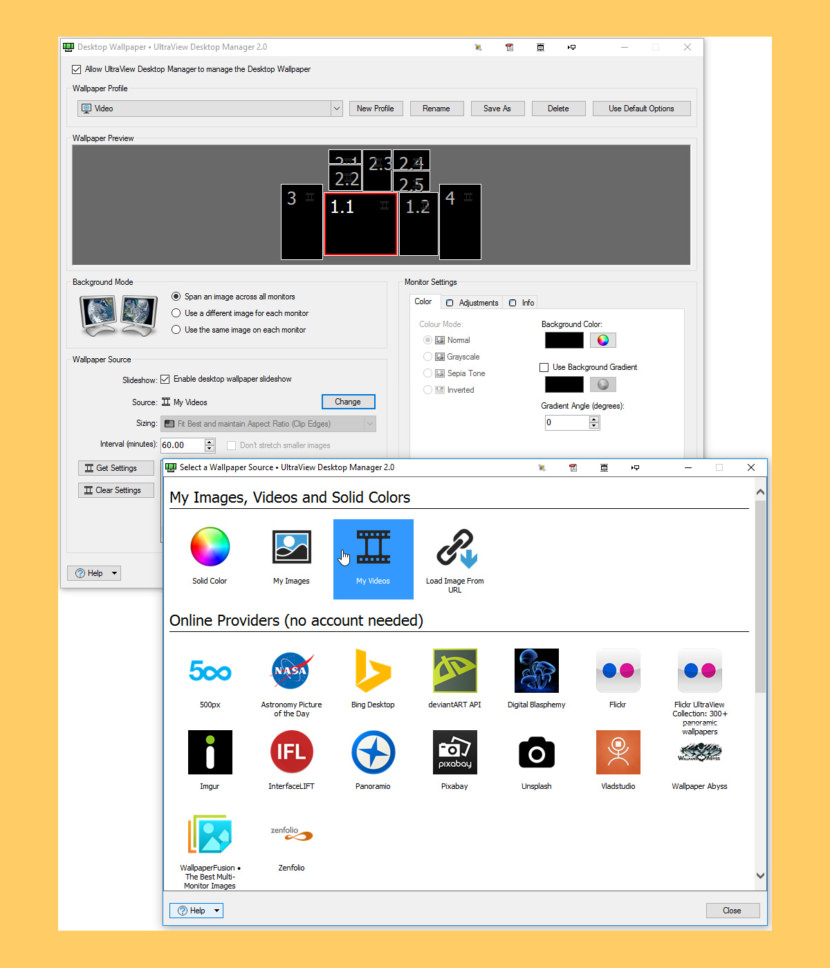
UltraView Desktop Manager 2.0 now brings the productivity benefits of multiple monitors to large, high-resolution monitors, especially 4K UHD, QHD and ultrawide monitors.
Today’s massive LED monitors and 4K TVs are exciting to look at but can be difficult to work with productively. Key info and apps can get buried under other windows, causing you to miss deadlines or important alerts as you struggle to task-switch and multitask across a variety of work obligations, personal obligations and personal interests, little of which is visible to you at any one time.
Now you can split those giant monitors and 4K TVs into any number of virtual monitors, including micro monitors dedicated to time tracking, task managers, personal email, instant messaging, social media, live financial TV news, streaming music and video, newsfeeds and security cameras. Now you’ll never miss anything important because you lacked timely awareness.
5. Microsoft PowerToys
Windows 10 received PowerToys four years after its release. On May 8, 2019, Microsoft relaunched PowerToys and made them open-source on Github. Users can add their own additions and customizations to PowerToys. The first preview release was in September 2019, which included FancyZones and the Windows key shortcut guide. PowerToys for Windows 10 comes with the following utilities:
- FancyZones adds a window manager that makes it easier for users to create and use complex window layouts.
- PowerRename adds an option to File Explorer to allow the user to rename files using search and replace or regular expression.
- Windows key shortcut guide is a full screen overlay that allows the user to view the current windows key shortcuts available in the current window.
- Window Walker
- Image Resizer
6. Aquasnap
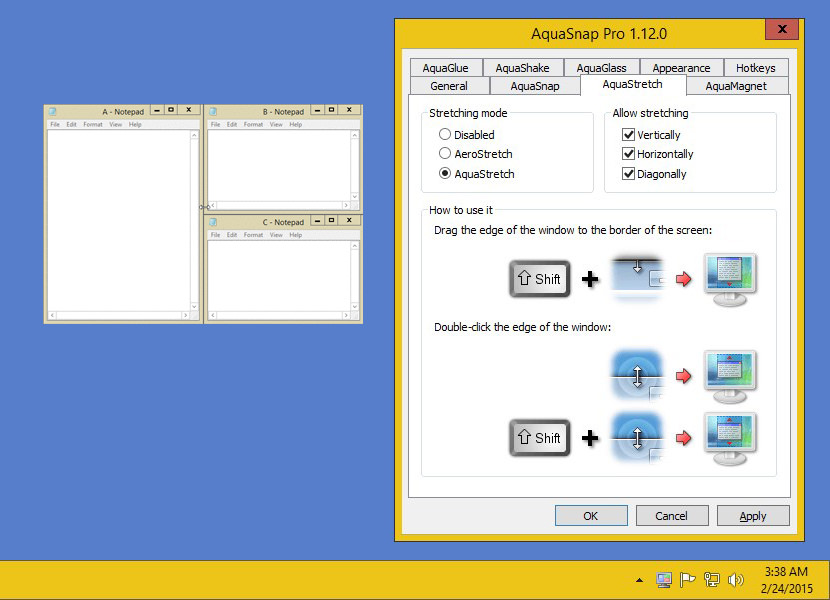
Aquasnap is a powerful window manager that helps you arrange and organize multiple applications on your desktop with minimum effort. It allows you to achieve maximum multitasking, especially if you own a high-resolution monitor or a multi-monitor setup.
Drag and drop your windows to the sides or corners of the screen, and they’ll automatically be resized to fit one half or one quarter of the screen. This feature is just like the built-in Aero Snap function of Windows 10, but with more possibilities! This is especially useful on either a 4K monitor or multiple monitors.
7. Divvy
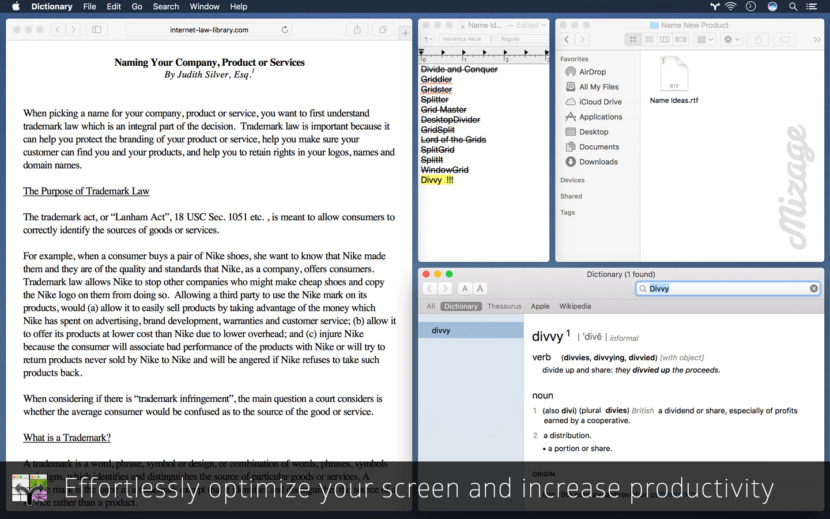
Divvy is an entirely new way of managing your workspace. It allows you to quickly and efficiently “divvy up” your screen into exact portions. With Divvy, it is as simple as calling up the interface, clicking and dragging. When you let go, your window will be resized and moved to the relative position on the screen. If that seems like too much work, you can go ahead and create as many different shortcuts as you’d like that resize and move your windows in exactly the same way.
8. BetterSnapTool
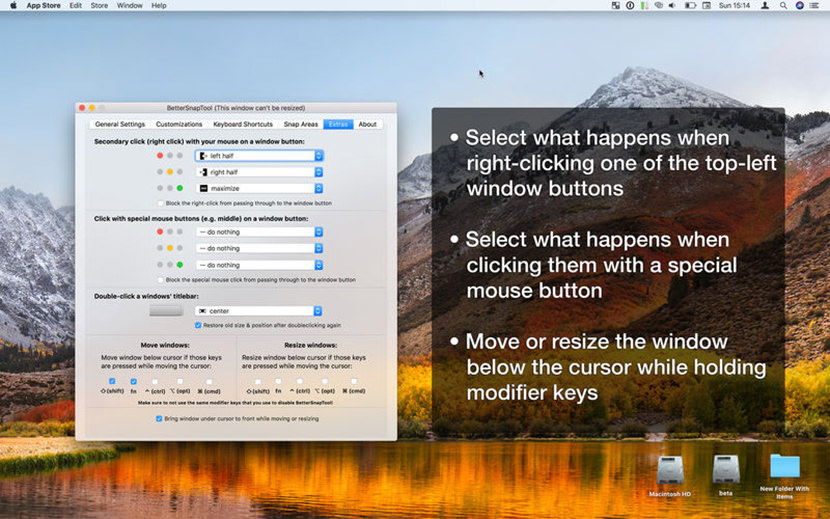
As the name implies, it is a better snap tool than the default window snapping feature in macOS. BetterSnapTool is a utility that mimics Windows 7 Aero snap, allowing you to easily manage your window positions and sizes by either dragging them to one of your screens corners or to the top, left or right side of your screen. This lets you easily maximize your windows or position them side by side. BetterSnapTool supports multiple monitors, hidden dock etc. You can change the design of the preview window and even set application specific snapping sizes!
9. Magnet (Windows Manager)
Every time you want to copy content from one app to the other, compare files side by side or multitask in any other way, you need all the windows arranged accordingly. Magnet makes this process clean and simple. In just one drag to the edge, you snap any window into the left, right, top or bottom half of your screen. And by dragging windows to the corners, you snap them into quarters. Taking advantage of such arrangements eliminates app switching and greatly enhances workspace efficiency. Magnet supports keyboard shortcuts as well, for every command it has to offer. There is that little icon sitting in the Menu Bar where you can find a predefined set or create yours. Features:
- Left/Right/Top/Bottom Halves of the screen supported
- Left/Center/Right Thirds of the screen supported
- Left Two Thirds & Right Two Thirds of the screen supported
- Fullscreen & all four Quarters of the screen supported
- Runs both on Retina and regular displays
- Up to six external displays supported
- Built to run on all macOS versions since 10.9 Mavericks
- macOS 10.12 Sierra optimized
10. Moom
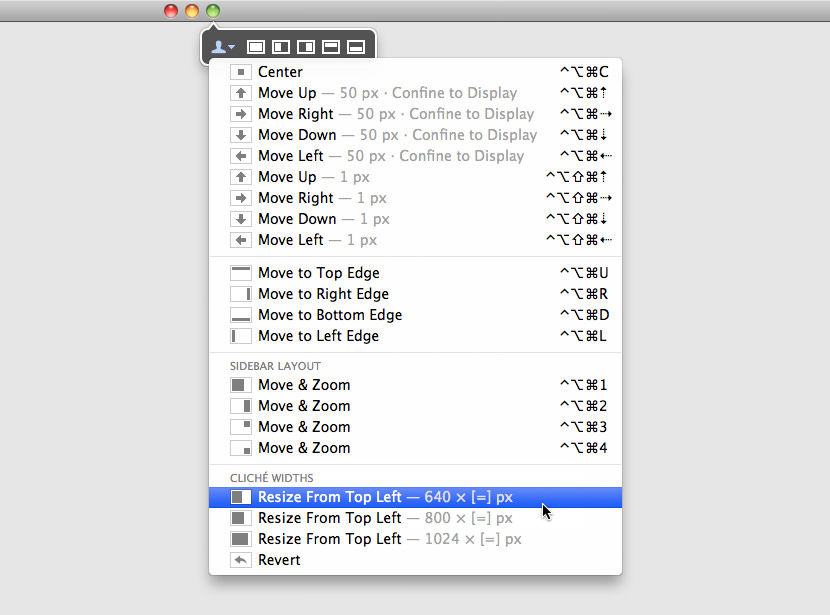
Do you spend a lot of time moving and zooming windows, so you can better see and work with all the content on your Mac? Instead of doing that work yourself, let Moom handle the task for you. When used via the mouse, all you need to do is hover over the green resize button in any macOS and Windows. Moom’s panel appears, and you then click the desired action.
When used via the keyboard, a hot key displays the Moom bezel, and you can then use the arrow and modifier keys to move and resize the windows. You can also save window layouts, create custom controls with shortcuts that work globally or work only when Moom’s keyboard bezel is on screen.
11. Better Window Manager
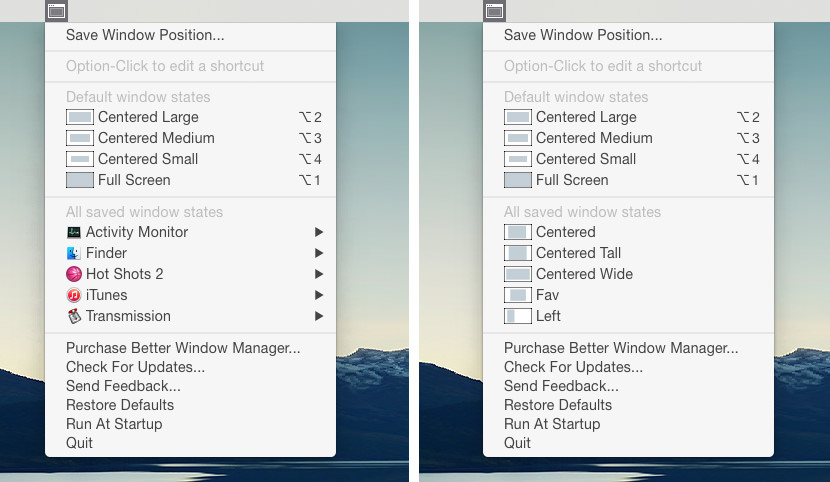
A tiny window management app for the Mac. Better window manager allows you to put windows where you want, save their positions, and restore them with a keyboard shortcut.
12. MaxSnap
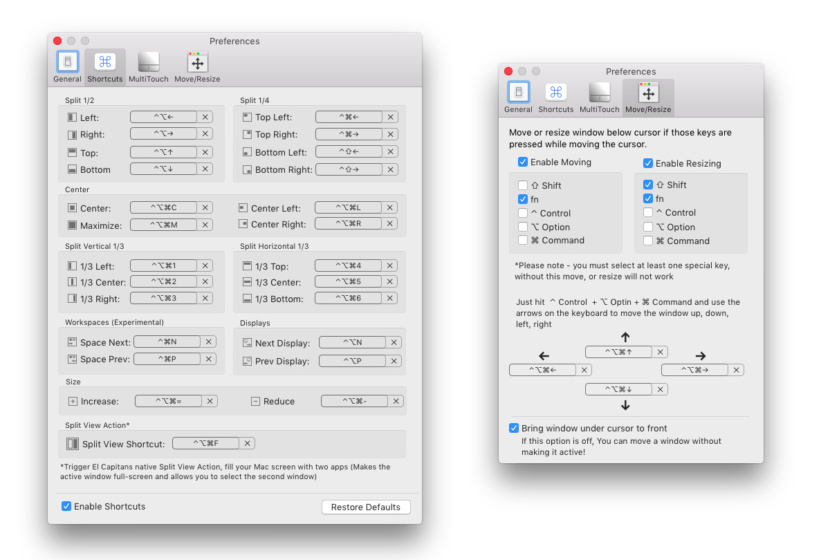
Typically, in macOS, you use the window title to move and the lower right corner to resize the window. MaxSnap allows you to re-arrange windows by using its entire surface – just click fn or Fn+Shift. and start changing window size or location. It is very convenient. You won’t be able to survive without it. Those who used Linux before probably remember the Alt-Drag function.
13. MaxTo
The window manager you didn’t know you missed. Divide your screen, increase your productivity. You can keep a different set of regions open on each virtual desktop. Use their handy setting to choose if you want each virtual desktop to have its own set of profiles. Only works on Windows 10. Because only Windows 10 has virtual desktops.
14. Shutter Split Screen
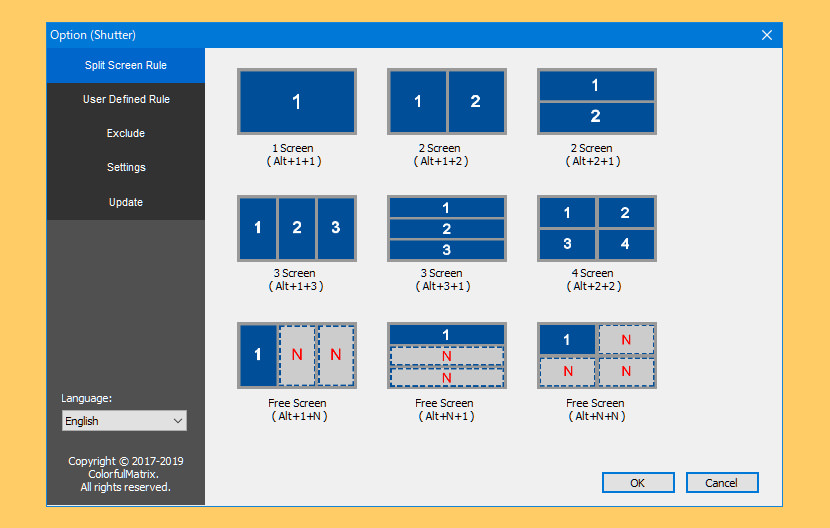
With widescreen, multi-screen, Ultra HD screen (4K, 5K and 8K) use increasing, you often switch back and forth between browser, or between your browser and a text document.
Sometimes you also need to move or resize the window and wished there was some way you could just fast and look at multiple at the same time. When you focus only on a portion of the area on the screen, you do not take full advantage of every area on the screen.
15. Spectacle
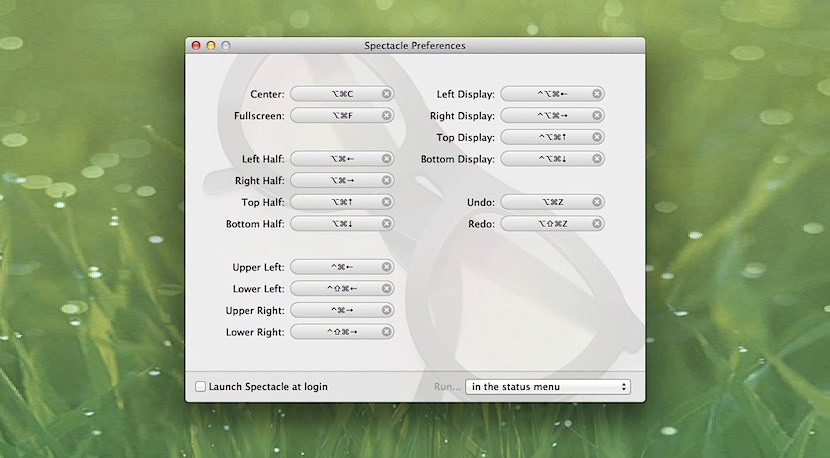
[ Discontinued ] Using Spectacle you can view multiple documents side-by-side, move windows to other displays, or even focus your full attention to a single task. Move and resize windows with ease. Window control with simple and customizable keyboard shortcuts
16. KDE Mover-Sizer

[ Discontinued ] An essential add-on for Windows XP, 2K, Windows Server, Windows 7 and Windows 8/8.1. It is a background application that emulates the behaviour of KDE, which is a rather good Linux desktop environment. Essentially, you hold down the Alt key, and Left-click to move a window, Right-click to resize it; and from anywhere inside the window.
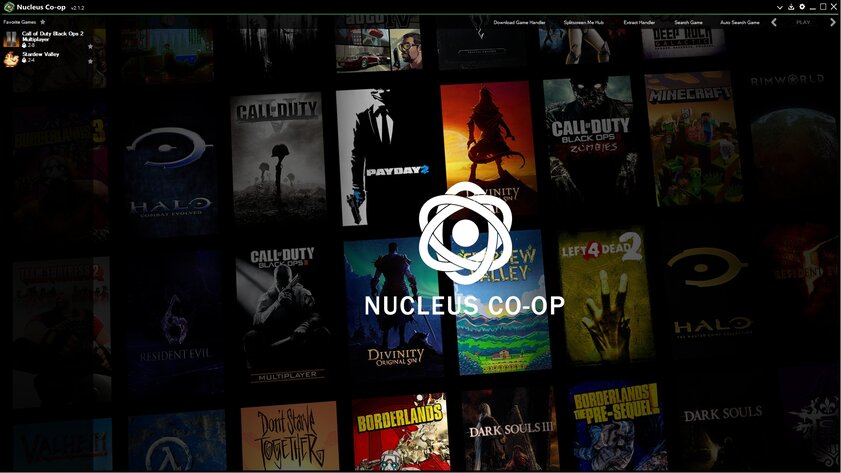
Далеко не все современные игры поддерживают кооперативный режим, и уж тем более локальный, с разделением экрана. Бесплатная Nucleus Co-op исправляет эту ситуацию. Это программа, которая позволяет запускать игры в режиме сплит-скрин на одном компьютере. Причём даже те проекты, которые неспособны на такое изначально. В этой статье я протестирую Nucleus и расскажу, как его настроить.
Как работает Nucleus Co-op
Программа позволяет на одном компьютере запускать игры в кооперативном режиме, выводя изображение для каждого пользователя в отдельное окно. Причём Nucleus умеет разделять экран как вертикально, так и горизонтально. А некоторые проекты можно даже отображать на разных мониторах.
Nucleus Co-op работает далеко не со всеми играми. Список поддерживаемых ограничен, но достаточно велик. Сейчас он включает более 500 тайтлов. В большинство проектов возможно сыграть благодаря специальным плагинам для Nucleus. Их можно даже создавать самому. Правда, это не самое простое занятие, которое требует подробного изучения документации.
Для управления используются разные устройства. Например, одному пользователю можно назначить геймпад, а другому — клавиатуру с мышью. Либо же подключить несколько комплектов периферии, что будет удобно для шутеров. Утилита позволяет настроить сессию хоть для двух, хоть для шестнадцати игроков. Максимальное количество ограничено самой игрой.
Кроме того, Nucleus Co-op будет полезна даже для игроков из разных городов, если использовать стороннюю программу Parsec для подключения к хосту.
Тестирование
Для того, чтобы опробовать Nucleus Co-op, я отобрал несколько популярных игр из списка поддерживаемых.
Call of Duty: Black Ops 2
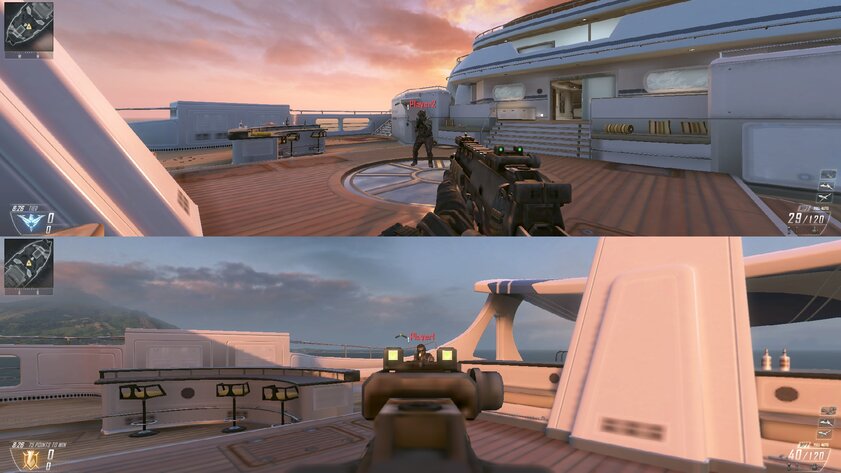
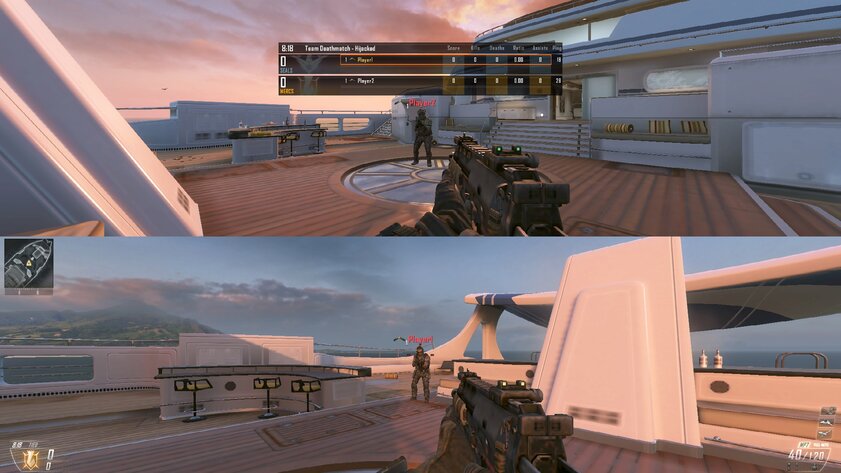

Black Ops 2 — это самая свежая игра в популярной франшизе шутеров, которую поддерживает Nucleus. Пускай и со второго раза, но проект запустился и работал как надо. Важная особенность: BO2 позволяет запускать совместную игру только в мультиплеерном режиме. То есть доступа к сюжетным миссиям не будет.
Чтобы организовать кооперативную сессию, мне пришлось создать и запустить кастомное лобби от лица первого игрока, а затем пригласить всех остальных участников. Иногда могут возникать ошибки или зависания при попытке открыть второй экземпляр игры, но как только всё настроено и загружено, технических проблем не возникает. Кстати, стоит упомянуть, что каждое новое окно потребляет дополнительные ресурсы. Чем больше игроков, тем больше нагрузка на компьютер.
С управлением здесь почти всё гладко. Я настроил геймпад для первого пользователя и клавиатуру с мышью для второго. Обе схемы управления работают одновременно и никак не мешают друг другу, но только если воспользоваться функцией «Заблокировать управление» клавишой End.
Counter-Strike: Source
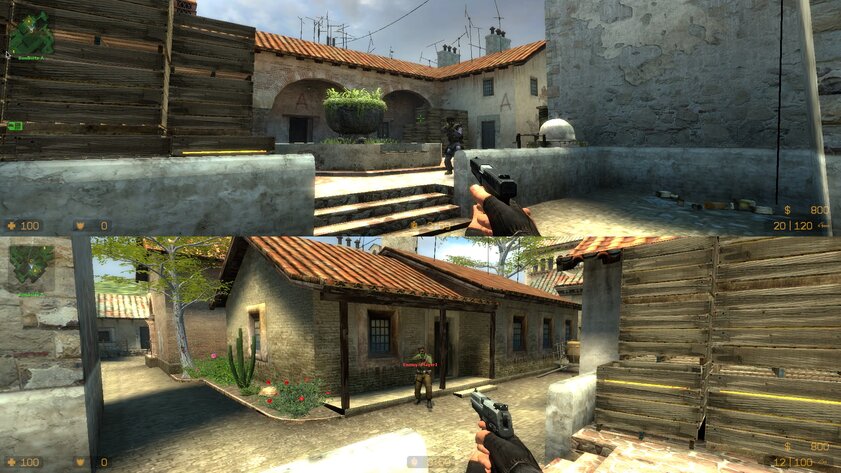
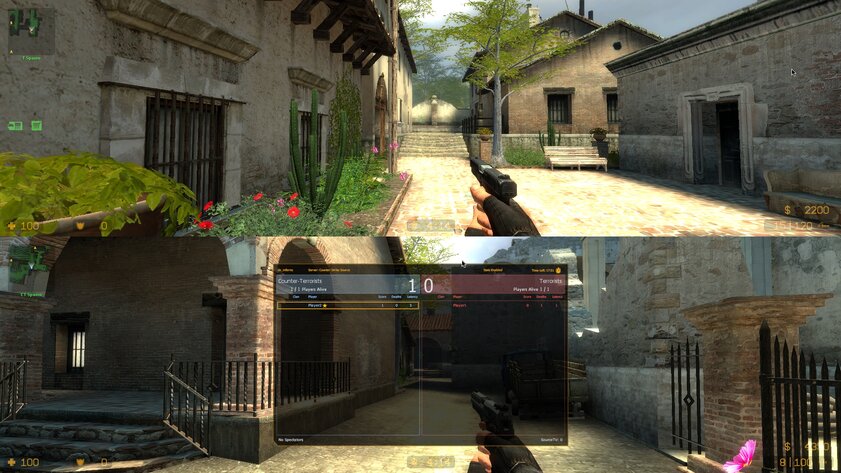
Новые версии Counter-Strike, к сожалению, Nucleus не поддерживает. Зато Counter-Strike: Source настраивается и запускается без каких-либо проблем. Для теста я подключил две мыши и две клавиатуры, настроив по одному комплекту на игрока. Пару раз возникала проблема, когда одно устройство управляло сразу двумя окнами, но это решается переключением на окно Nucleus с помощью Alt-Tab.
Всё, что потребовалось для совместной игры — создать локальный сервер внутри игры CS: Source, подождать загрузки карты и подтвердить запуск второго окна. Подключение других пользователей к хосту происходит автоматически. Пожалуй, один из наименее проблемных проектов среди всех, протестированных мною.
Stardew Valley
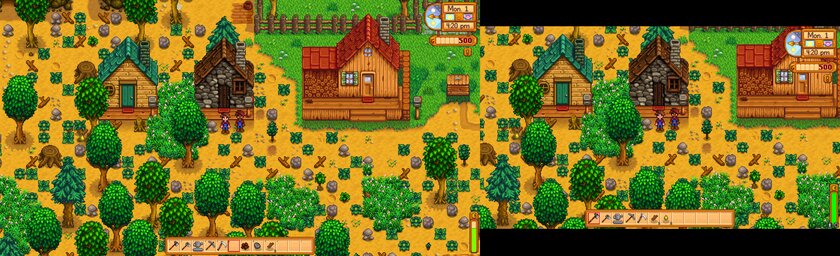
Оригинальная Stardew Valley поддерживает сплит-скрин, причём аж для четырёх игроков. Однако Nucleus позволяет выводить игру не в отдельные окна, а на другие мониторы. То есть каждый участник кооперативной сессии сможет смотреть на изображение в полноценном масштабе.
Нельзя сказать, что Stardew работает вместе с программой идеально. Например, возникли сложности с мышью, которые прошли сами по себе спустя минуту. На этот раз даже блокировка управления через клавишу End особо не работала. Но в конечном итоге тайтл получилось запустить в режиме локального кооператива и даже открыть его на двух мониторах. Управление одновременно работало для обоих игроков.
DUSK
А вот ретро-шутер DUSK работать через Nucleus наотрез отказывается, несмотря на заявленную поддержку. Утилита запускает отдельные экземпляры игры, но те сразу же закрываются.
Dirt 3
В Dirt 3 разработчиками изначально предусмотрен сплит-скрин для двух пользователей. Однако Nucleus улучшает этот режим, позволяя включать камеру от первого лица и расширяя количество возможных игроков. Звучит здорово, но на практике это не работает.
Nucleus вообще не запускает игру, ни для первого, ни для второго игрока. Возможно, такая проблема только со Steam-версией Dirt 3, но факт остаётся фактом: опробовать гонку в сплит-скрине мне не удалось.
Установка и запуск
Установить и сам Nucleus Co-op весьма просто. Бо́льшую часть времени отнимает настройка отдельных игр.
Скачать утилиту можно с GitHub, причём в двух версиях: Installer.exe для стандартной установки или портативный вариант NucleusApp.zip.
После установки или распаковки Nucleus Co-op необходимо загрузить сами игры, которые будут запускаться. Например, через Steam.
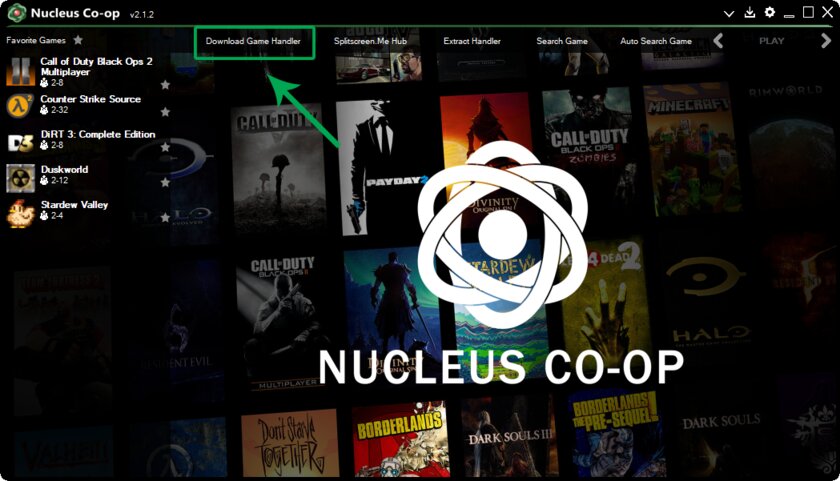
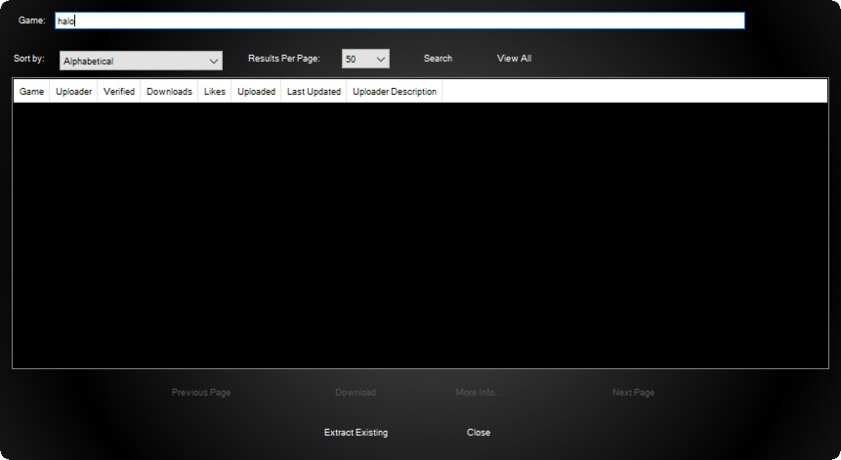
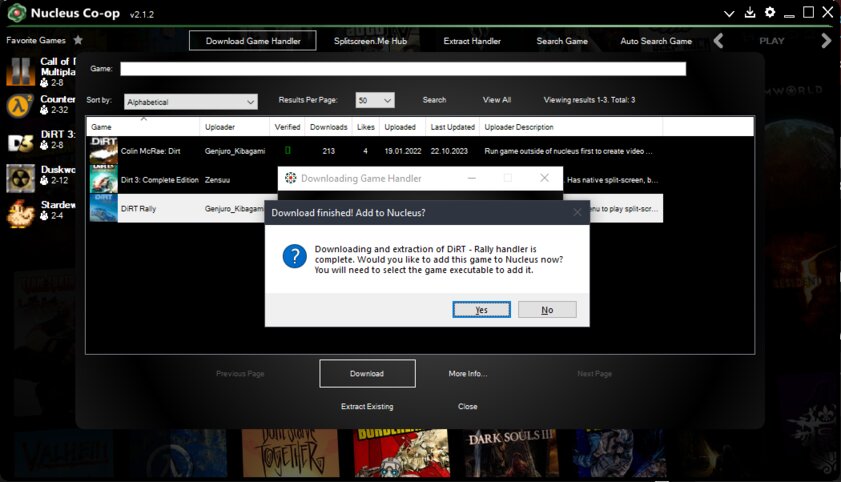
Затем надо скачать плагин для кооперативного режима. Для этого уже в Nucleus надо нажать Download Game Handler, вбить название игры и нажать Enter для поиска.
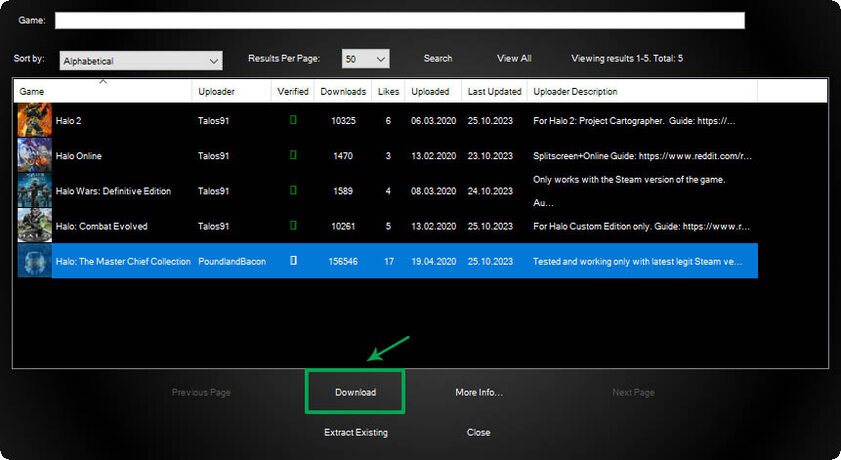
В списке следует выбрать нужный плагин и нажать Download. После установки плагина откроется окно выбора exe-файла игры. Например, для игры из Steam я указал путь D:\Program Files\Steam\steamapps\common\Call of Duty Black Ops II\t6mp.exe.
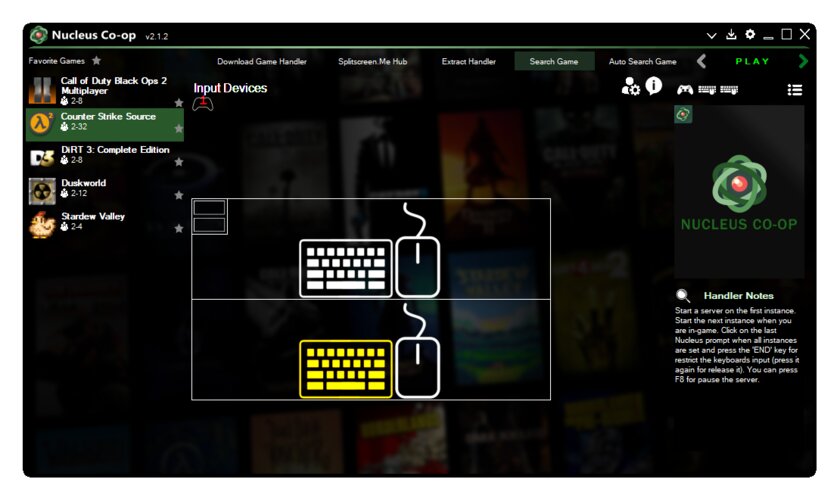
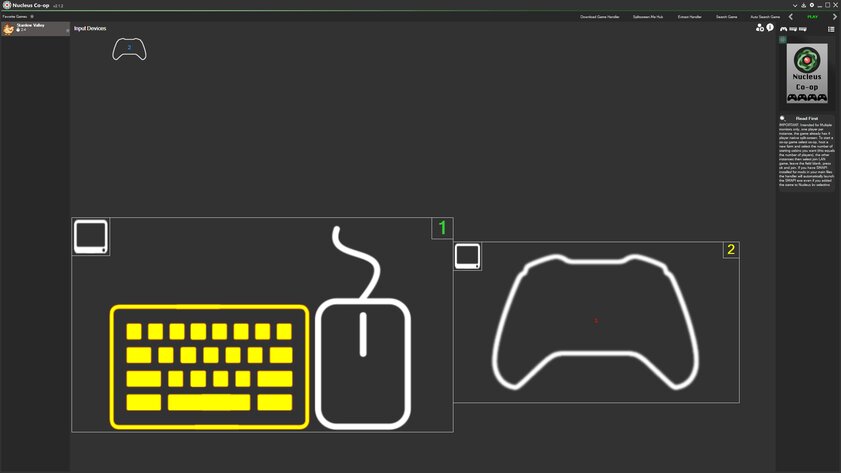
На этом с установкой закончено, ярлык для нужной игры появится в левой части Nucleus. Чтобы запустить игру, надо кликнуть на иконку проекта, а затем настроить управление. Для каждого подключенного монитора будет доступна отдельная область. Менять режим разделения можно, нажимая ЛКМ или ПКМ на иконку в левом верхнем углу виртуального окна.
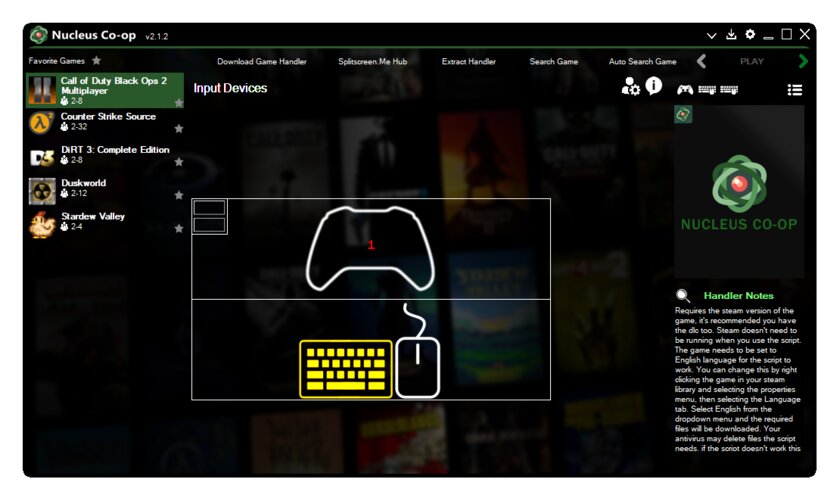
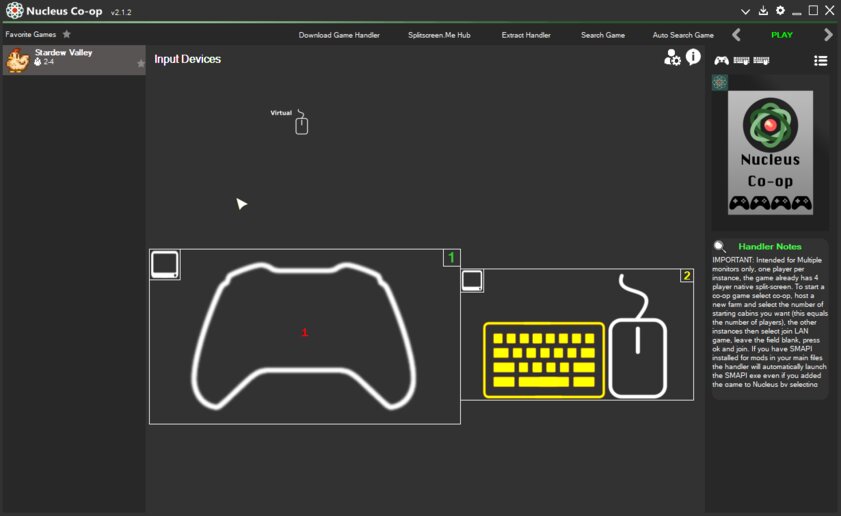
После этого надо перетащить устройства для управления в соответствующие области. Если мышь или клавиатура не отображаются, надо кликнуть любую клавишу на них — тогда они появятся среди доступных девайсов. Когда все устройства и области настроены, можно нажимать Play. Советую заранее ознакомиться с информацией от разработчика плагина — там часто указаны нужные шаги для запуска.
Сначала откроется окно главного игрока. Рекомендую не спешить и сначала настроить всё в этом экземпляре приложения. И только после этого можно разрешить создание окон для других пользователей. Опять же, лучше не торопиться и подождать, когда всё загрузится. Иначе всё может зависнуть и придётся начинать заново.
Итоги
Nucleus Co-op делает именно то, что заявлено — добавляет сплит-скрин в те игры, где его нет, либо же расширяет стандартные возможности. Настройка у программы простая и интуитивная. Однако некоторые игры вообще не работают, даже если поддерживаются.
А с теми, что всё-таки запускаются, иногда могут возникнуть ошибки: вылеты при подключении или проблемы с управлением. Несмотря на это, играть совместно всё же можно. Просто надо быть готовым, что Nucleus — это не то решение, где всё работает с первого раза и решается в один клик.
Introduction:
When multitasking, will you lose your temper by switching between different tasks? You cannot avoid switching screens constantly till you finish a simple but troublesome task. However, if you know how to split screen on your Windows, you can carry out multitasks with ease.
Splitting screen means you don’t have to switch back and forth between pages because all the pages you need will be simultaneously displayed in the window on your screen. But how do we split the screen on a computer? In fact, almost all systems enable users to split screens easily with a built-in tool – Snap Windows.
In this article, we will give you a thorough explanation of how to split screen on Windows. With these methods, you can manage to split the screen to better process multitasking without breaking a sweat.
How to Split Screen on Windows 11/10
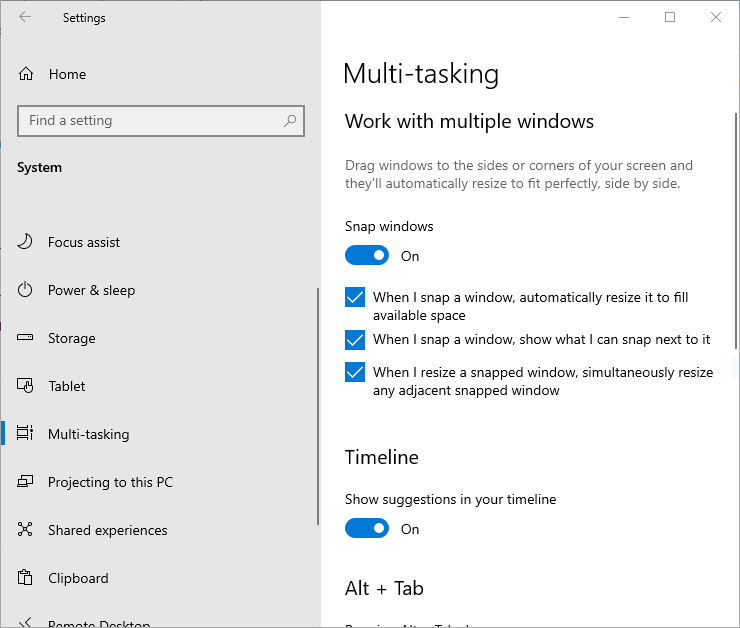
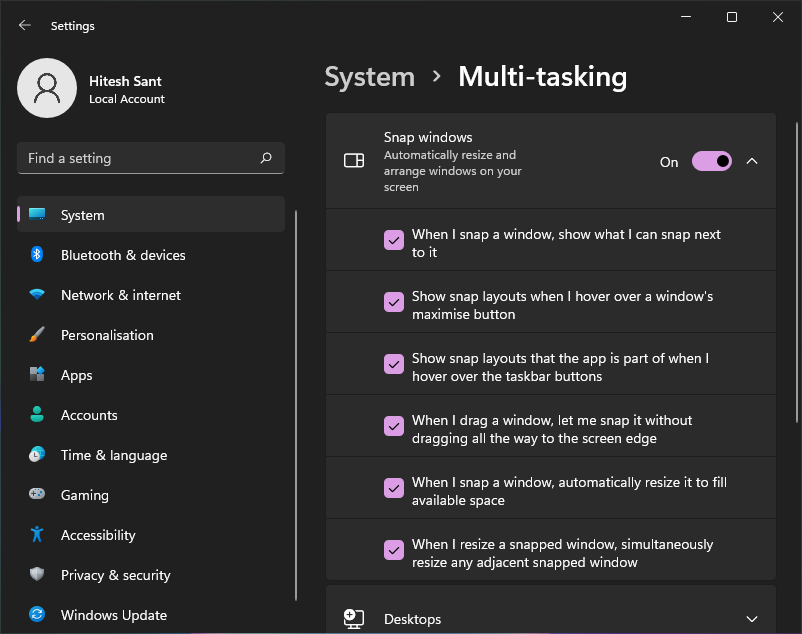
Before learning how to split screen on Windows, you need to enable snap windows on your device first. By doing so, you’re allowed to split screen on your computer. To activate the snap windows feature, follow these steps: Go to Settings > System; click Multitasking; and select Snap Windows.
By the way, the Snap Windows feature is renamed as Snap Assist in Windows 10.
Method 1. Choosing a Layout
Windows 11 enables you to split screen by just single-clicking one tab. There are a total of six different screen layouts that you can choose from, and you can split your screen up into four divided parts.
Before splitting screen, you must make sure that at least two windows or applications are opened. Let’s see the exact steps to split screen on Windows.
Step 1. Put your mouse over a window’s maximize/minimize button. You will see a box pop up under your cursor, which offers you six different ways to arrange your task windows;
Step 2. Select the most suitable viewing mode. And your screen will be separated successfully.
In addition to using the mouse to open the box, you can also use some shortcuts to achieve this. By simply pressing the Windows key and Z simultaneously, you can open the layout box and choose a suitable layout.
Method 2. Using Shortcuts to Split Screen
There’s a much easier way to split screen on Windows 11 and you don’t need to call out the box in advance. Let’s see how to make it with the shortcut keys:
When working on one task, you can press the Windows key and the Left/Right arrow keys, so your screen can be put aside to the left or right side accordingly.
However, this method only applies to the situation when you need two screens. If you need to split your screen to three or four parts, this solution may not satisfy you.
Method 3. Using Your Mouse to Split Screen
Do you know you can split your screen with mouse only? With this method introduced, you don’t have to remember any shortcuts.
Step 1. Place your mouse on any empty area at the top of a window;
Step 2. Long press the left mouse button and click on the blank space. Drag the window to either the left or right side until you can’t drag it anymore;
Step 3. Release the mouse, and the window you dragged will be automatically put to the side. It now fills half the screen;
Step 4. On the other side of the screen, all the other windows you’ve opened will be displayed in small views, so you can choose the one you need to fill in this side.
Now you’ve successfully split your screen into two screens. You can drag the dividing line in the middle to resize the two windows.
Note: By dragging the window to one corner of your screen, you can easily split your screen into four divided parts.
The method 3 not only works well on Windows 11, but also applies for Windows 10 system.
Split Screen on Windows 8, 8.1, and 7
On Windows 8 and 8.1, the same feature to help you split screen is Snap View. You also need to open it in the Settings app in advance. Please note that if you want to split your screen into three parts, each window needs to have a resolution of at least 1080p. Otherwise, only two screens are supported.
To split the screen on Windows 8 and 8.1, you can use method 3 mentioned above for Windows 11/10. Long press your left mouse button and drag the window to one side of the screen as far as possible, then select another window/app to fill the other half of the screen.
You can also resize the two screens by adjusting the dividing line, but unlike on Windows 11 or 10 (both two parts will be resized correspondingly), only one window will be resized when you move the dividing line, and the other one won’t get changed automatically on Windows 8 and 8.1.
On a Windows 7 operating system, you can use the same approach to split your screen. The only difference is that you also need to drag the other half of the window manually. In addition, Windows 7 supports displaying two screens at most.
Bonus Part: How to Split Screen on a PDF File
After explaining thoroughly how to split screen on Windows, we also provide this part to help you split screen for a PDF file.
When checking a large PDF file that contains many pages, it’s hard to remember all the content by only reading once. Moreover, you may need to scroll up and down to find the mentioned information or contrast the details of the same finger.
When it happens, a PDF viewer that supports splitting screen would be very helpful. Luckily, SwifDoo PDF is exactly the right one, which can help you read a PDF document with two divided screens.
Developed by an experienced team, SwifDoo PDF is an all-in-one PDF tool to help you solve all PDF-related issues. You can use it to edit, annotate, convert, and compress PDF files without a hassle. Without exaggeration, almost all the editing features you need to perform on a PDF file are offered by SwifDoo PDF.
SwifDoo PDF offers three viewing modes to split screen on a PDF file: vertical, horizontal, and four windows, supports splitting screens in three ways: vertical, horizontal, and four windows. Both vertical and horizontal views can split your files into two screens.
Splitting screen on a PDF file is super easy. Check the following steps:
Step 1. Download and install SwifDoo PDF, then launch it;
Step 2. Open the target PDF file with SwifDoo PDF;
Step 3. Click View in the top navigation bar, then selects Split Screen.
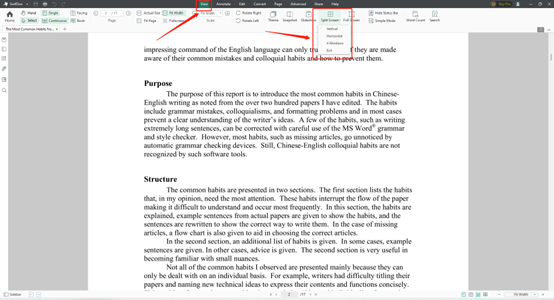
Tips: The screen will be divided into two parts, and they will be displayed vertically by default. By clicking the inverted triangle in the lower right corner of the split icon, you can choose the other two forms to split the screen.
Final Words
That’s all about how to split screen on Windows. Splitting screens is a super helpful feature when you’re multitasking. Windows 7 is the first version that supports splitting screens, so it’s relatively less inconvenient to use this feature. You can see that this feature is becoming much more mature.
Usually, it’s difficult to get a PDF tool that supports splitting screens for better reading large PDF files. But SwifDoo PDF makes it come true. If you find this feature useful, you can have a try on SwifDoo PDF. It’s a totally free and useful tool that can help you for real!
Let’s check how to split screen on Windows 10/11 to multitask like a pro.
One of the many Windows hidden features that most users aren’t aware of is split-screen.
This was something I was in grave need of, as sometimes my 2-year-old baby shows up and says to play something on YouTube.
Instead, I used to disagree and hand him over one of my old laptops to watch him take the life out of its keyboard.
Thanks to the split-screen feature on Windows, that’ll stop now. 😉
On a more serious note, one can stop switching windows every time and divide the screen to get the job done.
So, let’s move on and see how to split screen on Windows 10/11.
Notably, this article has three methods to split-screen on Windows:
- Dragging windows manually (Windows 10/11)
- Using keyboard shortcuts (Windows 10/11)
- Using Windows in-built split option (Exclusive to Windows 11)
But first, make sure to turn on the Snap windows feature in settings:
Windows 10 users can navigate to Settings > Multi-tasking and ensure that the Snap windows toggle is turned on.
Windows 11 users can do the same by browsing Settings > System > Multi-tasking and confirming that Snap Windows is turned on.
Now let’s start to divide the screen into two, followed by three and four divisions.
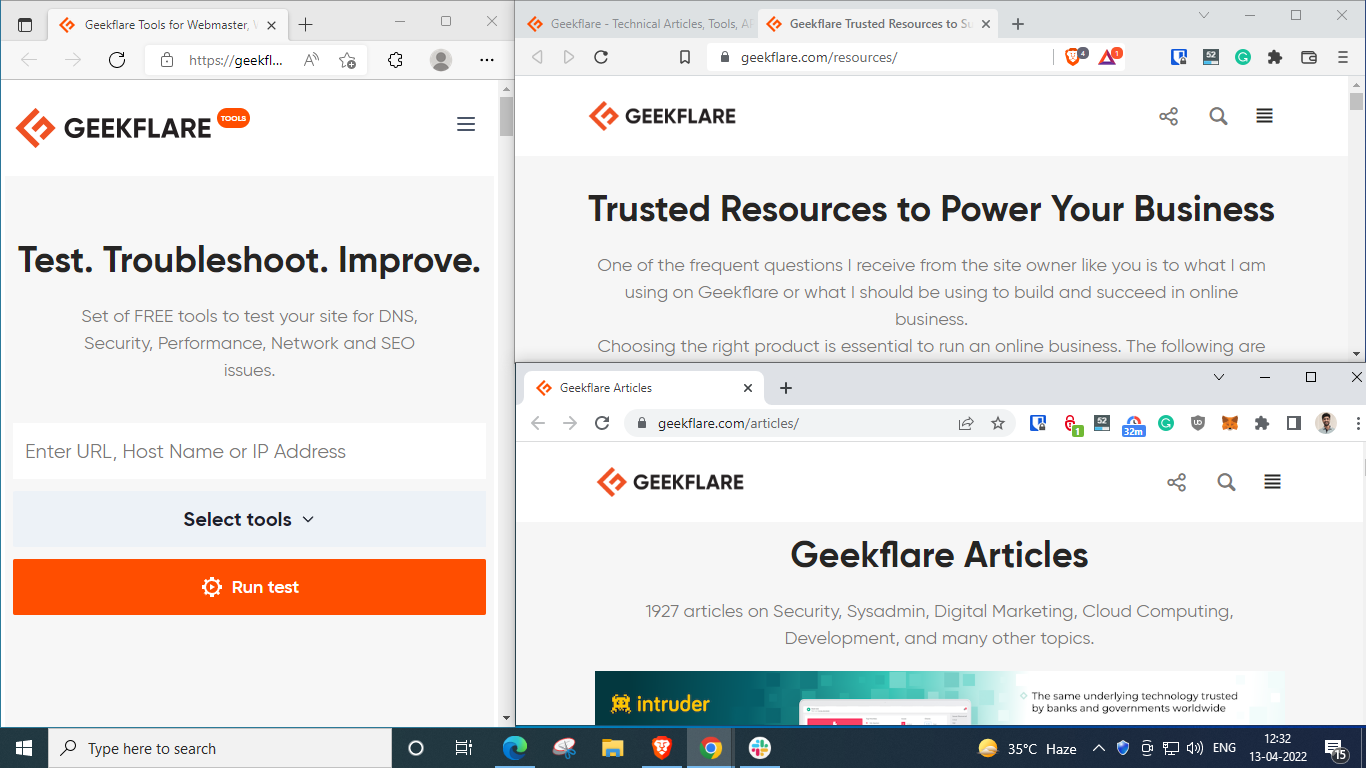
Split Screen in 2 in Windows 10/11
This is very simple. Just hold and keep dragging the window on either side till you see the split indication:
Subsequently, you can do this for the other window to split the display in half. In addition, you can resize the split by moving the border at your convenience.
However, there is a limit to how narrow you can go with a specific application. The most I could go with is Slack, with the other window taking roughly more than 75% of the real estate.

Alternatively, you can also use keyboard shortcuts.
Open the subject window, press and hold the Windows key ⊞, and tap the left arrow key ⬅️ to put it into the left half of the display. Afterward, place the other window on the other half by holding ⊞ and tapping ➡️.
Split Screen in 3 in Windows 10/11
Splitting Screen in 3 involves an arrangement like this:
The most straightforward way to achieve this combination is by dragging the windows one at a time.
Still, we’ll also try to replicate this with the keyboard shortcuts.
For this, open the first window and place it on the left half by holding the Windows key ⊞ + and taping the left arrow ⬅️:
Next, open the second window, hold ⊞, tap ➡️, followed by ⬆️.
Please note the Windows + Up/Down arrows also work as shortcuts to maximize/restore the windows.
So, don’t maximize the windows you want to put into the corners. Instead, let it hang somewhere in the middle and proceed with the above key combination.
Take a look:
Here, Windows gave suggestions to fill up the bottom right quadrant, but if you don’t see the options, you can simply hold ⊞, press and leave ➡️, and tap ⬇️.
Split Screen in 4 in Windows 10/11
Let’s do it the last time and divide the screen into four parts by dragging each one to a corner:
Alternatively, we can do this with Windows shortcuts as well. Please remember to avoid maximizing any window.
Here are the steps:
- Open the first one. Hold ⊞, press ⬅️, and then ⬆️ to put it into the upper left corner.
- Subsequently, open the next. Hold ⊞, press ⬅️, and then ⬇️ to send it under the first.
- Next, put the third window on the top right quadrant by holding ⊞, taping ➡️ followed by ⬆️.
- Similarly, fix the last one in the remaining space by holding ⊞, and pressing ➡️ and ⬇️ sequentially.
These were the methods valid for Windows 10 & 11. The following section entails an exclusive technique that’ll work only for Windows 11 users.
Split Screen for Windows 11
On Windows 11, you can hover over the maximize/restore icon to select the layout (2, 3, or 4 divisions) and start filling the preferred position sequentially.
However, you need to stick to the same layout for all your selections. Otherwise, it will keep changing the layout with every step, and you won’t see the desired final split.
It’s much like solving a jigsaw puzzle and putting in the pieces one by one.
Conclusion
So that was about splitting the screen into 2,3, or 4 sections on Windows 10 & 11.
Arguably, Windows 11 users can do it more quickly without dragging or using the shortcuts. So, now you can get more work done without having to switch screens or even PCs!
Read More About Windows
-
The Complete Guide to Sticky Keys on Windows 10/11
-
How to Definitively Fix Blurry Screens on Windows 10/11
-
How to Install Windows 11 on an Unsupported PC: 3 Methods