Одним из нововведений Windows 10 Creators Update стала нативная поддержка виртуальной реальности. Проблема только в том, что VR-шлемы начнут появляться в магазинах США и Европы лишь во второй половине 2017, и до их прихода в страны СНГ может пройти один-два года. Но функциональность, связанная с VR, встроена в Windows 10 уже сейчас, и ее можно попробовать протестировать или наоборот удалить. В этой инструкции мы расскажем, как это сделать.
Что такое Mixed Reality Portal
Это приложение обеспечивает работу VR-шлемов с Windows 10 и приложениями. Вам достаточно запустить программу и подключить шлем, чтобы начать пользоваться виртуальной реальностью. Приложение Mixed Reality Portal интегрировано глубоко в систему, поэтому его нельзя удалить стандартными средствами. Более того, часть настроек находится в приложении Параметры, в отдельной категории Смешанная реальность. Программа будет отображаться в меню Пуск в любом случае, а вот пункт в Параметрах появится только после успешного запуска Mixed Reality Portal. Стоит заметить, что на данный момент Mixed Reality Portal не поддерживает русский язык и работает только в 64-битной Windows.
Как запустить Mixed Reality без VR-шлема
Microsoft предоставляет механизм симуляции виртуальной реальности без шлема для разработчиков, но воспользоваться им может каждый пользователь.
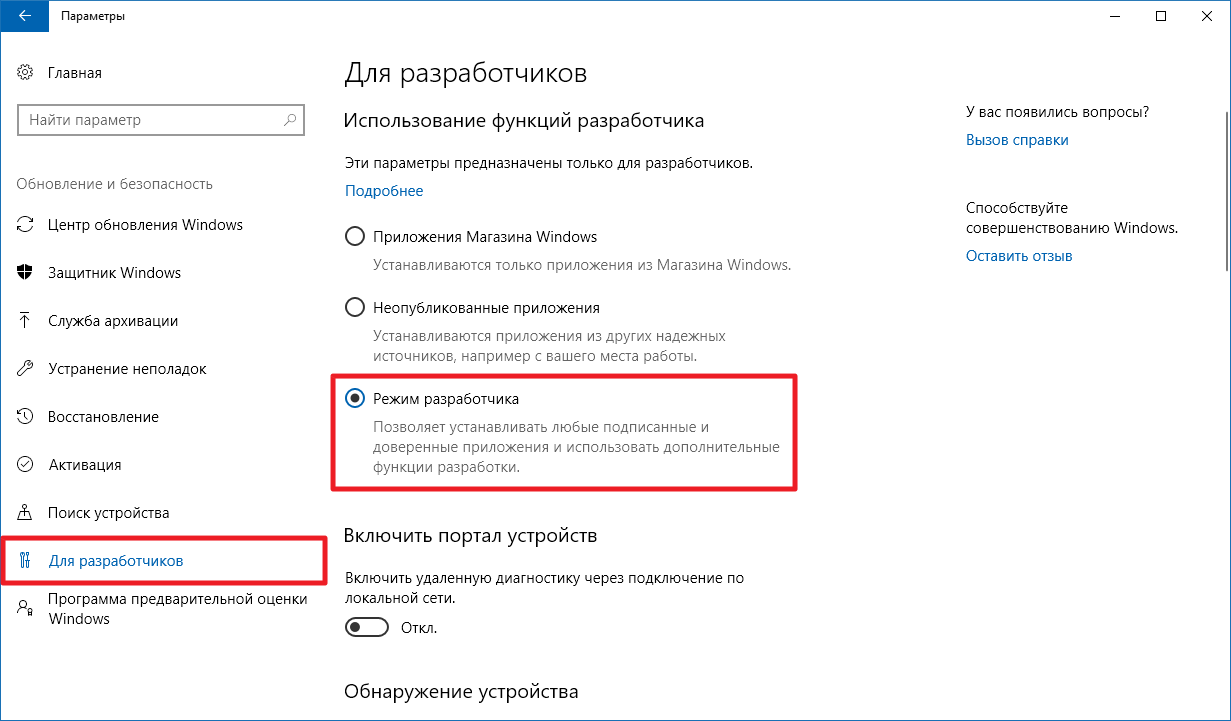
- Перейдите в Параметры — Обновление и безопасность — Для разработчиков.
- Поставьте галочку напротив Режим разработчика и подождите, пока необходимый пакет будет загружен и установлен.

- Перезагрузите устройство.
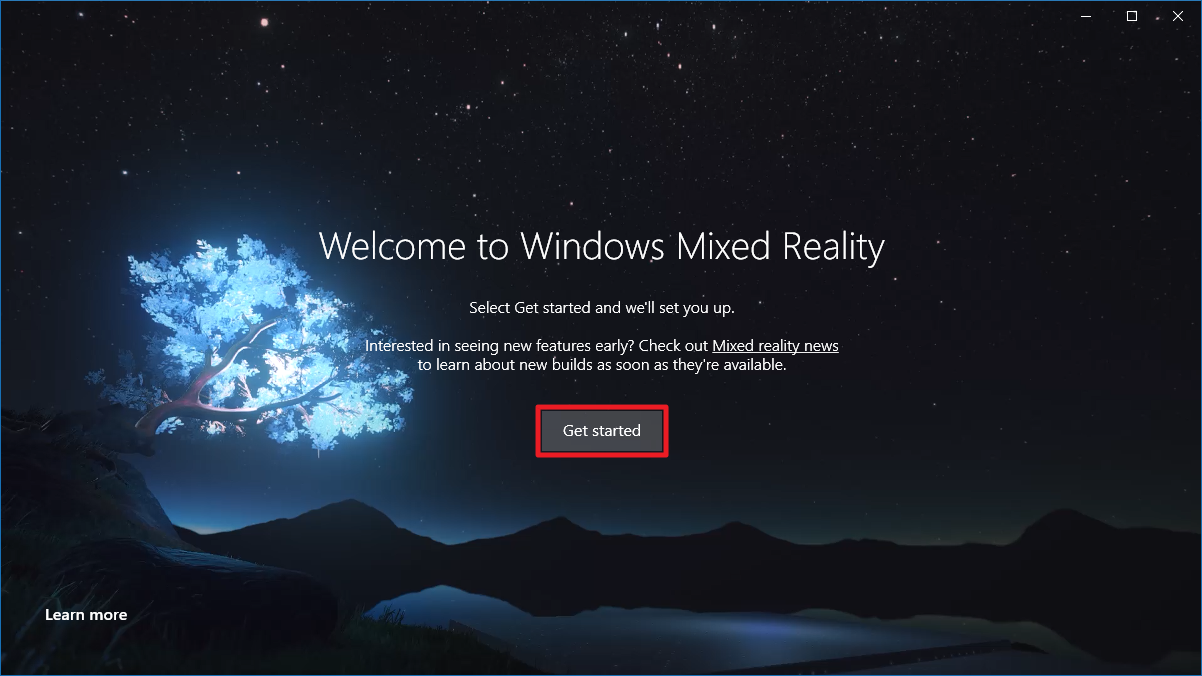
- Запустите приложение Mixed Reality Portal.
- Нажмите на кнопку Get started.

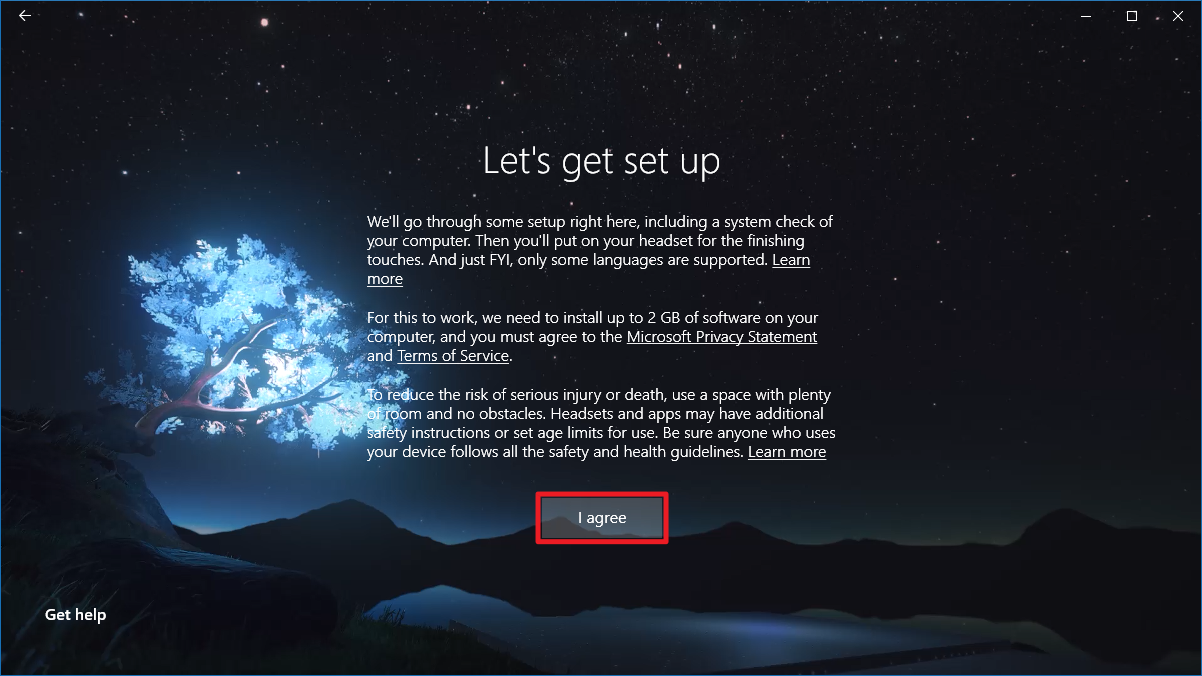
- Изучите различные предупреждения (например, неосторожное использование VR может привести к травмам и даже смерти), и нажмите I agree.
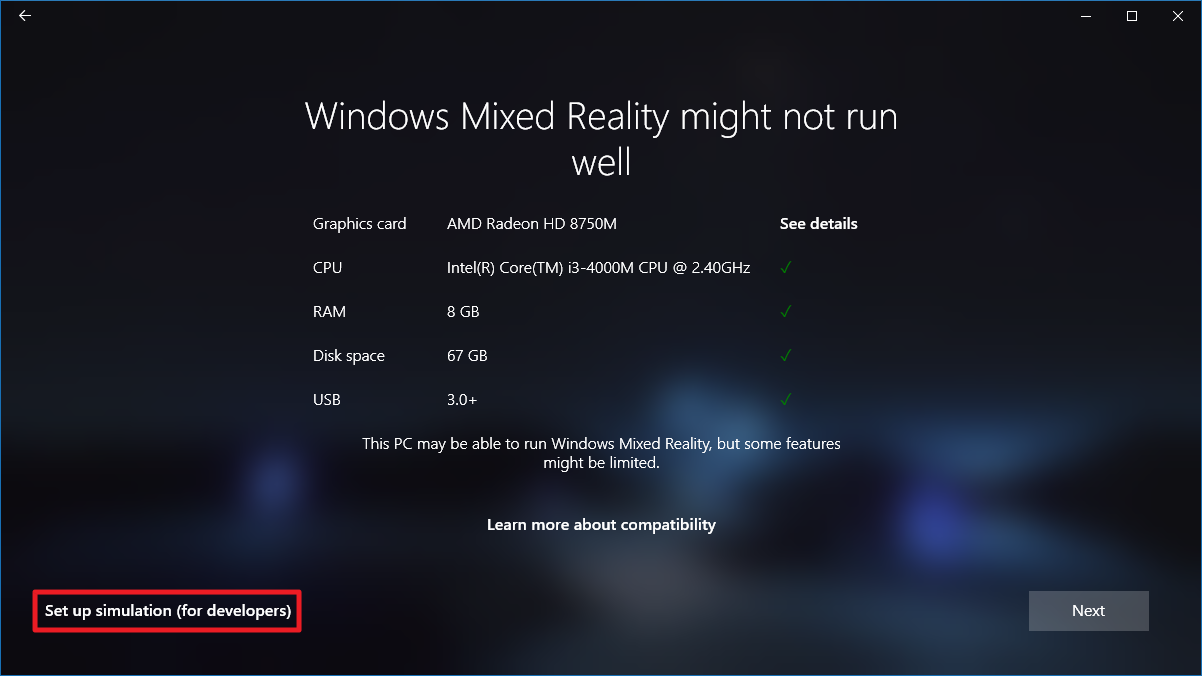
- Кликните на надпись Set up simulation (for developers) в левом нижнем углу.
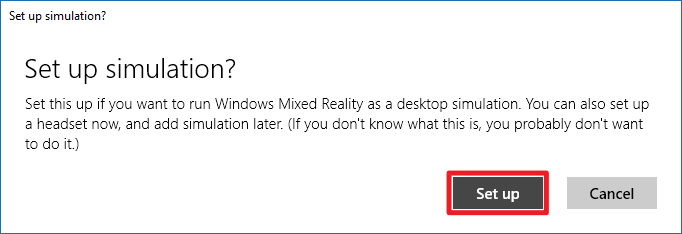
- Подтвердите запуск симулятора, нажав Set up.

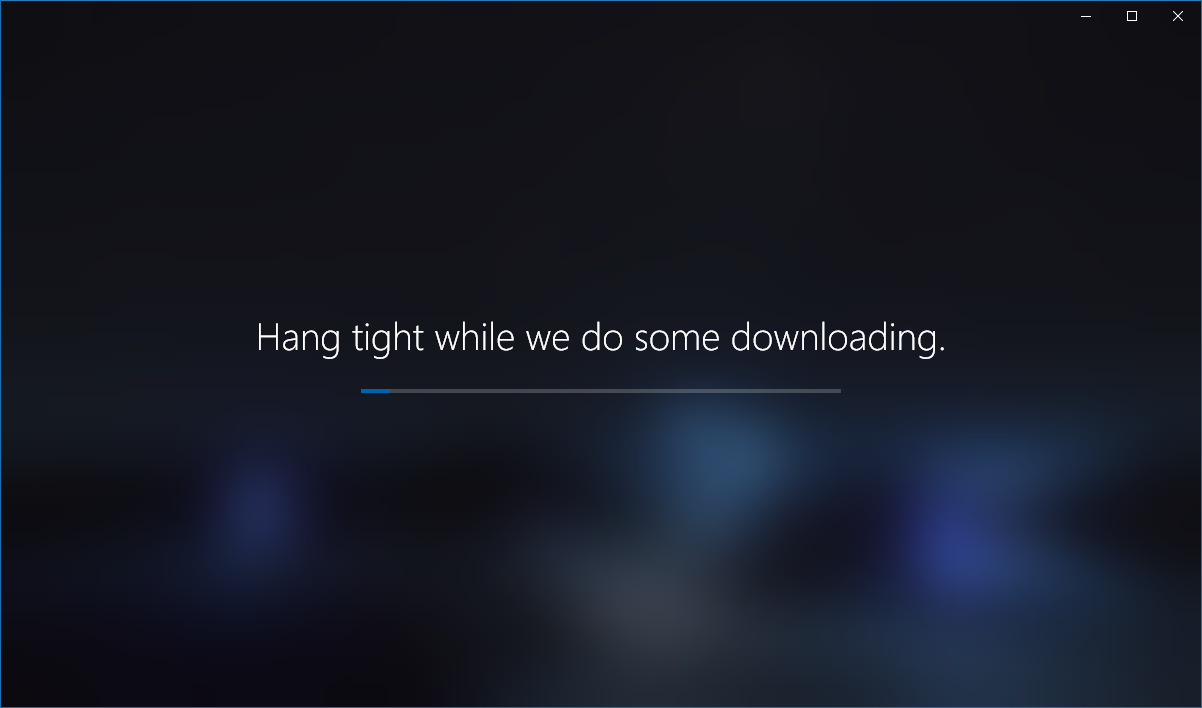
- Подождите, пока будут загружены необходимые файлы. Их размер может достигать 2 ГБ.

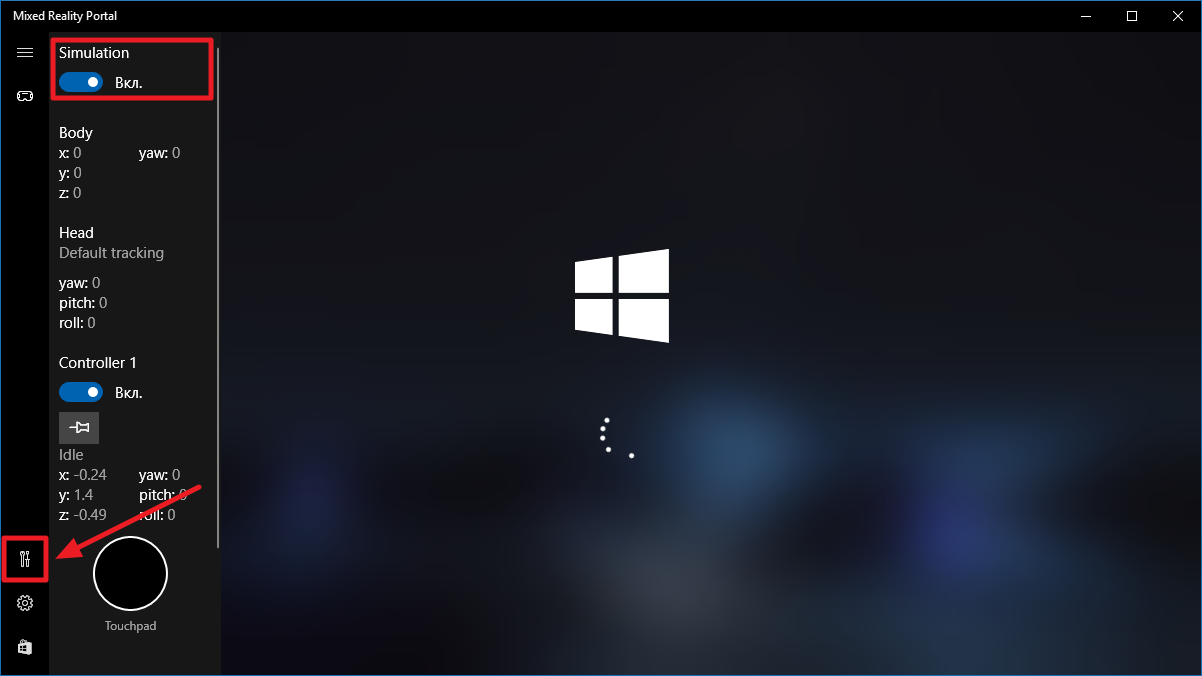
- Нажмите на иконку настроек разработчика в меню и поставьте галочку Simulation.
- Виртуальная реальность запустится.

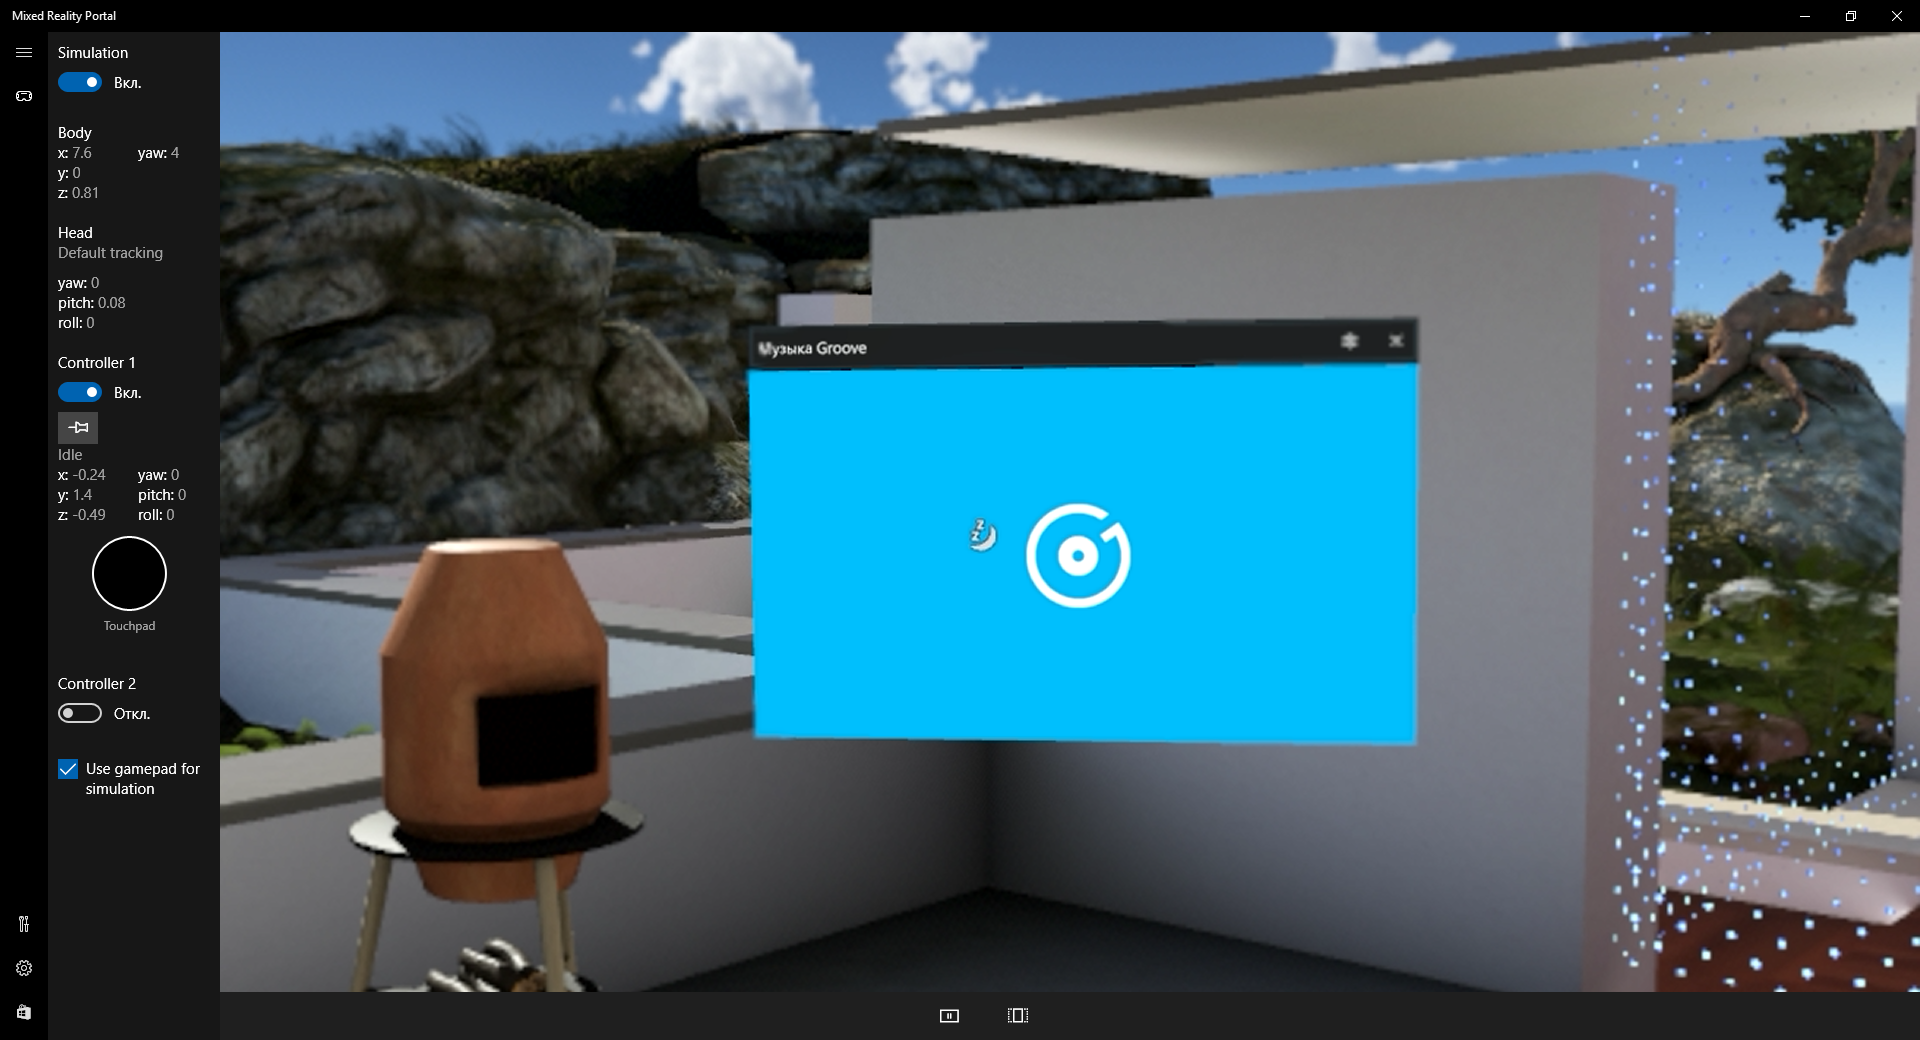
Персонаж находится в каком-то доме, по которому раскиданы иконки тех или иных приложений. Перед ним также отображается плиточное меню с ярлыками некоторых программ. Для управления передвижением предназначены клавиши W, A, S, D, а для поворота используются кнопки вверх, вниз, влево, вправо. Производительность очень сильно зависит от видеокарты, и именно из-за этого многие устройства не удовлетворяют минимальным требованиям Mixed Reality.
Напомним, что после первого запуска виртуальной реальности в приложении Параметры появится отдельная категория Смешанная реальность с некоторыми настройками.
Как включить или выключить отображение категории «Смешанная реальность» в Параметрах
Категория Смешанная реальность появляется в приложении Параметры после первого запуска Mixed Reality. Впрочем, вы можете добавить её даже не включая VR. Кроме того, существует метод удаления этой категории при активированной виртуальной реальности.
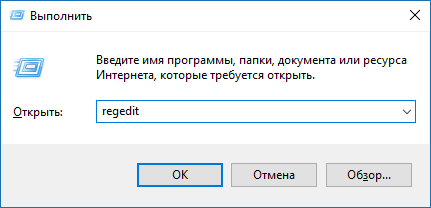
- Нажмите Win + R. Введите команду regedit и нажмите Enter.

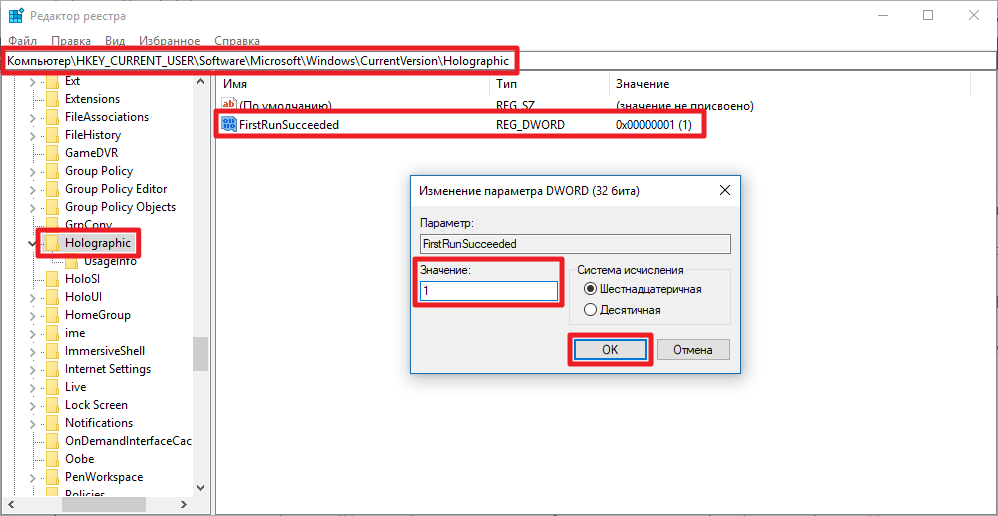
- Перейдите в: HKEY_CURRENT_USER\Software\Microsoft\Windows\CurrentVersion\Holographic.
- Кликните два раза по ключу FirstRunSucceeded.

- Измените его значение на 0, чтобы удалить пункт Смешанная реальность из настроек, или на 1, чтобы добавить соответствующую категорию.
Вы также можете воспользоваться новой функцией Windows 10, позволяющей скрыть ненужные пункты настроек.
Как удалить файлы Mixed Reality с жёсткого диска
Уже после первого запуска виртуальной реальности (со шлемом или без) на жёстком диске будут созданы файлы настроек и сохранений. Размер этого кэша может достигать нескольких гигабайт. Если VR-функциональность вам больше не нужна, от всех файлов можно избавиться.
- Закройте приложение Mixed Reality Portal.
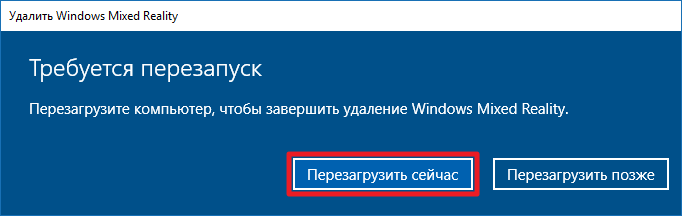
- Откройте Параметры — Смешанная реальность — Удалить.
- Нажмите на кнопку Удалить.
- Подтвердите удаление.

- Закройте программы во избежание потери данных и перезагрузите компьютер.
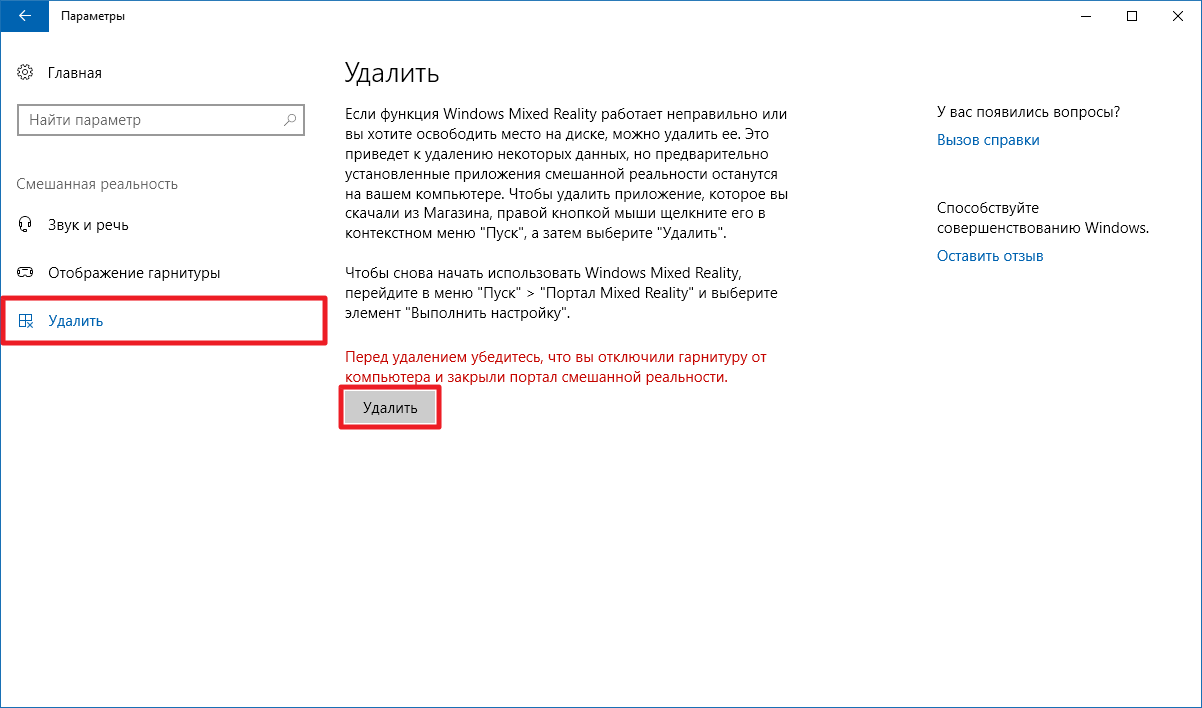

Файлы будут удалены, а категория Смешанная реальность исчезнет из настроек.
Как удалить Mixed Reality Portal
К сожалению, в актуальной версии Windows 10 — Creators Update (1703) — механизма удаления программы Mixed Reality Portal не существует. Она интегрирована в систему очень глубоко, так что стандартные средства тут не помогут. Никаких дополнительных параметров, вроде отдельной групповой политики, Microsoft пока также не предусмотрела. Получается, что Mixed Reality пополнило список уже 4 неудаляемых приложений: Cortana, Edge и Contact Support. Вы можете лишь предотвратить запуск Mixed Reality Portal из меню Пуск.
- Откройте Проводник и вставьте в адресную строку следующий путь: C:\Windows\SystemApps
- Найдите папку Microsoft.Windows.HolographicFirstRun_cw5n1h2txyewy, кликните по ней правой клавишей мыши и выберите пункт Переименовать.
- Добавьте в самое начало название восклицательный знак.


Приложение перестанет запускаться. Если вы захотите вернуть всё обратно, просто переименуйте папку обратно, убрав восклицательный знак.
Download Windows Speedup Tool to fix errors and make PC run faster
Apart from what is visible on the login screen, Windows OS tends to create several users and groups in the background to carry out several tasks on a computer. However, they are not visible to a normal user and are logged in in the background and serve a great deal in permission structuring. Let us learn how to see and to manage Local Users and Groups MMC Snap-in on a Windows 11/10 computer.
The following methods will help you to open and view Local Users and Groups MMC Snap-in on Windows 11/10:
- Using the Computer Management utility
- Directly by using lusrmgr.msc.
Let us look at the procedure in detail. We will also take a look at how to add or remove Users from a Group.
1] Using the Computer Management utility
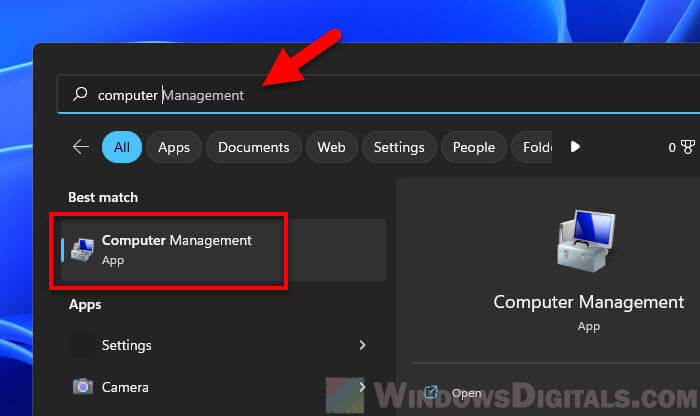
Open the WinX menu and select Computer Management.
From the left side navigation panel, select Local Users and Groups under the expanded list of Computer Management (Local).
You will see two folders here:
- Users and
- Groups.
Expanding each will give you the required details.
2] Directly by using lusrmgr.msc
To open Local Users and Groups window, you have to invoke its process, which is called lusrmgr.msc, and you can do this in the following four ways.
Using the Run box
Hit the Windows Key + R button combination on your keyboard.
Type in lusrmgr.msc and hit Enter.
It will open the Local Users and Groups window.
Using Windows Search box
Hit the Windows Key + S button combination on your keyboard. It will launch the Windows Search Box.
Search for lusrmgr.msc and hit Enter.
The Local Users and Group window will now be open.
Using Windows Command Prompt
Open Windows Command Prompt and execute the following command:
lusrmgr.msc
You will arrive at your destination window.
Using Windows PowerShell command line
Open Windows PowerShell and execute the following command:
lusrmgr.msc
It will open at your destination window.
Add or remove Users from Group
To add or remove Users from a Group:
- Open the Groups folder
- Select the Group
- Double-click on the group
- Under the Members box, select the user you want to delete.
- Click on the Delete button.
To add a User, click the Add button and follow the process.
Add a User to Group using Command Prompt
You need to execute the following command:
net localgroup "GROUP" "USER" /add
Replace GROUP and USER with the actual names.
Remove a User from a Group using Command Prompt
You need to execute the following command:
net localgroup "GROUP" "USER" /delete
Replace GROUP and USER with the actual names.
Add a User to Group using PowerShell
You need to execute the following command:
Add-LocalGroupMember -Group "GROUP" -Member "USER"
Replace GROUP and USER with the actual names.
Remove a User from a Group using PowerShell
You need to execute the following command:
Remove-LocalGroupMember -Group "GROUP" -Member "USER"
Replace GROUP and USER with the actual names.
Related: Local Users and Groups is missing from Computer Management
I hope this helps.
Windows 11/10 Home user? These links may interest you:
- Use freeware Lusrmgr tool to access Local User and Group Management in Windows Home
- Open and Manage Local User and Group Management in Windows Home using Command Prompt or PowerShell.
Anand Khanse is the Admin of TheWindowsClub.com, a 10-year Microsoft MVP (2006-16) & a Windows Insider MVP (2016-2022). Please read the entire post & the comments first, create a System Restore Point before making any changes to your system & be careful about any 3rd-party offers while installing freeware.
We often want to limit other users’ abilities by adding or removing the user from being members of groups on our PC. Like you can set different rights and permissions for different groups. And for this, the Local User and Group Management tool or lusrmgr.msc is responsible. But unfortunately, it doesn’t really come with the Windows Home version. So the question is, how to enable the Local User and Groups in Windows 11/10 Home?

What is the Local User and Group Management tool?
Talking about lusrmgr.msc, it is a console for managing local users and groups. It has been in the Windows ecosystem since Windows 2000. But with the Windows 11/10 Home version, the feature doesn’t exist. As a result, you cannot assign rights to different users and groups.
But in this article, I will be sharing a step-by-step guide on how you can get rid of the local users and groups access is denied error or find an alternative.
Unfortunately, it is impossible to use the built-in or the official local user and group management tool in Windows 10 Home. But luckily, there is a third-party tool called lusrmgr.com.You can use it to assign rights to groups and users.

Talking about the program, Lusrmgr is a portable app that can run on any edition of Windows 11 and Windows 10, including the Home version. However, it requires administrative privileges and the .NET framework 4.5 or higher to function correctly.
Follow the steps to download and use the lusrmgr.msc alternative:
- At first, download the lusrmgr.exe file from this Github page.
- Once downloaded, double-click on the program to run it. You may also encounter a Microsoft Defender SmartScreen prompt. Click on More info and then on Run anyway.
- After launching the program, you should see a screen similar to the built-in lusrmgr tool.
- Now under the Local users and group consoles, you can easily create and manage users and groups.

- To create a user, right-click on the Users menu and select create. On the create new user window, fill in all the details of a new user and click on the create button.

- Also, to manage an account already created under your Windows 11/10, you have to select and right-click on the account. After that, you will find options to rename it, set a password, delete or edit the account.


Moreover, with the help of this program, you will be able to connect to a remote computer if a remote computer allows the remote connection. You have to right-click on your computer’s entry and select connect to a computer to access this feature.
Why is Gpedit not available for Windows 11/10 Home?
Windows 10 Home was made for home or personal use. As a result, there are lots of advanced features are missing from it. Among them, one is the Group Policy feature. Also, as there is no Group Policy Feature by default, Gpedit is not available.
How to Enable gpedit.msc in Windows Home version?
Similar to this tool, Group Policy Editor is not available for the Windows Home version. However, you can enable gpedit.msc by following this simple guide.
I cannot access GPEDIT.MSC in Windows?
At first, ensure that your computer is running on the latest version of Windows. Then to access Group Policy Editor, make sure you are using a profile with Admin rights. If your computer is on a domain, you must contact your Administrator.
To go to Group Policy Editor, press Windows + R, type “gpedit.msc” and press enter. If you cannot access Group Policy Editor, create a new user with admin rights and follow the same steps.
How Do I Enable Lusrmgr MSC in Windows 11/10 Home?
There is no way to enable Lusrmgr MSC by default in Windows 10 home. Instead, you have to download the lusrmgr.exe file, a third-party program to manage users and groups.
So that was a quick answer to your how to enable local users and groups in Windows 11/10 Home. I hope the above guide has helped you with your query. Also, in case if there is anything else you would want to ask, then feel free to drop a comment below.
Nayan is a crypto and gadget enthusiast who likes to cover topics related to Tech, Startups, Crypto, Gaming, Windows, and other interesting areas. But when he is not working, you can find him playing games or watch random videos on YouTube.
Most people edit Windows user accounts from the Settings app or the User Accounts section in the Control Panel. However, there’s another way to perform Windows user management, one that gives you access to much more detailed information about the users and groups on your PC and the permissions they have. I’m talking about managing Local Users and Groups using the snap-in console that bears the same name. You can access it from Computer Management or by running its lusrmgr.msc file directly. Here’s how to see and manage all the local users and groups on your Windows 11 or Windows 10 PC:
IMPORTANT: Local Users and Groups (lusrmgr.msc) is available only in the Pro, Enterprise, and Education editions of Windows 11 and Windows 10. Unfortunately, Home editions don’t include this tool. For help in identifying the edition you’re using, check these guides:
- What is the latest version of Windows 10? Check the version you have
- How to check the Windows 11 version and edition
The Local Users and Groups (lusrmgr.msc) in Windows 11 is identical to the one in Windows 10, both in terms of appearance and features offered. Thus, to keep things as simple as possible, most of the screenshots included in this guide are from Windows 11.
How to find all the local users and groups using lusrmgr.msc
In both Windows 11 and Windows 10, the Local Users and Groups snap-in, also known as lusrmgr.msc, offers the best way to see all the users and groups configured on the system. This tool shows you the “visible” user accounts, as well as all the hidden user accounts and groups that are available on the system but are disabled by default, such as the Administrator account. Here’s how to see your local users and groups:
Open Computer Management — a quick way to do it in either operating system is to simultaneously press Win + X on your keyboard and select Computer Management from the menu.
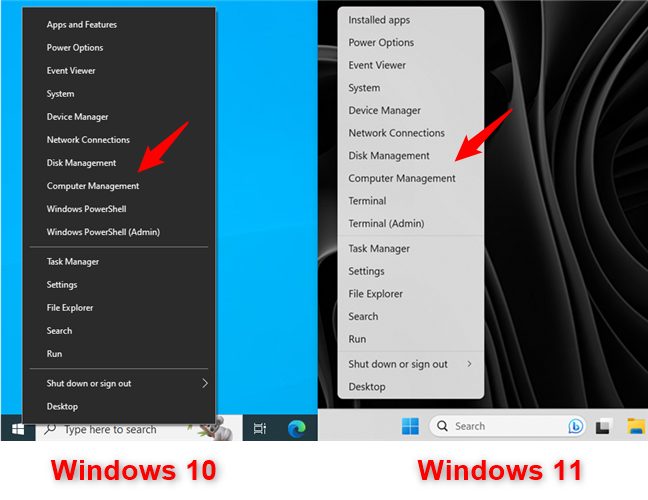
For Windows user management, open Computer Management
In Computer Management, select “Local Users and Groups” in the left panel.
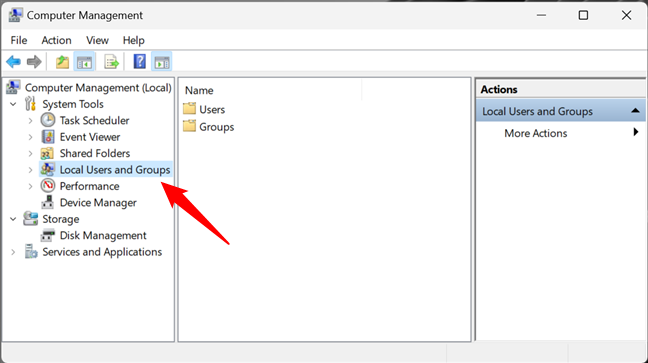
Local Users and Groups in Computer Management
An alternative way to open Local Users and Groups is to run the lusrmgr.msc command. You can do it from the Run window (Win + R), Command Prompt, and PowerShell.
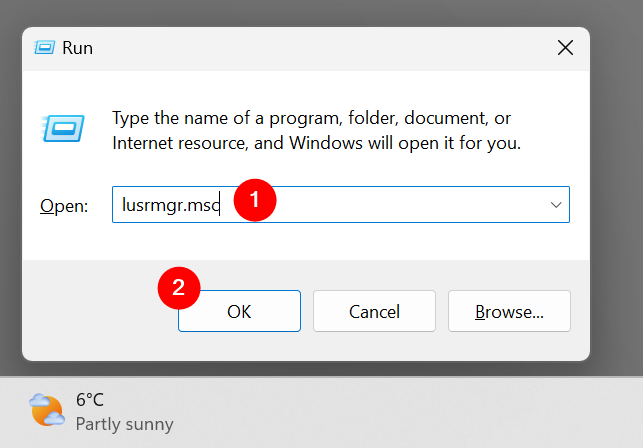
Run lusrmgr.msc in Windows
Running the lusrmgr.msc command opens the Local Users and Groups console directly and without loading it in Computer Management.
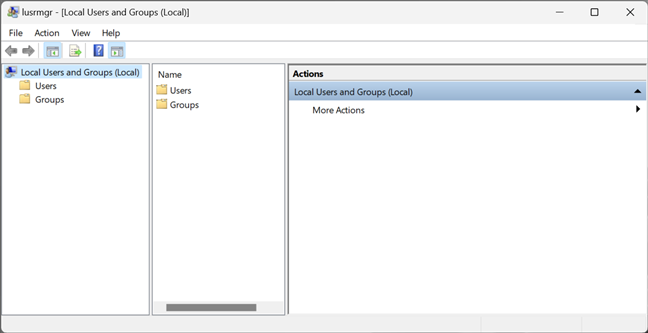
lusrmgr.msc — Local Users and Groups
Regardless of how you choose to open Local Users and Groups (lusrmgr.msc), this is where you find all the user accounts and groups that are configured on your Windows computer or device, split into two folders: Users and Groups.
How to find and manage Windows users with lusrmgr.msc (Local Users and Groups)
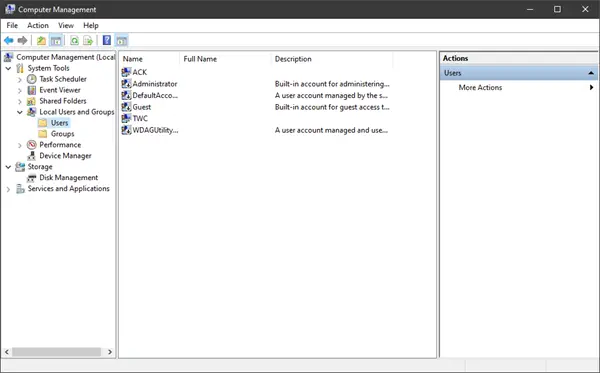
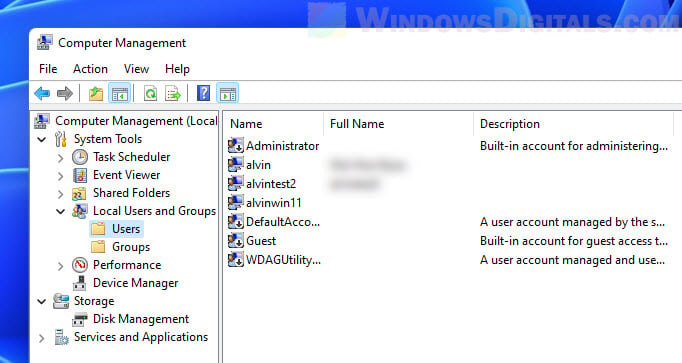
In the Users folder, you see all the user accounts available on your Windows 11 or Windows 10 PC. This includes accounts that are hidden or disabled.
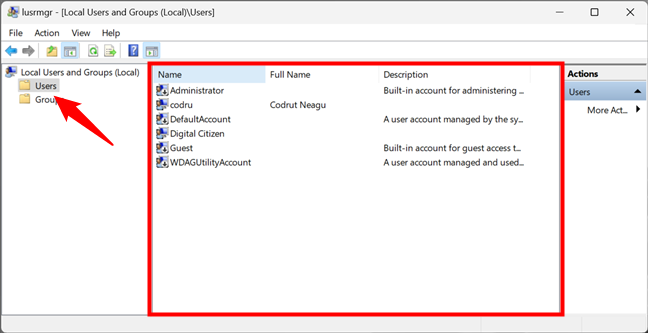
List of user accounts shown by lusrmgr.msc
What are the user accounts found on every Windows computer? There aren’t as many as you might think. You have:
- All the user accounts you have created on your Windows PC;
- Administrator — a built-in account created by Windows for administration purposes, regardless of whether you use it or not;
- DefaultAccount — a user account that’s managed by Windows;
- Guest — a legacy built-in account that, in older versions of Windows, could be used for guest access on the computer or domain — in Windows 11 and Windows 10, it’s no longer operational;
- WDAGUtilityAccount — managed and used by the Microsoft Defender antivirus for running certain processes (like the Microsoft Edge browser) in sandboxed/virtualized environments.
TIP: You can also view a list of all user accounts with PowerShell or Command Prompt. Find out all the ways to do that by reading this tutorial: How to list all the users on a Windows computer.
As you might have noticed, some of the user accounts shown by Local Users and Groups have a small arrow on their icons. The little arrow signals that a user account is disabled and thus can’t be used, even if it is available on your Windows computer.
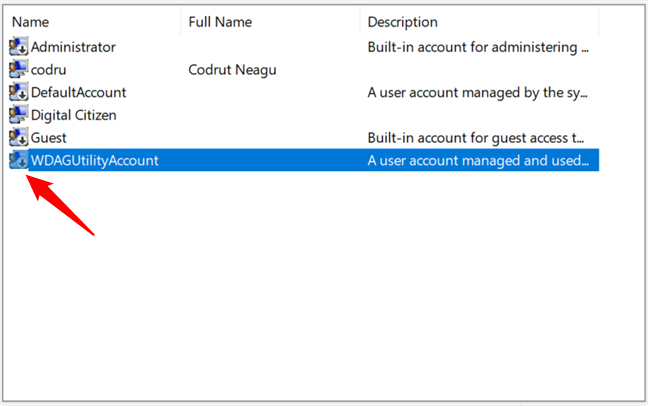
Deactivated users are marked with arrows
Double-clicking or double-tapping on a user account opens a Properties window that displays more information about that account and different customization options. For instance, you can set its password to expire, disable the account, or change the user groups to which it belongs.
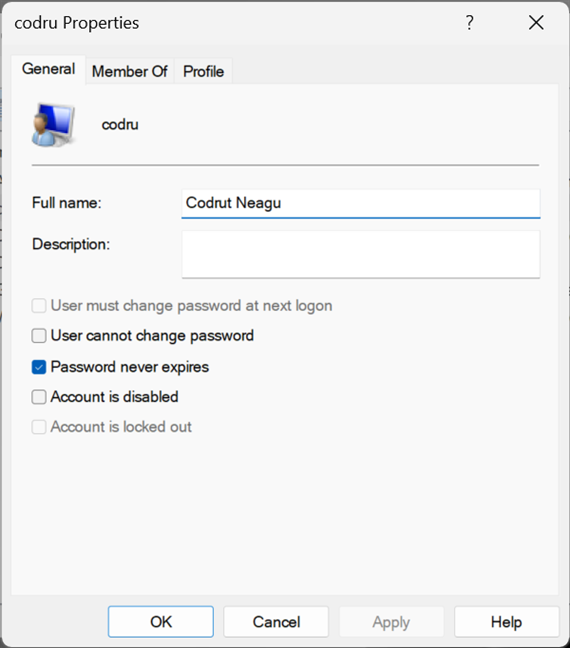
Properties of a user account
TIP: Speaking of which, here’s how to change your user account password in Windows.
How to find and manage user groups in Windows with lusrmgr.msc (Local Users and Groups)
Going back to the Local Users and Groups console (lusrmgr.msc), access the Groups folder to see all the user groups available on your Windows computer. The list is long and includes user groups created by Windows as well as third parties, such as drivers or virtualization software, which need hidden users and groups to operate properly.
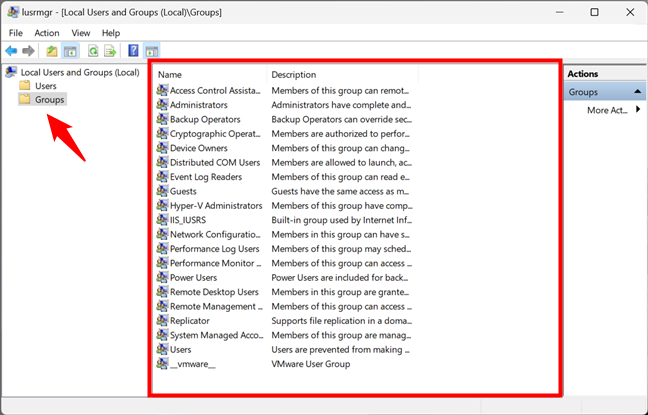
List of user groups in Windows shown by lusrmgr.msc
On most Windows PCs, you should have at least the following groups:
- Access Control Assistance Operators – members of this group can run remote queries for authorization attributes and permissions on your Windows computer. This group is used on computers that belong to a domain, so it’s mainly useful for network administrators in large companies.
- Administrators – it includes all the user accounts with administrative permissions on your computer. The Administrators group can’t be deleted or renamed.
- Backup Operators – user accounts with permission to perform backup and restore operations using tools like Backup and Restore.
- Cryptographic Operators – user accounts with permission to encrypt or decrypt data using tools like BitLocker.
- Device Owners – Windows says that the members of this group can change system-wide settings. However, as far as I know, this group is not currently used in either Windows 11 or Windows 10.
- Distributed COM Objects – this user group is harder to explain. It’s used mostly for user accounts that need to participate in more complex scenarios, such as distributed computing across computers on a network. Therefore, it is mainly used in business environments.
- Event Log Readers – this group gives permission to its members to read Windows 10 and Windows 11 event logs that show what is happening on the system.
- Guests – legacy user accounts (non-operational in Windows 10 and Windows 11) that cannot perform any administrative tasks on your computer. They can be used only for light computing activities like browsing the internet or running the installed applications. They cannot modify the system’s configuration, access or modify another user’s data, etc.
- Hyper-V Administrators – gives its members unrestricted access to all the features available in Hyper-V.
- IIS_IUSRS – this group is used only by the Internet Information Services you may choose to install from the Windows Features panel.
- Network Configuration Operators – this group permits users to configure networking features in Windows.
- Performance Log Users & Performance Monitor Users – members are given permission to perform advanced logging in Windows and collect performance data.
- Power Users – this user group was used in older versions of Windows to provide limited administrative permissions to specific user accounts. It is still present in Windows 10 and Windows 11 but only to provide backward compatibility for old legacy applications.
- Remote Desktop Users – this user group provides its members with permission to log on remotely to the computer via the Remote Desktop.
- Remote Management Users – members can access WMI resources remotely.
- Replicator – this user group is used in network domains and gives its members the permissions required to do file replication across the domains.
- System Managed Accounts Group – the Windows 10 or Windows 11 operating system manages the members of this group.
- Users – it includes the standard user accounts defined on your Windows PC. Its members do not have administrative permissions. They can only run installed applications and cannot make system changes that affect other users.
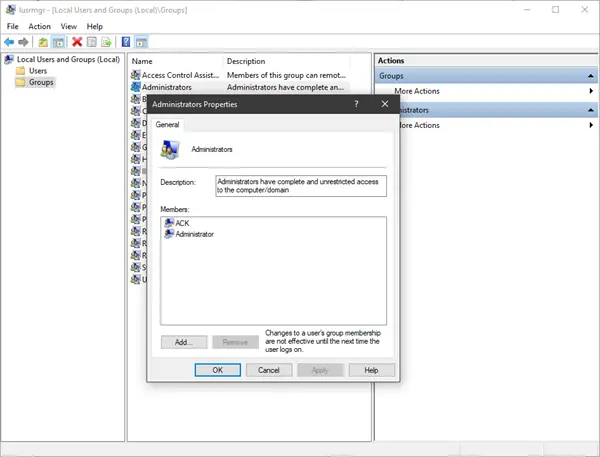
On your computer, you might also find other groups installed by Windows features, drivers, or third-party applications. Double-clicking or double-tapping on a user group opens a properties window that displays more information about it and several options. For step-by-step guidance on how to work with the available options, read the last part of this tutorial: Create new Windows user accounts and groups like an IT Pro.
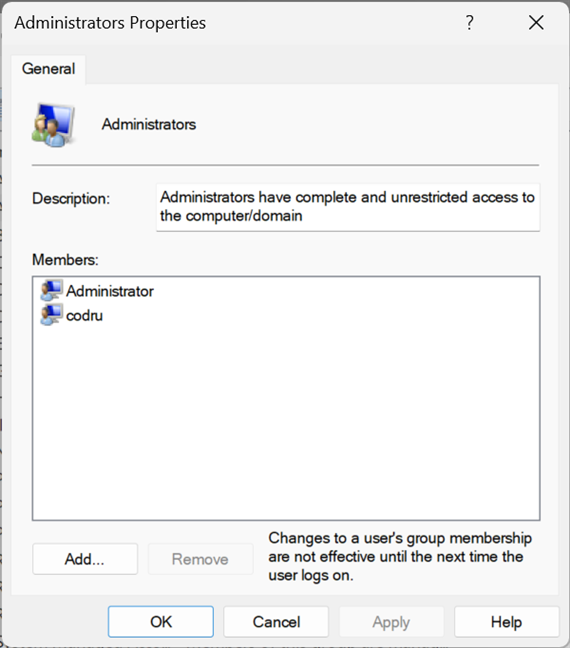
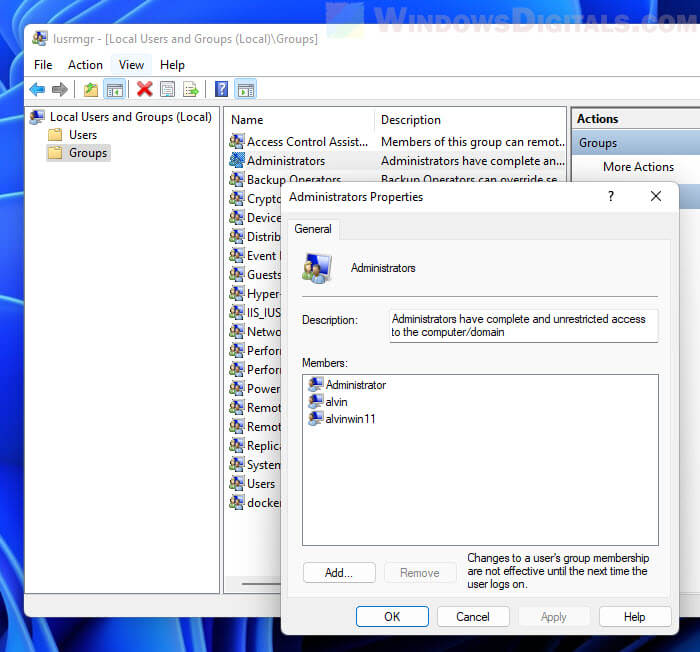
Properties of the Administrators group in Windows
What’s great about user groups is that you can use them to give additional permissions to standard user accounts. For example, if you create a user account that is a member of Users but not Administrators, that user can’t connect remotely to the computer. If you make that user account a member of Remote Desktop Users, it can connect remotely. This principle applies to all user groups. Add a user account as a member, and it receives both the permissions and restrictions of that user group.
NOTE: If you look at all the user groups listed on your Windows computer or device, you will likely notice that the user accounts defined as administrators are not listed as members of the other groups. That’s because administrators already have permission to do everything on your Windows computer, so they don’t need to be part of a special group to inherit its permissions.
Warning: Don’t change the standard Windows users and groups!
You may feel the urge to clean up and delete some of the standard user accounts and groups found on your Windows 11 or Windows 10 PC. If you try to do something like that, you should get a warning from the operating system about the issues that are likely to arise. For example, this is what you see if you try to delete the Administrator account:
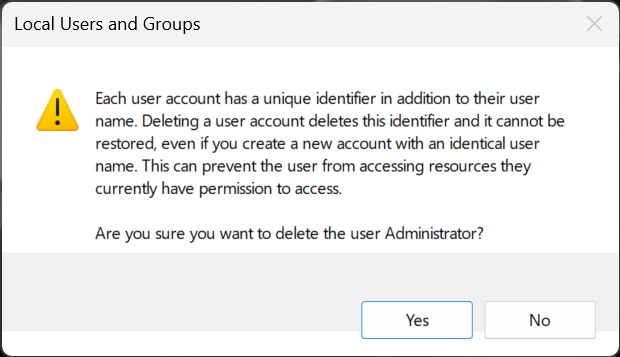
Default users and groups from Windows shouldn’t be altered or removed
Deleting or changing standard user accounts and groups from Windows 11 or Windows 10 can cause apps and system features to malfunction. Understanding all the connections between standard user accounts, user groups, and Windows features is difficult. One minor change can have unexpected consequences on many features and ruin your computing experience, so my strong recommendation is “Don’t touch the standard users and groups from Windows!”
Do you use lusrmgr.msc to manage local users and groups on your Windows PC?
I hope you enjoyed this tutorial and now you know more about Windows user management. If you have anything to add to this guide, let me know in the comments below. Also, don’t hesitate to ask if you have questions about how to work with lusrmgr.msc for managing local users and groups.
Local Users and Groups Management, also often referred to as lusrmgr.msc, is an administration console that allows you to manage advanced settings for users and groups that you would not normally see in the Settings application. This guide will show you how to access the local users and groups management in Windows 11 Home (requires third-party tool) or Pro (the normal ways) edition.
Also see: How to Create Local Admin Account Without Password on Windows 11
Access Local Users and Groups in Windows 11 Pro
Since the Local Users and Groups Management Snap-in is part of the included features in Windows 11 Pro edition, you can easily open the management console using one of the following methods. If you are using Windows 11 Home edition, please go to the next section of this guide.
Computer Management
You can quickly access the Local Users and Groups management in Windows 11 via the Computer Management application – a collection of Windows administrative tools you can use to manage a local or remote computer.
- Open Start menu.
- Search for “Computer Management” and open it.

- In the Computer Management window, select and expand “Local Users and Groups” on the left pane.

- From there, you can select the Users or Groups folder to view and manage the settings.
Open lusrmgr.msc
Alternatively, you can open the lusrmgr.msc process directly via Start, Run dialog box, Command Prompt or PowerShell.
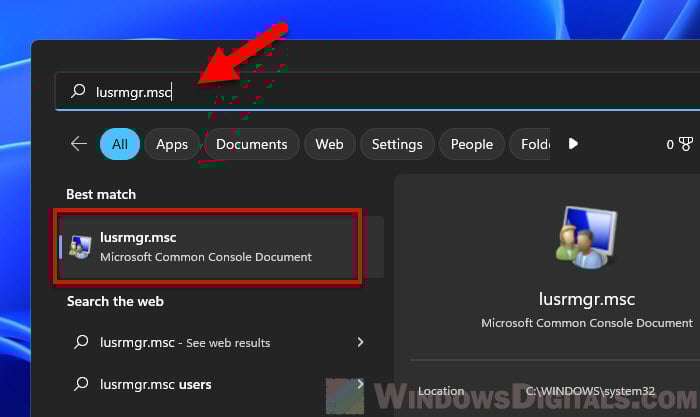
- Open Start menu.
- Type
lusrmgr.mscand select the first result to open it.
- You will then see two folders on the left pane: Users and Groups. Select the folder you want to manage.

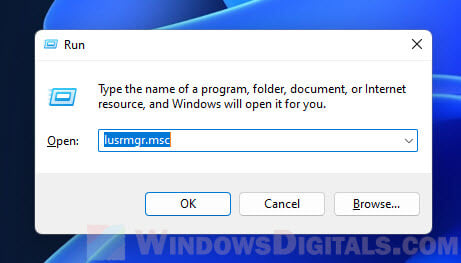
Run dialog box
You can open the Run dialog box by pressing the Win + R key. In the Run window, type lusrmgr.msc in the “Open” text field and press Enter to open it.
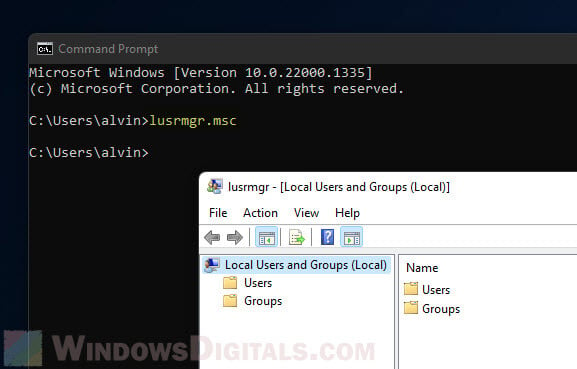
Command Prompt
If you do not have access to the Start menu nor the Run dialog box (when you are running into problem where you can only access the CMD), you can open the local users and groups management console by typing lusrmgr.msc as a command line and press Enter to run it.
As for PowerShell or Windows Terminal, you can enter lusrmgr without the .msc extension to open the management console.
Why can’t I see local users and groups in Windows 11?
In most cases, if you don’t see Local Users and Groups in the Computer Management window, or if you can’t open the lusrmgr.msc console at all, it is probably because your version of Windows 11 is Home edition, which doesn’t include this feature. To manage local users and groups in Windows 11 Home edition, follow the guide below.
Open Local Users and Groups in Windows 11 Home
Similar to the Group Policy Editor, the Local Users and Groups Management Console is also one of the power features that is not included in Windows 11 Home edition. If you are using Windows 11 Home, you will not be able to access the management console whether you access it through the computer management app, launch lusrmgr.msc directly, or via command prompt.
However, you can use a third-party tool as an alternative to enable the local users and groups management in Windows 11 Home. This third-party tool is open source and can be downloaded for free from GitHub. It has the same functionalities as the built-in lusrmgr.msc snap-in in Windows.
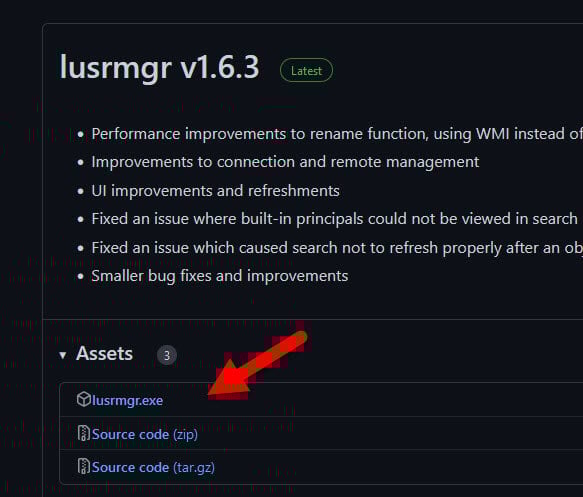
- Go to the lusrmgr releases page on GitHub.
- Click lusrmgr.exe under Assets in the latest release thread to download it.

- Once downloaded, run the executable file to open the app.
- It is normal for UAC to prompt you with a warning when you first run the application. Click Yes to acknowledge it.

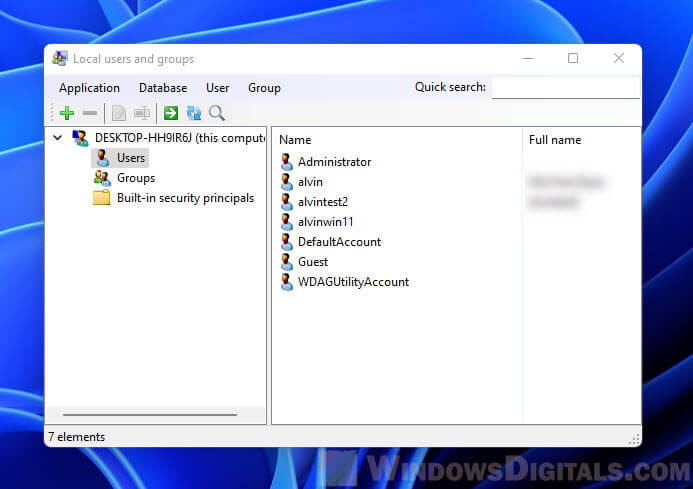
The settings for local users and groups in this third-party tool are essentially the same as the built-in lusrmgr.msc in Windows 11 Pro. You can view and change the settings just like you would on a Windows 11 Pro computer.
Add or remove a user from the Administrators group
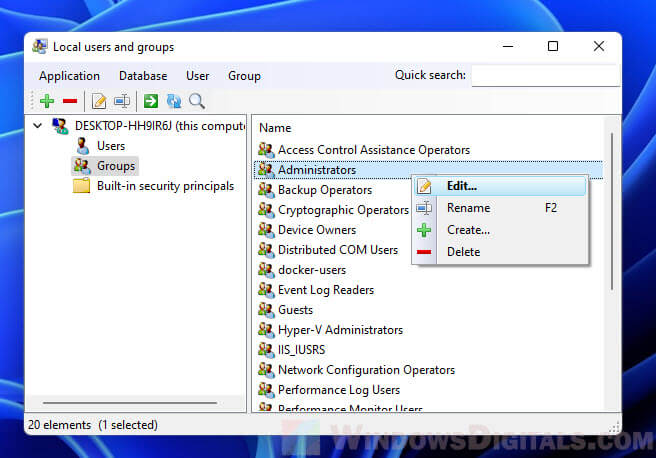
For example, to use the lusrmgr program to add or remove a user from the Administrators group, first open the program by running the executable file you downloaded from GitHub. In the program window, select Groups from the left pane. On the right, right-click Administrator and select Edit.
To add an existing user to the administrators group, click the plus (+) button. Select a user from the list of existing users and then click Select to add it to the group. If the user you want to add hasn’t been created yet, you need to create it via the local Users category instead.
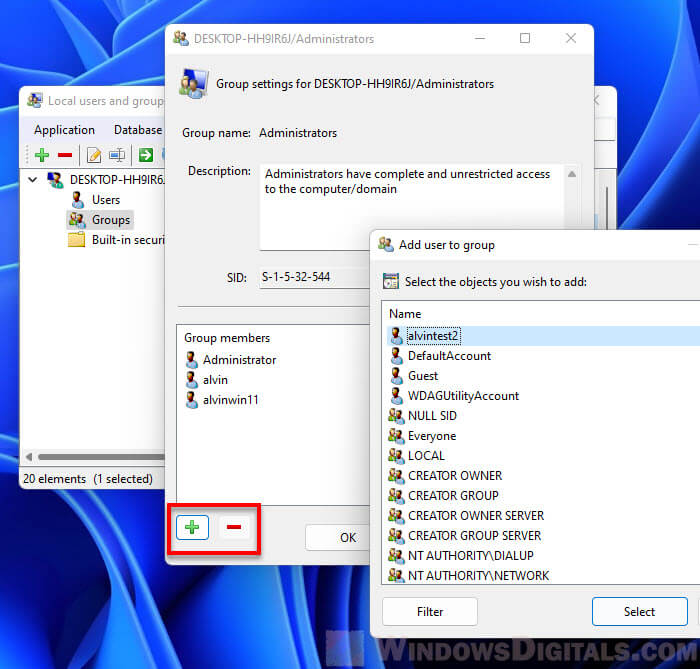
To remove a user from the group, select the user under Group members and click the minus (-) button to remove it from the group.
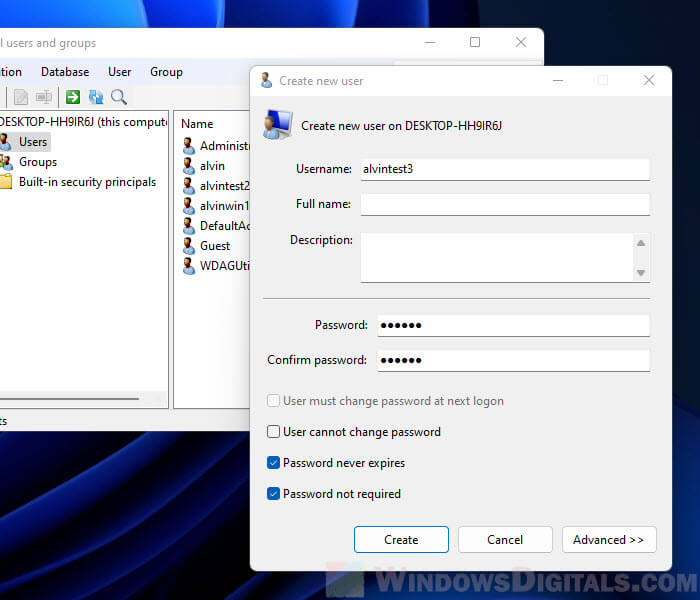
Create a new user using lusrmgr
To create a new user using the lusrmgr tool, open the tool and select Users from the left pane. Then, right-click any empty space in the right pane and select Create.
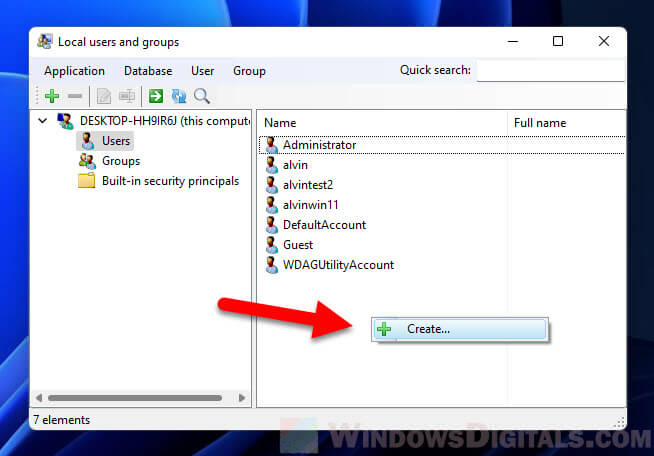
In the “Create new user” window, enter the details for the new user account, such as username and password. Optionally, you may consider enabling some useful settings for the user, such as “password not required”, “password never expires” and “user cannot change password”.