
Настройка COM Объекта «Excel.Application» на сервере 1С, настройка поможет обработать большие файлы Excel на сервере 1C, в том числе через фоновые задания.
Та же данная настройка может решить проблему с ошибкой 1С:
ошибка -2147467262(0x80004002): Интерфейс не поддерживается
- Заходим на сервер приложений 1С под локальным админом или администратором домена
- Запускаем DCOMCNFG (Консоль настроек «Службы компонентов»)
- Открываем ветку Корень консоли -> Службы компонентов -> Компьютеры -> Мой компьютер -> Настройка DCOM
- Ищем «Microsoft Excel Application»
- Если запись существует, то переходим к пункту 4
- Закрываем «Службы компонентов»
- Настройка реестра
- Запускаем REGEDIT
- Открываем ветку Компьютер\HKEY_CLASSES_ROOT\AppID\EXCEL.EXE, если ее нет, то создаем
- Создаем в ней строковый параметр AppID = {00020812-0000-0000-C000-000000000046}
- Выполняем команду «mmc comexp.msc /32», которая делает то же что и DCOMCONFIG, но позволяет видеть 32 битные компоненты
- После этого в Component Services должен появиться «Microsoft Excel Application»
- Настраиваем свойства DCOM компонента «Microsoft Excel Application»
- Заходим в «Свойства», закладка «Безопасность»
- «Разрешения на запуск и активацию» — Настроить — Изменить
- Добавляем пользователя, под которым запускается агент сервера 1С
- Назначаем ему только следующие права (Разрешить):
- Локальный запуск
- Локальная активация
- «Разрешения на доступ» -Настроить — Изменить
- Добавляем пользователя, под которым запускается агент сервера 1С
- Назначаем ему только следующие права (Разрешить):
- Локальный доступ
- «Разрешения на запуск и активацию» — Настроить — Изменить
- Переходим на вкладку «Удостоверение»
- Выбираем «Запускающий пользователь»
- Заходим в «Свойства», закладка «Безопасность»
- Настройка системных папок
- Папка «C:\Windows\SysWOW64\config\systemprofile\Desktop\»
- Проверяем наличие папки , если нет -то создаем
- Заходим в «Свойства» этой папки, закладка «Безопасность»
- Добавляем, если нет, пользователя, под которым запускается агент сервера 1С
- Добавляем права «Чтение» и «Запись»
- Папка «C:\Windows\System32\config\systemprofile\Desktop\»
- Проверяем наличие папки , если нет -то создаем.
- Заходим в «Свойства» этой папки, закладка «Безопасность»
- Добавляем, если нет, пользователя, под которым запускается агент сервера 1С
- Добавляем права «Чтение» и «Запись»
- Папка «C:\Windows\SysWOW64\config\systemprofile\Desktop\»
,
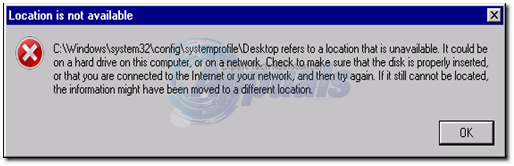
The following error may appear after updating Windows 10: «C:\Windows\system32\config\systemprofile\Desktop is unavailable. If the location is on this PC, make sure the device or drive is connected or the disc is inserted, and then try again. If the location is on a network, make sure you’re connected to the network or Internet, and then try again. If the location still can’t be found, it might have been moved or deleted.»

How to FIX Windows 10 Error: C:\Windows\system32\config\systemprofile\Desktop is unavailable.
Suggestion: The «C:\Windows\system32\config\systemprofile\Desktop is unavailable» error, commonly appears because the Windows update installation isn’t completed yet, or it is not completed successfully. So, before troubleshooting the problem, make sure that all the available updates are installed and also restart your PC (2-3 times) to complete the installation.
Method 1. Perform a Full System Shutdown.
Method 2. Create the missing Desktop folder from the Windows GUI.
Method 3. Create the missing Desktop folder from Advanced Startup Options.
Method 4. Go Back to a Previous Windows Version (Build).
Method 5. Uninstall the latest update from Advanced Startup Options.
Method 6. Restore Windows 10 to a Previous Working State.
Method 7. Repair Windows 10 with an in-place Upgrade.
Method 1. Fully Shutdown your PC.
The first method to resolve the «C:\Windows\system32\config\systemprofile\Desktop is unavailable» error is to fully shutdown the PC in order to force Windows 10 to reinitialize the device drives and the system files from scratch.
1. Click the Start menu and then click the Power button.
2. Now press and HOLD DOWN the SHIFT key (on your keyboard) and then click Shutdown.

3. Power On your PC.
Method 2. Create the missing Desktop folder from the Windows GUI.
The second method to fix the «C:\Windows\system32\config\systemprofile\Desktop is unavailable » issue is to create the missing ‘Desktop’ folder manually and then to restart the PC. To do that:
1. Open Windows Explorer and navigate to: C:\Windows\System32\config\systemprofile
2. Right click at an empty space and select New -> Folder.

3. Name the new folder Desktop and click Enter. *
* Note: If you cannot create the folder because you receive an «access denied» error, then proceed to method-3 below.

4. Restart your PC.
Method 3. Create the missing Desktop folder from Advanced Startup Options.
1. Click the Start menu and then click the Power button.
2. Now press and HOLD DOWN the SHIFT key (on your keyboard) and then click Restart.
3. At Recovery options, go to: Troubleshoot > Advanced options > > Command Prompt.

4. The computer will restart. After restart, click on a user with (administrative privileges) and then type your password.

5. Now, find out on which disk Windows were installed. To do that, in the command prompt window, give the following command: *
- dir C:
* Note: If the Windows directory is displayed, then continue to the next step, otherwise continue by typing the next alphabet letter until you find which drive contains the Windows folder (e.g. dir d: , dir e:. dir f:, etc.).
(In this example the Windows folder is located at drive D 

6. Then type the following command to create the missing folder and press Enter: *
- md X:\Windows\System32\config\systemprofile\Desktop
* Note: Where X = the Windows drive letter. (replace according your case)
(In this example the command will be: md D:\Windows\System32\config\systemprofile\Desktop )

7. Close the command prompt window.
8. Click Continue, to exit from the recovery options and boot to Windows 10.
Method 4. Go Back to a version Of Windows 10.
The next method to resolve the «desktop is unavailable» error in Windows 10, is to restore your system to the previous version of Windows (Build). To do that: *
* Suggestion: Backup your files, before restoring your system to the previous version.
1. From Start menu choose Settings > Update and security.
2. Select Recovery at the left and then click the Get Started button under the Go back to an earlier build section.

3. Choose a reason for going back (e.g. «For another reason») and press Next.
4. At ‘Check for updates’ options click No, thanks to continue.

5. Read all the information at the next screen and click Next.

6. If you have changed your password, after installing the latest build, make sure that you remember your old password and press Next.
7. Finally click Go back to earlier build and wait until the process is completed.

Method 5. Uninstall the latest update from Advanced Startup Options.
1. Click the Start menu and then click the Power button.
2. Now press and HOLD DOWN the SHIFT key (on your keyboard) and then click Restart.
3. At Recovery options, go to: Troubleshoot > Advanced options > Uninstall Updates.

4. At ‘Uninstall Updates’ options, choose Uninstall latest quality update if you face the problem after installing a Cumulative monthly update, or select Uninstall latest feature update, if you facing the problem after updating Windows to its latest build. *
* Note: If you don’t know which type of update to uninstall, then try first to uninstall the latest quality update. If you face the same error after booting to Windows, then perform the same steps to reach the ‘Uninstall Updates’ options and then Uninstall the latest feature update.

5. At the next screen click the Uninstall update button.

6. When the Uninstall is completed click Done

7. Finally, click Continue, to exit from the recovery options and boot to Windows 10.
Method 6. Restore Windows 10 to a Previous Working State.
To restore your system to a previous working state:
1. Click the Start menu and then click the Power button.
2. Now press and HOLD DOWN the SHIFT key (on your keyboard) and then click Restart.
3. At Recovery options, go to: Troubleshoot > Advanced options > System Restore.

6. Select an account with administrative privileges, type a password for that account and click Continue.

7. Click Next at the first screen and then check the Show more restore points checkbox, to select an earlier working state from the list and press Next.

8. Review your selection and if you agree, press Finish.
9. Finally press Yes to confirm your decision.

10. Now wait until the restore process is completed. During the restore process, your computer will restart several times and when it’s done, you should enter in Windows without problems.
Method 7. Repair Windows 10 with an in-place Upgrade.
The final method to resolve Windows 10 problems, is to create a Windows 10 DVD or USB installation media, by using the Media Creation tool, and then to repair Windows 10. For that task follow the detailed instructions in this article: How to Repair Windows 10 with an in-place Upgrade.
That’s it! Let me know if this guide has helped you by leaving your comment about your experience. Please like and share this guide to help others.
If this article was useful for you, please consider supporting us by making a donation. Even $1 can a make a huge difference for us in our effort to continue to help others while keeping this site free:
- Author
- Recent Posts
Konstantinos is the founder and administrator of Wintips.org. Since 1995 he works and provides IT support as a computer and network expert to individuals and large companies. He is specialized in solving problems related to Windows or other Microsoft products (Windows Server, Office, Microsoft 365, etc.).
The Windows 10 1803 update has a bug whereby it cannot find the folder located at C:\windows\system32\config\systemprofile\desktop. The error makes it so you cannot access anything on your desktop and this error can appear if you’re updating from an older version or doing a clean install. The error surfaces once you’ve gone through the entire update process. Here are two ways to fix the problem.
Control Userpasswords2
Tap the Win + R keyboard shortcut to open the run box. In the run box, type cmd.exe and tap Ctrl+Shift+Enter to open Command Prompt with admin rights. In Command Prompt, enter the following, and tap enter.
control userpasswords2
This will open the User Accounts window. Click the Add button and add a new user. You can add a local user or a Microsoft account and assign it admin rights if you want. You can do this later as well if you want. Once you add a second user, restart Windows, and login with it. This is the easiest way to go if you don’t want to lose your files and have to install apps again.
Clean Install
If the above method doesn’t work, you still have two options and you may lose files and apps via one of them. You will need to create a install disk for Windows 10. Use the media creation tool and create a USB that can install Windows 10, connect it to your system and turn it on. It will ask if you want to upgrade the current installation. Select the upgrade option and when prompted, choose the option to keep both files and apps.
If you get the error again, try the previous solution one more time after you attempt the update from the USB stick. If that doesn’t work, you’re going to have to do a clean install of Windows 10. To keep your files save, you should try booting from a live disk to back up the files you want to save. Your apps will be lost once you finish installing Windows 10.
The error message for this bug is called “Location is not available” but there are several bugs that have this exact same name. The above solutions work only if the location that the error reports as unavailable is C:\windows\system32\config\systemprofile\desktop. This same error appears for other locations too and they may or may not have anything to do with the April update. They will also have their own solutions though it’s safe to say a clean install will fix them all.

Fatima Wahab
Fatima has been writing for AddictiveTips for six years. She began as a junior writer and has been working as the Editor in Chief since 2014.
Fatima gets an adrenaline rush from figuring out how technology works, and how to manipulate it. A well-designed app, something that solves a common everyday problem and looks
Have you logged onto your Windows system only to find your desktop completely blank, unable to locate any data you previously had on your desktop? The following error may pop up, leaving you baffled and clueless as to what you should do next: “\system32\config\systemprofile\Desktop refers to a location that is unavailable. It could be on a hard drive on this computer, or on a network. Please check to make sure that the disk is properly inserted or that you are connected to the Internet or your network. Then try again. If it still cannot be located, the information might have been moved to a different location.” If this is your case, you are not alone.
This error usually occurs after a corrupt Windows update is installed on your computer, or when your system crashes abruptly. The cause can be as simple as an incorrect location path or as significant as corrupt system files. If a simple reboot has not solved your problem, then follow this guide to restore your desktop and its data to the way it was.
Solution 1: Restarting Windows Explorer.
Sometimes, the error occurs if Windows Explorer isn’t functioning correctly. Therefore, in this step, we will restart Windows Explorer after completely terminating it. To do so:
- Press “Windows” + “X” keys simultaneously.
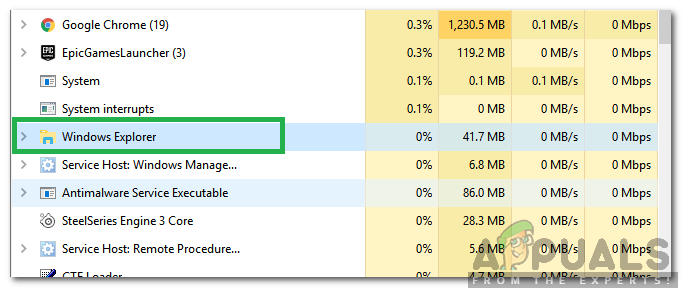
- Select “Task Manager” from the list and click on the processes tab.
Selecting Task Manager from the list - Scroll and select the ‘Windows Explorer’ option from the list.

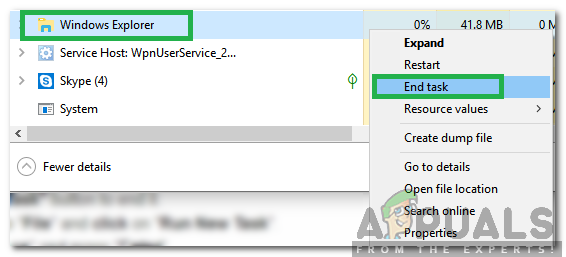
Selecting Windows Explorer from the list - Right-Click on it and then click on the “End Task” button to end it.

Right-clicking and then selecting the “End Task” option - Hover the pointer to “File” and click on “Run New Task“.

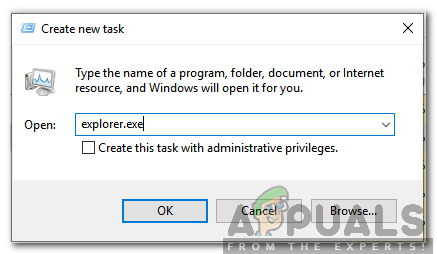
Clicking on File and then selecting Run New Task option - Type in ‘Explorer.exe’ and press ‘Enter’.

Typing explorer.exe and pressing enter - Check to see if the issue persists.

Solution 2: Reset Desktops’ Location
Your operating system may not be able to link your desktop to its default location.
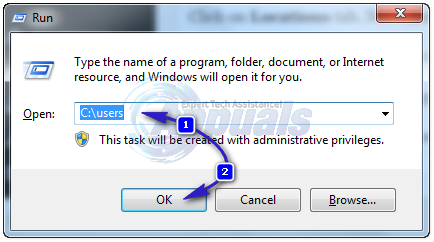
Hold the Windows Key and press R. In the run dialog, type
C:\Users
Open the folder with your username. There will be a folder named Desktop. Right click on it and click Properties.
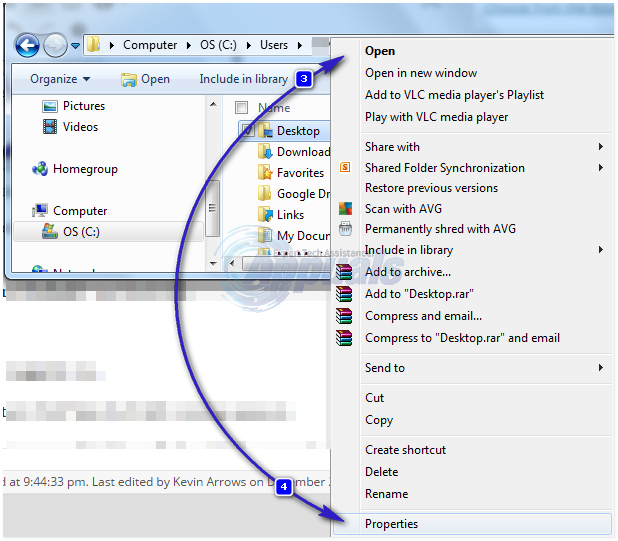
Click on the ‘Location’ tab. Now, click the ‘Restore Default’ button and then click ‘OK’. Close all windows and restart your system.
If that did not work, we could also change its location through the registry.
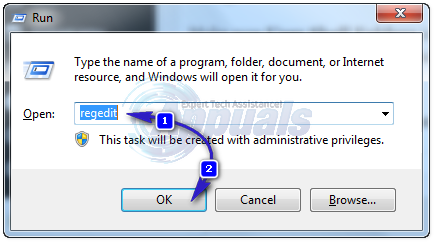
Press Windows key + R. Type regedit and press Enter. Click Yes if a UAC warning appears.
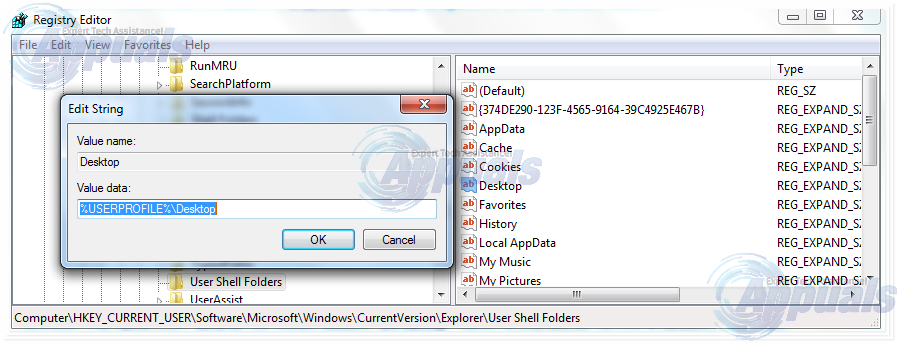
In the left pane, click on HKEY_CURRENT_USER to expand it. Now click on Software under it. Similarly navigate to Microsoft\Windows\CurrentVersion\Explorer\User Shell Folders.
Ensure that ‘User Shell Folders’ is highlighted and selected in the left pane, then double-click ‘Desktop.’ Check that the ‘Value data:’ is either ‘%USERPROFILE%\Desktop’ or ‘C:\Users\%USERNAME%\Desktop.’ Click OK and close the registry editor. Then, restart your system and verify whether your problem has been resolved.
If not, move on to the next method.
Solution 3: Move Profile’s Content Back to Its Location
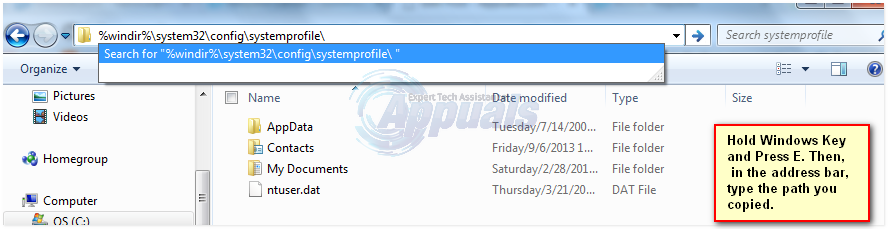
Press the Windows key + E to open the File Explorer. Copy %windir%\system32\config\systemprofile\, then click on the address bar above to make it editable, and paste the path you copied. Press Enter to go to the path.
A folder will open. Proceed to delete the folder named ‘Desktop.’ If an ‘Access Denied’ error appears, you must first take ownership of the ‘systemprofile’ folder. You can do this by following ‘Solution 5’ provided in our guide, accessible via this link. Afterward, you should be able to delete the folder successfully.
Hold the Windows key and press ‘E’. Then, open the ‘C:’ drive. There, you should find a folder named ‘Users’. Open this folder. Afterwards, open the folder associated with your account. This folder will have the same name as your username.
Now you can see a folder named “Desktop.” This folder will contain all the data you previously had on your desktop. If you have two folders named “Desktop,” open each one and delete the “Desktop” folder that is either empty or contains incorrect files that are not supposed to be there.
Similarly, if you can identify any additional duplicate folders, delete the folders that contain files they are not supposed to have or that are empty.
Now right click on the remaining Desktop folder and click copy.
Go back to %windir%\system32\config\systemprofile\ and paste the desktop folder there.
Now restart your system and check if your system’s back to normal. If not, you will have to create a new account and move your old data to it. Move to the next solution to do that.
Solution 4: Create a New User Profile
In this solution, we will create a new account and migrate your old data to it. Doing this can automatically fix corrupt paths in the registry.
Click ‘Start’ and type ‘cmd.’ Right-click on ‘cmd’ and select ‘Run as Administrator.’ In the command prompt, type and execute the following two commands.
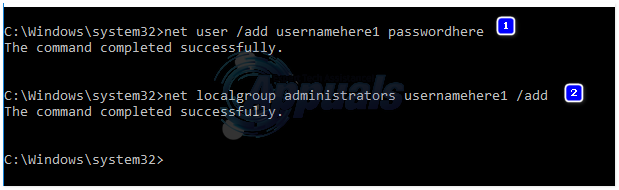
net user /add usernamehere passwordhere

net localgroup administrators usernamehere /add
This works exclusively for local accounts. However, should you wish, you can switch your account to Microsoft on Windows 8/10 by using any app from the Windows Store, which will prompt you to sign into the Microsoft Account. This is optional. Subsequently, you can copy your data from the corrupt or previous profile by following these steps:
- Hold the Windows key and press E to open Windows Explorer.
- For Windows 7, click on ‘Organize’ in the upper left corner, and then select ‘Folder and Search Options’.
- Click on the ‘View’ tab. Select ‘Show hidden files, folders, and drives.’
- Uncheck the box by clicking on it next to Hide protected operating system files.
- Confirm the warning, then click OK and close all windows.
- For Windows 8 and 10, click on View tab, and click on Options at the right corner.
- Click on the ‘View’ tab, then select ‘Show hidden files, folders, and drives.
- Uncheck the box next to ‘Hide protected operating system files’ by clicking on it.
- Confirm the warning, then click OK and close all windows.
- Navigate to the C: drive > Users > Old_Profile, where C: is the drive where your Windows is installed, and Old_Profile is the name of your old Windows account.
- Now copy all the files and folders here except Ntuser.dat, Ntuser.dat.log, and Ntuser.ini.
- New_Profile’ is the name of the new account you just created. Paste the copied content there.
- Once you have ensured that all your data has been moved to the new account, you can delete the old account by going to ‘Add or Remove User Accounts’ again in the Control Panel.
- Your problem should be resolved now. If not, please let us know your exact situation in the comment section below.
Kamil Anwar
Kamil is a certified MCITP, CCNA (W), CCNA (S) and a former British Computer Society Member with over 9 years of experience Configuring, Deploying and Managing Switches, Firewalls and Domain Controllers also an old-school still active on FreeNode.
Путь C:\Windows\SysWoW64\Config\systemprofile\Desktop — это расположение рабочего стола системного профиля в операционной системе Windows. Системный профиль представляет собой учетную запись, которая используется системой при запуске и выполнении различных сервисов.
Возникновение проблемы связанной с данным путем может привести к недоступности рабочего стола и некорректной работе операционной системы в целом. Загрузка системы может замедлиться, а при попытке открыть рабочий стол будет выдаваться ошибка.
Для решения проблемы с путем C:\Windows\SysWoW64\Config\systemprofile\Desktop необходимо выполнить несколько шагов. Во-первых, проверьте наличие данного пути на вашем компьютере. Если он отсутствует, то возможно, были удалены системные файлы. В таком случае вам следует восстановить их при помощи специальных программ или восстановления Windows.
Во-вторых, если путь C:\Windows\SysWoW64\Config\systemprofile\Desktop существует, но вы не можете получить к нему доступ, необходимо проверить права доступа к данному пути. Убедитесь, что у вас есть соответствующие разрешения на чтение и запись в данную директорию. Если права доступа установлены некорректно, вам следует изменить их, указав нужные разрешения.
Примечание: При изменении прав доступа к пути C:\Windows\SysWoW64\Config\systemprofile\Desktop будьте осторожны, так как это может повлиять на работу системы в целом.
После выполнения данных шагов вы сможете решить проблему с путем C:\Windows\SysWoW64\Config\systemprofile\Desktop и настроить его в соответствии с вашими потребностями. Не забывайте делать резервные копии файлов перед внесением изменений и консультироваться со специалистами при необходимости.
Содержание
- Проблемы и настройка C:\Windows\SysWoW64\Config\systemprofile\Desktop
- Почему возникают проблемы с путем C:\Windows\SysWoW64\Config\systemprofile\Desktop
- Решение проблем с путем C:\Windows\SysWoW64\Config\systemprofile\Desktop
Одной из проблем, с которыми пользователи могут столкнуться, является отсутствие или некорректное отображение рабочего стола в данной директории. Это может быть вызвано различными причинами, такими как повреждение системных файлов, неправильные настройки или вредоносное ПО. Для решения этой проблемы, можно попробовать следующие действия:
| Шаг | Описание |
| 1 | Перезагрузите компьютер |
| 2 | Проверьте наличие вредоносного ПО |
| 3 | Проверьте целостность системных файлов |
| 4 | Создайте новую директорию для рабочего стола |
| 5 | Обновите операционную систему до последней версии |
Если проблема с рабочим столом остается нерешенной, рекомендуется обратиться к специалисту по обслуживанию ПК или к поддержке операционной системы.
Настраивать директорию C:\Windows\SysWoW64\Config\systemprofile\Desktop можно с помощью различных параметров и настроек. Например, можно изменить путь к рабочему столу системного профиля, переместив его в другую директорию. Для этого необходимо открыть реестр Windows, перейти к ветке HKEY_LOCAL_MACHINE\SOFTWARE\Microsoft\Windows NT\CurrentVersion\ProfileList, найти запись с ProfileImagePath, и изменить путь на желаемый.
Еще одной настройкой, связанной с данной директорией, является автозапуск программ при входе в систему. Можно добавить ярлыки нужных программ в папку Startup в директории C:\Windows\SysWoW64\Config\systemprofile. Это позволит запускать программы автоматически при каждом входе в систему.
Важно помнить, что при изменении настроек системного профиля необходимо быть осторожным, так как неправильные изменения могут привести к непредсказуемым последствиям или ненадежной работе системы.
В заключении, помощь специалиста может быть нужна при решении проблем связанных с директорией C:\Windows\SysWoW64\Config\systemprofile\Desktop и при настройке данной директории под конкретные потребности пользователя.
Почему возникают проблемы с путем C:\Windows\SysWoW64\Config\systemprofile\Desktop
Проблемы с путем C:\Windows\SysWoW64\Config\systemprofile\Desktop могут возникать по следующим причинам:
1. Неправильные разрешения или доступ к папке.
Если у вас нет прав доступа к папке C:\Windows\SysWoW64\Config\systemprofile\Desktop, вы можете столкнуться с проблемами при попытке получить доступ к ней или использовать ее для хранения файлов. Проверьте разрешения к папке и убедитесь, что у вас есть права на чтение и запись.
2. Удаление или перенос папки.
Если вы случайно удалили папку C:\Windows\SysWoW64\Config\systemprofile\Desktop или перенесли ее в другое место, то все файлы и ссылки на эту папку будут недоступны. Проверьте, что папка находится в правильном месте.
3. Повреждение системного файла.
Путь C:\Windows\SysWoW64\Config\systemprofile\Desktop относится к системному профилю, который используется системой для хранения настроек и файлов. Если системный файл, отвечающий за этот путь, поврежден или отсутствует, могут возникнуть проблемы с доступом к папке Desktop.
Решение проблемы с путем C:\Windows\SysWoW64\Config\systemprofile\Desktop
Для решения проблемы с путем C:\Windows\SysWoW64\Config\systemprofile\Desktop вы можете предпринять следующие шаги:
1. Проверьте разрешения к папке: убедитесь, что у вас есть права на чтение и запись к папке C:\Windows\SysWoW64\Config\systemprofile\Desktop. Если нет, измените разрешения или обратитесь к администратору системы.
2. Проверьте местоположение папки: убедитесь, что папка C:\Windows\SysWoW64\Config\systemprofile\Desktop находится в правильном месте. Если вы ее случайно переместили, верните ее на место.
3. Восстановите поврежденные системные файлы: в случае повреждения системного файла, отвечающего за путь C:\Windows\SysWoW64\Config\systemprofile\Desktop, вам может потребоваться восстановление операционной системы или выполнение ремонтных действий. Постарайтесь восстановить системные файлы с помощью инструментов операционной системы или обратитесь к специалисту по ремонту компьютеров.
В целом, проблемы с путем C:\Windows\SysWoW64\Config\systemprofile\Desktop могут возникать из-за неправильных разрешений, удаления или повреждения системных файлов. Однако с помощью указанных выше шагов вы сможете решить большинство проблем и настроить путь C:\Windows\SysWoW64\Config\systemprofile\Desktop для правильного функционирования вашей системы.
Решение проблем с путем C:\Windows\SysWoW64\Config\systemprofile\Desktop
Каталог C:\Windows\SysWoW64\Config\systemprofile\Desktop может вызвать некоторые проблемы, такие как:
- Отсутствие доступа к папке
- Отсутствие файлов или их неправильное размещение
- Ошибка доступа к приложениям или службам
Для решения этих проблем рекомендуется выполнить следующие шаги:
- Убедитесь, что у вас есть административные права на вашем компьютере. Если нет, то выполните вход с учетной записью администратора.
- Проверьте права доступа к папке C:\Windows\SysWoW64\Config\systemprofile\Desktop:
- Щелкните правой кнопкой мыши на папке Desktop.
- Выберите «Свойства».
- Перейдите на вкладку «Безопасность».
- Убедитесь, что у учетной записи, с которой вы работаете, есть полные права на папку. Если прав нет, добавьте соответствующие разрешения.
- Если файлы отсутствуют или находятся в неправильном месте, попробуйте выполнить следующие действия:
- Создайте резервную копию существующих файлов на рабочем столе.
- Удалите все файлы и папки из C:\Windows\SysWoW64\Config\systemprofile\Desktop.
- Восстановите резервную копию на рабочий стол.
- Если проблемы сохраняются и возникают ошибки доступа к приложениям или службам, выполните следующие действия:
- Проверьте наличие вирусов или злонамеренных программ на вашем компьютере с помощью антивирусного ПО.
- Обновите все установленные приложения до последней версии.
- Перезагрузите компьютер и проверьте, исправились ли проблемы.
Если вы после выполнения всех этих шагов все равно столкнулись с проблемами, рекомендуется обратиться за помощью к специалистам технической поддержки.
There are a few steps you can take to try and fix the “C Windows system32 Config Systemprofile Desktop is unavailable” problem.
First, you need to check to make sure the “Desktop” folder path is valid. To do this, open the “Run” dialogue box from the start menu, type “REGEDIT”, and press Enter.
Once Registry Editor is open, navigate to the “HKEY_LOCAL_MACHINE\SOFTWARE\Microsoft\Windows NT\CurrentVersion\ProfileList” folder.
Check each subkey (e.g. S-1-5-18) for a “ProfilesDirectory” value. The value “-” indicates the profile is unavailable.
If the “Desktop” folder is missing, you can create it by navigating to the profile directory (e.g. C:\Windows\SysWOW64\Config\SystemProfile) and creating a new folder called “Desktop”.
If the “Desktop” folder is present but the PC still displays an error at startup, you should check the permissions, ownership, and access control lists of the “Desktop” folder and make sure that the current user has access to the folder.
Finally, if you can’t access the “Desktop” folder, you will need to try a System Restore. This can be done by going to the Control Panel, clicking “System & Security”, and then clicking “System”. On the left hand side, click “System Protection” and then “System Restore”.
Follow the steps to restore the PC back to a previous point in time.
If you still can’t fix the problem after these steps, you should contact a technical expert for assistance.
Depending on the exact issue you are having with your Desktop being unavailable, there are a few different things you can try:
1. Restart your computer: If your Desktop is inaccessible, the first step to try is usually a simple restart. Restarting your computer can help resolve a variety of system errors that can cause your Desktop to be unavailable.
2. Update your system: Outdated software and hardware can lead to issues with your Desktop being unavailable. Make sure your computer has the latest updates to operating system, programs and drivers.
3. Clean up your computer: Too many temporary files, history logs and other junk data can build up and overload your system. Use a program like CCleaner to help clean up your system.
4. Scan for viruses and malware: Viruses and malware can also temporarily block access to your desktop making it unavailable. Use an antivirus program to scan and remove any malicious software from your computer.
5. Restore your computer: Sometimes it may be necessary to restore your computer’s settings and settings to their factory settings. This will erase any data you may have added to your computer, but it can help resolve any serious conflicts or problems causing your Desktop to be unavailable.
How do I fix system32 config system missing?
If the System32\Config\System file is missing or corrupt on your Windows computer, your system will not boot. To fix this, you need to use an installation disk or drive to repair the damaged system file.
1. Insert the Windows installation disk or drive and boot your computer to access the setup screen.
2. On the setup screen, select “Repair Your Computer” option.
3. Select “System Restore” to repair the corrupted System32\Config\System file.
4. Once the restoration is finished, your computer will need to be restarted.
If System Restore does not resolve the issue, then you may need to use a utility like chkdsk to repair any corrupted data on the hard drive. You can run the utility by typing chkdsk /f in the command line.
If neither of these methods resolve the issue, then you may need to take your computer to a technician to have them diagnose and repair the issue.
Can you recover System32?
Yes, it is possible to recover System32. Depending on the specific issue that is affecting the computer. The most common approach is to use a System Restore Point to roll back to a point where System32 was working correctly.
Another option is to use a Windows repair tool, such as System File Checker, to repair any corrupt or missing files. Finally, reinstalling Windows or running a complete virus scan may help to recover System32 as well.
However, it is important to note that data may be lost if any of these recovery techniques are used, so it should be used as a last resort.
How do I do a system repair on Windows 10?
In order to do a system repair on Windows 10, the first step is to create a Windows 10 installation disc or USB drive. This can be done by downloading the Media Creation Tool from Microsoft. Once the installation media is ready, you need to boot your computer from the installation media and select ‘Repair your computer’ from the installation interface.
On the next window that appears, select ‘Troubleshoot’ and choose ‘Advanced options’. Here, you can select ‘System Restore’ which will allow you to restore your system to a previous state. Lastly, you will need to follow the on-screen instructions to complete the repair process.
You may also want to use the Windows 10 reset feature which will allow you to keep your personal files while removing any apps and settings that you might have installed.
What is C :\ Windows System32 Config software?
C:\Windows\System32\Config is a folder containing system and configuration data for the Windows operating system. The files stored in this folder are responsible for the configuration of the operating system and how it runs.
The important files in this folder include the “Registry,” which is the database that stores most of the settings and information for the operating system, as well as the “System File,” which is the primary file for Windows to boot up and function correctly.
The files in this folder are essential for the proper functioning of the operating system, so it is important to keep them safe and secure. If any of the files become corrupted or damaged, it is important to restore a backup version of the folder before proceeding to repair the problem.
How do I fix Windows 10 registry file is missing or corrupt?
If the Windows 10 registry file is missing or corrupt, there are several ways you can go about trying to fix the issue. The first step is to make sure your Windows 10 installation is up to date, as missing or corrupt registry files can occur if Windows 10 isn’t properly updated.
If your system is fully updated, then it’s time to check the registry.
To check the registry, you’ll need to use the System File Checker (SFC) tool. The SFC tool can scan for corrupt Windows system files and repair any that are found. To run an SFC scan, open a Command Prompt window as an administrator and type the following command: sfc /scannow.
The SFC scan may take several minutes to complete, so be patient.
If the SFC scan finds corrupted files and can’t repair them, then you may need to perform a repair install of Windows 10. To do this, you’ll need to use the media creation tool to create an installation media then use that to access the repair options.
You can find a guide on how to perform a repair install at the Microsoft website.
If that doesn’t work, then you may need to reinstall Windows 10, although this should be considered a last resort. It’s also recommended that you backup all of your important data before reinstalling Windows 10, just to be safe.
How do I reinstall a copy of System32 Hal DLL?
The best way to reinstall a copy of System32 Hal DLL is to first use Windows Update to check for any available updates related to the corrupted system32 Hal DLL file. If none are available, then you may need to reinstall the full version of Windows to ensure the proper functioning of the system.
During the installation, you will be prompted to provide the Windows installation media. It is important that you provide the same version of Windows that you are currently running, otherwise it could cause further problems.
Once the installation is complete, the new version of System32 Hal DLL should be installed automatically. Additionally, if you have a backup of your Windows files you can attempt to restore the corrupted system32 Hal DLL file directly from your backup.
How do I fix corrupted files in Windows XP?
Fixing corrupted files in Windows XP can be done in a few ways depending on the severity of the issue.
First, check whether the file is still readable. If the file is still readable, you may be able to recover the file by using a third-party file recovery software such as Recuva. After scanning the hard drive, try to recover the damaged file and save it to another storage device.
If the file is unreadable, there are still ways to fix the corruption. You can try running the system File Checker in the Command Prompt. The File Checker will check all system files, including. dlls and registry keys, for any inconsistencies and repair them accordingly.
If the corruption occurred due to something more serious, you may need to restore your system to an earlier point in time. This can be done by going to the Start menu, clicking All Programs and Accessories, then System Tools.
From there, you’ll be able to launch the System Restore utility and select the point in time you want to restore your system to.
Finally, installing the latest Windows updates can often fix corrupted files and prevent any further problems. To check for updates, go to the Start menu, then click Control Panel, then System, then click the “Automatic Updates” tab.
How do I repair Windows XP without a CD?
Repairing Windows XP without a CD is possible by using Recovery Console, which is a command-line utility that can be used to access the files and settings of your Windows XP installation. To access Recovery Console, you will need to set up a new installation of Windows XP on a blank drive and then boot the drive from the CD-ROM.
Once the installation is complete, access the Recovery Console via the Troubleshooting — Advanced Options menu and log in by typing in the password.
Once in Recovery Console, you can run several commands to repair Windows XP. You can use the ‘Fixboot’ command to copy the boot files from a Windows installation CD to your hard drive and the ‘Fixmbr’ command to repair the master boot record.
Additionally, you can use the ‘Chkdsk’ command to verify the file system integrity of a selected partition, and the ‘Disable’ command to disable services and other startup programs listed in the system configuration utility.
If Windows XP will still not boot after running these commands, you can use the ‘Copy’ command to copy files from the Windows Installation CD to your hard drive and the ‘Expand’ command to expand compressed files from the installation CD to your hard drive.
You can also use the ‘Delete’ command to delete corrupt or invalid files. Additionally, you can use the ‘Format’ command to reformat your hard drive.
For further assistance, you may want to consult an experienced technology expert who is certified in working with Windows XP.
How do I fix a missing system file in Windows XP without the recovery disk?
If you need to fix a missing system file in Windows XP without the recovery disk, there are a few options available to you.
First, you should check if the file is still present on the computer. To do this, you can search for the exact name of the missing file in the Start Menu, type the filename into the search bar or check through the folders in your Windows directory.
If you can find the file, you can attempt to restore it to its original location.
If the file cannot be found, you can attempt to download a fresh copy from the internet. However, you should ensure that you only use legitimate sources for the download, and use reputable anti-virus software to check the file before installation.
Additionally, make sure the version of the file you are downloading is suitable for the version of Windows XP you have installed.
Another potential option is to use a third-party program to repair the missing system file. However, you should use caution before downloading any third-party applications and make sure you read all instructions before proceeding with the installation.
Finally, you may be able to repair missing system files by running the System File Checker (SFC) tool. This automated tool will scan and replace any damaged or missing Windows system files with the correct versions.
To access this tool, you will need to run the command prompt – to do this, go to the Start menu, type ‘cmd’ into the search field and press enter. Then, type ‘sfc /scannow’ and press enter – this will scan the computer for any damaged or missing system files and will attempt to repair any that it finds.
By following these steps, you should be able to fix a missing system file in Windows XP without the recovery disk. However, be aware that this can be a complex process and there is no guarantee of success.
If you are still having trouble after attempting these steps, it can be beneficial to seek help from a professional.
How do you restore a Windows XP computer?
Restoring a Windows XP computer is a process that takes several steps and is best done in a controlled environment with an uninterrupted power supply. First, back up all important data, including any user preferences and documents.
Next, if the system is equipped with a restore partition, restart the computer to access the recovery menu. The menu will provide choices on how to restore the system to factory settings.
If the computer did not come with a restore partition, the only other option is to use the Windows XP CD. Insert the CD, switch the BIOS settings to boot from the CD drive, and restart the computer to begin the installation.
When prompted, select “Install Windows XP” and follow the instructions on the screen to restore the system. Once the installation completes, install all the necessary drivers and updates. Finally, restore the backed-up data.
With these steps completed, the Windows XP computer will be restored to its factory condition.
How do I fix Windows system32?
The first step in fixing your Windows system32 is to check if any of the files within this folder have been corrupted or deleted. Depending on if you have a version of Windows with or without System Restore, there are a few steps you can take to try and repair the issue.
If you have a version of Windows with System Restore, then you can perform a system restore to a point before the issue started, which should restore your system32 folder. To do this, open the Start menu and type “System Restore”, then select the “Create a Restore Point” option.
If a Restore Point exists at a point before the issue started, then select that one and click “Restore”. This will reset your system C: drive to a point before the issue started, which should fix your system32 folder.
If you don’t have a version of Windows with System Restore, then you may need to perform a repair installation. This will reset your OS without affecting any of your data or settings, and will reinstall any missing files necessary for Windows system32 to function.
To start the repair installation, insert your Windows installation disc into your computer, then restart your computer while pressing the “F12” key. This will bring up your computer’s boot options, where you can select to boot from the installation disc.
Select that option, and you will be given an option to perform a repair installation. This will reinstall any missing files necessary for your computer’s system32 folder to function correctly.
Once you’ve done this, you may want to do a virus and malware scan to ensure that nothing malicious is causing the issue. You can do this with most anti-virus and malware programs.
If none of these options work, then the issue may be more serious, and may require a technician to take a look at it.
What causes a System32 error?
System32 errors are generally caused by missing or corrupt files within the System32 directory on Windows computers. It can be caused by a number of different things, including issues with the hard drive, missing or corrupt registry keys, or virus/malware infections.
Other common causes of System32 errors include problems with device drivers, incompatible software, bad or outdated Windows Update patches, or third-party programs. In some cases, System32 errors may also be caused by hardware problems such as bad RAM, failing hard drive, or other faulty components.
What happens if I delete System32?
If you delete the System32 folder, it will have a severely negative impact on the functionality of your system. Without the System32 folder, Windows will no longer be able to boot or run as most of its critical system files are stored in that folder.
This will cause the system to become unstable and can lead to serious performance issues, such as frozen screens and blue screens of death (BSODs). Besides the instability, deleting the System32 folder may also cause hardware issues, as the system may no longer be able to recognize certain hardware components.
Furthermore, you may also end up experiencing data loss due to the deletion of important system files.
How do I fix error code 0xc0000221?
Error code 0xc0000221 occurs when Windows is unable to start due to either a hardware or software issue.
The most common way to fix this problem is to boot into safe mode and then use System Restore to roll back the system to an earlier time. To boot into safe mode you will need to press the F8 key while your computer is starting up.
Once in safe mode you should select the option to enter System Restore.
Once in System Restore you should choose an earlier date/time prior to when the error code first occurred. This will rollback the system so that any recently installed programs, drivers, and updates are uninstalled and restored to a stable condition.
If you are still encountering the error after reverting the system then you may want to consider performing a system restore from a Windows install CD/DVD. This will return the system to factory settings and remove any programs, drivers, and updates that may be causing the error.
Finally, if none of the above steps resolves your error code 0xc0000221 issue then you may need to repair/replace any faulty hardware (memory, hard drives, etc. ) or use a Windows repair disk to repair any corrupted system files.
What is system32 on my computer?
System32 on your computer is a folder that contains many of the most important operating system files for Windows. It contains files that control basic system functions, such as file management, security, memory management, and scheduling of tasks.
Many of the. dll files in System32 are essential components of core Windows features, like Windows Explorer and the Command Prompt. System32 also stores many drivers, especially drivers related to hardware, like audio drivers, network drivers, and printer drivers.
Keeping System32 up to date is essential for Windows to be able to use the latest features available.
How do I turn on location services in Windows 11?
In Windows 11, you can turn on Location Services by following these steps:
1. Go to your PC’s Settings.
2. Select Privacy.
3. Select Location.
4. On the left side of the screen, make sure that Location Services is set to On.
5. To confirm that your PC can access your location, select Change, and then select Allow access.
6. Select Location for this device to be On.
7. If apps are denied access to your location, you can add the app to the list of allowed apps if it is not already there.
8. Once Location Services is turned on, you can also control the type of location data that apps can access. You can select between Broad Location, Precision Location, Wi-Fi networks, or Cell towers as the type of data allowed.
9. When you are finished making changes, select Apply. Your changes should now be saved.
How do I enable location on my computer?
Enabling your computer’s location access can be done through your device’s system settings. To do this, you’ll first need to open the system settings. Depending on the type of computer you have, the exact steps may vary, but as an example, on Windows 10, you’d select the Start Menu, followed by the gear icon at the left side of the menu.
On this Settings page, select Privacy. This will open a page with various options related to how your device handles privacy matters. At the left side of this page, select Location. This will open a page that gives you greater control over location access.
At the top of the page, make sure Location access is set to On. Then, beneath this setting, you’ll see a list of applications and programs which either have or have requested access to your computer’s location.
If any of these applications have the toggle button set to Off, you can click it to enable location access for them.
Depending on your device, you may also need to enable a toggle switch to access the device’s location. On Windows 10, for example, this toggle switch is beneath the Find my device option.
If you’re using a wireless network, there should also be an option to turn on Wi-Fi location access. You can toggle this option on, as well, to allow access to your computer’s location through your wireless network.
Once you’ve finished making your settings changes, you should be able to access your computer’s location through compatible applications and programs.
Should location services be on or off?
Whether location services should be on or off depends on you and your needs. If you’re someone who values their privacy, then you may want to consider turning off location services when not needed. If you’re someone who loves to take advantage of location-based apps, such as the weather or navigation apps, then you may choose to keep them on.
You should also consider the safety implications of having your device location turned off.
When you have location services enabled, your device can sense its geographic location, providing enhanced and personalized services. On the other hand, there’s always a risk that your online activity could be tracked, so you should be aware of the potential privacy implications.
That said, the decision of whether to keep location services on or off ultimately comes down to you and your needs. If you’re unsure, you could always toggle it on and off as needed. Or, you could get creative and use location-based settings to your advantage—for example, you could enable Foursquare whenever you’re near a restaurant to receive recommendations.