
Creating a USB security key on Windows 11 is like turning your regular USB drive into a magic wand that adds an extra layer of security to your PC. You can use it to log into your system with a physical device, making it harder for unauthorized users to gain access. The process involves a few simple steps, like downloading some software and setting up your key. Once you’re done, your USB drive will act like a key to a lock, keeping your digital world safe from intruders.
To create a USB security key on Windows 11, you’ll be turning a USB drive into a powerful security tool. This involves using software to set up your USB drive as a key, which you can then use to log into your PC safely and securely.
Step 1: Download the Software
First, download a trusted USB security key software.
There are several options available online, so make sure to choose a reputable one. This software is essential because it transforms your USB drive into a security key, enabling enhanced protection for your system.
Step 2: Install the Software
Next, install the downloaded software on your Windows 11 computer.
Run the installer and follow the on-screen instructions. The installation process is usually straightforward and quick, just like installing any other application on your computer.
Step 3: Insert Your USB Drive
Step 3 involves plugging in your USB drive.
Make sure it’s empty or contains no important data, as the setup might format the drive. It’s like preparing a blank canvas for your masterpiece—your new security key.
Step 4: Configure the Security Key
Now, configure your USB drive as a security key using the software.
Follow the instructions provided by the software to set it up. This step is crucial as it binds the USB drive to your system, like pairing a remote control with your TV.
Step 5: Test Your USB Security Key
Finally, test your USB security key to ensure it’s working correctly.
Unplug it and try logging into your computer. If everything is set up right, it should prompt you to insert the USB drive, just like a lock waiting for the right key.
Once you’ve completed these steps, your USB drive is now a security key! Every time you start your computer, you’ll need to insert the USB drive to log in. It’s like having a secret password that needs a physical key. Without this USB security key, access to your system is locked, offering you an extra layer of security.
Tips for Creating a USB Security Key on Windows 11
- Make sure to choose a USB drive with enough storage, ideally one that’s not used for other purposes.
- Always use reputable software to ensure your data remains secure.
- Back up any important data on the USB drive before setting it up as a security key.
- Consider having a backup USB security key in case you lose or damage the original.
- Regularly check for software updates to ensure your security measures are up to date.
Frequently Asked Questions
Can I use any USB drive as a security key?
Yes, most USB drives can be used, but ensure they have sufficient storage and no critical data as they might be formatted.
Is the USB security key method safe?
When used with reputable software and best practices, it’s a secure way to protect your system.
What happens if I lose my USB security key?
You should have a backup method for logging in, such as a password or a backup security key.
Can I use the USB security key on multiple computers?
Typically, it’s set up for one computer, but some software might allow settings for multiple devices.
How do I remove the USB security key setup?
You can usually disable or remove the setup through the software used to create the security key.
Summary
- Download trusted software.
- Install the software.
- Insert USB drive.
- Configure the drive as a security key.
- Test the USB security key.
Conclusion
In today’s digital age, security is more important than ever. By learning how to create a USB security key on Windows 11, you’re taking a proactive step in safeguarding your digital world. Just like locking your front door before stepping out, setting up a USB security key ensures that your personal information remains safe from prying eyes.
This process is straightforward and doesn’t take much time, making it accessible to anyone with a computer and a USB drive. Remember to select a reliable USB drive and trustworthy software to ensure your key is up to the task. Once set up, you can rest easy knowing that your computer has an added layer of security. You could even consider teaching friends or family how to set up their own USB security keys, spreading digital safety awareness.
Whether you’re tech-savvy or just a beginner, creating a USB security key is an excellent way to enhance your security toolkit. Embrace this powerful feature of Windows 11, and keep your information safe and sound.
Matthew Burleigh has been writing tech tutorials since 2008. His writing has appeared on dozens of different websites and been read over 50 million times.
After receiving his Bachelor’s and Master’s degrees in Computer Science he spent several years working in IT management for small businesses. However, he now works full time writing content online and creating websites.
His main writing topics include iPhones, Microsoft Office, Google Apps, Android, and Photoshop, but he has also written about many other tech topics as well.
Read his full bio here.
Ключи безопасности можно использовать в организации в качестве метода входа без пароля. Ключ безопасности — это физическое устройство, которое используется с уникальным ПИН-кодом для входа в рабочую или учебную учетную запись. Так как для ключей безопасности требуется физическое устройство и то, что известно только вам, это считается более надежным методом проверки, чем имя пользователя и пароль.
Использование ключа безопасности в качестве метода проверки подлинности без пароля в настоящее время находится в общедоступной предварительной версии. Если то, что вы видите на экране, не совпадает с тем, что рассматривается в этой статье, это означает, что администратор еще не включил эту функцию. Пока эта функция не будет включена, необходимо выбрать другой способ проверки подлинности на странице Сведения для безопасности. Дополнительные сведения о предварительных версиях см. в разделе Дополнительные условия использования предварительных версий Microsoft Azure.
Примечания:
-
Если параметр ключа безопасности не отображается, возможно, ваша организация не разрешает использовать этот параметр для проверки. В этом случае вам потребуется выбрать другой способ или обратиться в службу поддержки вашей организации за дополнительной помощью.
-
Прежде чем зарегистрировать ключ безопасности, необходимо зарегистрировать по крайней мере один дополнительный метод проверки безопасности.
Что такое ключ безопасности?
В настоящее время мы поддерживаем несколько проектов и поставщиков ключей безопасности, использующих протоколы проверки подлинности fast Identity Online (FIDO2) без пароля. Эти ключи позволяют войти в рабочую или учебную учетную запись для доступа к облачным ресурсам вашей организации на поддерживаемом устройстве и в веб-браузере.
Администратор или ваша организация предоставит вам ключ безопасности, если он требуется для вашей рабочей или учебной учетной записи. Существуют различные типы ключей безопасности, которые можно использовать, например USB-ключ, который вы подключаете к устройству, или NFC-ключ, который вы нажимаете на считыватель NFC. Дополнительные сведения о ключе безопасности, в том числе о его типе, см. в документации производителя.
Примечание: Если вам не удается использовать ключ безопасности FIDO2, существуют другие методы проверки без пароля, например приложение Microsoft Authenticator или Windows Hello. Дополнительные сведения о Windows Hello см. в Windows Hello обзоре.
Подготовка
Прежде чем зарегистрировать ключ безопасности, необходимо выполнить следующие условия:
-
Администратор включил эту функцию для использования в организации.
-
Вы находитесь на устройстве с обновление Windows 10 за май 2019 г. и используете поддерживаемый браузер.
-
У вас есть физический ключ безопасности, утвержденный администратором или вашей организацией. Ключ безопасности должен быть как fido2, так и microsoft-совместимый. Если у вас возникли вопросы о ключе безопасности и его совместимости, обратитесь в службу поддержки вашей организации.
Регистрация ключа безопасности
Чтобы войти в рабочую или учебную учетную запись с помощью ключа, необходимо создать ключ безопасности и присвоить ему уникальный ПИН-код. В вашей учетной записи может быть зарегистрировано до 10 ключей.
-
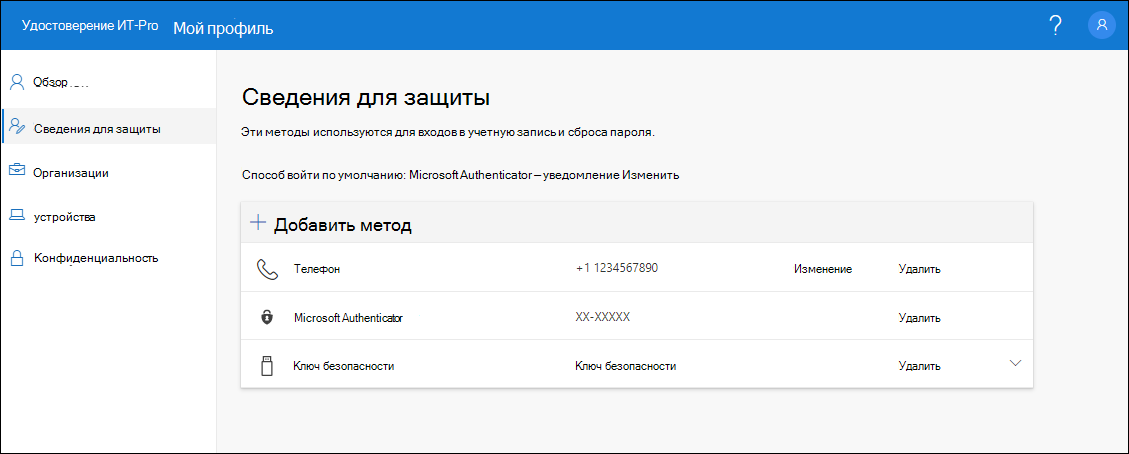
Перейдите на страницу «Мой профиль» на странице «Моя учетная запись» и войдите в систему, если вы еще этого не сделали.
-
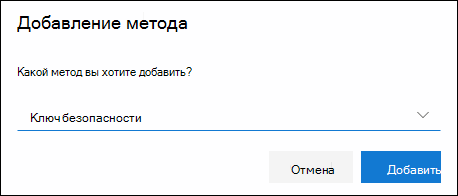
Выберите Сведения для безопасности, Добавить метод, а затем выберите Ключ безопасности в списке Добавить метод.

-
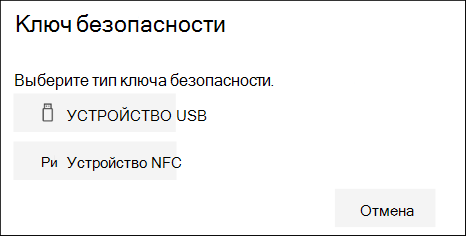
Нажмите кнопку Добавить, а затем выберите тип ключа безопасности, который у вас есть, либо USB-устройство, либо устройство NFC.

Примечание: Если вы не знаете, какой тип ключа безопасности у вас есть, обратитесь к документации производителя. Если вы не уверены в изготовителе, обратитесь за помощью в службу поддержки вашей организации.
-
Убедитесь, что ключ безопасности физически доступен, а затем на странице Ключ безопасности нажмите кнопку Далее.
-
На странице Настройка нового метода входа нажмите кнопку Далее, а затем:
-
Если ключ безопасности является USB-устройством, вставьте ключ безопасности в USB-порт устройства.
-
Если ваш ключ безопасности является устройством NFC, коснитесь ключа безопасности в своем средстве чтения.
-
-
Если вы используете Chrome или Edge, браузер может приоритизировать регистрацию ключа доступа, хранящегося на мобильном устройстве, а не ключа доступа, хранящегося в ключе безопасности.
-
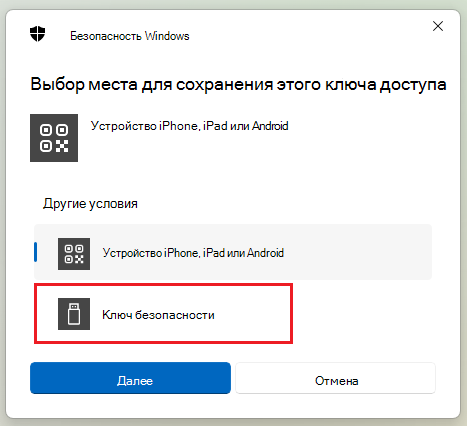
Начиная с Windows 11 версии 23H2, вы можете войти с помощью рабочей или учебной учетной записи и нажать кнопку Далее. В разделе Другие варианты выберите Ключ безопасности и нажмите кнопку Далее.

-
В более ранних версиях Windows в браузере может отображаться экран связывания QR-кода для регистрации ключа доступа, хранящегося на другом мобильном устройстве. Чтобы зарегистрировать ключ доступа, хранящийся в ключе безопасности, вставьте ключ безопасности и коснитесь его, чтобы продолжить.

-
-
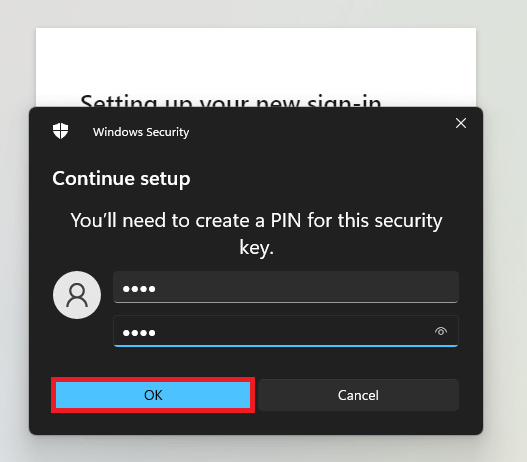
Введите уникальный ПИН-код ключа безопасности в поле безопасности Windows и нажмите кнопку ОК. Вы вернетесь к окну Настройка нового метода входа.
-
Выберите Далее.
-
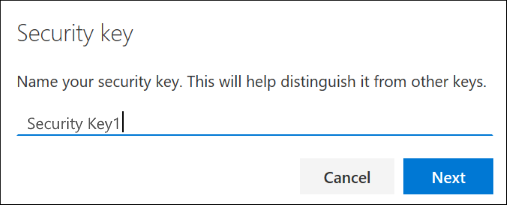
Вернитесь на страницу Сведения о безопасности, введите имя, которую вы узнаете позже для нового ключа безопасности, а затем нажмите кнопку Далее.

-
Нажмите кнопку Готово, чтобы закрыть страницу Ключ безопасности. На странице Сведения о безопасности будут добавлены сведения о ключе безопасности.


Удаление ключа безопасности из сведений безопасности
Если вы потеряли или больше не хотите использовать ключ безопасности, его можно удалить из сведений безопасности. Хотя это не позволяет использовать ключ безопасности с рабочей или учебной учетной записью, он продолжает хранить ваши данные и учетные данные. Чтобы удалить данные и учетные данные из самого ключа безопасности, следуйте инструкциям в разделе «Сброс ключа безопасности» этой статьи.
-
Выберите ссылку Удалить в удаляемом ключе безопасности.
-
В поле Удалить ключ безопасности нажмите кнопку ОК.
Ключ безопасности будет удален, и вы больше не сможете использовать его для входа в рабочую или учебную учетную запись.
Важно: Если вы удалили ключ безопасности по ошибке, его можно зарегистрировать снова, следуя инструкциям в разделе «Регистрация ключа безопасности» этой статьи.
Управление параметрами ключа безопасности из параметров Windows
Вы можете управлять параметрами ключа безопасности из приложения «Параметры Windows», включая сброс ключа безопасности и создание ПИН-кода ключа безопасности.
Сброс ключа безопасности
Если вы хотите удалить все сведения об учетной записи, хранящиеся в физическом ключе безопасности, необходимо вернуть ключ обратно в заводские значения по умолчанию. При сбросе ключа безопасности удаляются все элементы из ключа, что позволяет начать все сначала.
Важно: При сбросе ключа безопасности удаляются все элементы из ключа, а затем до заводских значений по умолчанию. Все данные и учетные данные будут очищены.
-
Откройте приложение «Параметры Windows» , выберите Учетные записи, параметры входа, ключ безопасности и управление.
-
Вставьте ключ безопасности в USB-порт или коснитесь устройства чтения NFC, чтобы проверить свою личность.
-
Следуйте инструкциям на экране, основанным на конкретном изготовителе ключа безопасности. Если изготовитель ключа не указан в инструкциях на экране, дополнительные сведения см. на сайте изготовителя.
-
Нажмите кнопку Закрыть, чтобы закрыть экран Управление.
Создание ПИН-кода ключа безопасности
Вы можете создать ПИН-код ключа безопасности для ключа безопасности.
-
Откройте приложение «Параметры Windows» , выберите Учетные записи, параметры входа,ключ безопасности и управление.
-
Вставьте ключ безопасности в USB-порт или коснитесь устройства чтения NFC, чтобы проверить свою личность.
-
Выберите Добавить в области ПИН-код ключа безопасности, введите и подтвердите новый ПИН-код ключа безопасности, а затем нажмите кнопку ОК.
-
Ключ безопасности обновляется новым ПИН-кодом ключа безопасности для использования с рабочей или учебной учетной записью. Если вы решите изменить ПИН-код еще раз, можно нажать кнопку Изменить.
-
Нажмите кнопку Закрыть, чтобы закрыть экран Управление.
Проверка безопасности и проверка подлинности сброса пароля
Методы сведений безопасности используются как для двухфакторной проверки безопасности, так и для сброса пароля. Однако для обоих методов можно использовать не все методы.
|
Способ |
Для кого предназначена |
|
Приложение Authenticator |
Двухфакторная проверка подлинности и проверка подлинности для сброса пароля. |
|
Текстовые сообщения |
Двухфакторная проверка подлинности и проверка подлинности для сброса пароля. |
|
Телефонные вызовы |
Двухфакторная проверка подлинности и проверка подлинности для сброса пароля. |
|
Ключ доступа (FIDO2) |
Двухфакторная проверка. |
|
Внешний метод проверки подлинности |
Двухфакторная проверка. |
|
учетная запись Email |
Только проверка подлинности для сброса пароля. Вам потребуется выбрать другой метод для двухфакторной проверки. |
|
Контрольные вопросы |
Только проверка подлинности для сброса пароля. Вам потребуется выбрать другой метод для двухфакторной проверки. |
Дальнейшие действия
-
Дополнительные сведения о методах проверки без пароля см . в статье Без пароля здесь и в большом масштабе.
-
Подробные сведения о ключах безопасности FIDO2, соответствующих требованиям Майкрософт.
-
Сбросьте пароль, если вы потеряли или забыли его, на портале сброса паролей или выполните действия, описанные в статье Сброс рабочего или учебного пароля.
Creating a USB Security Key on Windows 11 is a great way to make your PC more secure. You can use a USB drive to act as a physical key to lock and unlock your computer, adding an extra layer of protection. This involves setting up Windows 11 to recognize the USB drive as a security device.
How to Create a USB Security Key on Windows 11
We’re going to set up your USB drive as a security key to enhance your computer’s security. This means Windows 11 will need the USB drive to allow access, making it harder for unauthorized users to get in. Let’s jump into the details!
Step 1: Prepare Your USB Drive
First, get a blank USB drive ready.
Make sure your USB drive doesn’t have any important data because it might be formatted during the process. It’s best to use a new or empty USB drive to avoid losing any files.
Step 2: Insert the USB Drive
Insert the USB drive into a USB port on your computer.
Once you plug it in, your computer should recognize it and assign it a drive letter. Note this letter, as you’ll need it later on.
Step 3: Open the Run Dialog Box
Press Win + R to open the Run dialog box.
This handy shortcut will pop up a small window where you can type commands to open programs and settings quickly.
Step 4: Launch Command Prompt
Type cmd and press Enter to open Command Prompt.
Command Prompt is like the control center for Windows. Here, you’ll be able to enter commands that will set up your USB drive as a security key.
Step 5: Create a System Image
Type the command: «REPLACE COMMAND» and press Enter.
This command will prepare your USB drive to be used as a security key. It’s like telling your computer to take a snapshot and use it as a reference.
Step 6: Confirm the Action
Confirm any prompts that appear.
Windows might ask for confirmation to make changes to your system. Click Yes or Allow to proceed.
After completing these steps, your USB drive will be set up as a security key. Now, whenever you start your computer, you’ll need to insert this USB drive to gain access.
Tips for Creating a USB Security Key on Windows 11
- Make sure to back up any important data before beginning the process.
- Use a USB drive with fast read/write speeds for better performance.
- Label the USB drive so you don’t mix it up with your other drives.
- Keep a backup security method like a password in case you lose the USB drive.
- Regularly update your Windows 11 and drivers to ensure the security key functions properly.
Frequently Asked Questions
What happens if I lose my USB security key?
If you lose your USB security key, you can use your backup security methods like a password to access your PC. It’s also helpful to create a duplicate USB security key as a backup.
Can I use any USB drive for this?
Yes, you can use any USB drive, but it’s better to use one with good read/write speed and reliability.
Does this method work on older versions of Windows?
This tutorial is specifically for Windows 11. Other versions of Windows might have different steps or might not support this feature at all.
How can I remove the USB security key if I no longer want to use it?
You can go to your security settings in Windows 11 and remove the USB security key from your list of security methods.
Is this method completely foolproof?
While adding a USB security key increases your security, it’s not completely foolproof. It’s best used as part of a multi-layered security approach.
Summary
- Prepare Your USB Drive.
- Insert the USB Drive.
- Open the Run Dialog Box.
- Launch Command Prompt.
- Create a System Image.
- Confirm the Action.
Conclusion
Creating a USB security key on Windows 11 is a great way to bolster your computer’s defenses. Think of it like adding a super-strong padlock to your digital front door. While this may seem like an advanced technique, it’s quite manageable even for those who aren’t tech experts. Just follow the steps methodically, and you’ll have an extra layer of security in no time.
This guide covered everything from preparing your USB drive to actually setting it up as a security key. We also discussed tips and answered frequently asked questions to ensure you have all the information you need. If you’re serious about keeping your data safe, setting up a USB security key is a smart move.
For further reading, consider looking into other security features of Windows 11, like BitLocker and Windows Hello. These tools work in tandem with your USB security key to create a robust security framework.
So why wait? Secure your Windows 11 PC today by creating a USB security key. Your data will thank you!
Since Windows 11, Microsoft has implemented several restrictions in its installer: TPM module required, 4GB minimum RAM, …
Since version 22H2 of Windows 11, a new restriction has appeared: the need to use a Microsoft account when installing Windows 11.
Nevertheless, you will see that Rufus will easily allow you to disable all of its restrictions.
Which will allow you to install Windows 11 on any computer with officially supported or unsupported hardware, as well as with a local account instead of a Microsoft account (including on the new 22H2 version of Windows 11).
- Create Windows 11 v22H2 Bootable USB key with Rufus
- Install Windows 11 v22H2 with a local account from your bootable USB key
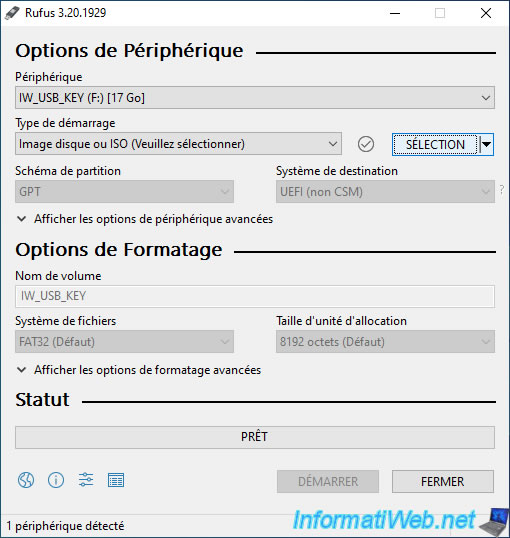
To get started, download and launch the «Rufus» program.
Next, select your USB key from the «Device» list and click «Select».
Warning : the USB key you will use will be completely erased before creating your Windows 11 bootable USB key.
Remember to save its content elsewhere before continuing with this tutorial.
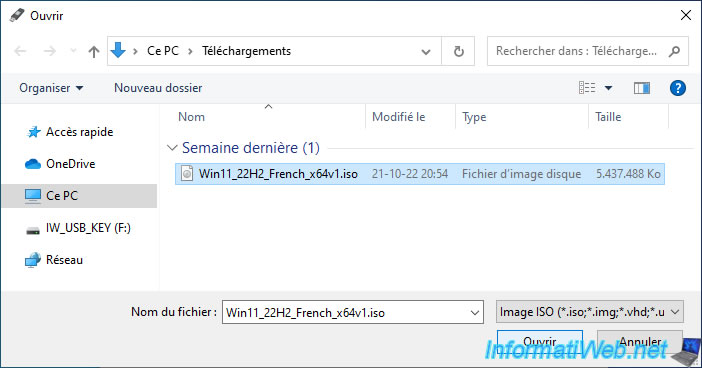
Select the Windows 11 ISO file and click Open.
Note: in this tutorial, we will use the iso of the latest version available at the moment.
Namely, the 22H2 version.
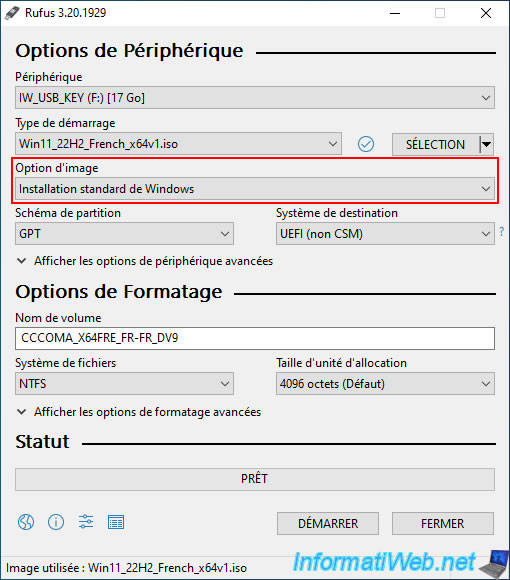
Note that the option «Extended Windows 11 Installation (no TPM / no Secure Boot)» which was visible in the old version of Rufus has changed its place.
With this new version of Rufus, you must therefore leave the «Standard Windows installation» option and the deactivation of the various restrictions of Windows 11 will be offered only when you click on the «Start» button.
Change the volume label (the name under which your USB key will appear in File Explorer) if desired.
Then, click on the button: Start.
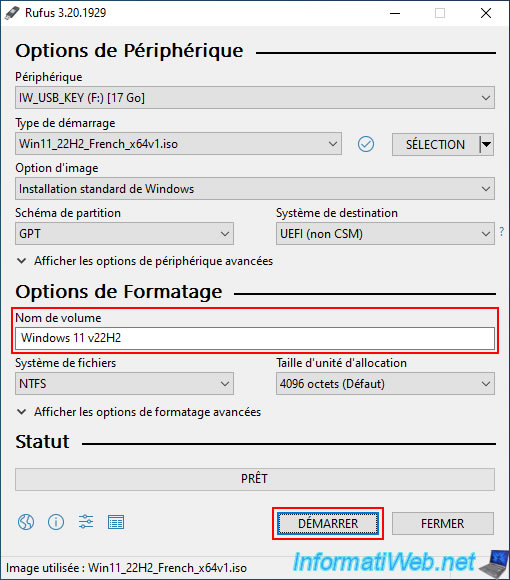
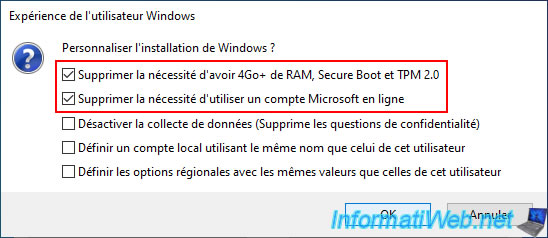
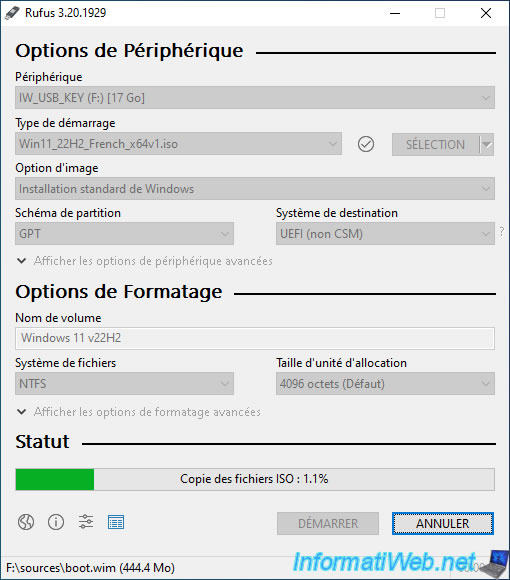
If you selected the Windows 11 v22H2 ISO, a «Windows User Experience» window will appear with 5 options:
- Remove requirement for 4GB+ of RAM, Secure Boot and TPM 2.0: allows you to install Windows 11 on a computer whose hardware is not officially supported.
This is possible, because checking for the presence of a TPM 2.0 module, at least 4 GB of random access memory (RAM) and the activation of Secure Boot (which requires a motherboard with UEFI firmware) will be disabled. - Remove requirement for an online Microsoft account: Allows you to install Windows 11 (regardless of its edition) using a local account IF Internet is not available.
In other words, when the installer asks you to connect to a Microsoft account, all you have to do is unplug the network cable from your computer and click on the «back» icon for the installer to offer you to use an account. local as was the case with the previous version (21H2) of Windows 11.
Note that the «Local account» option that appeared by default with the professional edition of Windows 11 no longer exists.
You will therefore have to activate this option to use a local account, even on this edition of Windows 11. - Disable data collection (Skip privacy questions): allows you to disable Windows 11 data collection without having to answer privacy questions during the Windows 11 setup steps.
- Set a local account using the same name as this user’s: allows you to create an account on your future installation of Windows 11 whose name will be the same as the user with which you are currently logged in on your computer.
- Set regional options using the same values as this user’s: allows you to use the same regional options (country, language, …) as your current installation for your future Windows 11 installation.
By default, the first 2 options will be checked. This allows disabling hardware verification (RAM, Secure Boot, and TPM 2.0), as well as installing Windows 11 using a local account, if desired.
Click OK.
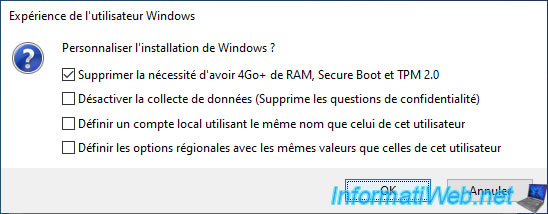
If you have selected the Windows 11 v21H2 ISO, you will see that the option «Remove requirement for an online Microsoft account» will not appear as this relates to the restriction that appeared with the 22H2 version of Windows 11 .
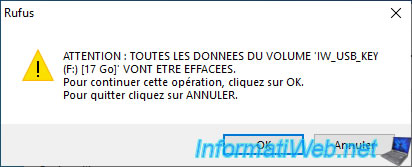
As stated by Rufus, all data present on your USB key will be erased.
Click OK.
Wait while the contents of the ISO file are copied to your USB key.
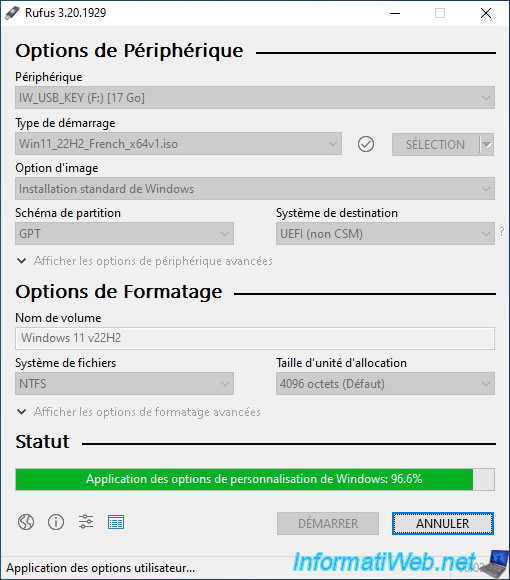
Then, the Windows customization options selected earlier will be applied to your USB key.
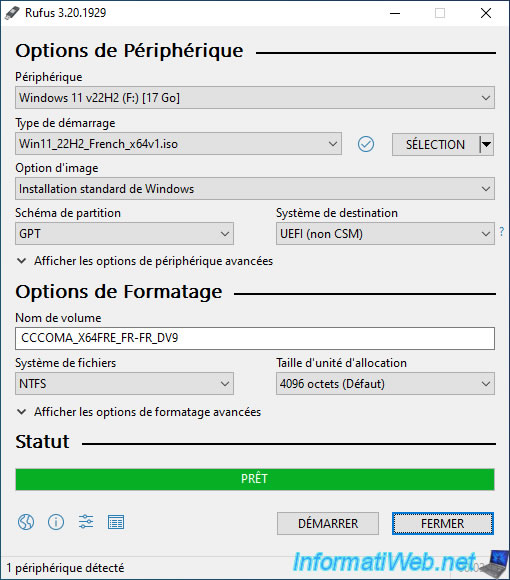
Once your Windows 11 bootable USB key is created, the «Ready» status will appear.
Click Close.
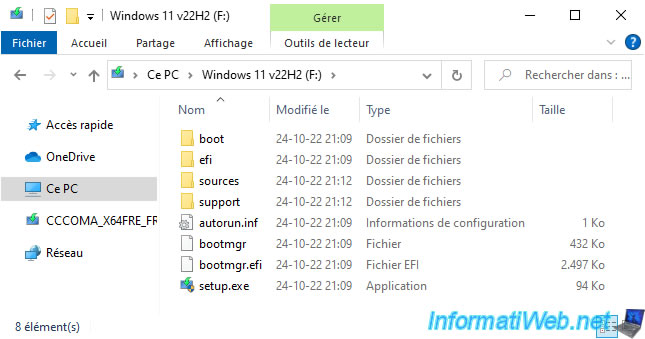
Your bootable USB key will have a blue icon as it does by default with the Windows 11 installation DVD.
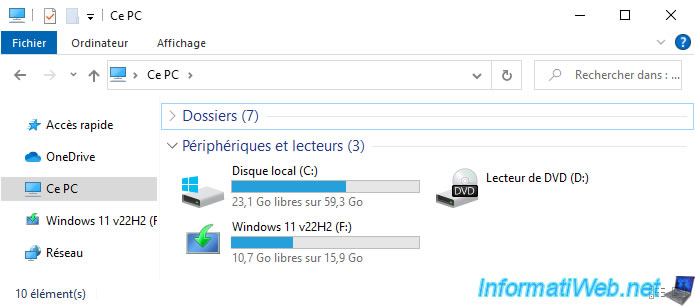
Its content will look like this.
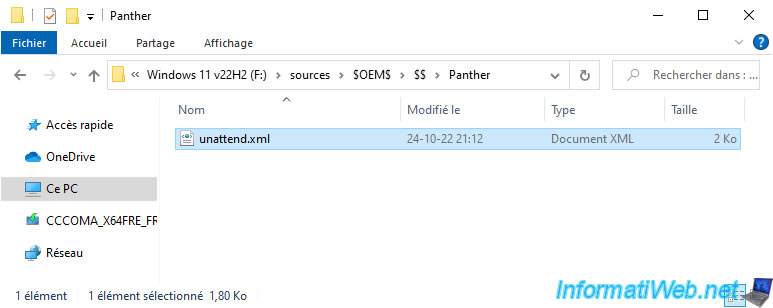
In the «sources\$OEM$\$$\Panther» folder of your Windows 11 bootable USB drive, you will find an «unattend.xml» file which contains the previously selected Windows customizations.
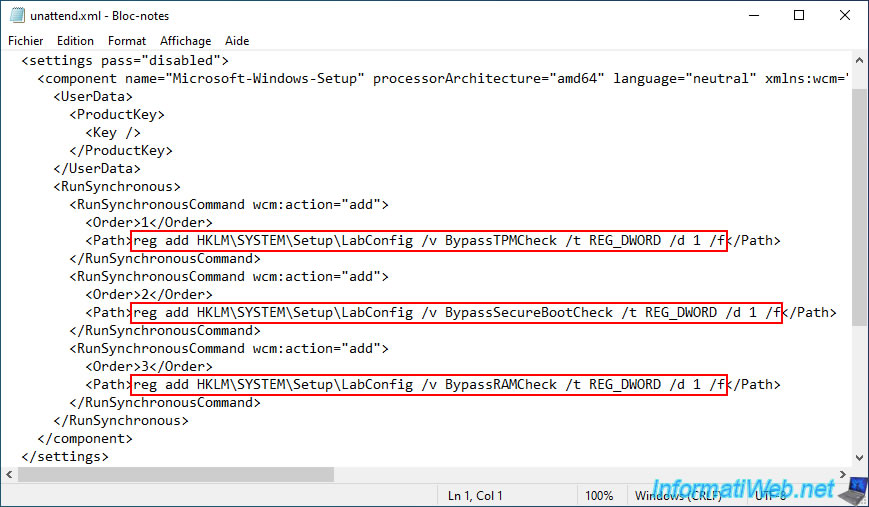
If you open this «unattend.xml» file with notepad, you will see that it has commands to add 3 DWORD values in the Windows PE environment registry of Windows 11 used during installation from Windows 11:
- BypassTPMCheck = 1
- BypassSecureBootCheck = 1
- BypassRAMCheck = 1
Note: this block concerns the 1st step of the installation of Windows 11.
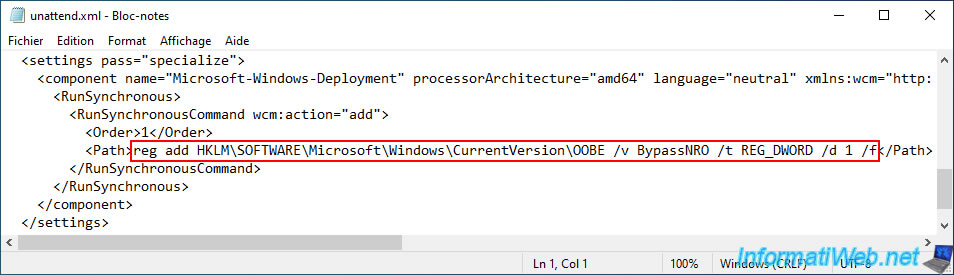
Below, you will find a second block which concerns this time the OOBE environment (Out-of-box experience).
In other words, the configuration steps proposed after the installation of Windows 11 (after the 1st restart).
The given command allows to add a DWORD value named «BypassNRO» whose value is again «1» and which allows to use a local account during the configuration steps of Windows 11 IF Internet is not available.
2. Install Windows 11 v22H2 with a local account from your bootable USB key
Configure your computer’s BIOS boot order to boot from your bootable USB key to install Windows 11.
If your BIOS is configured correctly, you will see a «UEFI:NTFS» screen briefly appear when your computer boots.
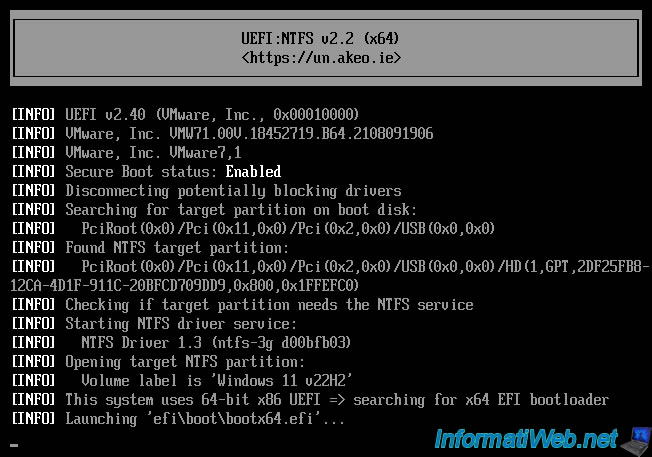
Then, the Windows 11 loading logo will appear.
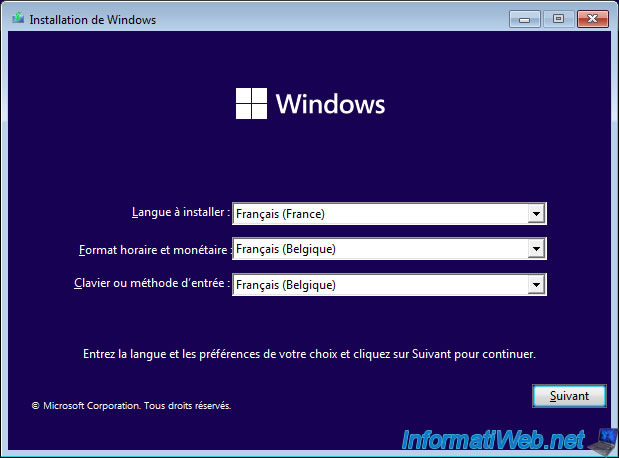
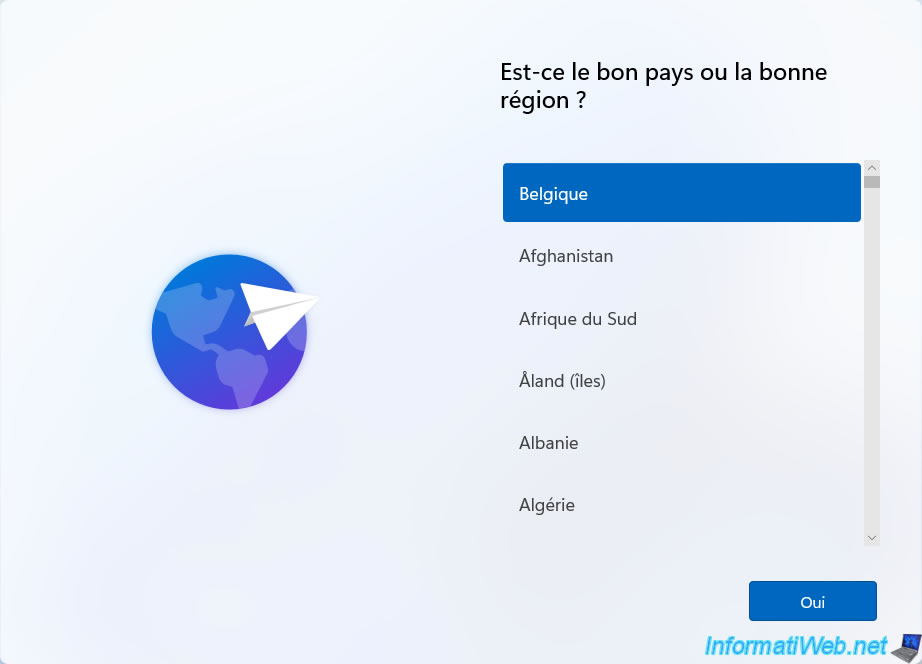
Choose your country and language in the «Windows Setup» program that appears, then click Next.
Then, click on: Install now.
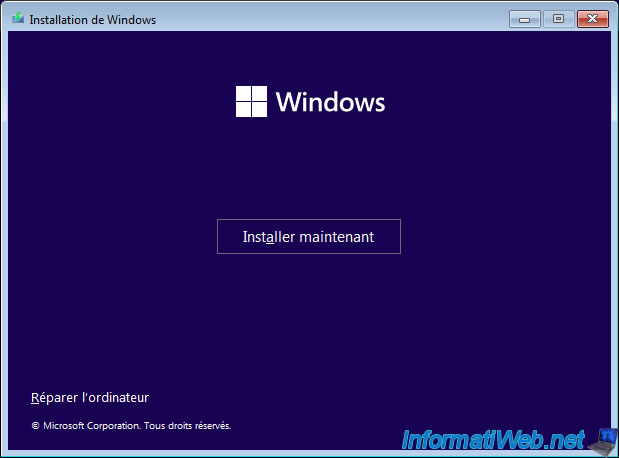
As expected, you will be able to install Windows 11 without any problem, without the error «This PC can’t run Windows 11» occurring.
Note: to see all the steps for a standard installation of Windows 11, refer to our tutorial: Windows 11 — Formatting and reinstalling.
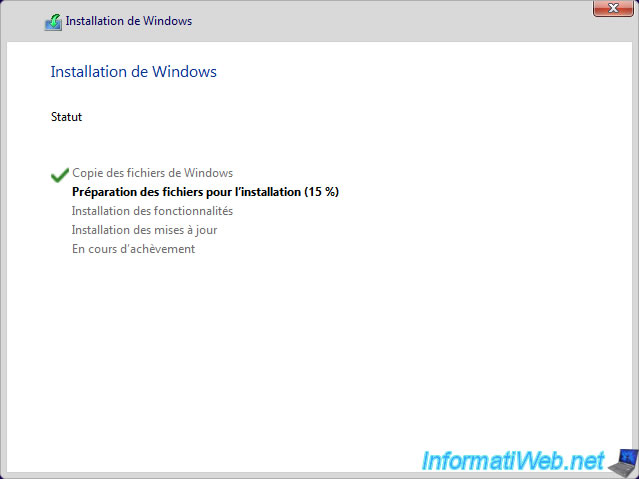
Once the 1st step of the installation is complete, your computer will restart and eventually arrive at the Windows 11 setup steps.
Select your country, your keyboard language, …
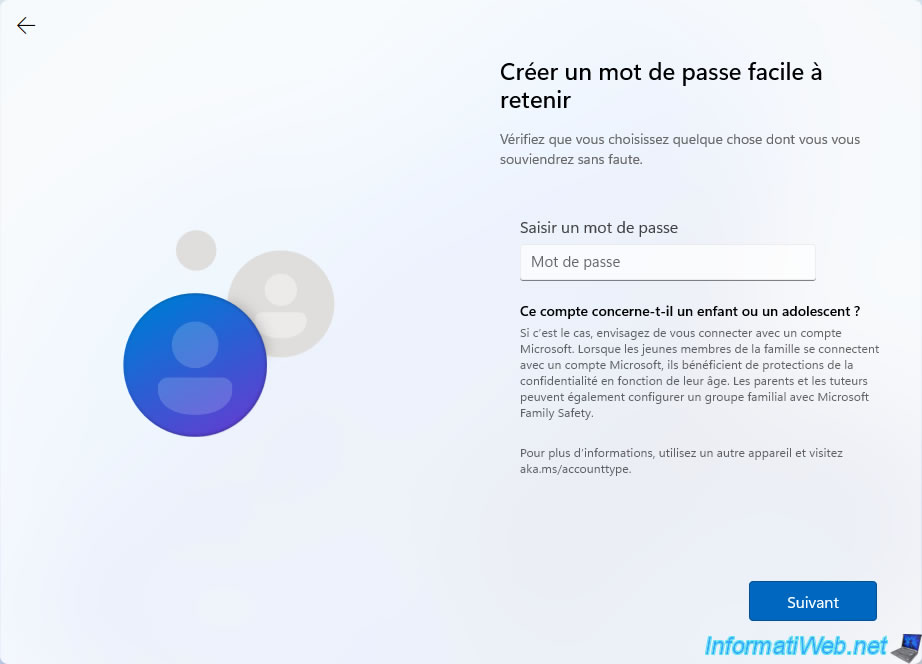
Since version 22H2 of Windows 11, a «Sign in with a Microsoft account» step will appear if you are connected to the Internet.
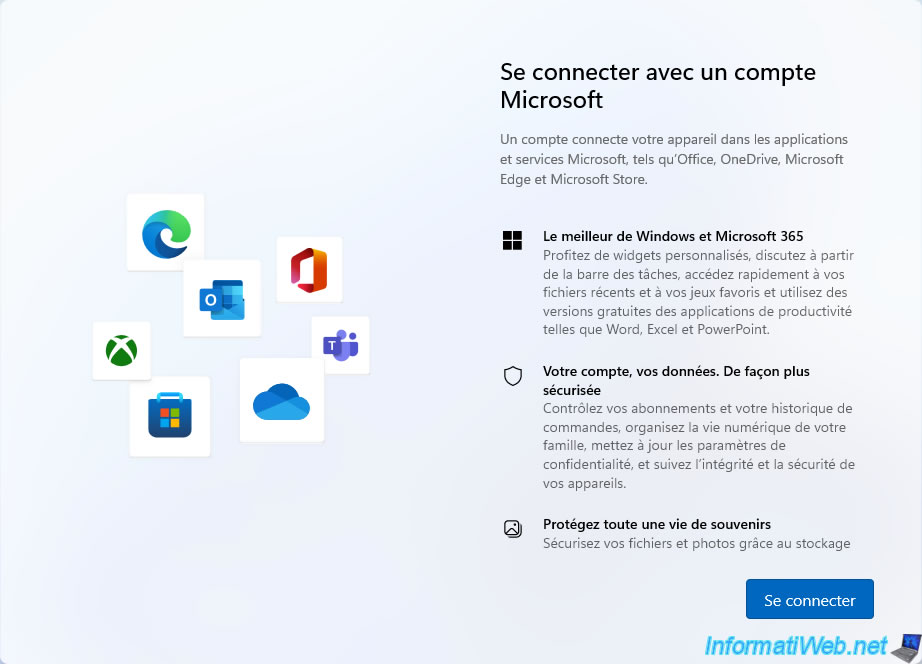
If you are connected to the Internet, Windows 11 will ask you to add your Microsoft account.
Even if you selected the «Remove requirement for an online Microsoft account» option when creating your Windows 11 bootable USB key.
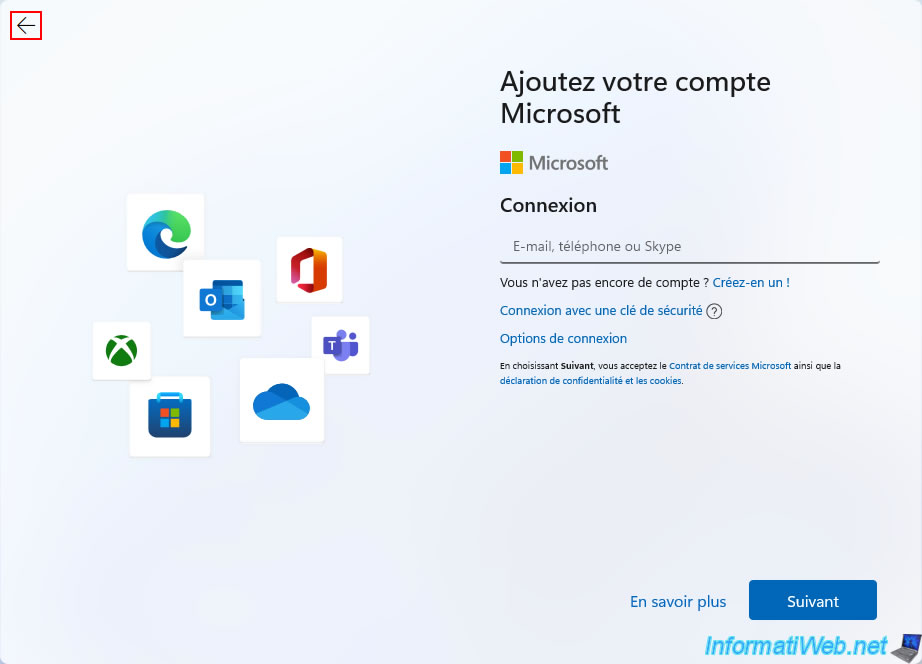
To use a local account, you must unplug the network cable from your computer (so that the Internet is no longer available), then click on the «<-» arrow located at the top left.
Now, Windows 11 asks you to provide a name for the local account to create on your computer.
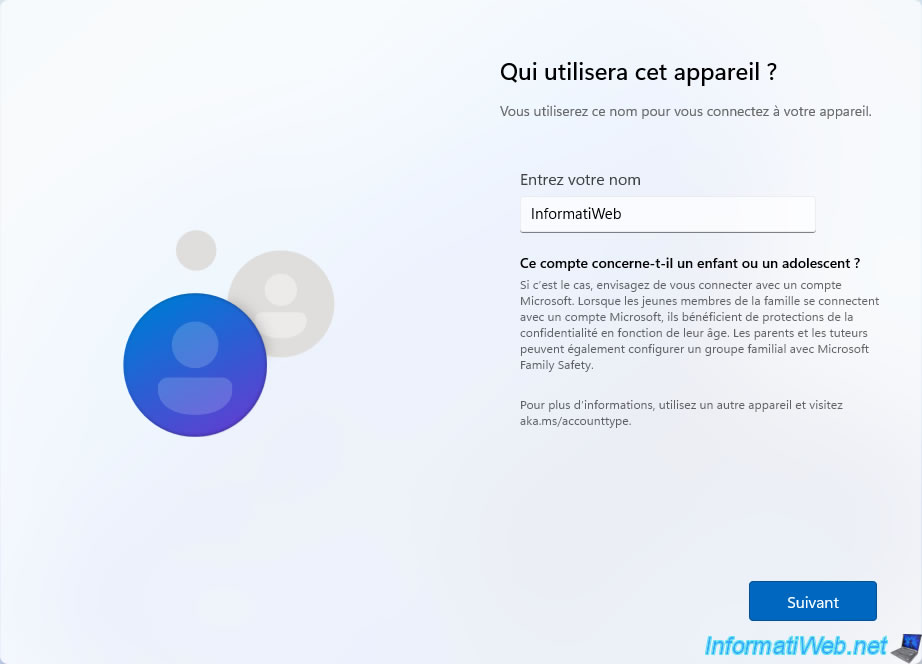
If desired, set a password for this local account.
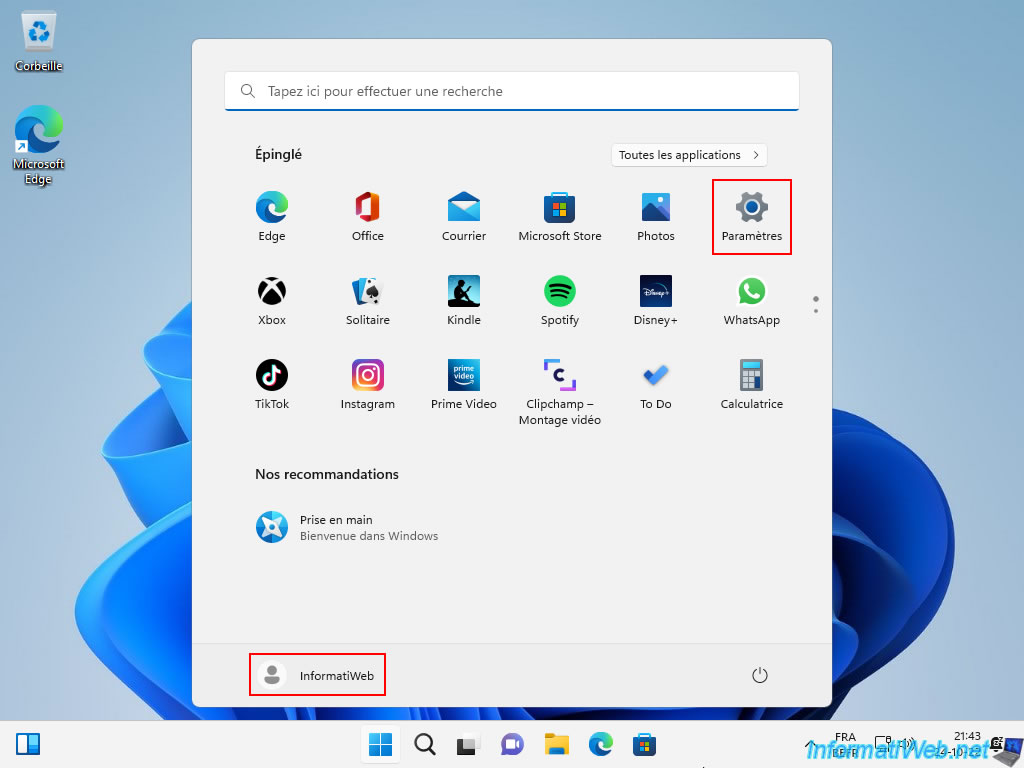
Once Windows 11 is installed, reconnect your computer’s network cable and open the start menu.
As you can see, you are logged in with a local account.
Click on: Settings.
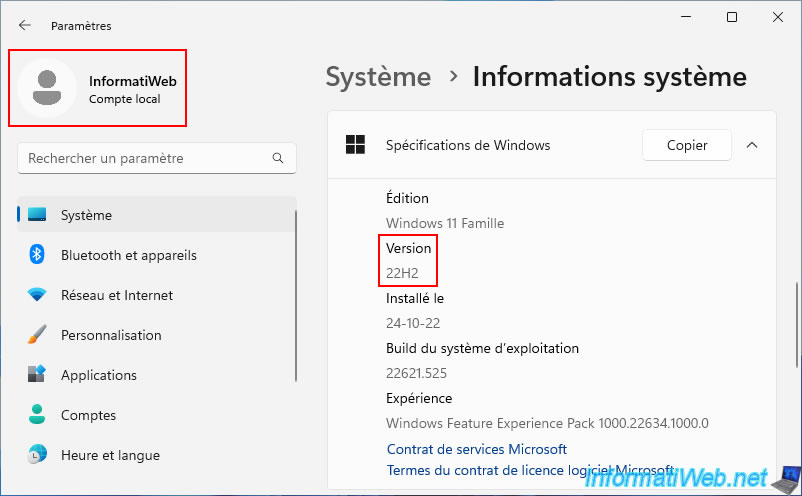
In the «Settings» window that appears, go to: System -> System Information.
As you can see, Windows 11 v22H2 was successfully installed using a local account.
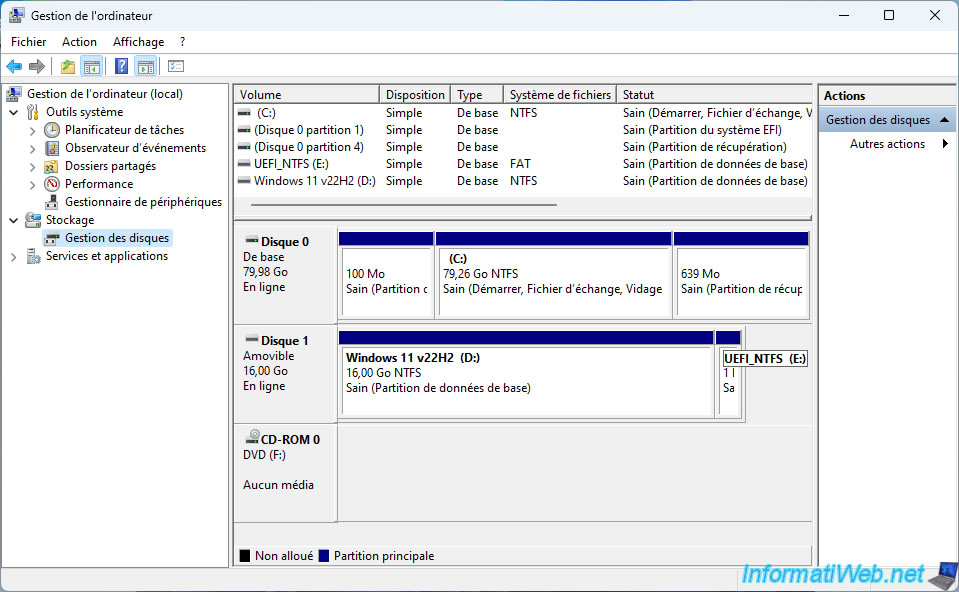
If you open the file explorer, you will see in particular a «UEFI_NTFS» partition appear.

This partition is not part of your Windows 11 installation.
Indeed, this small «UEFI_NTFS» partition of 1 MB is on your bootable USB key and was automatically created on your USB key by Rufus.
Once the USB key is unplugged, this partition will disappear from the file explorer.
A physical USB security key plugs into your computer’s USB port and functions as an extra layer of protection that’s used on Windows 11 and your Microsoft Account.
When you use Windows Hello as a sign in authentication method, you typically think about providing your face or your fingerprint for verification. But you could also use a FIDO2-compliant USB physical security key
Related: How to create your own USB startup key from scratch on Windows 11 – OnMSFT.com
You can use a USB security key with a unique PIN as a passwordless sign-in method to sign into Windows 11 and access your Microsoft account.
Because security keys require you to have the physical device and something that only you know, like a unique PIN, physical security keys are considered to be a stronger authentication method than using just a username and password.
Set up a USB security key on Windows 11
Of course, you can’t simply create a USB physical security key by just using any spare USB flash drive like you can create a USB startup key. Instead, you need to buy a FIDO2 security key.
According to Microsoft, a FIDO2 security key is “an unphishable standards-based passwordless authentication method.” FIDO2 security keys are typically USB devices that are equipped with Bluetooth or NFC.
Since a FIDO2 USB security key is equipped with the hardware to handle the authentication, the security of the account is increased because there’s no password that could be exposed or guessed. FIDO2 security keys are a great option for enterprises who are very security sensitive and can also be used for employees who aren’t willing or able to use their phone as a second factor for authentication.
I bought the Security Key NFC by Yubico because I didn’t want to spend a lot and other Yubikey options seemed to have more features than I needed.
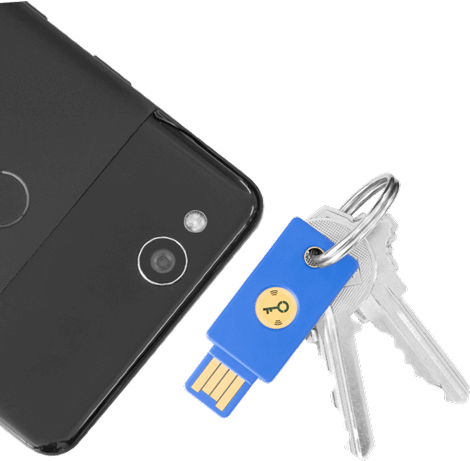
The Security Key NFC by Yubico is only about $25, supports FIDO2 (Fast IDentification Online) and U2F (Universal 2nd Factor), and has a USB-A connection with NFC connectivity. It’s also IP68 rated and made of ceramic, so I can carry it on my keychain without having to worry about getting it wet or damaged.
If you are wondering where to look for USB security keys, Microsoft offers an extensive list of FIDO2 security key providers. Here’s what you need to do to set it up and use a USB security key on your Microsoft Account and Windows 11.
Manage USB security key PIN in Windows Hello settings
If you ever want to change your USB security PIN or reset the USB security key back to factory settings, you can do that from within Windows Settings. Here’s what you need to do.
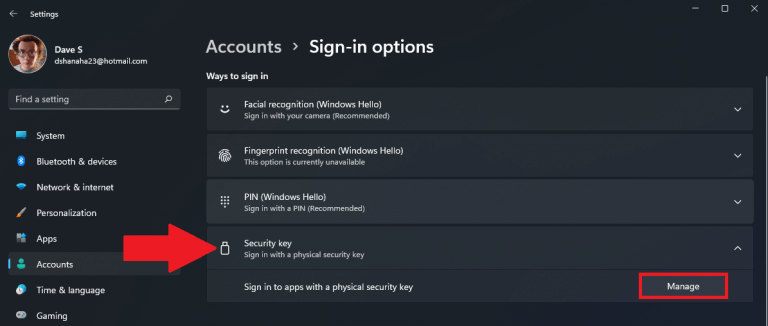
1. Go to Settings > Accounts > Sign-in options.
2. Under Ways to sign in, go to Security key and click Manage.
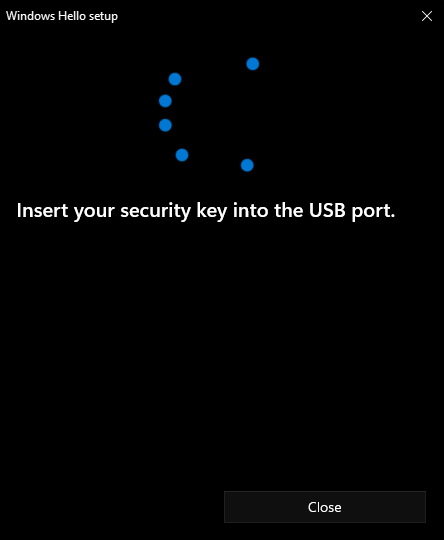
3. After you click Manage, a window will pop up prompting you to insert your USB security key. Insert your USB security key or tap your NFC reader to verify your identity on your Windows 11 PC now.
4. Once your USB security key is inserted and verified, you can either change the Security Key PIN or Reset Security Key to factory settings.
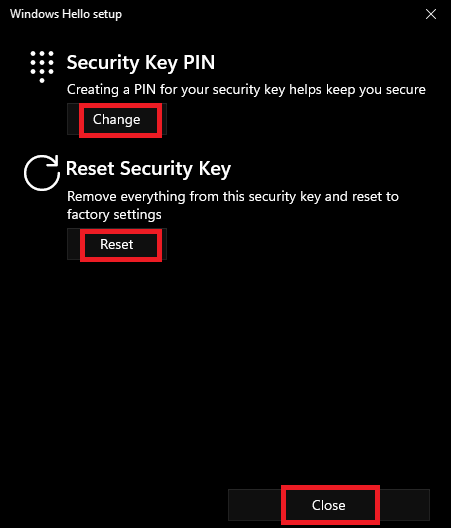
5. Click Close when you are finished.
Add USB security key to your Microsoft Account
Here’s how to set up a USB security key on your Microsoft Account.
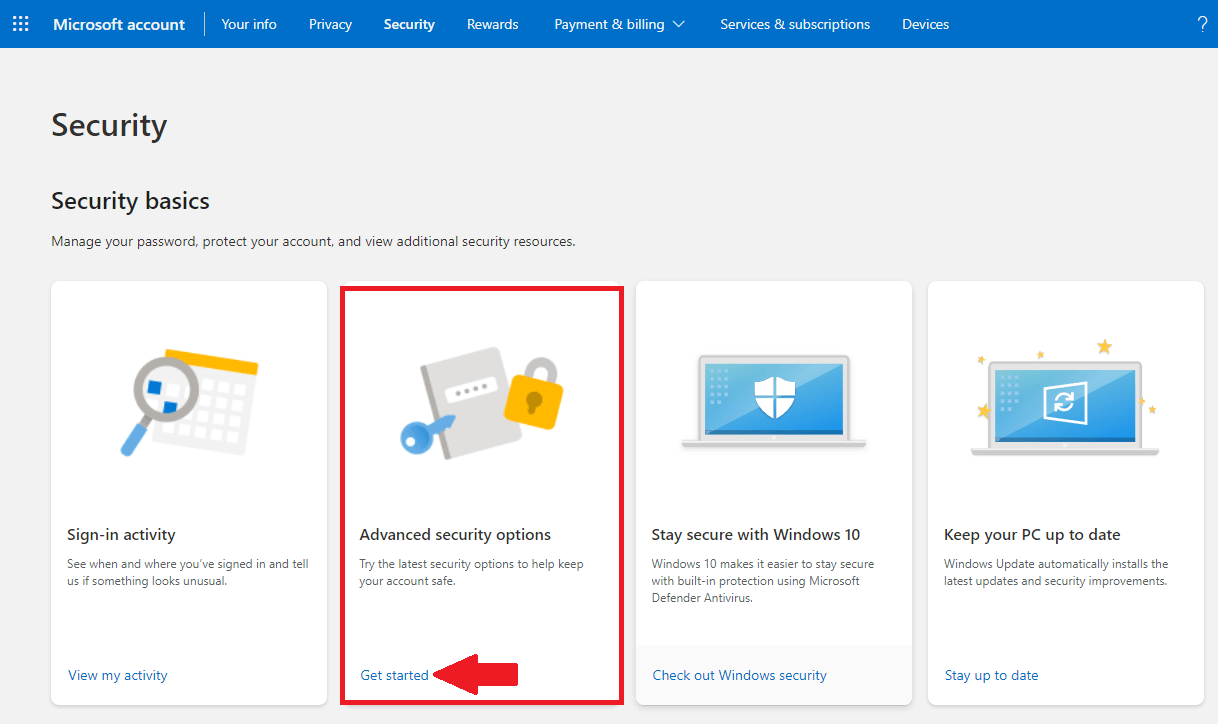
1. Set up a security key by signing into your Microsoft Account’s Security basics page in a browser.
2. Click “Get started” under Advanced security options.
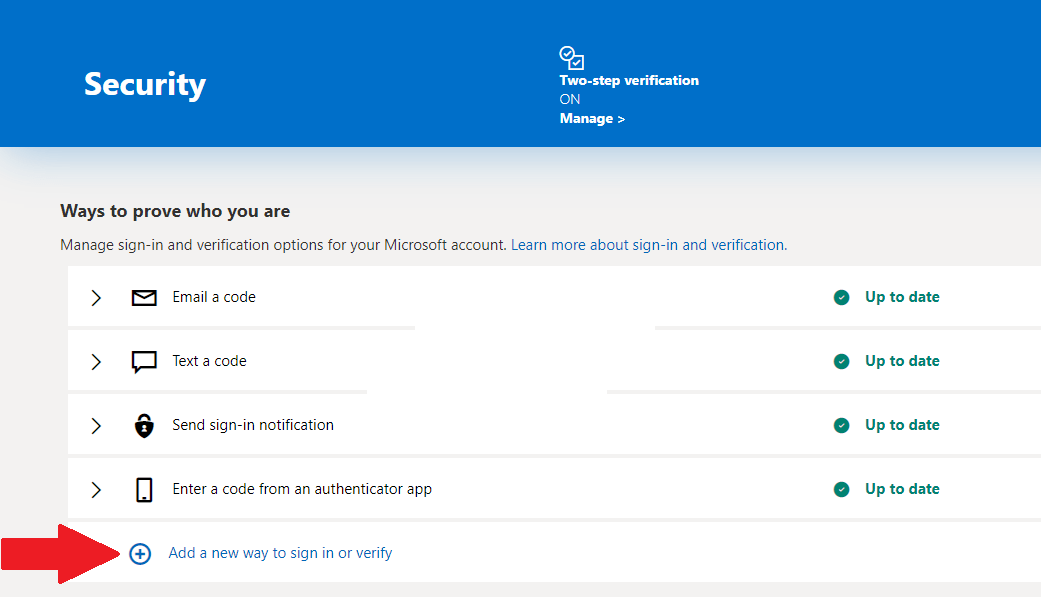
3. Click Add a new way to sign in or verify.
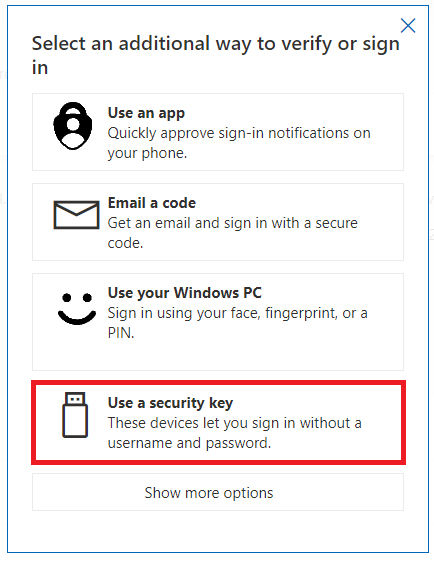
4. Click Use a security key.
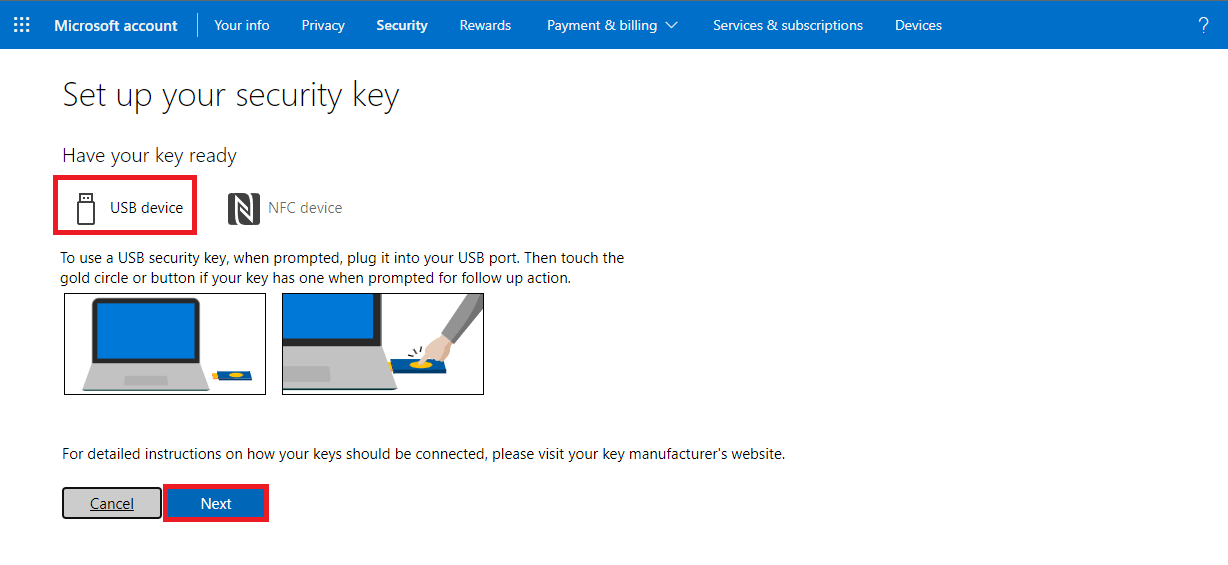
5. Ensure that the USB device tab is selected, and your USB is inserted into your PC, then click Next to set up your USB security key.
6. Next, you will need to set up a PIN. Once you set up and confirm your PIN, click OK.
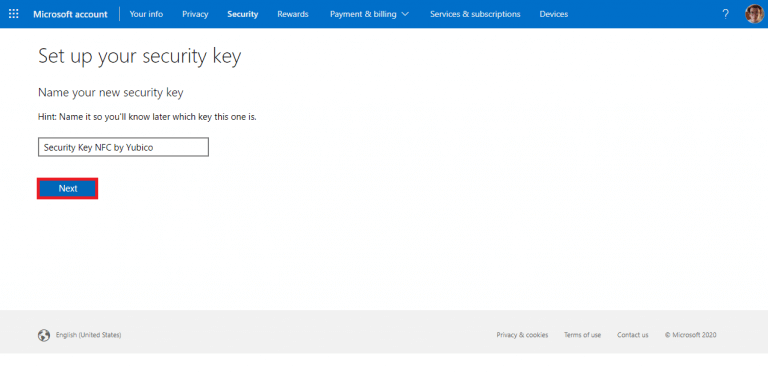
7. Finally, you need to name the USB security key so you can identify it later. Create a name for your USB security key and then click Next. I named my security key, “Security Key NFC by Yubico.”
8. You’re all set! The next time you sign in, you can use your security key and PIN to sign into your Microsoft Account.
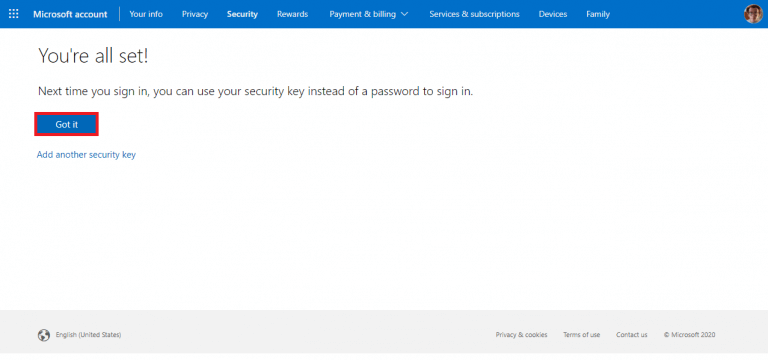
From here, you can add another security key or click Got it to be taken back to your Microsoft Account’s Security dashboard.
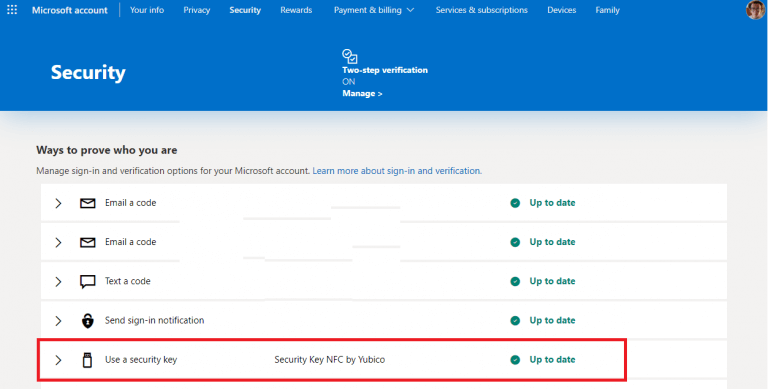
Once added, you will see your security key listed as a sign-in verification option under Ways to prove who you are.
You can add up to 10 physical security keys to your Microsoft Account.
Now, you can use your physical USB security key and PIN to sign into your Microsoft Account. Just plug in the USB to your PC, enter the PIN, and you will have access to your Microsoft Account and PC in no time at all.
Have you tried out the YubiKey or another brand on Windows 11? Any problems with losing your USB drive or having it fail? Let us know in the comments below.