
Windows Mail and Windows Live Mail are replacements for Outlook Express. Since the programs are similar, the instructions for creating an email signature with an image are similar. However, there are differences. One example is Live Mail may display the image border with a red X and not the contents. To make the instructions a bit easier, I broke them into sections. The first section deals with creating the elements you want in your signature. I refer to this as the “Signature source file”. This HTML includes your graphics such as a logo and accompanying text. The second part details how to link that file to your email signature. The last section should be used if your email signature only shows a border.
Note: Microsoft retired Windows Live Mail in May of 2016.
Part 1: Create a HTML Signature Source File
- Open up your email program.
- From the File menu, click New and then Mail Message. The New Message window opens.
- From the Insert menu, select Picture… (Live Mail users select Insert | Image | Inline…)
- Navigate to the image file you wish to insert.
- Click the Open button. Your image should show in the New Message window.
- Optionally, you may add text.
- From the File menu, select Save As…
- Type your File name and select HTML as the file type.
- Close the open window.
Sale: Access Powerful Excel Dashboard Insights
Learn to transform your data into clear, compelling visuals, and make better data-driven decisions. Get 20% off this course from Mynda Treacy (Microsoft MVP).

See Course Details
Part 2: Link the HTML file to your Email Signature
Now that the file with your image and text is saved, you need to point your email program to it.
- From the Tools menu, select Options.
- Click the Signatures tab.
- In the Signatures section, click the New button.
- In the Edit Signature section, select the radio button for File.
- Click the Browse… button.
- Navigate to the HTML file you just created. You may need to change the file types list to HTML Files.
- Highlight your file and click Open.
- Check your desired Signature settings.
- Click OK.
If you’re a Windows Mail user, you’re done. When you create an email you should see your image signature appear based on your settings.
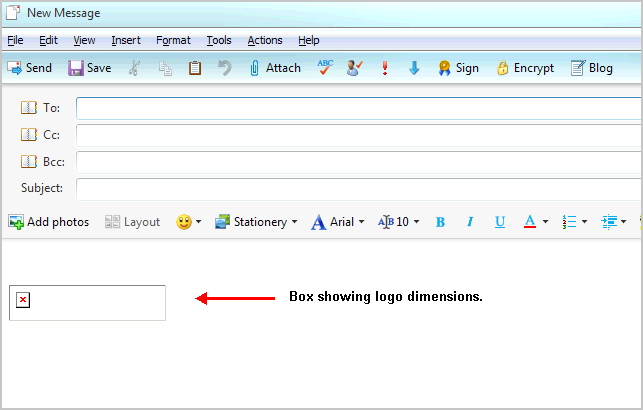
You’re not as lucky if you’re a Windows Live Mail user. Rather than seeing your image, you may see a box representing your image or logo dimensions.
Fixing Windows Live Mail Signature Images
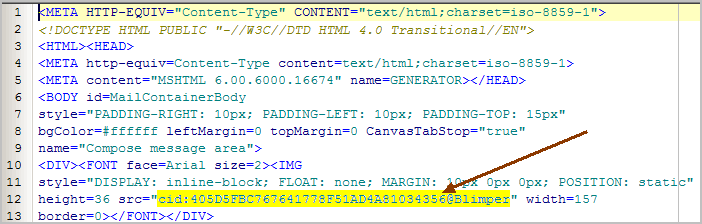
The reason this problem happens is the way Live Mail references the image in your HTML file. To fix the problem, you need to replace the cid: location with the file’s path for your image. The thumbnail below shows an example of this cid: reference.
- Navigate to your image file with Windows Explorer.
- Right-click the image name and select Properties.
- On the General tab, click to the right of the Location: line.
- Right-click and choose Select All
- Press Ctrl+C to copy the file path to your clipboard.
- Using Notepad or a HTML editor, open your HTML signature file.
- Locate the line with src=”cid:
- Remove the contents between the quotes.
- Press Ctrl+V to paste in your file path.
- Append that path with a slash and the file name such as logo.png
- Save your file.
In my case, I replaced
src=”cid:405D5FBC767641778F51AD4A81034356@Blimper”
with
src=”C:Documents and SettingsCompaq_OwnerMy DocumentsMy Pictureslogo.png”
Although you do have to do extra work to add an image to your email signature, it can be worth the effort. The good news is you only have to do this process once per signature. And for those people that haven’t tried Windows Live Mail, you should consider it as it offers more features and security.
If you still don’t see your image, you may need to go to Tools > Safety Options… > Security Tab > Download Images section and uncheck Block Images.
You Might Also Like These Tutorials
- How to Customize the Excel Ribbon
- How to Type Special characters
- How to View & Delete Your Chrome History
This free email tutorial shows you how to customize email signature handling in Windows Live Mail. We will also show you how to associate signatures with email accounts, how to automatically insert a signature in some or all outgoing emails, and how to manually insert a signature from a new email compose window. This tutorial also explains how to set your default email signature.
Email signature options in Windows Live Mail
Customizing email signatures in Windows Live Mail is done through the Options dialog: to open the email signature options, click on the Show Menu button, and click Options. If you have traditional menus visible (hidden by default), you can also go to Tools > Options.
Windows Live Mail’s Options dialog will open: click the Signatures tab. This single tab allows you to create and manage your signatures, and customize the way Windows Live Mail handles them.
All email signature options and settings available in Windows Live Mail are conveniently located under the same tab: anything related to email signatures is there. The only exception, explained further down this tutorial, is the manual insertion of a signature from a new email window.
Turn on or off automatic email signatures
The screenshot below displays the default email signature options in Windows Live Mail:
Windows Live Mail will not automatically add any signature to outgoing emails; check the «Add signatures to all outgoing messages» checkbox, and an email signature will always be included. Notice that the second option is now clickable: by default, «Don’t add signatures to Replies and Forwards» is turned off. This means that your email signature will only be added to new email messages you compose.
Unless your signature is particularly long, it makes sense to include it also in email replies and forwards (and will save you have to sign your emails).
Set your default email signature
Setting your default email signature in Windows Live Mail takes two clicks: from the Signatures tab of the Options dialog, click on the signature you want as default, and click the «Set as Default» button.
If the button is disabled (grayed out), it means either that you have only one email signature (in which case it is automatically the default signature), or that the email signature you selected is already the default signature.
Assign an email signature to an email account
Windows Live Mail lets you associate email signatures with particular email accounts. To do so, first select the email signature you want to assign, and click the Advanced button, under Edit Signature, to select one or more email accounts. The Advanced Signature Settings dialog will open, and list all email accounts you have set up.
Select the checkbox corresponding to the email accounts you want to tie with the selected email signature, and click OK. You’re done! (Don’t forget to click OK to close Windows Live Mail’s Options dialog to confirm your changes.)
Manually insert a signature in a new email
Regardless of your email signature settings, Windows Live Mail always leaves you the option to manually insert any email signature when you compose a new email, reply or forward another. To manually insert a signature, click the Show Menu button, and choose Insert signature.
If the «Insert signature» menu item is disabled (grayed out), you either have not already setup an email signature, or your cursor is in the To, Cc, Bcc, or Subject field. You need to have your cursor (insertion point) inside the body of the email to be able to insert a signature.
As soon as you have setup multiple email signatures in Windows Live Mail, the Insert signature menu item expands into a submenu revealing all available signatures. Pick the one you want, and it will be added in your email.
Just like its predecessors, Outlook Express and Windows Mail Vista, Windows Live Mail too lets you create an email signature and have it automatically appended to outgoing messages. Additionally, if you have multiple email accounts set up in this program, each can have its own email signature.
What can you put in the email signature?
An email signature is so much more than its non-digital counterpart. People generally include their:
- name,
- postal address and contact details (phone + fax),
- email address and web site link.
Sponsored Links
But nothing stops you from adding a sales blurb or a mentioning an ongoing promotion at your company. Some people also put in wise quotes and, yes, jokes! Come to think of it, you are limited only by your own creativity! For ideas and advice, I suggest checking my email signature tips.
Instructions to create an email signature in the Windows Live Mail program
Below are the instruction to help you create a simple email signature in the Windows Live Mail program. This is a fairly simple process but if you get stuck or confused at any point refer the screenshot in the slideshow.
- Open Windows Live Mail, click “Tools” and choose “Options” [Slide 1]. Important: You might need to hit the Alt key to unhide the Windows Live Mail toolbar.
- A pop-up window will be displayed [Slide 2].
- Click the “Signatures” tab [Slide 3].
- To add a new email signature in Windows Live Mail, click the “New” button [Slide 4].
- “Signature #1” immediately appears in the box [Slide 5].
- Put a checkmark in front of “Add signatures to all outgoing messages” option. Checking “Don’t add signatures to Replies and Forwards” will ensure that the email signature is appended to each outgoing email [Slide 6].
- I suggest having a more descriptive name for the signature. Click “Rename” and type in something more suitable. For instance, I’m going to create a signature for a personal email address that I’ve set up in Windows Live Mail and, hence, named the signature “Personal” [Slides 7 and 8].
- Now in the “Edit Signature” text-box, type in the contents [Slide 9].
- Click the “Apply” button followed by “OK” [Slide 10].
- To check out the new email signature you’ve created in Windows Live Mail, open a new email window. Viola! [Slide 11].
OK, this was just the tip of the iceberg. You can also make email signatures with embedded images, links and fancy text formatting. Unfortunately, creating such signatures in Windows Live Mail is not easy because of the absence of a formatting toolbar. But there is no need to despair. Using a little common sense, you too can get a Windows Live Mail email signature of your dreams – refer that for details.
This document is old. See this for a better way, with video!
In Windows Live Mail (as in the e-mail client and not the web site) the default method for an e-mail signature is nothing but plain text, like this:

You can however create advanced e-mail signatures using the freely available Nvu web page editor.
Here’s how it’s done.
1. Download and install Nvu. It’s free.
2. Copy any images you plan to use to the folder My Stationary.
My Stationary is a folder you already have on your computer, located under My Documents. This was created when you installed WL Mail originally. Any images to be used in a signature must reside in this folder, else it will not work.
For the example below I’m going to use a small image of myself:
The above is a 48×48 pixel image. You should keep whatever image you use small so you don’t annoy the people you send mail to. If you’re asking the question, “How big is too big?”, try not to use anything over a 100×100 image.
If you have an image you’d like to use but it’s too big, you can resize it quickly using Pixlr editor. This is a free in-browser editor (no need to install anything). Load that site, open the image you want to edit, click Image then Image Size from the black bar at the very top and resize to 80×80 or smaller, then save as PNG or JPEG.
When your images are ready, copy any you intend to use to the My Stationary folder.
4. Launch Nvu and save a blank signature first.
When you first launch Nvu you will be given a blank web page to edit, much like editing a new document a word processor. The first thing we’ll do is save this file. This is necessary to do first so that images can be added in more easily.
Click the Save button. You will be prompted to title the page. Call it signature, like this:
Click OK.
You will be be prompted to save the file somewhere. Navigate to the My Stationary folder and save your file as signature, like this:
The file will be auto-saved with the .html file extension.
5. Edit and save your signature.
First we’ll add in the image. Click the Image button at the top of Nvu. A new window will open.
Click the Choose File button.
Example:
You will be automatically placed into the My Stationary folder to find the image you want. If not, navigate to My Documents then My Stationary. Find the title of the image you want to add, then double-click to open it.
After that, tick the option for Don’t use alternate text (if you don’t, Nvu will force you to use alternate text for images, which is not necessary).
You should have something like this:

Click OK.
Your image will be inserted into the page.
After that, type in some text you want in your signature.
For any text you want linked to another web site, highlight the text and click the Link button at the top of Nvu.
Here’s an example of what you could have:

The last thing we’ll do is change the font.
Press CTRL+A to highlight everything in the page.
Click the drop-down menu that states Variable With or Mixed and pick Helvetica, Arial like this:
It is strongly suggested that you only use Helvetica/Arial, Times or Courier as everybody has these fonts installed on their computers. If you choose a font that is non-standard, chances are high that it will show up as nothing but Times New Roman (or other standard serif font) on the recipient’s computer.
Lastly, adjust the font size by using the font increase/decrease size buttons:
Remember that you can highlight and select different text just as you would in a word processor program, adjusting some to be one size and other text a different size.
Here’s an example of what you could have:

When we’re all finished, simply click Save and close Nvu.
6. Enable the signature in Windows Live Mail.
In WL Mail, press ALT+M to bring up the menu, then click Options:
For the new window that appears, click the Signatures tab, then tick the option File at bottom, like this:

Click the Browse button to the right of File.
From the Open window that appears, change Text Files to HTML Files, like this:
Navigate to your My Stationary folder and select signature (this is the file you just saved a few moments ago).
At this point you will see the file path next to File, similar to this (the path will be different on XP computers because My Documents is in a different location):
Make sure Add signatures to all outgoing messages is checked:

Click Apply then OK.
7. Compose a new e-mail to yourself to test it out.
If all goes well…
Success! Your new advanced signature works!
Questions answered
My signature doesn’t look the same as it did in Nvu. Did I do something wrong?
No. You’re probably viewing and/or composing mails in plain text only.
In Options/Read, uncheck Read all messages in plain text, like this:
In Options/Send, the Reply to messages using the format in which they were sent checkbox must be unchecked, the Mail Sending Format must ticked as HTML, like this:
How do I re-edit my signature?
Launch Nvu and open the signature file from the My Stationary folder. Make any edits you wish, then save. It will instantaneously take effect in WL Mail on any future mails you send out.
Are the images I use in my signature attached as inline?
YES. They are attached to your e-mail and sent inline without any need to host them externally on other web sites like ImageShack or PhotoBucket. Your signature will never “break” because it will be not be dependent on any external image hosting whatsoever.
Can I use colors when editing my signature?
YES. You can highlight any text and make it any color you want.
Can I use advanced features when editing my signature such as tables, horizontal rules, paragraph alignment and so on?
YES. You can use all those things.
What can’t I do with my signature?
You can’t do anything that involves scripting of any kind. For example, if you entered in some JavaScript, that absolutely would not work. Everything in your signature file must be static in nature (which it is by default).
Why must the signature file itself and images I use be in My Stationary and not in a more convenient spot?
WL Mail has a feature called Stationary. It is something not too many people use simply because the stationary choices are terrible, and the way to create them is even more terrible (File / Save as Stationary doesn’t work, and the Stationary Wizard via the Options/Compose tab/Create New button isn’t too much better).
The signature file itself must reside in My Stationary for any signature images to work. For example, the image I used was menga48.jpg. When in the My Stationary folder, the HTML markup written by Nvu has src=”menga48.jpg” in the <img> tag for the file path. If it were in any other directory, Nvu as well as any other editor would write something like src=”file:///some-local-location/menga48.jpg”, and that simply will not work.
Images for signature use almost must reside in My Stationary for file path reasons as well. When you have both the signature HTML file and the images in My Stationary, everything works.
Can I “export” my signature?
YES. Copy the signature.html file and whatever images you use to a USB stick, go to any other computer with Windows Live Mail installed on it, copy the files to the My Stationary directory on that computer, then follow steps 6 and 7 above.
What e-mail account types will this work on?
The signature will work regardless of account type, be it POP, IMAP or HTTP (Hotmail).
Is it absolutely required that I use Nvu?
No. Dreamweaver will work as will coding your HTML file “by hand” even with something as simple as Notepad. The editor is not necessary. I only mention it because it’s easier for most people to work with.
Can I use my word processor to export an HTML for use as a signature?
I highly recommend against doing that because word processors export HTML files with lots of useless junk code – so much so it may crash WL Mail on attempt to use it as a signature.
I use Outlook Express 6 and not Windows Live Mail. Will these instructions work if I’m using that software?
Yes, but the stationary folder on most XP computers is this:
C:Program FilesCommon FilesMicrosoft SharedStationery
You will have to substitute My Stationary for the this folder if you want to do this in OE6 using the above instructions.
Also remember that signatures are not shared. If you use a signature in OE6, it will not import over to WL Mail so you will have to manually copy the files from the OE6 Stationary folder to the WL Mail one.
Readers help support Windows Report. We may get a commission if you buy through our links.
Read our disclosure page to find out how can you help Windows Report sustain the editorial team. Read more
Windows Live Mail and Outlook Express by default support email signatures. Adding an email signature allows you to embed a snippet of information with all the emails sent from your email account.
Now, what if you want to edit a Windows Live Mail signature? It’s actually pretty easy. You can edit the existing Windows Live Mail signature from the Options.
In this article, we show you how to edit and add Windows Live Mail signatures.
How can I edit the Windows Live Mail’s signature?
1. Edit the Windows Live Mail signature
- Open Windows Live Mail app.
- Click on File and select Options, then Mail.
- If you don’t see the File option, click on Tools and select Options.
- Open the Signatures tab.

- Here you can see all the previously created email signatures.
- Click on the signature you want to edit.
- You can edit plain text signatures directly from the Live Mail editor.
- If not, note the path and file name in the box.
- Open File Explorer and navigate to the path you noted earlier.
- Open the file in Notepad and make the changes.
- Save the file and exit.

2. Add a signature to Windows Live Mail
- Start Windows Live Mail.
- Click on File and select Options, then Mail.
- On older versions, click Tools and choose Options instead.
- Open the Signatures tab.

- Select New from the Signatures section.
- Under the Edit Signature section, create your email signature.
- Click OK to save the signature.
- Open the Signature tab again and make sure the option Add signatures to all outgoing messages is checked.

3. Add a signature to an email
After composing an email message, you can select which signature you want to use:
- In the Compose window, go to Insert and click on Signature.
- Press and hold the Alt key if you can’t see the menu bar.
- Choose the signature you want to use and send the email.
While creating email signatures, make sure it is short and precise. Try to limit the email signature to a maximum of 3-4 lines to keep it professional.
If you don’t want to add a signature to replies and forwards, then follow these steps:
- Go to File.
- Select Options.
- Go to the Signature tab.
- Uncheck Don’t add signatures to Replies and Forwards option.
By following the steps in this article, you can add and edit email signatures in Windows Live Mail.
Do you prefer plain text or HTML enriched signatures? Leave your answer along with any other questions and suggestions in the comments section below.
Tashreef Shareef
Tashreef Shareef is a software developer turned tech writer. He discovered his interest in technology after reading a tech magazine accidentally. Now he writes about everything tech from Windows to iOS and streaming services to IoT at WindowsReport.