
Вы можете установить SMTP сервер с помощью встроенных средств во всех версиях Windows Server. Такой SMTP сервер внутри организации может работать в качестве почтового релея, который должен принимать и пересылать через себя SMTP сообщения от различных устройств (к примеру, сендеров, сканеров, устройств СКД и пр.) и приложений (веб приложения, SQL Reporting Services, SharePoint), которым необходимо иметь возможность отправлять почту через SMTP сервер. Такой релей может пересылать сообщения на полноценные Exchange сервер или на публичные почтовые сервисы в Интернет типа Gmail, Mail.ru, Office 365 и т.д (ведь не всегда целесообразно разворачивать полноценную внутреннюю почтовую инфраструктуру на базе Microsoft Exchange Server или других почтовых служб).
В этой статье мы покажем, как установить, настроить и протестировать работу SMTP сервера на Windows Server 2012 R2, 2016 и 2019, который будет функционировать в качестве mail релея. Такой SMTP сервер не хранит почтовые сообщения и на нем отсутствуют почтовые ящики, он сможет только отправлять или пересылать почту.
Содержание:
- Установка службы SMTP на Windows Server 2016/2012 R2
- Настройка SMTP сервера на Windows Server
- Автозапуск службы SMTPSVC
- Проверка работы SMTP сервера на Windows Server
Установка службы SMTP на Windows Server 2016/2012 R2
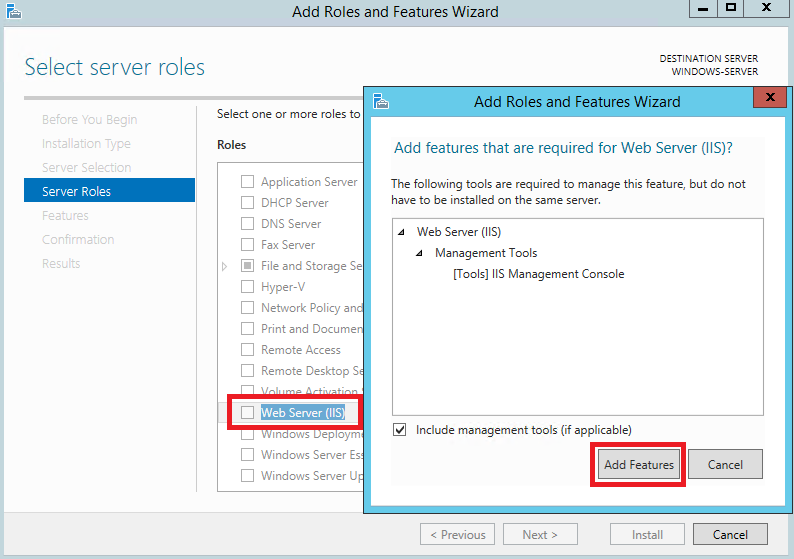
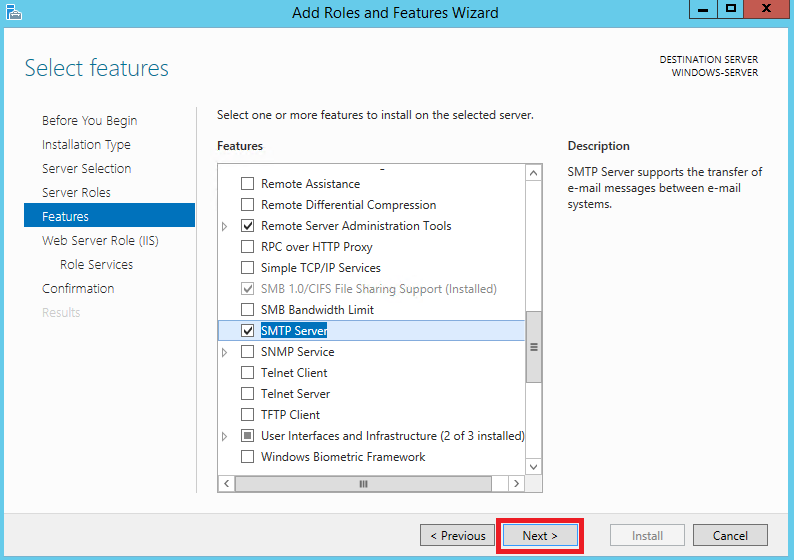
SMTP сервер – это один из компонентов Windows Server, который можно установить через Server Manager. Для этого откройте консоль Server Manager Dashboard (servermanager.exe), перейдите в режим Add roles and features и на этапе выбора функций отметьте чекбокс у пункта SMTP Server. Для управления службой SMTP нужно установить консоли управления, которые входят в комплект роли Web Server IIS (вам будет предложено установить IIS Management Tools).
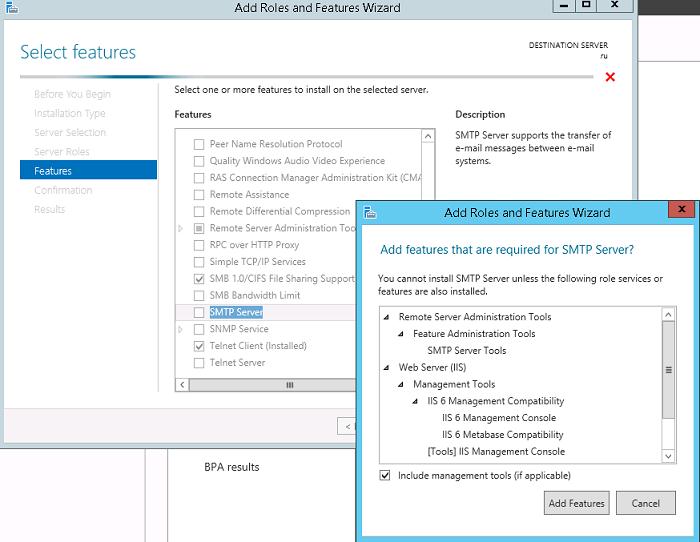
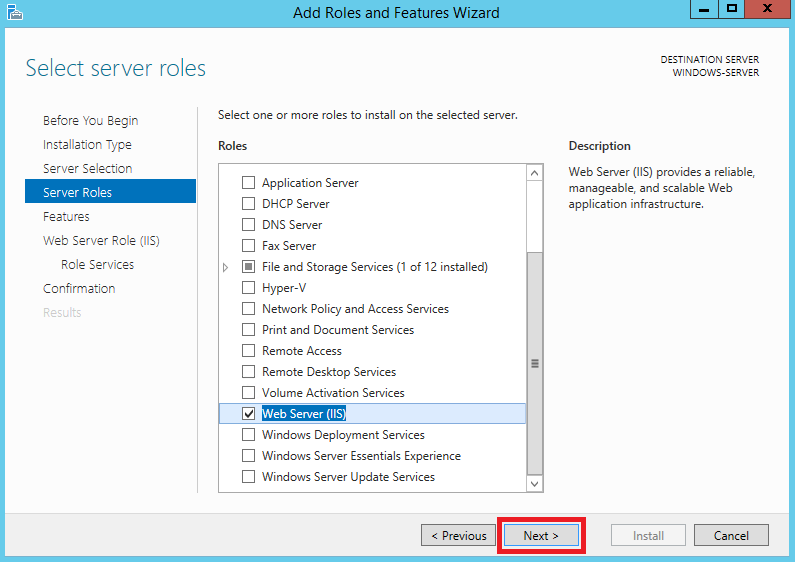
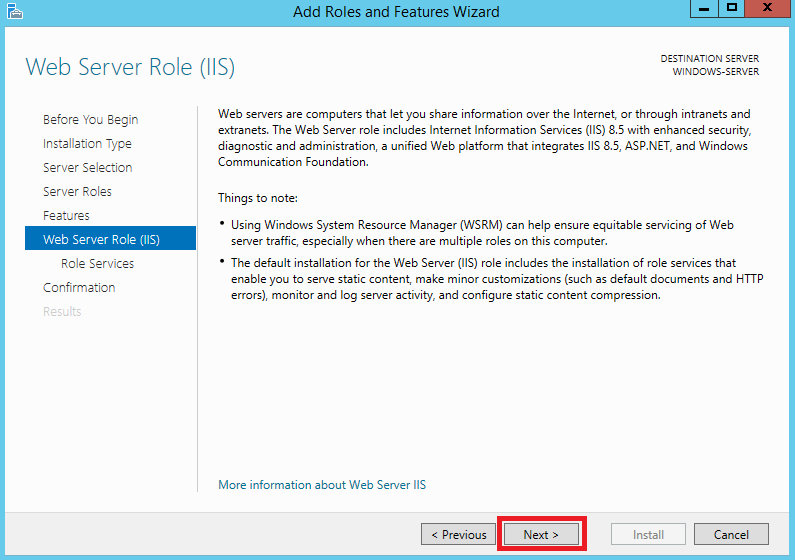
Оставьте все предлагаемые опции роли Web Server (IIS) и запустите установку.

Также вы можете установить компонент SMTP сервера с помощью одной команды PowerShell:
Install-WindowsFeature smtp-server
После окончания установки компонентов может потребоваться перезагрузка системы.
Настройка SMTP сервера на Windows Server
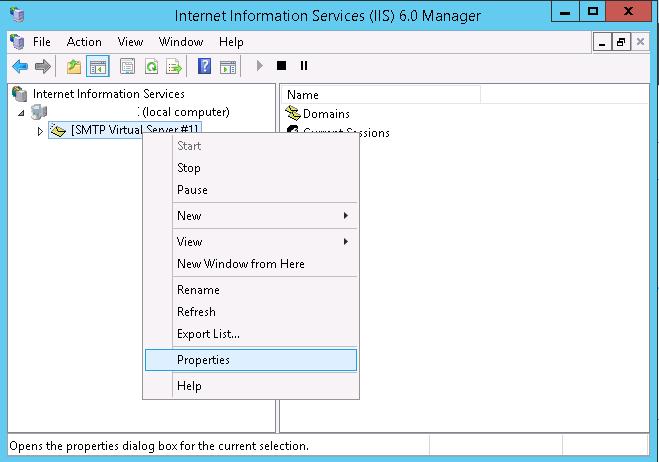
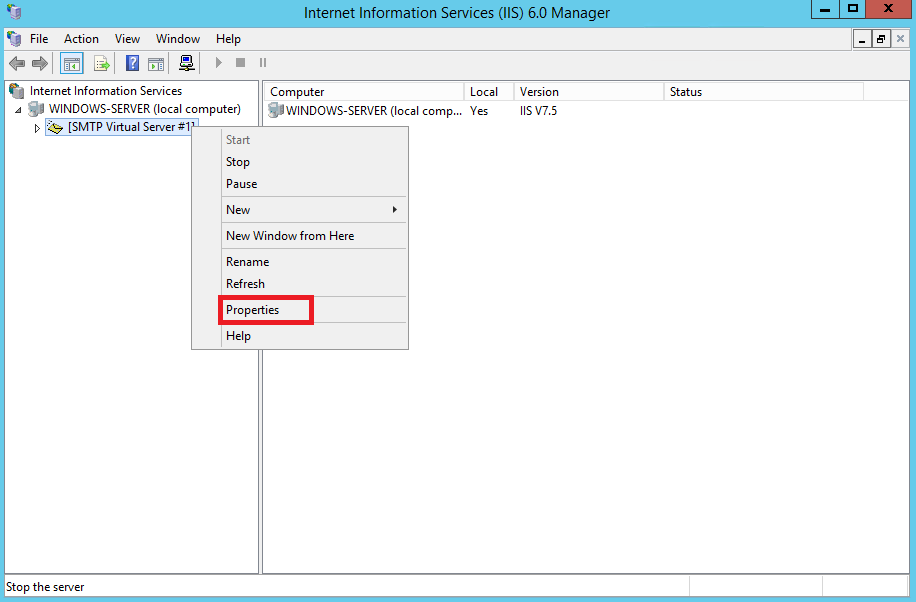
Управляется SMTP сервер консоль управления Internet Information Services (IIS) Manager 6. Открыть эту консоль можно через Server Manager: Tools-> Internet Information Services (IIS) 6.0 Manager или командой inetmgr6.exe.
В консоли IIS 6 Manager разверните ветку с именем сервера, щёлкните ПКМ по SMTP Virtual Server и откройте его свойства.
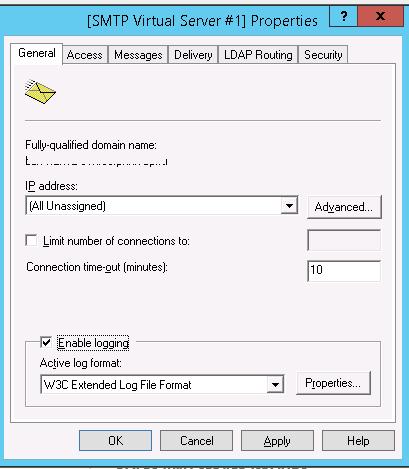
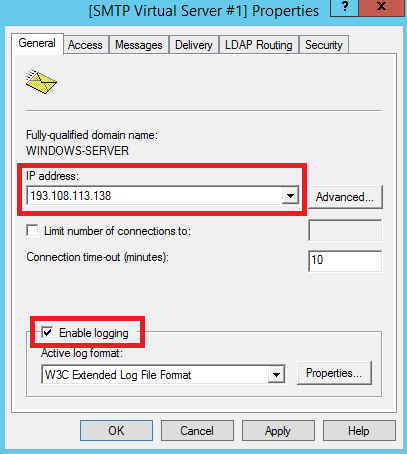
На вкладке General, если необходимо, выберите IP адрес, на котором должен отвечать SMTP сервер (если у сервера несколько IP адресов), и включите ведение логов Enable logging (чтобы сохранялась информация обо всех полученных письмах).
Затем перейдите на вкладку Access.
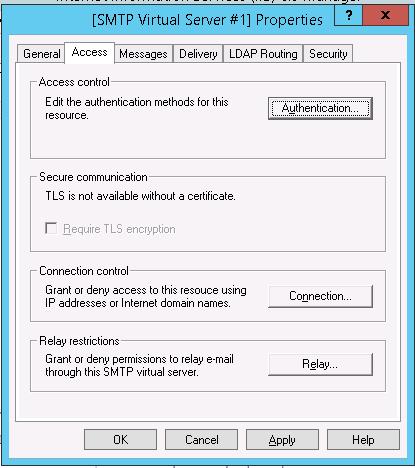
Здесь нажмите на кнопку Authentication и убедитесь, что разрешен анонимный доступ (Anonymous access).
Вернитесь на вкладку Access и нажмите кнопку Connection. Здесь вы можете указать IP адреса устройств, которым разрешено отправлять почту через наш SMTP релей. Нужно выбрать опцию Only the list below и указать список IP адресов, не забыв самого себя (127.0.0.1).
Аналогичным образом настройте список разрешенных IP в настройках Relay (нажмите соответствующую кнопку). В этой секции указано каким IP адресам (или подсетям) можно пересылать почту через ваш SMTP сервер.
Примечание. Как правило, обязательно стоит включать эту опцию, как минимум ограничив список обслуживаемых устройств диапазоном IP адресов. В противном случае ваш SMTP сервер может использоваться спамерами и другими злоумышленниками как открытый релей для массовых почтовых рассылок.
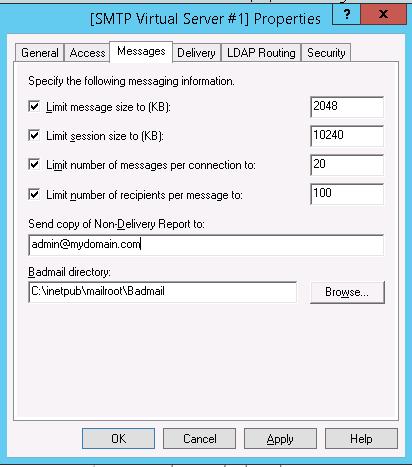
Перейдите на вкладку Messages. Здесь указывается email, на который будут отправляться копии всех NDR отчетов (Send copy of Non-Delivery Report to:). Также здесь можно указать ограничения на максимальный размер писем (Limit message size KB) и количество получателей (Limit number of recepients per message).
Перейдите на вкладку Delivery:
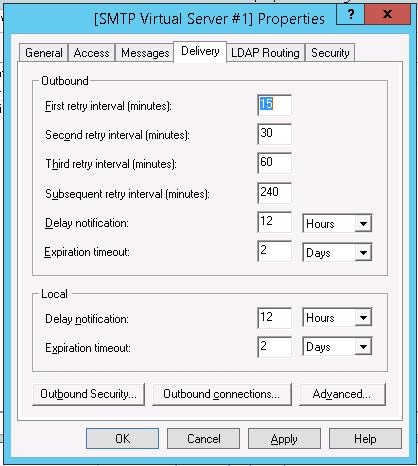
Затем нажмите на кнопку Outbound Security. Здесь указывается, как нужно авторизоваться на почтовом сервере, на который ваш SMTP-сервере будет пересылать (relay) всю почту. К примеру, если вся почта будет отправляться на почтовый сервер Gmail и уже с него пересылаться адресатам, вам нужно выбрать тип аутентификации Basic authentication, указав в качестве пользователя и пароля данные для доступа к почтовому ящику на сервисе Gmail (в настройках аккаунта Google нужно разрешить отправку через smtp сервера gmail).
Затем нажмите на кнопку Advanced.
Здесь указывается FQDN имя вашего SMTP сервера. Нажмите кнопку Check DNS, чтобы проверить корректность записи в DNS.
Если сервер должен пересылать почту внешнему smtp серверу, нужно указать его имя в поле Smart host (к примеру smtp.gmail.com или smtp.office365.com).
Некоторые внешние почтовые сервера принимает почту только при использовании защищенного SMTP соединения с помощью TLS Encryption (используется порт TCP 587). Это настраивается в разделе Delivery-> Outbound Security и Outbound Connections. Ознакомитесь с документацией вашего почтового провайдера.
Сохраните настройки SMTP сервера и перезапустите ваш виртуальный SMTP сервер для применения изменений.
Примечание.
- Настройки DNS критичны с точки зрения работоспособности почтовой системы. Если ваш SMTP сервер не может корректно разрешить DNS имена доменов, на которые он пытается отправить письма, доставка не удастся.
- Если ваш сервер сам будет отправлять почту в другие домены, важно, чтобы для вашего адреса была сформирована правильная PTR запись для разрешения обратных DNS запросов. PTR запись для белого IP адреса должна указывать на FQDN имя. В противном случае большинство внешних smtp серверов не будут принимать от вас почту, считая ваш сервер спамерским.
Автозапуск службы SMTPSVC
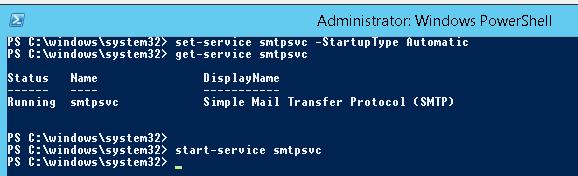
Осталось настроить автозапуск службы SMTP сервера. Быстрее всего это сделать из командной строки PowerShell:
set-service smtpsvc -StartupType Automatic
Запустим службу:
start-service smtpsvc
Проверим, что запущена служба SMTPSVC :
get-service smtpsvc
Status Name DisplayName
—— —- ————
Running smtpsvc Simple Mail Transfer Protocol (SMTP)
Проверка работы SMTP сервера на Windows Server
Ну и последнее, что осталось сделать, проверить работу созданного SMTP сервера. Проще всего это сделать, создав на рабочем столе текстовый файл smtp-test-email.txt и скопировав в него следующий текст, заменив имя отправителя и получателя на ваши.
From: [email protected]
To: [email protected]
Subject: Email test
This is the test email
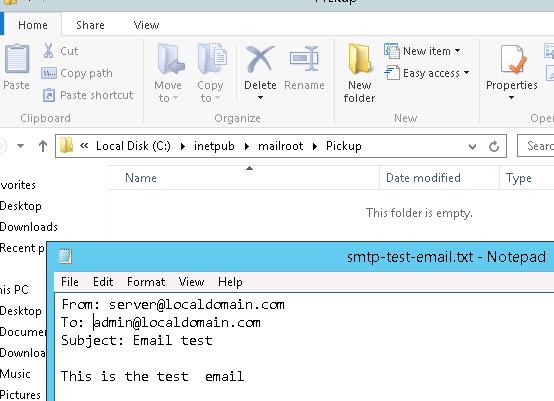
Скопируйте файл smtp-test-email.txt в каталог C:\inetpub\mailroot\Pickup. SMTP сервер следит за появлением файлов в этой каталоге и при обнаружении файла прочтет его содержимое и попытается отправить письмо с данной темой и текстом адресату, указанному в разделе To:.
Проверьте ящик получателя, в него должно прийти такое письмо.
Совет. Протестировать работу SMTP сервера можно и из командой строки telnet, скрипта vbs или PowerShell:
Send-MailMessage -SMTPServer localhost -To [email protected] -From [email protected] -Subject "Email test" -Body "This is the test email sent via PowerShell"
Если вы хотите, чтобы вы включили Basic Authentication (Обычная проверка подлинности) для авторизации всех ваших SMTP клиентов (вместо анонимной аутентификации), вы можете отправить письмо с smtp-аутентификацией через telnet следующим образом.
Также убедитесь, что на вашем SMTP сервере не блокируется порт TCP 25 при удаленном подключении (локальным файерволом, антивирусом или межсетевым экраном). Проще всего это сделать с компьютера Windows, IP адрес которого добавлен в разрешенные. Проверку доступности порта можно выполнить с помощью командлета Test-NetConnection:
Test-NetConnection smtpsrv1.name.local –port 25
Если 25 порт блокируется, проверьте настройки Windows Firewall, антивируса и аппаратных межсетевых экранов.
Итак, вы настроили собственный почтовый SMTP релей на Windows Server 2016/2012 R2 и протестировали отправку писем через него.
MailEnable is a free (standard edition) and robust email server solution for Windows platforms, offering a comprehensive suite of mail services.
It supports various protocols such as SMTP, POP3, IMAP, and webmail, making it an ideal choice for small to big businesses.
This article will guide you through the process of installing MailEnable on a Windows Server 2022 system, ensuring that you have a functional mail server to handle your organization’s email needs or even your personal.
This is the first project I have made for Windows Server. So, without further adieu let’s start!
Prerequisites
Before you begin the installation of MailEnable, ensure that your system meets the following requirements:
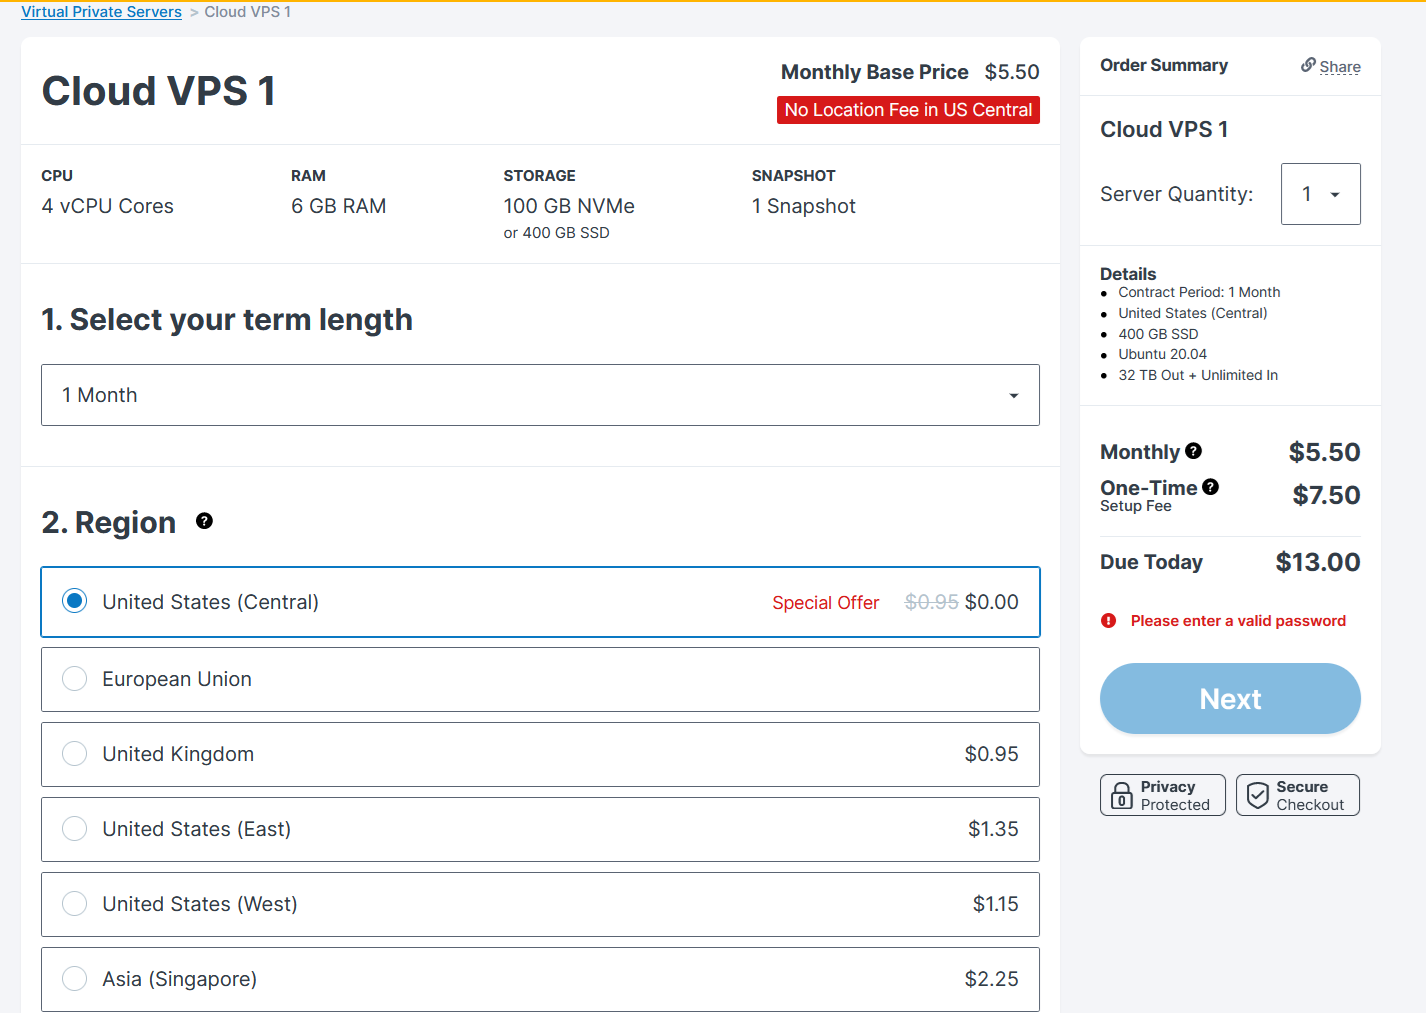
- Open Port 25 VPS: Get a Contabo VPS running Windows Server Datacenter 2022 because they don’t block port 25.
- Windows Server 2022: A fresh or existing installation of Windows Server 2022.
- System Requirements: Ensure your server meets the minimum requirements for running MailEnable. Have at least 1vCore, 4GB RAM, and 10GB Disk space. Contabo meets these requirements.
- Domain: I can vouch for Namecheap for affordability and security.
Step 1: Get a Windows VPS on Contabo
I’ve laid out the steps here on how to setup a Windows VPS on Contabo. Be sure to follow it.
You should be able to connect to your Windows VPS by now.
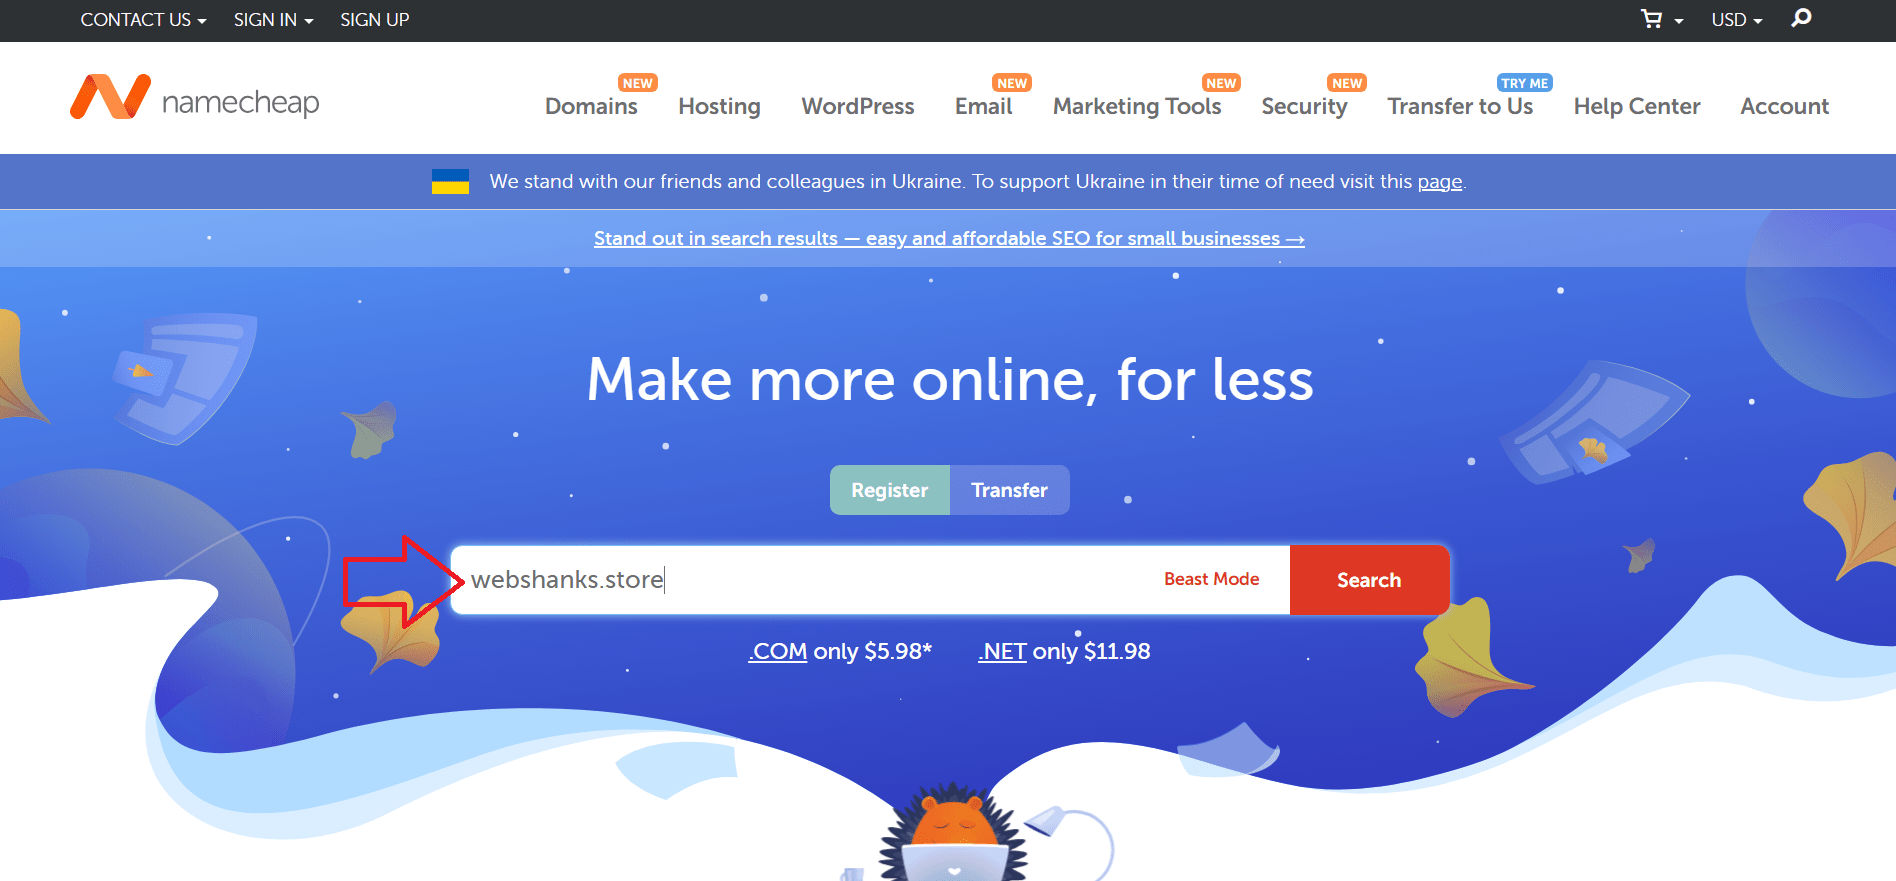
Step 2. Get a Domain
Go to Namecheap and buy a domain. Avoid top-level domains like .work .date .top .fun .life .review .xyz .bid .stream .site .space .gdn .click .pro.
Instead get .com .net .io .co.uk .org top-level domains.
Step 3: Download MailEnable
- Visit the MailEnable website.
- Navigate to the ‘Download‘ section.
- Choose the appropriate version (Standard, Professional, or Enterprise) and download the installer. The Standard Edition is free.
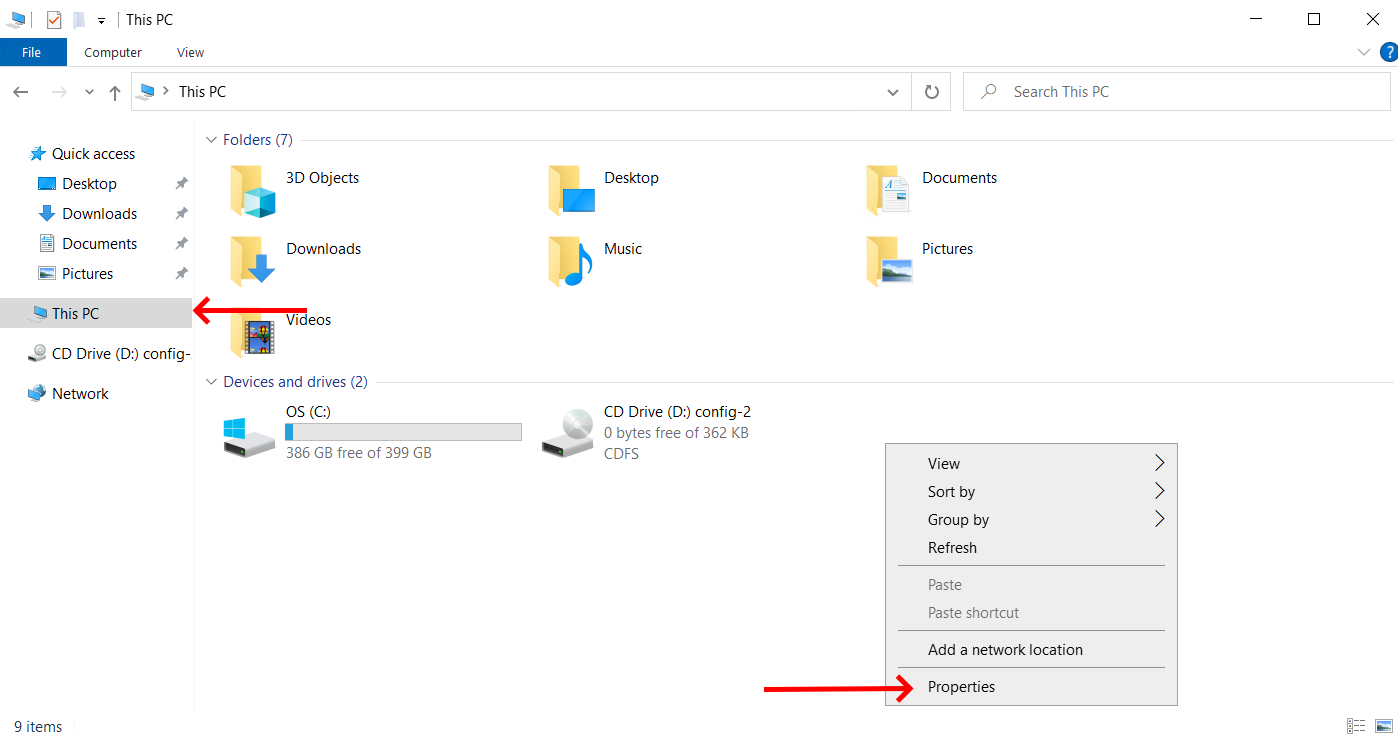
Step 4: Set Hostname
By now you are already connected to your Windows VPS.
If you are plainly using your Windows VPS as a mail server, you will need to set a hostname. To do that, click the folder on the taskbar and choose This PC. Then right-click on the empty space and choose Properties.
Click Rename this PC and name your PC to mail.

Finally, restart your Windows server.
Step 5: Install Microsoft IIS and Microsoft .NET Framework 3.5 or later
We need to install MailEnable prerequisite services first to enable it to work properly.
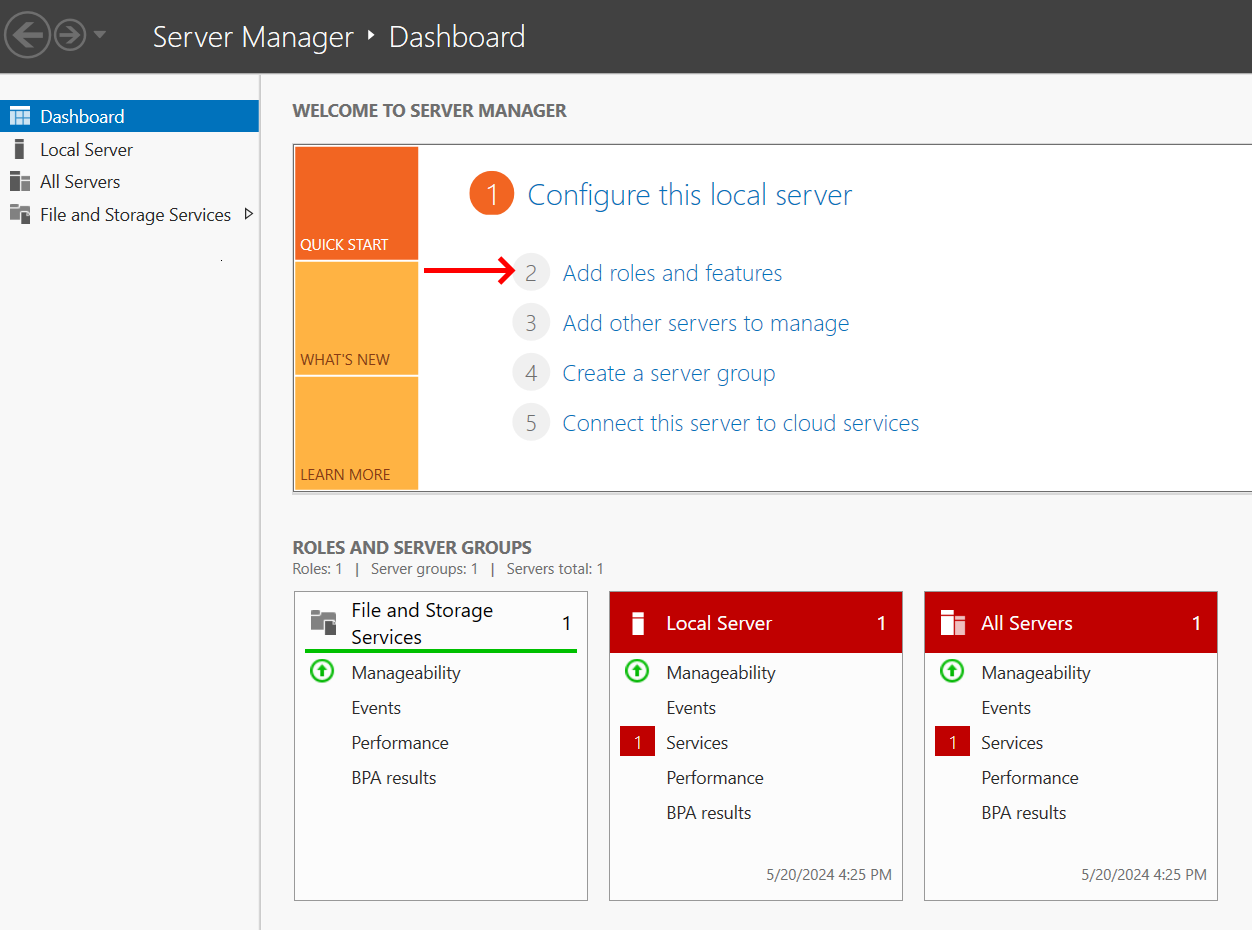
Click on the Start menu > select Server Manager.
In the Server Manager dashboard, click on Add roles and features. This will launch the Add Roles and Features Wizard.
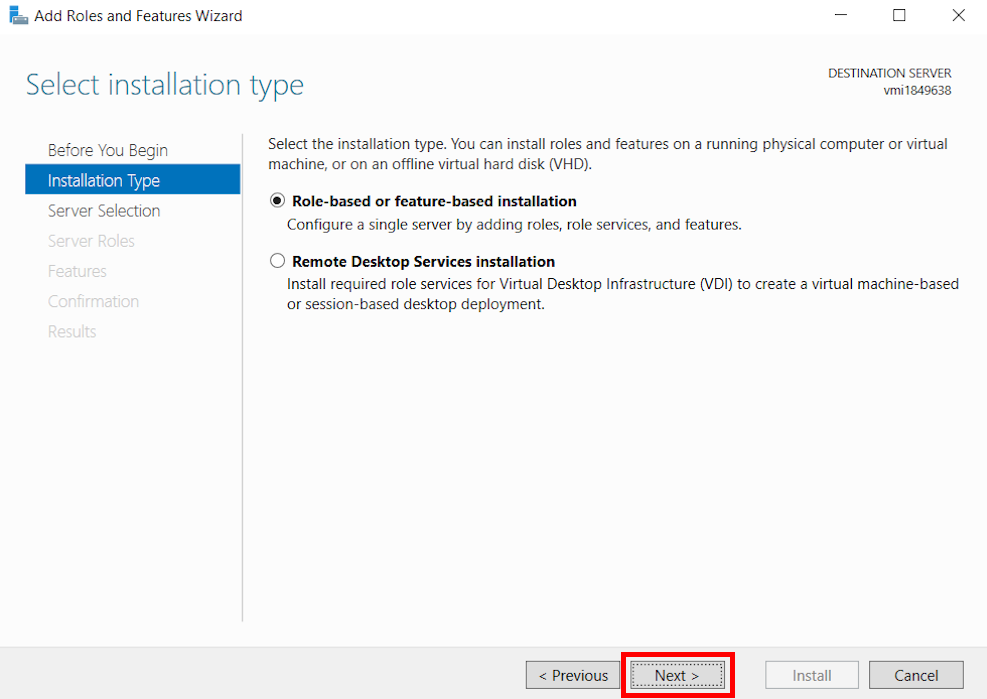
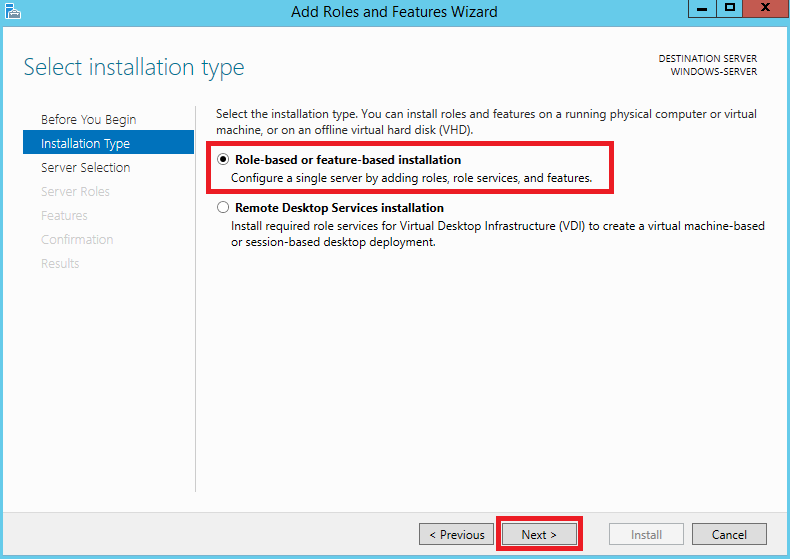
Click Next on the Before You Begin page.
Choose Role-based or feature-based installation and click Next.
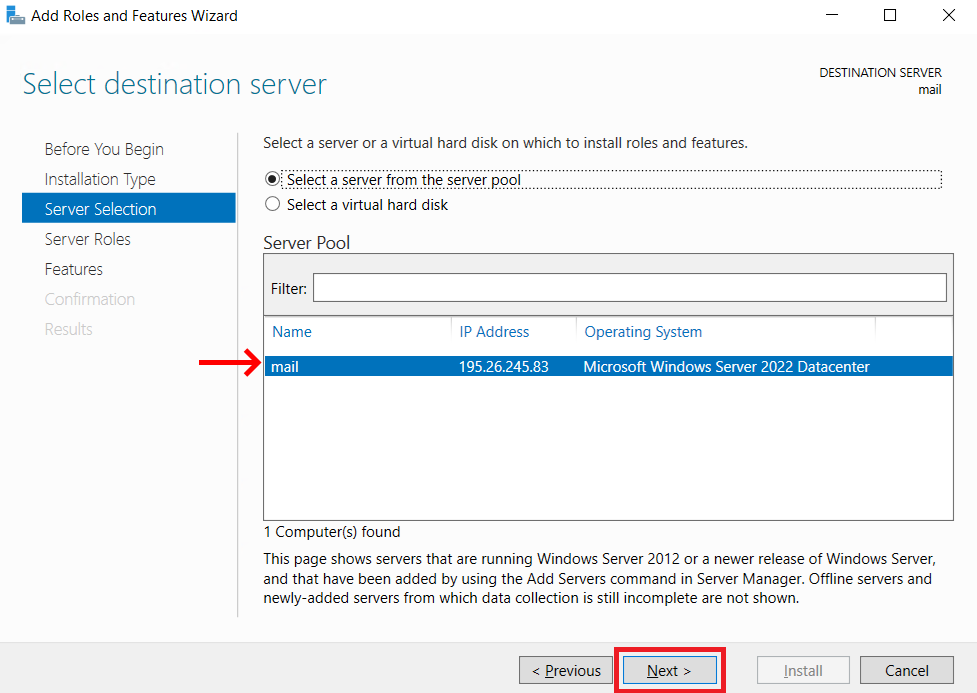
Select the server where you want to install IIS (usually the local server is selected by default) and click Next.
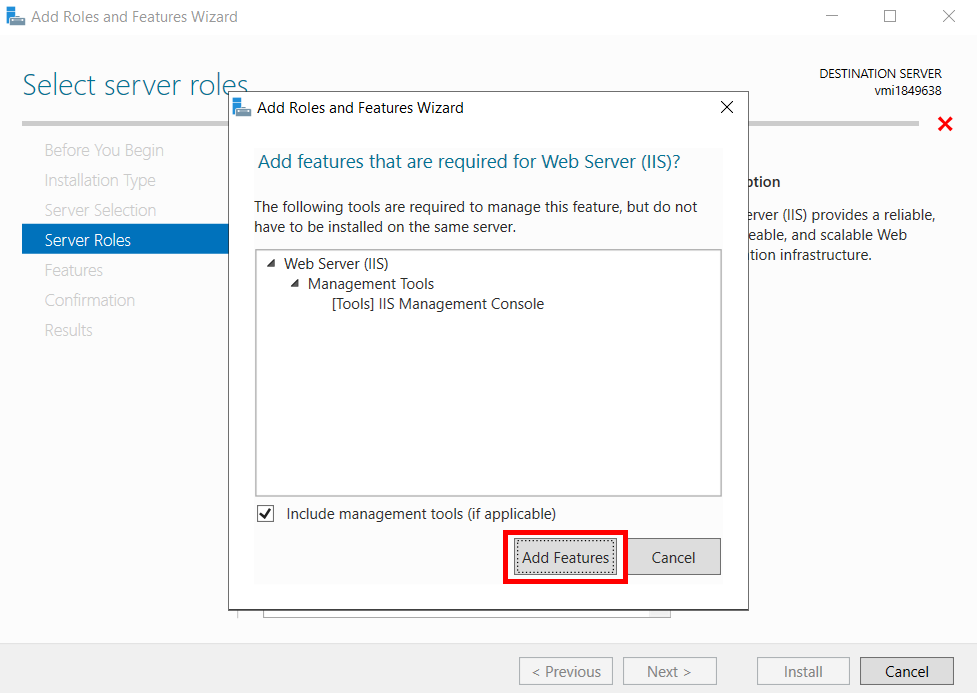
Scroll down and check the box next to Web Server (IIS).
A pop-up will appear asking to add required features. Click Add Features. Click Next.
Check the box next to .NET Framework 4.8.
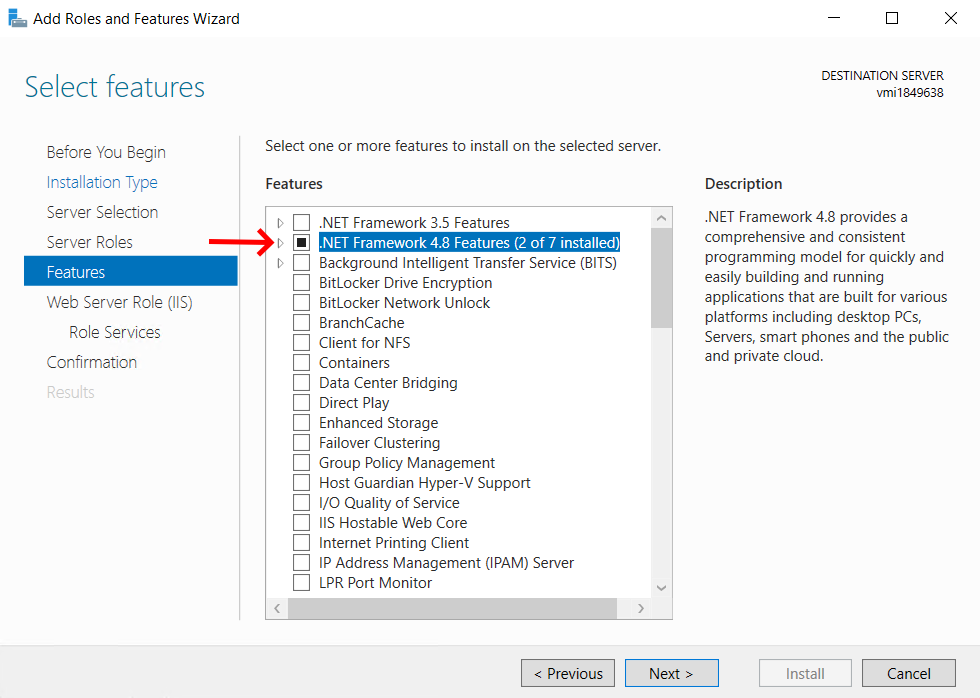
Click Next on the Web Server Role (IIS) page.
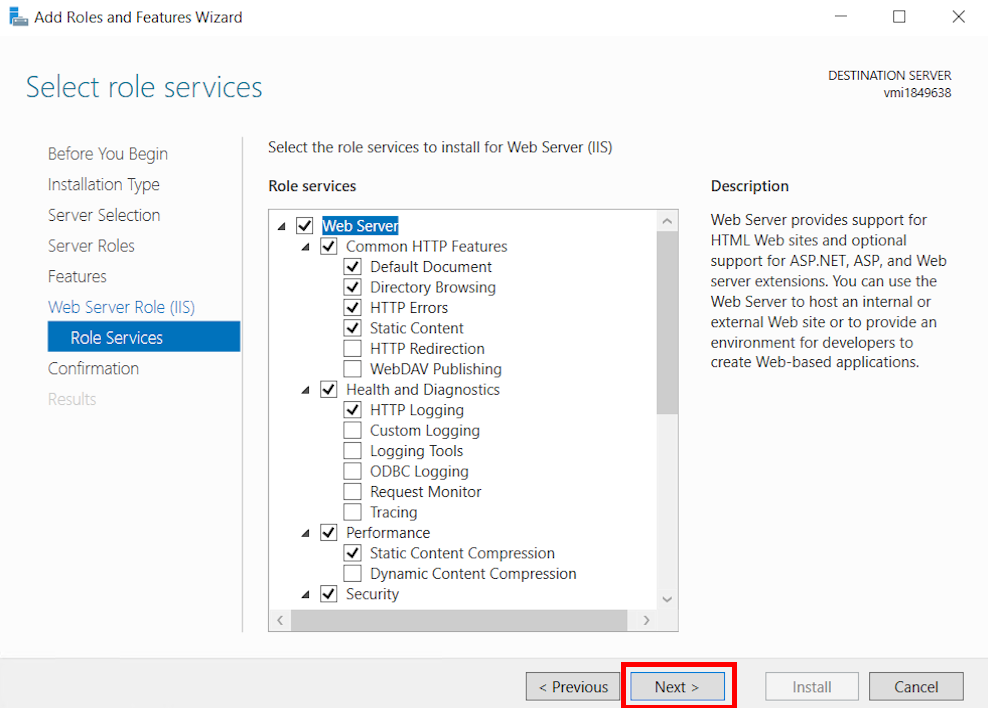
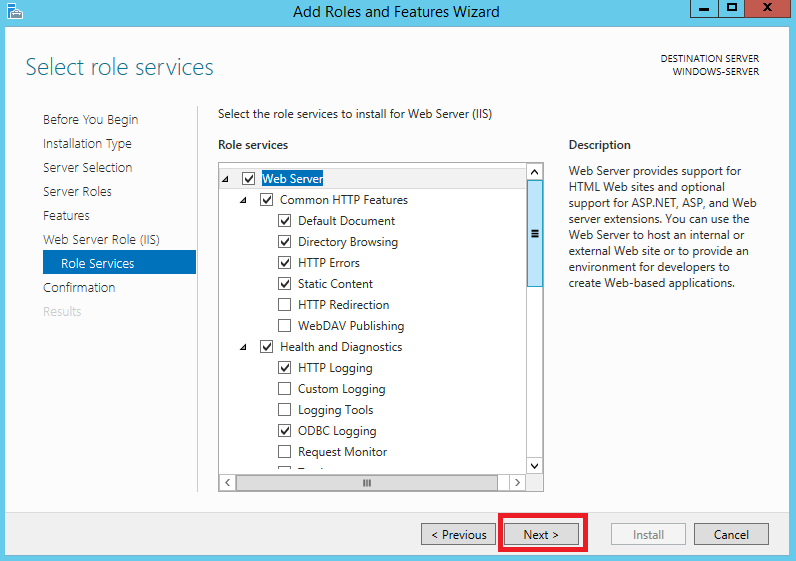
Select Role Services.
The default settings are usually sufficient. Ensure that the basic services you need are selected.
Click Next.
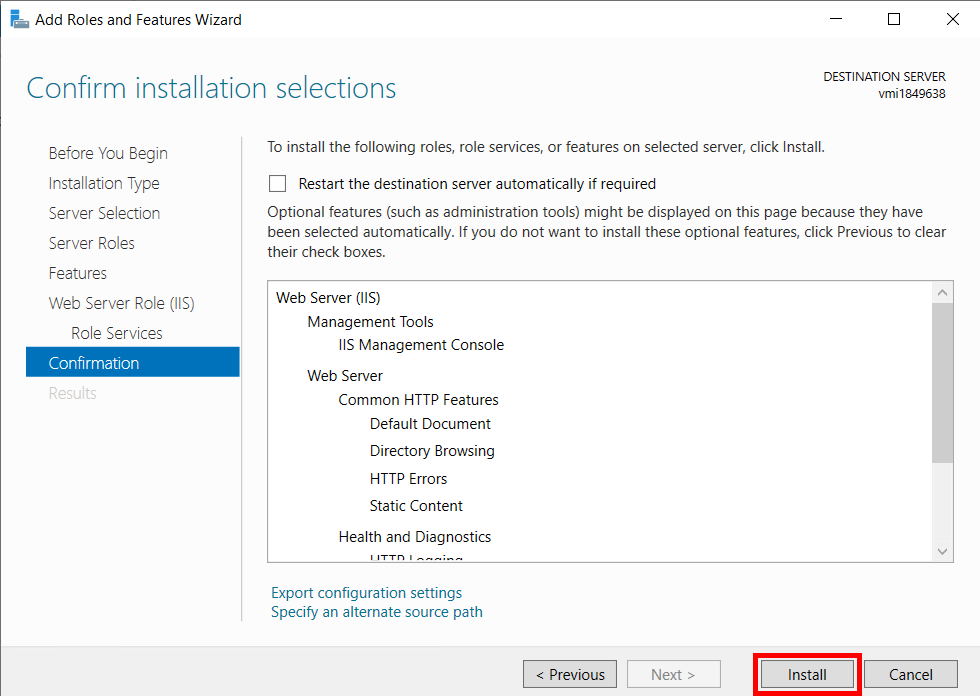
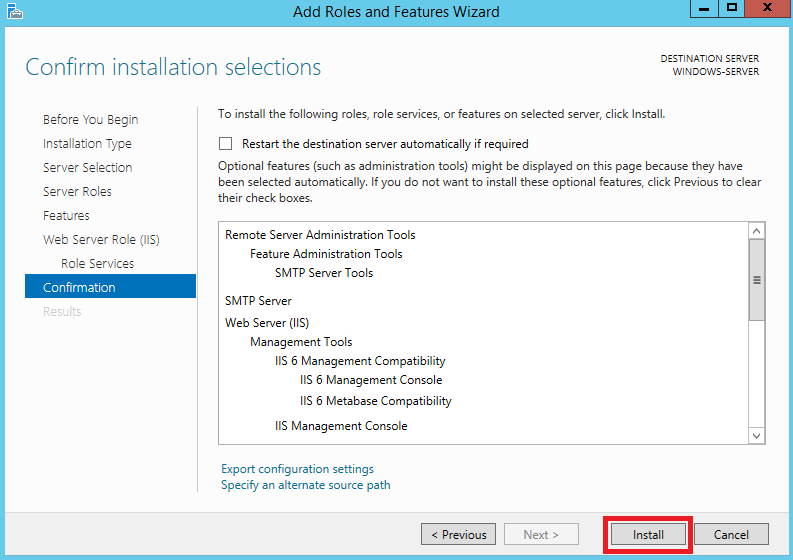
Review your selections and click Install.
The installation process will begin. Wait for it to complete.
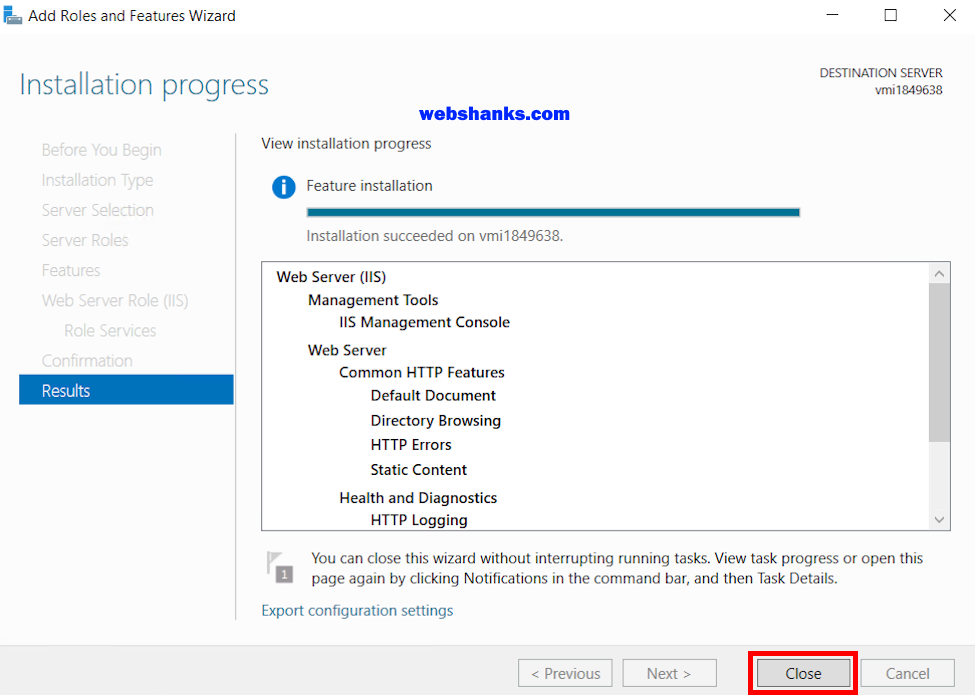
Once the installation is complete, click Close. Restart your server.
Step 6: Run the Installer
Locate the downloaded installer file and double-click to run it.
Follow the on-screen instructions to begin the installation process.
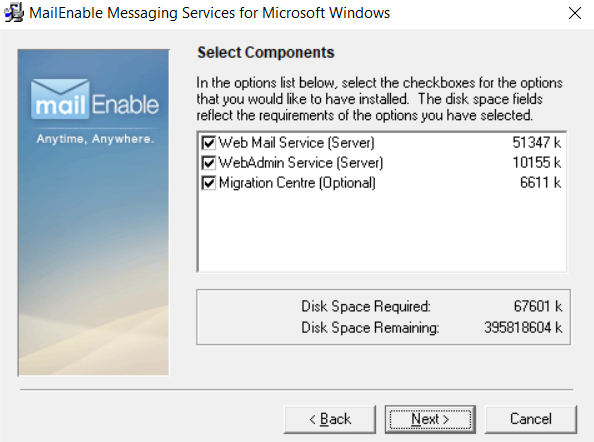
Select components. Be sure to choose the three options.
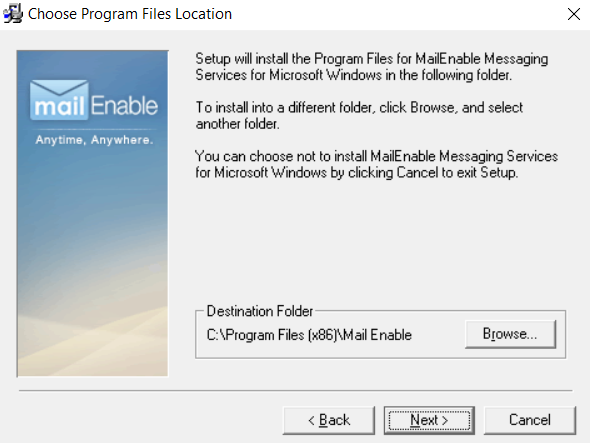
Select a destination folder. The default location is Program Files.
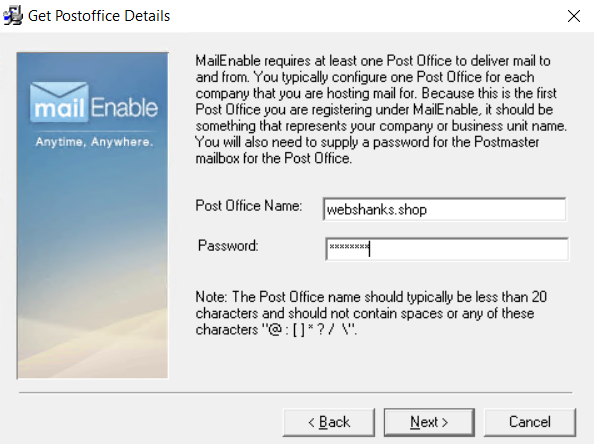
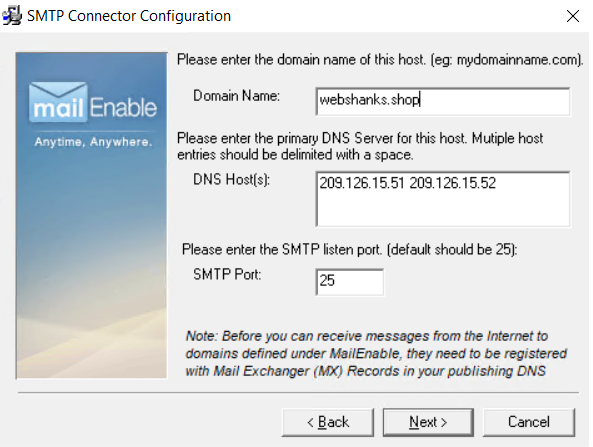
Get Postoffice details. You should enter your domain and assign a password.
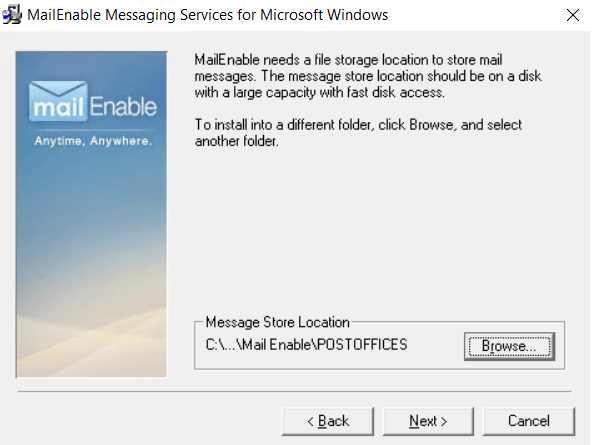
MailEnable needs a file storage to store email messages. Just choose the default location.
Enter your domain. Just use the default DNS and use port 25.
Start the installation by clicking Next.
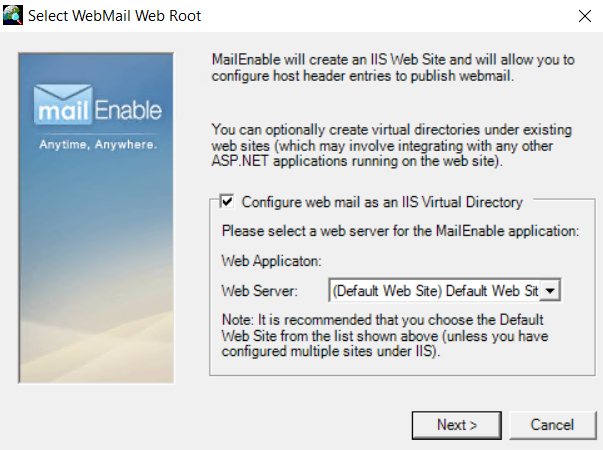
You will be prompted to select a web server. Just choose the default and click Next.
Step 7: Configuring MailEnable
After installation, you need to configure MailEnable to start handling emails.
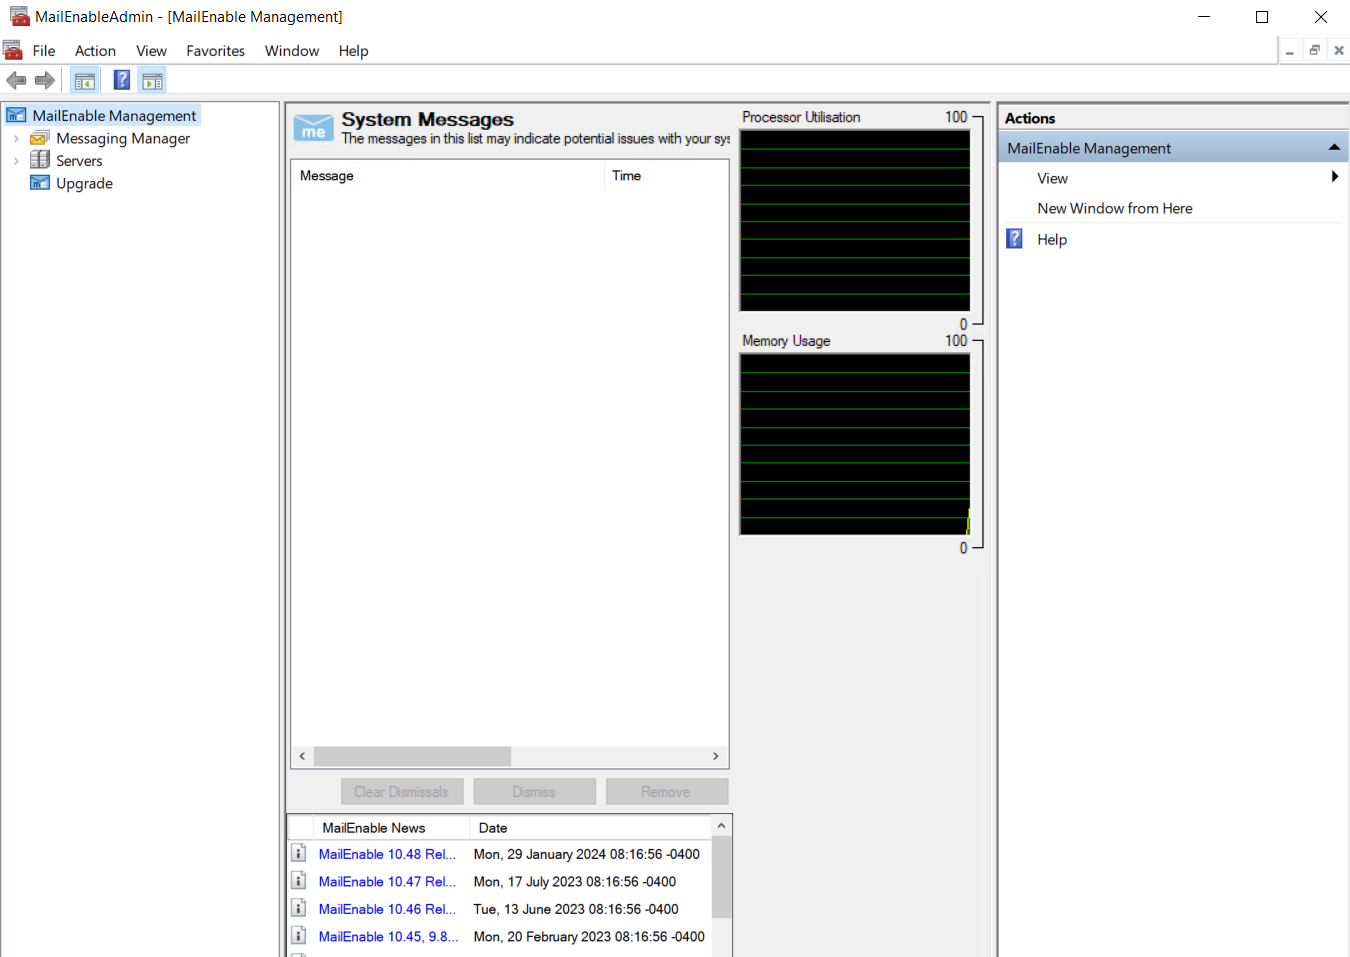
Open MailEnable Management Console: Find this in the Start menu and search MailEnable.
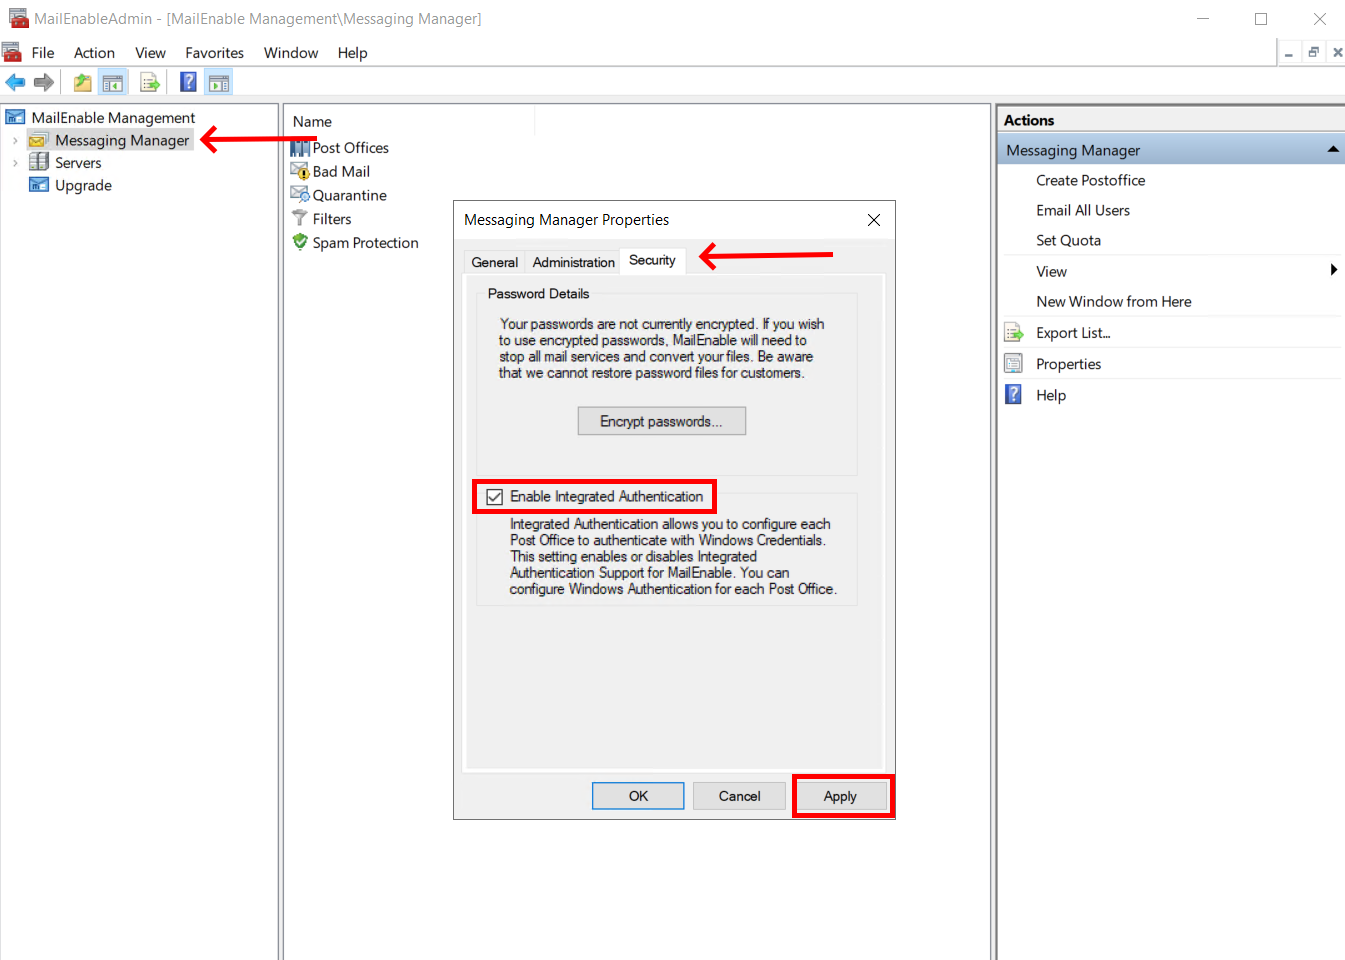
First, we need to enable integrated authentication.
Right-click Messaging Manager > Properties. Select the Security tab and check Enable Integrated Authentication.
Click Apply.
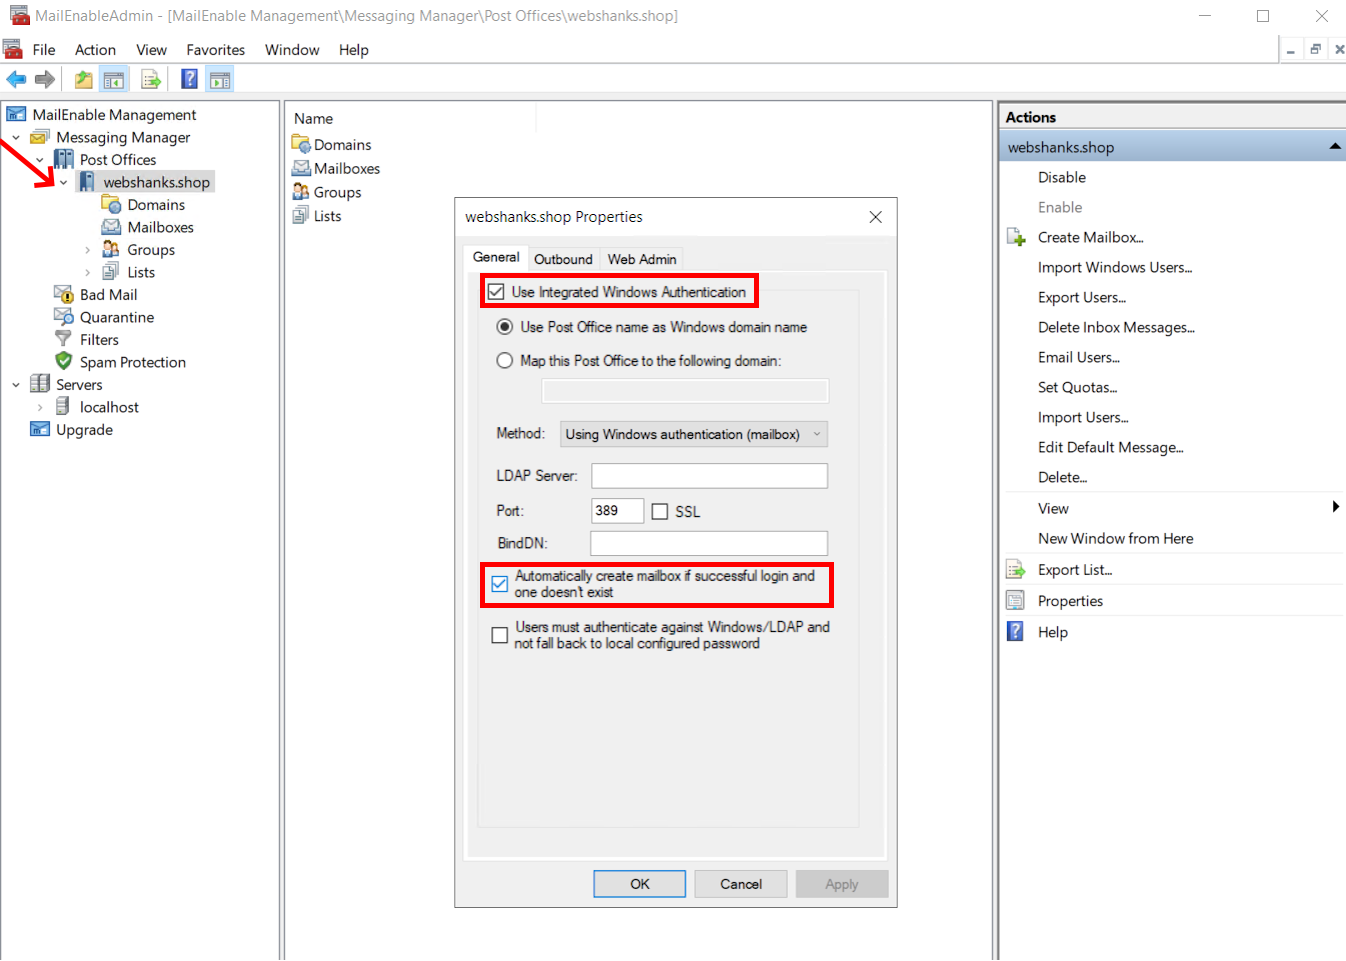
Next, select your domain and click Properties on the right side of the menu.
Check Use Integrated Authentication and Automatically create mailbox if successful login and one doesn’t exist.
Next, we will create a self-signed certificate so that we can use authentication on our inbound and outbound connections.
In the Start menu, search for IIS.
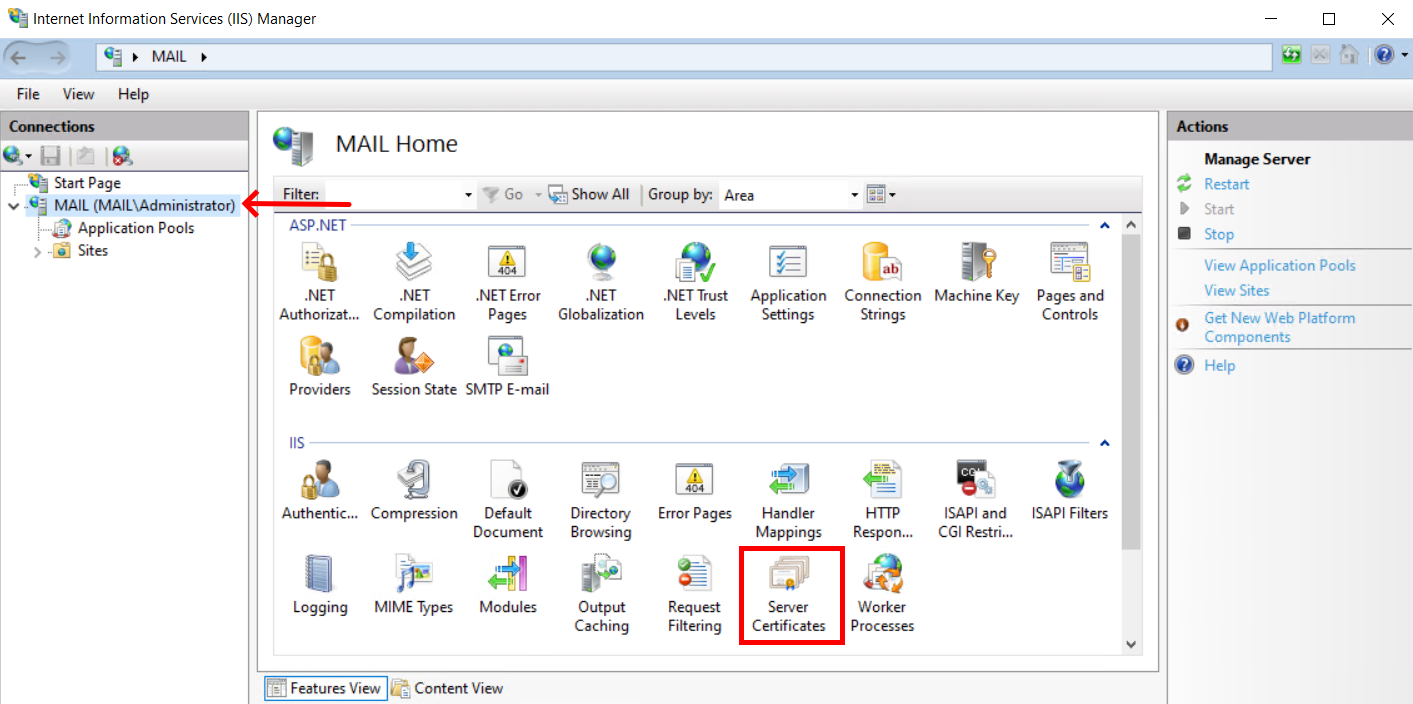
Choose the localhost and double click Server Certificates.
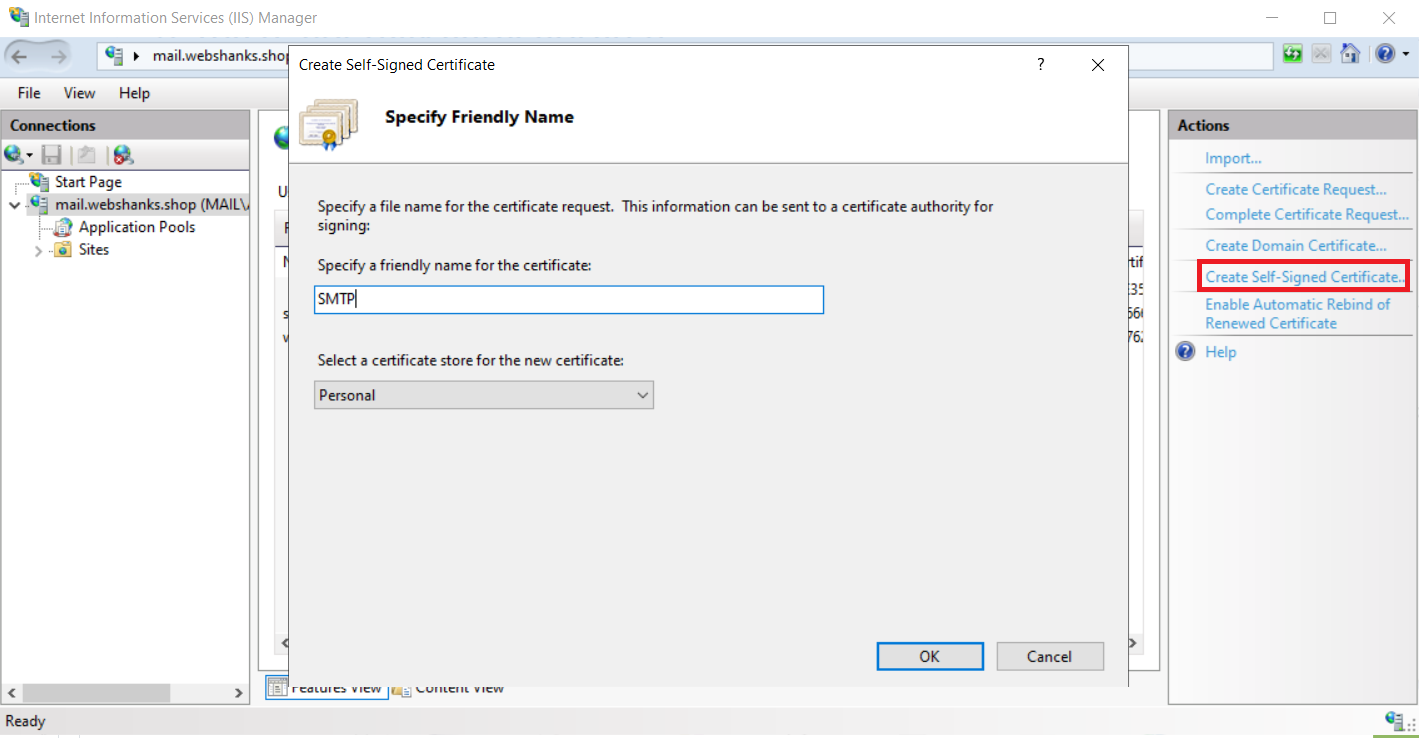
We will issue a Self-Signed certificate for our local host.
Click Create Self-Signed Certificate and specify a certificate name. Then click OK.
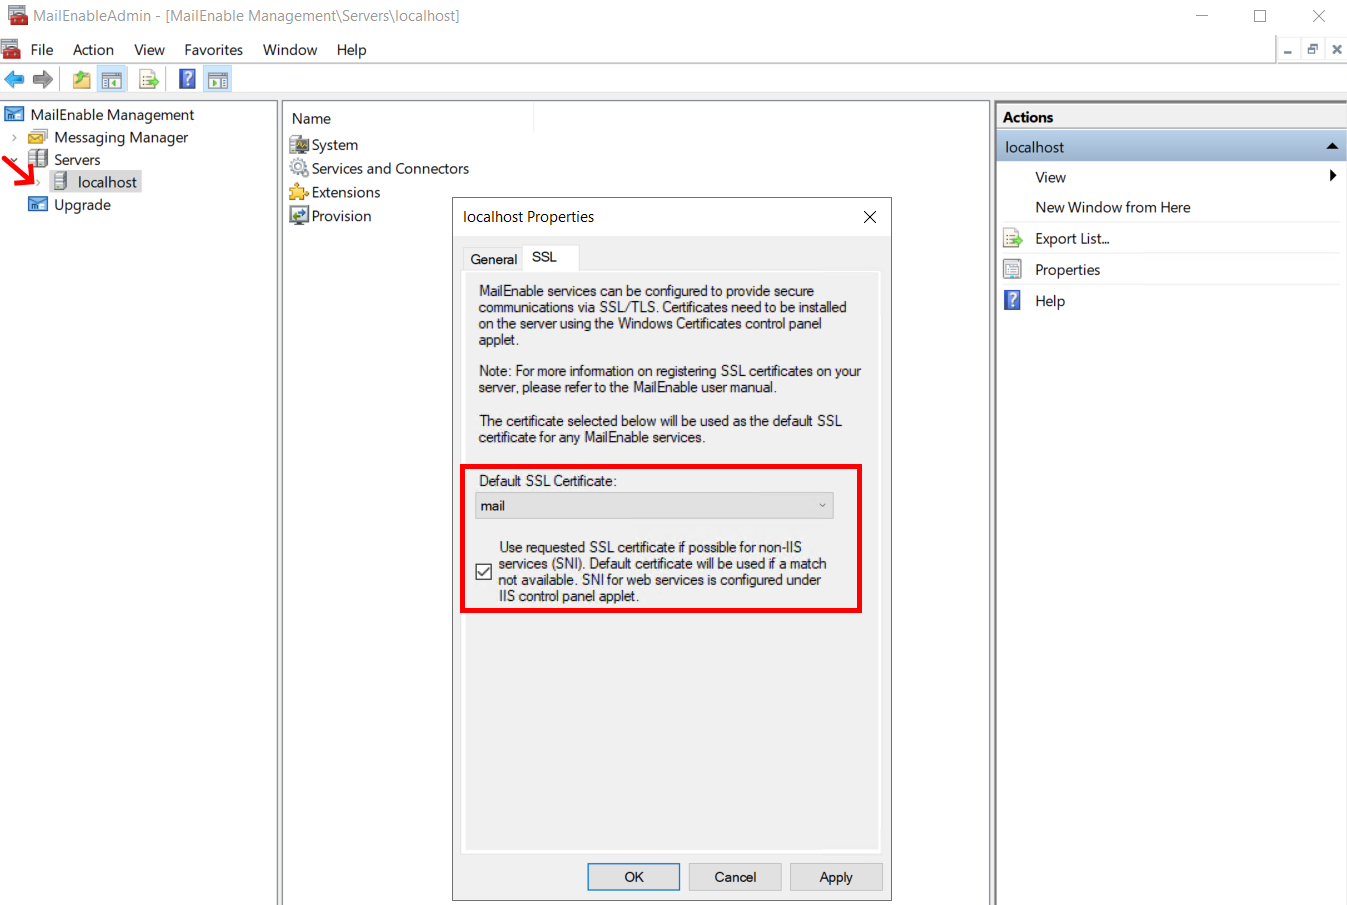
Now that we have created a self-signed certificate, we will use it on our servers.
In MailEnable, go to Servers > localhost > on the right menu choose Properties > SSL. Then check the box and click Apply and OK.
We will now configure SMTP and IMAP services so that we can send and receive email messages.
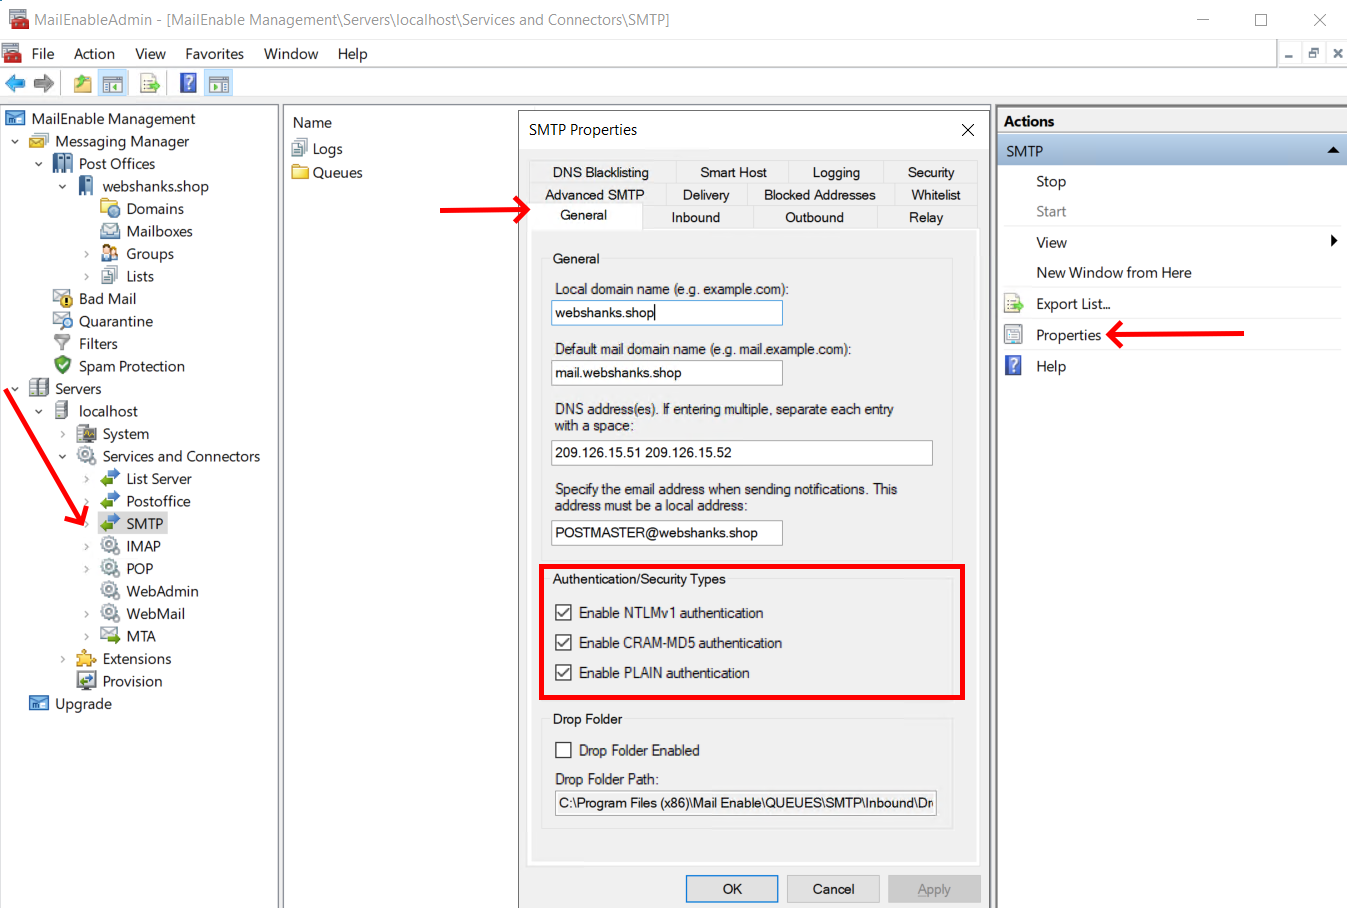
Go to Services > localhost > Services and Connectors > SMTP.
Click Properties on the right menu and select the General tab.
Set the Local domain with your own domain and default mail domain to mail. Then click Apply. The SMTP services will restart.
Mark all checkboxes under Authentication/Security Types.
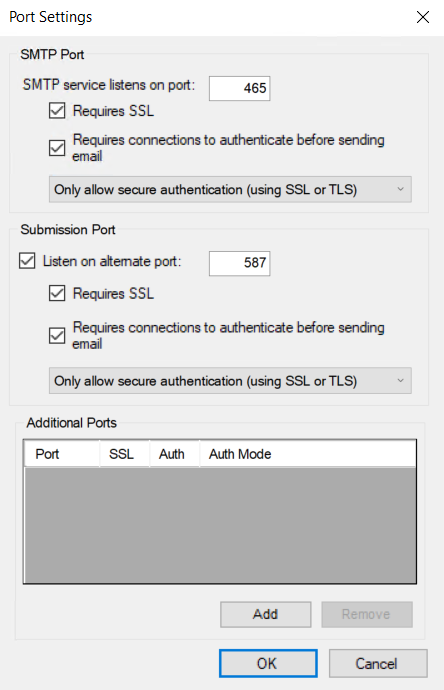
Next, go to the Inbound tab > Port Settings > Settings.
You can choose to have port 25 without authentication, but in this tutorial, we will be using Ports 465 and 587. Follow the settings I’ve made on the image below.
Click OK and Apply changes. The SMTP services will restart.
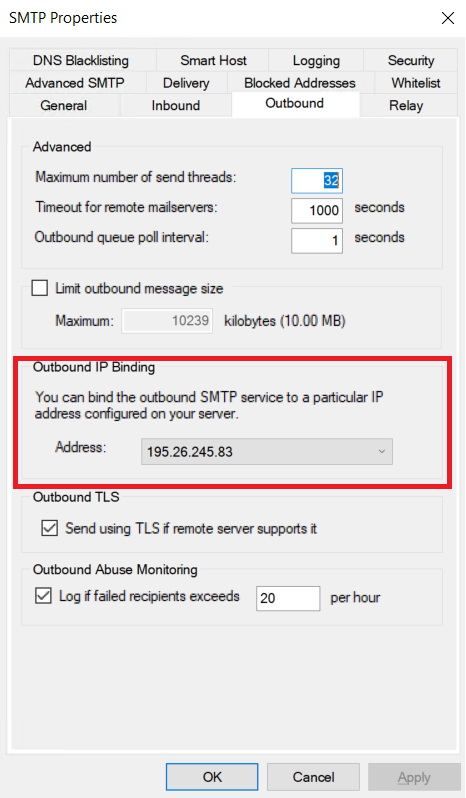
On the Outbound Tab, select your IP address under Outbound IP Binding.
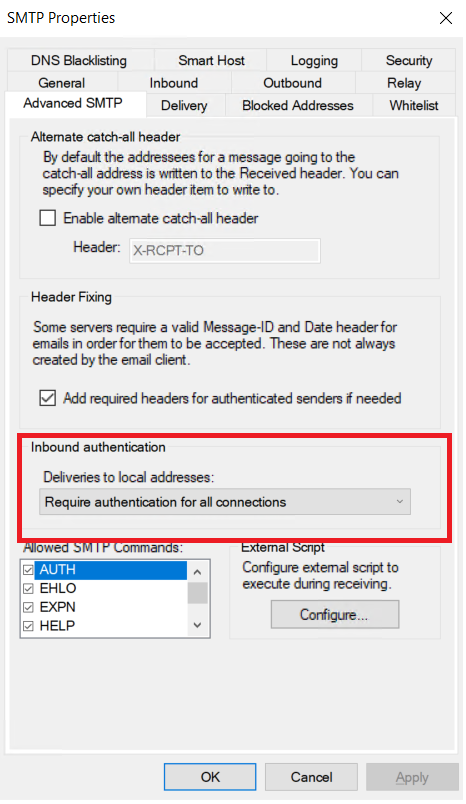
Go to the Advanced SMTP tab.
Under Inbound Authentication, select Require authentication for all connections.
Next, we will configure our IMAP.
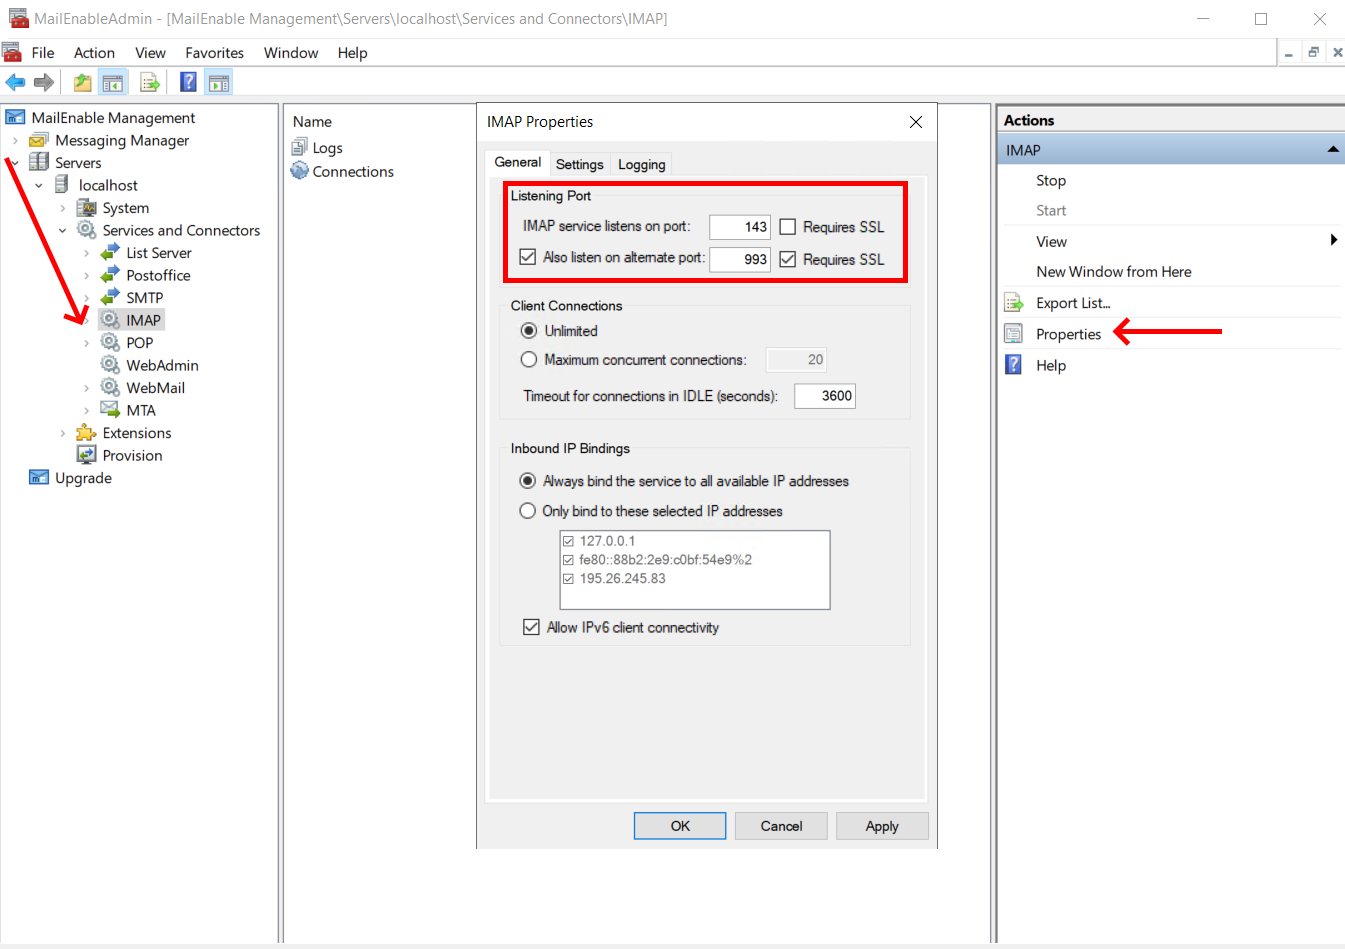
Go to Services > localhost >Services and Connectors > IMAP.
Check the box Also listen on the alternate port and set it to 993 and check the Require SSL checkbox.
Next, on the Settings tab, mark all checkboxes under the Security option.
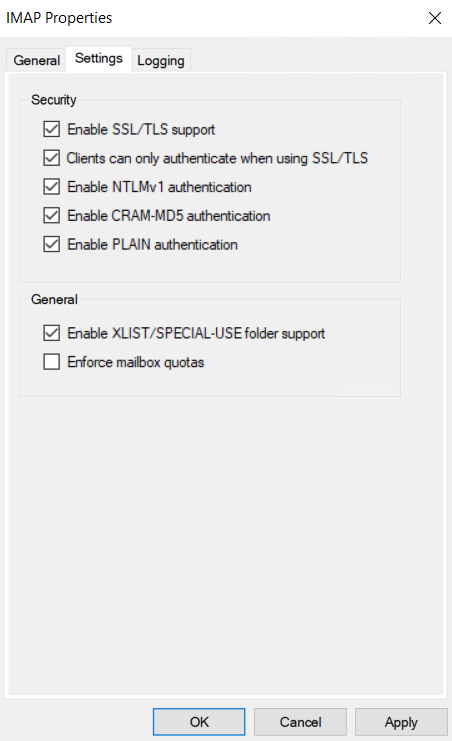
Click OK and Apply changes. The IMAP services will restart.
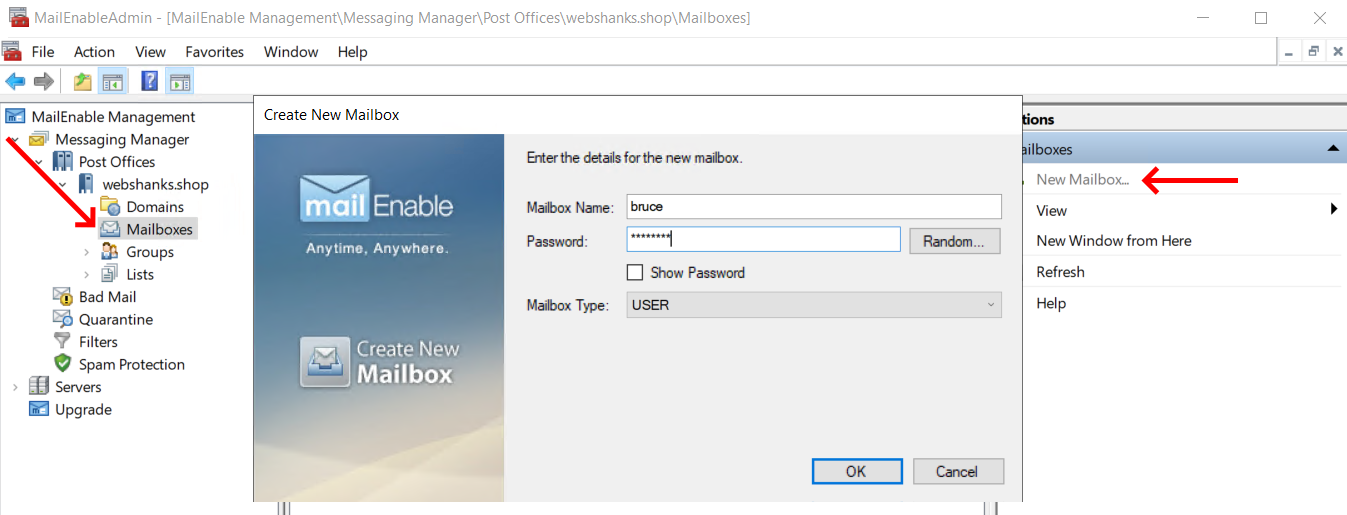
Now our SMTP and IMAP settings are configured, we will add mailboxes.
Expand Messaging Manager > Post Offices > Your Domain > Mailboxes and click New Mailbox.
I’d like to restart my server after this part for the mail domain to take effect.
Step 8. Map DNS Records and Reverse DNS
Now our MailEnable is set, we need to map our DNS
Create a free account on Cloudflare.
Login to your Namecheap and set the custom DNS to Cloudflare’s nameservers.

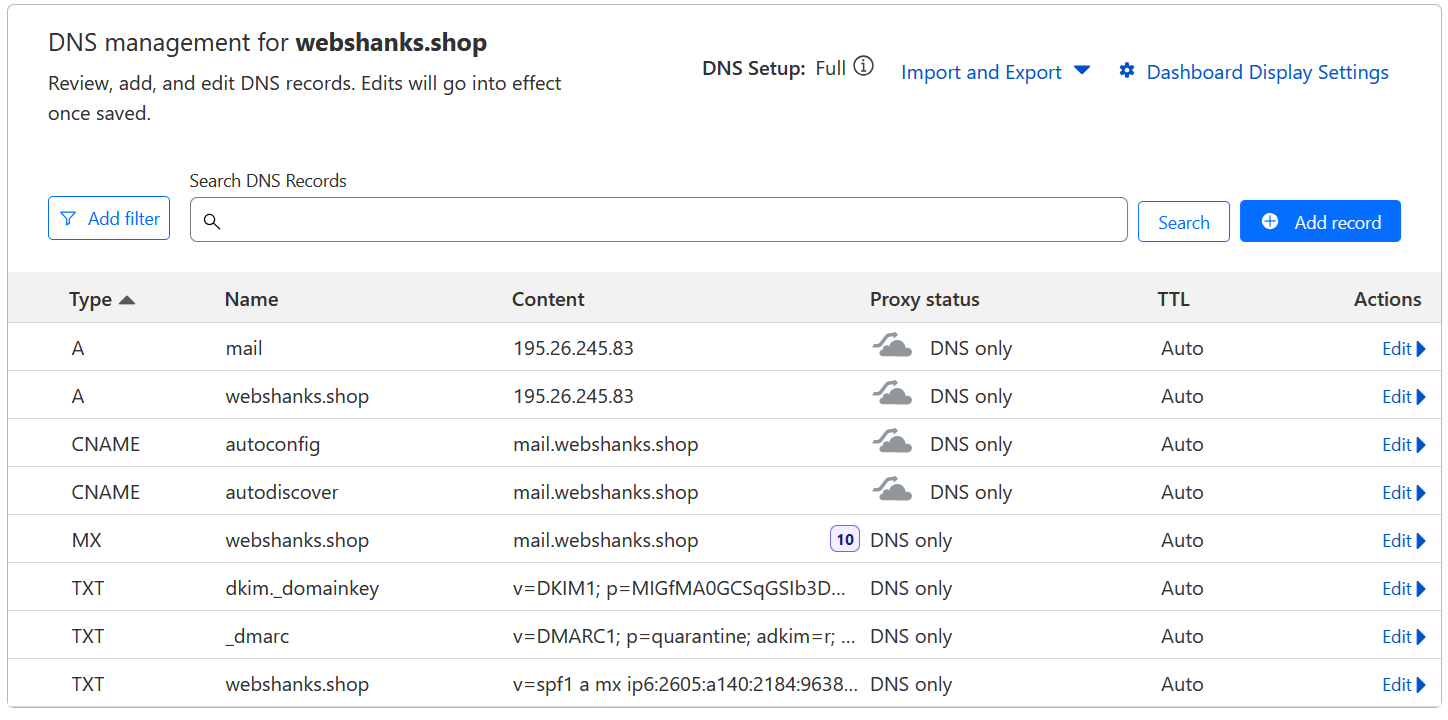
Set the A, MX, SPF, DKIM and DMARC records.
For A, CNAME, and MX records:
| Type | Name | Content/Value |
| A | @ | yourServerIP |
| A | yourServerIP | |
| CNAME | autoconfig | mail.webshanks.shop |
| CNAME | autodiscover | mail.webshanks.shop |
| MX | @ | mail.webshanks.shop priority 10 |
For SPF, DKIM, and DMARC records:
SPF Record
Be sure to replace your IPv6 and IPv4 with our own IPs.
- Type: TXT Record
- Host: @
- Value: v=spf1 a mx ip6:2a01:7a7:2:3343::f67:30f7 ip4:195.26.245.83 -all
- TTL: Automatic
DMARC Record
We will use the following records.
- Type: TXT Record
- Name: _dmarc
- Value: v=DMARC1; p=quarantine; adkim=r; aspf=r; pct=100
- TTL: Automatic
DKIM Record
For our DKIM record, we will generate one on MailEnable.
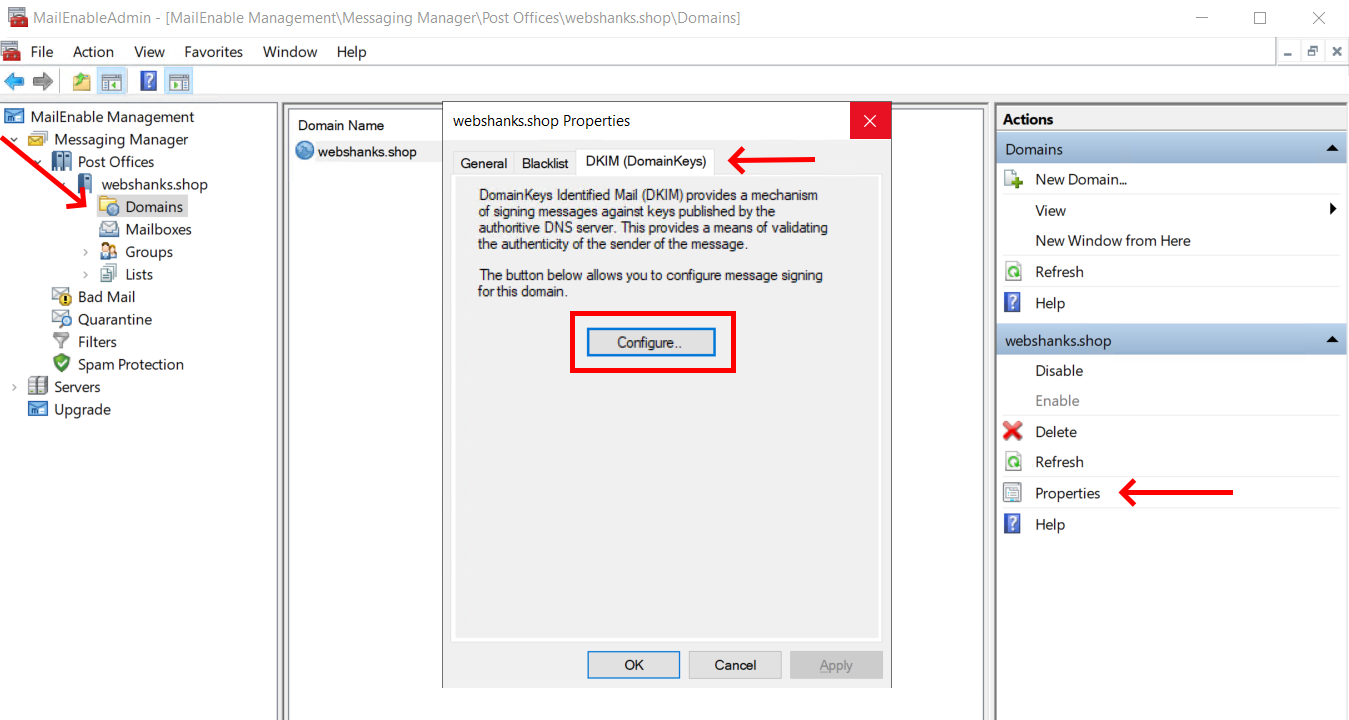
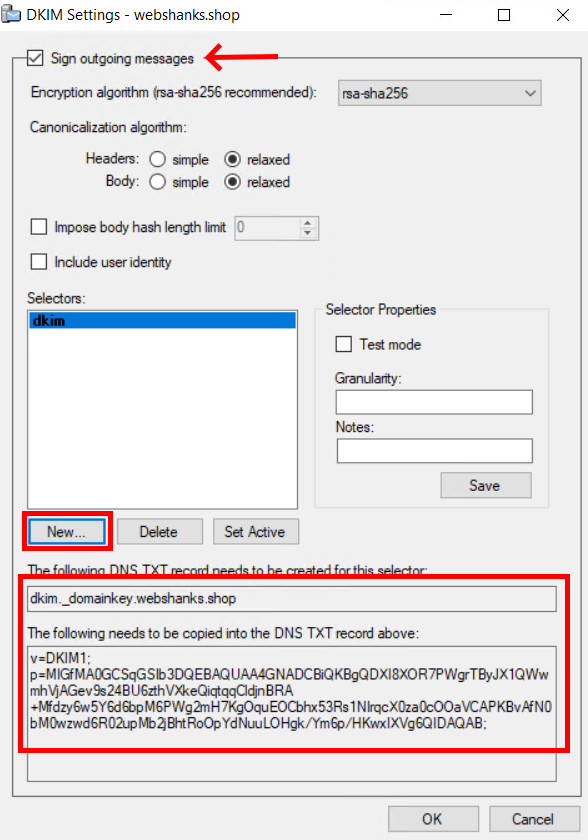
Check the Sign outgoing messages.
Create a New selector. You can name it like dkim or something similar. I’d like to add t=s tag in the DKIM.
Let’s take a look at our DNS management.
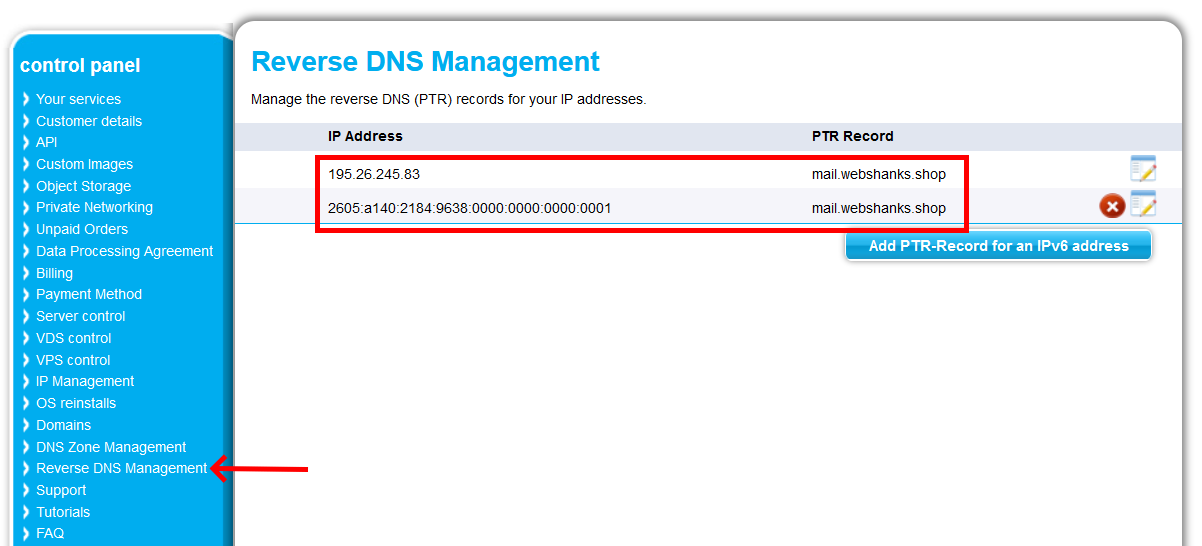
Our final step in our mapping is the reverse DNS.
Head to your Contabo VPS control panel and go to Reverse DNS management.
Set it to mail.yourdomain.com
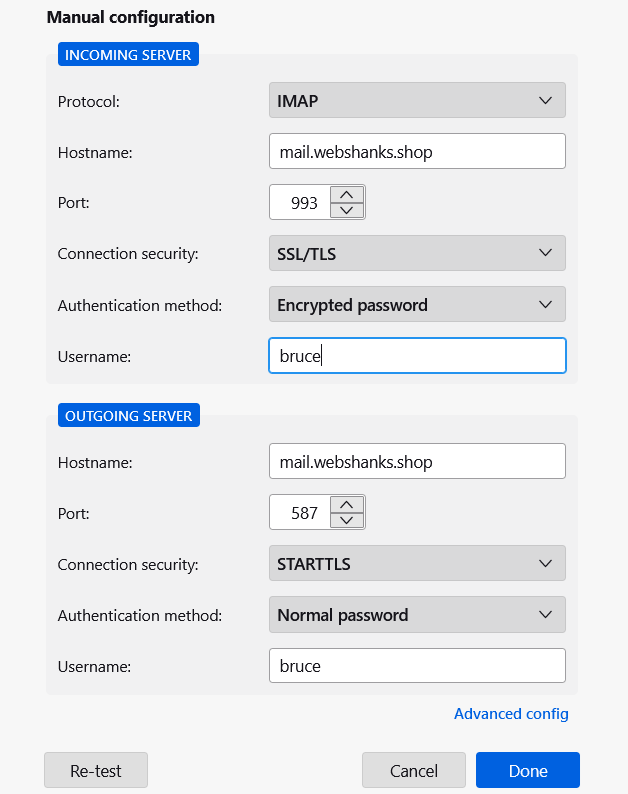
Step 9: Test our Email
For us to send an email, we will be using an email client. Plug the SMTP/IMAP relays and we are good to go!
I’m using Thunderbird to send and receive emails.
Now let’s send a test email to Gmail and Proton Mail to see if we can receive it. We’ll also send an email to Mail-Tester to see our results.
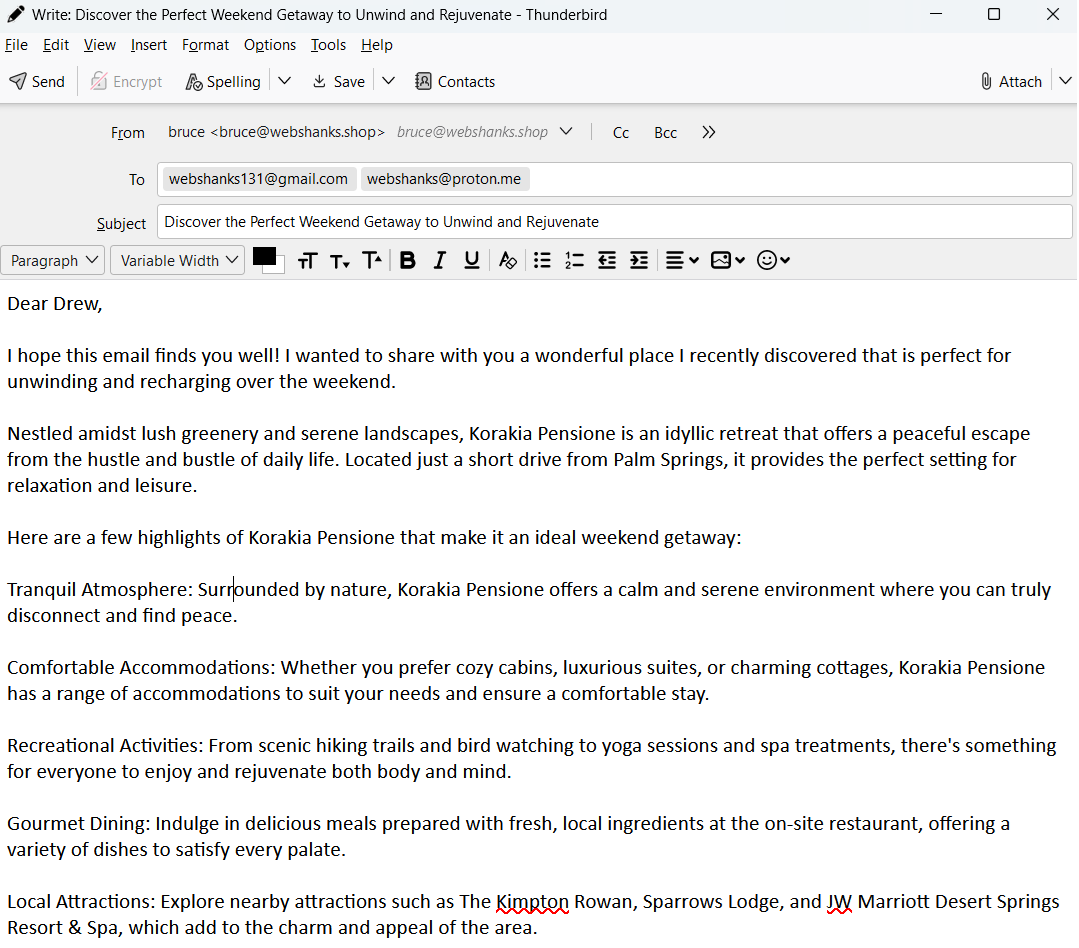
Let’s see the results.
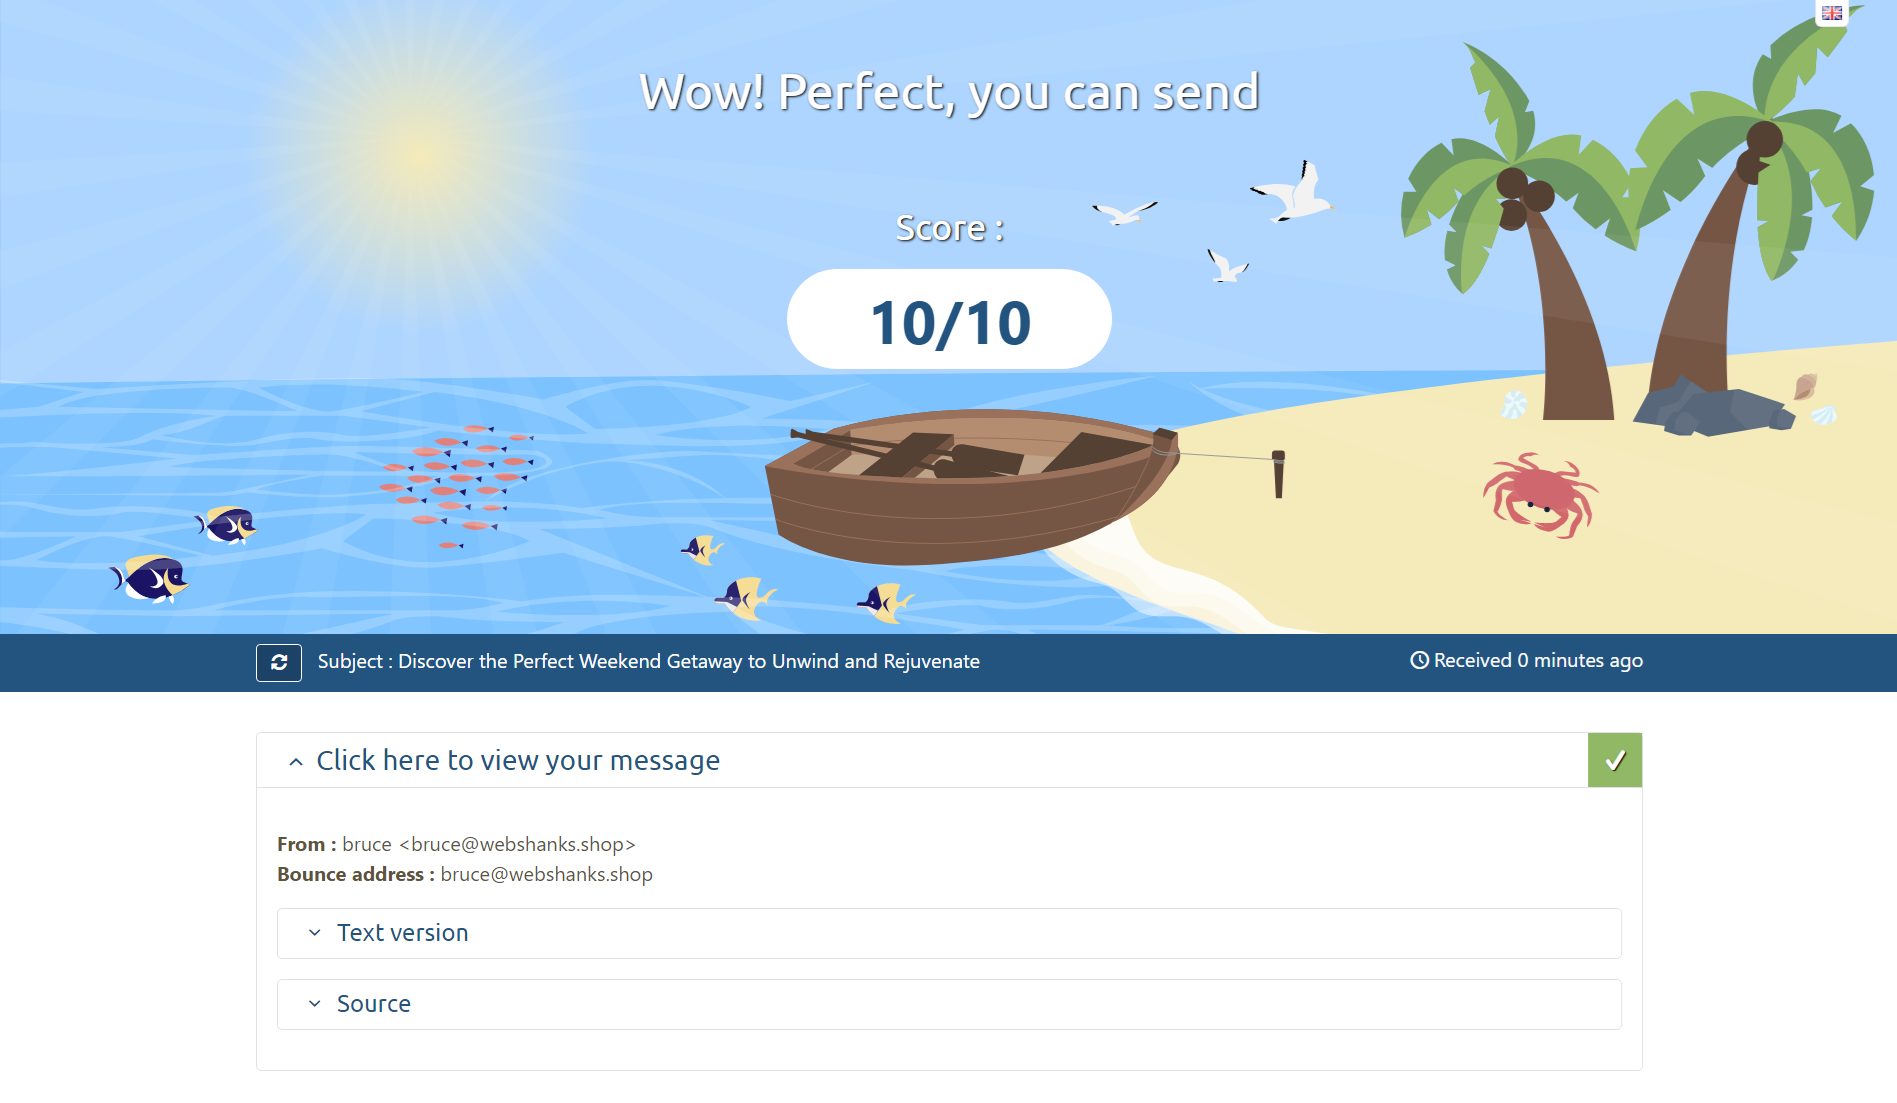
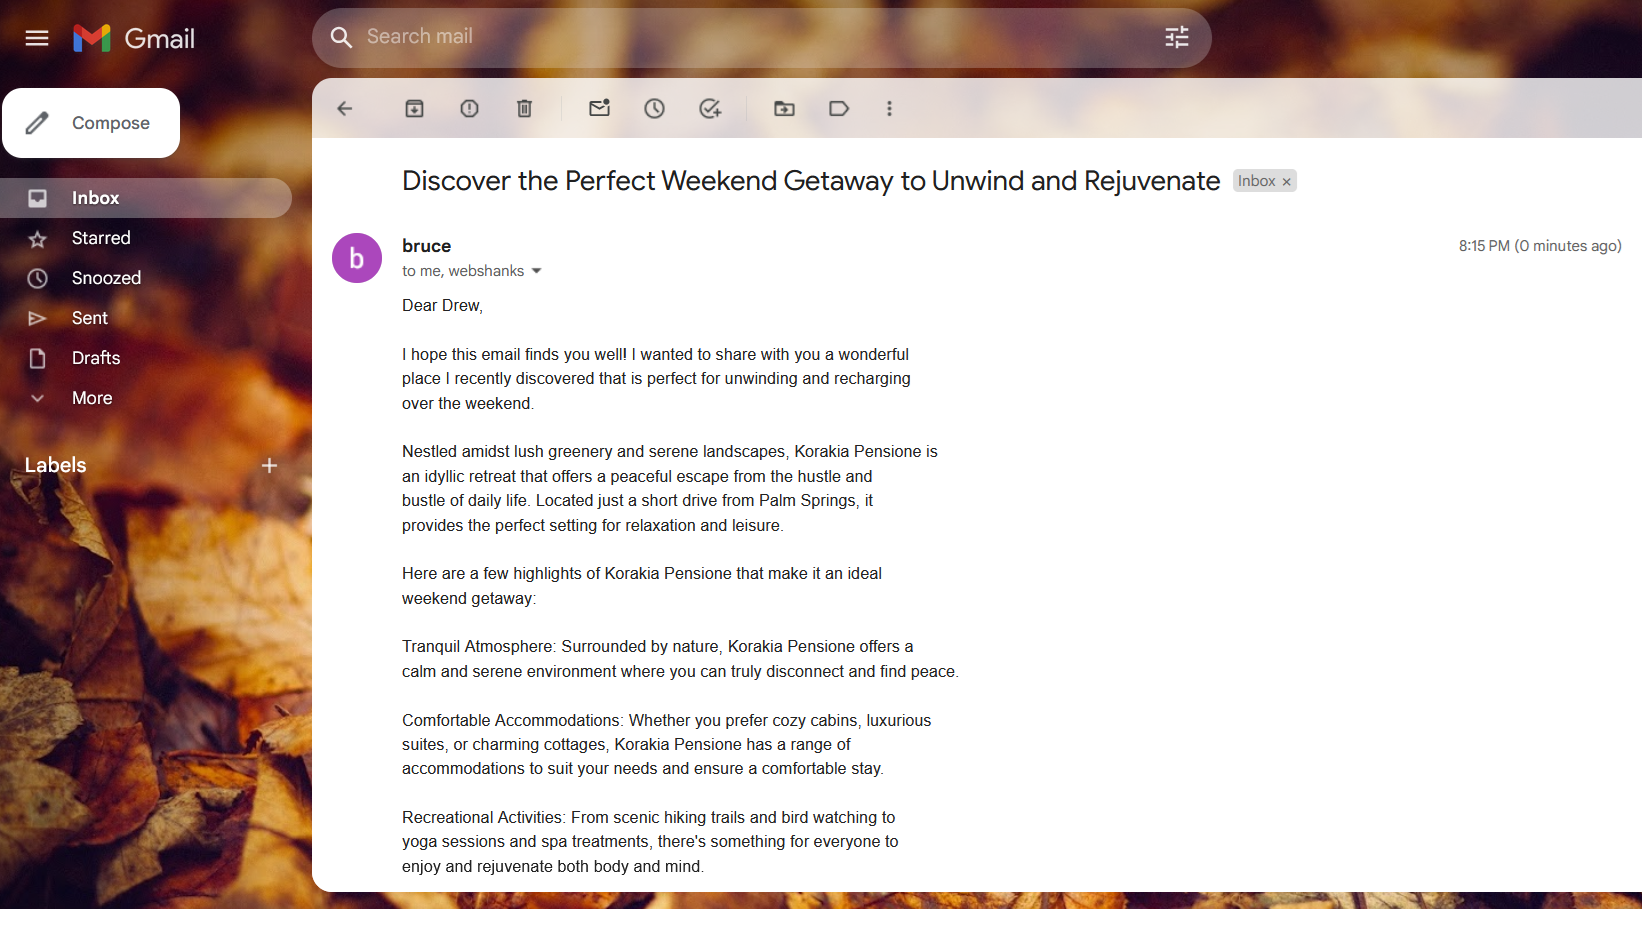
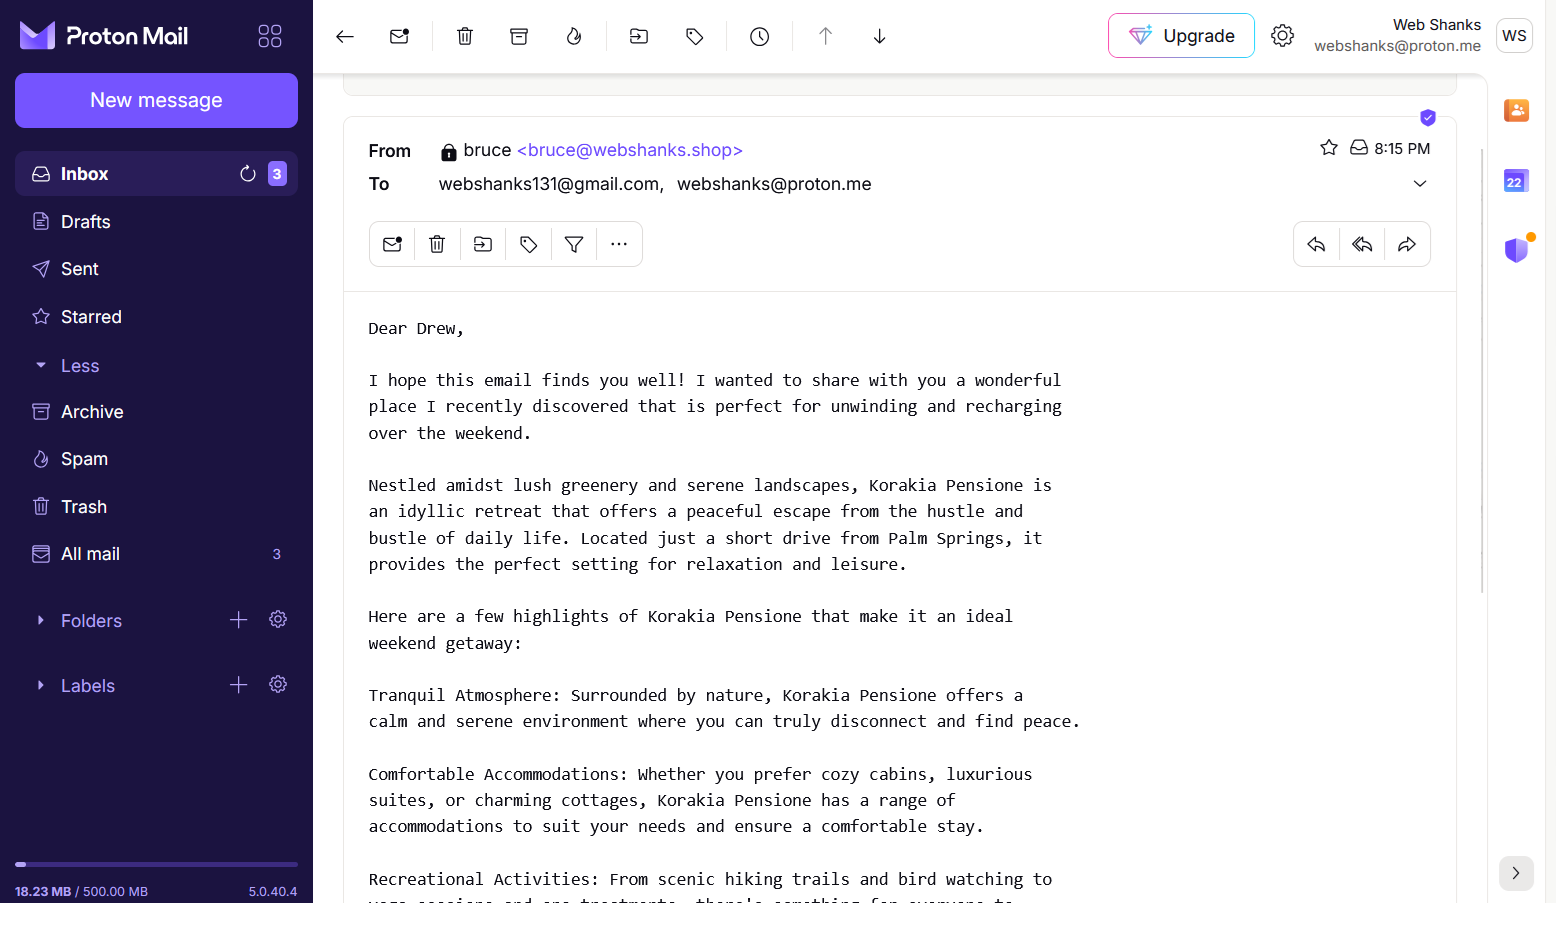
Hurrah we can now send emails!
Let’s try to send an email to the hard-to-get AOL Mail.
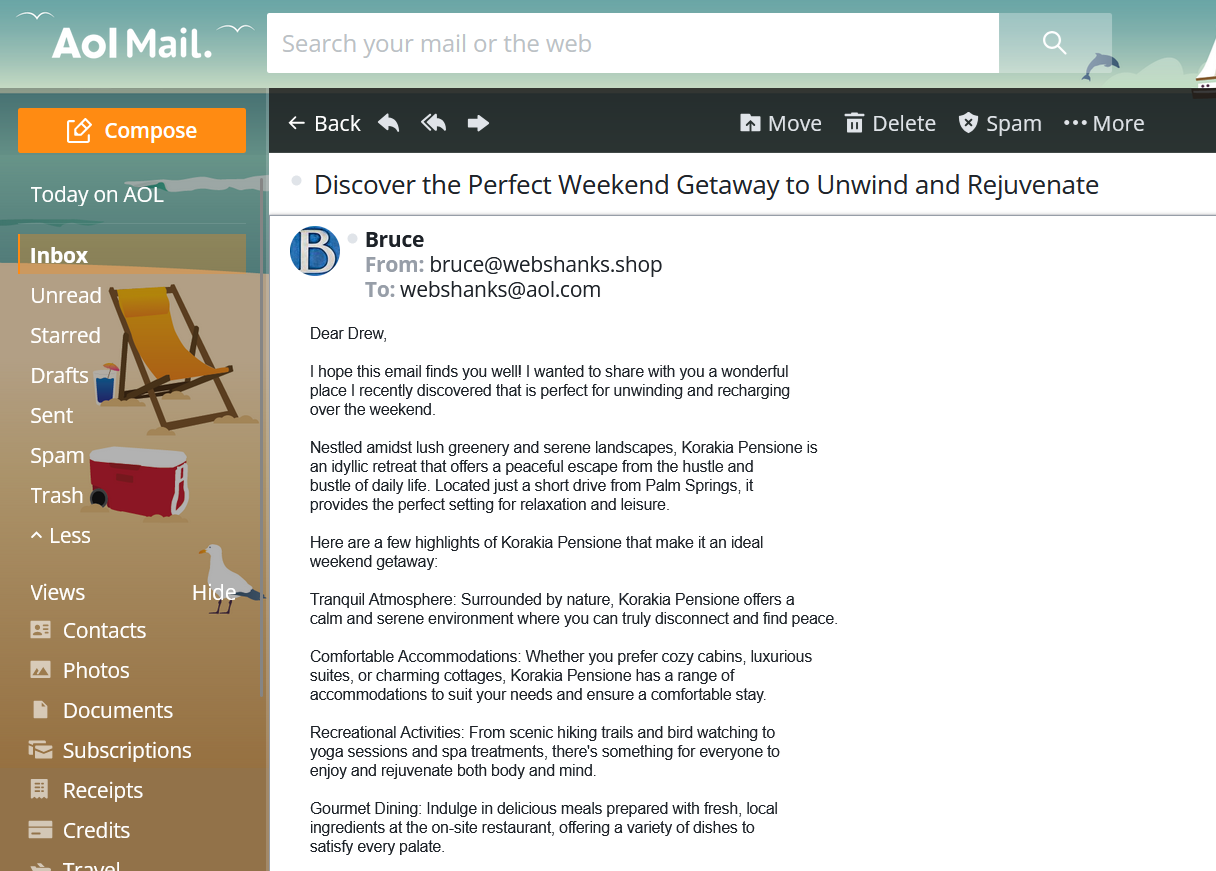
Surprisingly, we received the mail directly to our inbox!
I’ve also sent this to my personal AOL Mail and it went right through the inbox. It’s not a coincidence!
FAQs
What versions of Windows Server does MailEnable support?
MailEnable supports all recent versions of Windows Server, including Windows Server 2022. For more information about their system requirements go here.
Can MailEnable handle large volumes of emails?
Yes, MailEnable is designed to handle large volumes of emails efficiently, especially the Professional and Enterprise editions.
Is there a webmail interface available with MailEnable?
Yes, MailEnable includes a webmail interface that can be accessed via a web browser, providing users with the ability to send and receive emails without needing a local email client.
How do I secure my MailEnable server?
Securing your MailEnable server involves configuring SSL/TLS for encrypted communications, setting up SPF, DKIM, and DMARC records, and regularly updating the server and MailEnable software to patch any vulnerabilities.
Conclusion
Installing and configuring MailEnable on Windows Server 2022 is quite challenging if you are new to Windows Server and MailEnable. But you can follow my step-by-step guide to setup your own MailEnable mail server on a Windows Server.
If you find my tutorial useful, you can buy me a coffee.
You can also check out my Linux-based email servers like Docker Mailserver, aaPanel, mailcow, CyberPanel, or iRedmail.
For further assistance, refer to the MailEnable Documentation or seek support from the MailEnable community.
Firstly, we wish to clarify that we have installed the mail server on Windows Server because it is mandatory DNS server for this to work. Using Windows Server as the operating system is not mandatory but against, you need a DNS server on a network computer (easy : on the same computer). For example : BIND (For Windows) program.
For information :
— If you use Windows Server as the operating system, you must install and configure the role «DNS Server». To do this, read our tutorial on Windows Server 2008: «Windows Server 2008 — DNS».
— This tutorial was made in Windows Server 2008. The windows may differ following versions thereof.
— The mail server is «hMailServer v5.3.3-B1879» (Production release)
- hMailServer installation
- hMailServer Database Setup
- hMailServer Security
- hMailServer Administrator
- Configuration
- Firewall
- Thunderbird client
1. hMailServer installation

Let «Full Installation» selected.

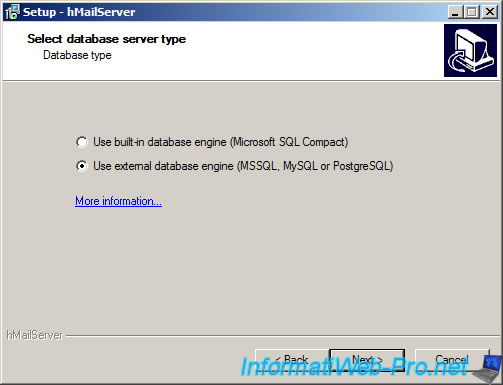
For the database containing the E-Mails, 2 choices available to you. Either a server SQL database integrated with hMailServer or MSSQL, MySQL or PostgreSQL external server.
For this tutorial, we installed WAMP which contains an Apache Web server (with PHP module) and a database server MySQL database. This will allow us to access the data of the mail server via PHPMyAdmin (or another similar script) through the web server.
Then click Install.

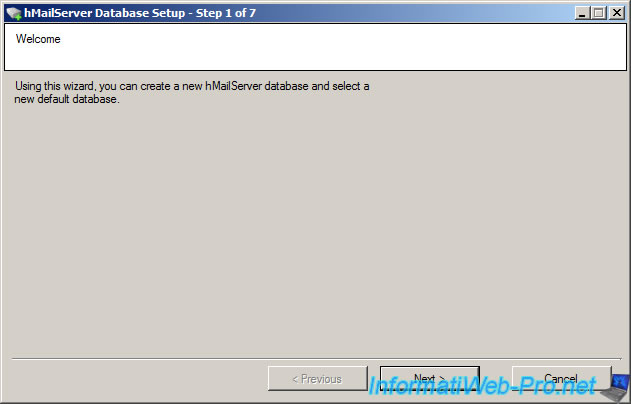
2. hMailServer Database Setup
The utility «hMailServer Database Setup» is displayed. It will allow you to install the database structure necessary for the operation of the mail server data.
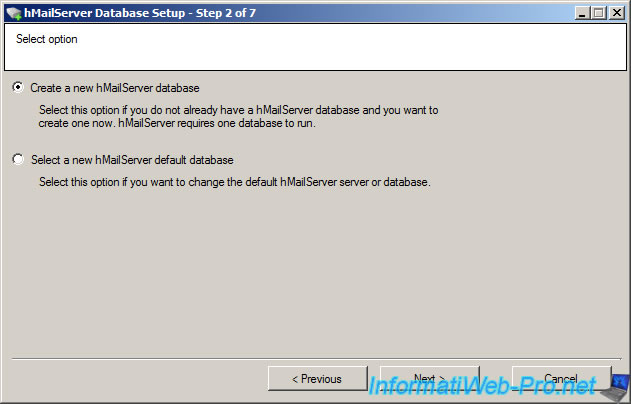
Select «Create a new hMailServer» if it is the first installation of the Mail server. Otherwise choose another option to reuse an ase data previously created with this program.
In our case it is a MySQL server.

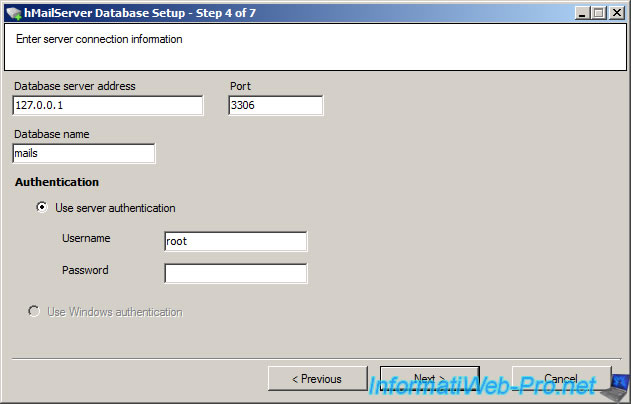
By default, the MySQL server is available with these settings (if the mail server is on the same machine as the MySQL server):
— Database server adress : 127.0.0.1 / Port : 3306
— Username : root
— Password : (no password). Warning : It is strongly recommended to secure the root account and create another user with password security.
You can put whatever you want as name database, but avoid spaces and long names.
Then you need to choose the Windows service that depends hMailServer. In our case, it depends on the service «wampmysqld» which represents the server MySQL database.
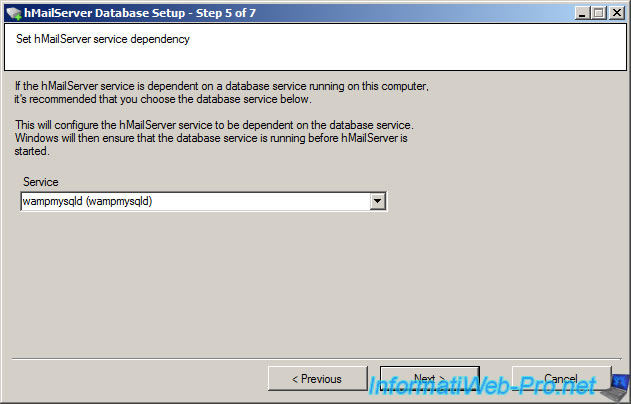
Then click «Next».
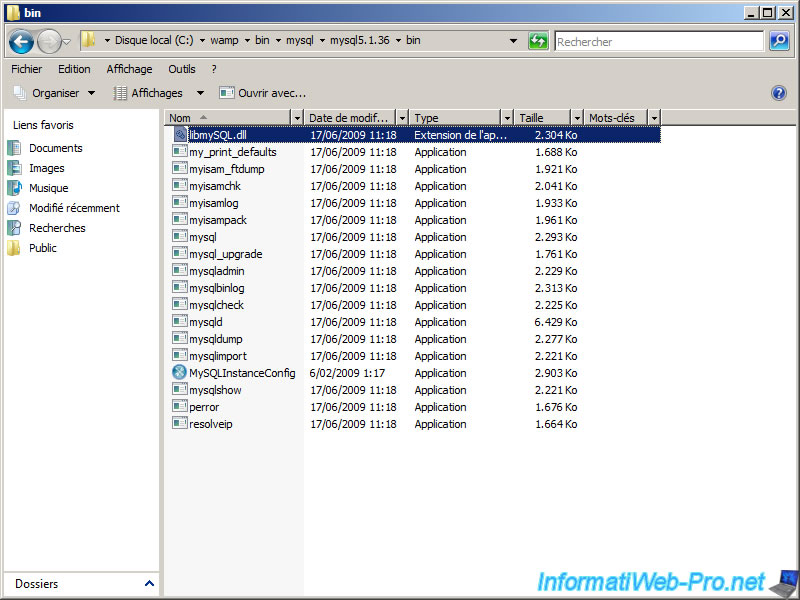
In the case of external MySQL server, hMailServer needs the «libmysql.dll (32 Bit)» file to be able to connect to it.
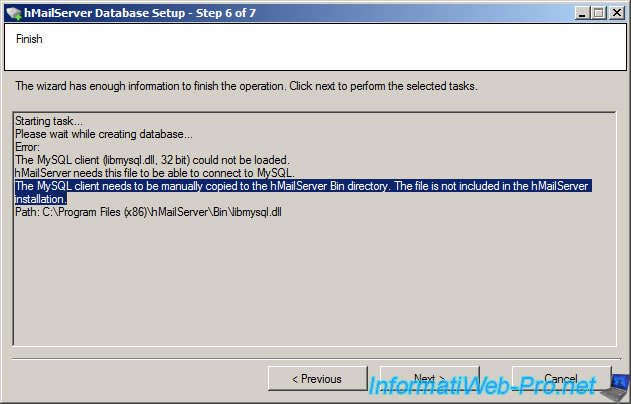
In Wamp, this file is located in «c:\wamp\bin\mysql\mysqlx.x.xx\bin». Copy this file into the folder specified by hMailServer (in our case : C:\Program Files (x86)\hMailServer\Bin\libmysql.dll).
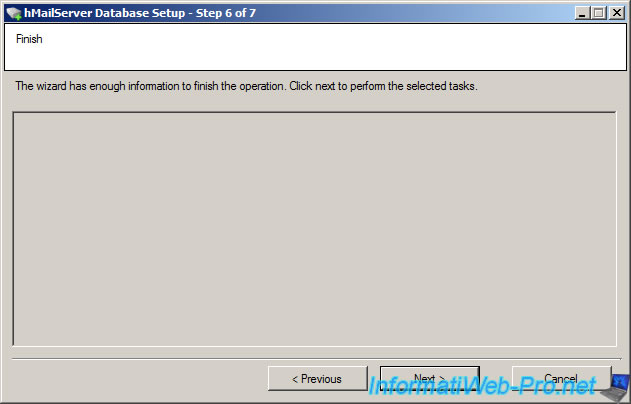
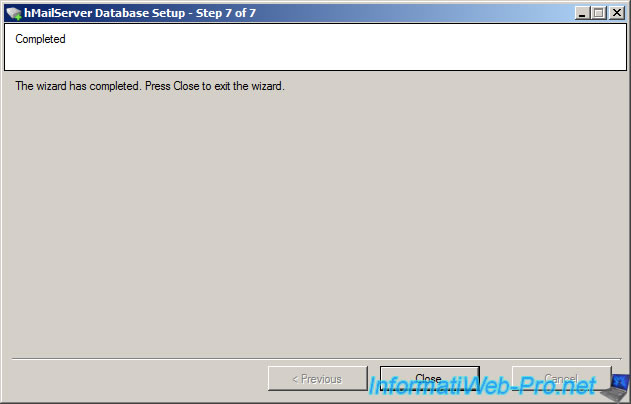
If all goes well, the database should be installed correctly.
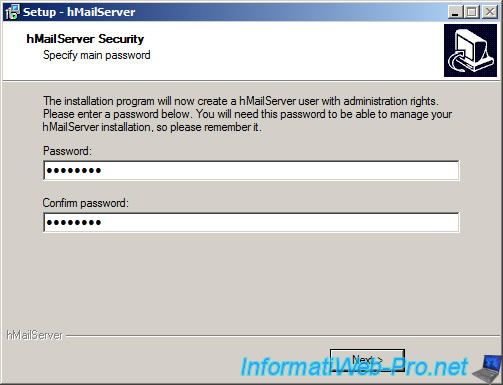
3. hMailServer Security
You must now define a password for the administration of the mail server via the «hMailServer Administrator» program.
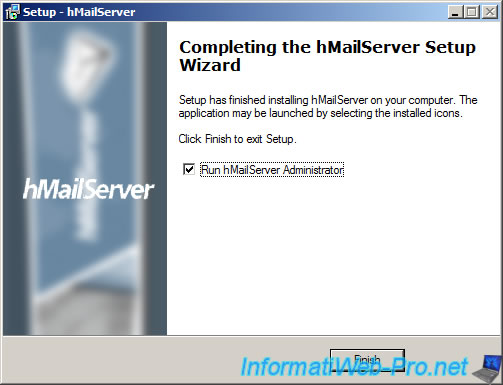
The installation is now complete. Leave the check box to automatically start the administration utility mail server.
4. hMailServer Administrator
Click the «Connect» button.
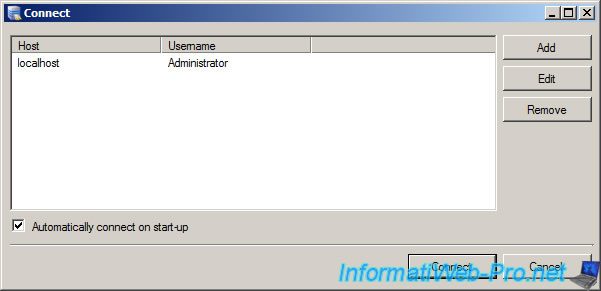
Enter the password you just set.
5. Configuration
We will now configure the mail server. The grounds, email accounts, SMTP server, …
To begin, click on the «Add Domain» button.
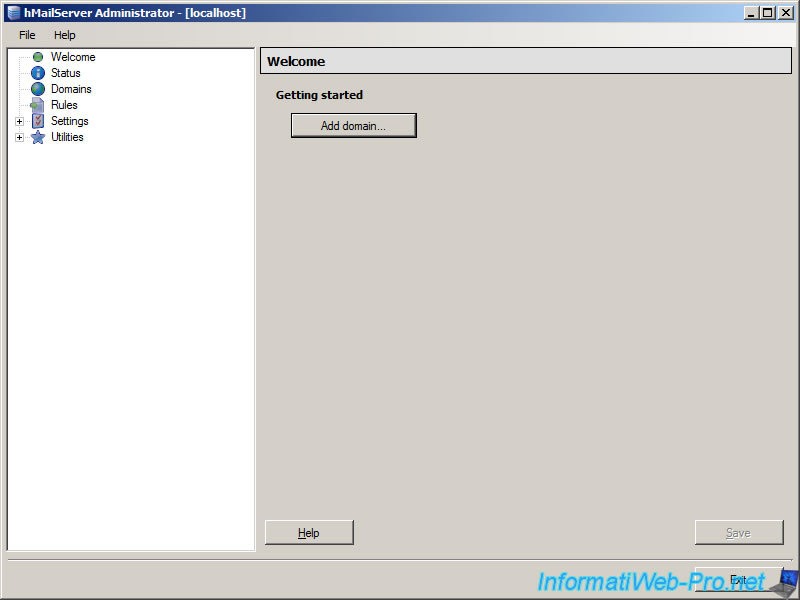
Enter your domain name (virtual if there is an installed and configured on your local home network DNS server or stored on the Internet if this mail server is accessible from outside the area).

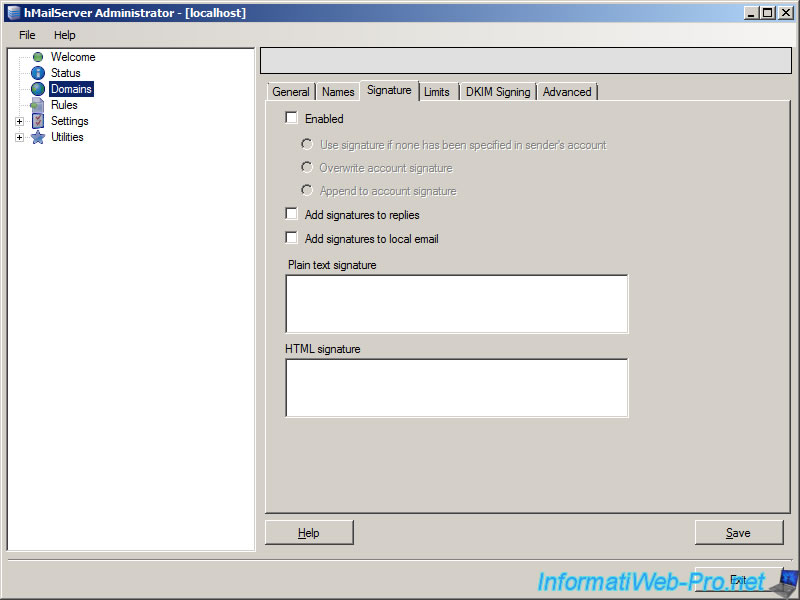
Optional : You can define a signature for emails sent through your mail server, a size limit (total size, size mail, …) electronic signatures (for SSL), …

User accounts (the famous mail address) is then added by going to «Domains -> InformatiWebLAN.net -> Accounts». Then click the «Add» button.
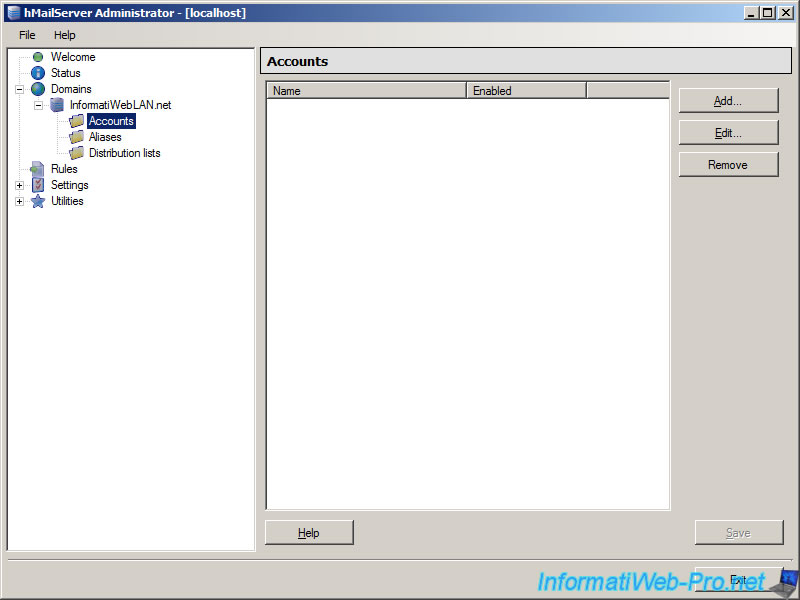
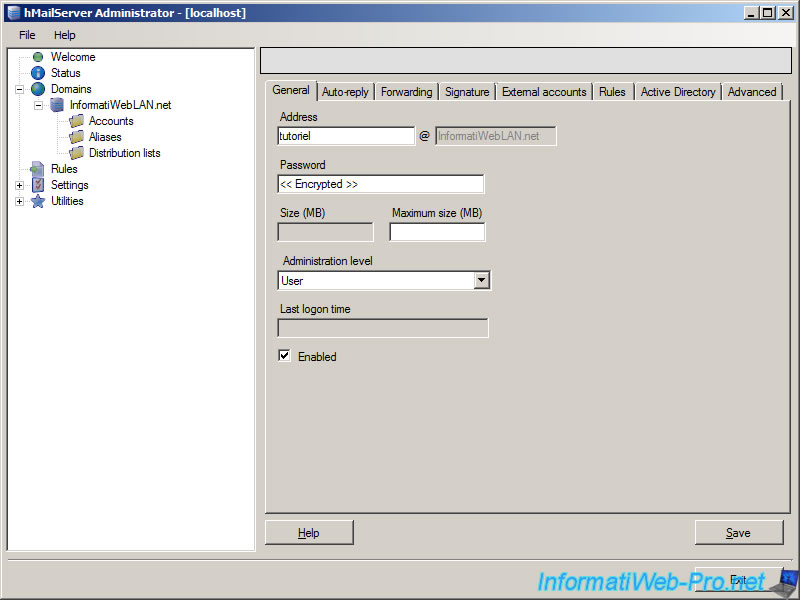
We will create an email address named «tutoriel@InformatiWebLAN.net» with a password. It is possible to change the level of administration for this account.
You can also define :
— Size Limits
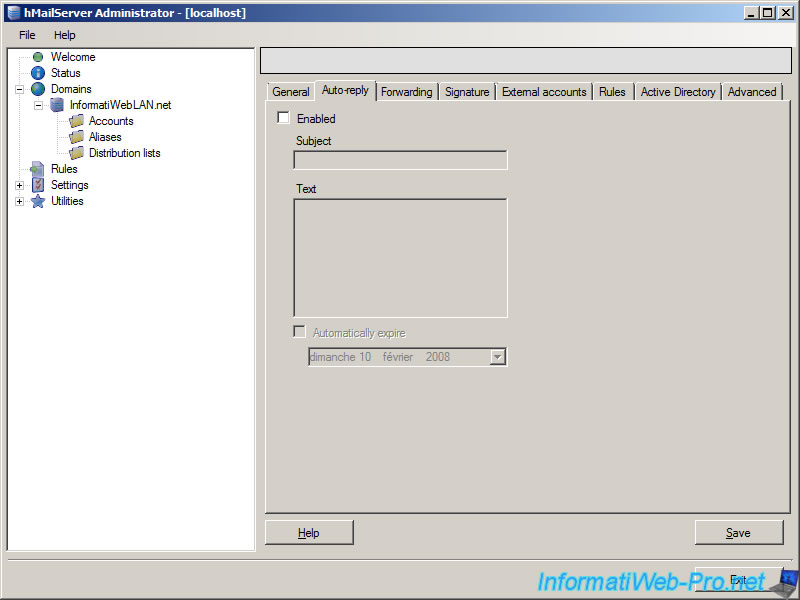
— An automatic response (in the absence of the person, for example, or to indicate that the message has been sent to the person concerned)
— Transfer emails to another email address
— A signature (to be displayed at the end of each message)
— An external account (in this case, the domain name must be registered on the Internet). Some registrars require that the MX record is set.
— etc.
We will then configure the SMTP server hMailServer. To do this, go to «Settings -> Protocols -> SMTP».
Enter your domain name in the «Local host name» box and enter a remote SMTP server to send emails outside of your domain.
In our case, we used the Gmail server (which requires authentication) and uses port «465» instead of the standard port «25». When you ordered your Internet subscription, you will have received the SMTP address and pop servers. You can use them for your mail server.
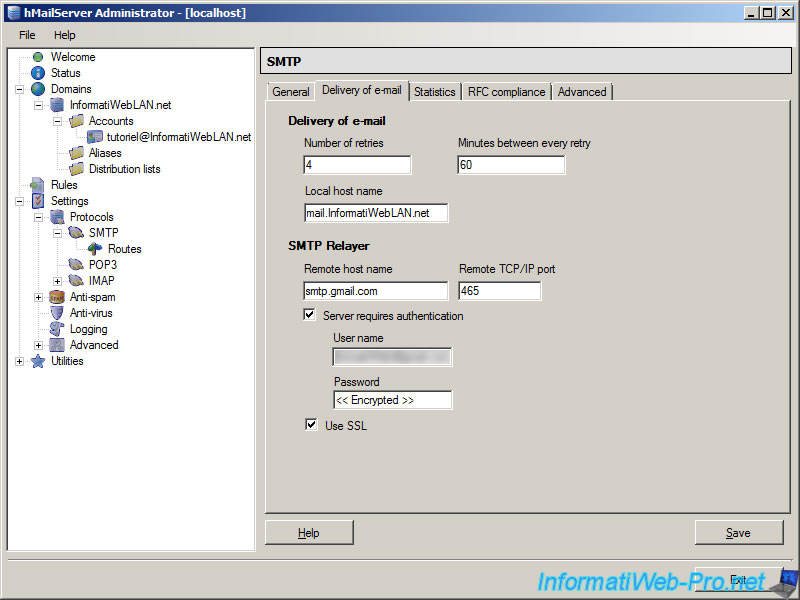
In the Advanced tab, you can specify the local IP address of your server.
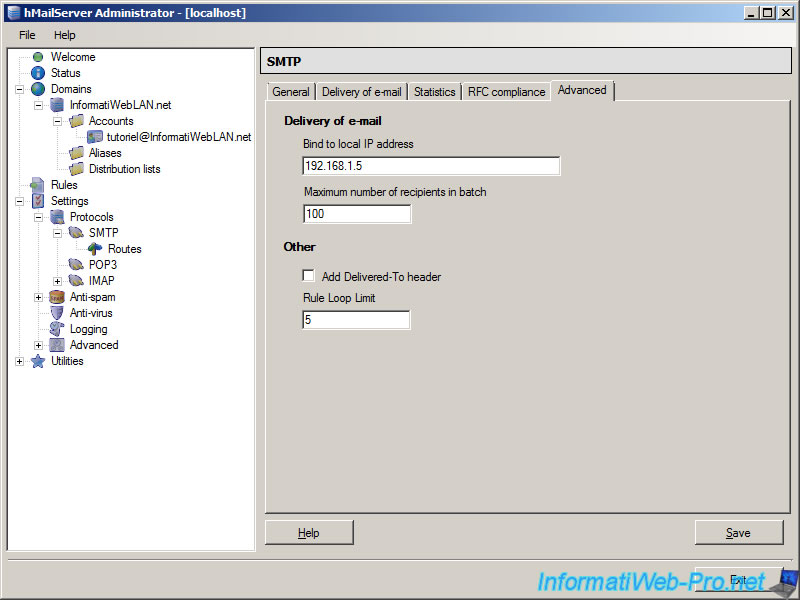
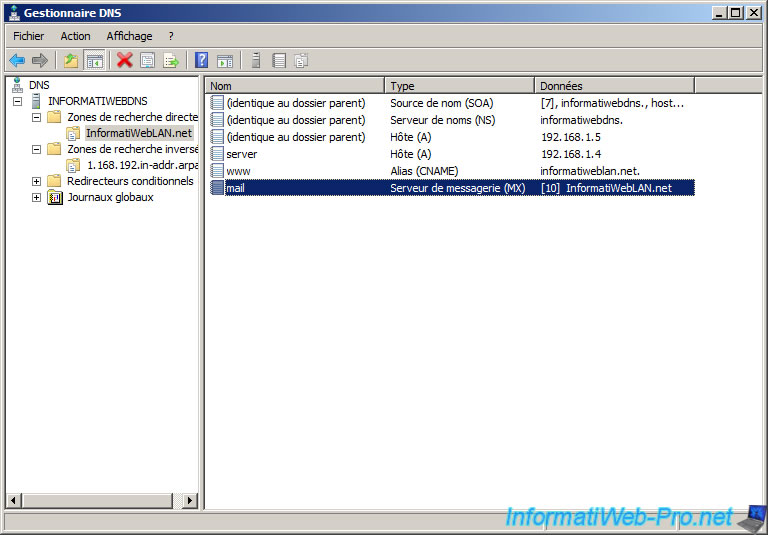
You can also create the MX record in DNS Manager in Windows Server.
So that our server can send emails to other areas than ours (eg to Gmail, Hotmail, Yahoo, …) we will define a road. To do this, go to «Settings -> Protocols -> SMTP -> Routes».
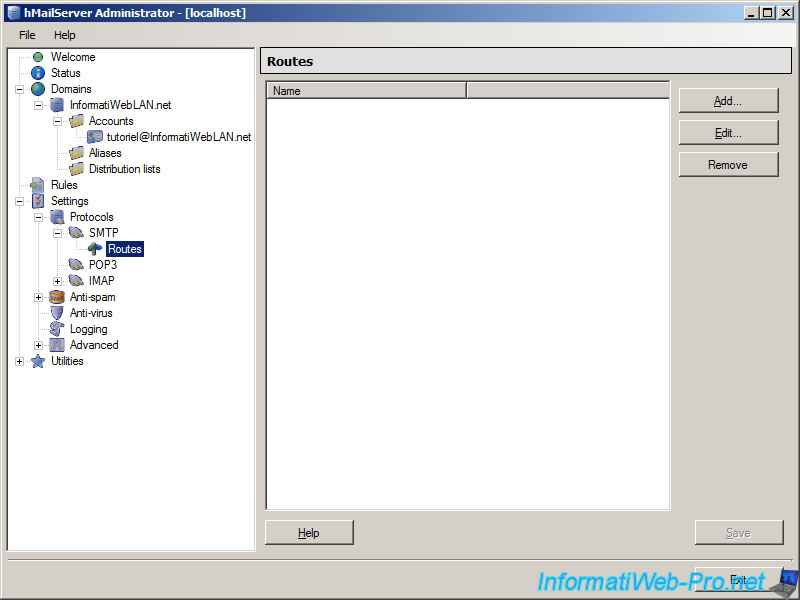
Then enter the same information as above.
In newer versions, you have two choices below which have emerged. Select «When sender matches route, treat sender as : A local email address» and «When recipient matches route, treat recipient as : A remote email address.» This means that the sender is the email address «xxxx@InformatiWebLAN.net» and the recipient «xxxxx@xxxxx.xx».
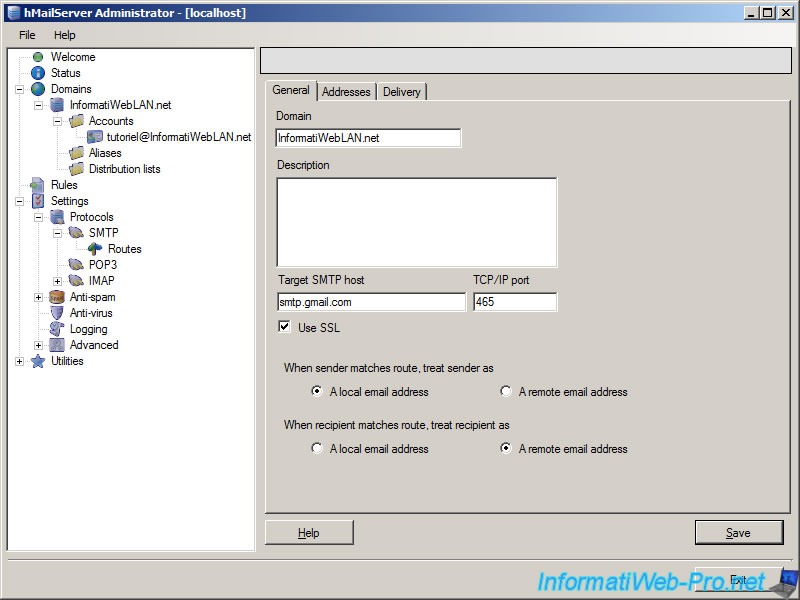
If the SMTP server requires an «Authentication», specify the necessary credentials in the «Delivery» tab then click «Save».

Почтовый сервер – это устройство, при помощи которого происходит доставка электронных сообщений от отправителя к получателю. Собственно, это и следует из его названия. В данной статье рассмотрим, как происходит установка и базовая настройка почтового сервера на VPS с операционной системой семейства Windows Server, а также на виртуальном сервере, работающем на Ubuntu 20.04.
Установка сервера SMTP на Windows Server
На серверах, работающих под управлением операционных систем Windows, для передачи почтовых сообщений часто используется протокол SMTP. В Windows Server служба SMTP является одним из компонентов операционной системы.
Для корректной отправки почтового сообщения от имени домена, к которому будет привязан сервер SMTP, нам необходимо иметь доменное имя. При этом в настройках домена должна быть указана A-запись, содержащая IP-адрес VPS. В нашем примере мы будем использовать имя домена my-domain.host.
Установку почтового сервера нужно будет начать именно с добавления необходимых компонентов. Для этого запустите Server Manager, перейдите Manage → Add Roles and Features.
В открывшемся окне нажмите Next.

Далее выберите опцию Role-based or feature-based installation, после чего нажмите Next.
В следующем окне укажите сервер, на который будет производиться установка новых компонентов, либо просто нажмите Next, если в вашем пуле серверов одна-единственная запись.

На следующем шаге активируйте строку Web Server (IIS), после чего нажмите Add Features.
Далее нажмите Next.
После чего отметьте строку SMTP Server и нажмите Add Features.
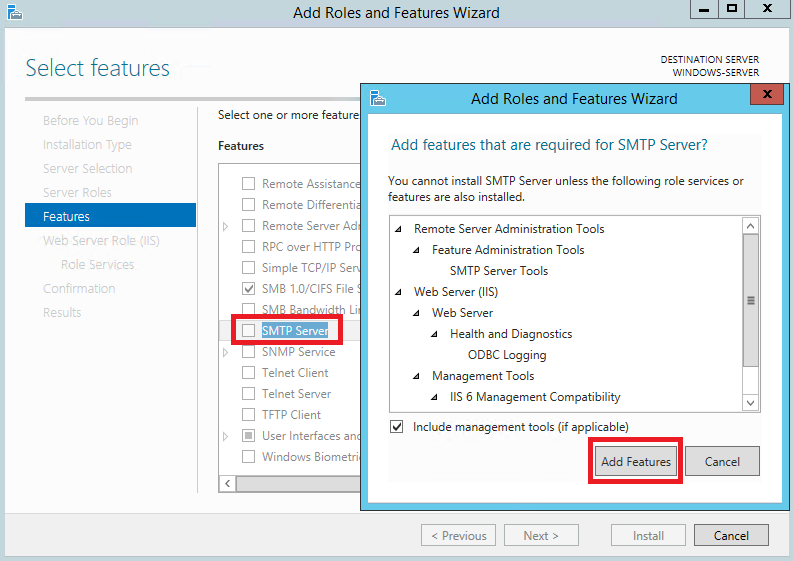
И нажмите Next.
Далее ещё раз нажмите Next.
В следующем окне снова нажмите Next.
Для запуска установки выбранных компонентов нажмите Install.
Настройка сервера SMTP
На следующем этапе необходимо будет настроить сервер SMTP. Для чего в Server Manager перейдите Tools → Internet Information Services (IIS) 6.0 Manager.
В открывшемся окне менеджера IIS раскройте ветку вашего сервера и на строке SMTP Virtual Server нажмите правую кнопку мыши, после чего перейдите в Properties.
Далее в строке IP address: необходимо выбрать IP-адрес вашего сервера и активировать опцию Enable logging.
Во вкладке Access нажмите кнопку Authentication...
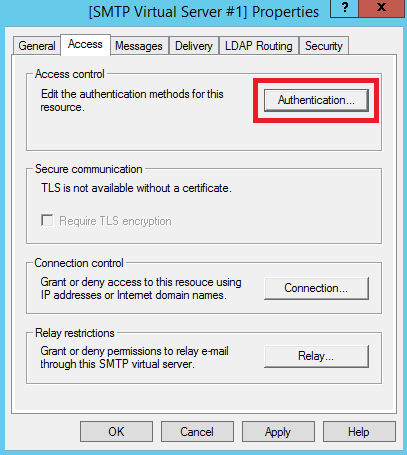
В открывшемся окне активируйте опцию Anonymous access. Активация данной опции нужна, чтобы пользователи и приложения смогли бы использовать сервер SMTP анонимно. Позже можно будет настроить более безопасную аутентификацию, пока же нажмите OK.
Далее в разделе Connection control нажмите кнопку Connection...
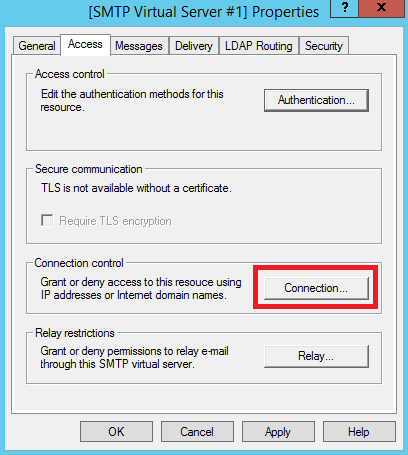
В окне Connection установите переключатель на Only the list below и при помощи кнопки Add... добавьте IP-адрес вашего VPS. После чего нажмите OK.
Точно такую же настройку необходимо проделать в разделе Relay restrictions. Для чего нажмите кнопку Relay... и добавьте IP-адрес вашего сервера установив переключатель в Only the list below.

После чего перейдите во вкладку Delivery и нажмите Advanced...

Здесь в строку Fully-qualified domain name: необходимо внести имя вашего домена, в нашем примере это – my-domain.host.
Для того, чтобы проверить корректность данной настройки, нажмите кнопку Check DNS.
Далее сохраните все внесённые в настройки изменения при помощи кнопки OK.
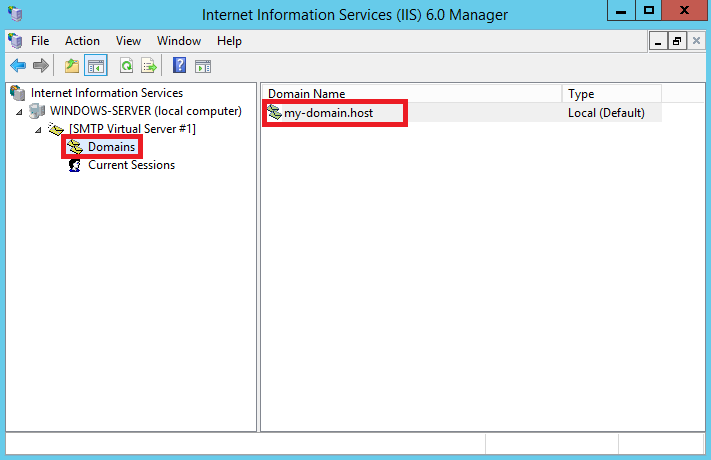
Также необходимо указать корректное имя домена в ветке Domains.
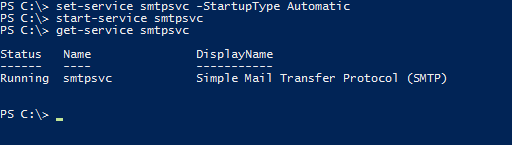
На следующем шаге нужно активировать функцию автоматического запуска сервера SMTP. Для этого запустите командную строку PowerShell и выполните следующие команды для запуска службы:
set-service smtpsvc -StartupType Automatic
start-service smtpsvc
Чтобы убедиться, что служба запущена, необходимо выполнить ещё одну команду:
get-service smtpsvcВывод данной команды должен выглядеть примерно следующим образом:
Теперь там же, в командной строке PowerShell, при помощи следующей команды отправьте сообщение на свою электронную почту:
Send-MailMessage -SmtpServer my-domain.host -To your@email.address -From mail@my-domain.host -Subject "Message Subject" -Body "Message Body"Здесь:
my-domain.host– имя домена, с которого будет производиться отправка сообщения;your@email.address– адрес электронной почты, на который будет отправлено сообщение;mail@my-domain.host– этот электронный адрес будет указан в сообщении как адрес отправителя;Message Subject– тема письма;Message Body– тело письма.
После чего проверьте свою почту, на которую должно прийти сообщение от вашего почтового сервера.
Установка и настройка Postfix на Ubuntu 20.04
Для операционной системы Ubuntu существует довольно популярный почтовый сервер – Postfix. Для установки Postfix мы будем использовать виртуальный сервер, работающий на Ubuntu 20.04. При этом на VPS должны быть произведены работы по первоначальной настройке, описанные в соответствующей статье нашего справочника.
Также, для работы Postfix нужен домен с привязанной A-записью, которой является IP-адрес вашего виртуального сервера.
Плюс ко всему, необходимо соотнести имя домена с именем сервера и его IP-адресом. Для этого запустите следующую команду:
$ sudo hostnamectl set-hostname ubuntu-serverЗдесь, ubuntu-server – имя нашего сервера, вместо которого вы можете использовать своё.
Теперь при помощи текстового редактора откройте файл /etc/hosts:
$ sudo nano /etc/hostsВ данный файл добавьте строку:
XXX.XXX.XXX.XXX my-domain.host ubuntu-serverВ данном случае:
XXX.XXX.XXX.XXX– IP-адрес вашего сервера;my-domain.host– имя вашего домена;ubuntu-server– имя вашего сервера.
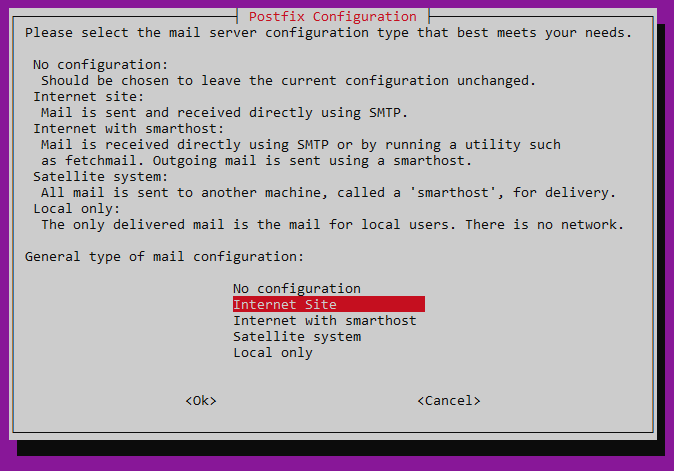
Теперь запустите установку Postfix и почтового пакета mailutils:
$ sudo apt install postfix mailutilsВ процессе установки система попросит вас выбрать тип конфигурации. Необходимо указать Internet Site:
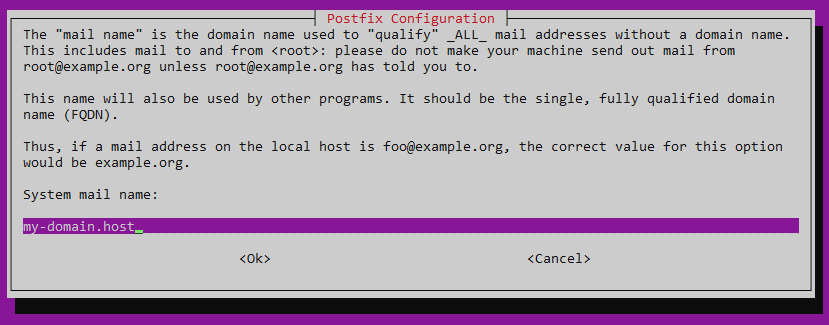
Также установщик попросит согласиться с именем домена, в отношении которого производится настройка почтового сервера. В нашем случае это будет my-domain.host.
По окончании установки можно попробовать с нашего почтового сервера отправить тестовое сообщение. Команда для отправки сообщения выглядит следующим образом:
$ echo "Message Body" | mail -s "Message Subject" your@email.addressВ данной команде:
Message Body– тело письма;Message Subject– тема письма;your@email.address– адрес электронной почты, на который будет отправлено сообщение.
Проверьте свой почтовый ящик (в нашем примере это – your@email.address), на который должно прийти отправленное из Postfix сообщение.
21.10.2020
26,196
9
Do you want to create a free mail server for your company? Here we will provide you with a step-by-step guide on how to install and configure a mail server on your Windows Server with various types of software: hMailServer, MailEnable, and, Apache James.
The solution will work no matter if you have purchased a Cloud Server or a Dedicated Server with Windows Server 2012, 2016, or 2019.
Apart from a server, you will also need a domain and some basic DNS knowledge.
Before installing an email server on Windows Server
Before installing the mail server, we will need a .NET Framework and IIS for hMailServer and EnableMail.
Installing .NET Framework 3.5 or .NET. 4.7 and IIS
If you don’t have a preliminary setup, you can install it from the Server Manager. Go to “Manage” (up on the right corner) and select “Add features and Roles”. There you just need to click on “Next” a few times and eventually you will see all the features. Search for the features you need and select them, then click on “Install”.
For Apache James we need Java Runtime Environment. You can download it from Oracle’s page and install it.
What is hMailServer?
The hMailServer is a handy free (AGPLv3) software that serves as a mail server for Windows Server. Many people choose it, including governments, because it is relatively easy to use, has a rich set of features, and is of course, free!
hMailServer features:
- SMTP, POP3, IMAP for sending and receiving mails.
- Built-in backup is always welcome
- SSL encryption for better security
- Anti-spam for a cleaner inbox
- An Anti-virus that stops most of the malicious software
- Web administration for remote controlling
hMailServer installation
- Downloading hMailServer.
Go to this address and proceed with the download.
- Installation.
Open the file you downloaded. Click “Next”, then select “I accept the agreement” and again “Next”. We recommend the full installation of the next step. It includes “Server” and “Administrative Tools”.
Press “Next”. After that, you can select “build-in database” for this example, but you already have another one, you can select the second option.
The last step is important too. It includes selecting a strong password for your mail server.
Now you only need to choose the setup folder and then run the software. The next step is configuration.
- Configuring the mail server.
The first part is to click on “Connect” and use your password to enter.
Now click “Add domain”. Type in your domain and press “Save”.
From the left menu go to the folder “Accounts”. Add “Address”, for example, charley@YOURDOMAIN.COM. Here you can define the password, the size of the mailbox, and the maximum size of each file.
Now go to “Settings”, “Protocols” and select “SMTP”. You will need to add the localhost of your server with a valid IP address. Later you need to add an A record that resolves the localhost to its IP and a PTR record for a reverse DNS lookup that resolves the IP to the hostname. The name of your server can be mail.YOURDOMAIN.COM.
Let’s also add an Auto-ban. Go to “Advanced” and select “Auto-ban”. Put the default domain and your password and then adjust the settings. Enable the setting. This will stop IP addresses if they continue to try to log in.
Now let’s go to “IP ranges”. Select “TCP/IP ports” and configure the SMTP, IMAP, and POP3 ports for this mail server. SMTP – 25, 587, POP3 – 110 and IMAP – 143. When we open these ports, this will allow the mail server to receive mails.
- Again some DNS work. You will need to add an SPF record to show that this mail server is authorized to send mails from your domain. You will need to add the domain and IP address in the SPF record.
Add an MX record too, for the incoming mails. The record will provide information, which enables accepting mails on behalf of the domain.
What is MailEnable?
MailEnable is another excellent proposal if you have a Windows Server. It is a paid mail server, but there is a free version too (the Standard). It is one of the most popular mail servers for Windows.
There are 4 versions:
- Standard (Free)
- Professional (starting at 349 USD)
- Enterprise (starting at 699 USD)
- Premium (starting at 1098 USD)
It is popular of its integration with Outlook and its set of features similar to Microsoft Exchange.
MailEnable features
- Supports SMTP, IMAP, and POP3 (All versions)
- Webmail for easy access through the web (All versions)
- Contacts, Calendars, Schedule Tasks (All versions)
- Anti-Spam (All versions)
- Media players for videos and audio for the attached files (All versions)
- ActiveSync (cost extra) for iOS and Android. (Professional and up)
- Content filtering (Professional and up)
- Antivirus (Professional and up)
- Outlook MAPI Connector for MS Outlook (Enterprise, unlimited for the Premium)
- Collaboration and sharing (Enterprise, Premium)
How to install MailEnable?
- Downloading MailEnable.
Go to the MailEnable website and after that go to the download page. Choose the right version for you. The standard versión is free. You could try it out before deciding on an upgrade or a purchase of a more advanced version.
- Installation.
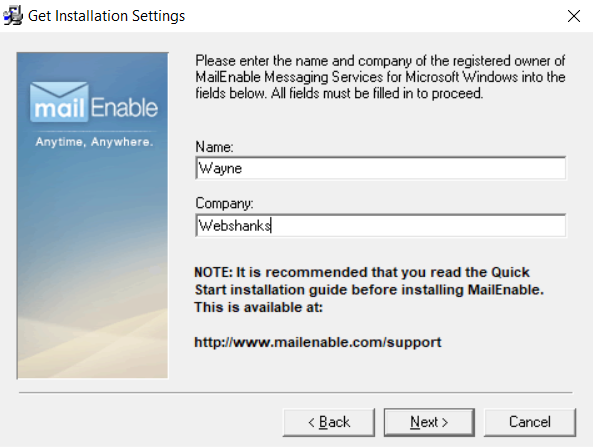
Open the file. The first window will be general information about the software, press “Next”. It will be followed by a License Agreement, click “Yes”. Write the owner’s details. The next step is to select what you want to install and where to install it– “WebMail Service (Server)”. The next screen will ask you about the Program Manager group, just leave it as it is and click “Next”. Here comes an important step, “Repository”. This is the location of the messages’ data. Choose and press “Next”.
- Creating a post office.
The post office unites all of your domains under one hat. You will need a strong password for it. At this point, you will be asked your domain name, DNS host (the IP address/es for the domain), and port for the SMTP (25). Click “Next” and wait for the installation.
- WebMail.
You need to select which website are you going to install it for. If you have one, leave it to “Default”.
- Configuration of the DNS.
To be sure that your mail server operates correctly, you will need a few DNS records. You will need to have a fixed IP address and create an A record with your domain and its IP address. You will need MX records for the incoming mail server pointing to the A record.
Some more necessary DNS settings include the enablement of DNS Forwarding. You will also have to create a Reverse Lookup Zone. You can do it from the DNS Manager by selecting “New Zone”. Inside this zone, you will need a PTR record.
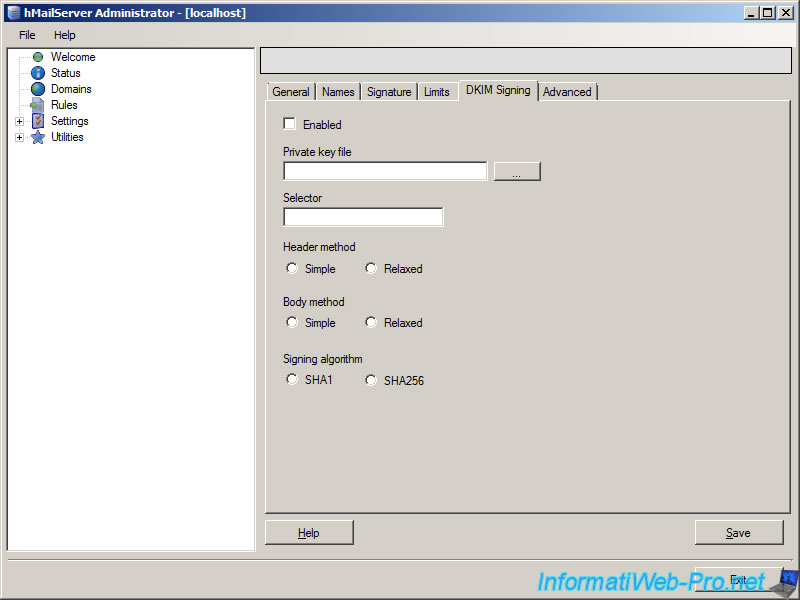
- DKIM enable.
DKIM is an encryption method that verifies the message. To start using it, you will need to go to the administration console – “Servers”, “Localhost”, and “Extensions”. Click with the right button on the “Domain Keys (DKIM). Select the “Enable DomainKeys Identified Mail (DKIM)” functionality on this server.
To configure it go to the administration console and “MailEnable management > Messaging Manager > Post Offices > (postofficename) > Domains”. On your domain select properties and go to “DKIM”, “Configure”. There click on the “Sign outgoing messages” box. From there you can choose an encryption algorithm, the canonicalization one, impose body hash length limit, and include user identity. After that, you need to configure a selector. The selector is the combination of a public and private key. When you click on “new” you will need to give it a unique name and size of the key. The selector can work in “test mode, granularity (for specific users), notes“ and make this active selector (for all outgoing messages).
The final step is to select a Selector and copy the text. You will need to add a new TXT DNS record with the text from it and put it in a subdomain _domainkey subdomain with the same name as the selector.
- Mailbox configuration.
To create mailboxes, you need to use the administration console – “Messaging Manager > Post Offices > (postofficename) > Mailboxes”. Click on the “New Mailbox”, type in a name and password. Click ok and you are done.
What is Apache James?
Apache James (Java Apache Mail Enterprise Server) is an open-source mail server. It is free under the Apache License 2.0 and completely written in Java
There is a small group of developers (currently 30) who work for the Apache Software Foundation, creating the Apache James mail server. The group is active and there are frequently new features added to the software. Just don’t expect the same level of complexity as MailEnable.
Apache James features
- Supports SMTP, IMAP, and POP3
- jSPF, a java SPF
- jDKIM, a java DKIM
- FetchMail
Installing Apache James
- Installation.
It is a very different method of installation compared to the last examples. First, visit the download page and get the Apache James Server for your mail server.
Then go to the installation folder, where you want it to be, and unpack it. That’s the installation process, now we need to configure it. This is the hard part.
You will need to install a database.
Configure it. After unpacking, the configuration folder will be in ./conf/META-INF folder. There you need to change a few things: the postmaster address, open port 25 for SMTP, port 110 for POP3, and 143 for IMAP4.
Create an A record
Add your domain, the default is localhost, you can change it.
Configure pop3 server by choosing the right port for it and you can add SSL too.
The Imap4 port should be set to 143.
Configure the Smtp server to work on port 25.
Run it. Go to the directory where you put the installation archive. Run the James Apache with the command $cd bin and then $ ./james start.
Create a domain
Use the command $ cd bin and $ james-cli –h localhost –p 9999 addomain mydomain.tld. Change the domain to your domain.
Create users with the command $ james-cli –h localhost –p 9999 adduser myuser@mydomain.tld mypassword and respectively change the user and domain you want, followed by space and the password for the user.
You can see additional components here. We recommend that you use at least jSPF and jDKIM.
You can use it with a client like Mozilla Thunderbird.
Firewall configuration
Let’s check if the ports that we have set in the software are open. If they are not, we can open then in Windows Firewall. Open it and go to “Inbound Rules”. There we will put “New Rule”. Choose “Port” and “Next”. Here write down the same port from before – 25, 110, 143, and 587 (or the one you have put). In the next window select “Allow The Connection” and “Next”. Select all of the available – “Domain”, “Private” and “Public”. In the last step, write down a name corresponding to the rule. For example, “Ports for the mail server”.
Conclusion
Installing a fully working mail server is not that hard, as many will tell you. You can do it in a few easy steps, if you choose the right software. You can set it up and run it in a day.
Yes, you will need some basic knowledge about how servers work and what they need. But nothing is too hard to learn and there is enough information on the Internet with detailed instructions.
hMmailServer is a good solution for a mail server. It is free and relatively easy to use and there are enough professional features that can serve the needs of an average company.
MailEnable has a good enough Standard version, the free one. It is fine for those of you who need just an email server without additional features for sharing and cooperative work. It could get expensive in its Premium version, although not as much as most of the paid solutions.
Apache James is a smaller project. It is harder to set up and you will need more Java knowledge. The good part is it is free and there is a good chance it will remain that way for a long time.
If you want to check out a paid solution, Microsoft Exchange would be a solid choice.