
You can also be interested in these:
- How to use single jack headset on pc without splitter
- Can you buy a PS5 on layaway?
- Sony X750H 4K Ultra HD TV review
- Corsair HS65 Wireless headset full review
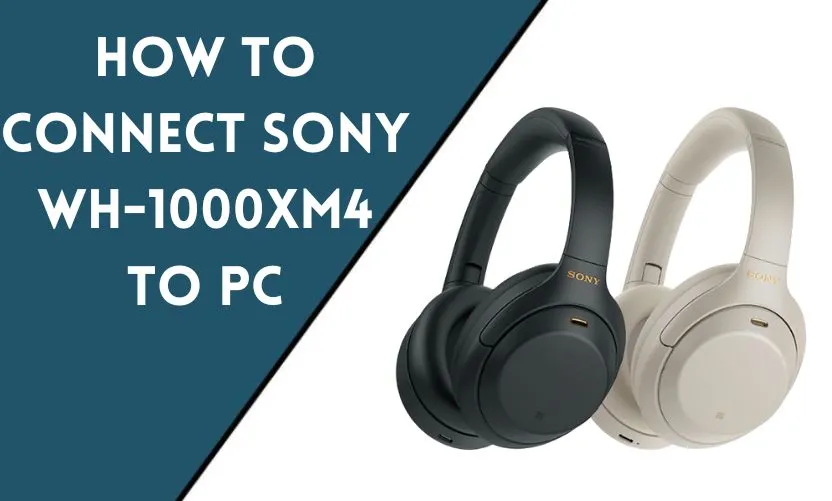
The Sony WH-1000XM4 are not just a pair of ordinary headphones, they are one of the greatest pairs of headphones currently available on the market. With an incredible slew of features, absolutely excellent sound quality, solid build quality and a sleek, comfortable design, it’s no wonder they’ve become so popular among headphone enthusiasts and casual users alike.

They’re also quite easy to use, as the pairing process with your smartphone is pretty simple. Not only is the process as easy as pressing a couple of buttons, but it’s also feature rich, with an accompanying app being available just to adjust the headphone’s settings and profiles. This makes sense, as the Sony WH-1000XM4 were designed to be used with smartphones from the ground up.
On PC, things are slightly different. Instead of the simple, streamlined process on mobile, you instead have many different options and ways to connect the headphones to your computer. For beginners it may seem like a bit of a daunting task. Just how exactly do you connect the Sony WH-1000XM4 to PC? What are the steps that one would need to take in order to get things to work properly?
Worry not though, because we’re here to lend you a helping hand. We’ll be breaking down how to connect your Sony WH-1000XM4 to PC, as well as which ways are the most convenient and what you’ll need to do it. So, let’s get into it!
Connecting Sony WH-1000XM4 to a Windows 10 PC via Bluetooth
This is the official way to connect your pair of Sony WH-1000 XM4 headphones to your PC, and it’s also the method with the most documentation available. It takes several steps to get working, but once everything is set up it’s a relatively painless affair after.
Before you start, you’ll want to make sure your PC supports music playback through Bluetooth. Generally, most PCs with Bluetooth functionality have it, so you don’t need to worry too much. If your PC doesn’t have Bluetooth functionality to begin with, then you’ll want to purchase a Bluetooth dongle before getting into the steps proper. Once everything’s prepared, you can begin.

First off, you need to put the headphones into pairing mode. The first time you turn them on, they’ll go into pairing mode automatically, but in case they didn’t you’ll need to press and hold the pairing button on them for 7 seconds. You’ll know your pair is in pairing mode when the blue indicator light on them repeatedly flashes twice in a row. The headphones will also say “Bluetooth pairing” when this happens.
Once that’s all set up, next you’ll want to turn on Bluetooth functionality on your PC. You can do this from the ‘Devices’ option in your settings menu. Once you’ve turned it on, all that’s left is to find WH-1000 XM4 in the pairing list. Make sure to wait for and select WH-1000 XM4 and not LE_WH-1000 XM4, or it won’t work.
If it asks for a passcode, it’s usually 0000. Once this is done, your headphones should announce “Bluetooth connected,” and from there it’s just a matter of listening to music. In case it’s still not working, you’ll want to go into your audio settings and change the default output device to the WH-1000 XM4. It’s a simple fix, and one many people don’t know.
Connecting Sony WH-1000XM4 to a Windows 8.1 PC via Bluetooth
We’ll knock this one out too while we’re here, since it’s pretty much the same process as with Windows 10 with one minor difference. For your headphones, the process is pretty much the same. The main difference comes from the menu of Windows 8, where you’ll need to navigate to the ‘PC and Devices’ tab and then continue to find the Bluetooth section before carrying on.
Otherwise, both are pretty much the same, so the steps above apply here as well. It may take bit more trying with Windows 8.1 since it’s an older version, but there shouldn’t be too much of an issue getting it working. Now, let’s move on to a different PC system altogether.
Connecting Sony WH-1000XM4 to a Mac PC via Bluetooth
On Mac, the process begins the same. You’ll want to put your headphones into pairing mode by holding down the pairing button for 7 seconds. Once the headphones announce that they are ready to be paired, you’ll want to head to your Mac and begin setting things up.

First of all, make sure you turn on internal speakers, it makes things easier to adjust later. Then, head into the ‘System Preferences’ menu and scroll around until you find the Bluetooth section. Click on it, activate it and then wait until WH-1000 XM4 appears. Once again, wait until WH-1000 XM4 appears, and make sure you don’t select LE_WH-1000 XM4.
Once that’s done, it will ask you for a passcode. Input 0000, and setup should be ready. Now, click on the little speaker icon in the top right of your taskbar, and change the output device to your now fully paired Bluetooth headphones.
Connecting Sony WH-1000XM4 via headphone Cable
If you’re not a huge fan of embracing the wireless life, then don’t worry, Sony has you covered. Inside the box for your headphones, you’ll find a supplied audio cable that you can plug into the headphones. It allows you to physically plug the headphones into any device with an audio jack.
Like any other normal pair of wired headphones, all you really need to do is plug it into your PC, quite basic stuff. It even works when the headphones are turned off, though you’ll want them turned on if you want to take advantage of the active noise cancellation feature.
And that’s about it for methods to connect your Sony WH-1000 XM4 to PC. It’s not all too difficult, and once you get the hang of it, it’s quite painless to get through. We hope this article managed to assist you in getting your headphones to work and stay tuned for more helpful tips in the future.
More stories like this
- How to use single jack headset on pc without splitter
- Can you buy a PS5 on layaway?
- Sony X750H 4K Ultra HD TV review
- Corsair HS65 Wireless headset full review
- Bytech gaming headset review
- Wireless Blackweb headphones review
Are you the proud owner of the Sony WH-1000XM4 headphones and looking to connect them to your PC? Look no further! In this article, we will guide you through the step-by-step process of connecting your Sony WH-1000XM4 headphones to your PC. Whether you want to enjoy immersive audio while watching movies or listening to music, connecting your headphones to your PC can enhance your overall audio experience. Let’s get started!
Step 1: Check PC Compatibility
Before connecting your Sony WH-1000XM4 headphones to your PC, ensure that your PC has built-in Bluetooth connectivity or a Bluetooth adapter. Most modern PCs come with Bluetooth, but if yours doesn’t, you can easily purchase a Bluetooth dongle and connect it to your PC’s USB port.
Step 2: Turn on Bluetooth on Your PC
To establish a connection between your PC and the Sony WH-1000XM4 headphones, you need to enable Bluetooth on your computer. Here’s how you can do it:
- Go to the “Settings” menu on your PC.
- Look for the “Bluetooth & other devices” option and click on it.
- Toggle the Bluetooth switch to turn it on.
Step 3: Set the Sony WH-1000XM4 Headphones to Pairing Mode
To connect the headphones to your PC, you need to put them into pairing mode. Follow these steps:
- Power on the Sony WH-1000XM4 headphones.
- Locate the “Power” button on the headphones and press and hold it for a few seconds until you hear a voice prompt saying, “Bluetooth pairing.”
Step 4: Pairing the Headphones with Your PC
Once the headphones are in pairing mode, you can proceed to pair them with your PC. Here’s how:
- On your PC, go to the “Settings” menu and select “Bluetooth & other devices.”
- Click on the “Add Bluetooth or other devices” option.
- Choose the “Bluetooth” option.
- Your PC will start scanning for nearby Bluetooth devices.
- When you see “WH-1000XM4” or a similar name in the list of available devices, click on it to initiate the pairing process.
- Follow any additional on-screen prompts to complete the pairing.
Step 5: Test the Connection
After successfully pairing your Sony WH-1000XM4 headphones with your PC, it’s time to test the connection. Play some audio or video on your PC, and the sound should now come through your headphones. Adjust the volume on both your PC and the headphones to your preferred levels.
Troubleshooting Tips
If you encounter any issues during the connection process, here are a few troubleshooting tips:
- Make sure the headphones are sufficiently charged.
- Restart both your PC and the headphones.
- Double-check that Bluetooth is enabled on your PC.
- Move your headphones and PC closer together to ensure a strong Bluetooth signal.
- Update the Bluetooth drivers on your PC.
Conclusion
Connecting your Sony WH-1000XM4 headphones to your PC is a straightforward process that allows you to enjoy high-quality audio and a personalized listening experience. By following the steps outlined in this article, you can easily connect your headphones and immerse yourself in a world of sound.
Frequently Asked Questions
Can I connect the Sony WH-1000XM4 headphones to multiple devices simultaneously?
No, the Sony WH-1000XM4 headphones can only connect to one device at a time. You will need to disconnect them from one device before connecting them to another.
Can I use the Sony WH-1000XM4 headphones with a Mac computer?
Yes, the Sony WH-1000XM4 headphones are compatible with Mac computers. The pairing process is similar to the one described in this article.
How do I update the firmware on my Sony WH-1000XM4 headphones?
To update the firmware on your Sony WH-1000XM4 headphones, you can download the Sony | Headphones Connect app on your smartphone and follow the instructions provided in the app.
Can I use the Sony WH-1000XM4 headphones for gaming on my PC?
Yes, you can use the Sony WH-1000XM4 headphones for gaming on your PC. However, they are primarily designed for music and multimedia consumption rather than gaming.
How do I adjust the noise cancellation settings on the Sony WH-1000XM4 headphones?
You can adjust the noise cancellation settings on your Sony WH-1000XM4 headphones by using the Sony | Headphones Connect app. The app allows you to customize the level of noise cancellation according to your preferences.
Sufyan Mughal, is a Tech and Gaming nerd. He developed his passion during the college days and is now working passionately to make his dreams come true. He mostly likes Gaming but is also a master of Tech. His knowledge has served many people around him. He mostly likes to be alone to gain as much knowledge as he can which makes him a true master of Tech World.
Congratulations on your new Sony WH1000xm4 headphones. To start your immersive audio experience, go through the following instructions.Let us know How To Connect Sony WH1000XM4 To A Pc?

To Connect Sony WH1000XM4 To A Pc is a simple process. The headphones use Bluetooth to connect with your PC, and this process is called “pairing”. To complete the pairing process follow the steps below and you will have your device connected and ready to use in no time.
Make sure you have the following before you begin the process:
- Your headphones are fully charged.
- Your PC has a Bluetooth option.
- Your PC’s Bluetooth option is enabled (for instructions on how to do this, see [part A – Bluetooth pairing] points 1, 2, and 3).
- You are using the latest version of Windows – Windows 11 (to know how to connect with windows 10 go to the end of this article)
Part A – Bluetooth Pairing
Step 1: PC and Bluetooth
- Turn on Bluetooth on your PC – to do so, press the Windows button on your PC (bottom left of your keyboard).
- Type [Bluetooth] into the search field and hit Enter (fig1). This will take you to the Bluetooth settings. (fig2)
- Turn the Bluetooth on if it’s turned off.
- Right below the Bluetooth on/off option, you’ll find [add device]. Click that option and a box will pop up.
- The pop-up box will show three options – Bluetooth, Wireless display or dock, and Everything else. Select Bluetooth.
Step 2: Pairing with Headphones
- The power button can be found on the left ear cup of the headphones (fig 4) – press and hold the power button. (Your new headphones will enter pairing mode automatically. If you’re pairing again, follow the rest of the steps below).
- Keep holding down the power button until you hear the words “[power on].”The LED indicators would start pulsing twice in a row which indicates that the headphones are ready for Bluetooth pairing. Release the button at this point. (Fig 5)
- On your PC you should now be able to see the [WH1000XM4] under add a device. Select the device.
- Once connected the popup box will close and you will land back in the Bluetooth settings. There, under audio, you’ll find your headphones connected to your PC.
6. Now that your device is connected, you can start using it.
Part B – Sound setting
This part of the settings is optional, but if you’re someone who needs extra customization options in terms of sounds, follow the instructions below to get the best out of your headphones.
Step 1
- Press the Windows button on your PC (bottom left of your keyboard). Type [sound] on the search bar and press Enter.
- The sound settings should be seen. Under the [output] option make sure [headphones] are selected instead of speakers.
- Toward the right end of the headphones option, you’ll find an arrow key pointing right. Pressing that arrow will take you to headphone properties. This settings page will have all the available sound quality options that are inbuilt into your PC, [Dolby Atmos for Headphones] can be found in some Windows computers, for example.
How to connect a Sony WH1000XM4 to a Windows 10 PC
The Bluetooth pairing process is fairly similar to that of Windows 11, however, there are a few differences which we will see below.
Before you start the process make sure you have the following:
- Make sure you have the following before you begin the process: Your headphones have enough battery power.
- Your PC has a Bluetooth option.
- Your computer has Bluetooth enabled (to know how to turn Bluetooth on your PC go through points 1 and 2 in part A – Bluetooth pairing).
Step 1: PC and Bluetooth (windows 10)
- On your Windows PC, click the start menu and select the settings button.
- Type [Bluetooth and Other Devices] and press Enter in the settings window. The Bluetooth settings windows will appear after you click this.
- Make sure the Bluetooth is enabled. Select the [Add Devices] option. Which will open a pop-up box.
Step 2: pairing Headphones
- Press and hold the power button in the left earcup of the headphone for up to 7 seconds. A pulsing LED indicator flashing twice in a row should start. This indicates that the headphones are ready for pairing.
- Wait for the [WH1000XM] to appear on your computer screen. This might take 30 seconds to 1 minute to appear. (Restart the process if the device is not visible.)
- Once you see the name of your device on the list, select it.
- You will hear the voice saying [Bluetooth connected] and now your device is ready to be used.
- If the device asks for a PIN or Passkey input “0000”.
Your new headphones are now paired and ready to be used. To further your experience of Sony WH1000XM4, download the Sony Headphones Connect App to explore all the customization options and features. The Sony WH1000XM4 is the flagship device in the Sony’s headphones line up and it has won several awards and gained stellar reviews.
Frequently asked questions:
1) Q. my device does not appear on my PC.
- Restart your PC if that doesn’t work after you’ve tried restarting your Bluetooth settings.
2) Q.How devices can I connect to with WH1000XM4?
- WH1000XM4 can be connected with up to 2 devices simultaneously.
3) Q. is WH1000XM4 waterproof?
- No, WH1000XM4 is not waterproof. However, your headphones are water-resistant, which means your headphones will survive a heavy sweaty workout on the ground and not underwater.
You’ve purchased your Sony WH-1000XM4 headphones, and you’re ready to enjoy the benefits of noise-canceling technology, but what happens next?
You need to register your headphones using your PC. In Windows, click the “Start” button and select Settings. Click “Devices” and select Bluetooth. Ensure that “Bluetooth” is selected “On”, which makes the Bluetooth function available. Select WH-1000XM4 and click pair.
But we’ve all been in the position where we’ve tried to connect using the instructions above, and it just does not work.
There’s nothing more frustrating, especially when you’re looking forward to a weekend gaming session.
Luckily for you, we’ve trawled through pages of manuals and watched countless videos to bring you the best advice, and tips & tricks to get your Bluetooth device purring.
To connect your Sony WH-1000XM4 to your PC should be straightforward.
First off, you need to make your headset discoverable.
H2 How Do I Make My Sony WH 1000XM4 Discoverable?
If you’re pairing your headphones for the first time, then you usually won’t have a problem.
After switching your headset on, it automatically enters pairing mode. This happens when you first get the headset home from the store or after repairing it.
You can follow the instructions given above, and in next to no time, the headphones will be paired.
But the next time you try to pair your device, you will usually run into a problem.
How Do I Reset My Sony WH-1000XM4 Bluetooth Headphones?
You may want to try resetting your Bluetooth connection before trying to connect to more than one device.
Take, for instance, pairing with your PC after first pairing with your cell phone. The cell phone pairing goes fine, with no problems at all.
Next, you try to pair them with your PC, and it just won’t show up in your list of Bluetooth devices available.
Try this if you have a problem pairing with multiple devices:
- With your headphones off, press and hold the power button on the side of the headphones. Continue to hold the button down until the LED indicator starts to blink blue and red. Don’t be fooled though, it takes a little while before the light blinks blue and red to indicate that it is in pairing mode.
- So, keep holding the button down until you are certain that the indicator is alternating between blue and red consistently (we’re talking about 10-15 seconds here but it may take a little while longer or shorter depending on your headset).
- Waiting for the LED to turn from blue, then to red and back again, is what fools people. The alternating blue and red LED rate is quite quick, expect it to be around 4 to 6 blinks per second.
- Only when you’re certain the LED is blinking blue and red must you release the button.
- Next, go to your PC or laptop and click on the Windows Start button at the bottom left of your screen.
- Click the gear icon and select Settings.
You may have to type settings into the search bar depending on which version of Windows you are running, but for this article, I assume you have Windows 10 installed.
The Bluetooth and other devices will appear and you need to ensure that the blue tooth selector is switched on.
- Click on the Add Bluetooth button at the top of the screen.
- On the next screen, click on the Bluetooth icon to search for nearby Bluetooth devices.
- When your Sony headset appears on the list, click on it. It may take a few seconds for the headphones to fully connect but you will see the confirmation on your screen when it does.
- When you see the message, ‘Your device is ready to go!’ your headset is paired and ready for use.
Despite running through all the instructions above, you may still have a problem with pairing your headset.
Why are my Bluetooth Headphones Still Not Connecting?
Bluetooth usually works seamlessly with all your smart devices.
However, some versions of Bluetooth are not backward compatible, so it’s a good idea to ensure that you have the latest version of Bluetooth installed.
You may need to enter your Windows Settings to check whether your Bluetooth drivers are updated.
Soft Reset
This is the classic call center response to any computer glitch. Try switching off your headphones and laptop or PC and then restarting both.
Surprisingly, this sometimes works, but not always.
Delete Bluetooth Devices
Older devices or older versions of Bluetooth may just connect with the latest device that you used.
To avoid this and to clean everything up, delete any Bluetooth devices that are paired with your PC or laptop and try pairing them with your headset again after rebooting everything.
Charge Your Headphones
You may not have sufficient charge in your headset battery and that will sometimes affect its ability to connect. Recharge the headset fully before trying to connect.
USB Interference
The new high-speed USB 3.0 ports can sometimes create interference with nearby devices, so make sure your headphones are not close to the USB ports on your laptop or PC.
Router Interference
In the same way, as USB 3 ports may cause interference, your router can also be the culprit. Move away from the router if possible or, at the very least, don’t position the router right on top of your PC.
Read Next
May 3, 2025
QuickVSL Review 2025 – Coupon, Bundle Deal, Bonus
May 1, 2025
AI MultiMinds Review 2025 – Coupon, Bundle Deal, Bonus
April 29, 2025
CourseMateAI 2.0 Review 2025 – Coupon, Demo, Bonus
April 19, 2025
ViralValet Review 2025 – Coupon, Bundle Deal, Bonus
April 18, 2025
ChannelBuilderAI Review 2025 – Coupon, Bundle Deal, Bonus
April 13, 2025
Tube Bonanza Review 2025 – 30% OFF Coupon + 5 OTOs Links
April 11, 2025
MagicFlixAI Review 2025 – Coupon, Bundle Deal, Bonus
April 10, 2025
AI Traffic Accelerator OTO 1,2 Links – Big Coupon, Bonus
March 21, 2025
Eduzign OTO 1,2,3,4,5 Links – Coupon, Bundle Deal, Bonus
March 20, 2025