
Bad sectors in hard drives and solid-state drives (SSDs) can disrupt system performance and lead to data loss. As we advance further into the digital age, where data integrity is paramount, understanding how to manage and repair bad sectors becomes increasingly significant. This guide delves into the world of bad sectors, the tools available to repair them, and practical steps for both Windows 10 and 11 users.
Understanding Bad Sectors
What are Bad Sectors?
A bad sector is a section of a storage device (HDD or SSD) that cannot be read or written due to physical damage or corruption. These bad sectors can occur for various reasons, including:
- Physical Damage: External factors like drops or impacts can cause mechanical failures.
- Sudden Power Loss: Abrupt shutdowns during read/write processes can corrupt sectors.
- Ageing: Over time, drives may develop bad sectors due to wear and tear.
- Software Issues: System crashes can lead to corruption, resulting in bad sectors.
Bad sectors can be classified into two types:
- Hard Bad Sectors: These are physically damaged sections of a drive that cannot be repaired.
- Soft Bad Sectors: These are logical errors caused by data corruption but can often be repaired.
Signs of Bad Sectors
Recognizing the signs of bad sectors early can be critical in preventing data loss. Here are some common indicators:
- Frequent system crashes or freezes.
- Unusual noises from the hard drive, such as clicking sounds.
- Files or folders that fail to open.
- Slow system performance.
- Disk errors reported by the operating system.
Tools for Repairing Bad Sectors
While some bad sectors cannot be repaired, many tools are available to help Windows 10 and 11 users diagnose and potentially repair soft bad sectors. Let’s delve into some popular bad sector repair tools as of 2025.
1. Windows CHKDSK Utility
The built-in CHKDSK utility in Windows is a robust tool for scanning and repairing disk errors.
How to Use CHKDSK:
-
Open the Command Prompt as an administrator. You can do this by right-clicking the Start button and selecting “Windows Terminal (Admin)” or “Command Prompt (Admin).”
-
In the command line, type
chkdsk C: /f /r(replace «C:» with the letter of the drive you want to scan) and press Enter./ffixes errors found on the disk./rlocates bad sectors and recovers readable information.
-
If you’re scanning a system drive, you may need to restart your computer, as Windows cannot fix errors on a drive that is in use.
-
Let the scan complete. It may take some time depending on the size and speed of your drive.
CHKDSK can help recover data from soft bad sectors, effectively marking any hard bad sectors to prevent the system from trying to access them in the future.
2. HDD Regenerator
HDD Regenerator is a powerful third-party software that claims to repair bad sectors without formatting the drive.
Key Features:
- Disk Scanning & Repair: It scans the entire disk surface and can reportedly regain bad sectors.
- User-Friendly Interface: The software is relatively straightforward to navigate, making it accessible to non-technical users.
How to Use HDD Regenerator:
-
Download and install HDD Regenerator from its official website.
-
Launch the software, and select the drive you wish to scan.
-
Choose the scanning option (normal or deep scan) based on your needs.
-
Allow the software to complete the scan and follow the prompts for any repairs.
While HDD Regenerator can be effective, it’s always advisable to back up your data before using such tools.
3. SpinRite
SpinRite is a hard disk recovery utility that focuses on repairing and recovering data from failing drives.
Key Features:
- Data Recovery: Undelete data from logically damaged drives.
- Enhanced Data Protection: Offers options to recover data from bad sectors precisely.
How to Use SpinRite:
-
Purchase and install SpinRite from the official website.
-
Create a bootable USB device with SpinRite, as it works best outside of the Windows environment.
-
Boot your system from the SpinRite USB drive and follow the on-screen instructions.
-
Choose the drive you want to scan and initiate the repair process.
SpinRite is particularly liked by advanced users for its in-depth capabilities.
4. EaseUS Partition Master
EaseUS Partition Master is a versatile tool that allows users to manage partitions and also includes a disk check feature.
Key Features:
- Disk Partitioning: Create, resize, and merge partitions easily.
- Disk Management: Offers comprehensive disk management tools beside bad sector repair.
How to Use EaseUS Partition Master:
-
Download and install EaseUS Partition Master on your Windows PC.
-
Launch the program and select the disk you want to check.
-
Right-click the selected disk and choose “Check Partition.”
-
Follow the prompts to scan and fix bad sectors.
5. MiniTool Partition Wizard
MiniTool Partition Wizard is another robust tool that provides features for partition management, along with disk checking functionality.
Key Features:
- Disk Partitioning: Similar to EaseUS, it enables users to manage disk partitions effectively.
- Disk Check Feature: Specifically targets bad sectors.
How to Use MiniTool Partition Wizard:
-
Download and install MiniTool Partition Wizard.
-
Open the program, and select the drive you want to check for bad sectors.
-
Click on the “Check File System” option under the “Partition” menu.
-
Follow the instructions to initiate the check and repair process.
Tips for Preventing Bad Sectors
While tools and software are available to help repair bad sectors, prevention is always better than cure. Here are several tips to maintain the integrity of your drives:
Regular Backups
Ensure you frequently back up your data to avoid loss during a hard drive failure. Use cloud services or external drives to store crucial information.
Monitor Disk Health
Use tools like CrystalDiskInfo or HDDScan that provide health status monitoring and SMART information to catch potential issues early.
Maintain Power Stability
Avoid abrupt shutdowns by using an uninterruptible power supply (UPS). This can protect against power failures that may corrupt data.
Keep the System Updated
Windows updates often include fixes and improvements that can enhance system stability and efficiency. Regularly check for updates.
Practice Good Disk Management
Frequent reboots, especially after software installations or updates, can keep your system running smoothly. Defragment HDDs (not SSDs) periodically to optimize performance.
When to Consider Drive Replacement
Despite all efforts to repair and maintain your storage device, there may come a time when replacement becomes inevitable. Here are signs that it’s time to consider a new drive:
Frequent Bad Sectors
If your drive continues to develop bad sectors despite running repair tools, it may indicate impending failure.
Performance Degradation
Consistent slowdowns and responsiveness issues, even after repairs, can suggest that your drive is on its last legs.
Age of the Drive
Drives typically have a lifespan of 3 to 5 years. If your device exceeds this age and shows signs of distress, consider replacing it.
Conclusion
Navigating the complexities of bad sectors on drives can be daunting, but understanding the tools available to manage and repair them is essential for any Windows 10 and 11 user. By maintaining your system, utilizing helpful software, and knowing when to replace your drives, you can safeguard your data and enhance your computing experience.
In the ever-evolving digital landscape, staying informed and proactive about disk health is a vital aspect of computer ownership. Whether through built-in tools like CHKDSK or third-party applications, you can effectively manage potential threats to your data integrity. Ultimately, the key is to remain vigilant and informed, ensuring that your computing environment is optimized for performance and reliability.
Last Updated on April 11, 2024 by Ian McEwan
Hard drives are one of the safest data storage devices. But still, there are ways in which you will lose your hard drive data. One of the ways is the formation of bad sectors on a hard disk.
If one or more than one bad sectors appear on your hard drive, it will start behaving abnormally and all of your data present in the bad sectors will become incomplete and inaccessible or in other words, will get lost.
So here, you are going to learn an easy way to fix bad sectors on the hard drive in Windows 10/8/7 and recover data from bad sector.

What is a Bad Sector?
A bad sector is a little cluster of defective storage space on hard drive (no matter magnetic hard drives, solid-state drives/SSD, internal hard drive or external hard drive), which won’t respond to load or write requests.
Types of Bad Sector
Bad Sectors are classified into two sections: Physical/hard bad sectors & Logical/soft bad sectors
Hard bad sectors are mainly due to physical damage and cannot be repaired. Physical damage can be due to extreme heat or dust on the disk drive.
On the other hand, Soft bad sectors result from system error and can be repaired. Soft bad sectors appear when the hard drive faces some invisible damage due to improper PC shutdown, system crash, etc.
Signs: What Bad Sectors on Hard Drive Can Do to Your Daily Computing
If you are not sure that if your hard drive has bad sectors or not, then here is how you can check. Following are the symptoms of bad sectors, if you constantly keep going through them, then be sure that your hard drive has bad sectors.
- Poor performance from the PC. Always stuck whenever you try to open multiple programs.
- Blue Screen
- When you try to open a file, this error occurs – “File is Corrupted“.
- Strange noises from the Hard drive
- Windows fail to boot
- Data loss or file corrupt
Are you experiencing any of these problems with your computer? If yes, then it becomes really necessary to fix bad sectors on hard drive if you don’t want to lose your important data.
TROUBLESHOOTING: Bad Sector Repair

*Note: Hard /Physical Bad Sector cannot be fixed. So, to keep your data safe as much as possible, it’s highly advisable to take Step 1 and Step 4.
Step 1. Recover Data on the Bad Sector Hard Drive
Although you still got a chance to correct bad sectors later, any information written to bad sectors are usually lost or inaccessible.
So, before fixing the bad sector, you’d better recover your inaccessible, deleted or lost files on your disk to minimize the chance of data loss during the bad sector repair.
And the one and only bad sector hard drive recovery solution is to use Hard Drive Recovery software.
There are a lot of Hard Drive Recovery software in the marketplace, and Stellar Data Recovery is one of the best.

To recover data from bad sector hard drive:
Note: Aside from Stellar Data Recovery, you can also try Aiseesoft Data Recovery, Wondershare Recoverit, EaseUs Data Recovery. All of these enable you to recover data with Zero compromise.
Step 2: Repair Soft Bad Sectors with Built-In Error Checking Utility
You don’t need any third party software to fix soft bad sectors in windows 10/8/7 because it has its own error checking tool- Disk Check.
Disk check helps you locate and correct hdd bad sectors automatically.
While Bad sectors may look like a big problem, its solution is short and easy. If you use Windows 10/8/7, it only takes a few steps to fix bad sectors on Hard Drive.
Here is how you can use the in-built Error checking tool of Windows 10/8/7 to fix it.
Windows 10/8
- Go to ‘My Computer‘
- Right click on the hard drive you want to repair and select ‘Properties‘
- Select ‘Tools‘ and then click ‘Check‘
- Now review the scan result and under ‘Error Checking‘, click on ‘Scan and Repair Drive (drive will be unavailable)‘
- Choose when you want to fix the hard drive and wait for several minutes for the scanning to finish
- After the scanning finishes, reboot your computer and the hard drive has been fixed
Windows 7
- Open ‘Computer‘
- Right Click on the disk drive you want to check for bad sectors and select ‘Properties‘
- Now click on ‘Tools‘ and under ‘Error Checking‘ section, click on ‘Check Now‘
- Now, a pop up will open, check all the boxes in the pop-up under ‘Check Disc Options‘ and click ‘Start‘ to start scanning the bad sectors in the disk drive and wait until the Scanning is finished.
- A check disc report will appear which means your hard drive has been repaired and bad sectors have been fixed.
This is how easily you can fix logical bad sectors on hard drive in Windows 10/8/7.
Step 3. Check the Physical Bad Sectors on Your Hard Disk
Disk check can eliminate the soft bad sectors, but not hard bad sectors, which will never go away and will only get worse.
To check your hard drive’s health and know the amount of the hard bad sectors, you need a free partition software to help.
Let’s pick EaseUS Partition Master as an example:
- Download, install and run the free partition manager, EaseUS Partition Master on your PC.

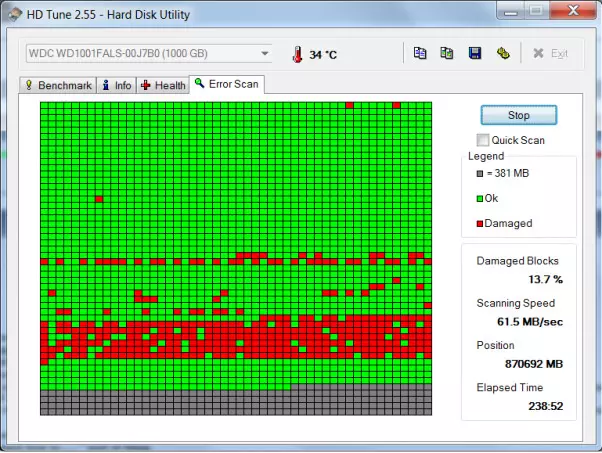
- Select and right-click the disk with suspected bad sectors, click Surface test.
- As you can see from the quadrille grid, all the bad sectors left behind after Step 2 are all marked as red.

Now, it’s time to make a decision.
Continue to use the hard drive or just replace it with a new one?
In what circumstances should I replace the hard drive with bad sector?
In fact, one or a few bad sectors is not a big deal. Because all modern hard drives have Spare sector pools for reallocation purposes.
When sectors fail while being written, the drive firmware will retire the bad sectors and activate spare sectors from the Spare sector pools.
With this bad sector swapping function, you can keep that hard drive unless more bad sectors occur.
If the amount of bad sectors reach a critical value or the disk is in serious conditions, then you should replace the drive.
Step 4. Backup Data and Replace Bad Sector Hard Drive
Although you can continue to load and write data from that hard disk with bad sector, your hard drive is actually beginning to wear out.
In case of any data loss due to hard drive malfunction, you’d better back up your files and replace the old drive with a new one.
To transfer your data to the new drive safely, you should use a disk cloning tool, EaseUS Disk Copy.
Just download and have it run on your PC, then follow the steps below.
- Connect the new hard drive to the computer as a storage device.
- Select Disk Mode from the program window, then pick the old drive as the source disk and the new one as the target disk. Click Next.

- Click OK when the warning message “The data on the target disk/partition will be erased. Do you want to continue?”
- Then you will have three options from the drop-down list, which are “Autofit the disk”, “Copy as the source” and “Edit disk layout”. Choose the “Autofit the disk” and click Proceed to continue.

The Way Forward
Whenever bad sectors appear on your hard drive in Windows 10/8/7, you can always follow the aforementioned guide to repair them. Hope you enjoyed the article and got your bad sectors repaired.
*FAQ About HDD Bad Sectors and Bad Sector Repair
Why My Hard Drive Gets Bad Sector?/ What are the Causes of Bad Sectors?
Bad Sectors don’t just appear and corrupt your files for no reason, there are some causes which force them to appear. Here are some of the most common causes of Bad sectors on hard drive:
- Improper PC Shutdown
- Malware or Virus attack
- Dust Pollution
- Hard drive constantly getting overheated
- System Crash
- Too old hardware
- Static Electricity effect
If you take care of these things, you will maintain your computer’s health without involving too much time or resources. This way your data will stay safe from getting lost.
This guide will show you various methods to fix the Bad Sectors error on your Windows 11 PC. The disk drive on which all your precious data is stored is divided into various sectors. In case, one of the sectors gets corrupted, then the repercussions might be faced by all the other sectors as well. And this could result in a great deal of inconvenience to the end-users as it would mean bidding adieu to their precious data.
As far as the plausible reason behind this issue goes, well it could be related to corrupt data, interference with third-party apps and services, buggy system files, or in rare cases, issues with the hard disk itself. While this is indeed one of the most concerning issues out there, fortunately, you could fix this Bad Sectors error on your Windows 11 PC via a few handy tweaks. And in this guide, we will make you aware of just that.
Table of Contents
It is recommended that you try out each of the below-mentioned workarounds and then see which one spells out success for you. So with that in mind, let’s get started.
FIX 1: Use Windows Error Checking Tool
Windows comes with a built-in error-checking tool that focuses specifically on hard disks. It will diagnose, scan and debug hard disk-related issues and then rectify them accordingly. So let’s put this tool to the test and check out the results.
- Bring up the File Explorer via Windows E shortcut keys.
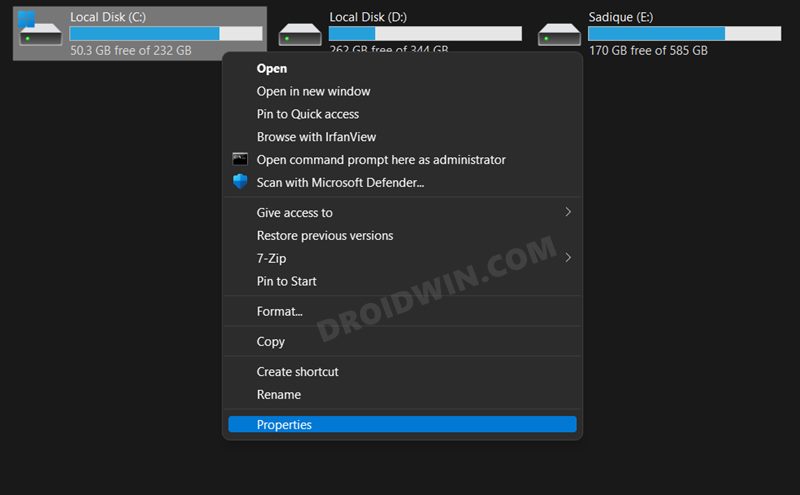
- Then right-click on the drive that is currently facing this issue and select Properties.

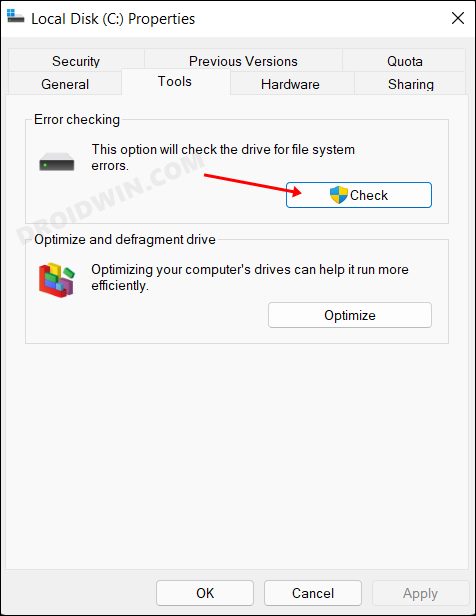
- After that, go to the Tools section and click on Check under Error Checking.

- Wait for the tool to diagnose and resolve the issue. Once done, restart your PC.
- Check if it fixes the Bad Sectors error on your Windows 11 PC.
FIX 2: Use SFC and DISM Commands
System File Checker and Deployment Image Servicing and Management are two command-line utility tools that scan for corrupt Windows files and then replace them with their working counterpart. The major difference between the two is whereas the SFC replaces the corrupt files with the working ones from the cached directory on your PC, DISM does so by downloading the working files from the online Microsoft servers. And as of now, we would be making use of both these tools to fix the underlying issue.
- Head over to the Start Menu, search Command Prompt, and launch it as an administrator.
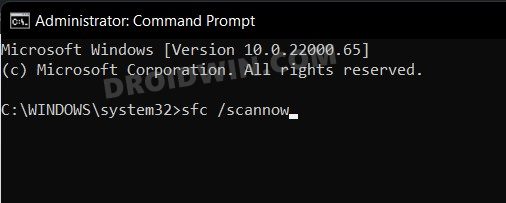
- Then copy-paste the below command to open the SFC Tool:
sfc /scannow

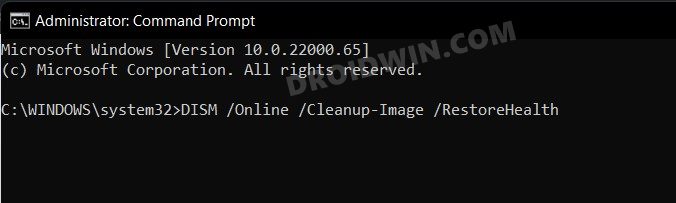
- Once the SFC Scanning is complete, it’s time to use the DISM Tool. So copy-paste the below command:
DISM /Online /Cleanup-Image /RestoreHealth

- Once DISM finishes the scanning, it is recommended to reboot your PC.
- Now check if it fixes the Bad Sectors error on your Windows 11 PC.
FIX 3: Run CHKDSK Command
If there are any bad sectors on your disk or if some system files have got corrupted, then it could result in the underlying issue that we are currently facing. In such cases, you could make use of the Check Disk command-line tool and get these issues rectified. Here’s how
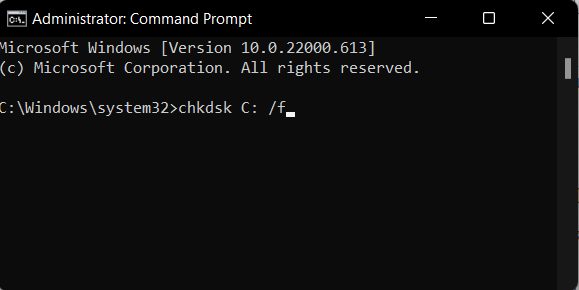
- Launch Command prompt as an admin from Start Menu
- Then copy-paste the below command and hit Enter
chkdsk C: /f

- Now, wait for the scan to complete. Once done, restart your PC.
- Check if it fixes the Bad Sectors error on your Windows 11 PC.
FIX 4: Delete Temporary Files
In some instances, the temporarily stored files could lead to a few conflicts with the proper functioning of your PC. Therefore, you should consider deleting these cached files and then test out the results.
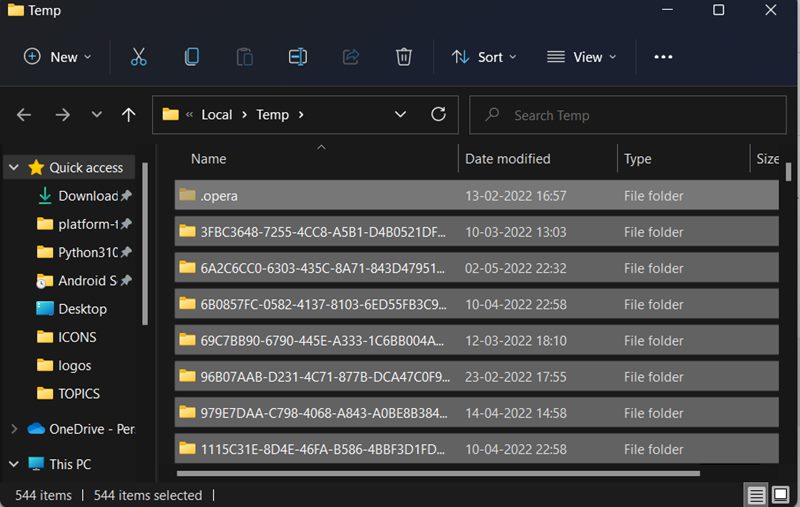
- Launch Run via Windows + R shortcut keys.
- Then copy-paste the below command and hit Enter. This will take you to the temp folder.
%temp%

- Use the Ctrl + A shortcut to select all the files and hit the Del key to delete them.
- Check if it fixes the Bad Sectors error on your Windows 11 PC.
FIX 5: Use Windows Troubleshooter
Windows comes built-in with quite a few troubleshooter apps that scan for issues and bring out the related fixes. As for the current issue, we will be using the System Maintenance and the Hardware and Devices troubleshooters, as they are the best fit to resolve this bug.
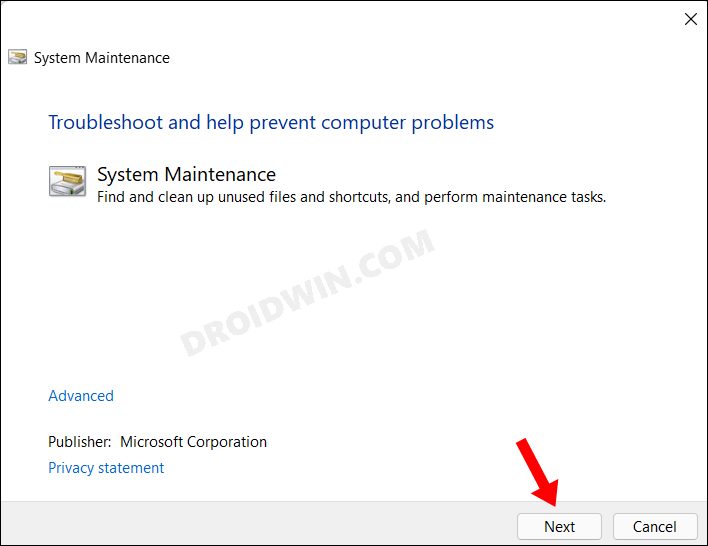
- Bring up the Run dialog box via Windows R shortcut keys.
- Then type in the below command and hit Enter
msdt.exe -id MaintenanceDiagnostic
- This will launch the System Maintenance troubleshooter, click Next to continue.

- It will now scan for underlying issues and bring up the related fix as well.
- Just select the fix to implement and then check if the issue has been fixed or not.
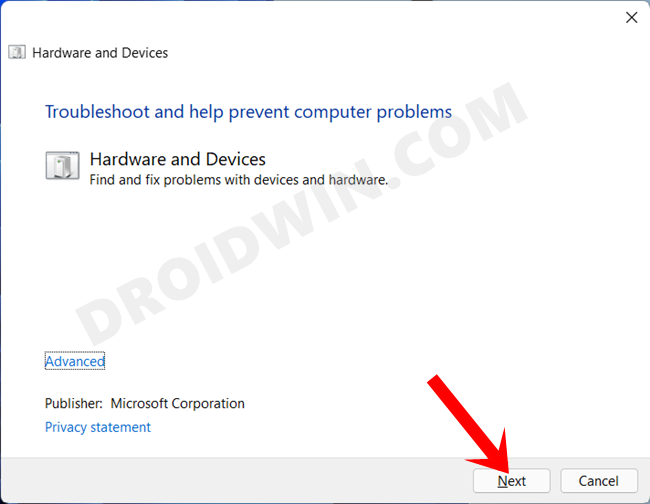
- If it is still there, then enable the Hardware and Devices troubleshooter on your PC.

- Then launch it, click Next and let it scan for issues. Then apply the fixes that it brings up.
- Check if it fixes the Bad Sectors error on your Windows 11 PC.
FIX 6: Boot to Safe Mode
In some instances, a third-party app might conflict with the OS functionality as well. The best way to verify and hence rectify this issue is to boot your PC to the Safe Mode. Doing so will disable all the third-party apps and give you the stock environment with just the system apps. If you are able to select multiple files in this mode, then the culprit is an app or software. Therefore, you should consider uninstalling the recently installed apps after which the issue first came to light. Here’s how:
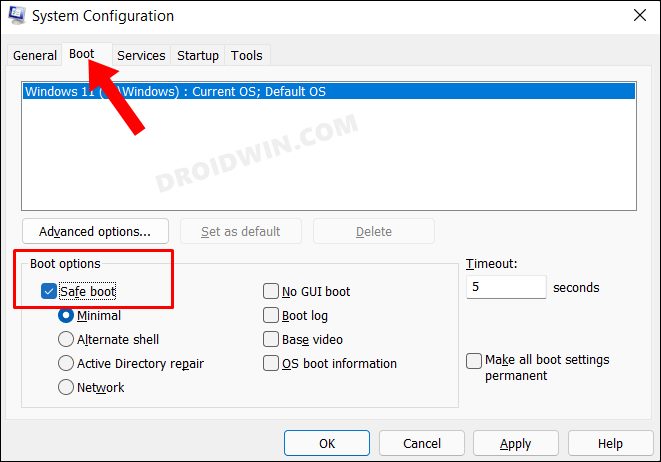
- Bring up the Run dialog box via Windows+R shortcut keys.
- Then type in the below command and hit Enter to open the System Configuration menu
msconfig

- Now go to its Boot tab and checkmark Safe Mode under Boot Options.
- Finally, click OK followed by Restart in the confirmation dialog box.
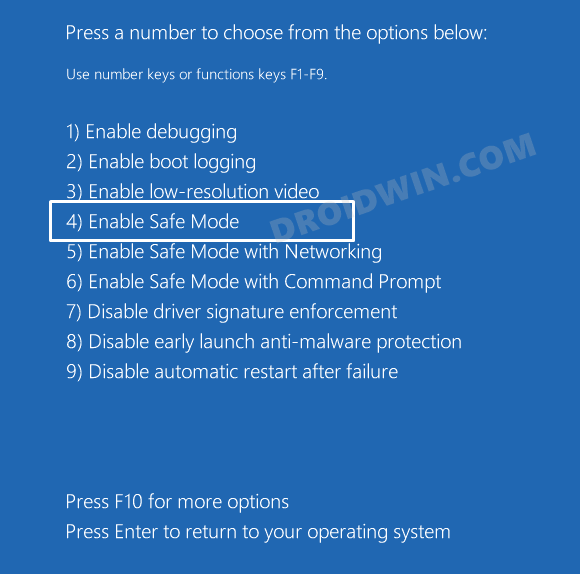
- Your PC will now boot to Windows Recovery Environment.
- Go to Troubleshoot > Advanced options > Startup Settings > Click Restart > Press 4 to boot to Safe Mode.

- Check if it fixes the Bad Sectors error on your Windows 11 PC.
FIX 7: Disable Third-Party Service
A third-party service could also create a few roadblocks in the functioning of this feature. Therefore, you should consider disabling all the non-Microsoft-related services and then test out the results. Here’s how it could be done
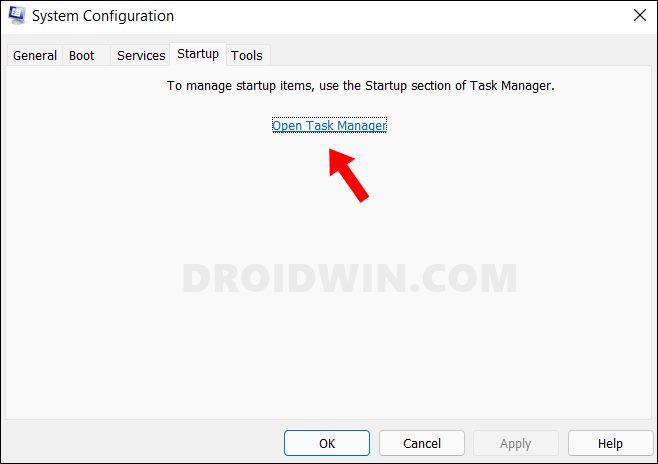
- Head over to the Start Menu, search System Configuration, and open it.
- Then go to the Services tab, checkmark Hide All Microsoft Services, and click on the Disable All button.

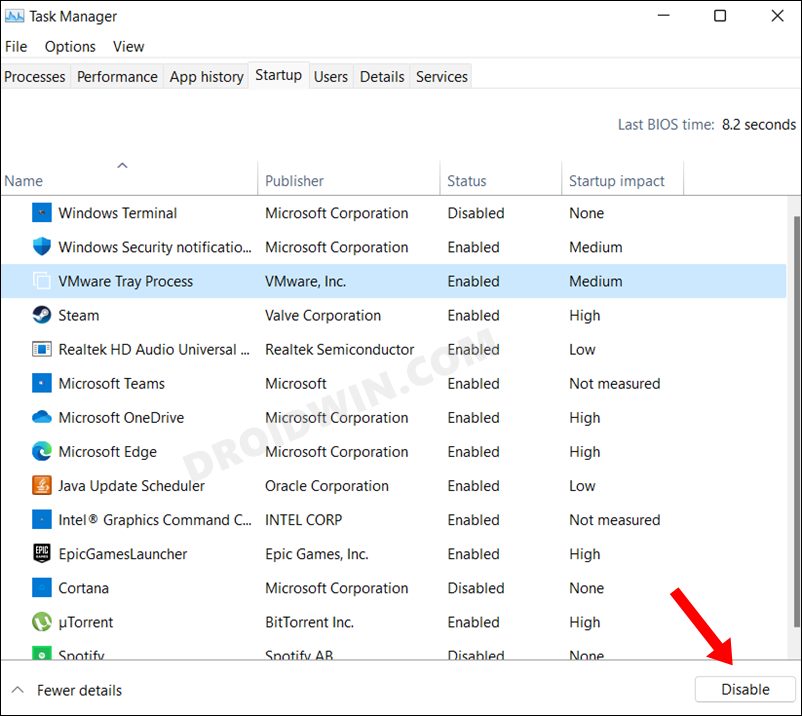
- Then go to the Startup tab and click on Open Task Manager.

- Now select a process from the list and click Disable. Do so for all the running services.

- Once done, restart your PC and then check if it fixes the Bad Sectors error on your Windows 11 PC.

FIX 8: Use a Restore Point
If none of the aforementioned methods spelled out success, then you should consider restoring your system to an earlier point during which it was free from this issue. Here’s how it could be done
- To begin with, open the Settings page via the Windows+I shortcut keys.
- Then go to the System tab from the left menu bar, scroll all the way to the bottom and click on About.
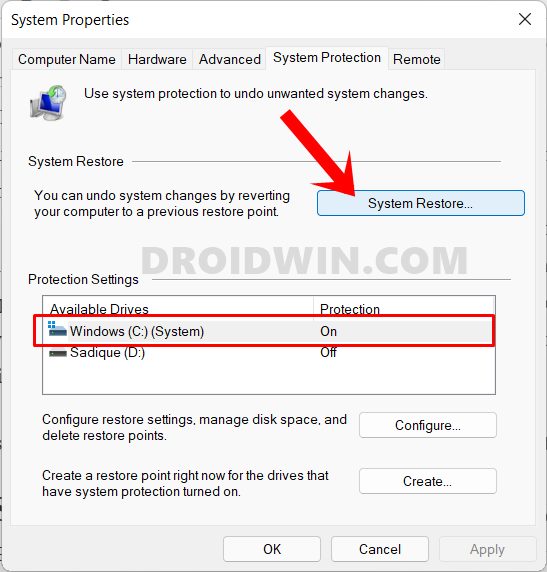
- After that, click on the System Protection option present on the Related Links tab.
- This shall launch the System Properties dialog box. Go to the System Protection tab and click on System Restore.

- Windows will now bring up the backup under the Recommended Restore section. This is the backup that it finds most suitable according to your PC’s current condition.
- If you are satisfied with it, enable the Recommended Restore option and hit Next.
- However, if you wish to select any other custom backup, then select Chose a Different Restore point and click Next.
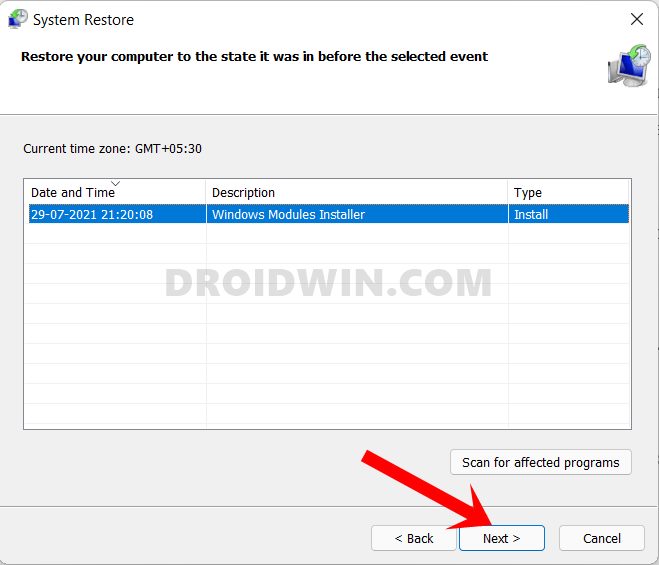
- Now select the desired restore point and hit Next.

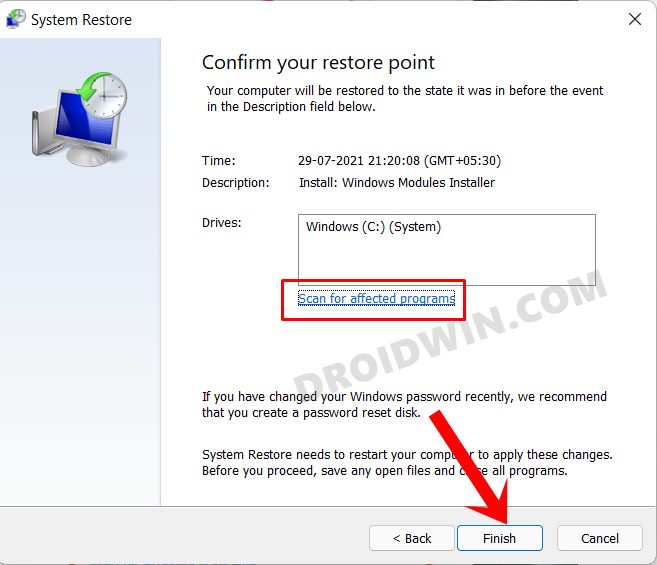
- Windows will now bring up the finalized screen showing all your selections. You may click on the Scan for Affected program option and get a list of all the programs that would be uninstalled/re-installed after this restore.

- If everything is as per your requirement, hit the Finish button and wait for the restore to complete.
- Once done, your PC will automatically boot to that system restore point, with the underlying bug being resolved.
FIX 9: Verify Hardware Issue
If none of the aforementioned methods spelled out success for you, then it might be a case of hardware issue. To verify the same, take the help of a technician and remove the hard disk from your PC. Then insert it into another system and check out the results. If it still shows the same error, then it is indeed a case of hardware failure, and you will need to repair it. If the issue is not that deep-rooted, then some highly skilled technician might preserve all your data as well, though it will come at an additional cost.
So with this, we round off the guide on how you could fix the Bad Sectors error on your Windows 11 PC. We have listed nine different methods for the same. Do let us know in the comments section which one spelled out success for you. Likewise, all your queries are welcomed in the comments below.
- Windows Detected a Hard Disk Problem: How to Fix
- How to Fix Windows 11 High CPU and Disk Usage
- Convert Legacy BIOS to UEFI and MBR to GPT in Windows 11
- Enable Hardware Acceleration in Windows 11 [3 Methods]
There are several symptoms that you can start to suffer on your PC when your hard drive has bad sectors: from extreme slowness in processing files stored on the hard drive to strange noises in the drive, through crashes and file corruption. If you start to notice any of these symptoms, it is possible that your hard drive is starting to die from too many bad sectors, but don’t worry because there is still a chance to repair them to bring the drive back to relative normality.
What are bad sectors and why do they occur?
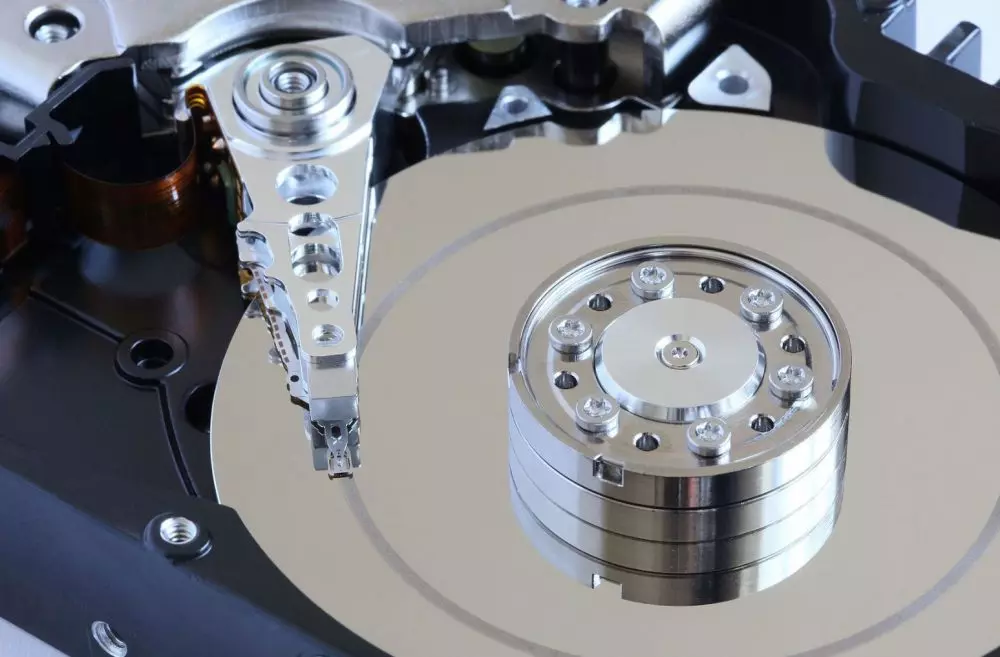
Internally and in order to better manage information, mechanical hard drives group the information they hold in sectors made up of a certain number of bits. These sectors are created so that, we repeat that internally, a kind of map or index can be created so that the disk knows where each bit of information is housed and is able to send the moving head to the appropriate sector to be able to read or write the information .
When you try to read or write to a sector and, for whatever reason, the head is not capable of it, the drive reports it as faulty and discards it (this means that the next few times it will not even try to read or write to that sector ). There are two types of bad sectors and the causes that produce them are multiple, but we will try to explain it in the simplest way possible:
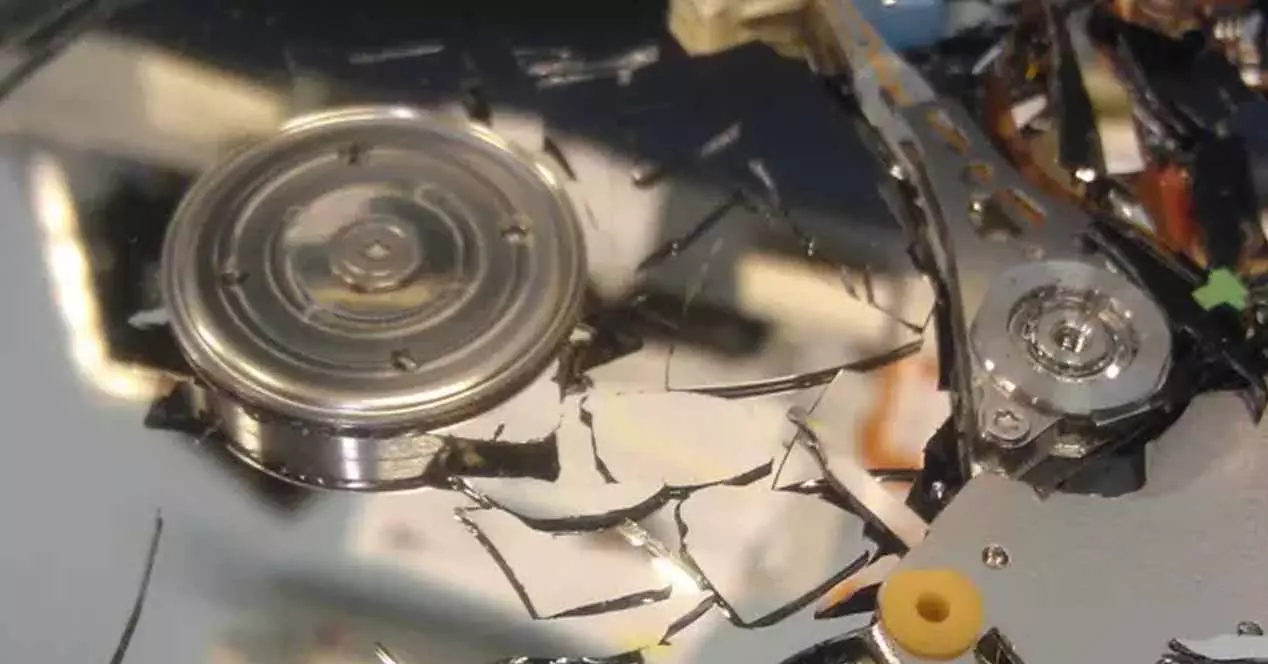
- Physical problems: generally caused by impacts (dropping your hard drive to the ground, for example) or serious errors with the head (known as head crash) in which the platter has been physically damaged and, therefore, certain sectors have been left permanently inaccessible. This type of bad sector cannot be repaired, although we can mitigate the problem by having the hard disk permanently discard the affected sectors to avoid errors.
- Logical problems: They are caused by a failure in the reading or writing of the disk, which can be caused for example by a sudden power failure while the hard disk was writing data. In some cases they can also be caused by errors or data corruption in which the sector has disappeared from the index that we talked about a moment ago. In these cases, the problems can be fully repaired.
How to tell if your hard drive has bad sectors
In the image that we have placed above these lines you can see the inside of a hard disk that has suffered a “head crash”, and in which it is clearly seen that the head has completely damaged the surface of the platter, rendering it practically unusable. If this is your case, you will notice that the hard disk makes a series of strange noises, such as scratching or scraping, and obviously it is not working correctly.
To find out if your hard drive has bad sectors, the best thing you can do is use the tools that Windows contains for it, since they are simple to use and really very effective. We talk about the utility CHKDSK We have already talked about it on previous occasions, a tool that is precisely designed to detect and repair almost any type of problem that you may have in your storage units (not only hard drives but also SSDs or even USB Flash drives).
To do this, right-click on the Start button and select the “Command Prompt (administrator)” option. In the window that opens, you must execute (type and then press ENTER) the following command:
chkdsk x: / F (where x is the drive letter assigned to the hard disk; you can check its handwriting simply by going to “This computer” in Windows).
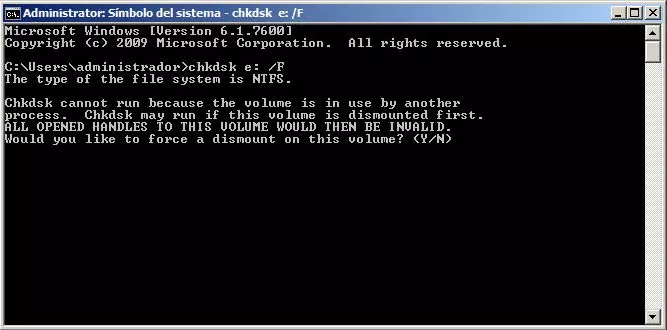
If you are executing the command directly from Windows, you will see a screen similar to the one above, in which the operating system tells us that the unit is in use and that it cannot be analyzed, urging us to unmount the volume (something that only It will appear in the event that the hard drive to be analyzed is not where you have the operating system installed) or if you restart the computer and that CHKDSK runs automatically on the next boot. Either way, hit the Y on your keyboard and then ENTER to accept.
The process consists of three phases, in which the system will first analyze the drive and then try to repair any errors it finds (the third phase is simply verification). The process can take a long time depending on the capacity of your hard drive and the number of errors it finds, but if the errors are fixable, this tool will take care of everything and you will not have to do anything.
Another way to check if your hard drive has bad sectors is also built into Windows. Go to “This computer”, right-click on the problem drive and click on “Properties”. There go to the Tools tab and you will see something like this:
Click on the Check button, and the system will analyze the hard drive for problems, errors and bad sectors. In the event that it finds a problem, the software itself will suggest that you try to repair it automatically without you having to do anything else.
Can bad sectors on hard drive be repaired?

As we have mentioned, both with CHKDSK and with the Windows Check tool you can detect and try to repair bad sectors on your hard drive, but neither of these tools is completely infallible (and the problem may not be repaired if the damage is physical , as we told you at the beginning) so the hard drive may not be in good condition despite everything.
If the problems are not physical but logical and the previous tools have not been able to solve the problem, another more direct method is to perform a low level formatting of unity, a process that will delete all information It contains (so back up the data first) because it literally resets all the bits on the hard drive one by one, including the sector assignment and index.
This is a pretty radical way to repair a hard drive with bad sectors, but if the bad sector problems are not repairable they will be skipped in the new sector assignment and therefore you can continue to use the hard drive after the process. Of course, if the amount of bad sectors on the disk is large enough, you will see that its maximum capacity will have been reduced since, literally, it will have fewer usable sectors.
Follow Us
The hard drive is a critical component that stores all your digital content and data. All the files saved on the hard drive are kept in various sectors.
As such, when the hard drive runs into issues, you might bump into the “bad sectors” error. This issue simply indicates that one of the hard drive sectors is damaged and needs attention. So, let’s find out what causes the “bad sectors” issue and explore all the possible solutions to this problem.
What Causes the Windows «Bad Sectors» Error?

Here are some of the leading causes of the “bad sectors” issue on your hard drive:
- Corrupted Data: The hard drive sectors are often damaged by corrupted data. Some of the main causes of data corruption include malicious attacks and improper system shutdown.
- Damaged or Corrupted Firmware: When the firmware is damaged or corrupted, the hard drive often runs into issues or won’t operate at all.
- An Overheating Hard Drive: An old hard drive that has reached the end of its life span is usually prone to overheating and other issues. To avoid problems (such as the «bad sectors» error), it’s best to replace an old hard drive with a new one as soon as possible.
- System Maintenance Issues: The error might also be caused by various system-related issues. In most cases, you can resolve the problem by using a few built-in troubleshooters.
Now, let’s explore the various solutions to this problem.
1. Scan and Repair Drive Errors
To tackle the «bad sectors» issue, you could start by scanning and repairing a few drive errors. Here’s how you can do this:
- Press Win + E to open the Windows File Explorer.
- Click This PC on the left-hand side and locate your PC’s main hard drive on the right-hand side.
- Right-click on the hard drive and select Properties.
- Navigate to the Tools tab and click the Check button.
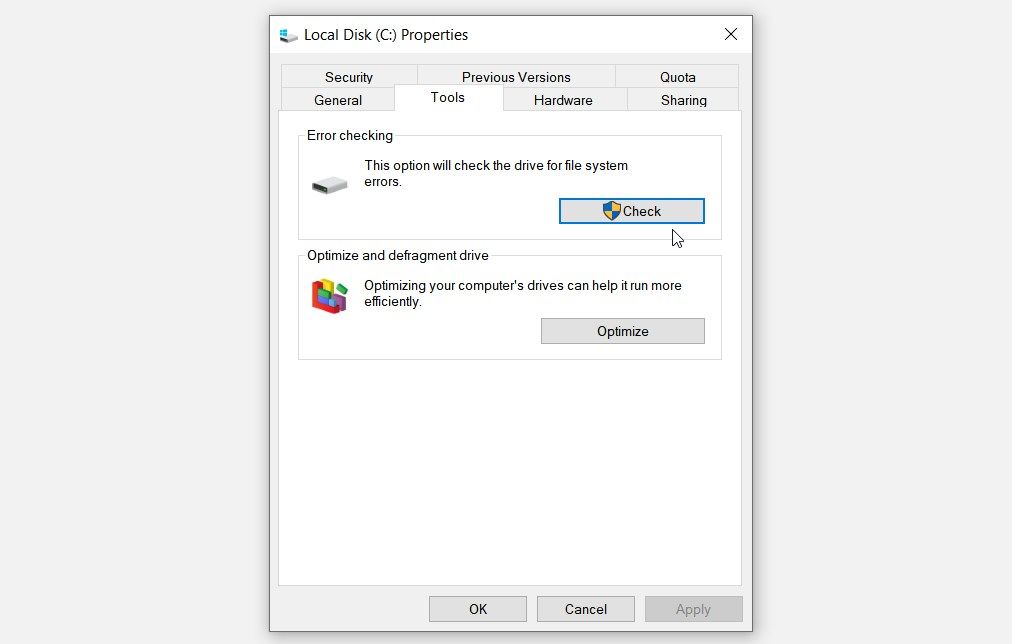
Follow the on-screen instructions and then restart your device to apply these changes.
2. Perform a Check Disk Scan
You could also get rid of this issue by performing a Check Disk (CHKDSK) scan. This feature thoroughly scans your hard drive and fixes the issues on it.
So, let’s check out how you can perform the Check Disk scan:
- Press Win + R to open the Run command dialog box.
- Type CMD and press Ctrl + Shift + Enter to open an elevated Command prompt.
- Type the following command and press Enter to run a Check Disk scan:
chkdsk C: /f
If your Windows OS is installed on a different drive, replace the C: command with the letter of the correct drive.
Restart your device when the scan is complete.
If you want to fix the error and scan for other bad sectors, type the following command and press Enter:
chkdsk C: /r
Wait for the process to complete and then restart your device.
3. Repair or Replace Corrupted System Files
If this error is caused by corrupted system files, then you could try using the DISM and SFC tools. These two features are the best when it comes to fixing or replacing Windows corrupted system files.
Let’s start by checking how you can run a DISM scan:
- Press Win + R to open the Run command dialog box.
- Type CMD and press Ctrl + Shift + Enter to open an elevated Command Prompt.
- Type the following command and press Enter to run the scan:
DISM /Online /Cleanup-Image /ScanHealth
Wait a couple of minutes for the scan to complete. From there, type the following command and press Enter:
DISM /Online /Cleanup-Image /RestoreHealth
Wait a few more minutes for this scan to complete. Finally, restart your device to apply these changes.
Now, let’s see how you can now run an SFC scan:
- Open an elevated Command Prompt by following the previous steps.
- Type the following command and press Enter to run the scan:
sfc /scannow
Wait for this scan to complete and then close the Command Prompt. Restart your device to apply the changes.
The built-in troubleshooters often make it easy for you to tackle most system-related issues. However, you should always use a relevant troubleshooter for every specific problem.
Assuming that the error is caused by system maintenance problems, then the System Maintenance troubleshooter will help. Meanwhile, if the error stems from hardware-related issues, then you could run the Hardware and Devices troubleshooter.
Now, let’s start by running the System Maintenance troubleshooter:
- Press Win + S to open the Start Menu search bar.
- Type Perform recommended maintenance tasks automatically and select the Best match.
- Next, click the Advanced option and check the Apply repairs automatically box.
- Click Next and finalize the process by following the on-screen instructions.

If this doesn’t resolve the issue, try running the Hardware and Devices troubleshooter through these steps:
- Type Settings in the Start Menu search bar and select the Best match.
- Type Troubleshoot in the Settings search bar and select the Troubleshoot option when it appears.
- Click the Additional troubleshooters option on the right-hand side.
- Click the Hardware and Devices troubleshooter and then press the Run the troubleshooter button. Finally, follow the on-screen instructions to finalize the process.
5. Restore Your Device to a Previous State
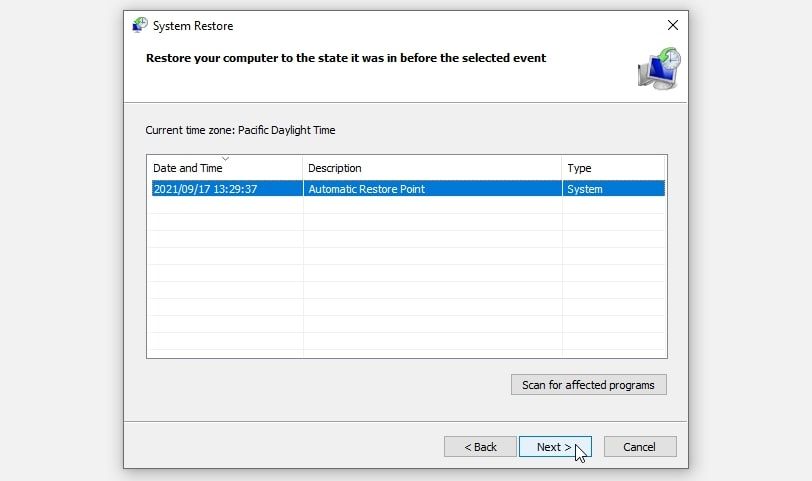
If you only started noticing this error recently, then you could try using a restore point.
A restore point combats any recent system issue by restoring your device to its previous state. However, this tool only works if you’ve previously created a restore point.
Now, here’s how you can use a restore point to get rid of this error:
- Press Win + S to open the Start Menu search bar.
- Type Create a Restore Point and select the Best match.
- Click on the System Protection tab and then press the System Restore button. Press Next to continue.
- Select the most recent restore point from the list and then click Next. Follow the on-screen steps to complete the process.
6. Restore Windows’ Factory Settings
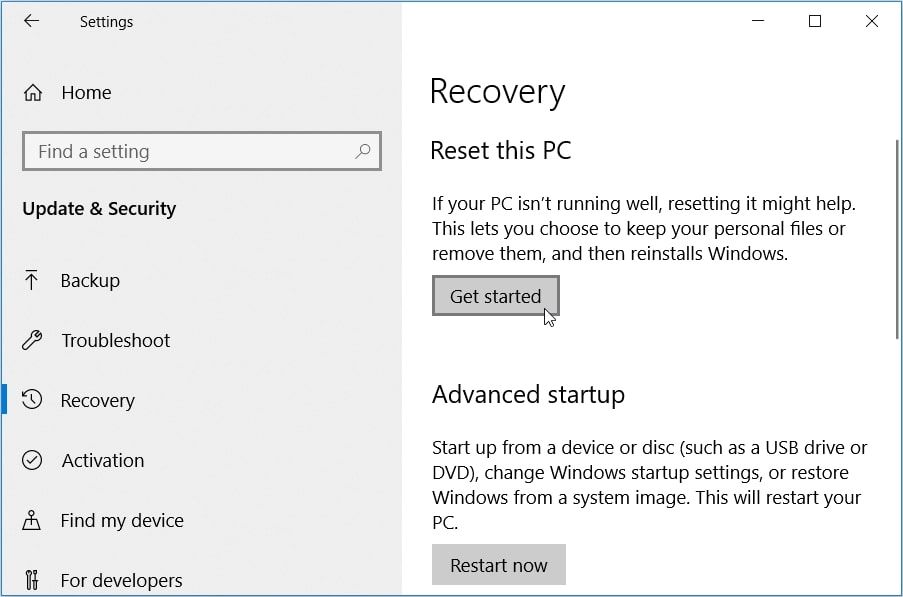
By now, the “bad sectors” error should be resolved. However, if the issue persists, then you might just consider resetting your Windows PC. This process restores the device to its factory settings while keeping your data safe.
Resetting Windows is a safe and reliable process. However, before proceeding with these steps, it’s best to back up your device first just in case things don’t go accordingly.
Now, here are the simple steps for resetting your Windows device:
- Press Win + I to open the Settings window.
- Select the Update & Security option. Next, select Recovery from the options on the left-hand side pane.
- Click the Get started button on the right-hand side pane. Finally, follow the on-screen steps to complete the process.
Resolve the Windows “Bad Sectors” Issue With Ease
The «bad sectors» error is a common problem that usually attacks old Windows devices. To tackle this issue, you could try any of the solutions we’ve covered. But if all else fails, replacing your hard drive could be the ultimate solution.