
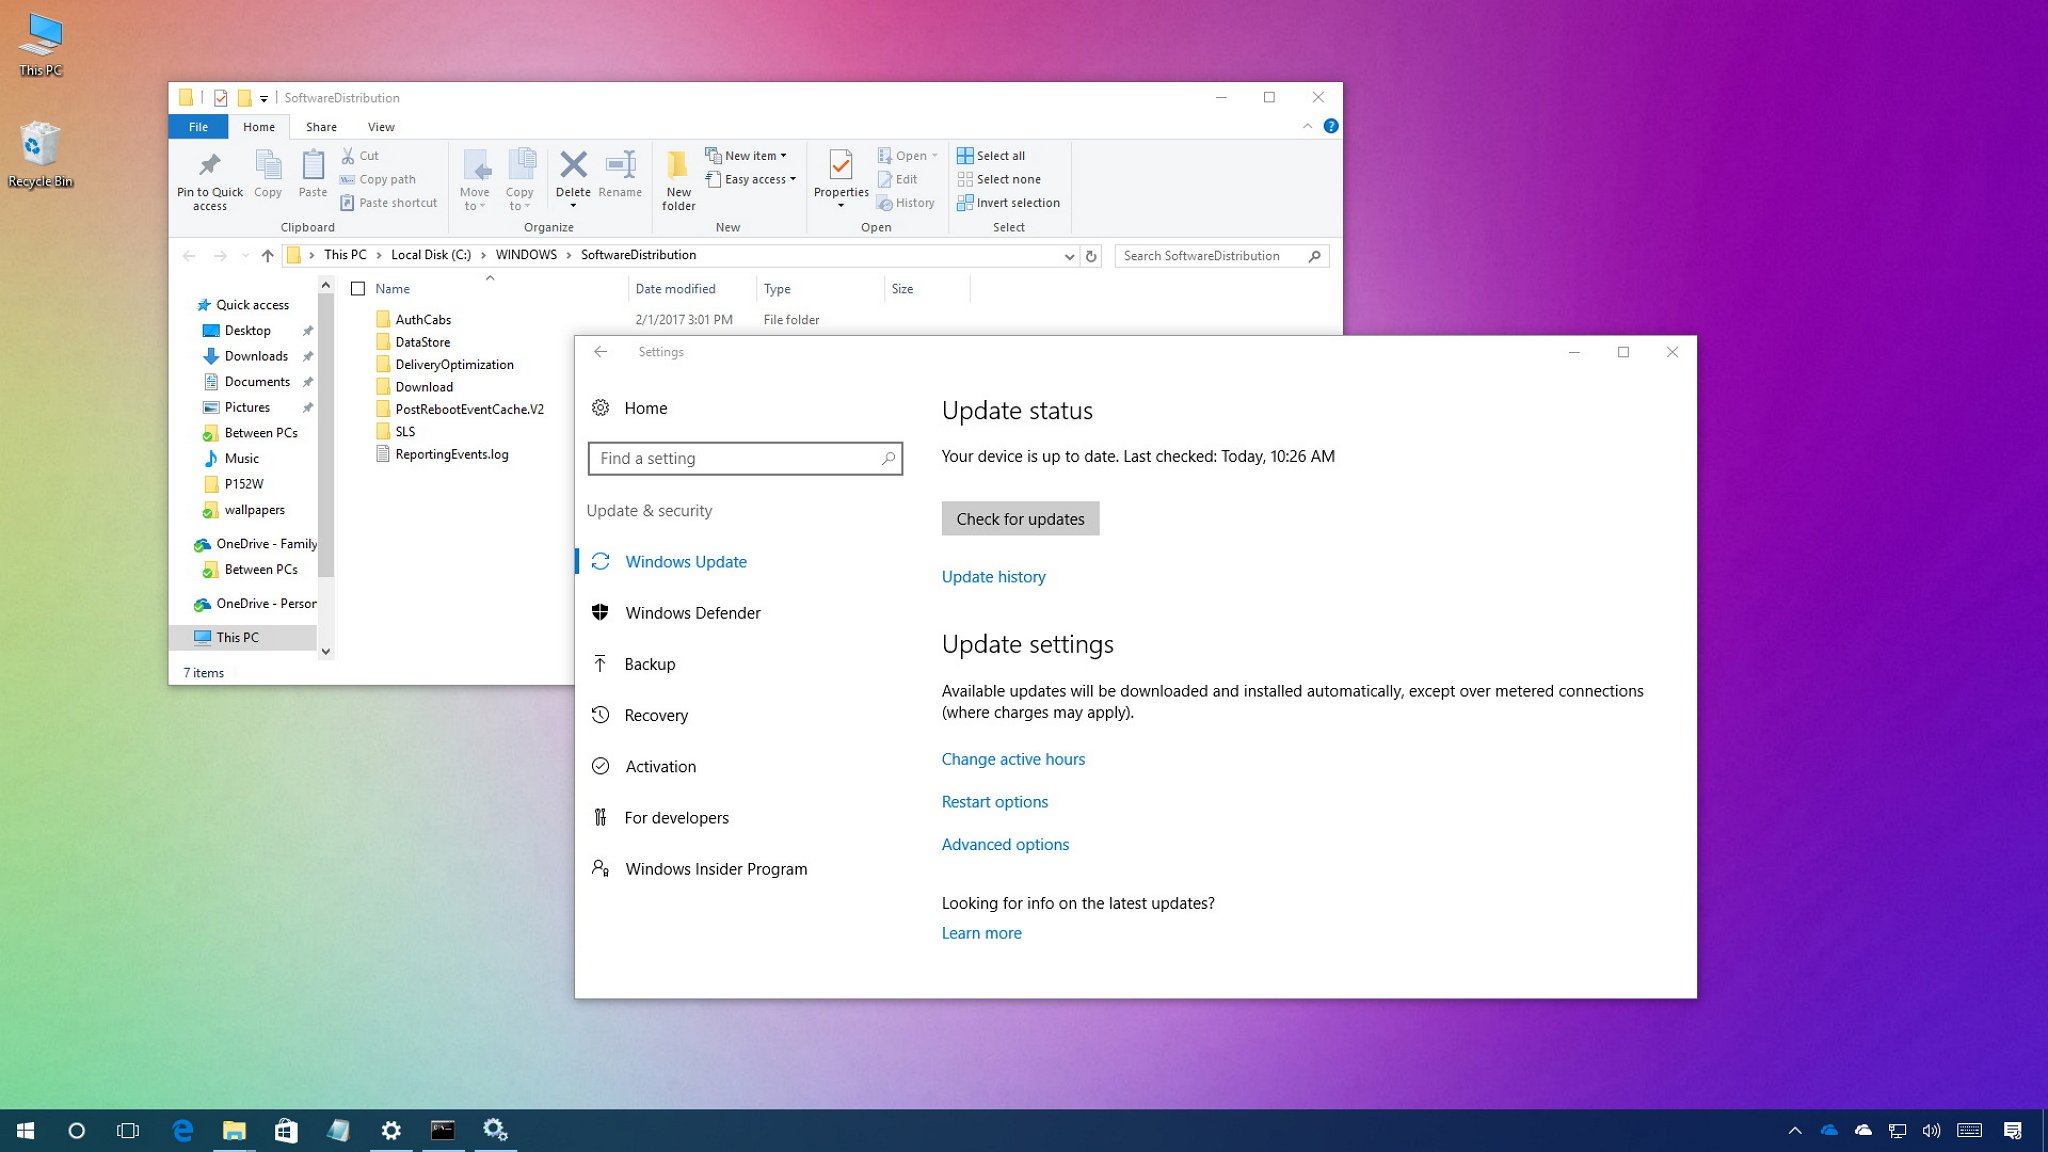
On Windows 10, the «SoftwareDistribution» folder is an essential component for Windows Update, which temporarily stores files needed to install new updates to keep your device secure and with the latest fixes and improvements.
This folder is maintained by the WUAgent (Windows Update Agent), and typically, it should be left alone, but there will be times when you may need to clear its content manually in the case the Datastore and Download folders aren’t synchronized, and it’s preventing Windows Update from applying new updates to your PC.
Usually, if you’re having trouble with Windows Update, or after updates have been applied, it’s safe to empty the content of the SoftwareDistribution folder. Windows 10 will always re-download all the necessary files, or re-create the folder and re-download all the components, if removed.
In this Windows 10 guide, we’ll walk you through the steps to delete the content inside the SoftwareDistribution folder. As an alternative option, we’ll also show you the steps to rename the folder, in case you only want to test if the folder’s content is the one causing problems.
- How to clear the ‘SoftwareDistribution’ folder
- How to rename the ‘SoftwareDistribution’ folder
How to clear the ‘SoftwareDistribution’ folder
To delete the content inside the SoftwareDistribution folder, do the following:
- Open Start.
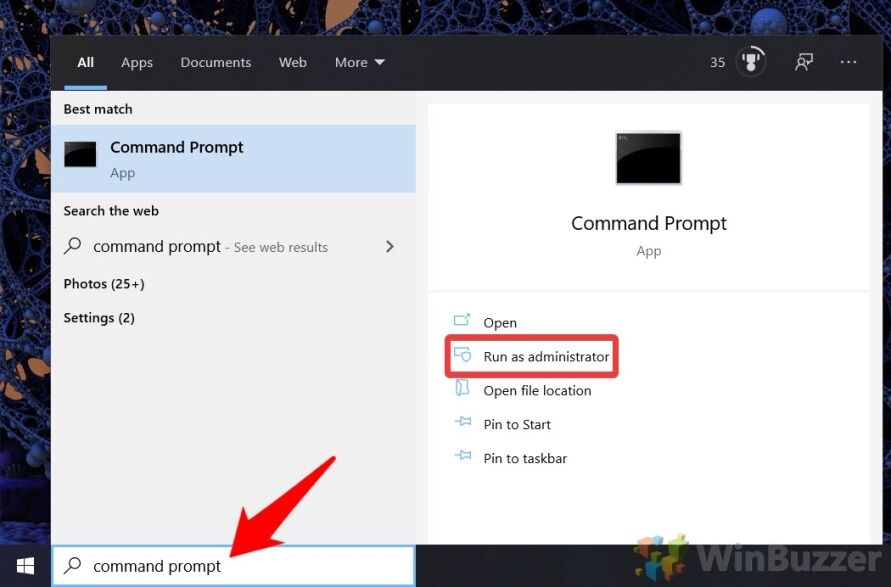
- Search for Command Prompt, right-click the result, and select Run as administrator.
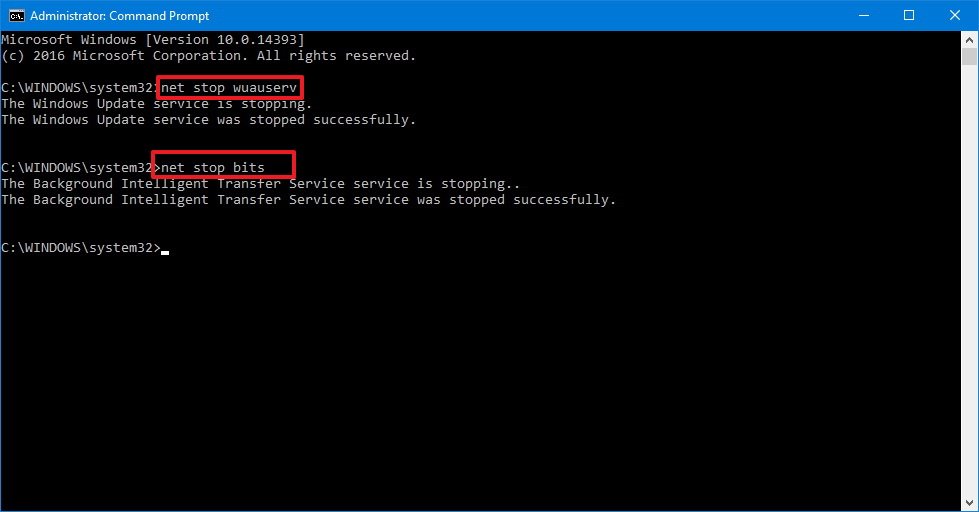
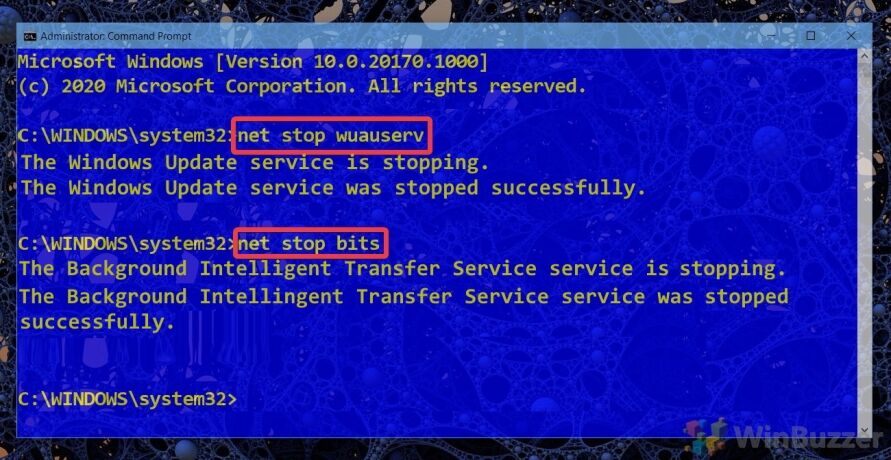
- Type the following command to stop the Windows Update Service and press Enter:
net stop wuauserv - Type the following command to stop the Background Intelligent Transfer Service and press Enter:
net stop bits
- Use the Windows key + R keyboard shortcut to open the Run command.
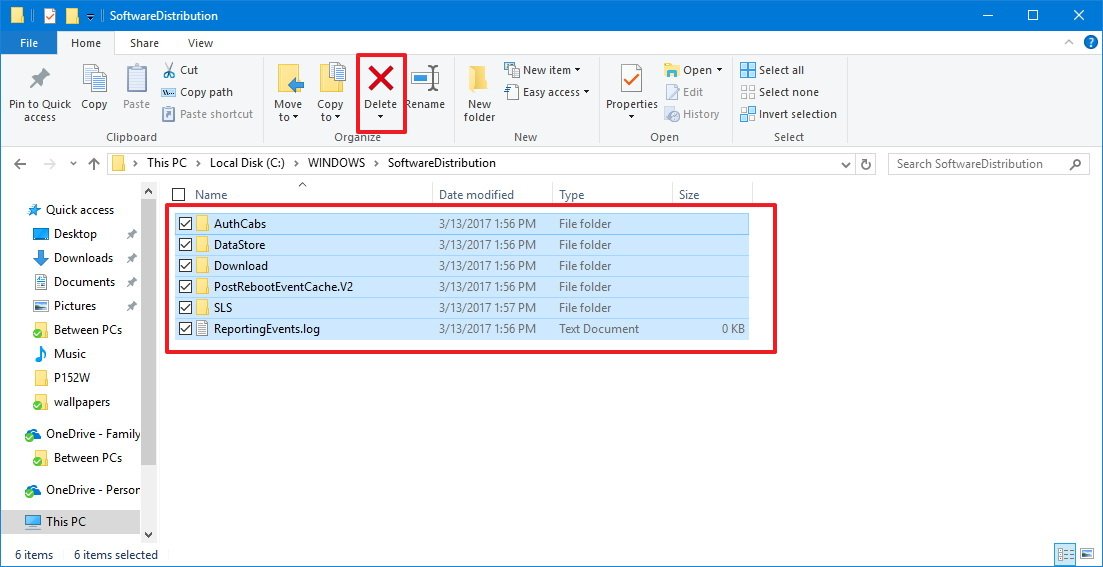
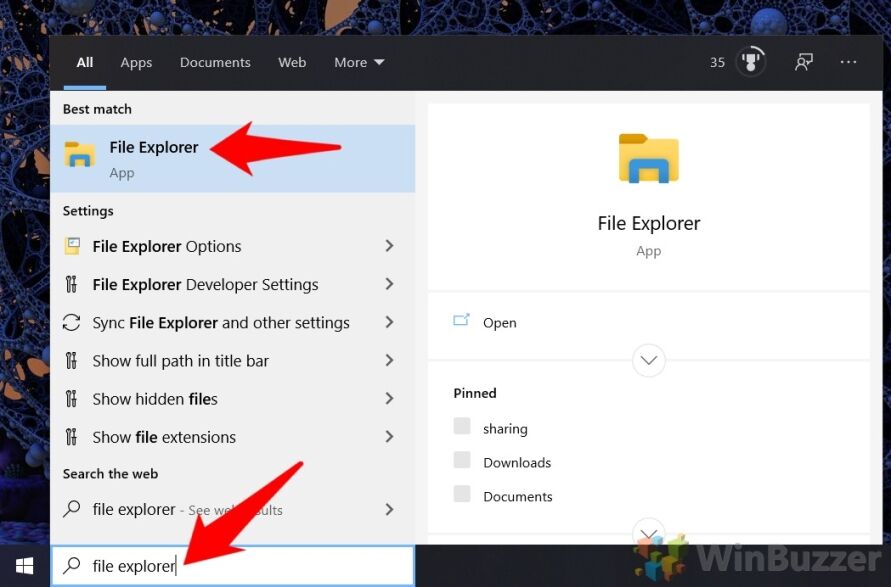
- Open File Explorer and browse the following path:
C:\Windows\SoftwareDistribution - Select all its content and click the Delete button to clear the content.Quick Tip: In the case, you’re having trouble deleting all the files, simply restart your computer, and try again.
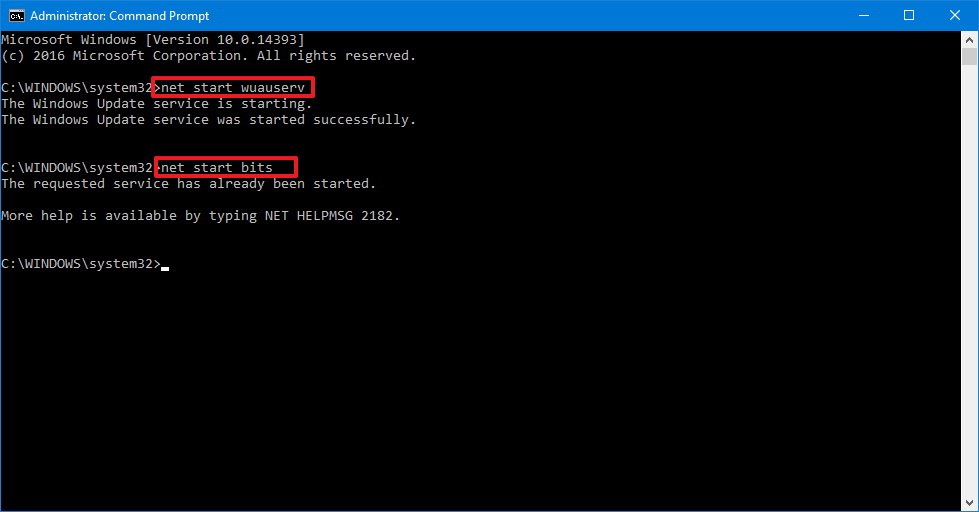
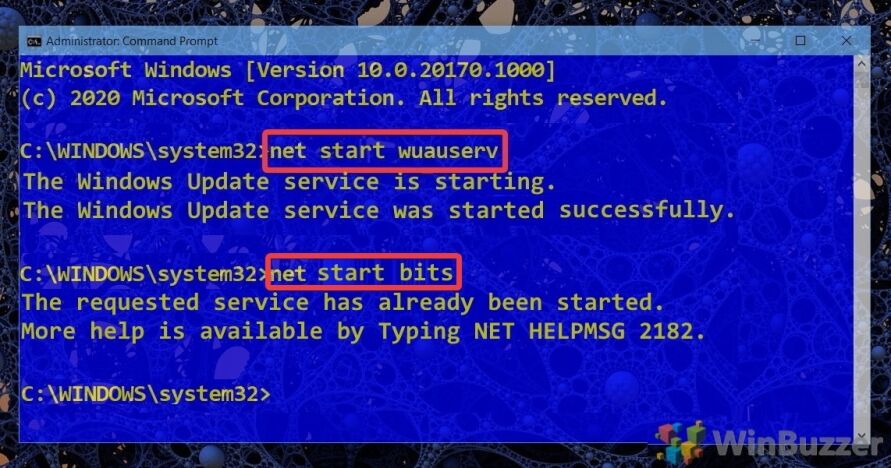
- On Command Prompt, type the following command to start the Windows Update Service and press Enter:
net start wuauserv - Type the following command to start the Background Intelligent Transfer Service and press Enter:
net start bits
Once you completed the steps, Windows 10 will reconfigure the folder and re-download all the necessary components.
How to rename the ‘SoftwareDistribution’ folder
If you don’t want to delete the content inside of the folder, you can alternatively, rename the folder to troubleshoot Windows Update problems.
All the latest news, reviews, and guides for Windows and Xbox diehards.
To rename the SoftwareDistribution folder, do the following:
- Open Start.
- Search for Command Prompt, right-click the result, and select Run as administrator.
- Type the following command to stop the Windows Update Service and press Enter:
net stop wuauserv - Type the following command to stop the Background Intelligent Transfer Service and press Enter:
net stop bits
- Use the Windows key + R keyboard shortcut to open the Run command.
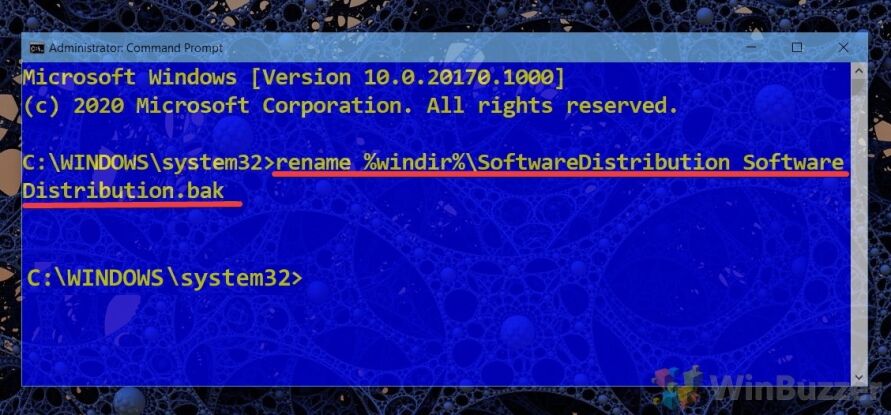
- Type the following command to rename the folder and press Enter:
rename %windir%\SoftwareDistribution SoftwareDistribution.bakQuick Tip: If the command isn’t letting you rename the folder, try steps No. 3 and 4 one more time, and then try to rename the folder.

- Type the following command to start the Windows Update Service and press Enter:
net start wuauserv - Type the following command to start the Background Intelligent Transfer Service and press Enter:
net start bits
After you’ve completed the steps, Windows 10 will re-create the folder and re-download all the necessary components.
The only caveat with this process is that the SoftwareDistribution folder also includes the Windows Update history information, which means that emptying up the folder will result in loss of this data. In addition, you’ll notice that Windows Update will take longer than usual to detect and update your computer because the WUAgent must check and re-create the Datastore information. However, it’s a small price to pay to get your device to update again.
While sometimes the folder may grow, it’s only recommended to use these instructions only when necessary. You shouldn’t mess with the SoftwareDistribution folder to free up storage space on your computer.
More Windows 10 resources
For more help articles, coverage, and answers to common questions about Windows 10, visit the following resources:
- Windows 10 on Windows Central – All you need to know
- Windows 10 help, tips, and tricks
- Windows 10 forums on Windows Central
Mauro Huculak has been a Windows How-To Expert contributor for WindowsCentral.com for nearly a decade and has over 15 years of experience writing comprehensive guides. He also has an IT background and has achieved different professional certifications from Microsoft, Cisco, VMware, and CompTIA. He has been recognized as a Microsoft MVP for many years.
What is the SoftwareDistribution folder and what is it used for? Although many users are not aware of this folder, so let’s shed some light on the importance of the SoftwareDistribution folder. This folder is used by Windows to temporarily stores files needed to install the latest Windows Updates on your device.
Windows updates are important as it provides security updates & patches, fixes a lot of bugs and improves your system performance. SoftwareDistribution folder is located in the Windows directory and is managed by WUAgent (Windows Update Agent).
Do you think that deleting this folder is ever required? On what circumstances, you would delete this folder? Is it safe to delete this folder? These are some questions that we all come across while discussing this folder. On my system, it is consuming more than 1 GB space of C drive.
Why would you ever delete this folder?
SoftwareDistribution folder should be left alone but there comes a time when you may need to clear the contents of this folder. One such case is when you’re unable to update Windows or when Windows updates which are downloaded & stored in the SoftwareDistribution folder are corrupt or incomplete.
In most of the cases, when Windows Update stops working properly on your device and you are getting an error message, you need to flush out this folder to solve the problem. Moreover, if you find that this folder is accumulating a large chunk of data taking more space of the drive, you can manually clear out the folder to free up some space on your drive. However, if you face Windows Update issues such as Windows Update not working, Windows Updates fails, Windows Update stuck while downloading the latest updates, etc. then you need to delete SoftwareDistribution folder on Windows 10.

Is it safe to delete SoftwareDistribution folder?
You don’t need to touch this folder under any normal circumstances, but if the content of the folder is corrupted or not synchronized causing issues with Windows updates then you need to delete this folder. It is completely safe to delete this folder. However, you need to first make sure that you are experiencing a problem with your Windows Update. Next time when Windows Update files are ready, Windows will automatically create this folder and download the update files from the scratch.
How to Delete SoftwareDistribution Folder on Windows 10
Make sure to create a restore point just in case something goes wrong.
To delete SoftwareDistribution folder from your device, you need to either open the Command Prompt or Windows PowerShell
1.Open Command Prompt or Windows PowerShell with Administrator access. Press Windows key + X and select the Command Prompt or PowerShell option.
2.Once PowerShell opens, you need to type below-mentioned commands to stop the Windows Update Service and the Background Intelligent Transfer Service.
net stop wuauserv
net stop bits

3.Now you need to navigate to SoftwareDistribution folder in C drive to delete all its components:
C:\Windows\SoftwareDistribution

If you are not able to delete all files because some files are in use, you just need to restart your device. Upon rebooting, you need to again run the above commands again and follow the steps. Now, again try to delete all the content of the SoftwareDistribution folder.
4.Once you have deleted the content of the SoftwareDistribution folder, you need to type the following command to activate the services related to Windows Update:
net start wuauserv
net start bits

An alternate way to Delete SoftwareDistribution Folder
1.Press Windows Key + R then type services.msc and hit Enter.
2.Right-click on Windows Update service and select Stop.

3.Open File Explorer then navigate to the following location:
C:\Windows\SoftwareDistribution
4.Delete all the files and folders under SoftwareDistribution folder.
5.Again right-click on Windows Update service then select Start.

6.Now to try to download the Windows updates and this time it will without any issues.
How to Rename SoftwareDistribution folder
If you’re worried about deleting the SoftwareDistribution folder then you can simply rename it and Windows will automatically create a new SoftwareDistribution folder to download the Windows updates.
1.Press Windows Key + X then select Command Prompt (Admin).
2.Now type the following commands to stop Windows Update Services and then hit Enter after each one:
net stop wuauserv
net stop cryptSvc
net stop bits
net stop msiserver

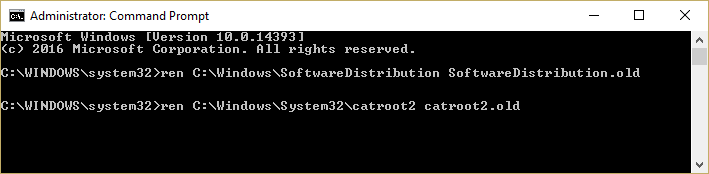
3.Next, type the following command to rename SoftwareDistribution Folder and then hit Enter:
ren C:\Windows\SoftwareDistribution SoftwareDistribution.old
ren C:\Windows\System32\catroot2 catroot2.old
4.Finally, type the folowing command to start Windows Update Services and hit Enter after each one:
net start wuauserv
net start cryptSvc
net start bits
net start msiserver

Once you have completed these steps, Windows 10 will automatically create a folder and download the necessary elements for running Windows Update services.
If the above step is not working then you can boot Windows 10 into Safe Mode, and rename SoftwareDistribution folder to SoftwareDistribution.old.
Note: The only thing which you may lose in the process of deleting this folder is the historical information. This folder also stores the Windows Update history information. Thus, deleting the folder will delete the Windows Update history data from your device. Moreover, the Windows Update process will take more time than it used to take earlier because WUAgent will check and create the Datastore information.
Overall, there is no problem associated with the process. It is a small price to pay for getting your device updated with the latest Windows Updates. Whenever you notice Windows Update problems such as Windows Updates files missing, not updating properly, you can opt for this method to restore the Windows Update process.
Recommended:
- Remove Activate Windows Watermark from Windows 10
- How to Fix Bluetooth problems in Windows 10
- Enable Flash for Specific Websites in Chrome
- How to Sideload Apps on Windows 10
I hope the above steps were helpful and now you can easily Delete SoftwareDistribution folder on Windows 10, but if you still have any questions regarding this tutorial then feel free to ask them in the comment’s section.
Кэш обновлений Windows — уже скачанные на компьютер файлы обновлений, готовые к установке. При возникновении проблем с их установкой, для освобождения места на диске или для того, чтобы после удаления обновлений они не отображались в Центре обновлений Windows с кнопкой «Установить», вы можете очистить этот кэш.
В этой пошаговой инструкции несколько простых способов очистить кэш обновлений в Windows 11 и Windows 10 встроенными средствами системы, все они безопасны и не должны привести к каким-либо проблемам в работе. Также может быть полезным: Сброс компонентов Центра обновлений (включая очистку кэша) в PowerShell.
Кэш обновлений в утилите «Очистка диска»
Самый простой способ очистки кэша обновлений — встроенная в Windows утилита «Очистка диска». Шаги будут следующими:
- Нажмите правой кнопкой мыши по кнопке «Пуск» и выберите пункт «Выполнить».
- Введите cleanmgr и нажмите Enter.

- При появлении запроса на выбор диска выберите диск C.
- Нажмите кнопку «Очистить системные файлы».
- Отметьте пункт «Очистка обновлений Windows».

- Нажмите «Ок» и дождитесь завершения очистки.


В Windows 11 и 10 вы также можете использовать функции очистки диска в «Параметрах», подробнее об этом в инструкциях Очистка диска Windows 11 встроенными утилитами, Автоматическая очистка диска Windows 10.
Очистка кэша обновлений вручную в командной строке
Кэш обновлений хранится в папке C:\Windows\SoftwareDistribution\Download и мы можем удалить её содержимое вручную с помощью командной строки. Для этого потребуется временно отключить службу Центра обновлений Windows с повторным её включением по завершении процесса.
- Запустите командную строку от имени Администратора. Для этого можно использовать поиск по «командная строка» в панели задач и пункт «Запуск от имени администратора».
- По порядку введите следующие команды
net stop wuauserv
cd C:\Windows\SoftwareDistribution
del /f /s /q Download
net start wuauserv


Удаление кэша обновлений Windows в проводнике
Этот способ, по своей сути повторяет предыдущий, но без использования командной строки:
- Нажмите клавиши Win+R на клавиатуре, введите services.msc и нажмите Enter.
- В списке служб найдите «Центр обновления Windows», дважды нажмите по ней и нажмите кнопку «Остановить».

- В проводнике перейдите в папку
C:\Windows\SoftwareDistribution\Download
- Выделите всё содержимое папки (клавиши Ctrl+A) и удалите его.
- Снова зайдите в «Службы» и запустите Центр обновления.

Сброс кэша обновлений и его параметров без фактического удаления
Если задача — исправить ошибки центра обновлений, а не выполнить удаление кэша, можно использовать следующий набор команд в командной строке, запущенной от имени администратора:
net stop wuauserv
net stop cryptSvc
net stop bits
net stop msiserver
ren C:\Windows\System32\catroot2 catroot2.old
ren C:\Windows\SoftwareDistribution SoftwareDistribution.old
net start cryptSvc
net start bits
net start msiserver
net start wuauserv
Если ошибки были исправлены, созданные папки SoftwareDistribution.old в папке Windows и catroot2.old в папке System32 можно будет удалить.
Очистка кэша обновлений также доступна в сторонних утилитах, предназначенных для исправления ошибок при обновлениях, подробно: Как исправить ошибки Центра обновлений Windows.
Также, в контексте рассмотренной темы могут быть полезными следующие материалы:
- Как удалить обновления Windows 11
- Как удалить обновления Windows 10
- Как отключить обновления Windows 11
- Как отключить обновления Windows 10
What is the Software Distribution folder?
The SoftwareDistribution folder usually located in C:\Windows\SoftwareDistribution is used by Windows Update to preload downloaded updates and hotfixes before installing them. On Windows 10 you usually find the following folder-structure but there might exist other sub-folders as well:
- C:\Windows\SoftwareDistribution
- C:\Windows\SoftwareDistribution\Datastore
- C:\Windows\SoftwareDistribution\Download
- C:\Windows\SoftwareDistribution\EventCachte.v2
- C:\Windows\SoftwareDistribution\PostRebootEventCache.V2
- C:\Windows\SoftwareDistribution\SLS
While the SoftwareDistribution folder is managed completely by the Windows Update Agent (WUAgent) problems might occur that require a manual cleanup of its contents.
Automatically delete win download files in Windows 10
If you are facing issues with Windows Update you might try to use Windows Disk Cleanup in extended mode before moving forward with our tutorial. This might already fix incomplete or corrupted Windows Update files in the SoftwareDistribution folder by deleting them.
Is it safe to delete Windows\SoftwareDistribution-subfolders?
The method shown below to delete the SoftwareDistribution folder manually is generally safe as Windows Update will download all update files again when needed. To be sure that the issue you try to fix is related to the Windows SoftwareDistribution folder, you might want to temporarily rename it beforehand as shown below. This will preserve the files inside.
If you decide deleting the SoftwareDistribution folder, you will lose the Windows Update history which might be usuful to trace down problematic updates. Also Windows Update will need a bit longer afterwards until available updates are shown and downloaded because the WUAgent must check and re-create the Datastore information.
How to Cleanup the SoftwareDistribution folder?
Before you can clear the SoftwareDistribution folder, you will have to stop both the Windows Update Service (wuauserv) and the Background Intelligent Transfer Service (bits).
- Open an elevated Command Prompt

- Use the net stop command to terminate services
Run the command
net stop wuauservto stop the Windows Update Service andnet stop bitsfor the Background Intelligent Transfer Service.
- Open file Explorer

- Delete contents/subfolders of C:\Windows\SoftwareDistribution

- Use the net stop command to restart services
Run the command
net start wuauservto re-launch the Windows Update Service andnet start bitsfor the Background Intelligent Transfer Service.


How to Rename the SoftwareDistribution folder
Renaming the SoftwareDistribution folder allows to quickly check if Windows Update files there are really causing the issue you are trying to resolve.
- Open Command Prompt
- Use the net stop command to terminate services
Run the command
net stop wuauservto stop the Windows Update Service andnet stop bitsfor the Background Intelligent Transfer Service.
- Rename the SoftwareDistribution folder with one command
Run the following command to rename SoftwareDistribution folder into SoftwareDistribution.bat:
rename %windir%\SoftwareDistribution SoftwareDistribution.bak
To revert this, you can apply the same procedure afterwards using this command:
rename %windir%\SoftwareDistribution.bak SoftwareDistribution

- Use the net stop command to restart services
Run the command
net start wuauservto re-launch the Windows Update Service andnet start bitsfor the Background Intelligent Transfer Service.
How to Pause, Defer, or Delay Quality and Feature Updates
If you deleted the SoftwareDistribution Folder´s contents to free up space you might also want to delete the $SysReset folder to gain even more. If necessary you can also tell Windows Update to Pause, Defer, or Delay Quality and Feature Updates if you don´t want to download new Windows Updates immediately again after clearing SoftwareDistribution.
Last Updated on August 27, 2021 3:53 pm CEST
“SoftwareDistribution” is a directory in the Windows operating system that temporarily stores the Windows Update files before installing them on your system. However, occasionally, the files don’t always get deleted from the SoftwareDistribution folder.
They either get left behind, gradually taking up more and more space on the hard drive, or cause issues for the newer Windows updates to install.
Either way, there may come a time when you will need to manually clear out this folder and make space for new files. But is safe to do so, or will it corrupt your operating system?
In this article, we discuss whether or not it is safe to clean up the SoftwareDistribution folder, and if it is, how to do it?
Table of Contents
What is the SoftwareDistribution Folder
As mentioned earlier, the SoftwareDistribution folder stores Windows Update files temporarily. This folder can be found at the following path:
C:\Windows\SoftwareDistribution
It has the following subdirectories and files:
- DataStore
- Download
- PostRebootEventCache.V2
- SLS
- ReportingEvents.txt

The SoftwareDistribution folder is automatically managed by the Windows Update Agent (WUAgent), therefore it does not need any external involvement. However, you may need to interfere when there is something wrong with it.
Is it Safe to Cleanup the SoftwareDistributon Folder
Although it is recommended to stay clear of the SoftwareDistribution folder, one may need to clean it up from time to time, when needed.
The SoftwareDistriution folder stores temporary files for Windows Updates and other hotfixes. These are usually downloaded through Windows Update. If you remove them, then they will be downloaded again. Therefore, it is safe to clean up the SoftwareDistribution folder.
That said, there are a few caveats about cleaning up the aforementioned folder which you should be intimated about beforehand.
If you clean the SoftwareDistribution folder, you will lose all history data of the recently-installed Windows updates. This will then make pinpointing a problematic update difficult.
Moreover, it will take longer and more bandwidth to re-download all the required files for the updates, since the WUAgent will need to recreate the Datastore directory information.
Other than that, it is completely safe to clear out the SoftwareDistribution folder.
If you are still having second thoughts about the operating system’s safety and reliability, then we suggest that you create a system restore point before proceeding with the cleanup, or, you can adapt the SoftwareDistribution folder renaming method instead of deleting it.
When Should You Cleanup SoftwareDistribution Folder
As we mentioned earlier, it is recommended to steer clear of the SoftwareDistribution folder and only manipulate it when absolutely necessary. Therefore, do not rename or delete it without a reason.
You can clean up the SoftwareDistribution folder if you are experiencing an issue with Windows updates. For example, if an update is getting stuck, or won’t install at all. You can also do so when you encounter an error code relating to Windows updates, like error code 0x80070424. Or any other issue with Windows Update.
Now that you understand what the SoftwareDistribution folder is about, when to clean it out, and that it’s safe to do so, let us show you 2 safe methods to clean up the SoftwareDistribution folder.
How to Rename the SoftwareDistribution Folder
The safest approach is to simply rename the default SoftwareDistribution folder. When you rename it, Windows will automatically create a fresh folder with new subdirectories and files.
Moreover, this way, you can always restore the old folder if needed. However, it will not resolve the issue of a large SoftwareDistribution folder and clear out any disk space. Therefore, this method can only be applied if you have sufficient available disk space.
Since the SoftwareDistribution folder is being utilized by the “Windows Update” and the “Background Intelligent Transfer Service” services, these 2 will first need to be stopped.
Follow these steps to successfully rename the SoftwareDistribution folder:
-
Launch an elevated Command Prompt.
-
Run the following cmdlets to stop the “Windows Update” and the “Background Intelligent Transfer Service” services.
Net Stop wuauserv
Net Stop bits
Stop dependent services -
Now immediately run the following cmdlet to rename “SoftwareDistribution” to “SoftwareDistribution.old”.
Rename %windir%\SoftwareDistribution SoftwareDistribution.old
Rename the SoftwareDistibution folder -
Now run the following cmdlets to start the stopped services.
Net Start wuauserv
Net Start bits
Start the dependent services


Now try reinstalling the Windows update (or whatever it was you were having trouble with) and see if the new, fresh SoftwareDistribution has helped in any way.
If this did not work for you, then always clean up the existing SoftwareDistribution folder using the steps given in the next section below.
How to Cleanup the SoftwareDistribution Folder
-
Launch an elevated Command Prompt.
-
Run the following cmdlets to stop the “Windows Update” and the “Background Intelligent Transfer Service” services.
Net Stop wuauserv
Net Stop bits
Stop dependent services Do not close the Command Prompt.
-
Now navigate to the following path using File Explorer:
C:\Windows\SoftwareDistribution
-
Select everything by pressing the CTRL + A hotkeys, and then click Delete.
Delete everything in SoftwareDistribution folder Alternatively, you can also run the following cmdlet in Command Prompt to clear out the SoftwareDistribution folder silently:
del c:\windows\SoftwareDistribution /q /s -
(Conditional) If asked for administrative permission, click Continue.
Provide administrative privileges -
Now run the following cmdlets in the Command Prompt to start the stopped services.
Net Start wuauserv
Net Start bits
Start the dependent services


You will now have a clean and good-as-new SoftwareDistribution folder for a fresh start.
Closing Thoughts
Although one does not usually need to make modifications to the SoftwareDistribution folder, we found that people are looking for automated methods to clean out the folder. Some recommendation that we saw was to delete the “Temporary Windows installation files” from the Windows Settings app.

Let us inform you that doing so will not clean up the SoftwareDistribution folder. It may free up some space on your hard drive, but it will simply remove the “Windows.old” folder, and have no effect on the SoftwareDistribution folder.