
Высокая частота процессора, Turbo Boost, гигагерцы и прочее — это отлично, но не во всех случаях. К примеру, при работе на ноутбуке преимущественно от батареи с не особенно ресурсоемкими приложениями, отключив повышение частоты и ограничив максимальную частоту процессора вы получите более тихую работу системы охлаждения и продолжительное время работы от аккумулятора, не особенно потеряв в производительности.
В этой инструкции подробно о способах ограничить максимальную частоту процессора в Windows 11 и Windows 10, используя встроенные средства управления схемами электропитания, не прибегая к сторонним утилитам.
Установка опции «Максимальное состояние процессора» в дополнительных параметрах схемы электропитания
Первый способ — настроить схему электропитания, используемую при работе от батареи, задав максимальное состояние процессора ниже 100% — это отключит ускорение Turbo Boost (когда частота может повышаться выше номинальной частоты процессора) и, даже если мы выставим 99% в значительной мере повлияет на расход заряда и нагрев. Шаги будут следующими:
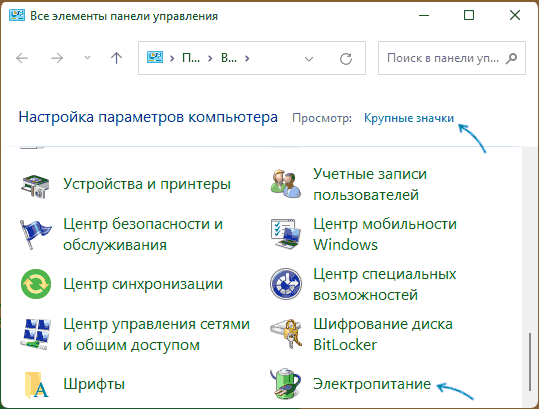
- Откройте Панель управления, для этого в Windows 11/10 можно использовать поиск в панели задач. В поле «Просмотр» установите «Значки» и откройте пункт «Электропитание».

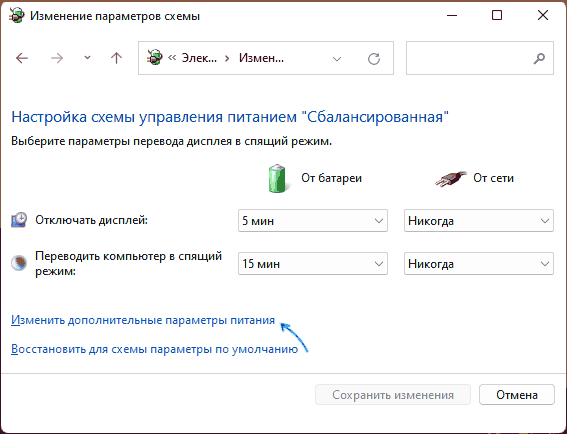
- Нажмите по пункту «Настройка схемы электропитания» у той схемы, которую вы используете при работе от батареи (при условии, что это ноутбук и вы переключаете схемы питания).

- В следующем окне нажмите «Изменить дополнительные параметры питания».

- В дополнительных параметрах раскройте раздел «Управление питанием процессора», а затем задайте собственное значение в пункте «Максимальной состояние процессора». Его можно задать отдельно для питания от батареи и электросети.

- Примените сделанные настройки.


На этом процесс будет завершен — изменения должны начать действовать сразу.
Полезным будет настроить две или более схем электропитания: одну экономичную с ограничением частоты, другую — для случаев, когда нужна высокая производительность. Также вы можете ускорить переключение между имеющимися схемами электропитания: Программы для удобно переключения схем электропитания на ноутбуке или ПК.
К примеру, я на своем основном ноутбуке с горячим Core i7-10870H пишу статьи в бесшумном режиме с ограниченной частотой, и температура процессора держится в пределах 35-40 градусов, при этом каких-либо неудобств нет. А когда необходимо монтировать видео — включаю схему электропитания с высокой производительностью.
Добавление опции «Максимальная частота процессора» в дополнительные параметры электропитания
Возможен вариант, когда ограничение «Максимального состояния процессора» не срабатывает. В этом случае можно установить максимальную частоту процессора. По умолчанию эта опция в дополнительных параметрах электропитания отсутствует.
Чтобы добавить возможность настройки максимальной частоты процессора, используйте один из следующих способов:
В Терминале Windows или PowerShell
- Запустите Windows PowerShell или Терминал Windows от имени администратора, нажав правой кнопкой мыши по кнопке «Пуск» и выбрав соответствующий пункт меню.
- Введите команду
powercfg -attributes SUB_PROCESSOR 75b0ae3f-bce0-45a7-8c89-c9611c25e100 -ATTRIB_HIDE
и нажмите Enter.


В редакторе реестра
- Нажмите клавиши Win+R на клавиатуре, введите regedit и нажмите Enter.
- Перейдите к разделу реестра
HKEY_LOCAL_MACHINE\SYSTEM\CurrentControlSet\Control\Power\PowerSettings\54533251-82be-4824-96c1-47b60b740d00\75b0ae3f-bce0-45a7-8c89-c9611c25e100
- Дважды нажмите по параметру с именем Attributes в правой панели и установите значение 2 для него. Примените сделанные настройки.


В результате, в дополнительных параметрах схемы электропитания в разделе «Управление питанием процессора» появится новый пункт «Максимальная частота процессора».

По умолчанию указано значение «0 МГц», при таком выборе частота не ограничивается. Вручную можно указать любую частоту в пределах номинальной частоты вашего процессора.
Надеюсь, для кого-то из читателей представленная информация окажется полезной. Если остаются вопросы — задавайте их в комментариях, я постараюсь ответить.

If you’re running Windows 11 and notice that your computer’s CPU usage is abnormally high, you’re not alone. High CPU usage can lead to a sluggish computer, decreased performance, and frustration. Fortunately, several ways exist to fix this issue and get your computer running smoothly again. In this article, we’ll explore the possible causes of high CPU usage in Windows 11 and provide you with easy-to-follow steps to resolve the problem. Whether you’re a seasoned computer user or a novice, this guide is designed to help you optimize your computer’s performance and keep it running smoothly. So, let’s dive in and learn how to fix high CPU usage in Windows 11.
Windows Operating System Update
Ensure your Windows 11 version is up to date. Search for Update in your start menu search to open up your Check for updates system settings window. Click on Check for Updates, Download Now, or Install Now. After downloading the latest update, make sure to restart your PC. In addition to restarting your PC, which can already fix high CPU usage.
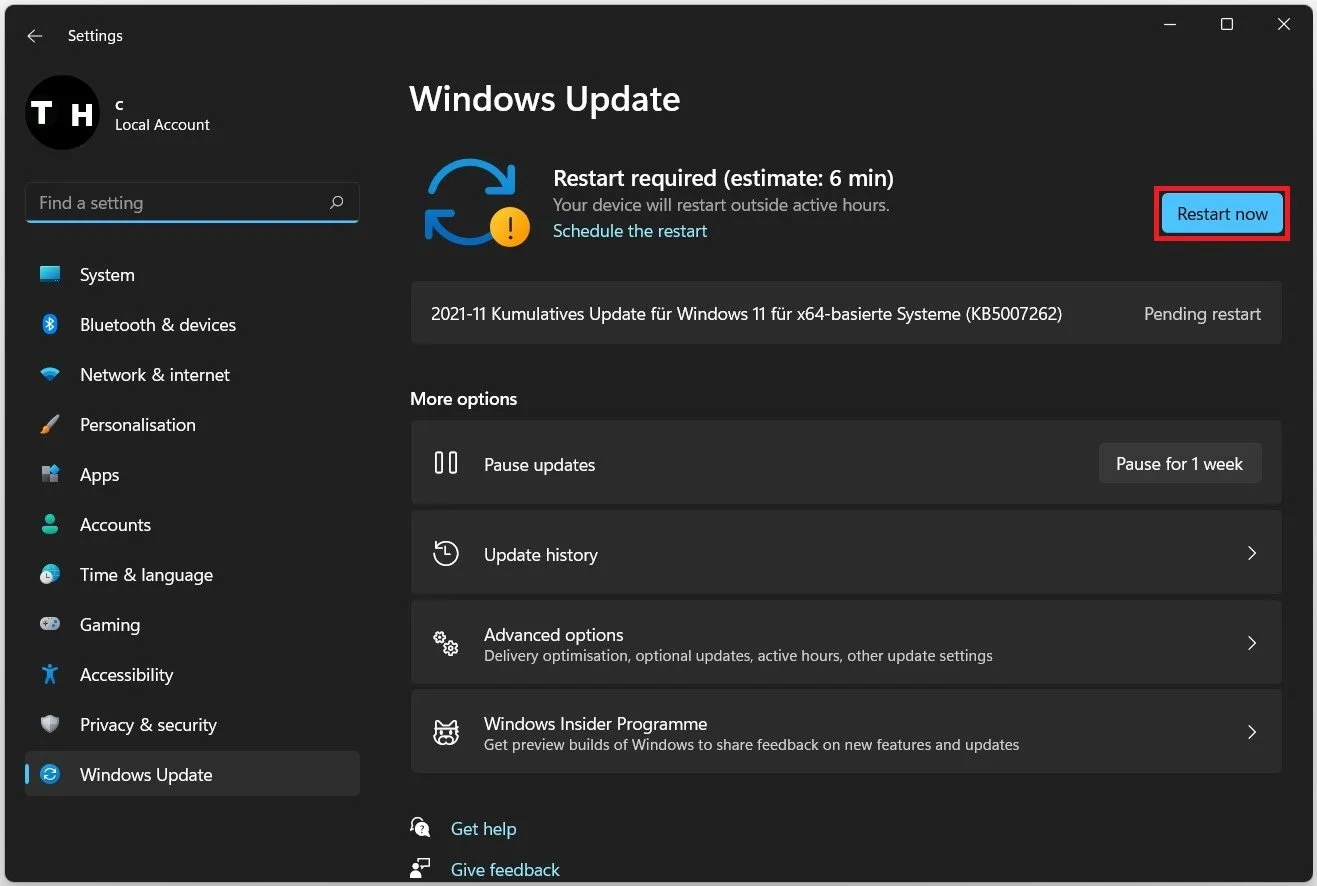
Windows Settings > Windows Update
Disable Startup Apps
Prevent applications from running in the background, which you don’t need while using your PC. In your system settings, navigate to the Apps tab, and here, click on Startup.
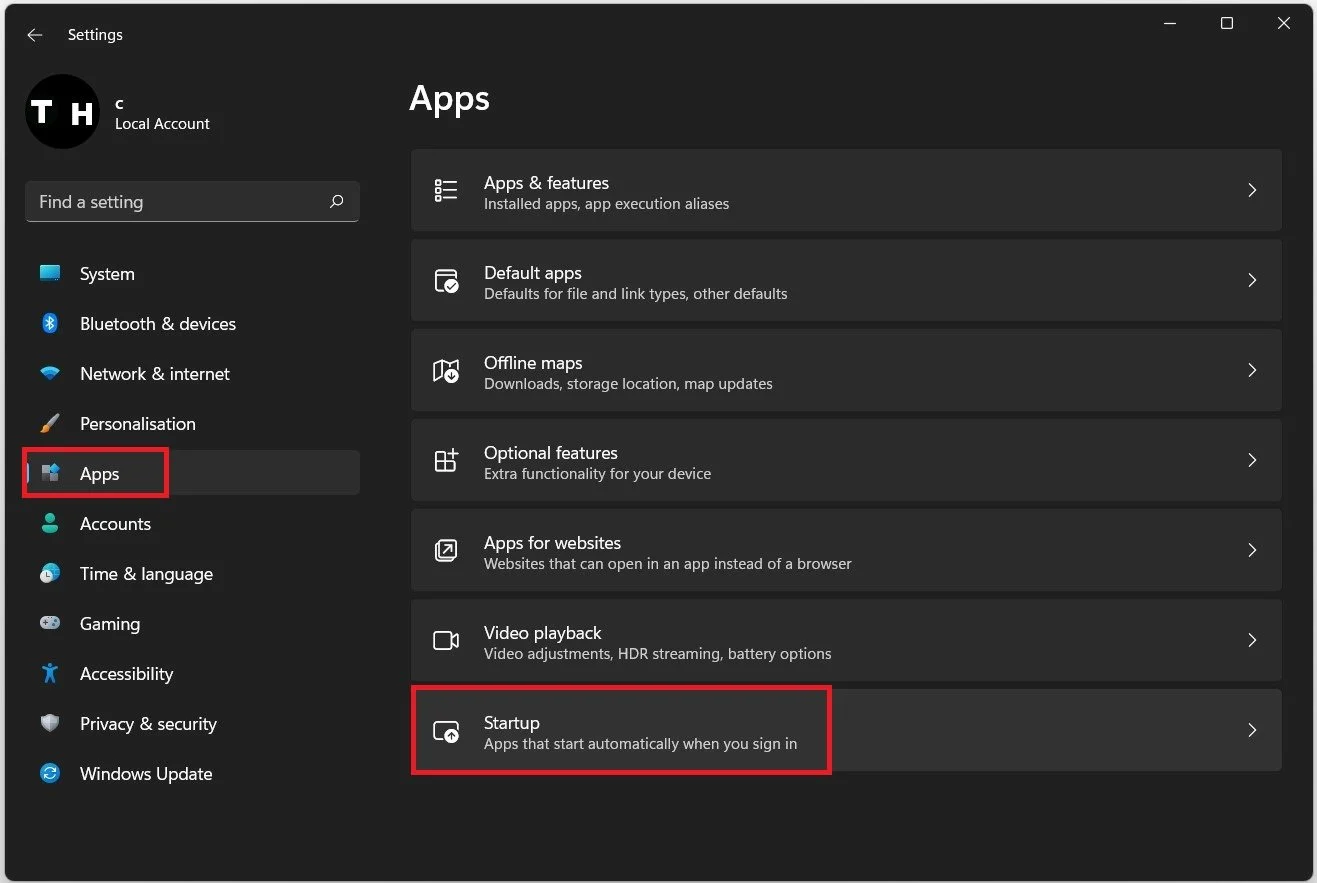
Windows Settings > Apps > Startup
These applications will automatically open up once you boot up your PC. It’s suggested to enable the least amount of applications, especially Steam, the Adobe Creative Cloud, and your third-party anti-virus application can use up a significant amount of your processor’s usage.
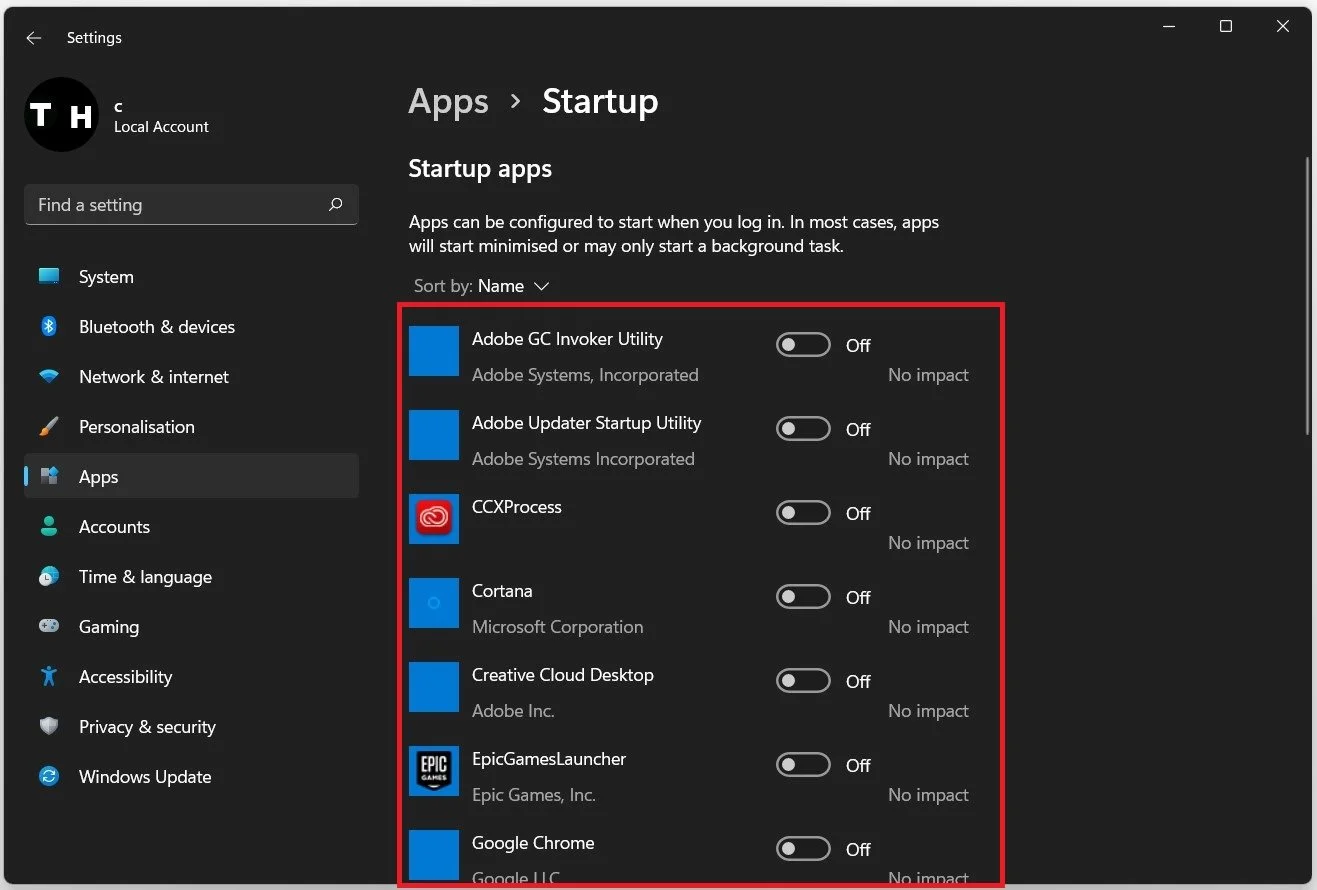
Prevent apps from starting on system boot
End CPU-Intensive Processes
After disabling the applications you don’t need every time you use your PC, you should prevent processes from running using your Task Manager. Right-click the start icon in your start menu and select Task Manager. You can see a list of applications running on your PC in the Processes tab. Sort these processes by CPU usage, which will most likely be your browser and other CPU-intensive applications. End these processes by right-clicking the process and selecting End task, but make sure only to end processes from running, which you know won’t break your operating system.
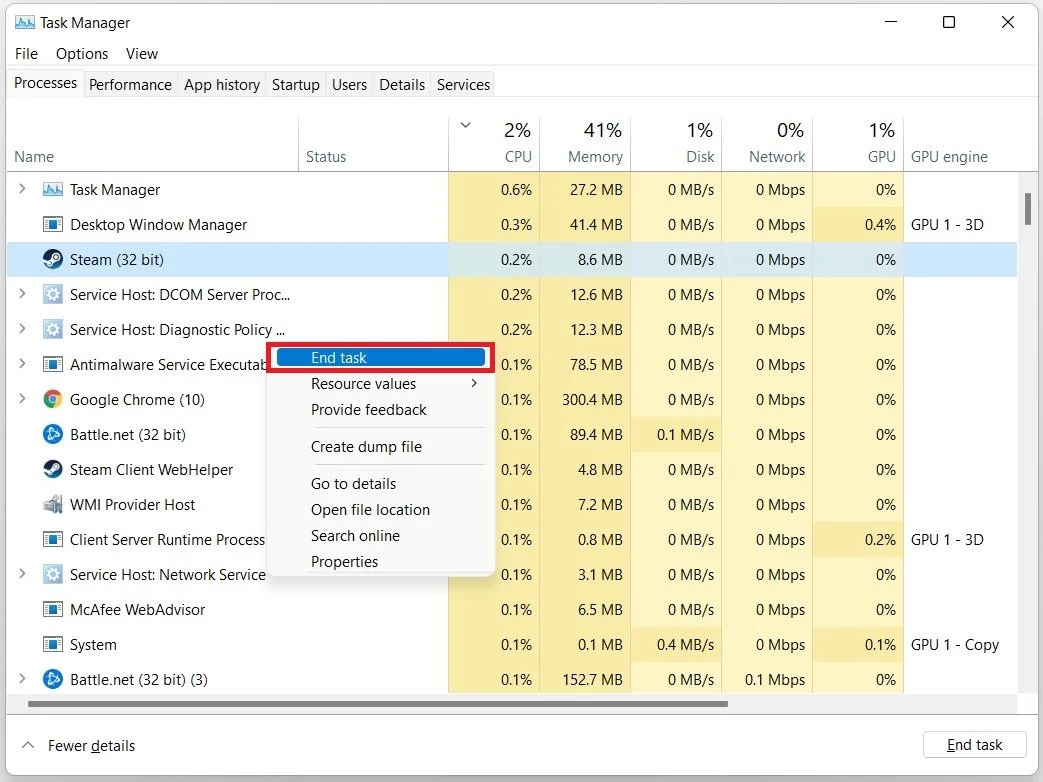
Task Manager > Processes > End Task
Update your Device Drivers
Ensure your device’s drivers are up to date. In your start menu search, enter Device Manager to open it up. Depending on which version of Windows 11 you are using, you must search for your Device Manager in your system settings window.
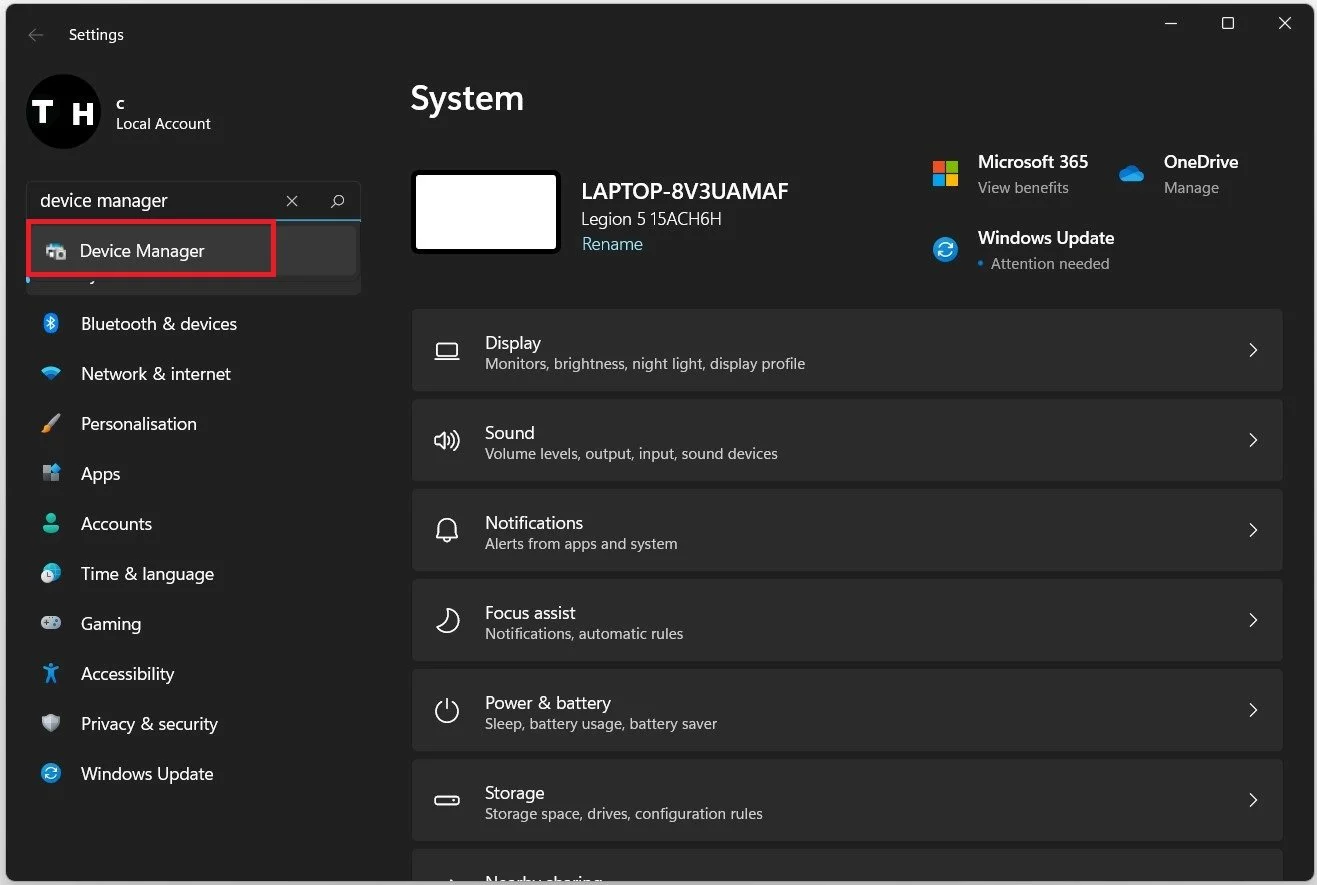
Windows Settings > Lookup “Device Manager”
Expand your Audio Inputs and Outputs, Disk Drives, Display adaptors, Keyboards, Monitors, Network adaptors, and Other devices. For each device, right-click the primary device you are using and select Update driver. Click on Search automatically for drivers. This will take a few seconds to ensure you are using the most up-to-date version of your device’s driver.

Device Manager > Device > Update Driver
Use the High-Performance Power Plan
Search for Edit Power Plan in your settings or start menu search to open up your Windows Power Settings. Use the High-Performance power plan in your Advanced Power Settings if you can.
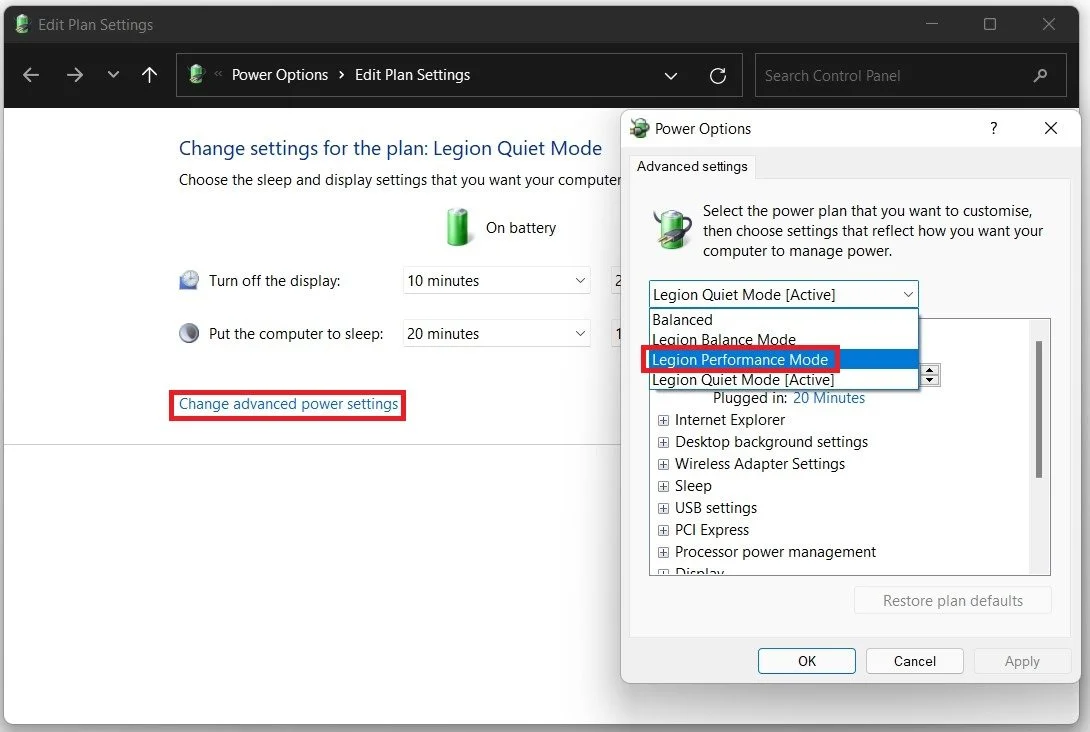
Power Options > Edit Power Plan
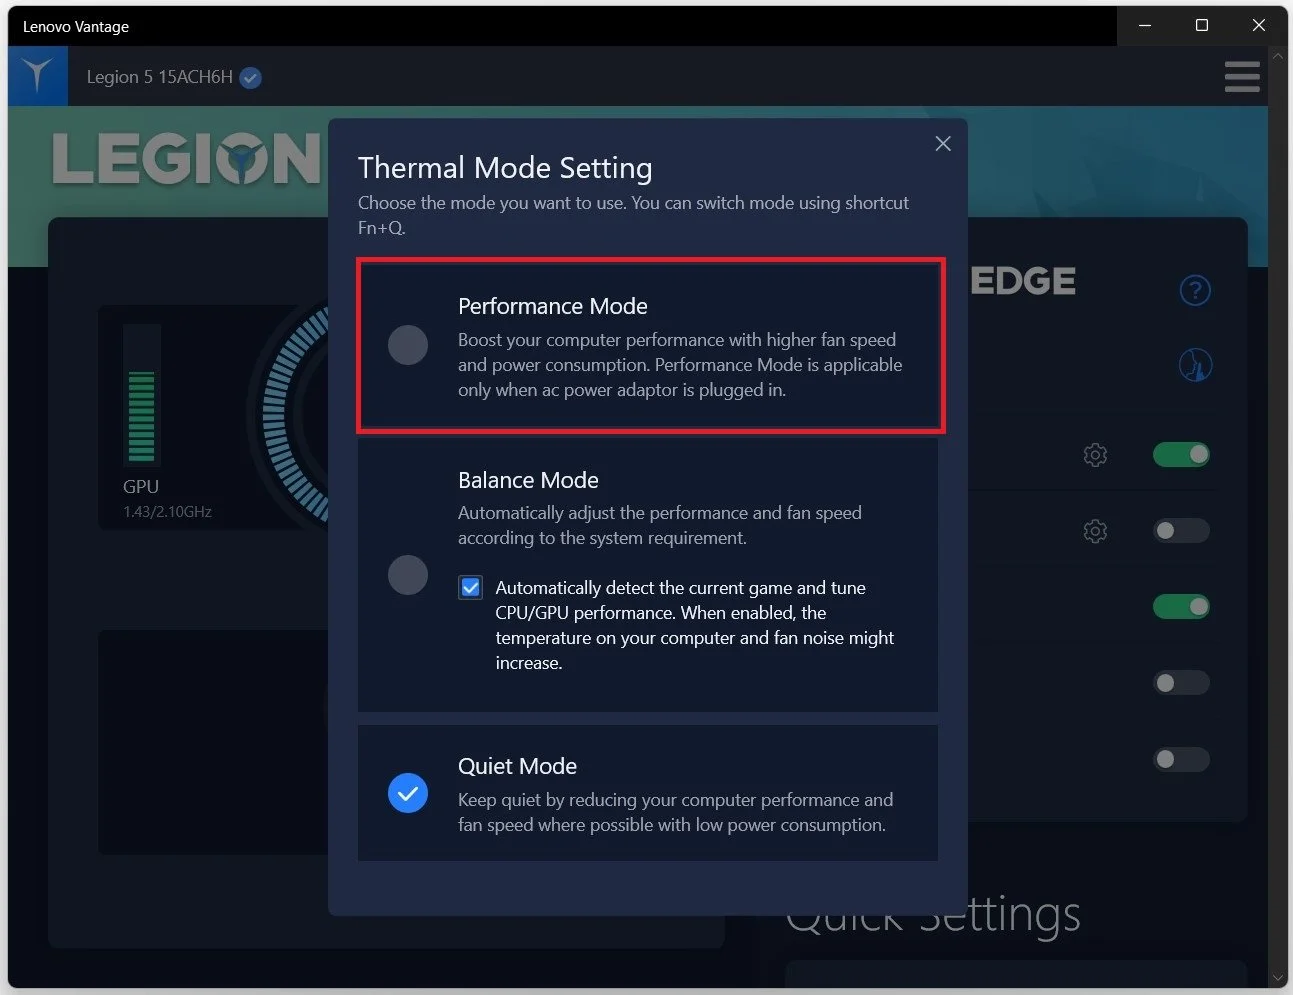
Some PCs and laptops also come with preinstalled firmware that lets them enable the performance mode on their PC. In my example, I can open up the Lenovo Vantage application and click on the first setting to change the Thermal Mode option; from Quiet Mode, which reduces the PC’s performance to keep it quiet, to Balance Mode, which will automatically adjust the fan speed to the application that is being used on the PC, to lastly to the Performance Mode which will boost the PC’s performance with higher fan speed and power consumption. It’s also advised to plug your PC into a power source if you use a laptop to get the most performance.
If a game or app is using unknowingly high CPU usage and you wish you can reduce or limit how much CPU resource the process can use, this guide will show you how to limit the number of CPU cores a process can use in Windows 11 via Task Manager, and optionally how to permanently set a process to run on limited CPU core every time you start it.
Limit CPU usage of a process via Task Manager
In Task Manager, there is an option called CPU Affinity which you can set for each process to control how many or which CPU cores a process is allowed to use in Windows 11. Since most modern computer processors are multi-core processors, you should be able to see multiple cores in the processor affinity selection window. To limit CPU usage of a process in Windows 11, follow the steps below.
First, on the Windows 11 desktop screen, open Task Manager by pressing CTRL + SHIFT + ESC (Optional read: How to Open Task Manager From Taskbar in Windows 11).
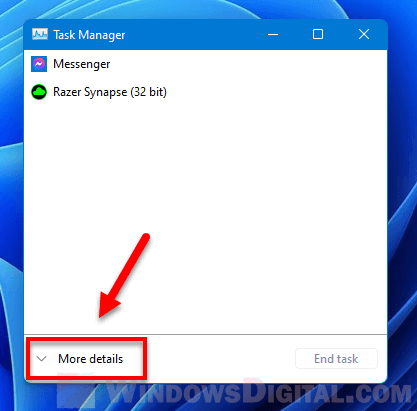
In the Task Manager window, if it’s in simplicity mode where you can’t see any tab but only a couple of apps with little to no information, click on More details to expand it.
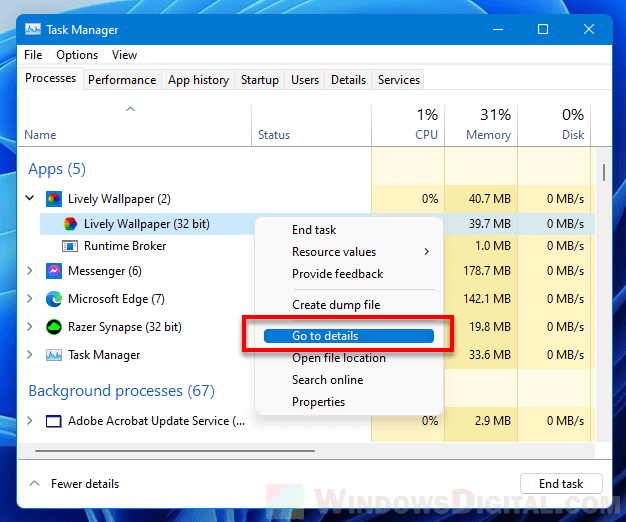
Under Processes tab, click on the app whose CPU usage you want to limit to expand the list of processes the app is running. Right-click on the process you want to limit, and select Go to details.
Task Manager will then direct you to the Details tab and highlight the executable process (.exe) of the app’s process you’ve selected earlier. Right-click on the highlighted process and select Set affinity.

Note: If you know and can pinpoint the .exe process of the app you want to limit in the Details tab, you can skip the Processes > Go to details part. You can go directly to the Details tab instead and select the process whose CPU usage you want to limit.
In the Processor affinity window, by default, for most processes, you should see all processors are selected which means all processor cores are allowed to run the process.
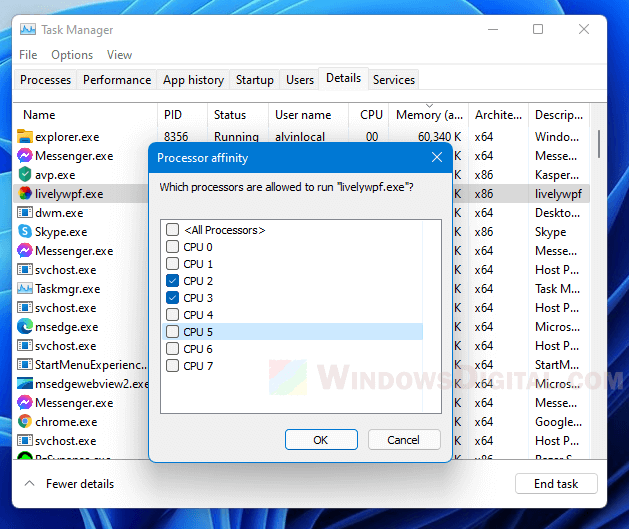
From there, you can select which CPU core the selected process can use by checking the checkbox of the CPU core you want to allow the app to use and uncheck the checkbox for CPU core you don’t want it to use. You can limit only one or multiple CPU core for a process, but at least one core has to be selected.
For apps that has multiple processes such as Chrome.exe, you will have to set the CPU affinity for each of the processes since each executable represents a different tab, window or plugin.
Limit CPU usage (Processor affinity) of a process permanently
If you limit the CPU usage of a process by setting its CPU affinity via Task Manager in Windows 11, after you close the app or game, the next time you open it, the CPU affinity of the process will be reset back to its default, which allow it to use “all processors” again.
Fortunately, there is a workaround to force an app or game to always start with your preset allowable CPU cores (CPU affinity) – by creating a shortcut that runs the app with CPU affinity parameters. You can read more about the workaround here: How to Set a Process CPU Affinity and Priority Permanently in Windows 11/10.
It may sound a little too complicated for people who are not very computer literate, but it’s definitely worth trying, especially if you often have to set the CPU affinity or priority for processes in Windows 11/10. Once you learn how to do it, it will definitely make your day much easier.
One of the most common reasons for High CPU Usage on Windows computers is due to default tendency of apps like Skype, OneDrive and others to start up with the computer and keep running in the background.
Apart from this High CPU and High Resource Usage on a Windows computer can also be caused due to activity of certain Windows services, corrupted system files, presence of virus/malware and other reasons.
You can find below a number of personally tried and tested methods that can be used to bring down the CPU usage on your Windows 11 computer.
A quick way to fix a computer that is suffering from High CPU usage and has become painfully slow and difficult to operate is to restart your device.
Advertisement
In addition to closing open apps, programs and processes, restarting the computer helps in terminating stuck apps and processes, which might be responsible for high CPU Usage on your computer.
After the computer restarts, you need to follow other steps as provided below to prevent the possibility of High CPU usage on your computer in future.
1. Disable Startup Programs
Start by preventing unwanted apps and programs from starting up with the computer and using up resources on your computer.
1. Go to Settings > Apps > click on Startup in the right-pane.

2. On the Startup screen, disable Apps that you do not want to startup with the computer by moving the slider to OFF position.

2. Limit Background Running Apps
Certain apps have a tendency to remain active and keep running in the background, once they are manually opened by the user.
Hence, preventing such apps from running in background is one of the most effective strategies to reduce CPU usage on a Windows computer.
You can find the steps to prevent apps from running in background in this guide: How to Disable Background Apps in Windows 11/10.
3. Update Device Drivers
Outdated device drivers can lead to high CPU usage on a Windows computer.
1. Right-click on Start button and select Device Manager.
Advertisement
2. On the Device Manager screen, select the Action tab and click on Scan for hardware changes.

Windows will scan your computer for Hardware changes and update device drivers (if required).
4. Disable Tips & Tricks
While receiving tips from Microsoft can be useful, this feature has also been linked to high resource usage.
1. Go to Settings > System > click on Notifications in the right-pane.
2. Scroll down in the right-pane and uncheck Offer suggestions on how I can setup my device and Get tips and suggestions when I use Windows options.

3. Restart the computer and you should now find it running better than before.
5. Disable Updates from other PCs
Preventing the computer from downloading updates from other PCs can help in reducing Runtime Broker Activity, which has been linked to High CPU usage on Windows computers.
1. Go to Settings > Windows Update > In the right-pane, scroll down and click on Advanced Options.

2. From Advanced Options screen, go to Delivery Optimization and disable Allow Downloads from other PCs option.

6. Scan for Malware and Uninstall Unwanted Programs
As mentioned above, the reason for high CPU usage on your computer could be due to your device being infected by malware or viruses.
You can rule out this possibility by using Microsoft Defender Offline Scan and also by using the scan function, as available on most third-party antivirus programs.
If the offline scan detects a virus, it will automatically clear the virus/malware from the computer or prompt you for further actions.
7. Defragment Hard Drives
If your computer has HDD drives, defragmenting the Hard Drive can help in improving its performance.
1. Type defrag in the Search bar > click on Defragment and Optimize Drives option in the search results.
2. On the next screen, select the Hard Disk Drive that you want to defragment and click on the Optimize button.

Patiently wait for Windows to complete the process of optimizing the selected drive.
8. Set Visual Effects for Best Performance
Setting the visual effects for Best Performance, instead of Appearance can help in reducing the resource usage on a Windows computer.
1. Press Windows + R keys to open Run Command.
2. Type SystemPropertiesAdvanced and click on OK.

3. On the next screen, switch to Advanced tab and click on the Settings button, located under “Performance” section.

4. On Performance Options screen, switch to Visual Effects tab and select Adjust for best performance option.

5. Click on Apply > OK to save these settings on your computer.
9. Remove Unwanted Programs
Finally, consider Removing Unnecessary Apps and Programs installed on your computer. This can help both in recovering storage space and reducing the resource usage on your computer.
Отличные новости для пользователей со слабыми компьютерами — энтузиаст выпустил в релиз утилиту ShiftDown, которая меняет приоритет для определённых процессов в случае, если нагрузка на процессор слишком высокая, тем самым разгружая его. Стоит отметить, что речь идёт о программе с открытым исходным кодом, которая работает как на Windows 10, так и на Windows 11. Изначально разработчик создал данную утилиту для компьютера с процессором Intel Core i5 третьего поколения после того, как у него возникли проблемы с производительностью системы — они возникли в связи с патчами, направляющими уязвимости Meltdown и Spectre.
Разработчик заявил, что его компьютер заметно тормозил, когда процессор находился под повышенной нагрузкой, и снижение приоритета определённых процессов позволяет решить эту проблему. Собственно, софт ShiftDown оценивает текущие состояние системы, а когда нагрузка на процессор превышает 25%, утилита меняет приоритет для процессов с самой высокой нагрузкой на IDLE, тем самым снижая общую загрузку системы. Автор софта при этом заявляет, что утилита с механизмом распределения приоритетов не должна снижать общую производительность компьютера, но улучшит состояние системы в ситуациях с высокой нагрузкой на процессор.
В ситуации, когда работа программы прерывается, система автоматически восстанавливает исходный приоритет для всех процессов. Единственная проблема данного решения в том, что установка утилиты ShiftDown не так проста, как хотелось бы, ведь софт устанавливается как служба в Windows, и это необходимо делать в ручном режиме (для установки требуется Microsoft .NET Framework 4.7).
Процесс установки:
- загрузите последнюю версию ShiftDown с GitHub и поместите в корень диска C;
- запустите командную строку от имени администратора;
- выполните команду sc.exe create ShiftDown binpath=»С:\shiftdown.exe» start=auto;
- выполните команду sc.exe start ShiftDown для запуска новой службы.
После выполнения вышеуказанных действий ShiftDown будет настроена для активации с запуском системы в автоматическом режиме — она будет обрабатывать процессы и менять приоритеты для снижения нагрузки на процессор.