
Snipping Tool lets you capture your screen and save the screenshots in your local drive or cloud storages, or upload them to Imgur for sharing. It can be integrated with some browsers, supports keyboard shortcuts for quick captures, and provides a few editing features.
If you take a look at it, Snipping Tool looks good, but it is actually full of annoyances. The reason is because it will keep bombarding you with upgrade notifications. And if you don’t want to see the ads that keep popping up from time to time, you have to allow BrightData to use your computer resources to download the so-called public data from the internet.
Features and Highlights

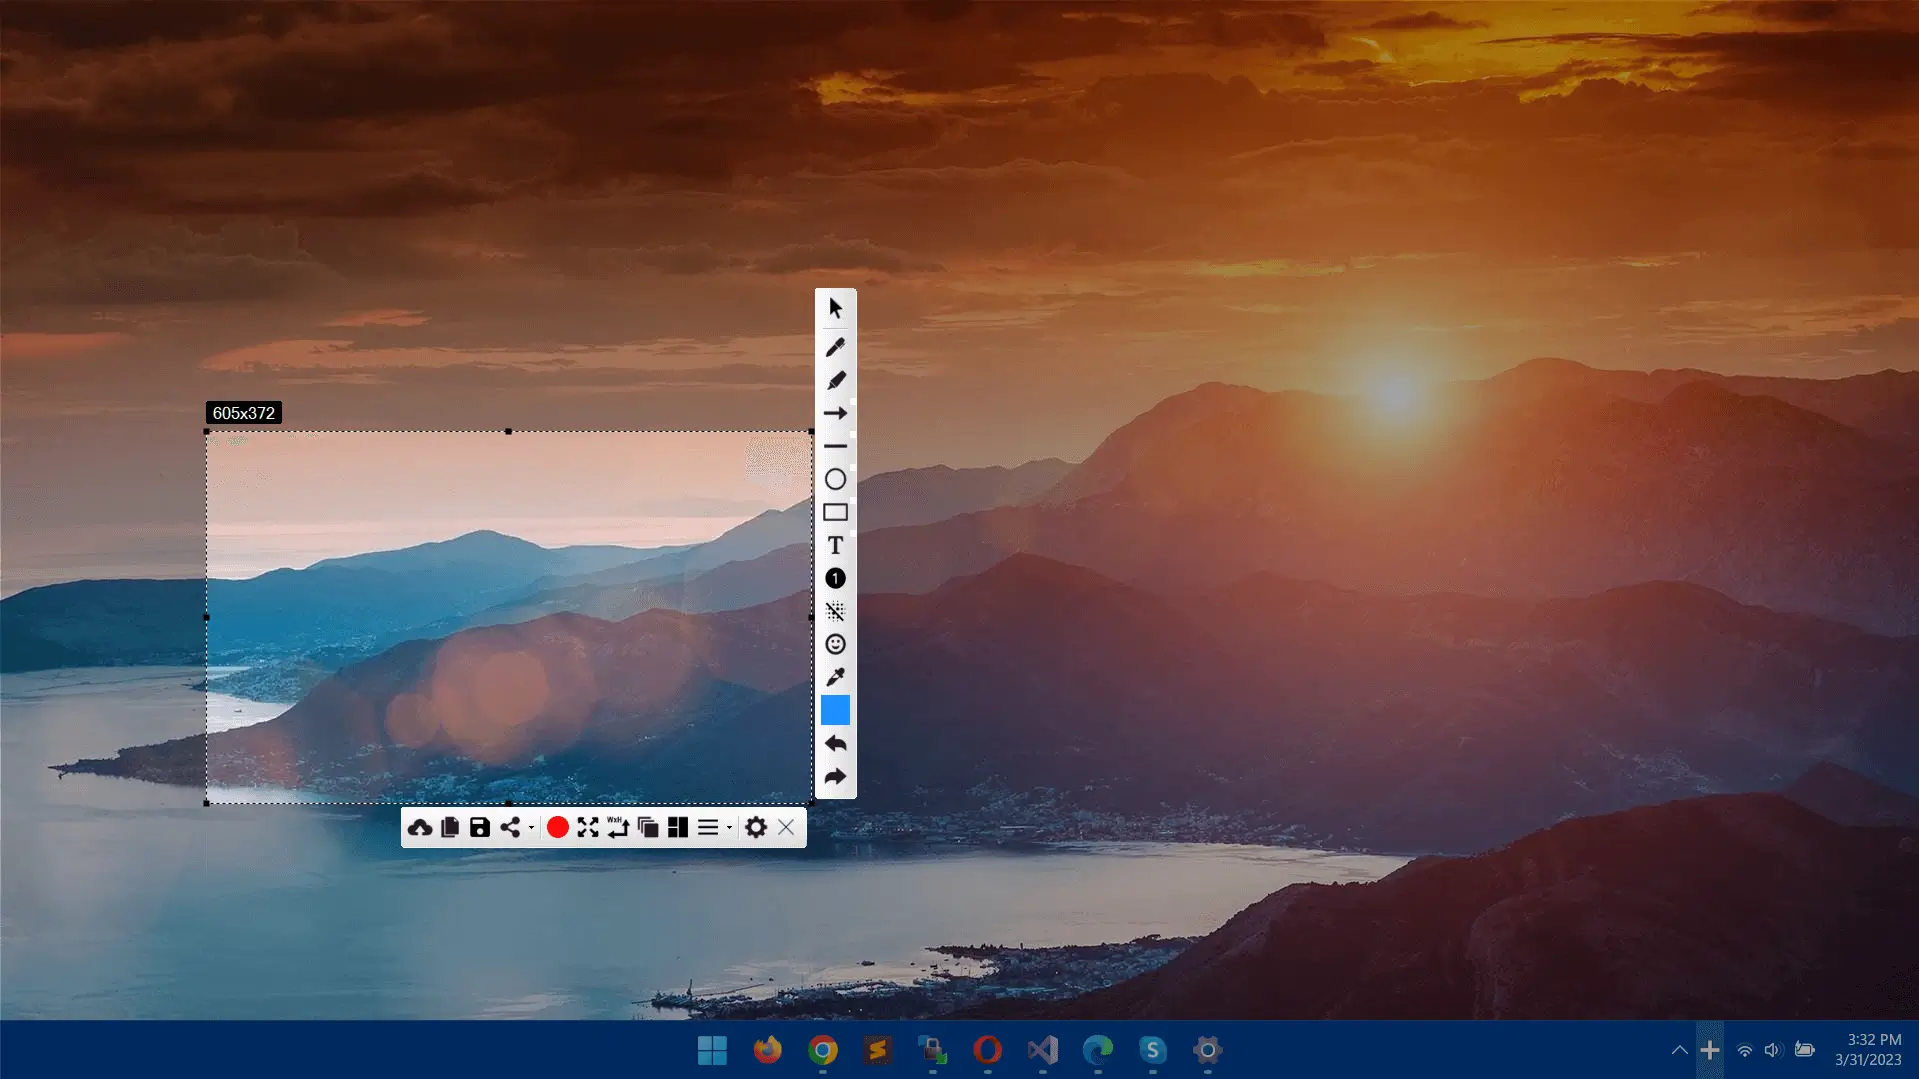
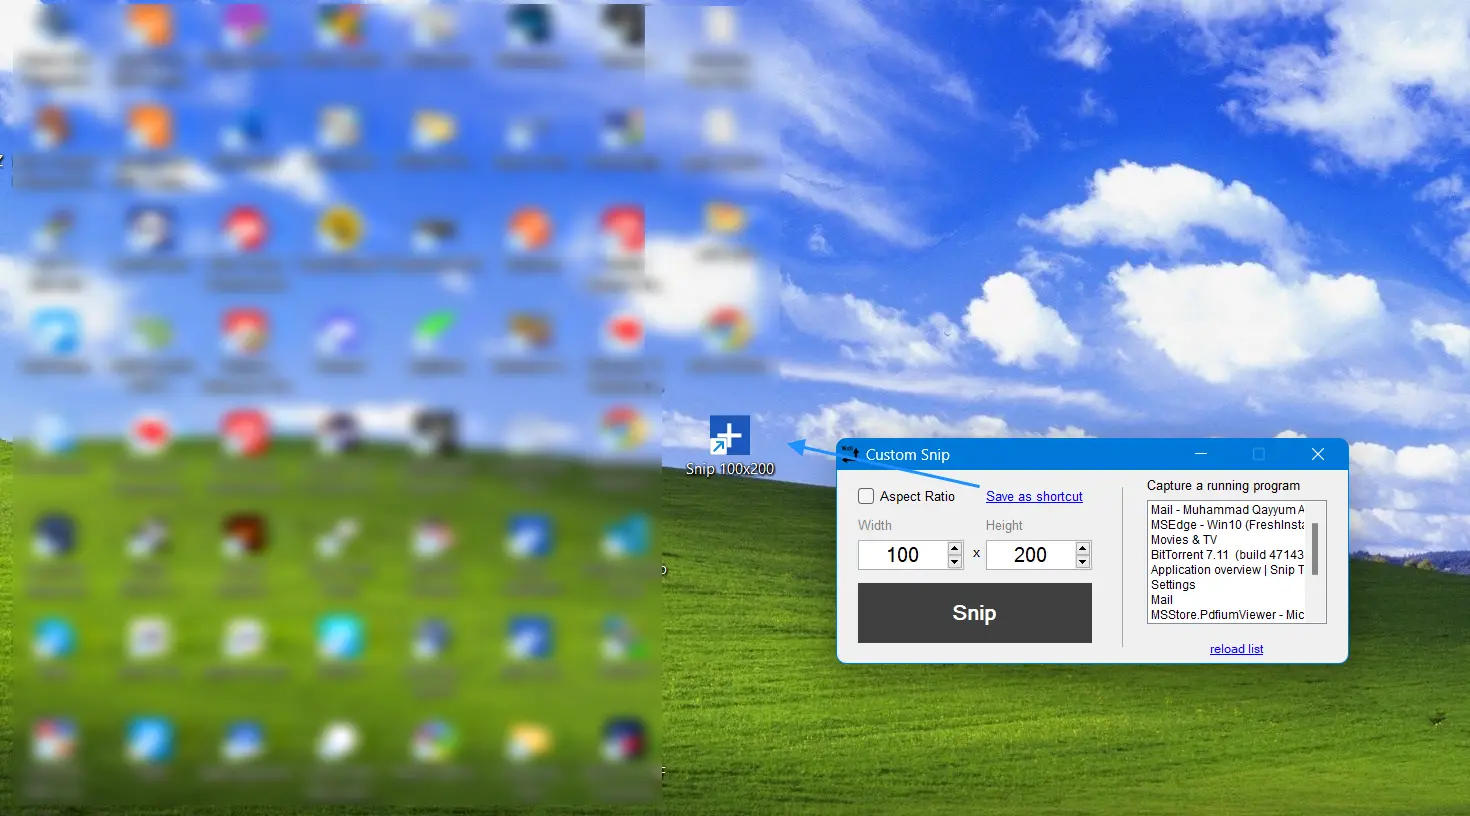
Screen capture software typically reside in the notification area during the operation, so does Snipping Tool. It has a plus icon in white color on a blue background which makes it easily noticeable.
A left click on it will dim the screen and change the cursor appearance to a rather big plus icon. To take a screenshot, drag the cursor around the area of the screen that you need to capture. Full screen capture is supported if you need to capture everything you see on the screen. There is a keyboard shortcut to perform the capture but it cannot be changed.
Once a screenshot has been taken, you can annotate it with arrows, lines, text, circle, or rectangle. Important areas can be highlighted.
Snipping Tool can blur any part of the screenshot that you need to hide, but it is a pro feature so free users won’t be able to use it. If you blur your screenshot very often, and if you aren’t willing to upgrade Snipping Tool, there are other alternatives that provide the blur functionality without demanding you to pay even a single dime.
When it is running, Snipping Tool consumes around 133 MB memory. For a software that offers few features, the memory consumption is too high. Combined with the lack of portability and keyboard shortcut customization, there is little to no reason to use this screen capture software.
There is nothing unique about Snipping Tool. Its editing panel resembles that of Lightshot and its pro features are available for free in ShareX: automatic watermark, video and GIF recording, OCR, blurring, scrolling capture, uploading screenshots to web, etc. It doesn’t make sense to pay for features that you can get for free from other software.
Snipping Tool Free Download for Windows
Snipping Tool is marketed as a free screen capture, but there are hidden pro features that will trigger upgrade notifications when you try to use any of them. On top of that, the notifications also appear very frequently when you save the screenshots that eventually you will probably fed up with it. And don’t forget about the BrightData offer.
ShareX, Greenshot, and Lightshot are way much better than this Snipping Tool and they are completely free without a catch. Still, if you’re willing to give it a shot for some reason, you can click the link below to download Snipping Tool for Windows:
Download Free Snipping Tool
Main Interface
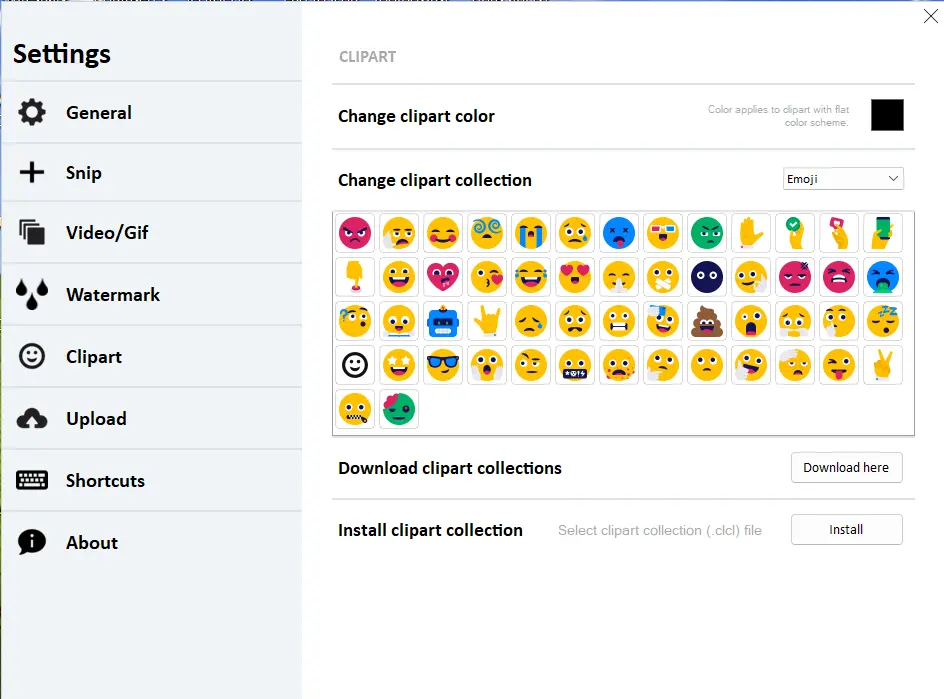
Express yourself by adding emojis to your screenshots
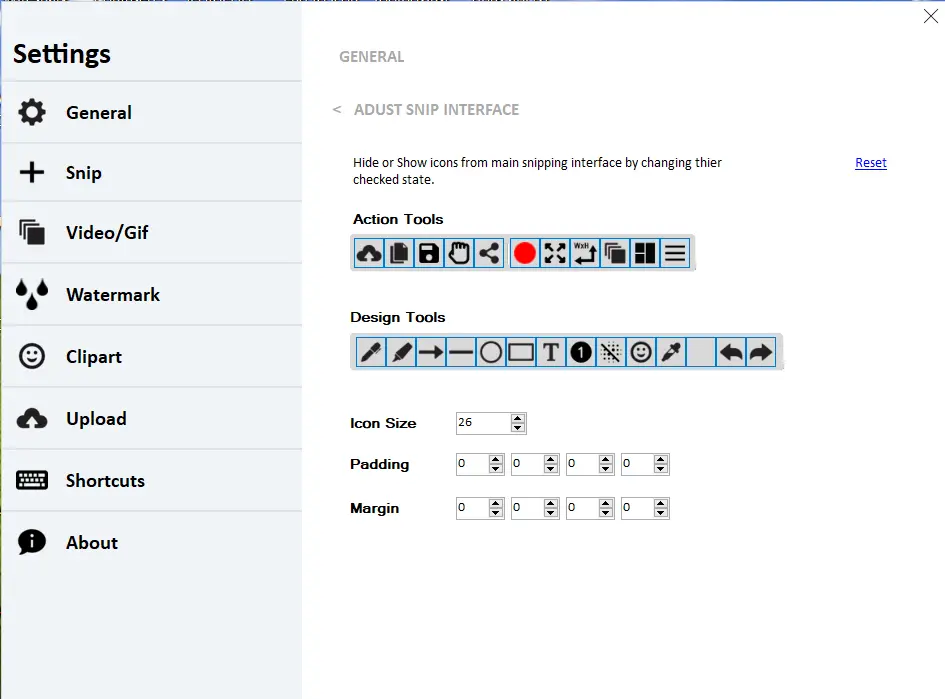
Customize the interface to match your workflow
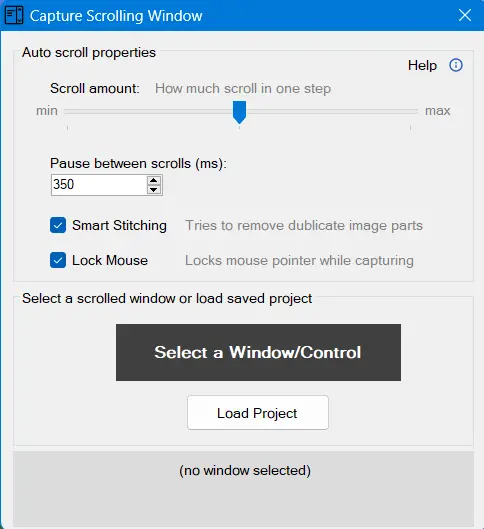
Capture scrolling windows and long content easily
Quick access with customizable desktop shortcuts
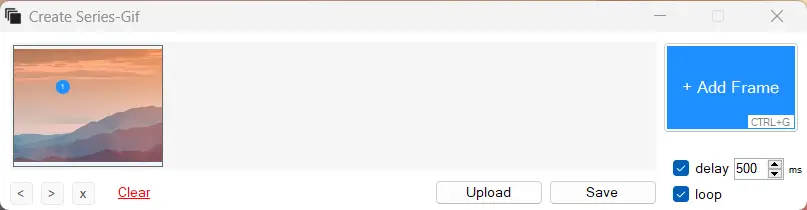
Create animated GIFs from screen recordings
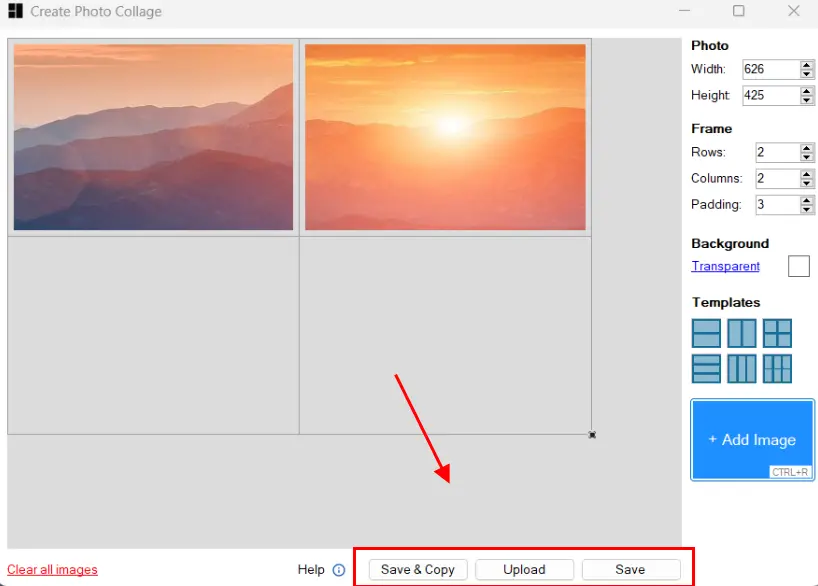
Make beautiful collages from your screenshots
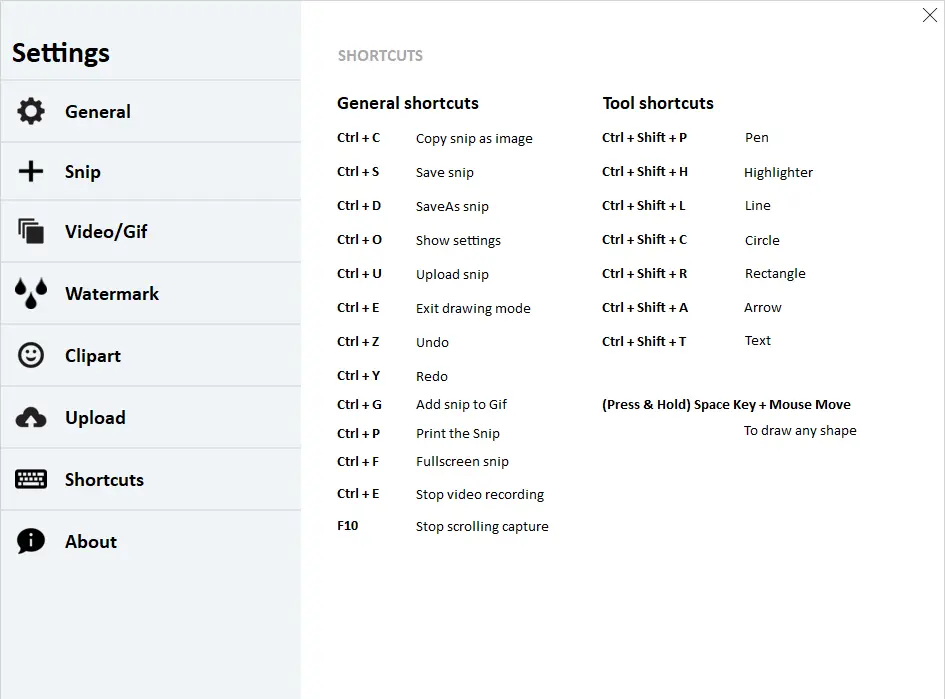
Boost productivity with keyboard shortcuts
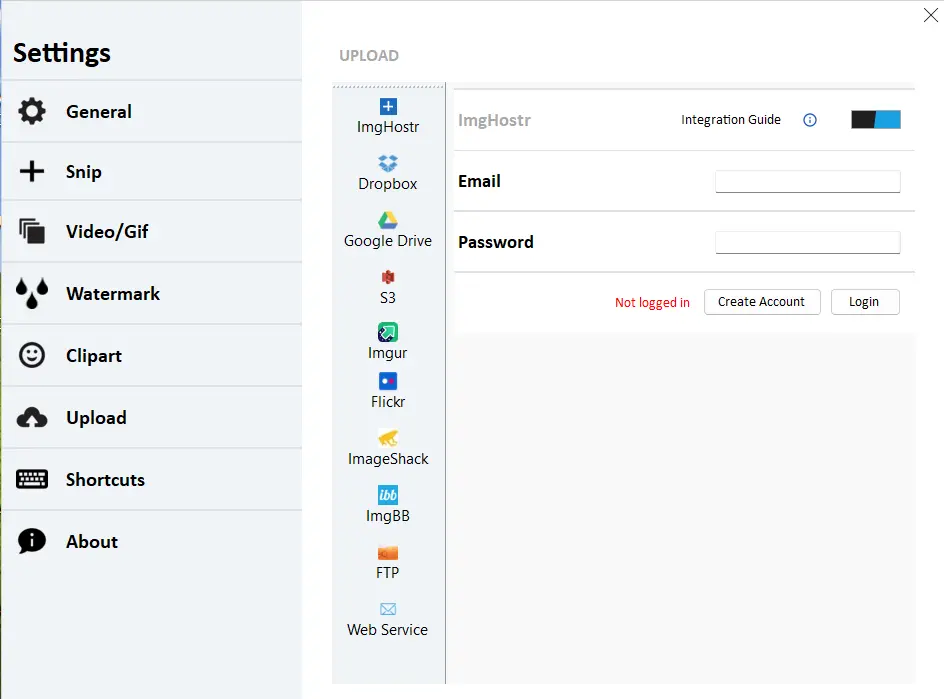
Upload directly to cloud services and sharing platforms
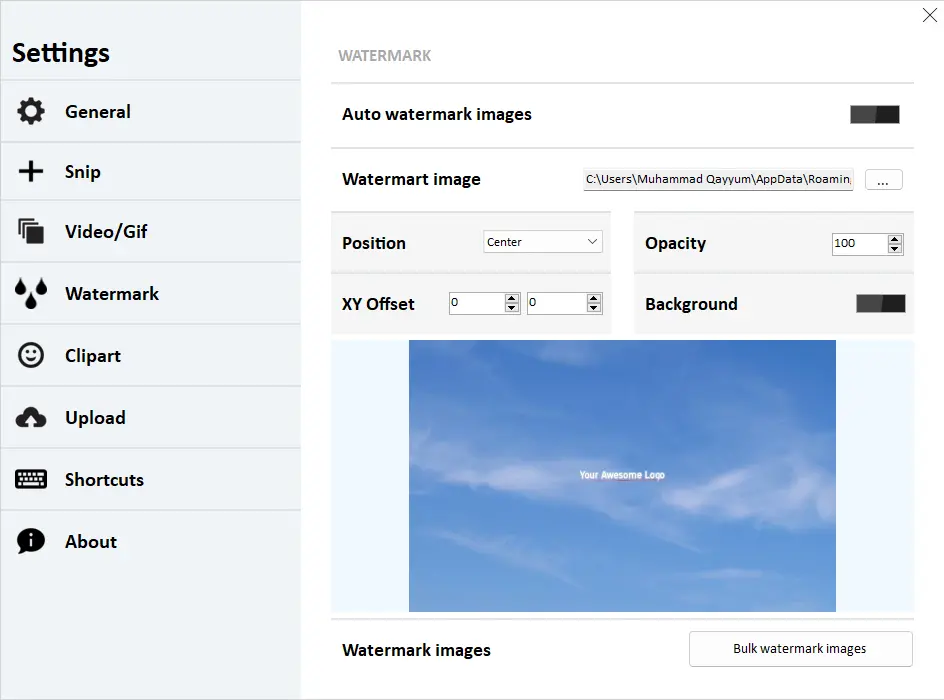
Protect your screenshots with custom watermarks
Free Snipping Tool works great on latest Windows 11, Windows 10 and Windows 7. Download and start snipping.
Over 9 million snips uploaded via our app. Here’s list of download mirrors.
Snipping Tool is a screenshot taker developed by Microsoft for Windows. It is lightweight yet equipped with more than just the capability of taking a simple fullscreen screenshot.
It is necessary to keep a software like Snipping Tool in our computer because sometimes we need to take a screenshot. A screenshot is one of the most straightforward ways to communicate something to other people. When you need an online help to fix a computer that suddenly acts weird, for instance, you can provide screenshots so that others know exactly what kind of trouble you are dealing with and therefore can give you the most effective solution.
Features and Highlights
Most screenshot taking software have simple user interface. So does Snipping Tool. When it is running, you will see a small window floating on the screen with two drop-down menus and three clickable buttons to execute different actions.
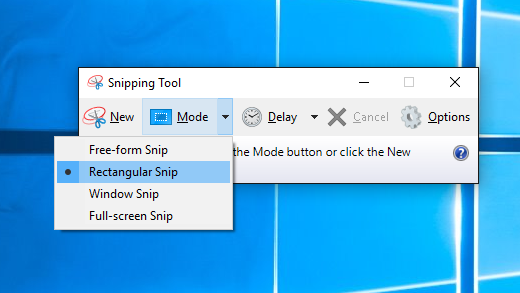
When you are ready to take a screenshot, clicking the New button will get you into action. A plus sign will appear that you can drag across the screen. When you stop dragging it, Snipping Tool takes the screenshot according to the selected mode. If it is a fullscreen mode, then it will grab an entire screen.
There are four screen capture modes: free-form snip, rectangular snip, fullscreen snip, and windows snip. You need to click the Mode button to switch between them.
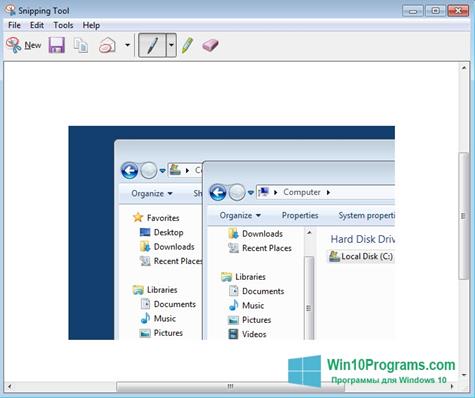
Once the screenshot is taken, there are two things happen. Snipping Tool displays the picture in its own image editor and send it to the clipboard so that you can paste it somewhere. If you don’t like it overwriting your clipboard content every time it takes a screenshot, the automatic behavior can be disabled.
There are only three kinds of editing tools in Snipping Tool. A pen, a highlighter, and an eraser. You can change the color, thickness, and tip of the pen. But the other two tools are provided without any other option. Even the color of the highlighter cannot be changed.
Once the picture is good enough, you can save it, or send it to someone by email either as an attachment or as a part of the content, or copy it into your word processor. If you choose to save it, Snipping Tool supports JPG, PNG, and GIF.
The Cancel button is the one that you need to click if you want to cancel taking a screenshot. This can be done by pressing ESC on your keyboard as well.
Snipping Tool Free Download for Windows
Snipping Tool has a delay functionality. When this option is enabled, Snipping Tool gives you up to five seconds before the plus sign appears. During the delay, you can prepare the screen, like switching to the targeted window or opening a certain menu so that you can capture its content.
To create a complex screenshot, unfortunately, you will have to use other software as Snipping Tool doesn’t have much to offer. But if you just need to take screenshots as quick as possible, and apply some simple elements such as lines or highlights, Snipping Tool is satisfying enough. You can click the link below to download Snipping Tool for Windows:
The Windows Snipping Tool is a built-in utility that allows you to take screenshots (or snips) of your screen. It provides multiple options to capture different areas of your screen, annotate the snips, and save or share them.
- APP : Snipping Tool
- License : Freeware
- OS : Windows
- Developer : Microsoft
Download Now
Below is a tutorial on how to use the Snipping Tool effectively.
Opening the Snipping Tool
There are a couple of ways to open the Snipping Tool in Windows:
- Using the Start Menu:
- Click the Start button (or press the
Windows key). - Type Snipping Tool in the search bar.
- Click on the Snipping Tool from the search results.
- Click the Start button (or press the
- Using a Keyboard Shortcut:
- Press
Windows key + Shift + Sto directly open the snipping toolbar (this opens a newer version called Snip & Sketch on Windows 10/11, but the functionality is similar).
- Press
Snipping Tool Modes
The Snipping Tool offers several modes for taking screenshots:
- Free-form Snip: Allows you to draw any shape around the area you want to capture. It’s freehand, so you can be creative with what you capture.
- Rectangular Snip: Lets you capture a rectangular portion of the screen. You click and drag the cursor to outline the rectangle.
- Window Snip: Captures the active window. This is useful when you want to capture an application window without capturing the entire screen.
- Full-screen Snip: Captures the entire screen, similar to pressing the
Print Screenkey, but with the added benefit of being able to annotate and save the screenshot directly.
Taking a Screenshot
- Open the Snipping Tool.
- In the Snipping Tool window, click the Mode button (or the arrow next to New in some versions).
- Select the snip type (Free-form, Rectangular, Window, or Full-screen).
- Click New to start a new screenshot.
- For Rectangular or Free-form snips, drag the cursor to create the capture area.
- For Window Snip, select the window you want to capture.
- The snip will be taken and displayed in the Snipping Tool editor window.
Editing and Annotating the Snip
Once you capture a screenshot, the Snipping Tool provides some basic editing options:
- Pen Tool: You can draw on the screenshot using different colors.
- Highlighter Tool: Use this to highlight certain areas of the image.
- Eraser Tool: Remove your annotations if you make a mistake.
- Delay: You can set a delay before the snip is taken, which is useful if you need to capture something that requires timing (such as a dropdown menu).
Saving and Sharing Snips
- After capturing and editing your screenshot, you can save it by clicking the File menu and selecting Save As.
- Choose the format (PNG, JPEG, GIF, etc.) and the location where you want to save the screenshot.
- You can also copy the snip to the clipboard using the Copy button (or by pressing
Ctrl + C). - To share the snip, click the Share button to send it via email or other apps.
Keyboard Shortcuts for Snipping Tool
- Windows key + Shift + S: Opens the snipping toolbar for quick snips (Rectangular, Free-form, Window, or Full-screen).
- Ctrl + C: Copy the snip to the clipboard.
- Ctrl + S: Save the snip to a file.
Differences Between Snipping Tool and Snip & Sketch
- Snipping Tool: This is the older version and is still available in Windows 10/11 but may be deprecated in future updates.
- Snip & Sketch: This is the newer version with a more modern interface and additional features like sharing, annotating with touch/stylus, and using delay options.
You can still access the classic Snipping Tool, but Microsoft is encouraging users to switch to Snip & Sketch, which can also be opened using the Windows key + Shift + S shortcut.
Conclusion
The Snipping Tool (or Snip & Sketch) is a handy tool for capturing, editing, and sharing screenshots. It’s especially useful for creating tutorials, documenting bugs, or sharing information visually.
Post Views: 38
Snipping Tool для Windows 10 предназначен для создания снимков дисплея. При использовании программного продукта можно работать с отдельной определенной частью, со всем рабочим столом. Утилита оснащена файловым редактором. Она выполняет основную обработку получившейся картинки.
Готовые изображения доступны к сохранению на жесткий диск, загрузке в сеть. Ссылку на них можно скопировать для буфера обмена. Приложение пригодится тем, кто часто использует скриншоты. Рекомендуем скачать Snipping Tool для Windows 10 на русском языке без регистрации и смс с официального сайта.
Информация о программеСКАЧАТЬ БЕСПЛАТНО
- Лицензия: Бесплатная
- Разработчик: Microsoft
- Языки: русский, украинский, английский
- Устройства: пк, нетбук, ноутбук (Acer, ASUS, DELL, Lenovo, Samsung, Toshiba, HP, MSI)
- ОС: Windows 10 Домашняя, Профессиональная, Корпоративная, PRO, Enterprise, Education, Home Edition (обновления 1507, 1511, 1607, 1703, 1709, 1803, 1809)
- Разрядность: 32 bit, 64 bit, x86
- Версия: последняя 2025, без вирусов
Аналоги Snipping Tool
- ESET NOD32 Titan
- Ventrilo
- Linux MultiMedia Studio
- Spartan
- Kaspersky Virus Removal Tool
- ISO Master
Отзывы пользователей
Категории программ
- Программы для Windows 10
- Очистка компьютера
- Создание загрузочного диска
- Переводчики
- Просмотр видео
- Графические редакторы
- Удаление вирусов
- Создание видео
- Удаление программ
- Рисование
- Восстановление флешки