
Facing the intricate challenge of efficiently managing logs and gaining insights into your system’s activities? Enter the Snare Syslog Agent — your ally in the realm of IT operations. Whether you’re a seasoned IT pro or just venturing into the world of log management, the struggle is real, and Snare Syslog Agent is the solution you didn’t know you needed.
By the end of this tutorial, you won’t just be dealing with logs; you’ll be orchestrating a symphony of system insights.
Turn those log-related headaches into a thing of the past!
Prerequisites
Before you begin setting up the Snare Syslog Agent, ensure you have the following in place to follow along in this tutorial:
- A machine running a Windows Operating System – This tutorial uses Windows 10 Pro v21H2 build 19044.1889.
- Administrative access to your Windows machine.
- A centralized Syslog server or Security Information and Event Management (SIEM) software installed – This tutorial uses Syslog Watcher Manager 6.5.5.
Downloading and Installing the Snare Syslog Agent on Windows
You’ve already ensured your system meets the prerequisites for a seamless integration. Now, it’s time to shine a light on a crucial step – downloading and installing the Snare Syslog Agent.
To install the Snare Syslog Agent on your Windows, follow these steps:
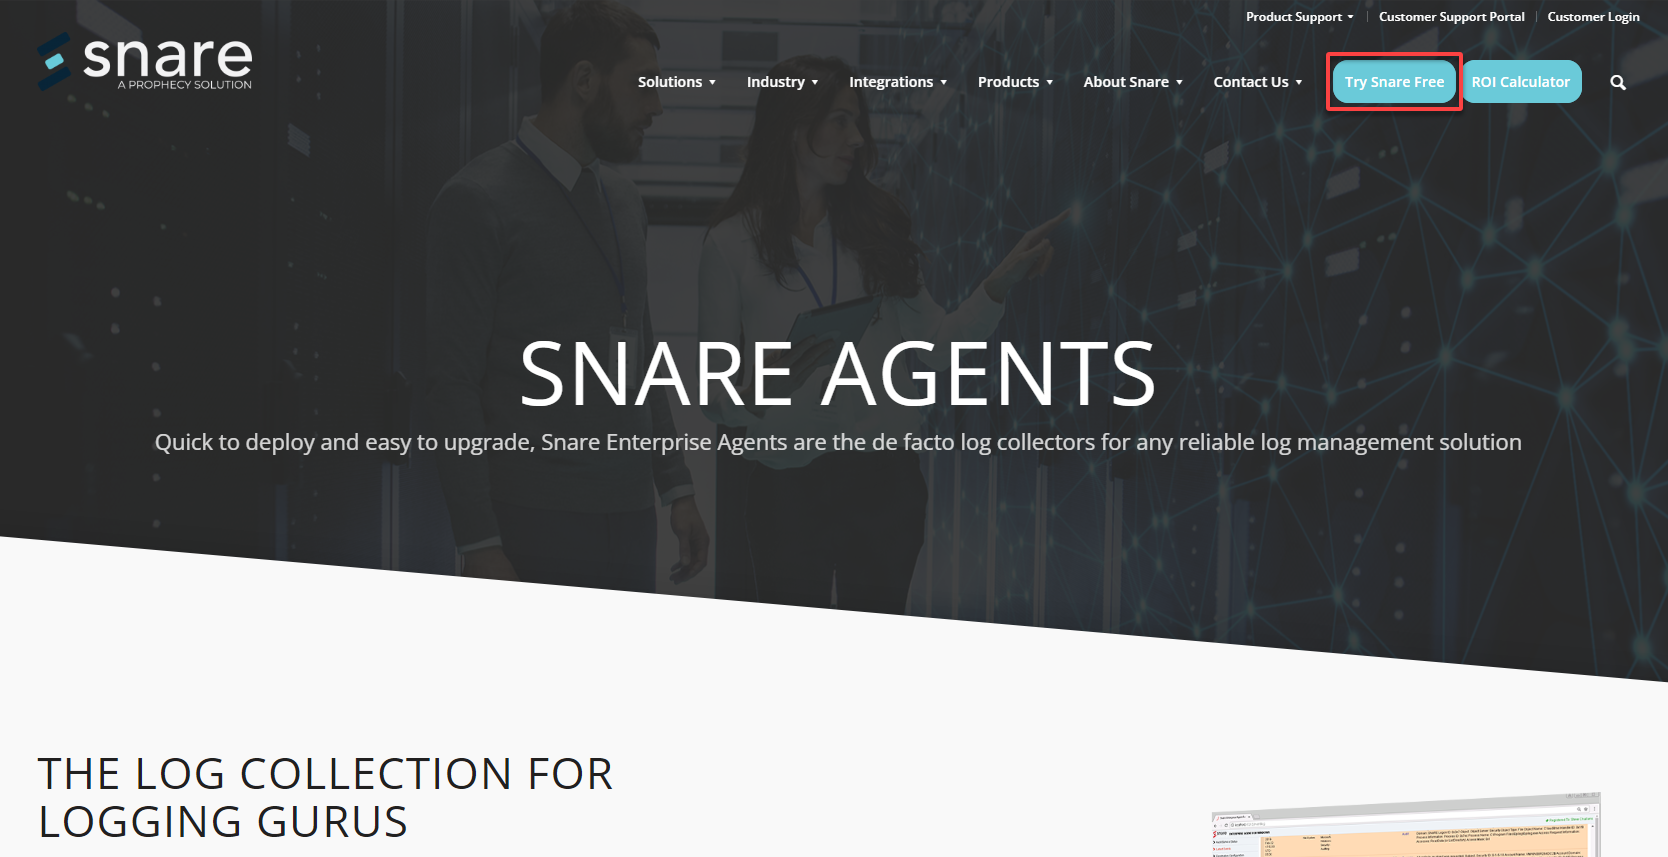
1. Open your preferred web browser, visit the official Snare Syslog Agent download page,
2. Next, click Try Snare Free (top-right) to register for a trial of the Snare Syslog Agent.
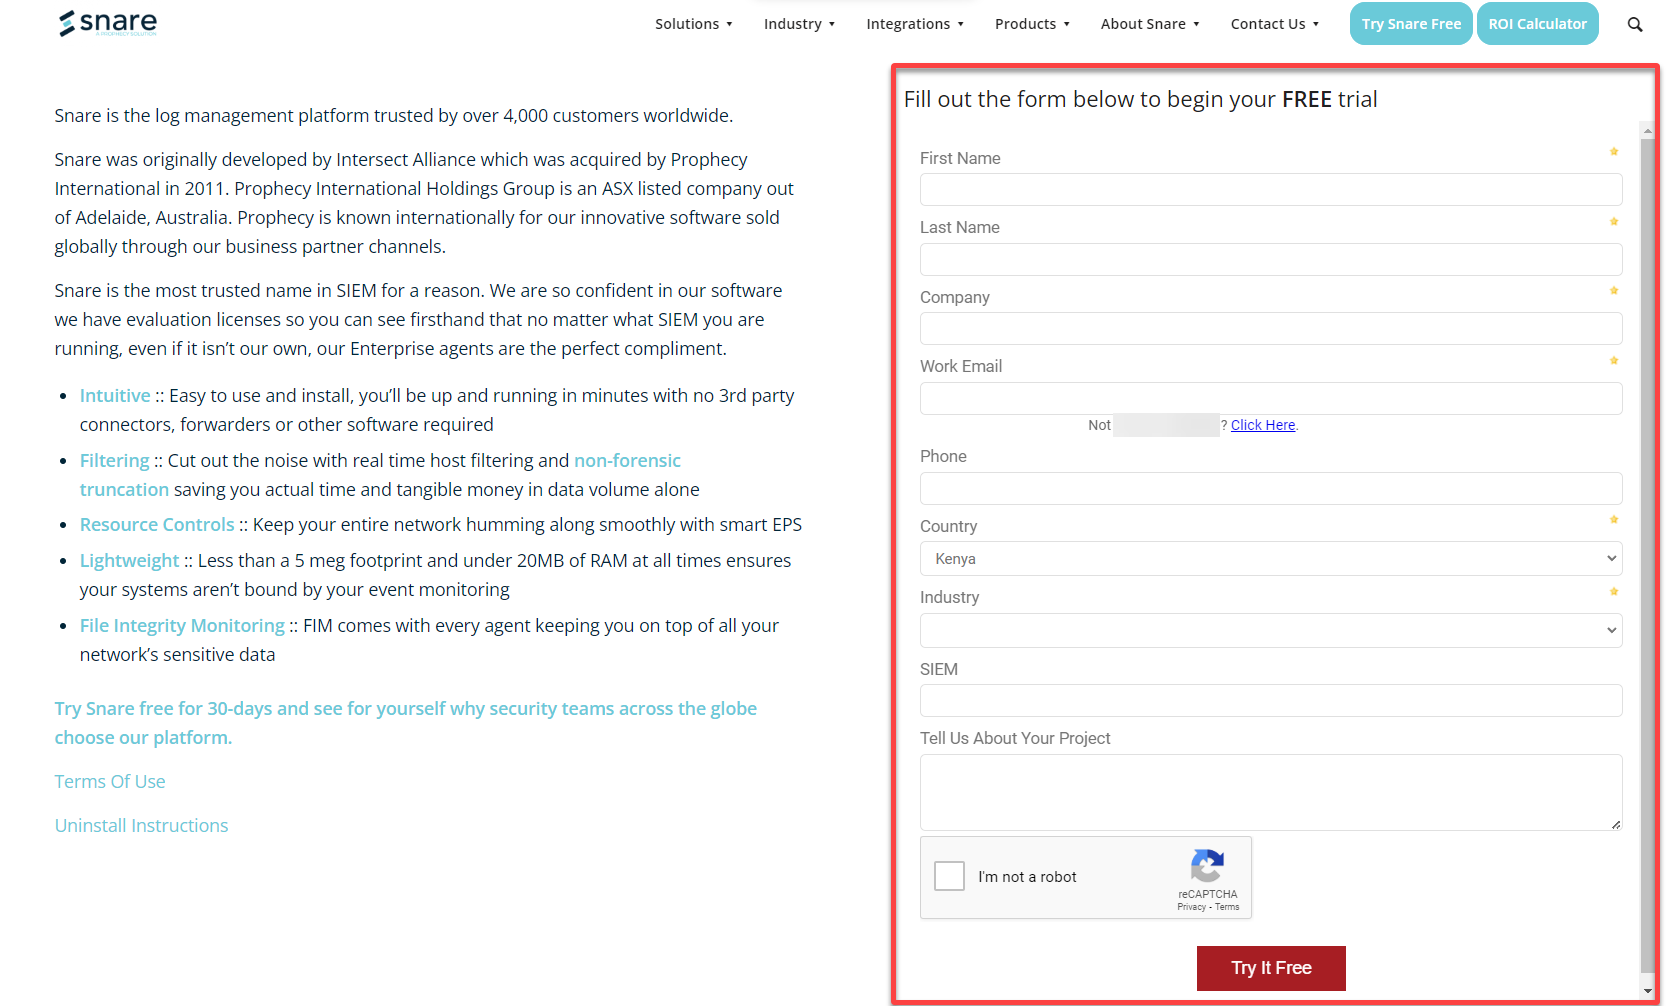
3. Fill out the form provided to register an account and request a Snare Syslog Agent 30-day free trial. An email will be sent to you containing the link to your free trial.
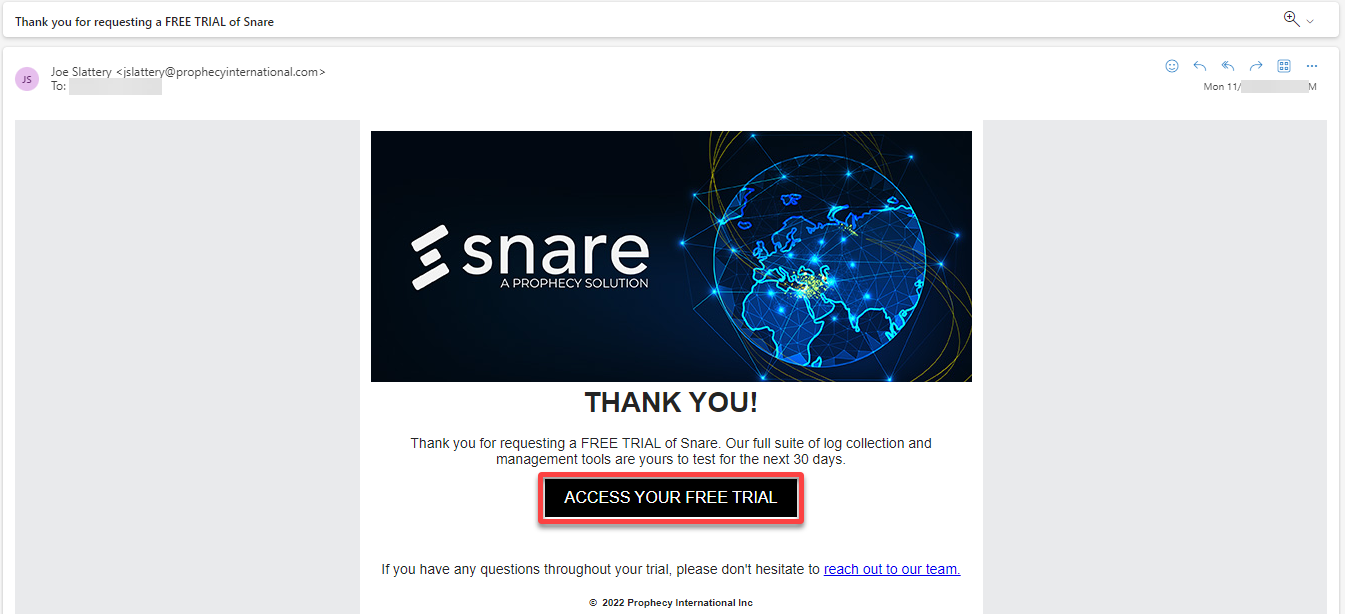
4. Now, open the email you received, and click ACCESS YOUR FREE TRIAL to open the download page to your free trial.
5. On the Snare evaluations download page, select your preferred Snare Agent (i.e., Snare Enterprise for Windows) and click Download to download the installer.

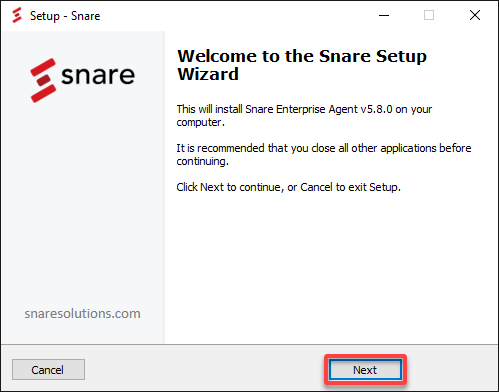
6. Double-click on the downloaded installer executable file to start the installation process.
7. In the welcome screen, select Next to continue with the installation process.
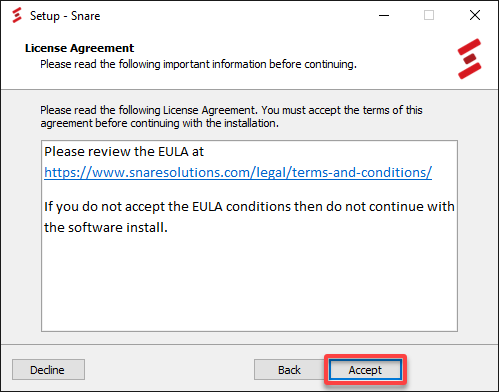
8. Next, review the End User License Agreement (EULA) and click Accept to continue.
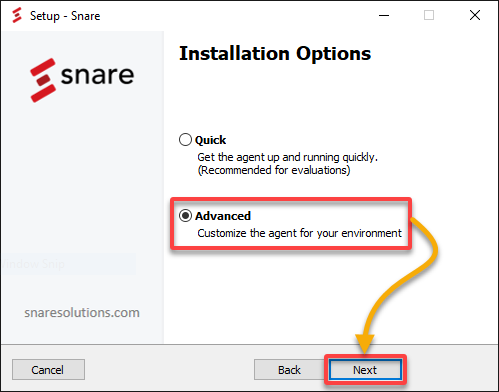
9. Choose either of the following Installation Options, depending on your preferences:
- Quick – Allows you to run the agent quickly, enabling the web UI with default settings.
- Advanced – Allows you to customize the agent for your environment.
But for this tutorial, choose the Advanced option and click Next.
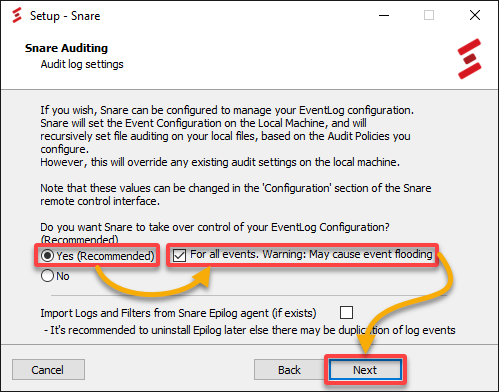
10. Configure Snare Auditing with the following:
- Select Yes to allow Snare Agent to configure the audit settings of the local machine automatically to match the configured objectives.
- Tick the For all events box to enable the auditing for all events, such as System Audit, Logon Audit, and Account Logon Audit.
Once configured, click Next to continue with the installation.
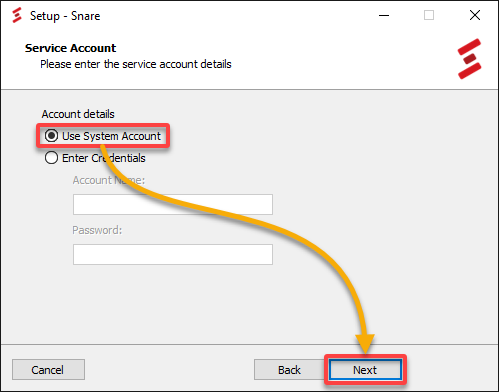
11. Choose the Use System Account option for the service account the Snare agent will operate on, and click Next.
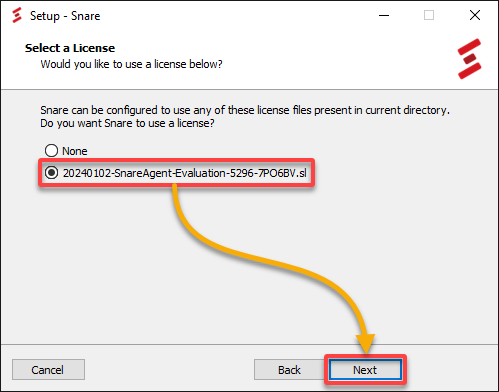
12. Select a license to activate your Snare Syslog Agent, and click Next to continue.
Snare license files are found in the Snare installation folder.
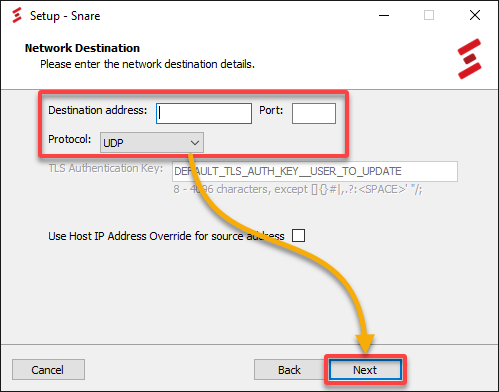
13. Configure (optional) the Network Destination for the Snare Syslog Agent by using the following options:
- Destination address – Provide the hostname or IP address.
- Port – Configure the port settings. For example, Snare Server users should only send events to port 6161 in native UDP or TCP, or 6163 for TLS/SSL, and Syslog via port 514.
- Protocol – Select a network protocol (UDP, TCP, TLS, or TLS_AUTH) that the agent will use when sending events.
- Tick the box at the bottom to Use Host IP Address Override for source address. This option sets the Snare Agent to choose the first network adapter as the source of the IP address.
Once configured, click Next to continue with the installation.
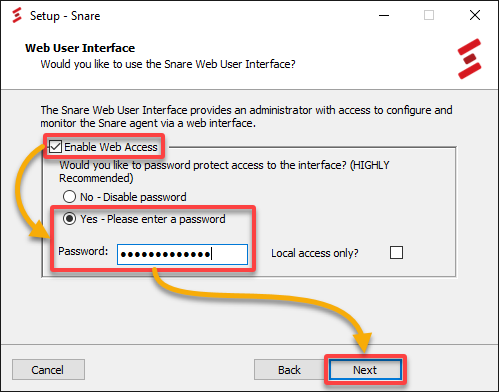
14. Set the Snare Syslog Agent web user interface (UI) as follows:
- Enable Web Access – Tick this option, which enables the Snare Syslog Agent web UI. Otherwise, all configuration changes must be made by directly modifying the registry settings. Also, the service must be restarted for any changes to take effect.
- Yes – Please enter a password – Choose this option and provide a username/password combination for accessing the web UI. Note that the user is always ‘snare’ (without quotes).
💡 Alternatively, choose the No – Disable password option, which sets the web UI to operate without a password. This option allows unauthenticated access to the configuration options.
15. Select the destination folder to install the Snare Syslog Agent, and click Next to confirm.
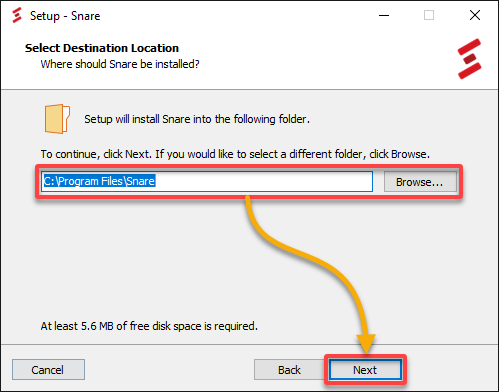
💡 Note: Regularly monitor the disk space usage on the machine where the agent is installed to avoid log file overflow.
16. Choose the program group within the Start Menu to create a shortcut for the Snare Syslog Agent’s remote control web UI.
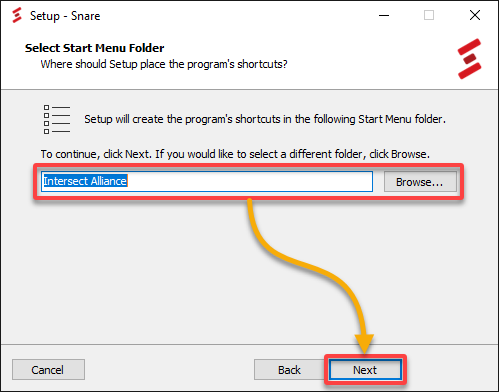
17. Now, click Next to install the Snare Syslog Agent with your selected configurations.
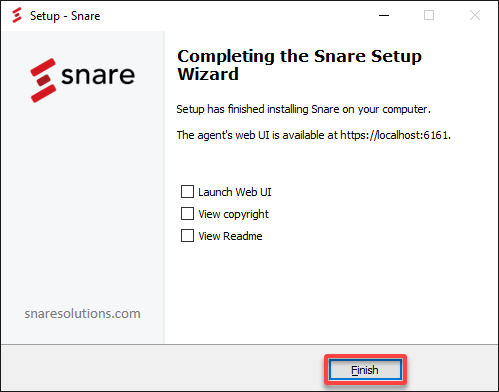
18. Lastly, click Finish after installation to close the Setup wizard.
Configuring the Snare Syslog Agent
Having successfully installed the Snare Syslog Agent, you can now focus on ensuring your Syslog setup aligns seamlessly with your system’s unique needs. You’ll configure your Snare Syslog Agent for an optimized logging mechanism that enhances your system’s visibility and operational efficiency.
To configure your Snare Syslog Agent, proceed with the following:
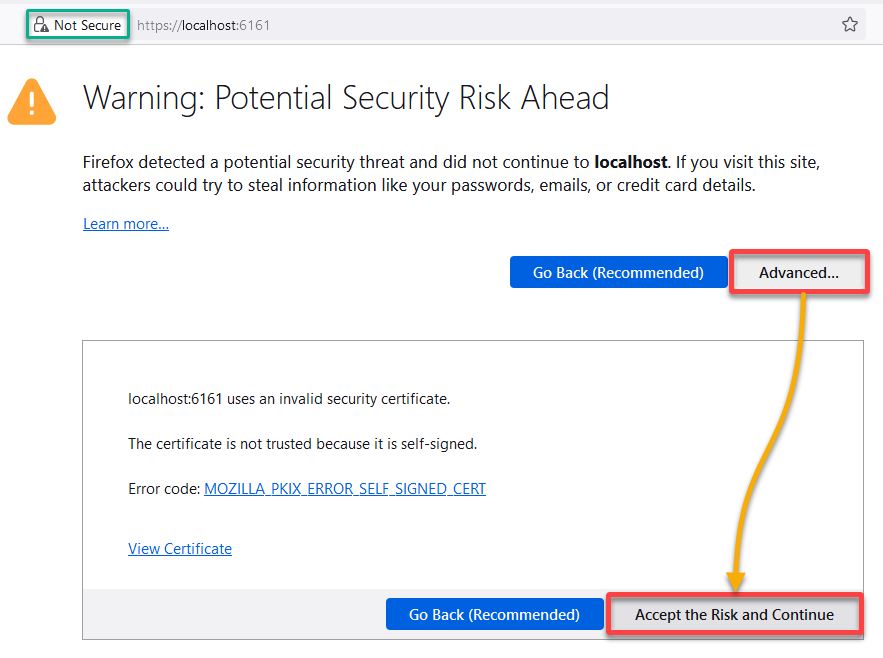
1. Open a new tab on your web browser and visit https://localhost:6161/ to launch the Snare Syslog Agent web UI from your local machine.
2. Next, click Advanced, then Accept the Risk and Continue when prompted about the security warning below to continue accessing the Snare Syslog Agent web UI.
This warning is due to the use of a self-signed certificate. But despite this warning, you can safely access the Snare Syslog Agent web UI.
💡 If you have any concerns or are working in a production environment, consider obtaining and installing a valid SSL/TLS certificate. That way, you ensure a secure connection without encountering these warnings.
3. Provide the username (snare) and password you set while installing the Snare Syslog Agent.
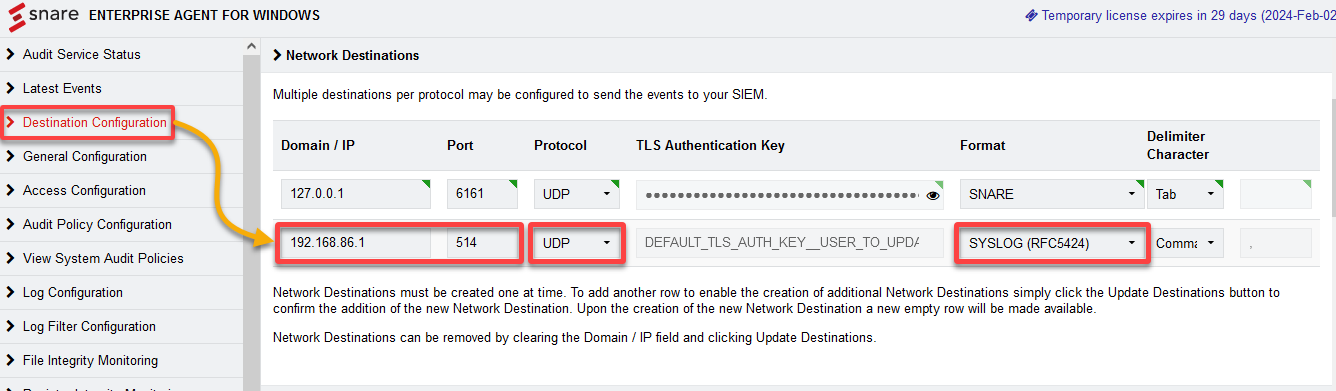
4. Once logged in, navigate to Destination Configuration (left-pane) in the main interface and configure the Network Destinations as follows:
- Domain / IP and Port – Provide the IP address (i.e., 192.168.86.1) and port number (i.e., 514) of your Syslog Server or SIEM system where you want to forward the logs.
- Protocol – Specify the protocol for the log transmission as either UDP or TCP. This example uses the UDP protocol.
- Format – Set the event log format style as either Snare or Syslog (i.e., Syslog) for the logs.
This configuration is crucial for effective log management and analysis. Moreover, this configuration ensures relevant logs are directed to the appropriate destinations for security and compliance purposes.
💡 Tip: Enable encryption (TLS/SSL) if your Syslog server or SIEM system supports it to ensure secure log data transmission.
Defining Sources for Collecting and Forwarding Event Logs
Moving on from configuring your Snare Syslog Agent, you must ensure critical data flows seamlessly into your infrastructure. How? You’ll define sources from which your Snare Syslog Agent collects and forwards event logs.
To specify which event logs to collect and forward, carry out the following:
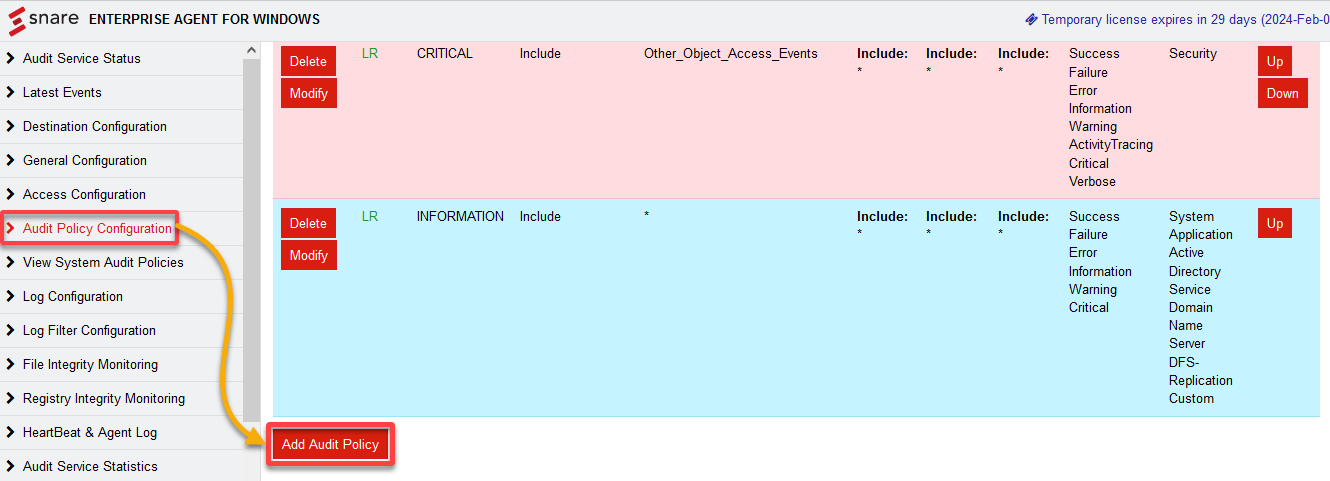
1. In the Snare Syslog Agent web UI, navigate to Audit Policy Configuration (left-pane), scroll down, and click Add Audit Policy to add a new event log source.
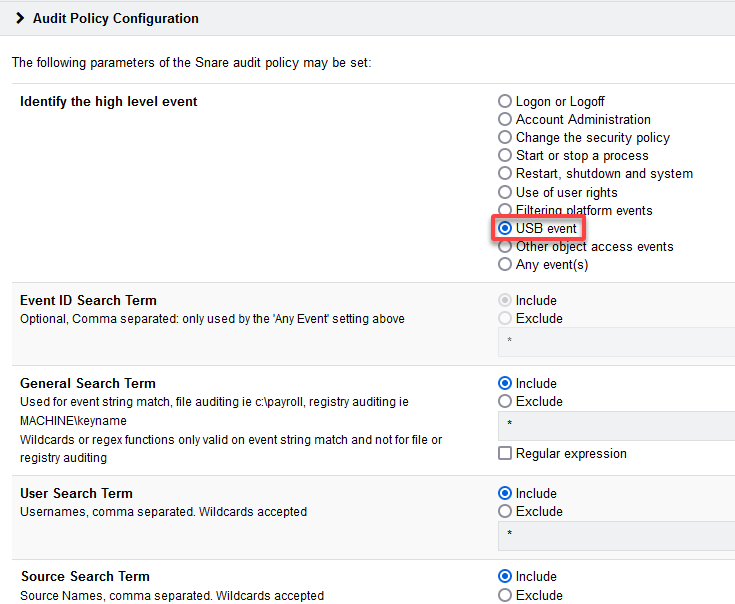
2. Next, specify which event logs to collect and set any additional filtering options in the Identify the high level event section.
In this case, set to monitor any USB event on your Windows machine.
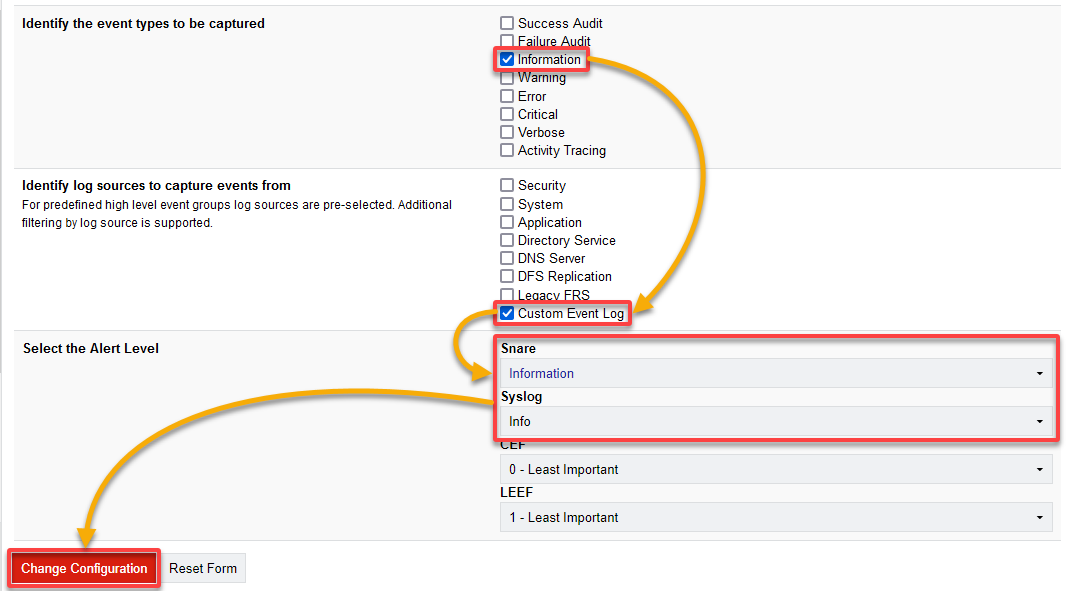
3. Scroll down and set the rest of the configuration as follows:
- Identify the event types to be captured – Tick the Information box to capture events with an informational severity level.
- Identify log sources to capture events from – Select your desired event log(s) from the list, like Application, Security, Information, or System. This example’s choice is the Custom Event Log to capture all USB events as Information event logs.
- Select the Alert Level – Choose the following options to determine the severity level of captured and forwarded events.
| Alert Level | Details |
|---|---|
| Snare – Information | Snare captures and forwards events with an information severity level. Informational events are typically routine notifications or reports that signify normal operation. These events might not indicate issues or problems but are rather informative. |
| Syslog – Info | Events forwarded to the syslog server will have an informational severity level. Like Snare’s Information, Syslog Info events are typically non-critical messages that provide general information about the system’s operation. |
Once configured, click Change Configuration to confirm your changes.
💡 Note: Consider selecting only the event logs relevant to your monitoring needs. Collecting unnecessary logs can lead to increased storage and network overhead.
4. Now, repeat all steps in this section if you wish to add additional event log sources.
Testing and Verifying Log Forwarding
After all the meticulous configurations, you must ensure the orchestrated symphony of syslog data flows seamlessly from the designated sources. This step is crucial to put the Snare Syslog Agent through its paces.
You’ll verify that your log forwarding setup is functional and optimally tuned to capture the nuances of your system.
To test and verify your log forwarding configurations, complete the steps below:
1. Open PowerShell as administrator and execute the New-NetFirewallRule command to add a new firewall. This command adds a new Inbound rule named Syslog Port to Allow traffic on UDP port 514, commonly used for the Syslog service.
Adding this inbound rule ensures that the Snare Syslog Agent can securely and resiliently communicate with your Syslog Server or SIEM system.
New-NetFirewallRule -DisplayName "Syslog Port" -Direction Inbound -Protocol UDP -LocalPort 514 -Action Allow
2. Next, generate some test events where the Snare Syslog Agent is installed on your machine.
In this example, the generated event is where a malfunctioned flash drive has been inserted into the system.
3. Navigate to the Latest Events tab in the web UI to monitor the generated event log.
Note the Event Count (i.e., 731664) from the latest log, as you’ll need it in the following step.
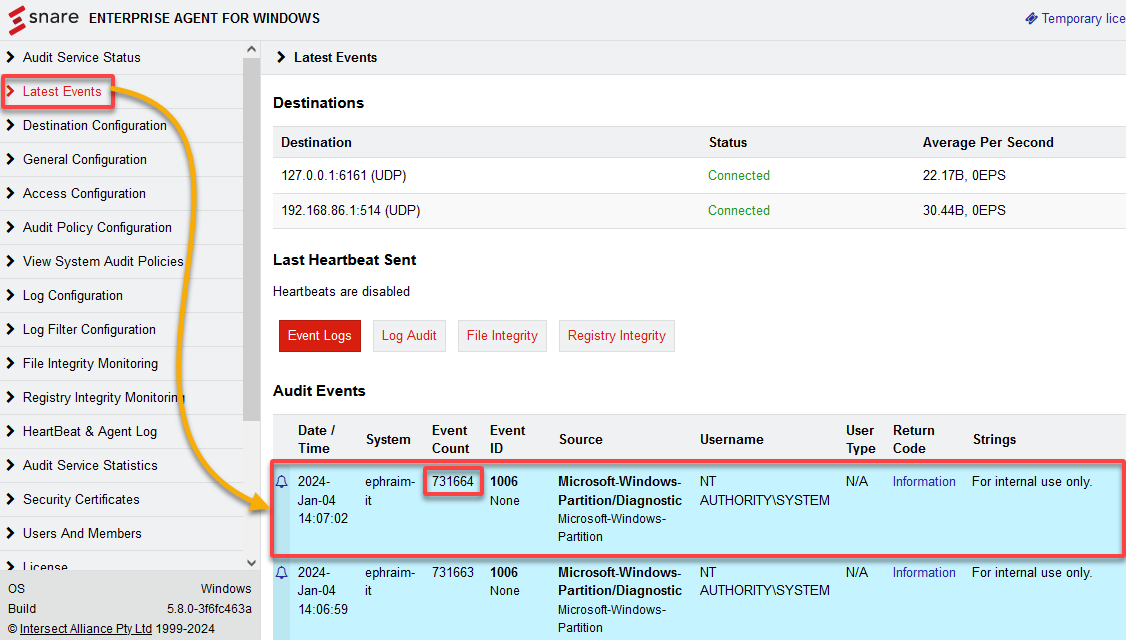
4. Finally, monitor your Syslog Server or SIEM system for the arrival of the forwarded log with the exact Event Count (i.e., 731664) and its details.
Verify that the forwarded logs contain the expected event information, including the correct facility, severity, and log message. In this case, the forwarded log above includes information like that generated from the Snare Syslog Agent.

💡 Tip: Periodically review the logs on the syslog server or SIEM system to detect potential issues and ensure reliable log forwarding. These issues include but are not limited to network connectivity problems or log format discrepancies.
Conclusion
Through this tutorial, you’ve successfully set up and configured the Snare Syslog Agent for collecting and forwarding event logs. You’ve gained the skills to orchestrate a robust syslog infrastructure that enhances visibility, monitors critical events, and fortifies your system’s security.
As you reflect on your learning, explore advanced customization by refining log formats to extract more meaningful information. Why not dive deeper into security configurations by implementing encryption for heightened data protection?
Seize the opportunity to specialize and optimize your Syslog setup for a tailored, efficient, and secure logging ecosystem!
Posted March 18, 2016 | Categories: Automation
1.0.0
Rating: 0
Download
For Windows
- About
- Specifications
- Reviews
The Snare Agent for Windows is a windows service that facilitates transfers of windows eventlog data to a central collection server (such as syslog)
| Platform | Windows |
| Categories | Automation |
| File Size | 0.00 KB |
| Create Date | March 18, 2016 |
| Last Updated | March 15, 2017 |
| Downloads | 54 |
Average Rating: [0]
Submit Your Review
Display Name
Rate
Title
Message
Not readable? Change text.
Reply
Name
Title
Message
Not readable? Change text.
Ensure you have administrator rights, double-click the downloaded file Snare-Windows-Agent-(Desktop Only)-v{Version}_x64.exe file where {Version} is the most recent version of the file available. This is a self extracting archive, and will not require WinZip or other programs. You will be prompted with the following screens:
Welcome to the Snare (Desktop Only) Setup Wizard

This screen provides a brief overview of the product you are about to install. Where available, select «Next» to continue the installation, «Back» to return to the previous screen or «Cancel» to abort the installation.
License Agreement

The License Page displays the link to the End User License Agreement (EULA). Please read the document carefully and if you accept the terms of the agreement, select «Accept». If you do not accept the EULA conditions, click «Decline» and do not proceed with the installation.
Installation Options

The following options are available to install the agent.
Quick — recommended for evaluations to get the agent up and running quickly, enabling the web UI with default settings. If a previous installation is detected, it will be overwritten with the Quick install, replacing any configuration previously found. Selecting this option will install the agent and you will be presented with the final screen Completing the Snare Setup Wizard.
After Quick Install has completed immediately access the agent website to set your password.
Advanced — recommended to customize the agent for your environment. Installer proceeds with individual screens as detailed below.
To upgrade the Agent from earlier version, please select Advanced.
NOTE: If existing installation of the agent is detected, the Quick install option will overwrite the installation.
Existing Install (Upgrade only)

If the Wizard detects a previous install of the Snare agent, you will be asked how to proceed. Selecting «Keep the existing settings» will leave the agent configuration intact and only update the Snare files. The Wizard will then skip directly to the Ready to Install screen.
Selecting «Reinstall» will allow the configuration wizard to continue and replace your existing configuration with the values you input. Note that replacing the configuration does not happen immediately; it takes place after selecting the «Install» button on the Ready to Install screen.
Snare Auditing

EventLog Configuration:
The Snare agent has the ability to automatically configure the audit settings of the local machine to match the configured audit policies. To enable this feature, select «Yes».
Very Important
IF YOU DO NOT SELECT THIS OPTION AND/OR THE WINDOWS ACTIVE DOMAIN GROUP POLICIES OVERWRITE THE AUDIT SETTINGS, THEN YOU WILL NEED TO MANUALLY ENSURE THAT THE WINDOWS AUDIT SETTINGS MATCH YOUR DESIRED AUDIT POLICY CONFIGURATION.
For all events. This option, when selected, will enable the auditing for all the events (i.e. System Audit, Logon Audit, ObjectAccess Audit, PrivilegeUse Audit, DetailedTracking Audit, PolicyChange Audit, AccountManagement Audit, DirectoryServiceAccess Audit and AccountLogon Audit). Enable this option only when you know what you are doing.
Import Logs and Filters from Snare Epilog agent: The Snare agent can import Logs and Filters settings from an Snare Epilog agent installed on the same machine. If selected, the Snare agent, on detecting the Snare Epilog settings, will import Logs and Filters settings from the Snare Epilog agent.
- Case 1 — Snare Epilog already installed: The Snare agent, on startup, will import Logs and Filters settings from the Snare Epilog agent.
- Case 2 — Snare Epilog is NOT installed at the time of this installation: The Snare agent will periodically try to detect Snare Epilog settings. Once Snare Epilog agent is installed, the Snare agent will then import Logs and Filters settings from the Snare Epilog agent.
NOTE: Selecting the option of importing relevant settings from Snare Epilog agent may result in duplication of log events.
Service Account

The Snare agent requires a service account to operate. The default option is to use the in-built SYSTEM account.
If a custom account is required to run the Snare service, select Enter Credentials. The account requires the following permissions:
- Provide the account with administrative privileges
or
- Ability to run Snare as a service
- Be part of the Event Log Readers group (Application,System,Security event logs)
Select a License

If Snare license files are found in the current directory where the Snare installation file exists, an option to select the license will be available.
Network Destination

This screen provides configurations for network destination. Following configurations can be configured.
- Destination address The name or IP address can be entered and comma delimited when several addresses are required.
- Port Configure the port, for example Snare Server users should only send events to port 6161 in native UDP or TCP, or 6163 for TLS/SSL, and Syslog via port 514.
- Protocol Select the network protocol (UDP,TCP,TLS and TLS_AUTH) you would like the agent to use when sending events.
- TLS Authentication Key This option is available only for TLS_AUTH protocol. TLS authentication key should be the same as configured in destination. A valid TLS Authentication Key must be between 8-4096 characters and allowed characters include A-Za-z0-9~!@$%^*\()_+=`-
- Use Host IP Address Override for source address Enabling this setting will use the first network adaptor as listed in the network configuration as the source of the IP address.
Web User Interface

This screen provides a means to configure the Snare Agent’s web interface for first time use. Select from the following options to configure the Snare web interface:
- Enable Web Access
Select this option to enable the web user interface.
A user/password combination will be required to access the web interface. The user is always «snare» and the password will be set to text supplied in the «Password» field.
If the Enable Web Access option is NOT selected, all configuration changes will need to be made by directly modifying registry settings and the service will need to be restarted for any changes to take effect.
-
Password: Enter the login password for the agent website.
Password complexity rules
The password must meet the following criteria:
Between 10 and 128 characters in length.
Not more than 2 identical characters in a row (e.g. 111 not allowed).
And 3 out of the following 4 complexity rules:
At least 1 uppercase character (A — Z),
At least 1 lowercase character (a — z),
At least 1 digit (0 — 9),
At least 1 special character (e.g. punctuation).
- Local access only? Selecting «Local access only» will configure the web interface to restrict access to local users only. Remote users will be unable to contact the web interface.
Select Destination Location

This screen provides the ability to select the folder where the Snare Agent will be installed. If the folder name specified does not exist, it will be created. It is important that this folder has enough space available to install the agent.
By default, the installation wizard will install Snare under the Program Files folder. If a different destination is desired, one may be selected via the «Browse» button, or by typing the full path name directly into the box.

Select the program group within the Start Menu under which a shortcut to the Snare Agent’s remote control interface will be created.
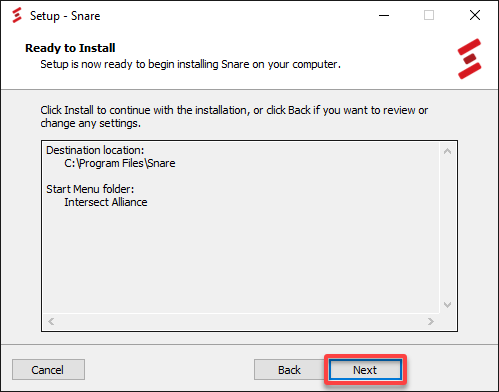
Ready to Install

This screen provides a final summary of the chosen installation options. If the options listed are incorrect, select the «Back» button to return to previous screens and change their configuration.
Select the «Next» button to proceed with the listed choices and run the installation, or «Cancel» to abort the installation without making any changes.
Completing the Snare Setup Wizard

This is the final screen of the installation wizard. By default, the web UI will be launched at https:/localhost:6161
Information on Server
Please note if the desktop agent is attempted to be installed on a Windows server, the following message will be displayed:
Free and open-source tool for Windows event logs collection, analysis, reporting, real-time alerts and archiving features, accessible from a web UI.
- Snare for Windows
- Version :4.3.8
- License :Trial
- OS :Windows All
- Publisher :InterSect Alliance
Download Now
Snare for Windows Description
Snare is a handy Windows service that enables users to remotely access EventLog details in real time, as well as to transfer data. It monitors all tree main event logs, namely Application, System and Security, along with secondary ones if they exist, namely DNS, Active Directory and File Replication.
Customizable setup pack and simple UI
During installation, the tool can be asked to manage your EventLog configuration by overriding any existing audit settings. What’s more, you can use the system account or input other credentials for the service, as well as enable web access with or without a password.
Monitor EventLog data remotely
Once set up, you can access Snare via a web browser and log in with the previously defined credentials to view data. The app shows the current PC events, such as created and exited processes, together with in-depth information about them, like date, system name, event count and ID, source, user name, and audit status.
Configure network and remote control settings
Snare lets you change the network configuration in regard to the destination Snare server address and port number, event log cache size, UDP or TCP, message encryption, automatic tasks (set audit and file audit configuration), data exporting to file, and others.
As for remote control, you can restrict the Snare agent to specific hosts, set an IP address allowed for remote control and indicate a password to permit its removal, establish the web server port number, and so on. This form can be reset to default.
Evaluation and conclusion
No error dialogs were shown in our tests and the app did not hang or crash. It had a good response time and consumed low CPU and RAM, so it didn’t put a strain on computer performance. To sum it up, Snare provides experienced users with a fast and simple method of viewing EventLog information from a distance.
Post Views: 1