
Если у вас на компьютере установлены две операционные системы: Linux и Windows 8, 8.1 или 10 и вы захотите примонтировать системный раздел Windows, чтобы скопировать оттуда или записать туда файлы, то, скорее всего, столкнетесь с ошибкой.
В современных системах такие разделы монтируются в режиме только для чтения по умолчанию, но если вам надо туда что-то записать, то придется немного поработать. В этой статье мы поговорим о том как подключить диск Windows в Linux.
Содержание статьи
- Монтирование раздела Windows в Linux
- Выводы
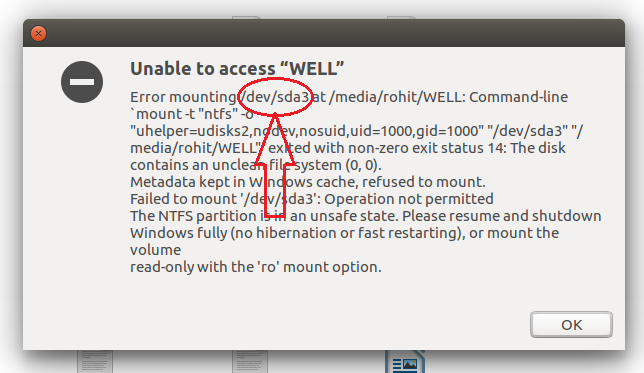
Скорее всего, если вы попытаетесь примонтировать раздел Windows, утилита mount выдаст вот такое сообщение: Error mounting: windows is hibernated refused to mount и примонтирует его только для чтения:

Это связано с использованием в новых версиях Windows алгоритма гибридной загрузки с использованием гибернации, которая и мешает вам получить доступ к вашим файлам.
Такое сообщение может сбить вас с толку. Обычно мы выключаем компьютер, с помощью пункта Завершение работы в меню Пуск. Никаких упоминаний о гибернации там нет, но Linux утверждает система находиться в режиме гибернации. А дело в том, что современные версии Windows используют гибернацию по умолчанию для ускорения загрузки.
Когда вы выключаете современную операционную систему Windows, она выключается не полностью, часть системных процессов сохраняются на диск, чтобы загрузка выполнялась быстрее. Это ускоряет процесс загрузки, но и имеет недостаток при использовании Linux.
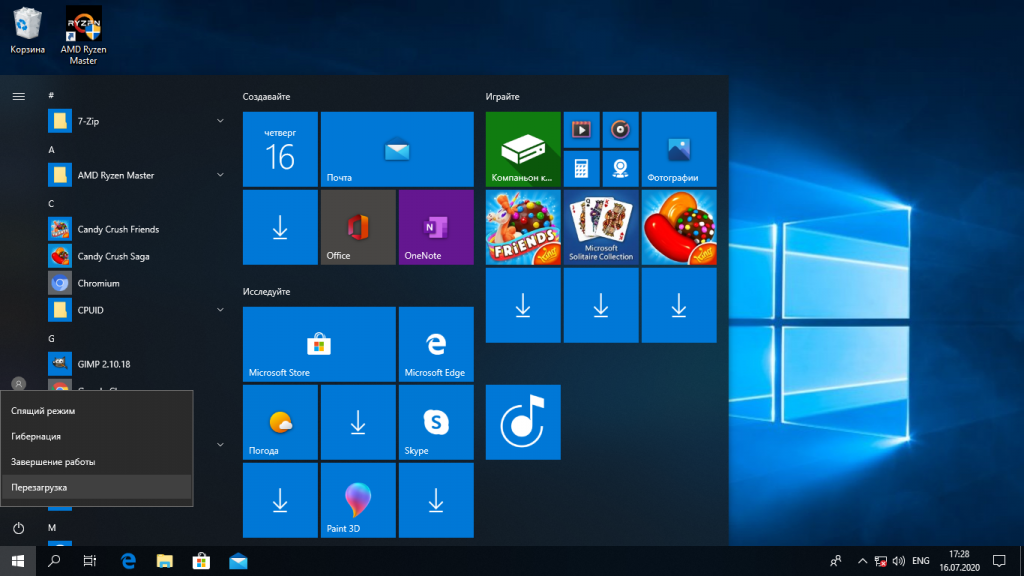
Чтобы исправить эту проблему можно загрузить Windows и отключить гибридную загрузку. Единственным недостатком такого метода будет замедление загрузки системы. Она будет загружаться приблизительно с такой же скоростью, как Windows 7. Но зато вы сможете выполнить подключение раздела Windows в Linux. Ещё можно войти в Windows и перезагрузить компьютер, при выборе этой опции гибернация не используется.
1. Перезагрузка Windows
Windows не использует гибридную загрузку во время перезагрузки. Если выбрать пункт перезагрузка, то сохраненное начальное состояние будет стерто и создано новое.
Поэтому если в следующий раз захотите перейти в систему Linux из Windows — выбирайте пункт перезагрузка. Так система не уйдет в гибернацию и у вас не возникнет ошибок во время монтирования раздела Windows в Linux.
2. Выключение с клавишей Shift
Если вам нужно именно выключить компьютер есть еще один способ. Когда выбираете пункт меню выключить удерживайте нажатой клавишу Shift. Тогда система тоже не будет использовать гибернацию и полностью выключиться.

3. Отключение гибридной загрузки
Если вы не хотите думать какую кнопку нажимать и что делать при каждой перезагрузке Windows, можно полностью отключить гибридную загрузку. Но тогда Windows будет загружаться медленнее. Это также может понадобиться если аппаратное обеспечение компьютера не поддерживает гибридную загрузку. После ее отключения вы сможете легко выполнять монтирование разделов Windows в Linux без каких-либо ошибок в режиме как для чтения так и для записи.
Для этого загрузитесь в Windows, откройте панель управления, откройте пункт Оборудование и звук. В разделе Электропитание выберите Изменение параметров, которые сейчас недоступны:
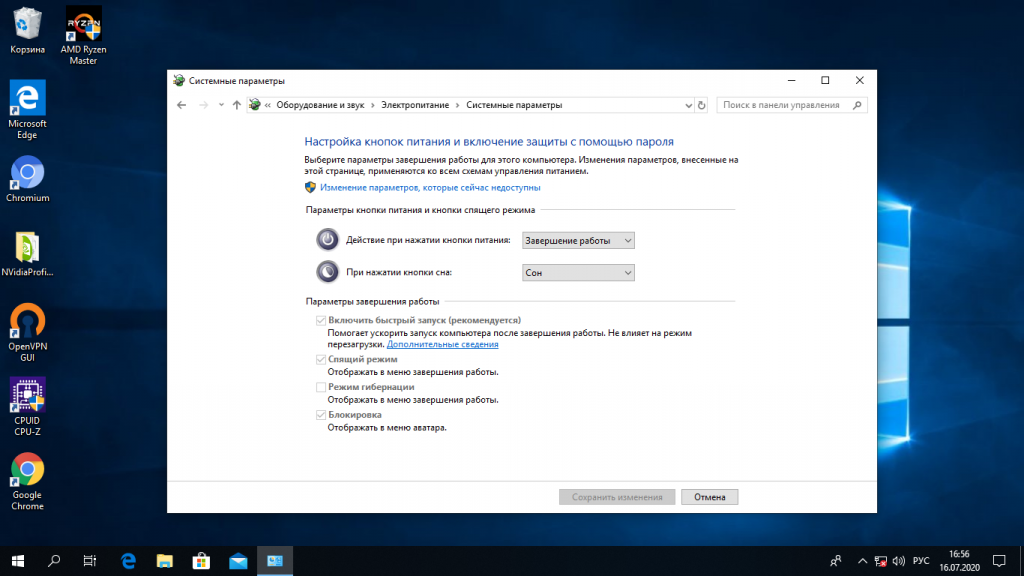
В открывшимся окне кликните по ссылке Изменить параметры, которые сейчас недоступны, затем пролистайте вниз и снимите галочку с пункта Включить быстрый запуск:

Затем нажмите кнопку Сохранить изменения.
4. Удаление файла Hiberfile.sys утилитой диски
Вместо перенастройки Windows, можно автоматически удалять файл гибернации каждый раз когда вам нужно выполнить монтирование разделов Windows в Linux. Конечно, после такой процедуры система будет загружаться медленнее, но потом она снова создаст файлы гибридной загрузки и продолжит использовать быстрый запуск. Это идеальный вариант если вы нечасто пользуетесь системным разделом Windows и не хотите терять скорость загрузки.
Но имейте в виду, что если вы действительно отправите компьютер в режим гибернации оставив открытыми программы и не сохраненные данные, то Linux все равно удалит реальный файл гибернации вместе со всеми вашими данными. Разницу между видами гибернации определить невозможно.
Для удаления файла hiberfile.sys достаточно добавить опцию монтирования файловой системы ntfs remove_hiberfile. Этот же совет вы можете видеть когда пытаетесь монтировать системный раздел с помощью ntfs3g.
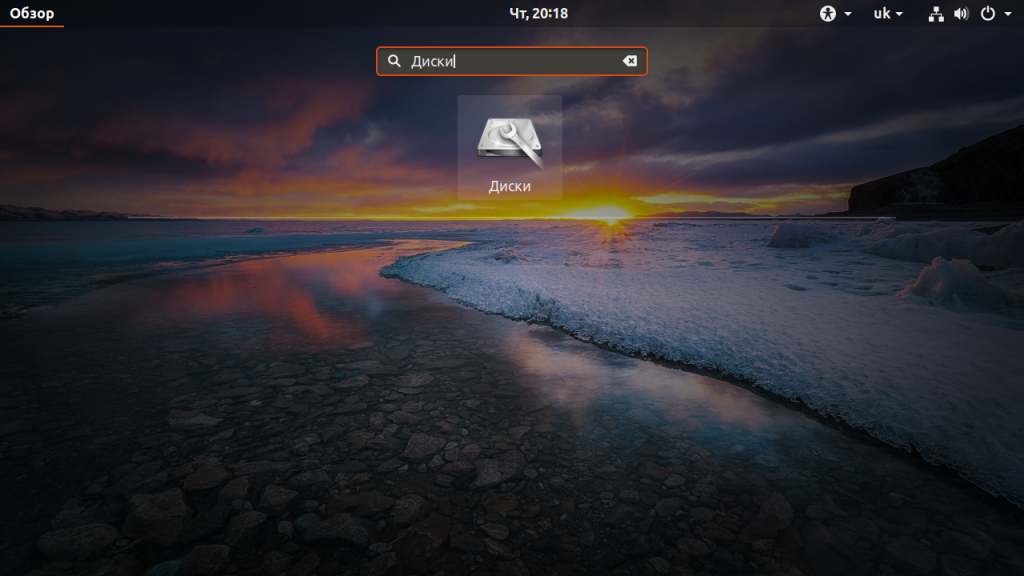
В Ubuntu и других дистрибутивах с оболочкой Gnome это можно сделать с помощью утилиты Диски:
В правой части окна программы выберите жесткий диск с Windows, затем выберите системный раздел Windows. Кликните по кнопке с шестерней и выберите Изменить параметры подключения:
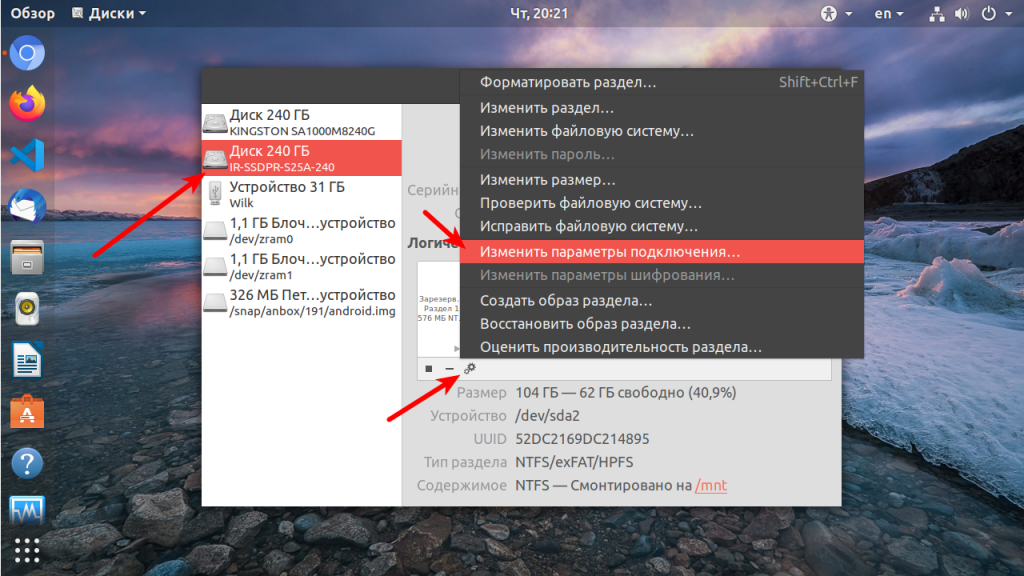
Переключите выключатель Automatic Mount Options в положение Off, затем вставьте следующую строку в конец опций монтирования внизу окна:
,remove_hiberfile
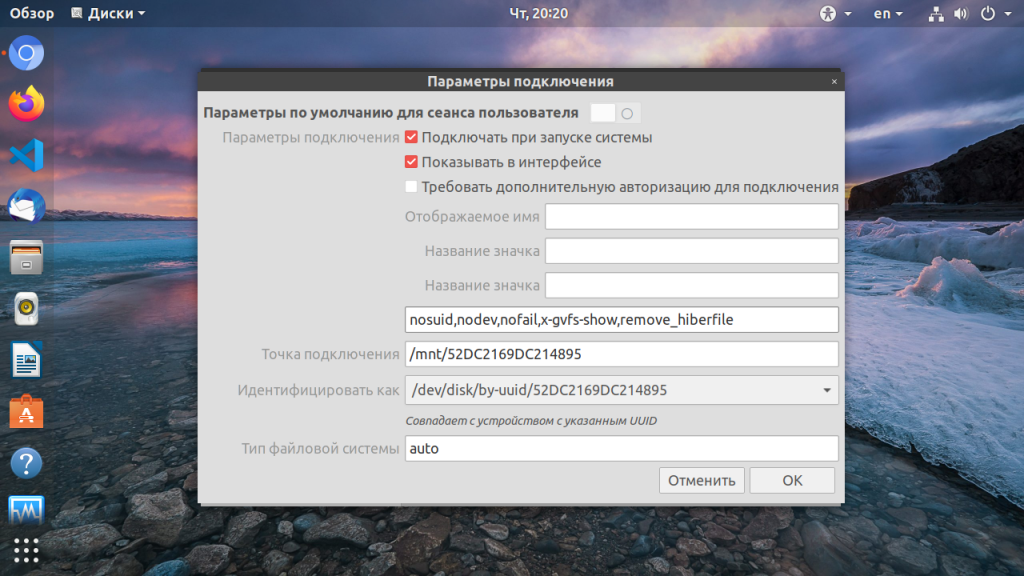
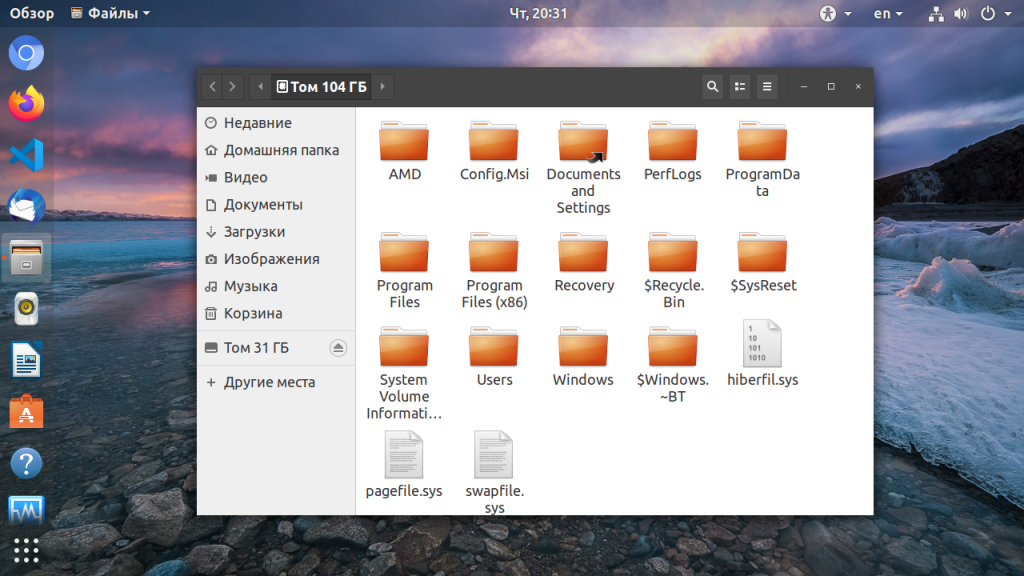
Нажмите OK и введите свой пароль. Теперь можете попробовать примонтировать системный раздел Windows в файловом менеджере Nautilus. Как видите, монтирование выполняется успешно, без каких-либо ошибок. Если файл гибернации был включен система его попросту удалит.
5. Удаление файла hiberfile.sys утилитой mount
Если вам нужно просто один раз подключить Windows раздел в Linux, несмотря на ошибку error mounting windows is hibernated и не настраивая никаких автоматических опций воспользуйтесь утилитой mount. Команде нужно передать имя системного раздела Windows включить ту же самую опцию, например:
mount -o defaults,rw,remove_hiberfile -t ntfs /dev/sda2 /mnt/ntfs
Здесь /dev/sda2 — раздел диска с Windows, а /mnt/ntfs — точка монтирования.
Эти действия необходимы, только если вам нужен доступ для записи файлов на системный раздел Windows. Если же вам просто нужно просмотреть или скопировать тот или иной файл можно выполнить монтирование разделов windows в Linux в режиме только для чтения. Например:
mount -o defaults,ro -t ntfs /dev/sda1 /mnt/ntfs
В Linux можно монтировать системные разделы в режиме только чтение, даже когда система Windows в гибернации.
Выводы
Независимо от того какой способ вы выбрали, в результате вы должны получить возможность подключить раздел Windows для чтения и записи:
Использование нескольких систем на одном компьютере — очень часто практикуется новичками. Обмен файлами между двумя системами — нормальное явление, а поэтому вы очень часто будете сталкиваться с этой ошибкой. Но эта статья поможет вам решить ее раз и навсегда. Если остались вопросы, пишите в комментариях!
Last Updated :
15 Apr, 2025
If you’re looking to mount Windows drives in Ubuntu, this guide will walk you through the steps. Whether you want to access files on a Windows partition or need to read Windows drives in Ubuntu, mounting them is essential for seamless data sharing between operating systems. Ubuntu makes it easy to mount Windows partitions, including those with the NTFS file system, allowing you to work on your files across both platforms effortlessly.
How to Mount Windows Drives in Ubuntu?
Following are the step wise instructions to access windows drives in Ubuntu (Any Version)
Step 1: Open terminal and type the following command
sudo ntfsfix error mounting location
Step 2: It will ask for system password, enter password and again press enter.
Step 3: It will take some seconds to process command and at the end shows the message like “NTFS partition was processed successfully.”
Step 4: Again click on windows drive, now you are allow to access clicked drive.
For Example:
Step 1: Type sudo ntfsfix /dev/sda3 and press enter as shown in below picture then it will ask for system password, enter password and again press enter.

Step 2: It will take some seconds to process command and at the end shows the message like “NTFS partition was processed successfully”, as shown in below picture.

By following this guide, you can easily mount Windows drives in Ubuntu and access your files from both systems.
Conclusion
Being able to mount Windows drives in Ubuntu enhances your system’s flexibility, allowing you to easily share and manage files between Windows and Linux environments. By following these simple steps to mount Windows partitions and access your NTFS drives, you’ll be able to create a more integrated workflow. Whether you’re looking to automatically mount Windows drives in Ubuntu or manually control the process, this guide provides the necessary tools to get the job done.
Also Read
- Linux-Command Archives
- How to install Python on Linux?
- How to Make Custom Commands for Linux Terminal?
If you are rocking a dual-boot setup with Windows and Linux, you might want to access data stored in the Windows drives from the Linux system.
However, you might find that Windows drives do not appear in the file manager. This is because, in some distros, you need to manually mount them. Let’s take a look at how you can access your NTFS/Windows drives in Linux.
Step 1: Install the NTFS-3G Driver
To successfully mount and access NTFS drives on Linux, you will need to install a driver to ensure no incompatibility issues arise. The go-to driver when working with NTFS drives is NTFS-3G. It’s cross-compatible between Debian/Ubuntu derivatives, Arch Linux-based systems as well as RHEL/CentOS/Fedora systems.
To install the NTFS-3G driver on your Linux system, fire up a terminal and install it using the package manager of the distro that you’re running:
On Debian and Ubuntu, run:
sudo apt install ntfs-3g
On Arch-based systems, run:
sudo pacman -S ntfs-3g
To install the NTFS-3G driver on Fedora, CentOS, or RHEL, issue the following command:
sudo dnf install ntfs-3g
This should install the driver on your Linux system. Now you can move on to the next steps.
Step 2: Identify the NTFS Partition
A preliminary step before mounting a drive is to first identify its device ID. This is important because you might end up causing unwanted data loss by working with the wrong partition or drive.
To identify all the drives and their partition types, use the fdisk command with the -l flag.
sudo fdisk -l
The output will display all the different drives and partitions along with useful information like size, available free space, partition type, and more. Take note of the device name carefully. You will be needing it later on in this guide.
Step 3: Make a Directory to Mount the Drive
In Linux, everything is treated as a file, including hardware devices. So, to mount your NTFS drives on Linux, you have to create a separate directory wherein the drive will be mounted, and its content laid out.
This process is as simple as creating a regular directory on Linux. Using the mkdir command, create a new directory in the root partition of your Linux system. For the sake of better organization, make the directory under the /mnt directory and name it «media».
sudo mkdir /mnt/media
Now that we’ve allocated a directory for the NTFS drive, we need to update the file system tables on Linux with the location of the drive.
Step 4: Update the File System Tables and Mount the Drive
Updating the file system tables is a crucial step that enables your Linux machine to recognize and mount new storage drives. In Linux, the /etc/fstab file stores the file system configurations.
sudo nano /etc/fstab
You need to add the NTFS drive’s location and other important data to make sure that your system can mount it without any hiccups.
To update the file system table of your Linux system, use any text editor of your choice and open the /etc/fstab file.
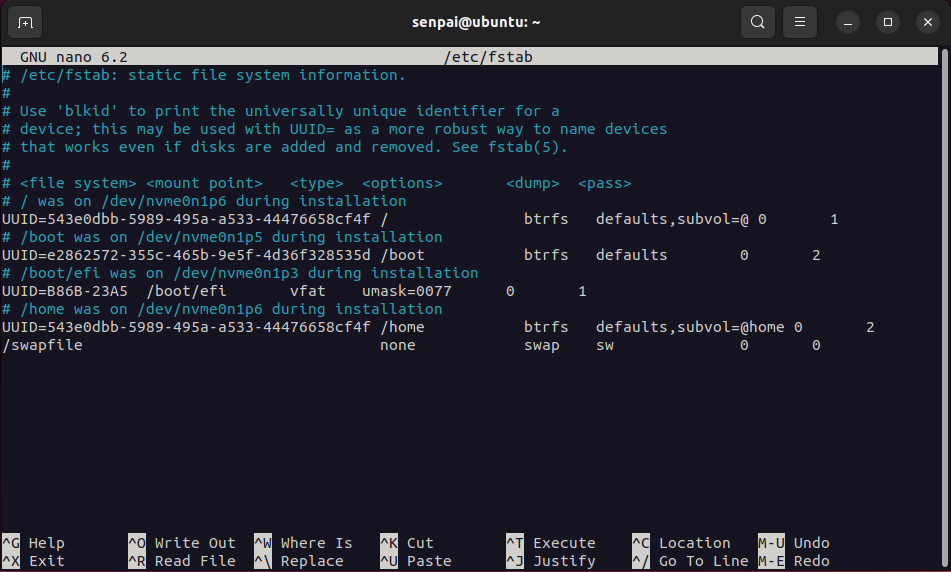
In a new line, add the NTFS drive location, the directory that you created earlier, the driver to use (NTFS-3g), and read, write, and user access information. Make sure to separate each input with one Tab space. If you’re unsure what to type in, you can replicate the settings for any drive that’s already mounted and functional.
Write out the file once you’re done inputting the data. Fire up the terminal and use the mount command in conjunction with your device ID to mount it:
mount /dev/sda3 /mnt/media/drive_location_here
In case you wish to unmount the drive, you can do that using the umount command:
umount /dev/sda3 /mnt/media/drive_location_here
That’s all you need to do. Optionally you can restart your system, however, it won’t be required in most cases. You can now explore your NTFS drive from the terminal using the cd command or via the file manager of your Linux distro.
Now You Can Access Windows Drives in Linux
While it may be a bit tedious, it is still straightforward and a permanent process. You can now freely mount and unmount your Windows drives when logged into Linux. In case you want to permanently use the drive on Linux, you will need to format it.
Contents
- General Considerations
- Using the File Manager
-
File System Differences
- NTFS
- FAT32
-
Configuring /etc/fstab
- Preface
- Automatic Configuration
- Manual Configuration
- Other Resources
- Footnote
Ubuntu is capable of reading and writing files stored on Windows formatted partitions. These partitions are normally formatted with NTFS, but are sometimes formatted with FAT32. You will also see FAT16 on other devices.
General Considerations
Ubuntu will show files and folders in NTFS/FAT32 filesystems which are hidden in Windows. Consequently, important hidden system files in the Windows C:\ partition will show up if this is mounted. Since it is all-too-easy to accidentally modify or delete files which are essential for Windows, it is advisable to mount your Windows C:\ partition as seldom as possible, preferably not at all, or read-only by configuring /etc/fstab (see below). If you have data which you want to access regularly from both Windows and Ubuntu, it is better to create a separate data partition for this, formatted NTFS.
Whether you write to your Windows C:\ partition or a shared NTFS data partition, be aware that if you are using Windows 7, and Windows 7 is in a hibernated state when you write to the NTFS partition from Ubuntu, you will lose all your changes. This is because when Windows 7 is hibernated it writes the system state to a file stored on disk and restores from that file when the system is re-awakened, thus restoring the whole fileystem to a state before any changes made from Ubuntu. In Windows 7 you must avoid using hibernation. With Windows 8, the situation is more complex in that, by default, it uses a hybrid hibernation/shutdown when you shut the system down. Any changes made by Ubuntu will be lost when you reboot into Ubuntu.
With both Windows 7 and Windows 8 (when installed to a legacy mbr partition table) there is usually a 100-200MB boot partition labelled «SYSTEM». Do not mount it — you do not need to. Similarly it is highly advisable to leave any recovery partitions unmounted.
Using the File Manager
For those using a desktop version of Ubuntu, or one of its offical derivatives, the easiest and quickest way of mounting NTFS or FAT32 partitions is from the file manager: Nautilus in Ubuntu, Thunar in Xubuntu, Dolphin in Kubuntu and PCManFM in Lubuntu. Simply look in the left pane of the file manager for the partition you wish to mount and click on it — it will be mounted and its contents will show up in the main pane. Partitions show with their labels if labelled, or their size if not.
Unless you require your Windows partition — or a NTFS/FAT32 partition for data shared with Windows — mounted every time you boot up for one of the reasons given below, mounting from the file manager in this way should suffice.
If you are using a Wubi version of Ubuntu and you wish to browse the host partition, you do not need to mount it — it is mounted already in the «host» folder. Click on «File System» in the left pane of the Nautilus file browser and then open the host folder which you will see in the main pane.
File System Differences
For a more in depth analysis, see LinuxFilesystemsExplained, but here are some basics:
- Windows 7, Vista, XP, 2000, older NT systems, and Windows Server 2003 and 2008 are formatted with NTFS. In rare cases, OEM manufacturers have pre-installed Windows XP and Windows 2000 to FAT32 filesystems.
- Older versions of Windows such as Windows ME, 98, and 95 are formatted with FAT32.
- Flash drives, such as a USB thumb drive or a camera’s flash card are typically formatted as FAT16. Some Flash drives are formatted with Microsoft’s proprietary exFAT file system.
In Windows, you can check which filesystem your partition is formatted with by right-clicking the partition in Windows Explorer and selecting Properties. In Ubuntu, run from terminal:
-
sudo fdisk -lu
NTFS
The ntfs-3g driver is used in Linux-based systems to read from and write to NTFS partitions.
NTFS (New Technology File System) is a file system developed by Microsoft and used by Windows computers (Windows 2000 and later). Until 2007, Linux distros relied on the kernel ntfs driver which was read-only. The userspace ntfs-3g driver now allows Linux-based systems to read from and write to NTFS formatted partitions.
The ntfs-3g driver is pre-installed in all recent versions of Ubuntu and healthy NTFS devices should work out of the box without further configuration. In Ubuntu versions 11.10 and later the ntfs-3g package included the functionality previously provided by ntfsprogs. Trying to install ntfsprogs in 11.10 (and possibly in 12.04) will cause the package-manager to ask if you wish to remove ntfs-3g. Users who have installed ntfsprogs and failed to notice the message from the package manager have unintentionally uninstalled ntfs-3g, after which the system falls back to the read-only kernel ntfs driver. Loss of the ntfs-3g driver for similar reasons has also been reported when upgrading from 11.04 to 11.10. If you are experiencing inability to write to a NTFS formatted partition or device, check whether or not the ntfs-3g package is installed.
FAT32
The vfat driver is used in linux to read and write FAT32 and FAT16 partitions.
Configuring /etc/fstab
Preface
If you require one or more of your Windows partitions mounted automatically during bootup, it is necessary to add one line to the file /etc/fstab for each partition that is to be mounted. Some reasons for mounting partitions by means of /etc/fstab, rather than relying on the file manager, include:
- Convenience.
- Where more than one user account is in use during a session. Partitions mounted from one user account by means of the file manager are not accessible to the other account(s).
- Where libraries have been set up in applications such as Banshee or Rhythmbox (for music) or Shotwell (for photos). If those libraries contain files on partitions mounted by means of the file manager, an error will occur in a subsequent session if the partition is not mounted first.
-
Where more advanced or special mount options are needed. Three working configurations for different needs are given below, but anything more advanced is beyond the scope of this wiki page. The NTFS-3G manual gives a list of mount options suitable for NTFS filesystems.
Automatic Configuration
Although there are a number of GUI applications available from the Ubuntu Software Centre, none of these can be recommended at the time of this writing, unfortunately. They are obsolete and unmaintained and can all cause problems. Two examples are ntfs-config and PySDM. (PySDM is no longer in the repository with effect from 12.10.) If you find a recommendation anywhere for either of these applications, it is likely to be an old one, and should not be followed. At this time it is advisable to configure /etc/fstab manually.
Manual Configuration
First, you need to find the device locations of the partition(s) you wish to mount. Open a terminal and run:
-
sudo blkid
For illustration purposes, an example output from a computer setup with a Vista/Ubuntu dual-boot and shared NTFS data partition is shown here:
-
/dev/sda1: LABEL="Recovery" UUID="B23613F43613B875" TYPE="ntfs"
/dev/sda2: LABEL="Windows" UUID="38CE9483CE943AD8" TYPE="ntfs"
/dev/sda3: LABEL="Data" UUID="519CB82E5888AD0F" TYPE="ntfs"
/dev/sda5: UUID="00d7d951-2a35-40fd-8e5d-411bb824ff3b" TYPE="swap"
/dev/sda6: LABEL="Ubuntu" UUID="6044b1d0-208e-4ab3-850d-03a92e1516fc" TYPE="ext4"
The first three partitions, all NTFS, are the ones that concern us here. There are no FAT32 partitions. In this instance, all three NTFS partitions have partition labels, which makes it easier to identify the purpose of each. If your blkid output does not include partition labels, this means that the partitions do not have labels and you will have to determine which partition you wish to mount by another means. Of the three NTFS partitions, we are going to configure /etc/fstab with only the third, the Data partition. Partition /dev/sda1 is the OEM manufacturer’s recovery partition and should be left unmounted, or as described below. Partition /dev/sda2 is the Windows C:\ partition and is best not included in /etc/fstab for the reasons described above, or mounted read-only — see below.
You will now need to create a mountpoint for each NTFS partition that you wish to mount by means of /etc/fstab. In our illustration we are going to add one entry only for /dev/sda3. From a terminal:
-
sudo mkdir /media/Data
In this case we have created a mountpoint with the same name – Data – as the partition label. You may use (almost) any string you wish.
Before editing /etc/fstab directly, it is a good idea to make a backup. From a terminal:
-
sudo cp /etc/fstab /etc/fstab.orig
Now open /etc/fstab in a text editor with root privileges. In Ubuntu:
-
gksudo gedit /etc/fstab
In Kubuntu:
-
kdesudo kate /etc/fstab
In Xubuntu or Lubuntu:
-
gksudo leafpad /etc/fstab
For a general-purpose read-write mount, add this line to the end of /etc/fstab:
-
UUID=519CB82E5888AD0F /media/Data ntfs-3g defaults,windows_names,locale=en_US.utf8 0 0
Replace the UUID with the one relevant for your partition as shown in your blkid output. “519CB82E5888AD0F” will not work for you.
Also, substitute your mountpoint for “/media/Data”. In case you have a blank space in the name of the mountpoint you want to use like «New Volume» instead of «Data» located in «/media» use «/media/New\040Volume». The space character is created by using «\040» in the fstab.
You will also need to change the “locale=en_US.utf8” option to one suitable for your location and language if you are not in the USA. You can determine your locale with this terminal command:
-
locale
Or for a list of all locales available on your system:
-
locale -a
Now save your edited /etc/fstab and close the text editor. The partition(s) you have configured will be mounted the next time you reboot, but to mount them now:
-
sudo mount -a
Two special cases
Sample /etc/fstab lines are suggested for two special cases.
Option 1 — for mounting read-only access. For example, this would be suitable for mounting your Windows C:\ partition if you need to access it. Modify the line below with your UUID and mountpoint:
-
UUID=519CB82E5888AD0F /media/Data ntfs defaults,umask=222 0 0
Option 2 — to ensure that Ubuntu does not mount the partition and also disables graphical mounting from the file manager. For example, you may wish to ensure that recovery and system partitions are never inadvertently mounted and do not appear in the file manager. In this case you need to create a mountpoint in /mnt, not /media. Modify the line below with your UUID and mountpoint:
-
UUID=519CB82E5888AD0F /mnt/Data ntfs noauto,umask=222 0 0
Note: with these mount options, the partition does not appear in the Devices list in the left pane of Nautilus (the Ubuntu file manager), but it still appears in Dolphin, the Kubuntu File Manager. Clicking on the partition in Dolphin causes the display of an error message. This solution is less elegant in Dolphin than with Nautilus, but the desired effect is achieved — the partition cannot be mounted.
If you need to revert to the original configuration:
-
sudo mv /etc/fstab.orig /etc/fstab
sudo umount  /media/<mountpoint>
Substitute your mountpoint in the second line.
FAT32 Partition
FAT32 partitions are mostly only found in older systems. If you are creating a partition to be used for data to be shared between Windows and Ubuntu, it is better to choose NTFS. Should you have a FAT32 partition which you need to mount using /etc/fstab, this will work to mount it read-write:
-
UUID=<UUID> /media/<mountpoint> vfat defaults,user,exec,uid=1000,gid=100,umask=000 0 0
Replace <UUID> with the UUID that blkid reveals for your partition, and adjust for your mountpoint. These mount options will make all files in the partition executable. If you have other needs, you will need to modify the options, but this is beyond the scope of this wiki page.
Other Resources
-
ntfs-3g homepage
-
Fstab
-
LinuxFilesystemsExplained
-
How to fstab
-
CategoryBootAndPartition
This page has recently been subject to significant revision. If you have any comments about current content, or suggestions for further additions or edits, please head over to this Ubuntu forums discussion thread so that we can co-ordinate our efforts.
Поддержку сетевых дисков Windows в Linux обеспечивает пакет cifs-utils. Если он у вас еще не установлен, в командной строке от имени суперпользователя введите
apt-get install cifs-utils
Эта команда проверит, установлен ли указанный пакет и, если нет, установит его.
Создайте в /mnt (или любом другом месте) папку, в которую мы будем подключать сетевой диск Windows:
mkdir /mnt/winshare
И наконец само подключение сетевой папки Windows в Linux выполняется с помощью команды mount.cifs
mount.cifs //SERVER_IP/SHARE_NAME /mnt/winshare -o username=WIN_USER_NAME,password=WIN_USER_PASSWORD
Такая команда выполнит присоединение к фаловой системе Linux сетевого диска Windows с именем SHARE_NAME, расположенного на сервере с IP-адресом SERVER_IP от имени WIN_USER_NAME с паролем WIN_USER_PASSWORD. Следует понимать, что на стороне Windows уже логичным образом указанная папка должна быть расшарена и права на доступ к ней должны принадлежать указанному пользователю.
В большинстве случаев этого достаточно, если вы работаете от лица суперпользователя. Если же вы от лица суперпользователя производите только подключение сетевой папки Windows, а работать с ней планируете от лица обычного, непривелегированного пользователя, то в качестве опции команде mount.cifs необходимо передать значения UID и GID этого пользователя, иначе, скорее всего, вам не будут доступны операции редактирования файлов и каталогов. Получить UID и GID пользователя можно командой:
grep MY_USER_NAME /etc/passwd
Подставив вместо MY_USER_NAME имя пользователя, под которым вы работаете в Linux, вы получите примерно следующую строчку:
MY_USER_NAME:x:1000:1000:user,,,:/home/user:/bin/bash
где 3-е и 4-е поле как раз указывают на UID и GID пользователя MY_USER_NAME. Теперь просто подставим полученные значения в качестве дополнительных аргументов команды mount.cifs:
mount.cifs //SERVER_IP/SHARE_NAME /mnt/winshare -o username=WIN_USER_NAME,password=WIN_USER_PASSWORD,uid=1000,gid=1000
где uid=1000,gid=1000 – uid и gid, полученные из примера выше.
Напротив, если сетевой диск публичен, и для доступа к нему не нужен ни логин ни пароль, в опциях вместо имени пользователя и его пароля необходимо указать, что доступ является гостевым:
mount.cifs //SERVER_IP/SHARE_NAME /mnt/winshare -o guest
И наконец, чтобы в Linux автоматически подключать сетевую папку после перезагрузки, вносим соответствующую информацию в /etc/fstab (дописываем в конец файла):
//SERVER_IP/SHARE_NAME /MOUNT_POINT_PATH cifs ALL_OPTIONS 0 0
Т.е. должно получиться что-то вроде
//192.168.0.1/share /mnt/winshare cifs user=WIN_USER_NAME,password=WIN_USER_PASSWORD,uid=1000,gid=1000 0 0
Вы скажите, что это плохо – хранить пароль в открытом виде в файле, доступном для чтения всем, и будете правы. К счастью, разработчики об это позаботились. Создаем файл с помощью редактора, например, nano:
nano /etc/credentials #имя файла может быть любым
такого содержания:
username=WIN_USER_NAME
password=WIN_USER_PASSWORD
domail=WIN_WORKGROUP
Делаем его доступным для чтения и записи только для пользователя root:
chmod 600 /etc/credentials #указывайте файл, который создавали вы
и вместо всей обвязки из имен и паролей просто пишем в опциях credentials=/etc/credentials (или тот файл, который вы создали). Эта опция работает как при ручном монтировании сетевого диска Windows
mount.cifs //SERVER_IP/SHARE_NAME /mnt/winshare -o credentials=/etc/credentials,uid=1000,gid=1000
так и автоматическом, при внесении записи в /etc/fstab (из примера выше):
//192.168.0.1/share /mnt/winshare cifs credentials=/etc/credentials,uid=1000,gid=1000 0 0
Примечание. Если вы используете дистрибутив, основанный на SystemD (Debian версии 8 и выше, Ubuntu версии 15.04 и выше, Fedora, ArchLinux…), применение файла /etc/fstab для автоматического монтирования файловых систем является нежелательным, так как SystemD использует несколько другой механизм для монтирования файловых систем, хотя он и обратно совместим с /etc/fstab. Узнать, как можно использовать возможности SystemD для монтирования файловых систем можно в статье SystemD Automount
Монтирование сетевого диска windows (samba) в linux.
Для того чтобы примонтировать сетевой диск samba необходимо отредактировать файл /etc/fstab
например в терминале — sudo gedit /etc/fstab
добавляем строку после всего
//IP/obmen /media/obmen cifs _netdev,noauto,users,user=human,password=04-fadetoblack,iocharset=utf8,file_mode=0777,dir_mode=0777 0 0
где
//IP/obmen- место шары в сети.
в поле user -пишем вашего пользователя (вместо human)
в поле password — ваш пароль, вместо 04-fadetoblack
В папке media создаем каталог share,сделать это можно командой
sudo mkdir /media/obmen
Затем получаем права на него
sudo chmod 777 -R -v /media/share
готово.
Пробуем монтировать
sudo mount /media/share
После перезагрузки должен монтироваться по клику на папку
Команда mount в Linux или все о монтировании разделов, дисков, образов ISO и SMB ресурсов.
Если Вам нужно подключить/примонтировать жесткий диск с файловой системой NTFS или ext2, ext3 к компьютеру на базе операционной системы Linux, то Вы читаете правильную статью.
Зачем делать это руками, если современные desktop-системы Линукс делают автоматически?
Есть отдельные случаи когда система Linux не может автоматически примонтировать/подключить диск в силу каких-то логических сбоев диска, вирусов, которыми заражены NTFS/FAT разделах или из-за еще чего-то аномального. Для этого настоящие системные администраторы делают это руками. И делают это командой mount.
Команда mount в линуксе является очень гибким инструментом в руках системного администратора. С помощью команды mount можно подключить сетевой диск, раздел жесткого диска или USB-накопитель.
Данная статья не является полным, исчерпывающим описанием команды mount (полное описание команды mount можно найти выполнив в консоли команду man mount), но стремиться к этому. Статья по описанию команды mount постоянно дорабатывается и видоизменяется. Все пожелания по статье можете оставлять в комментариях.
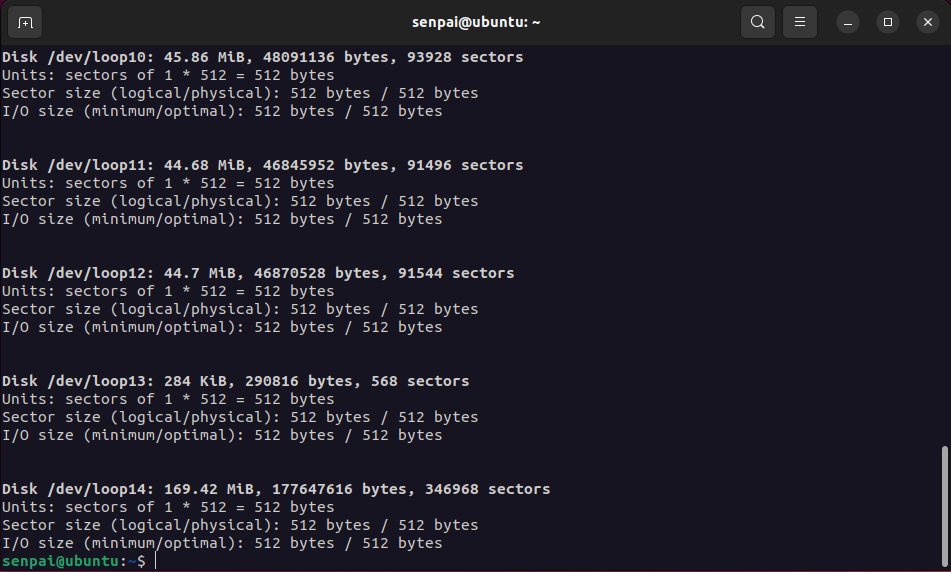
Устройства, которые в данный момент подключены к компьютеру, можно посмотреть набрав в консоли:
# sudo fdisk -l
Эта команда показывает все устройства, которые подключенны. Они могут быть не примонтированы, но подключены. На экране Вы увидите примерно это:
Диск /dev/sda: 40.0 ГБ, 40020664320 байт
255 heads, 63 sectors/track, 4865 cylinders
Units = цилиндры of 16065 * 512 = 8225280 bytes
Disk identifier: 0x815aa99a
| Устр-во | Загр | Начало | Конец | Блоки | Id | Система |
| /dev/sda1* | 1 | 1824 | 14651248+ | 83 | Linux | |
| /dev/sda2 | 4742 | 4865 | 996030 | 82 | Linux | своп / Solaris |
| /dev/sda3 | 1825 | 4741 | 23430802+ | 83 | Linux |
Пункты таблицы разделов расположены не в дисковом порядке
Диск /dev/sdb: 80.0 ГБ, 80026361856 байт
255 heads, 63 sectors/track, 9729 cylinders
Units = цилиндры of 16065 * 512 = 8225280 bytes
Disk identifier: 0x973248ad
Устр-во Загр Начало Конец Блоки Id Система
/dev/sdb1 * 1 9729 78148161 83 Linux
Диск /dev/sdc: 1027 МБ, 1027604480 байт
32 heads, 62 sectors/track, 1011 cylinders
Units = цилиндры of 1984 * 512 = 1015808 bytes
Disk identifier: 0x6f20736b
Из листинга выше видно, что к операционной системе подключено:
- два жестких диска: /dev/sda – операционная система и /dev/sdb – “файловая помойка”
- сменный USB-носитель: /dev/sdc
Просмотр примонтированых устройств осуществляется командой:
# sudo mount
После этого на экране можно увидеть:
/dev/sda1 on / type reiserfs (rw,relatime,notail) tmpfs on /lib/init/rw type tmpfs (rw,nosuid,mode=0755)
/proc on /proc type proc (rw,noexec,nosuid,nodev)
sysfs on /sys type sysfs (rw,noexec,nosuid,nodev)
varrun on /var/run type tmpfs (rw,nosuid,mode=0755)
varlock on /var/lock type tmpfs (rw,noexec,nosuid,nodev,mode=1777)
udev on /dev type tmpfs (rw,mode=0755)
tmpfs on /dev/shm type tmpfs (rw,nosuid,nodev)
devpts on /dev/pts type devpts (rw,noexec,nosuid,gid=5,mode=620)
fusectl on /sys/fs/fuse/connections type fusectl (rw)
lrm on /lib/modules/2.6.27-14-generic/volatile type tmpfs (rw,mode=755)
/dev/sda3 on /home type ext3 (rw,relatime)
securityfs on /sys/kernel/security type securityfs (rw)
binfmt_misc on /proc/sys/fs/binfmt_misc type binfmt_misc (rw,noexec,nosuid,nodev)
gvfs-fuse-daemon on /home/user/.gvfs type fuse.gvfs-fuse-daemon (rw,nosuid,nodev,user=user)
/dev/sdc on /media/USBFlash type vfat (rw,nosuid,nodev,uhelper=hal, shortname=mixed,uid=1000,utf8, umask=077,flush)
- в первой строке сообщается, что в качестве корневой ФС выступает файловая система reiserfs с параметрами монтирования: доступ на чтение и запись (rw)
- /dev/sda3 — это раздел диска /home
- /dev/sdc — это примонтированное сменное USB-устройство
Этого же результата можно достигнуть посмотрев содержимое файла /etc/mtab (в некоторых системах Linux файл называется /etc/mnt/tab)
# cat /etc/mtab
Монтирование разделов жесткого диска
Из приведенного примера видно, что жесткий диск /dev/sdb подключен, но не примонтирован. Примонтируем раздел жесткого диска /dev/sdb1 к диску /dev/sda. Точку монтирования выберем, к примеру – /home/user/Видео. Точку монтирования можно взять любую.
# sudo mount /dev/sdb1 /home/user/Видео
где user — это название Вашего имени пользователя.
Все очень просто, сначала пишется команда mount, потом пишется то, что нужно присоединять (цифра показывает номер раздела, у нас он всего один), а потом куда присоединять. Почти всегда этого достаточно. Диск, командой mount, монтируется в указанную папку. В некоторых случаях, когда имеются логические ошибки на разделах подключаемого жесткого диска, нужно дополнительно указать тип файловой системы. В данном случае у нас ext3.
# sudo mount -t ext3 /dev/sdb1 /home/user/Видео
Так же этот параметр может принимать значения:
- -t ntfsили -t ntfs-3g
- -t vfat
- -t iso9660
Соответственно для NTFS, FAT и CD-дисков файловых систем. Последний нужен только для подключения CD/DVD-ROM устройств и образа диска .iso.
Чтобы вручную задать параметры доступа к примонтированному разделу следует указать параметр:
- -o rw
- -o ro
Первый разрешает чтение и запись, второй только чтение. Ну например, так:
# sudo mount -t ext3 -o rw /dev/sdb1 /home/user/Видео
Дополнительные параметры, которые помогают в некоторых случаях:
# sudo mount -t ext3 -o rw,iocharset=utf8,codepage=866 /dev/sdb1 /home/user/Видео
Первый явно задает кодировку системной локали, в нашем случае это utf8 (для разных дистрибутивов она своя, но чаще utf8), а другая добавляет поддержку русского языка.
Если все же жесткий диск отказывается монтироваться в операционной системе Linux, то можно примонтировать его вручную. Параметр -o force позволяет принудительно монтировать разделы жесткого диска в линуксе. Ну, к примеру, так:
# sudo mount -t ext3 -o force /dev/sdb1 /home/user/Видео
У меня, к примеру, раздел жесткого диска не хотел монтироваться после подключения к Windows-машине, которая была заражена вирусами. Так получилось, что вирус кинул autorun.exe в корень моего раздела и Linux из-за этого не хотел монтировать этот раздел. Данный выше параметр команды mount помог примонтировать инфицированный раздел. После чего вирус успешно был удален вручную.
Есть в Linux уникальная возможность указать зеркало папки, которое получает все права и доступные над папкой действия. Допустим, раздел /dev/sdb1 применяется еще и для хранения документов. Зеркалим его в /home/user/Документы:
# sudo mount –bind /home/user/Видео /home/user/Документы
Действие команды mount –bind напоминает DOS-овский subst.
Посмотреть полную информацию(доступный объем диска, свободное место) о примонтированных устройствах можно командой:
# df -h
Отмонтироватние устройства производится командой:
# sudo umount /dev/sdb1
или
# sudo umount /home/user/Видео
Монтирование дисков CD/DVD-ROM
Если Вам нужно примонтировать CD/DVD-ROM, то монтирование CD/DVD-ROM осуществляется точно так же, той же командой mount, которая были приведены выше:
# sudo mount -t iso9660 -o ro /dev/cdrom /cd
Только при монтировании CD-ROM нужно указать тип файловой системы iso9660.
Монтирование образов диска ISO
Если Вы хотите примонтировать образ диска ISO, то это тоже достаточно просто сделать командой mount:
# sudo mount -t iso9660 -o loop /home/file.iso /home/iso
Где /home/file.iso — путь и имя файла ISO
/home/iso — точка монтирования
Добавился только параметр -o loop, который указывает, что используется файл .iso.
Монтирование сетевых дисков SMB
В некоторых случаях необходимо примонтировать удаленный сетевой диск. В некоторых дистрибутивах Linux, он так же монтируется автоматически (например в Ubuntu) при открытии его по сети. Можно примонтировать его вручную командой mount через консоль. Можно сделать ярлык и поместив его на рабочем столе активировать его когда нужен удаленный доступ к сетевому ресурсу. Ну или мало еще для чего.
# sudo mount -t smbfs -o username=vasja,password=pupkin //pupkin_v/Video /home/user/video
Где username=vasja,password=pupkin — это имя и пароль доступа к удаленному сетевому ресурсу, а //pupkin_v/Video — имя сетевого ресурса, /home/user/video – точка монтирования