
On Windows 11, the region settings make it easy to ensure that the system and apps can show content based on your location. For example, the Microsoft Store uses the region information to display the apps, games, and videos available in your territory.
In addition, you can adjust regional format settings to show date, time, numbers, or currency in a different format across the desktop and apps.
Whether you made a mistake during the initial setup, want to try a Microsoft Store app or feature only available in another region, or need to show the date, time, numbers, or currency in a different format, Windows 11 provides an easy way to change region settings with the Settings app.
In this how-to guide, I’ll walk you through the steps to personalize your computer’s region settings.
Recent updates
These instructions has been updated to ensure accuracy and reflect changes to the process in the operating system.
How to change region settings on Windows 11
To change the system region settings on Windows 11, use these steps:
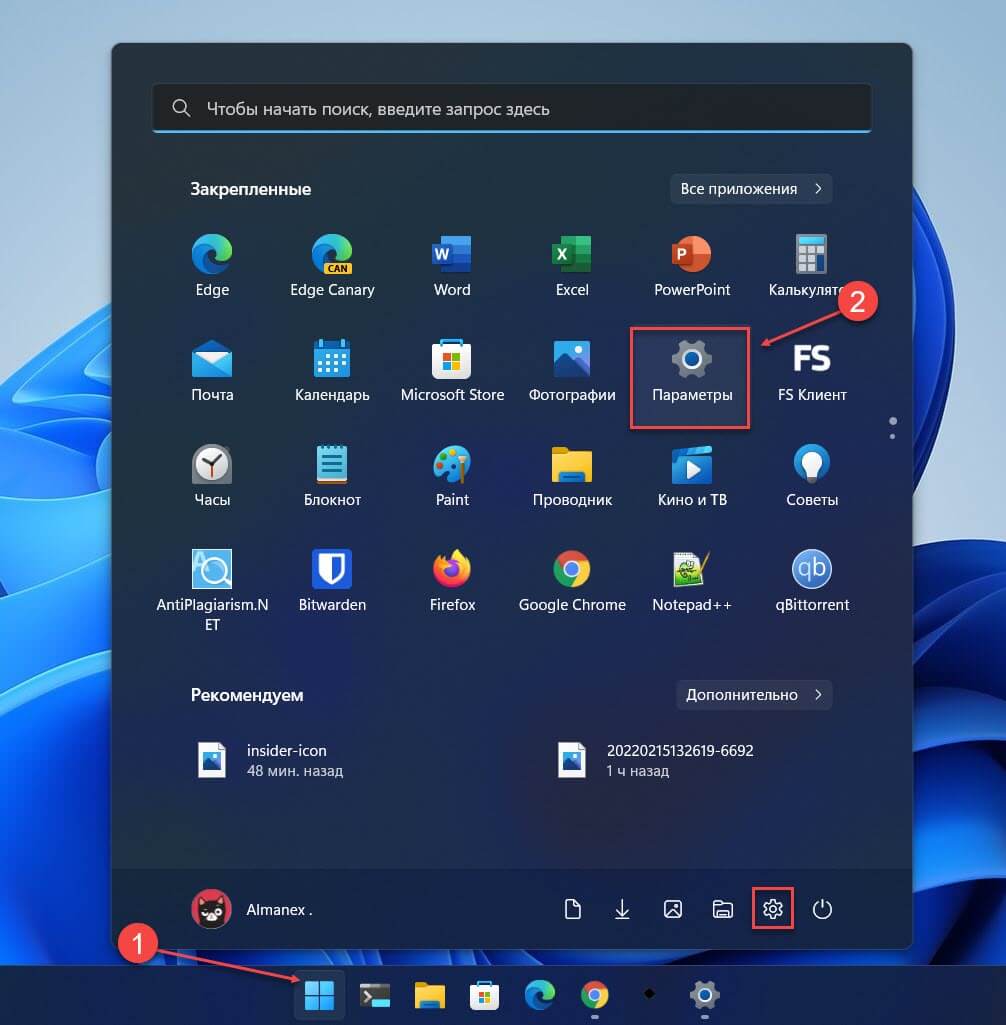
- Open Settings.
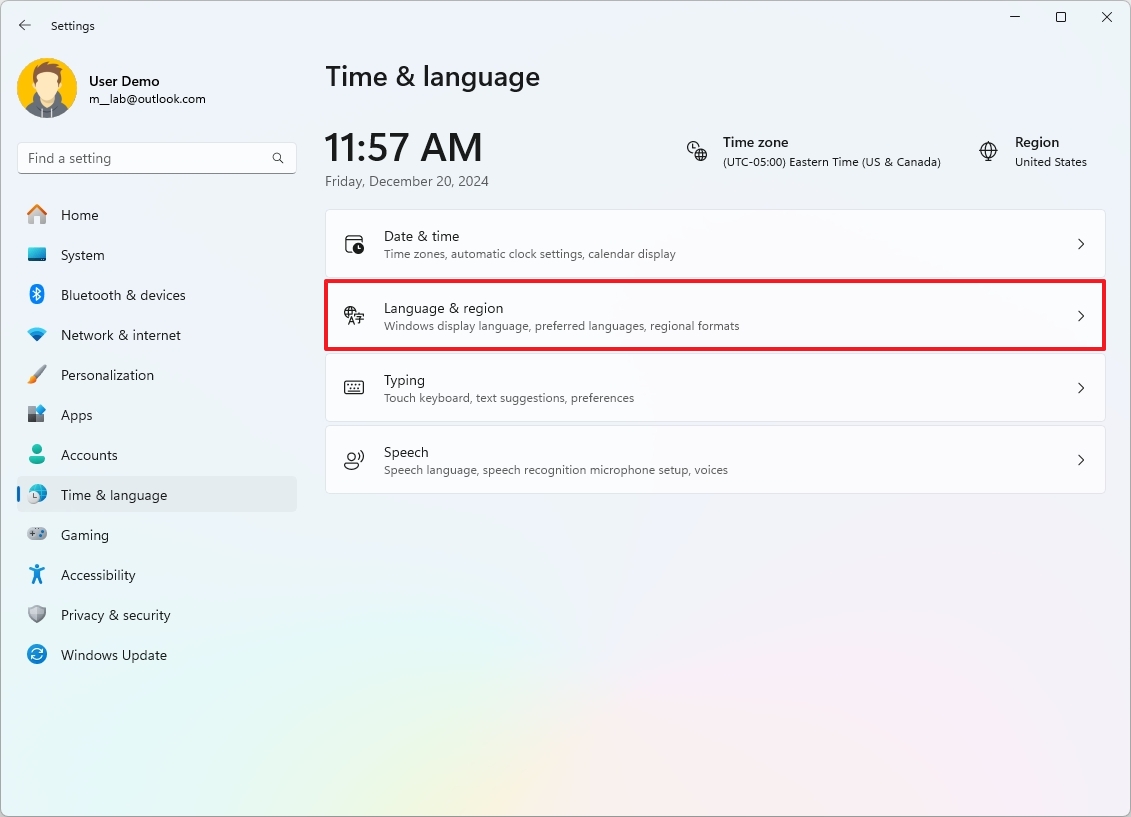
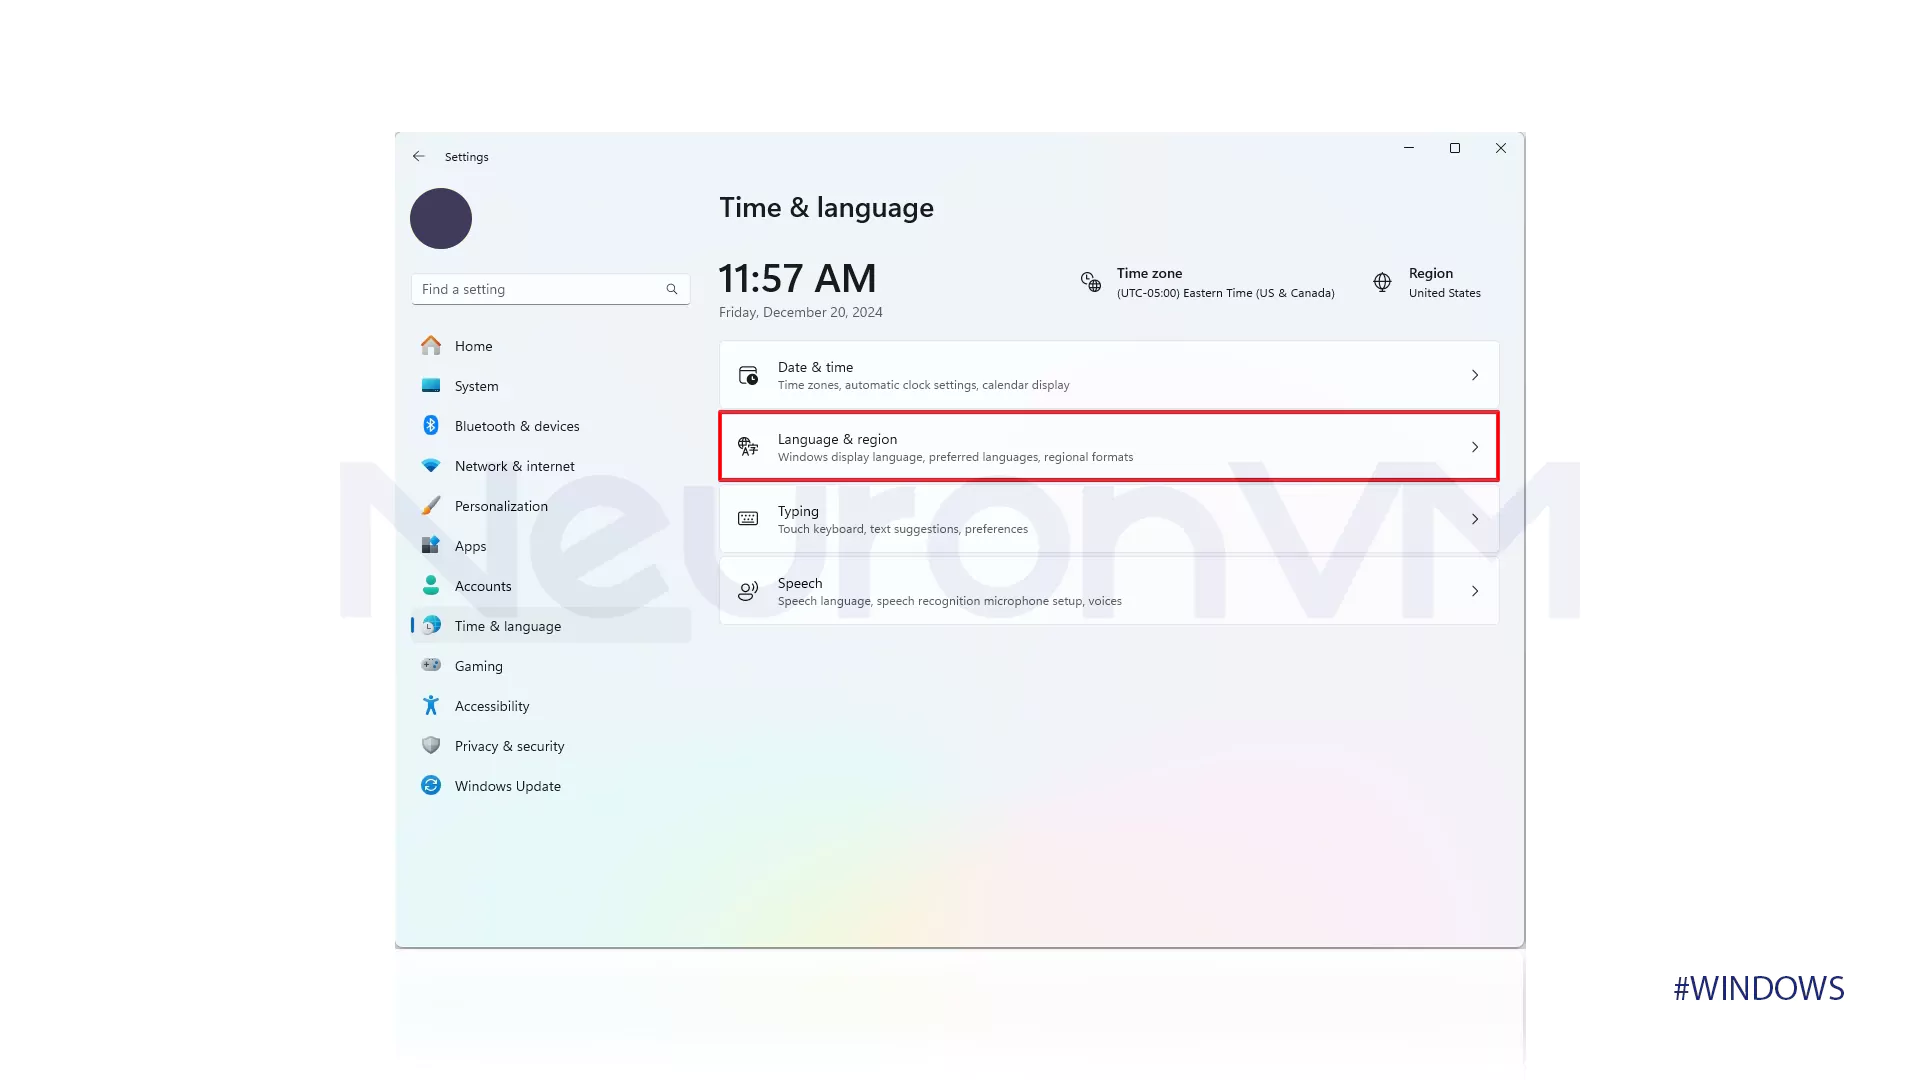
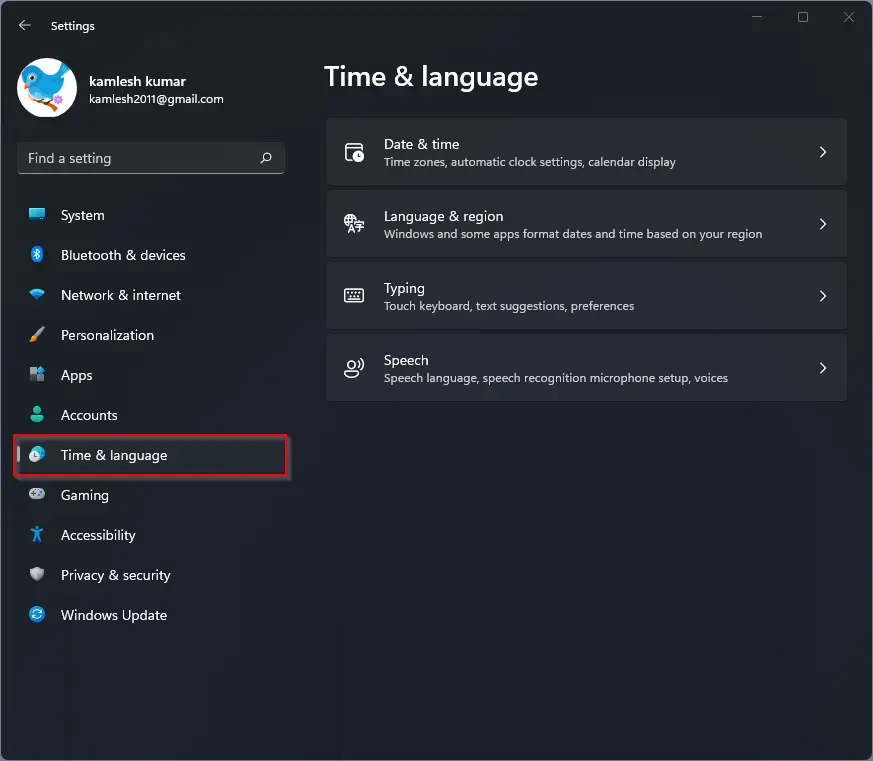
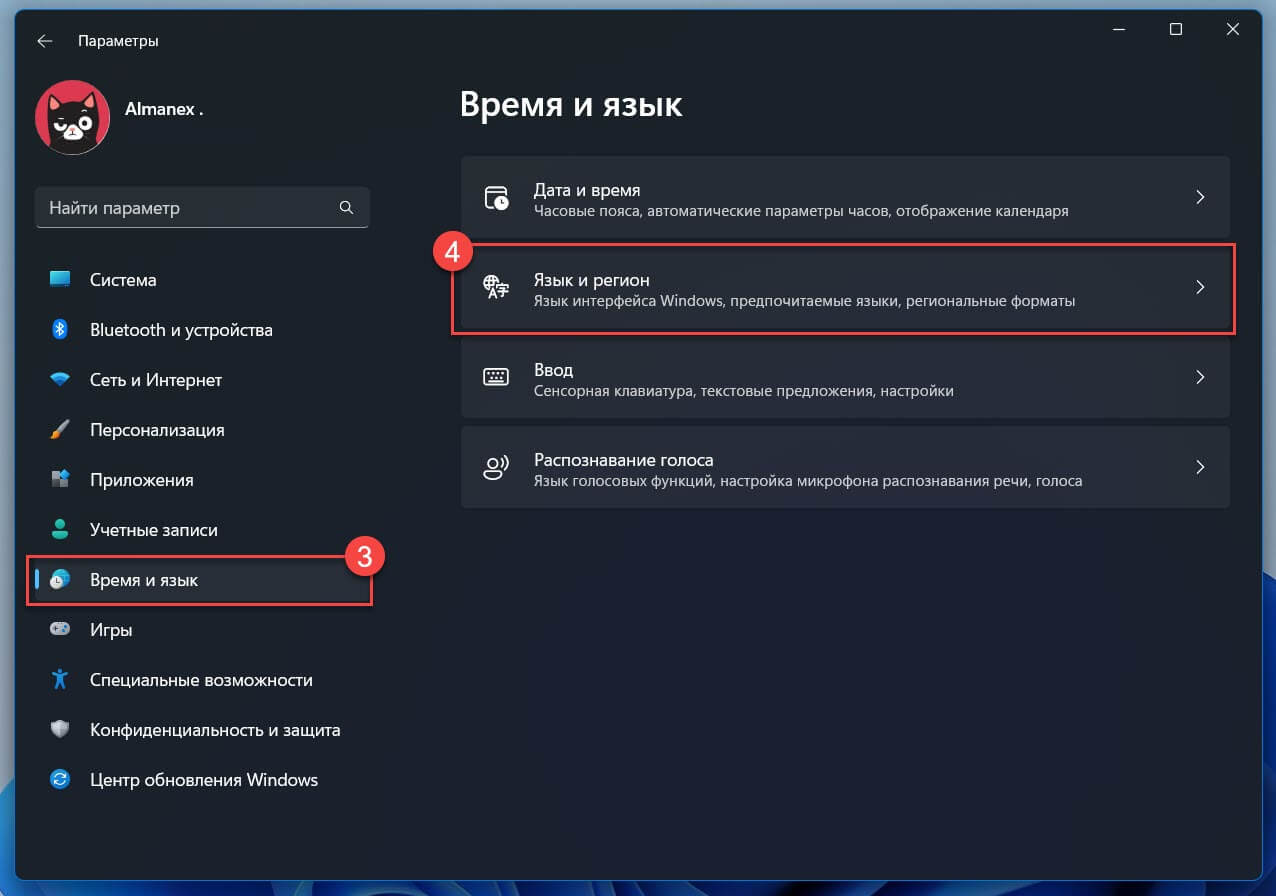
- Click on Time & language.
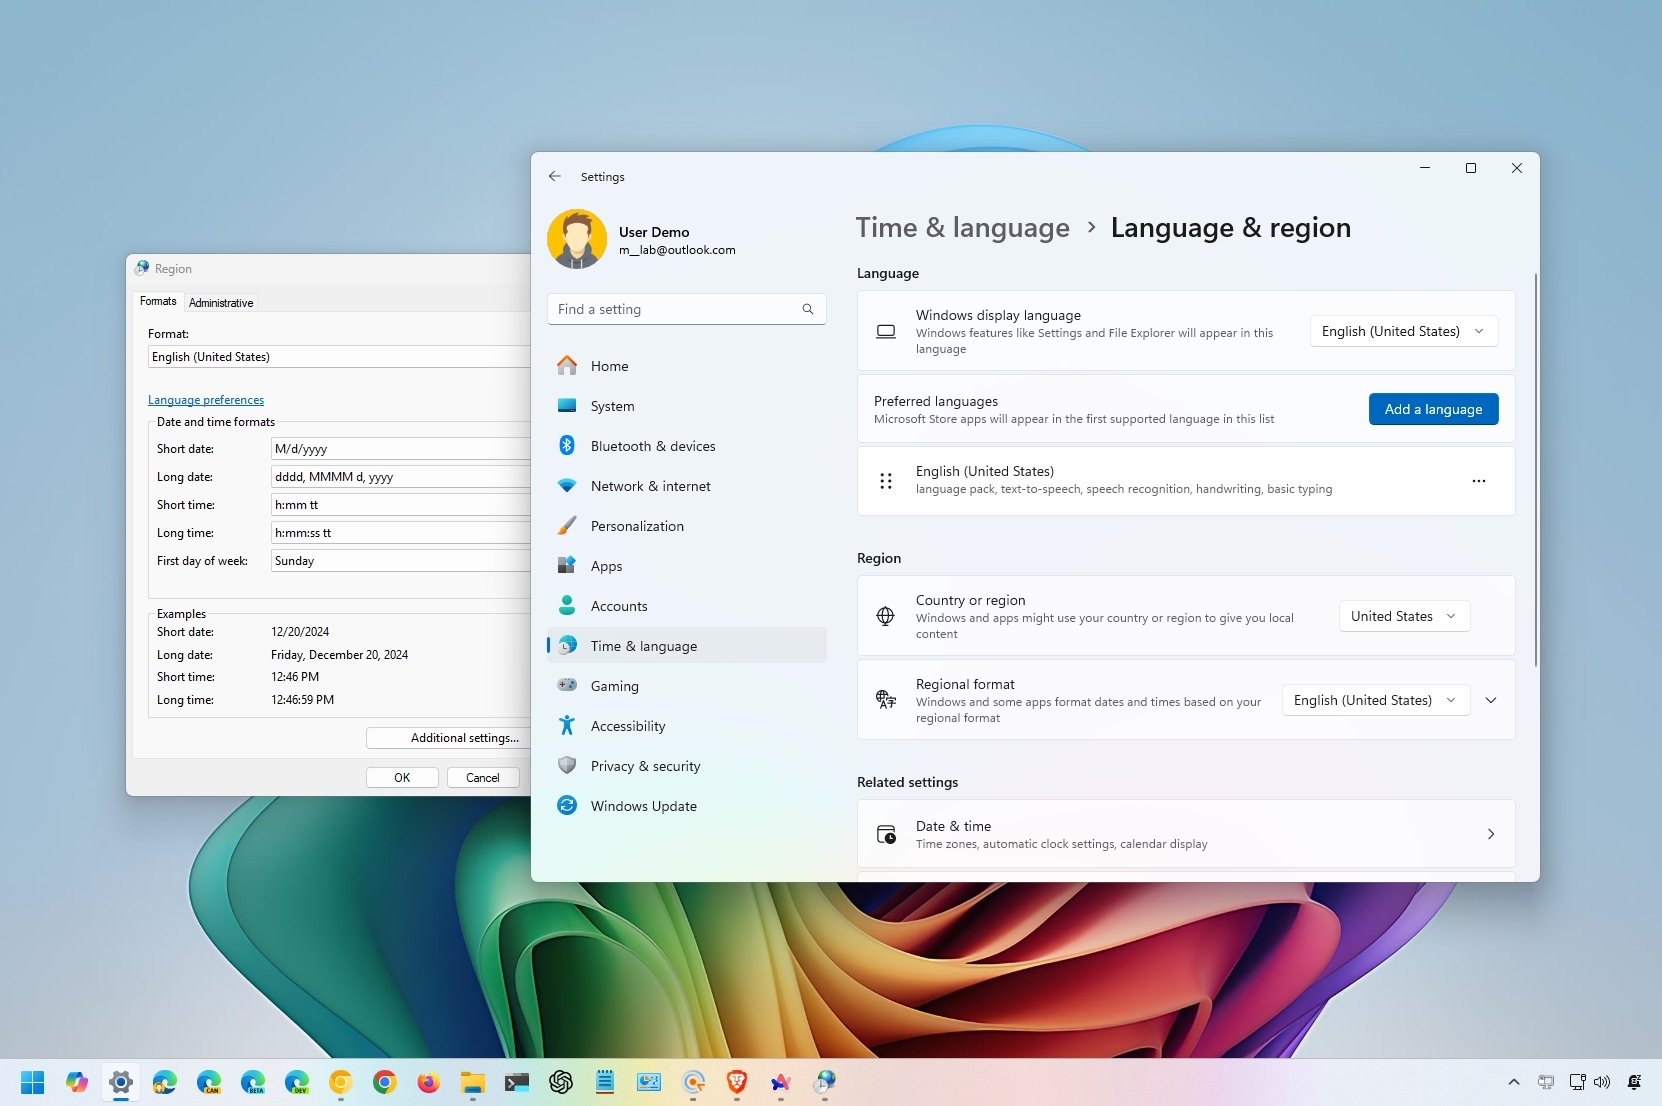
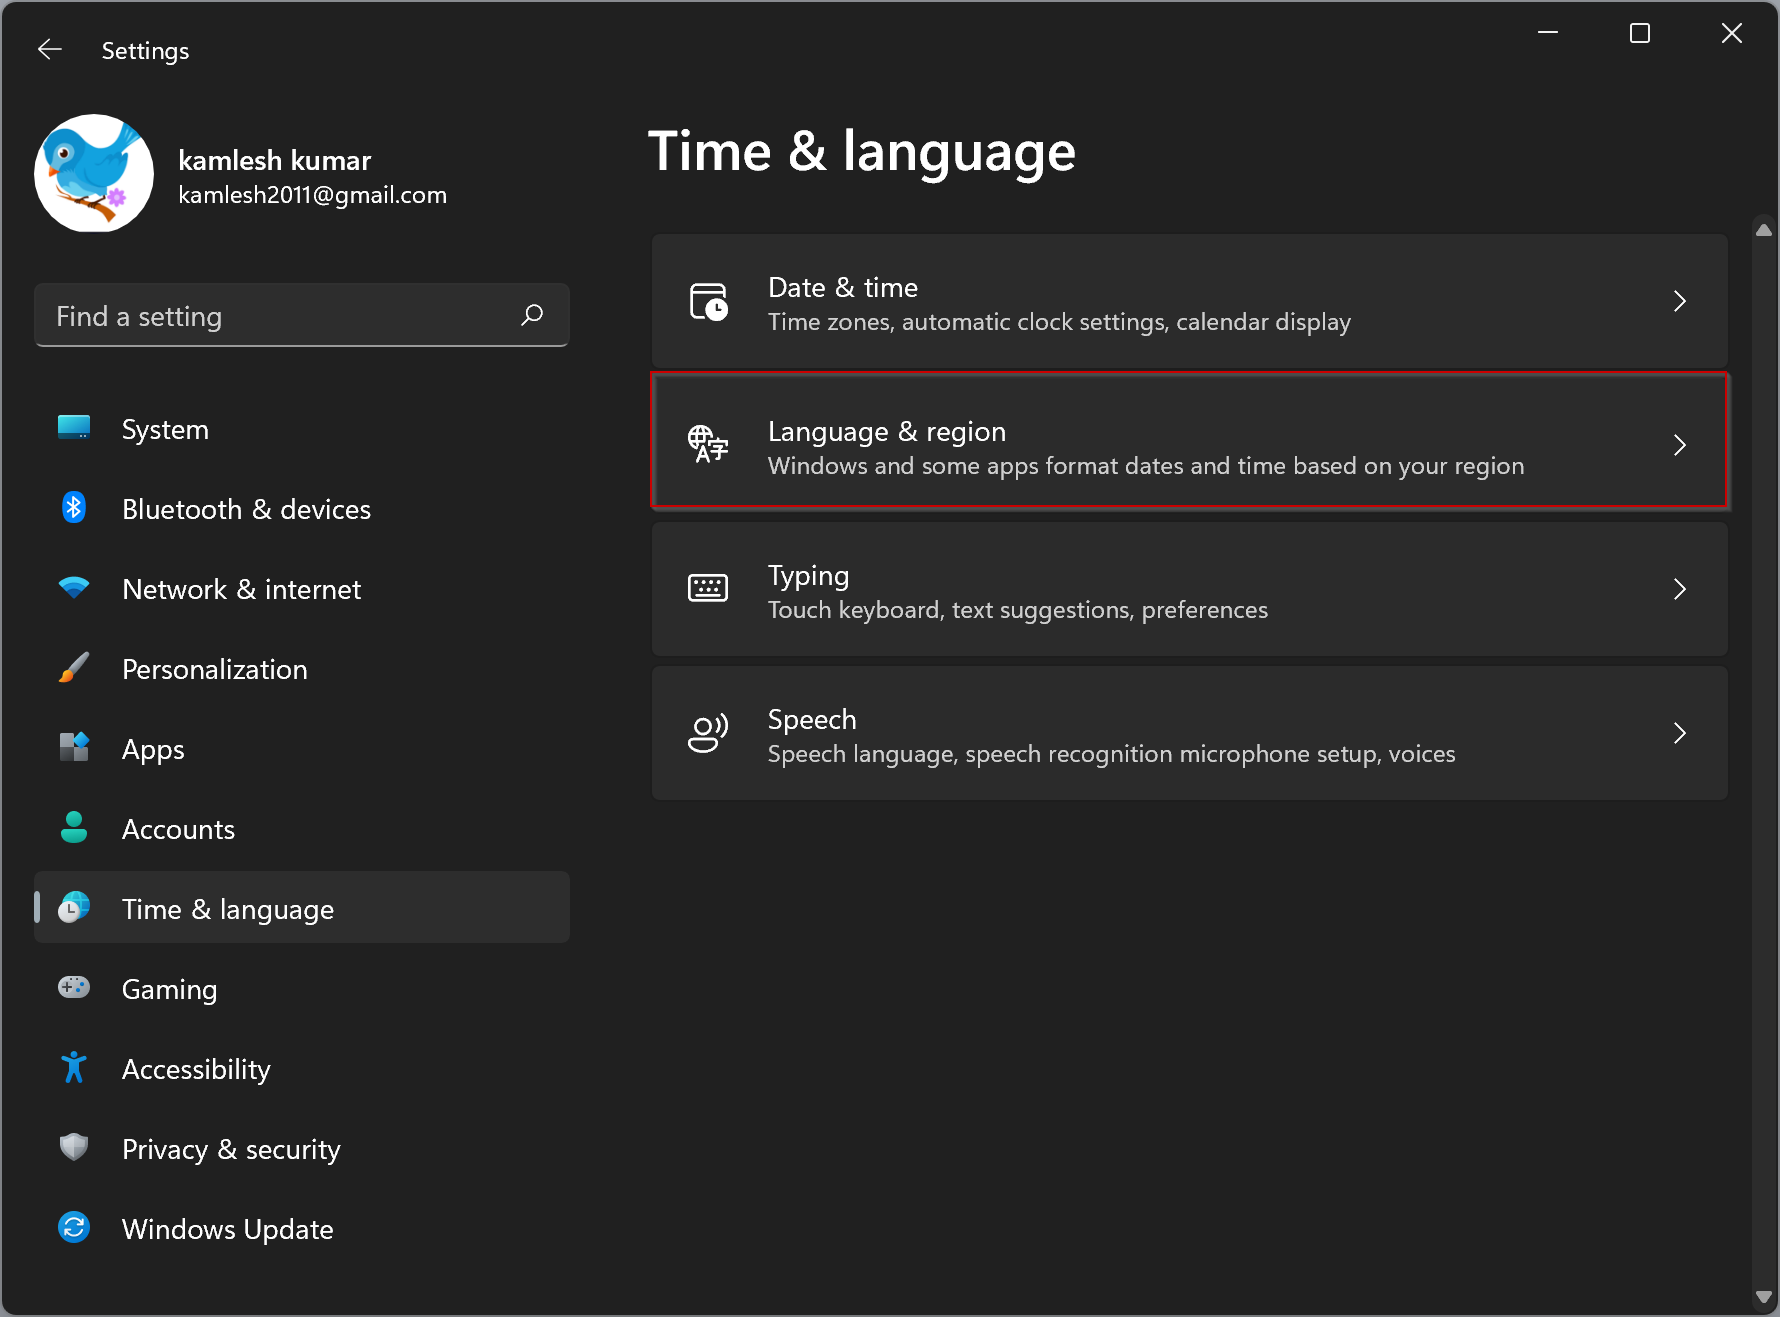
- Click the Language & region page on the right side.
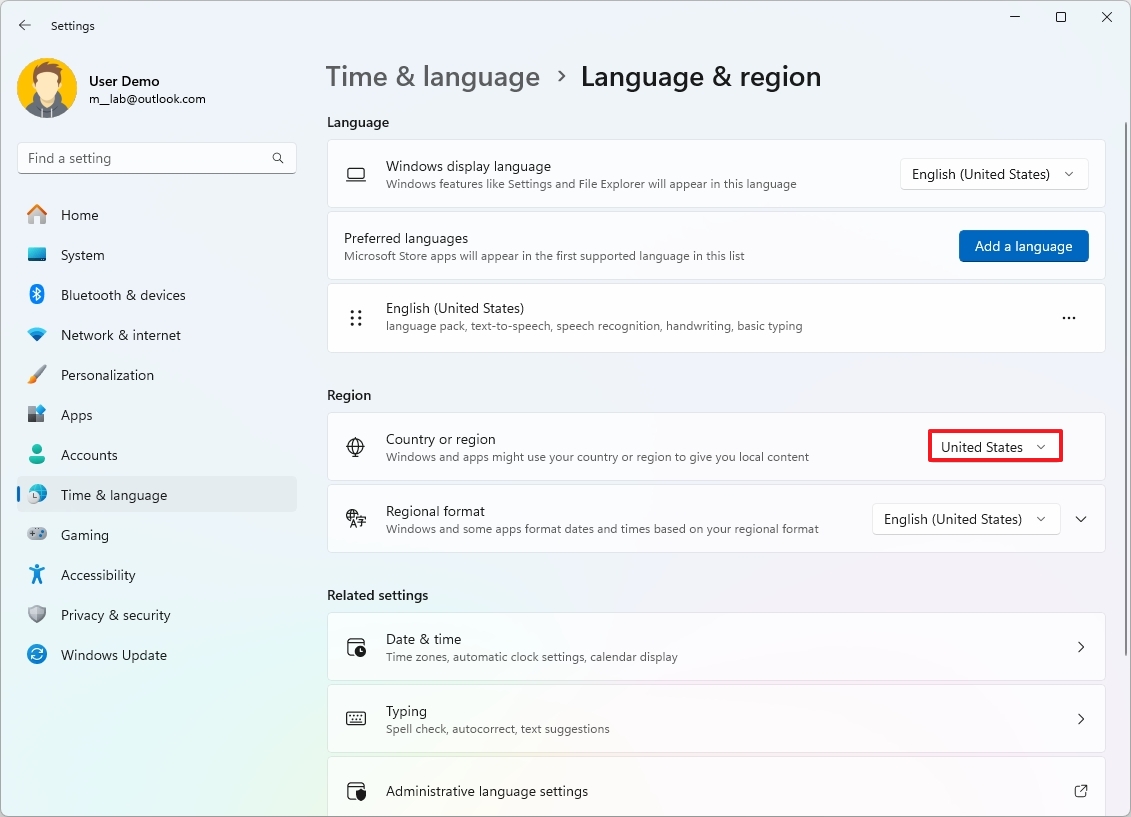
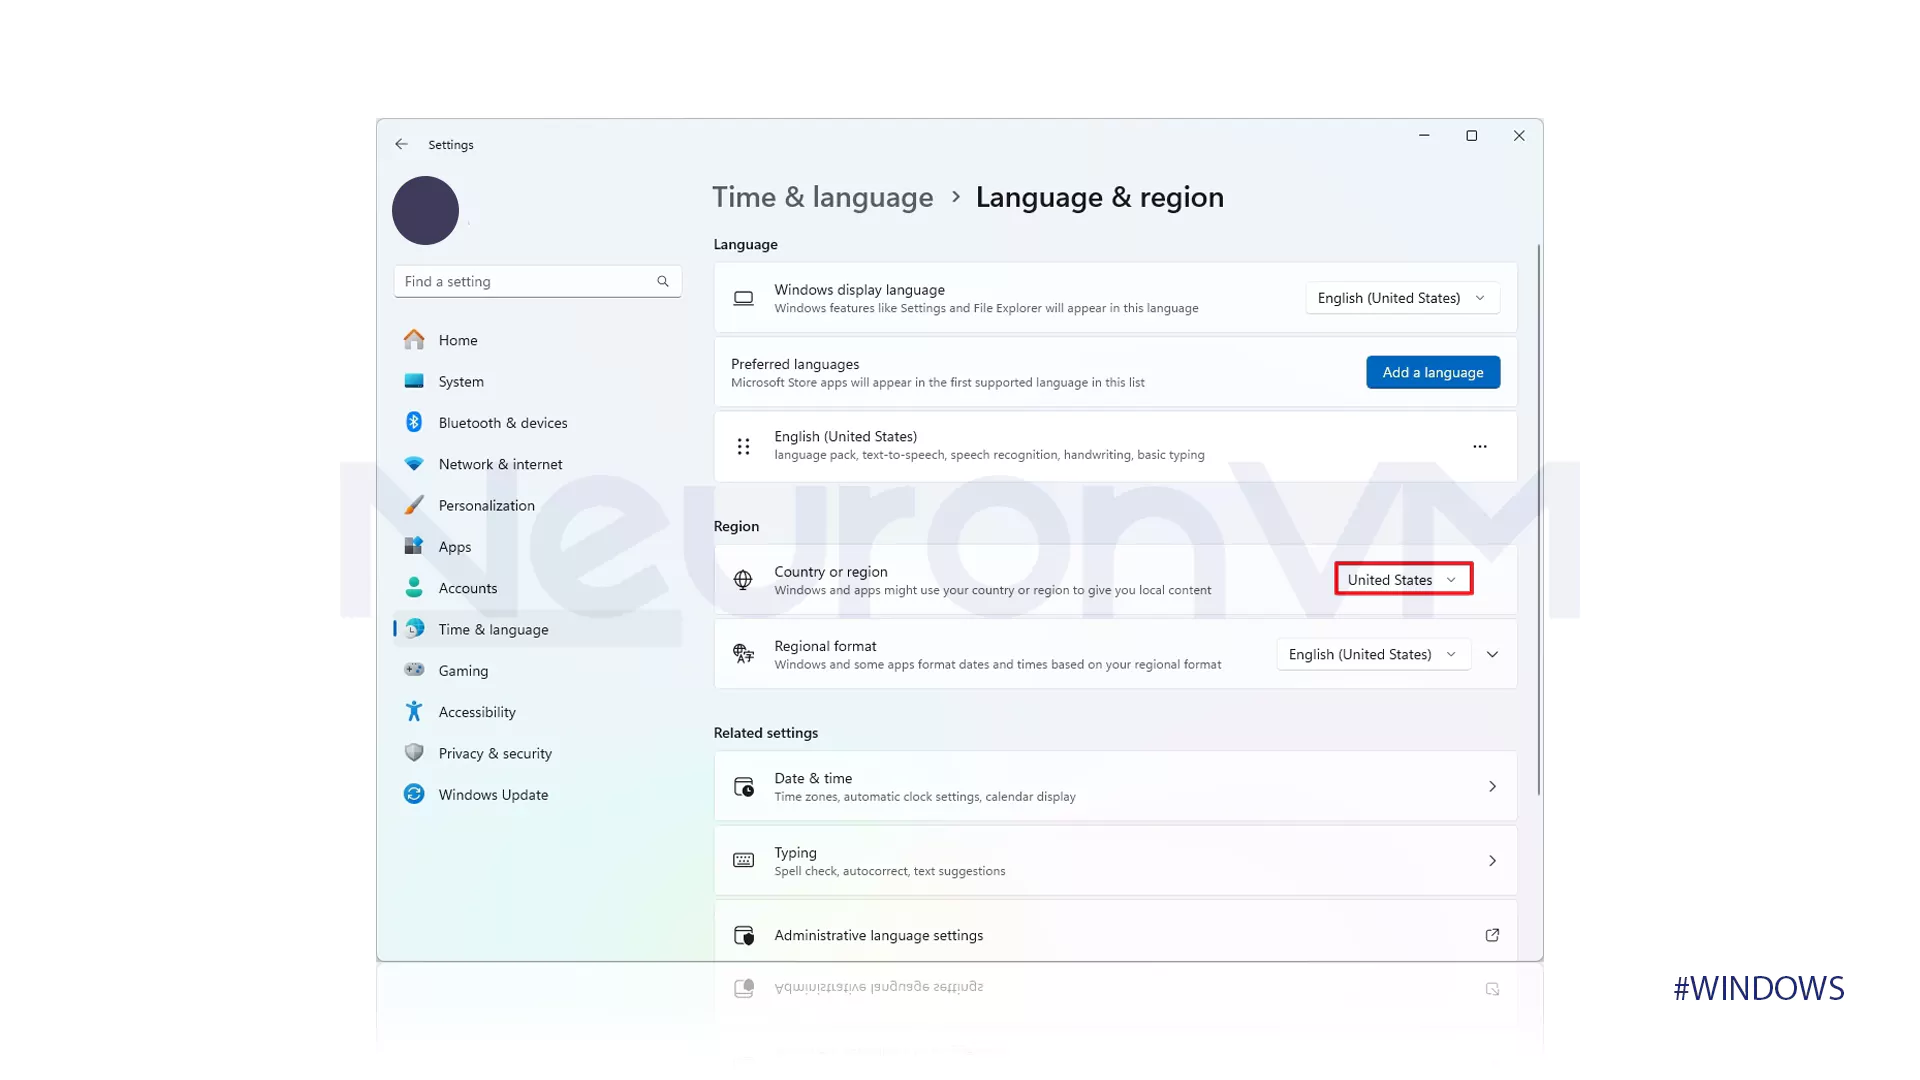
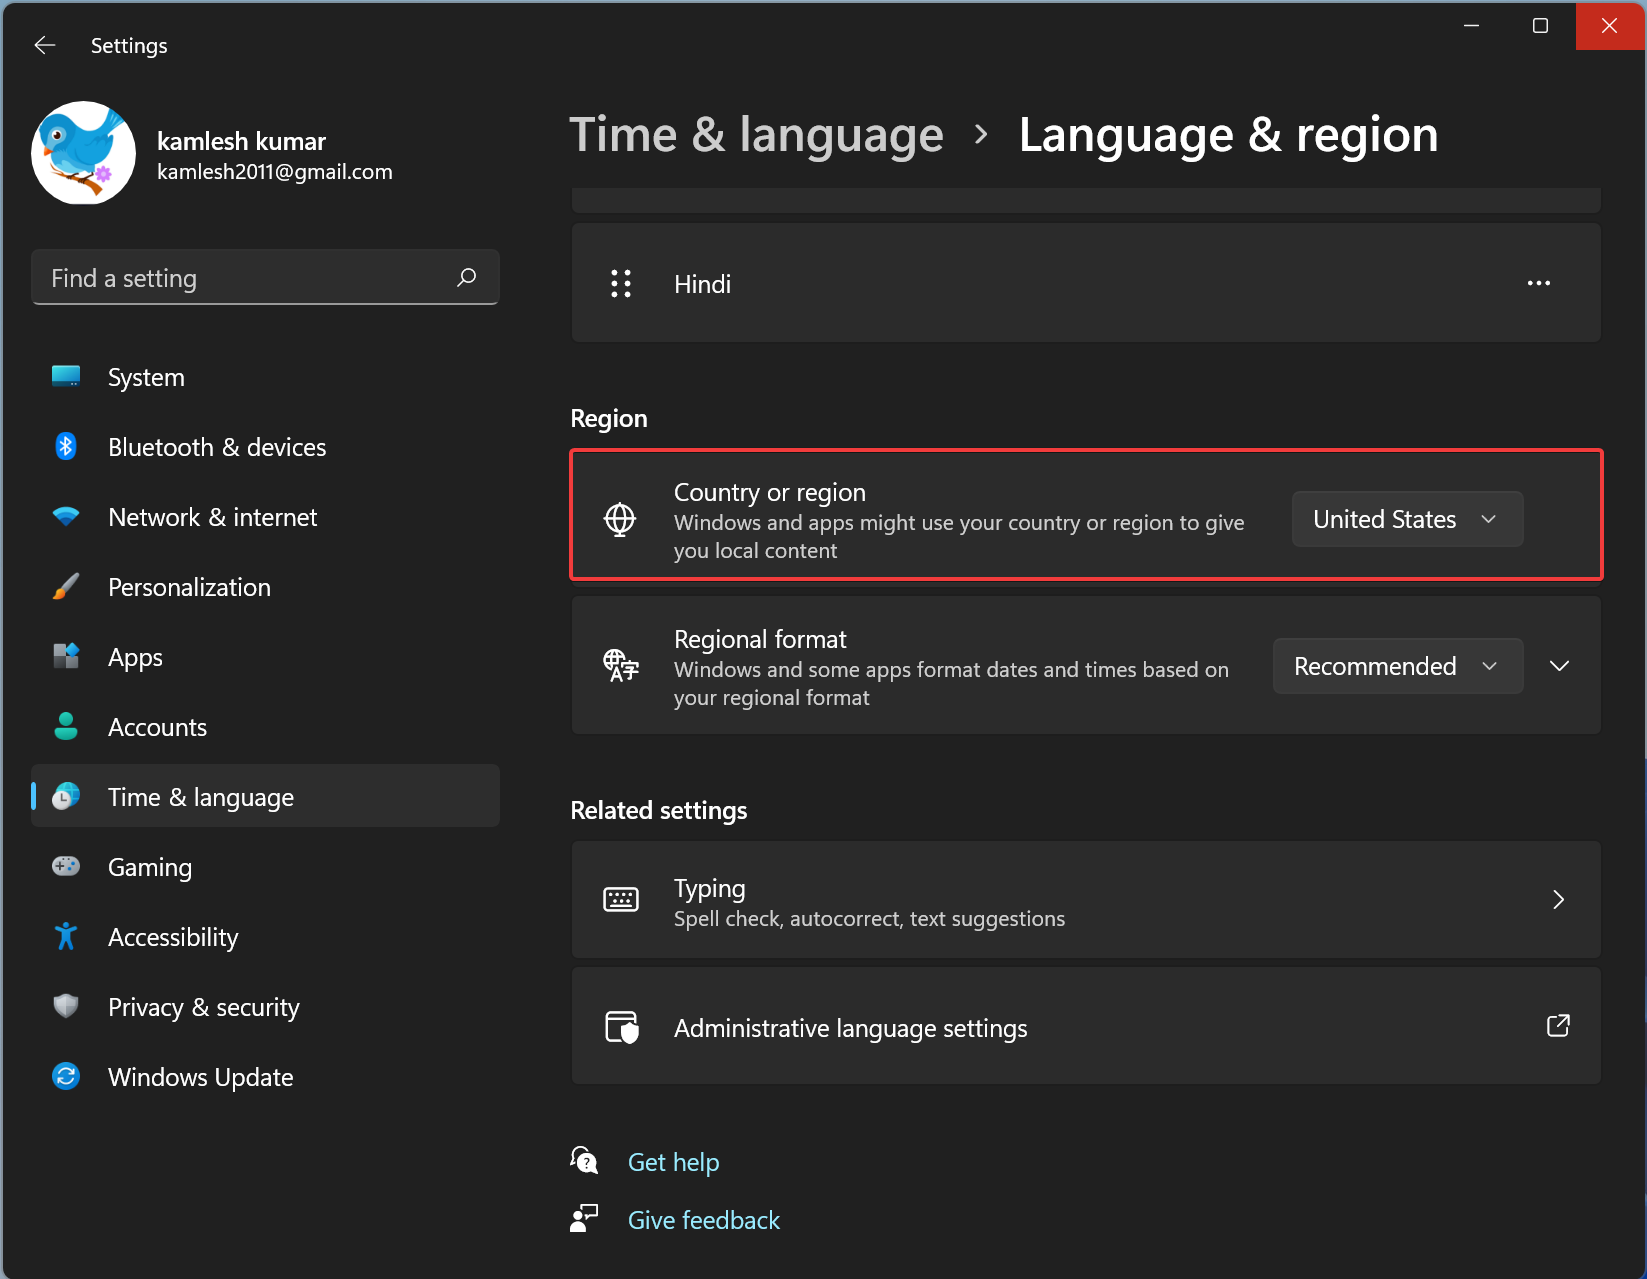
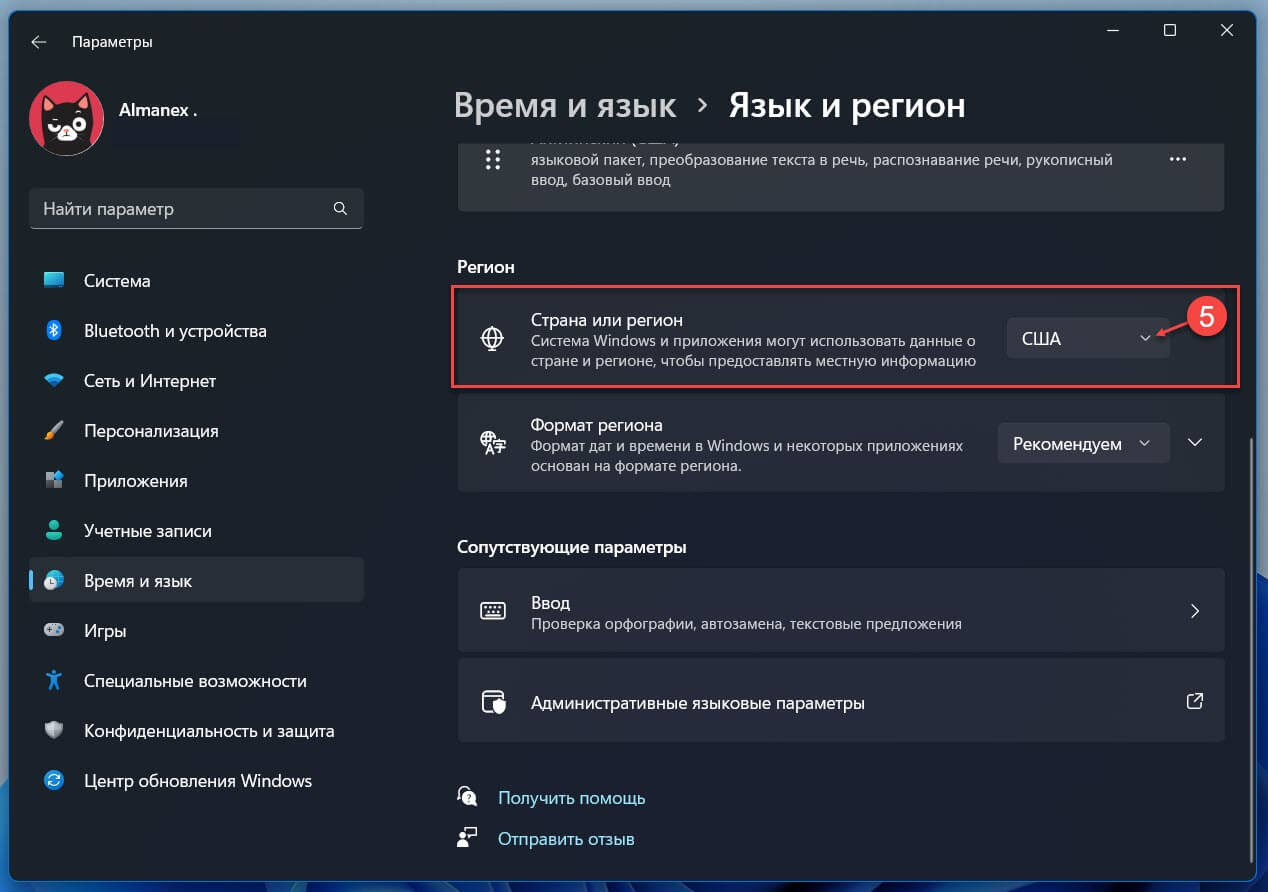
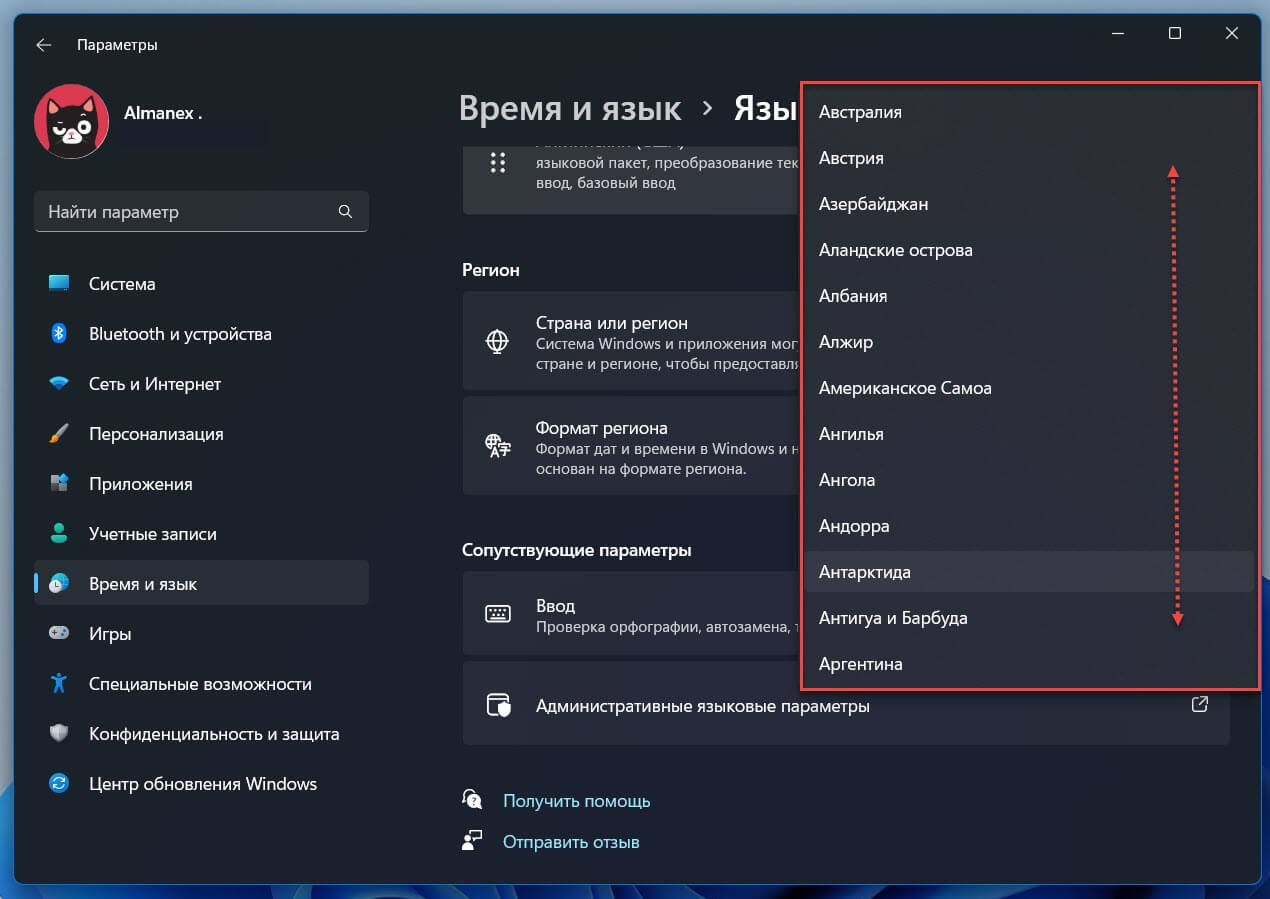
- Under the «Region» section, choose the new location in the «Country or region» setting – for example, United States.
- (Optional) Select the regional format to use on Windows 11 in the «Regional format» settings.
- Quick tip: Usually, the «Recommended» option offers the optional configuration.
Once you complete the steps, the system will apply the new region settings affecting the operating system and apps, including the Microsoft Store.
Sometimes, when a software company (or Microsoft itself) announces a new application limited to a specific region, users can change region settings to make the app available for download through the Microsoft Store.
All the latest news, reviews, and guides for Windows and Xbox diehards.
How to change regional format settings on Windows 11
To change the regional format settings, use these steps:
- Open Settings.
- Click on Time & language.
- Click the Language & region page on the right side.
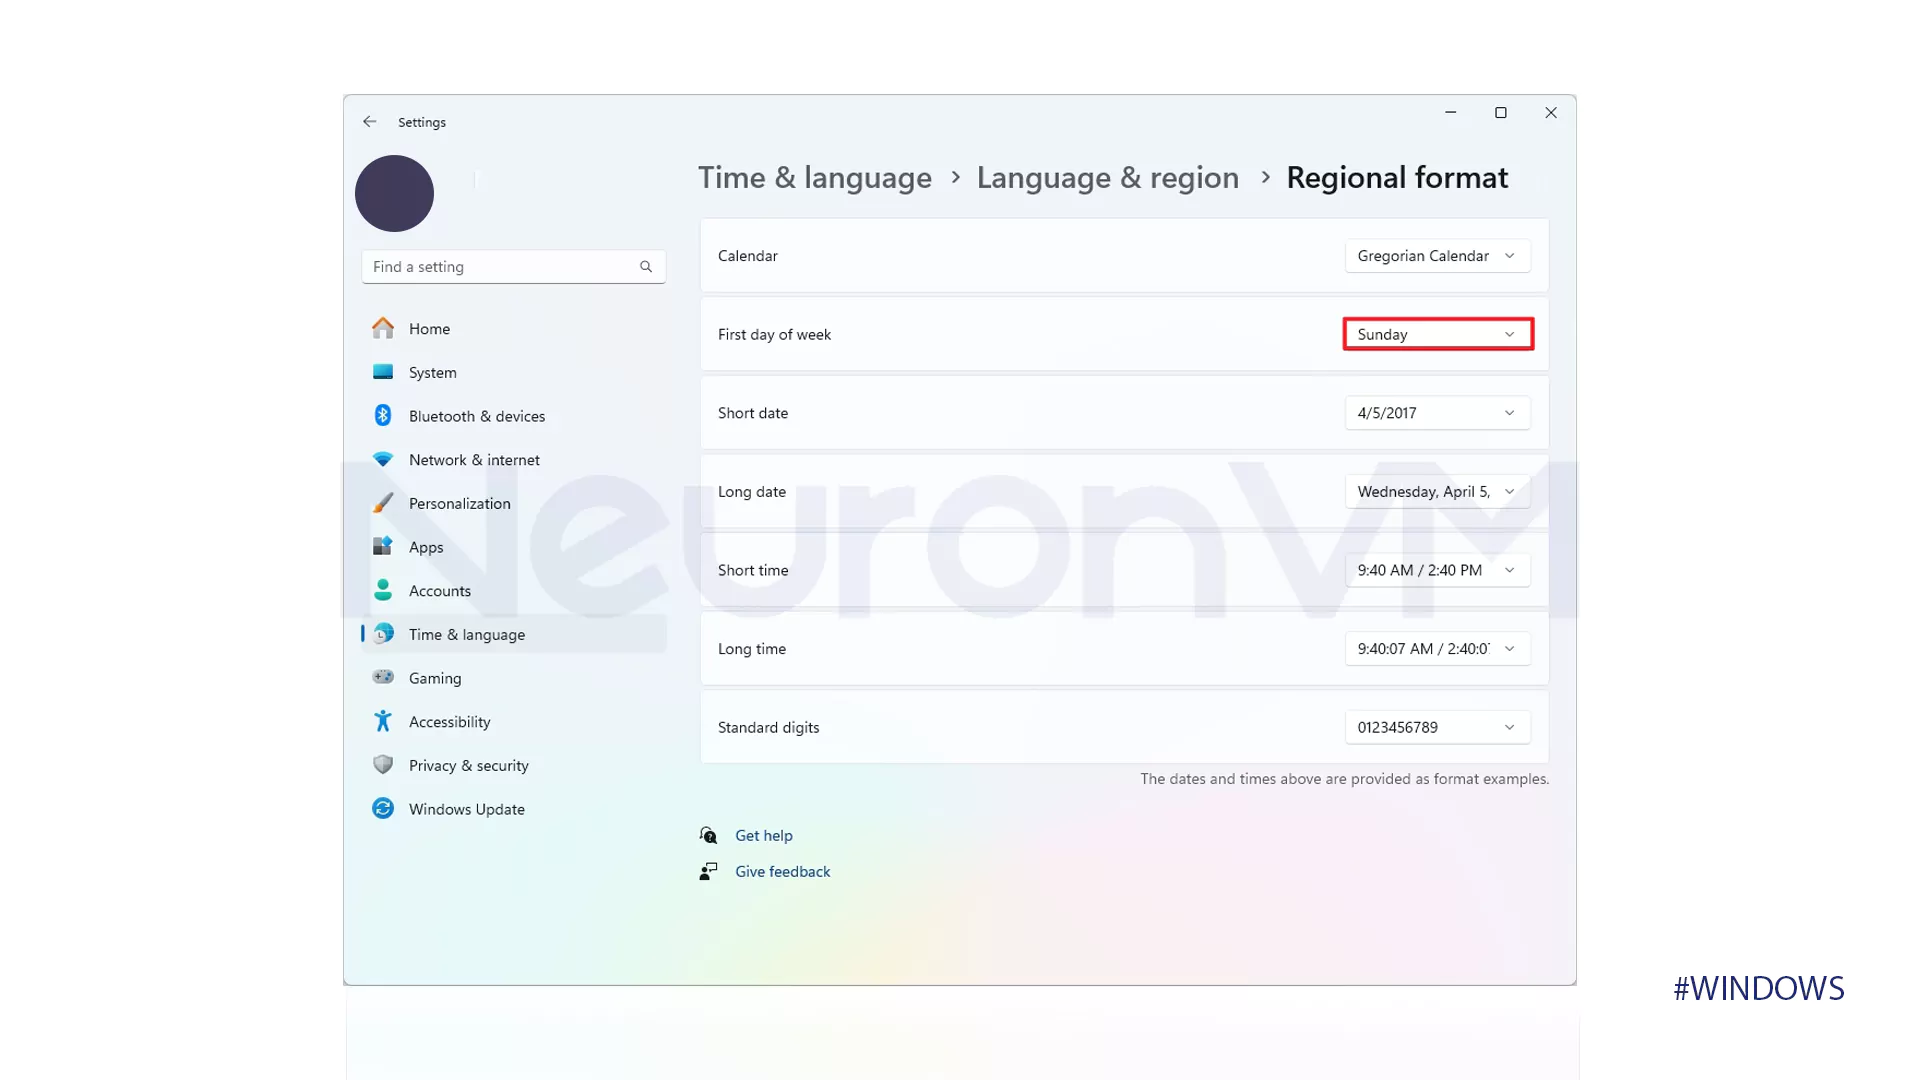
- Select the Regional format setting.
- Click the Change formats button.

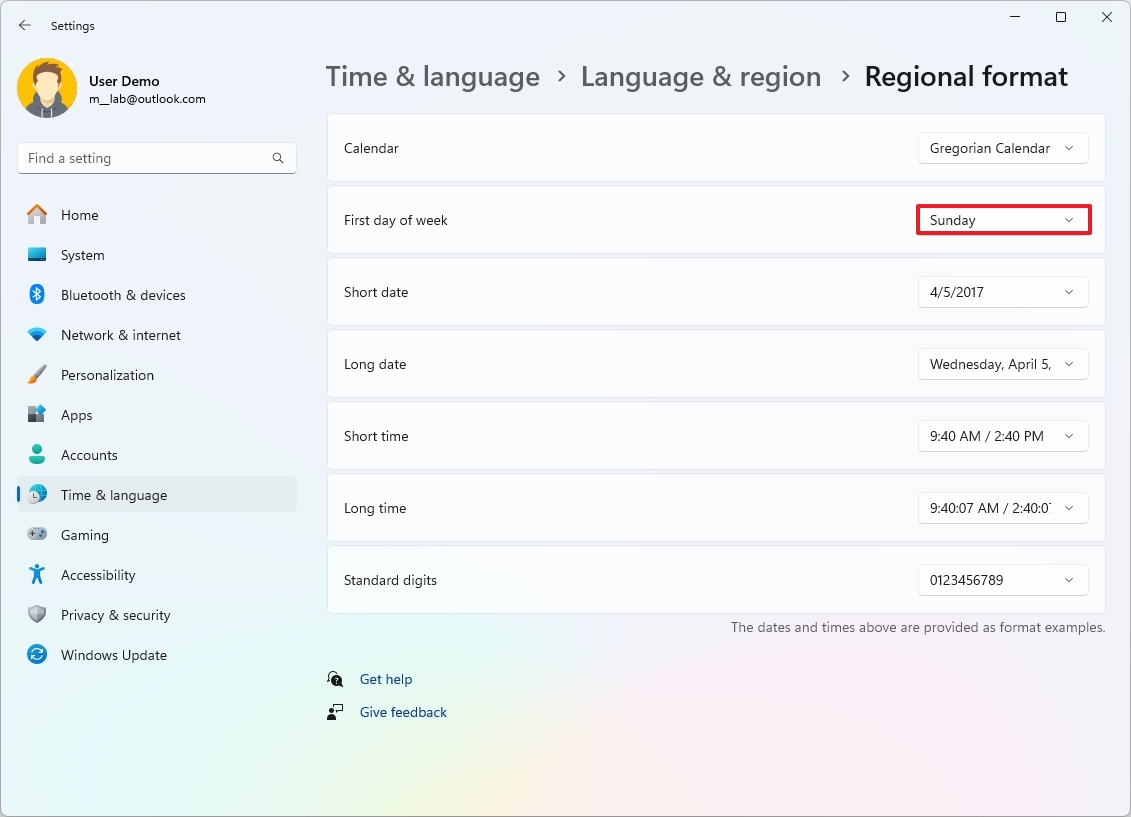
- Select when your week starts in the «First day of week» setting.
- Choose the date format in the «Short date» setting.
- Choose the date format in the «Long date» setting.
- Select the time format in the «Short time» setting.
- Select the time format in the «Long date» setting.
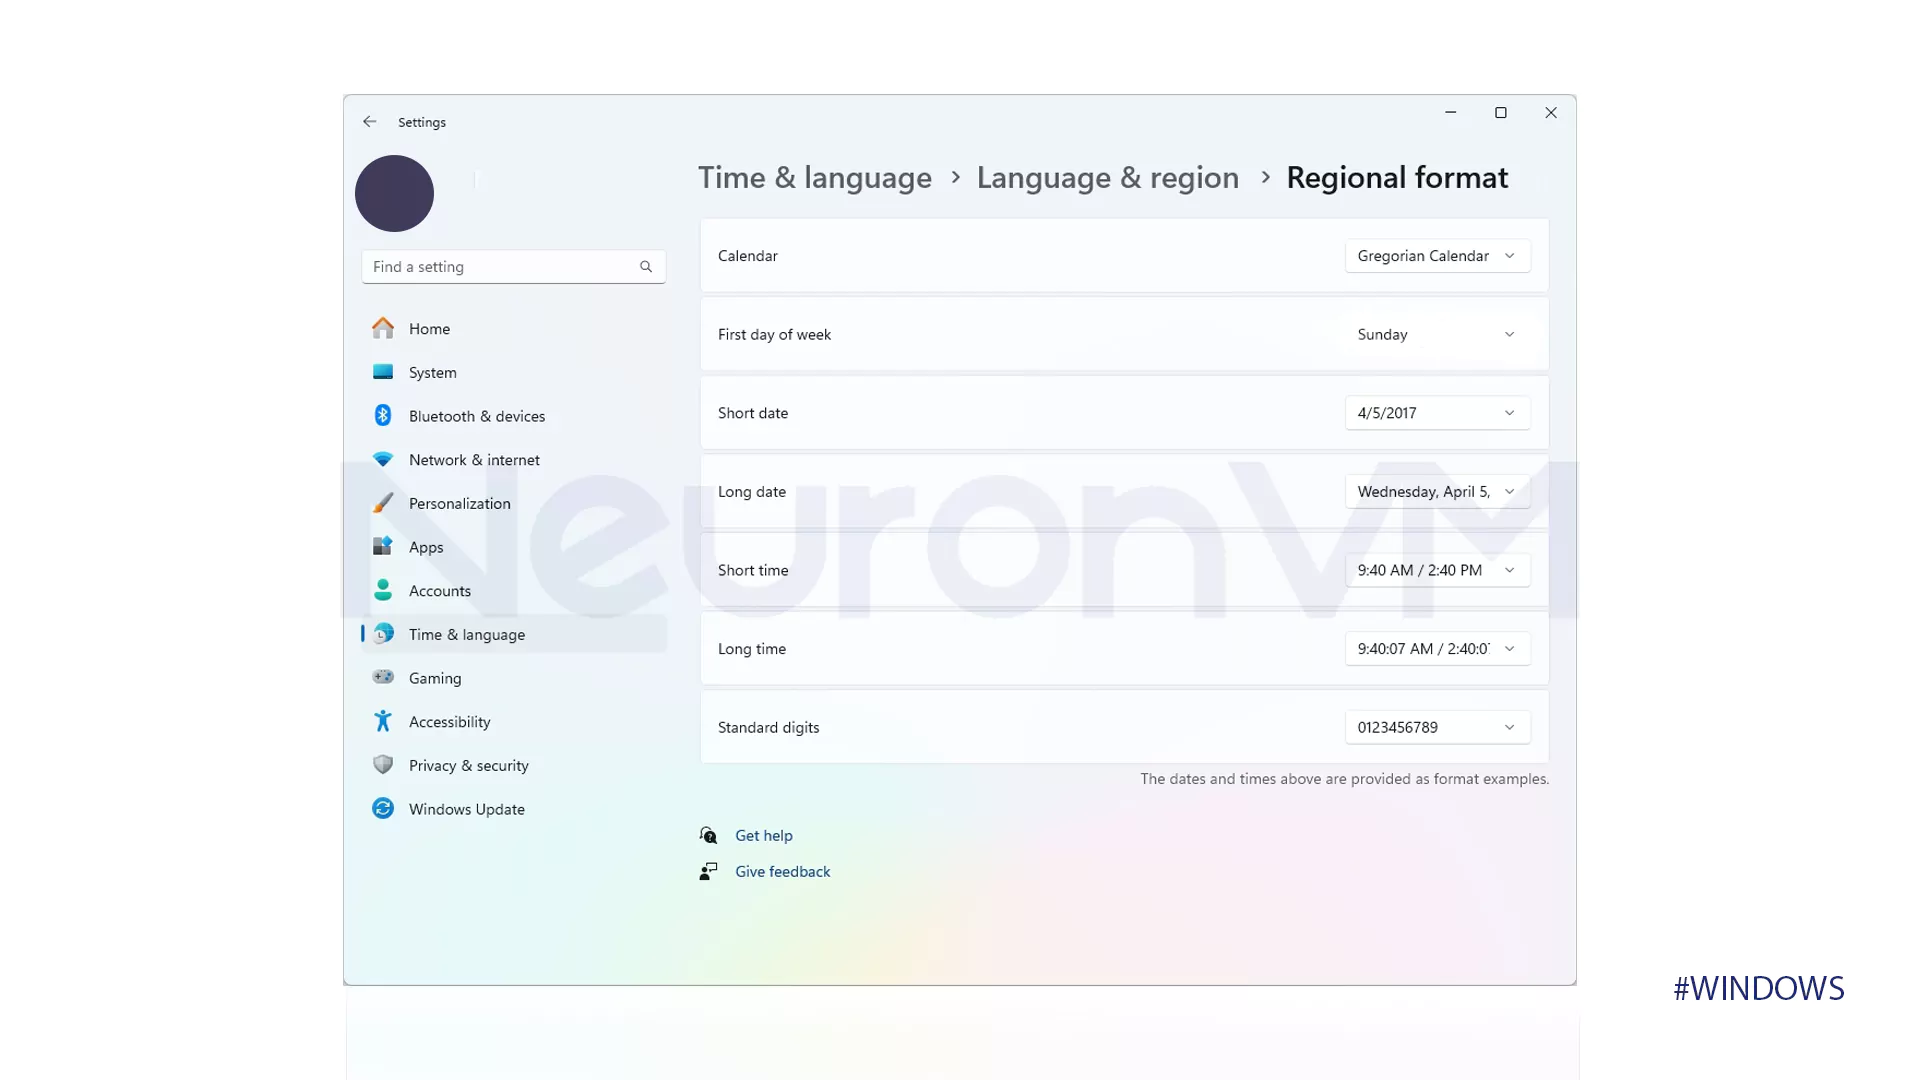
After you complete the steps, the updated format settings will be reflected across the desktop and apps.
How to change advanced region settings on Windows 11
To customize how numbers, currency, time, and date should appear on Windows 11, use these steps:
- Open Settings.
- Click on Time & language.
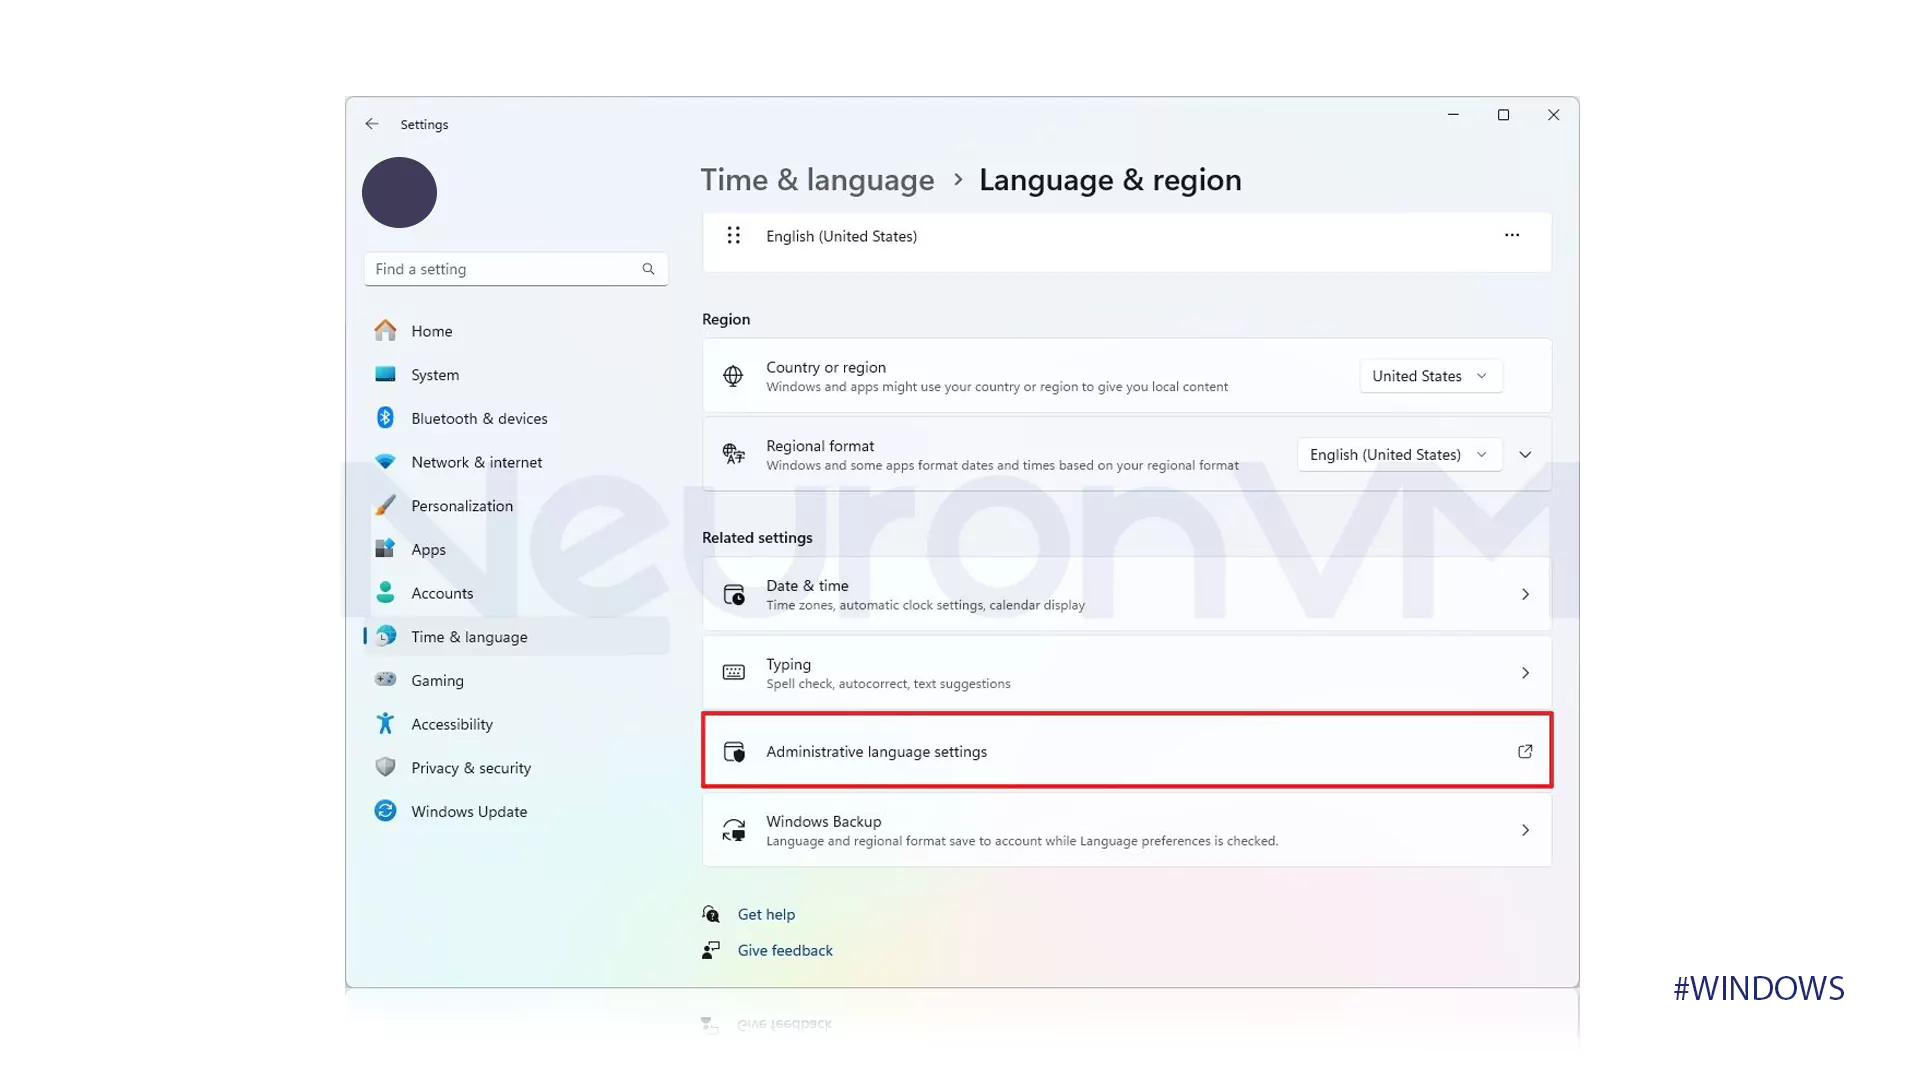
- Click the Language & region page on the right side.
- Click the «Administrative language settings» option under the «Related settings» section.

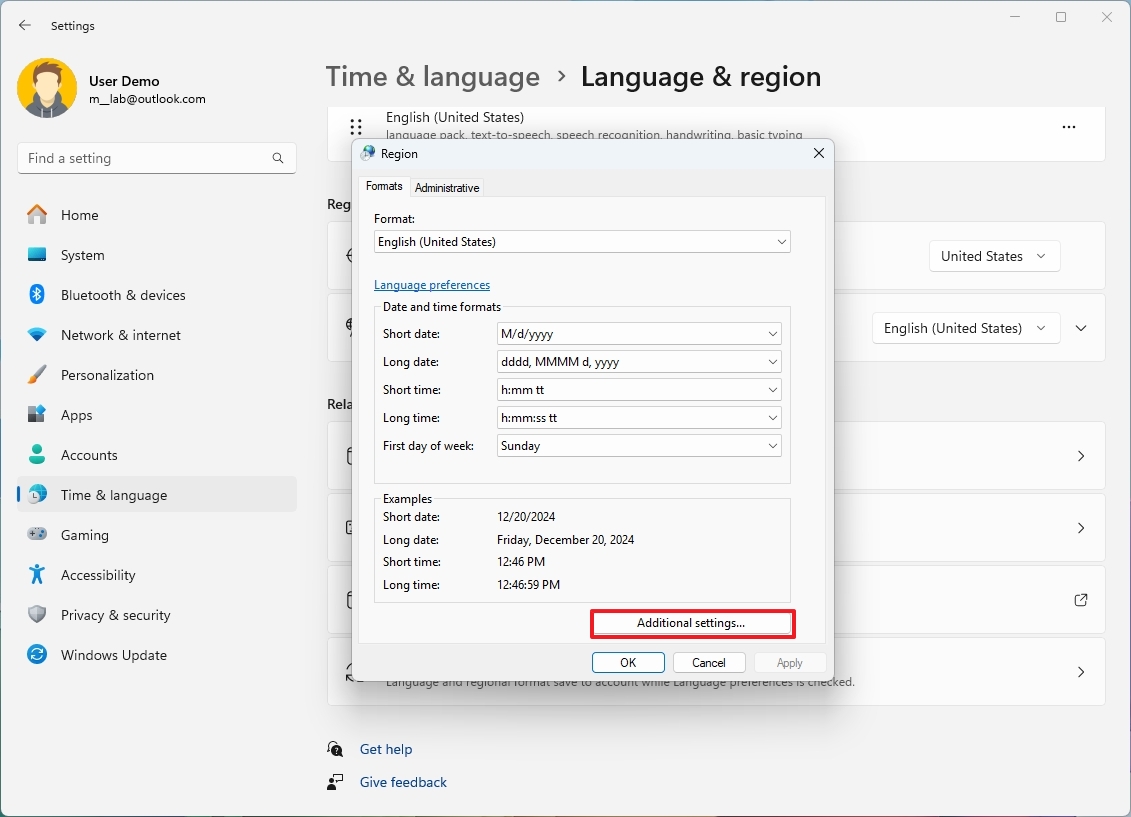
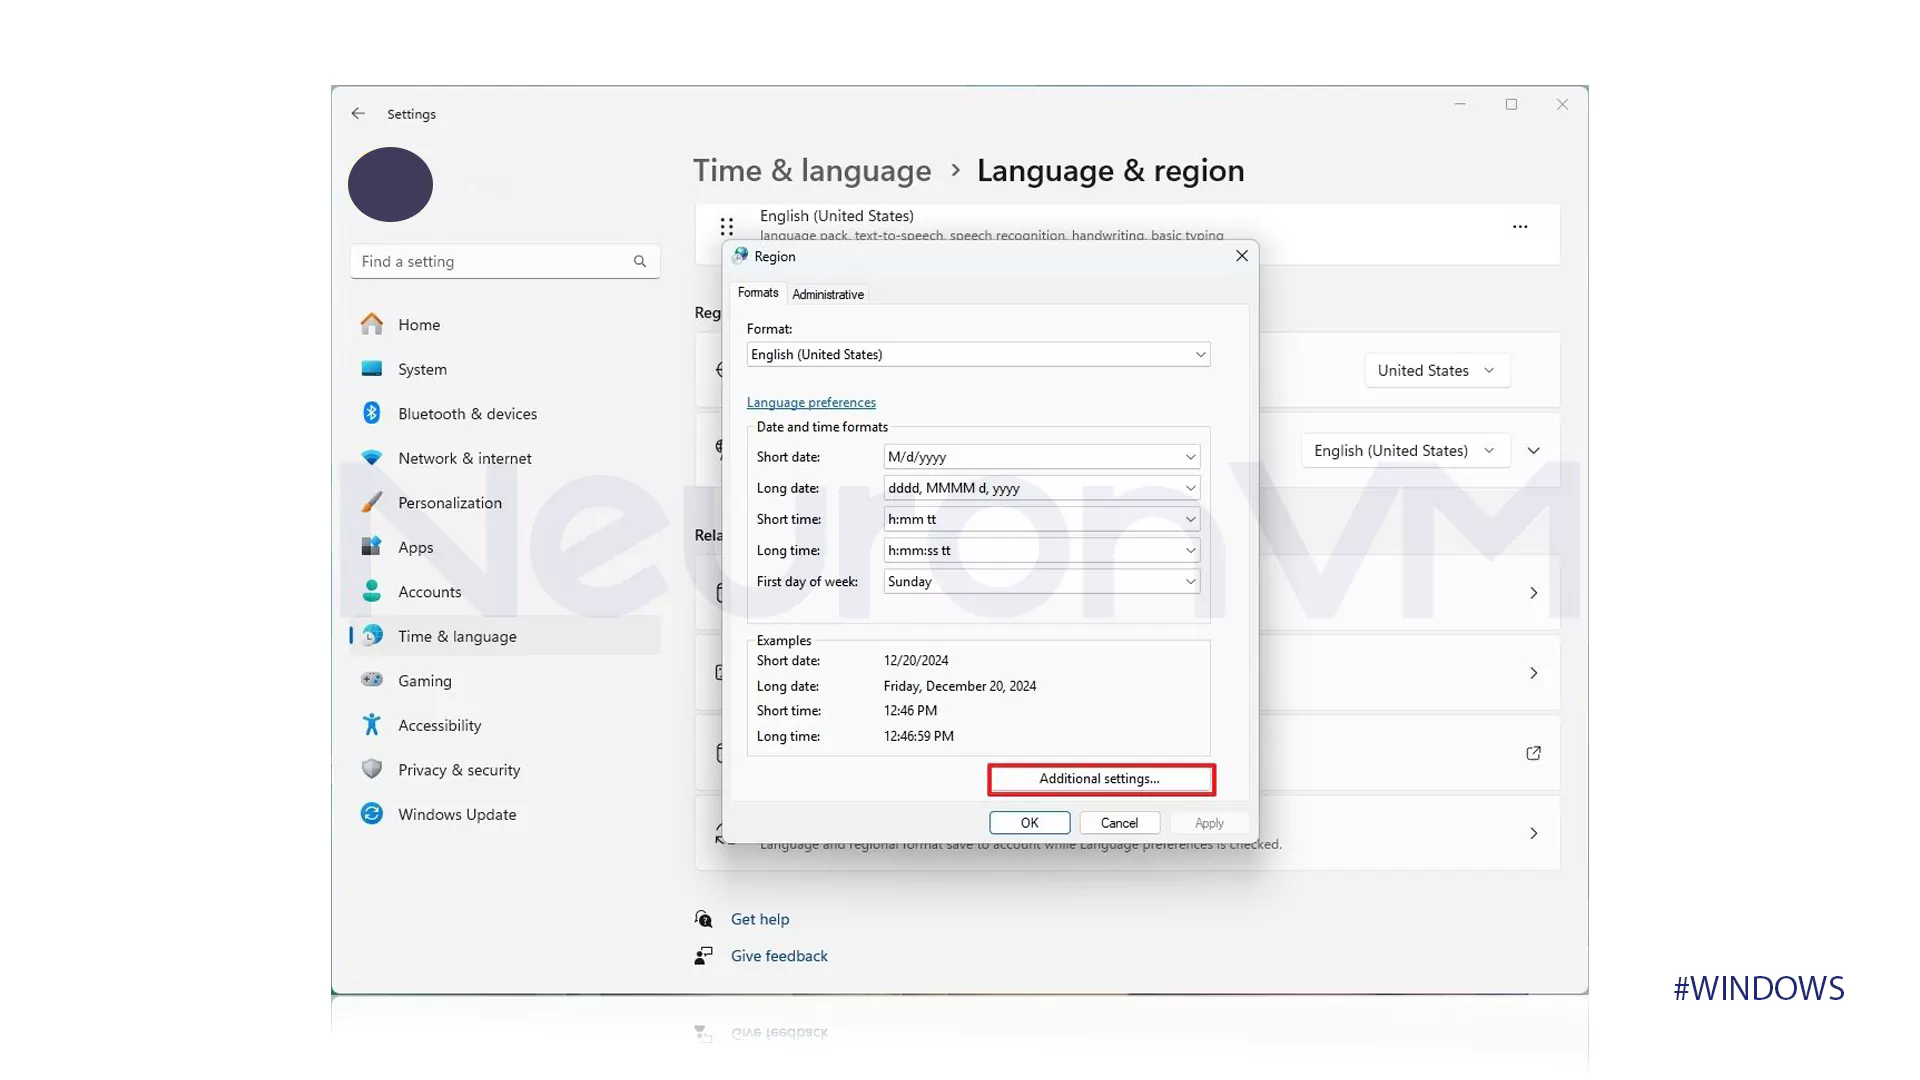
- Click the Formats tab.
- Click the Additional settings button.
- Click the Numbers tab.
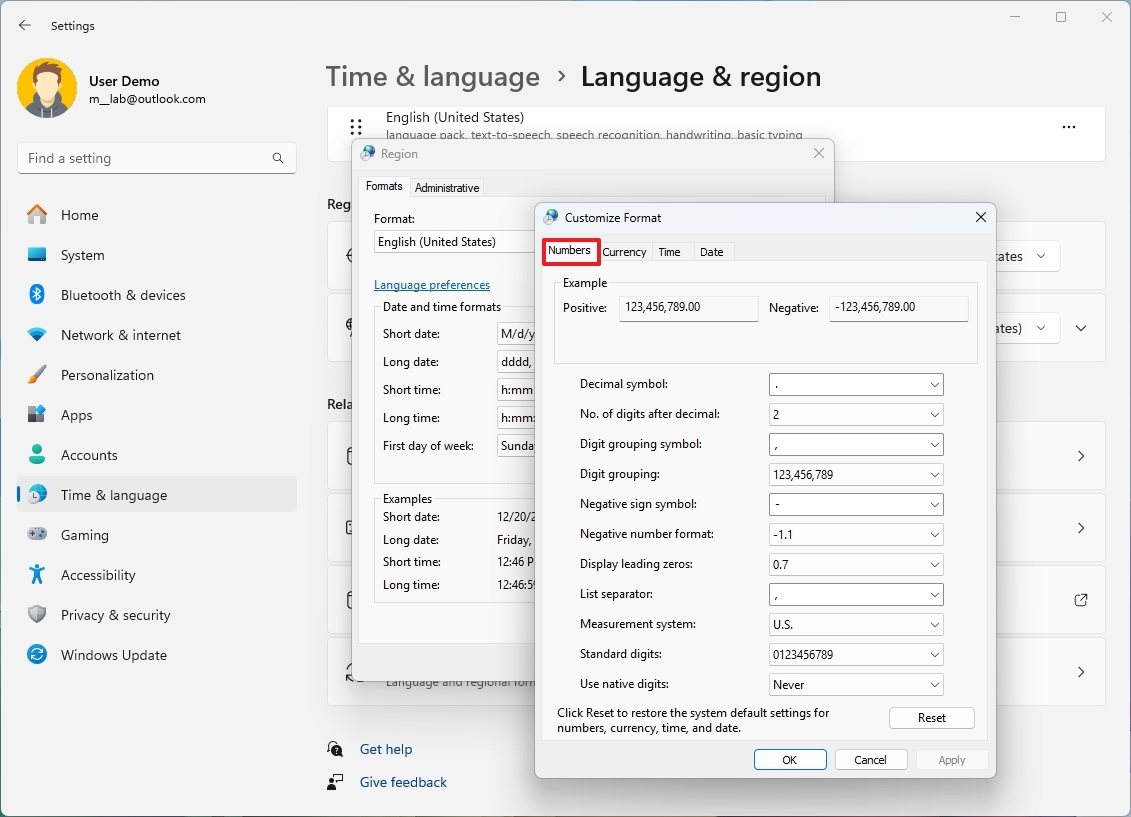
- Customize the regional formats for numbers and symbols.
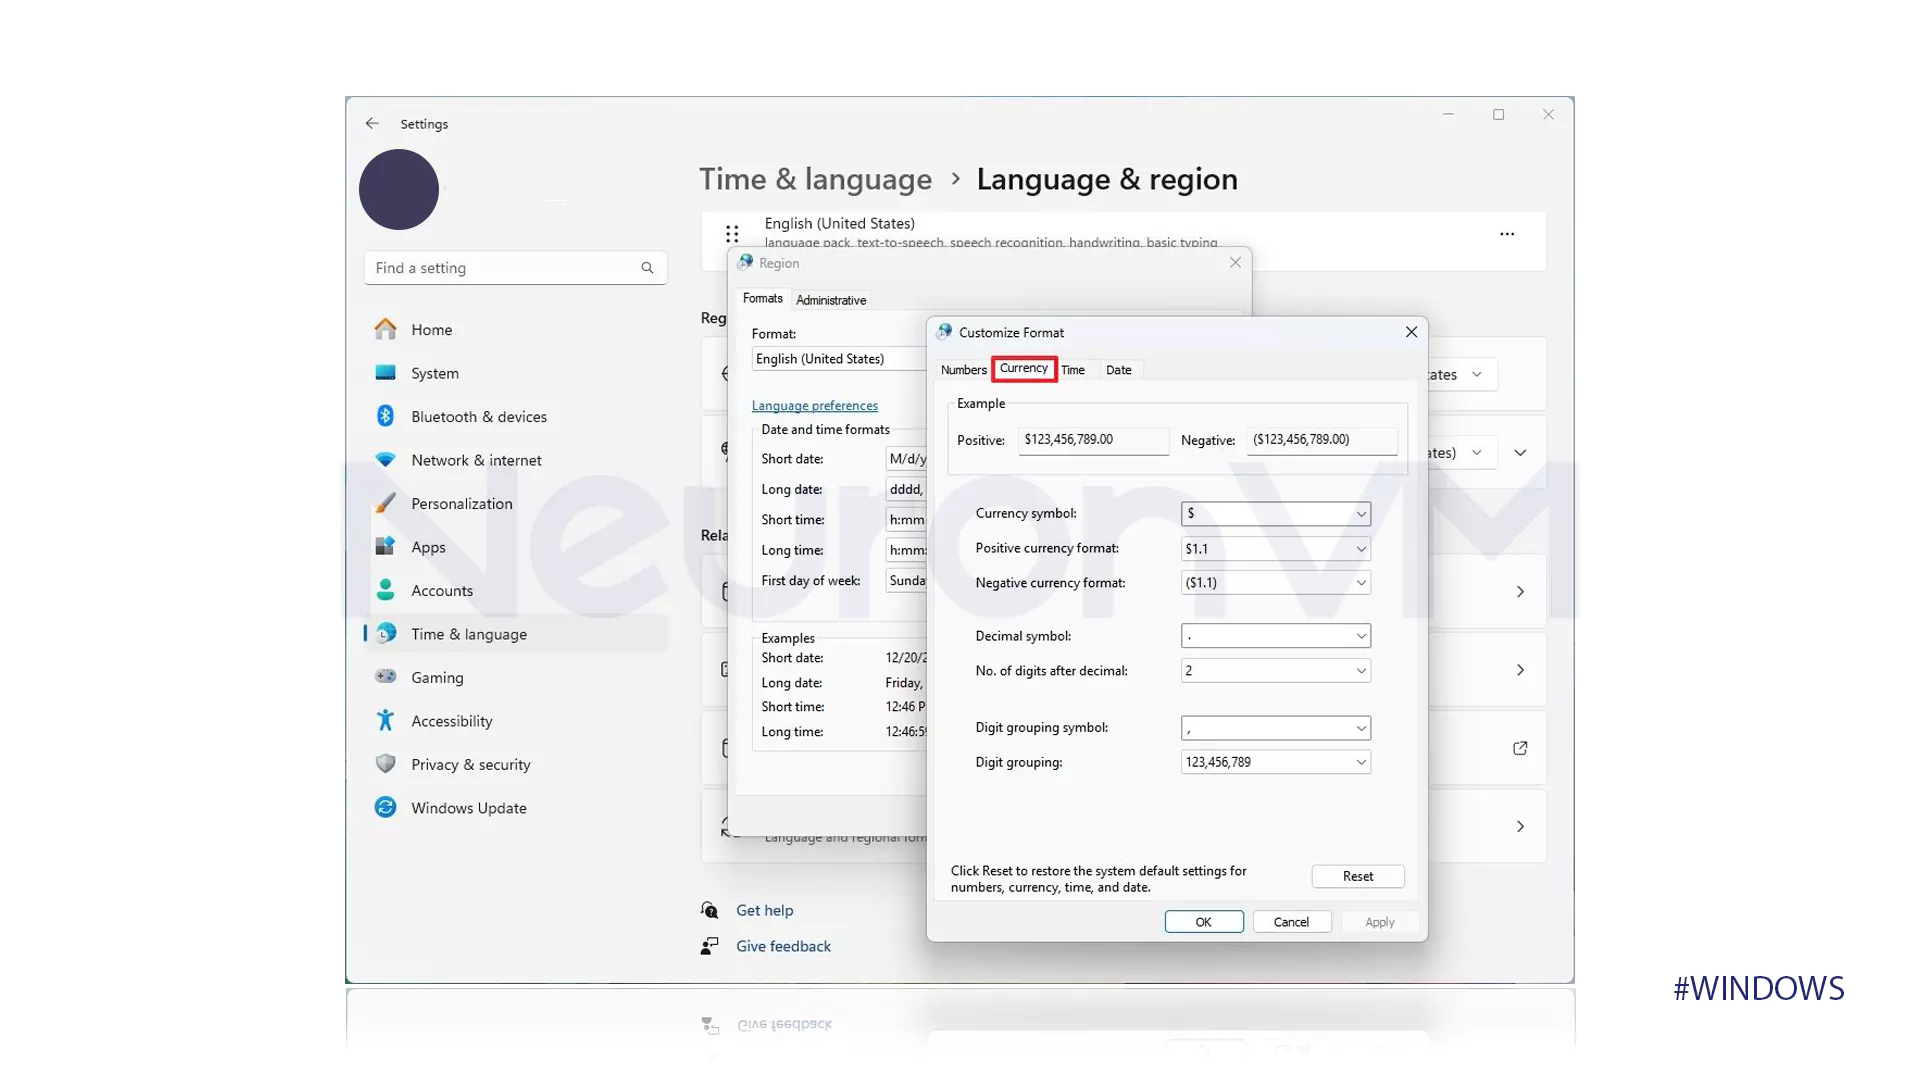
- Click the Currency tab.
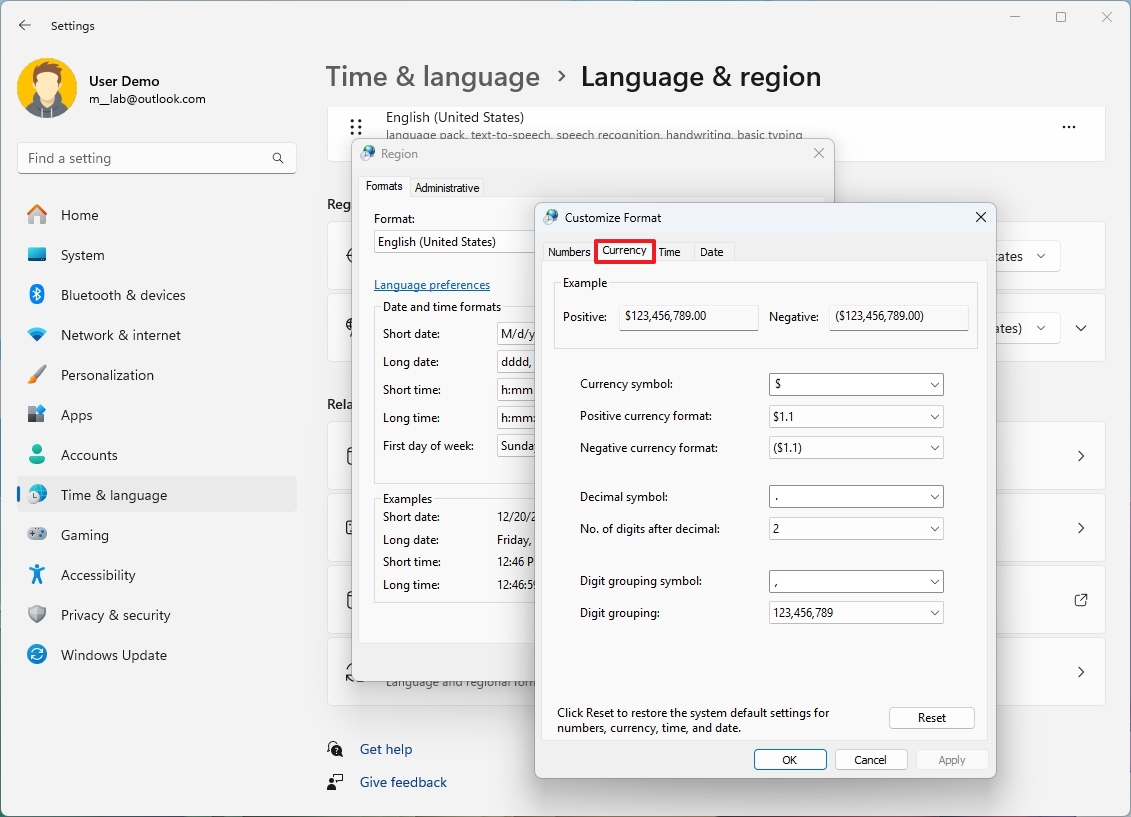
- Customize the currency formats on Windows 11.
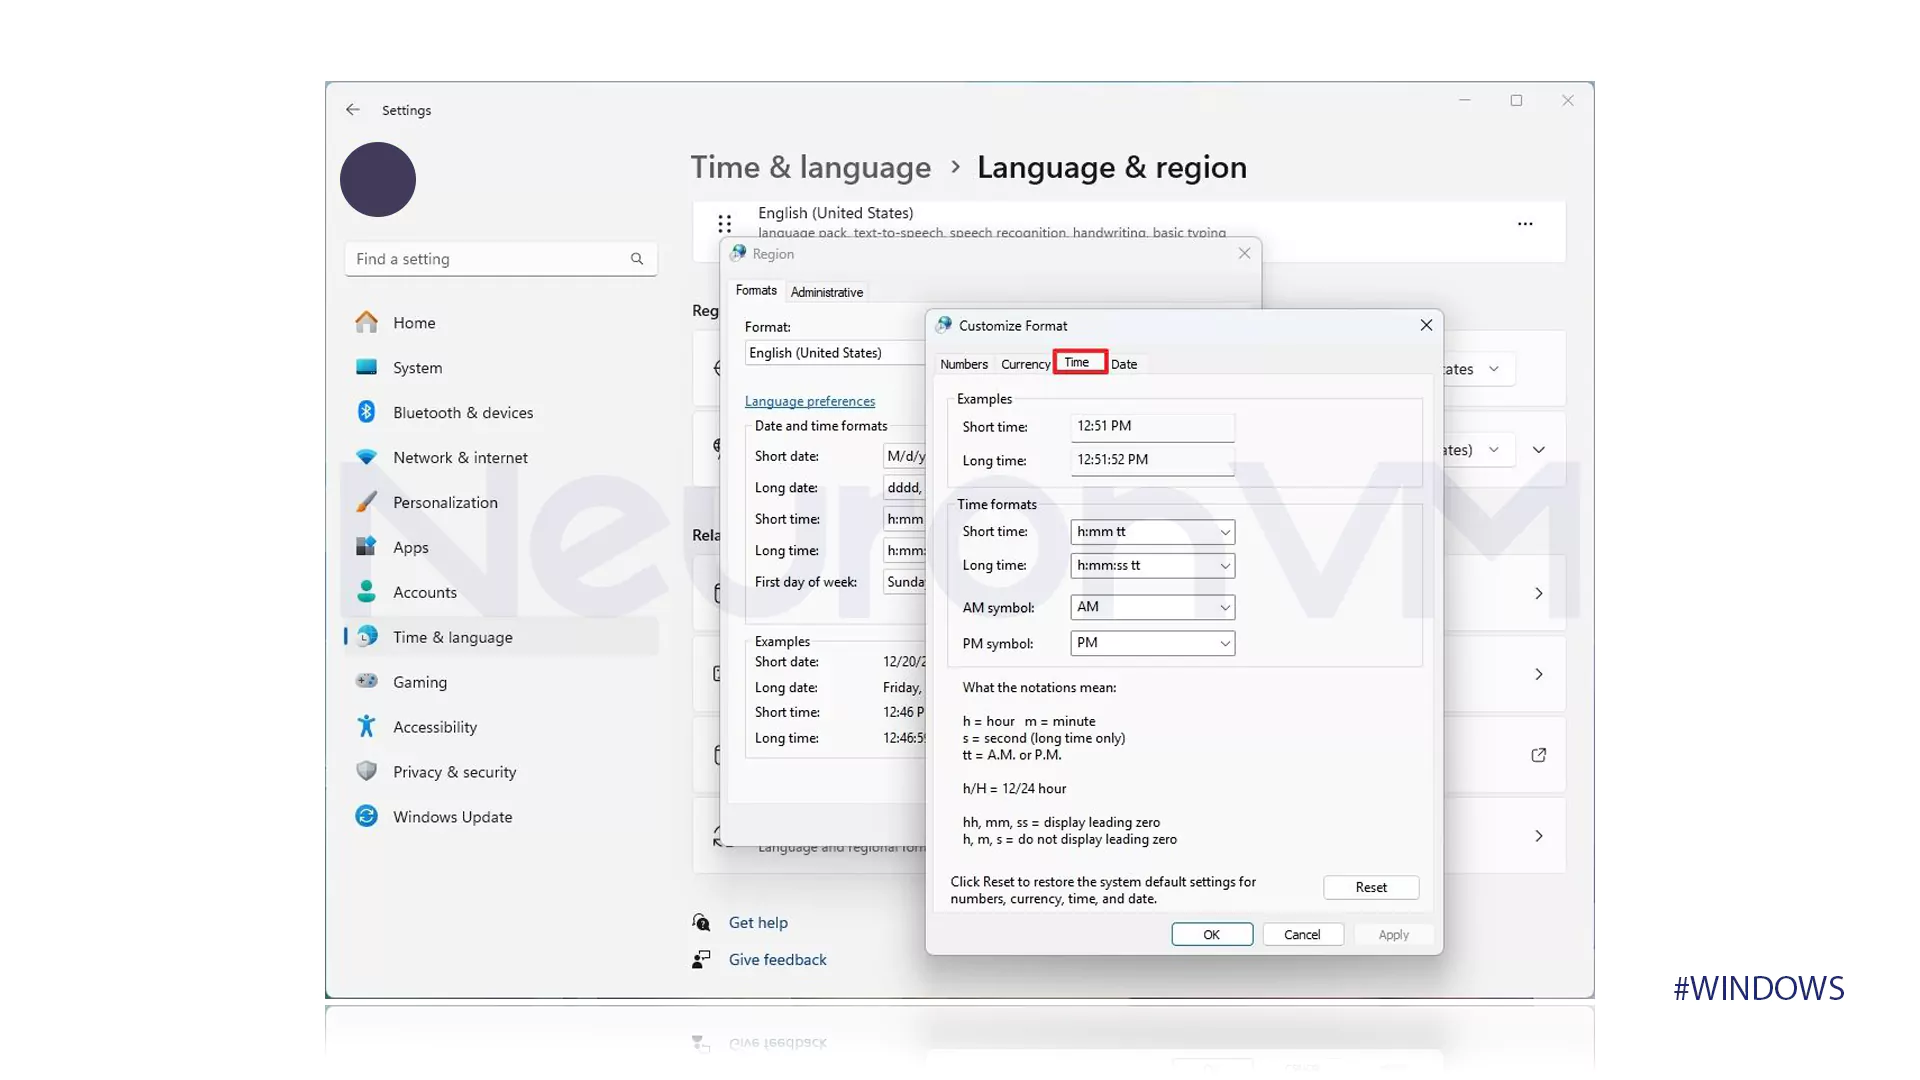
- Click the Time tab.
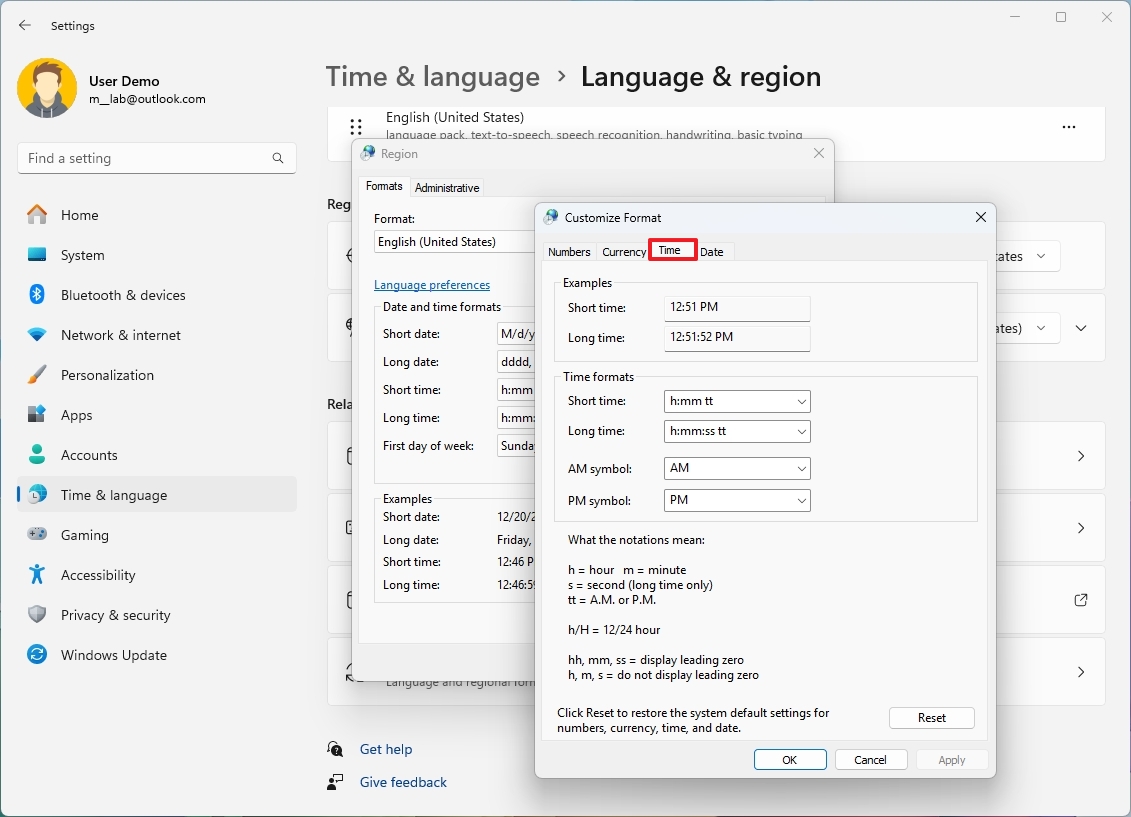
- Customize the time format more granularly.
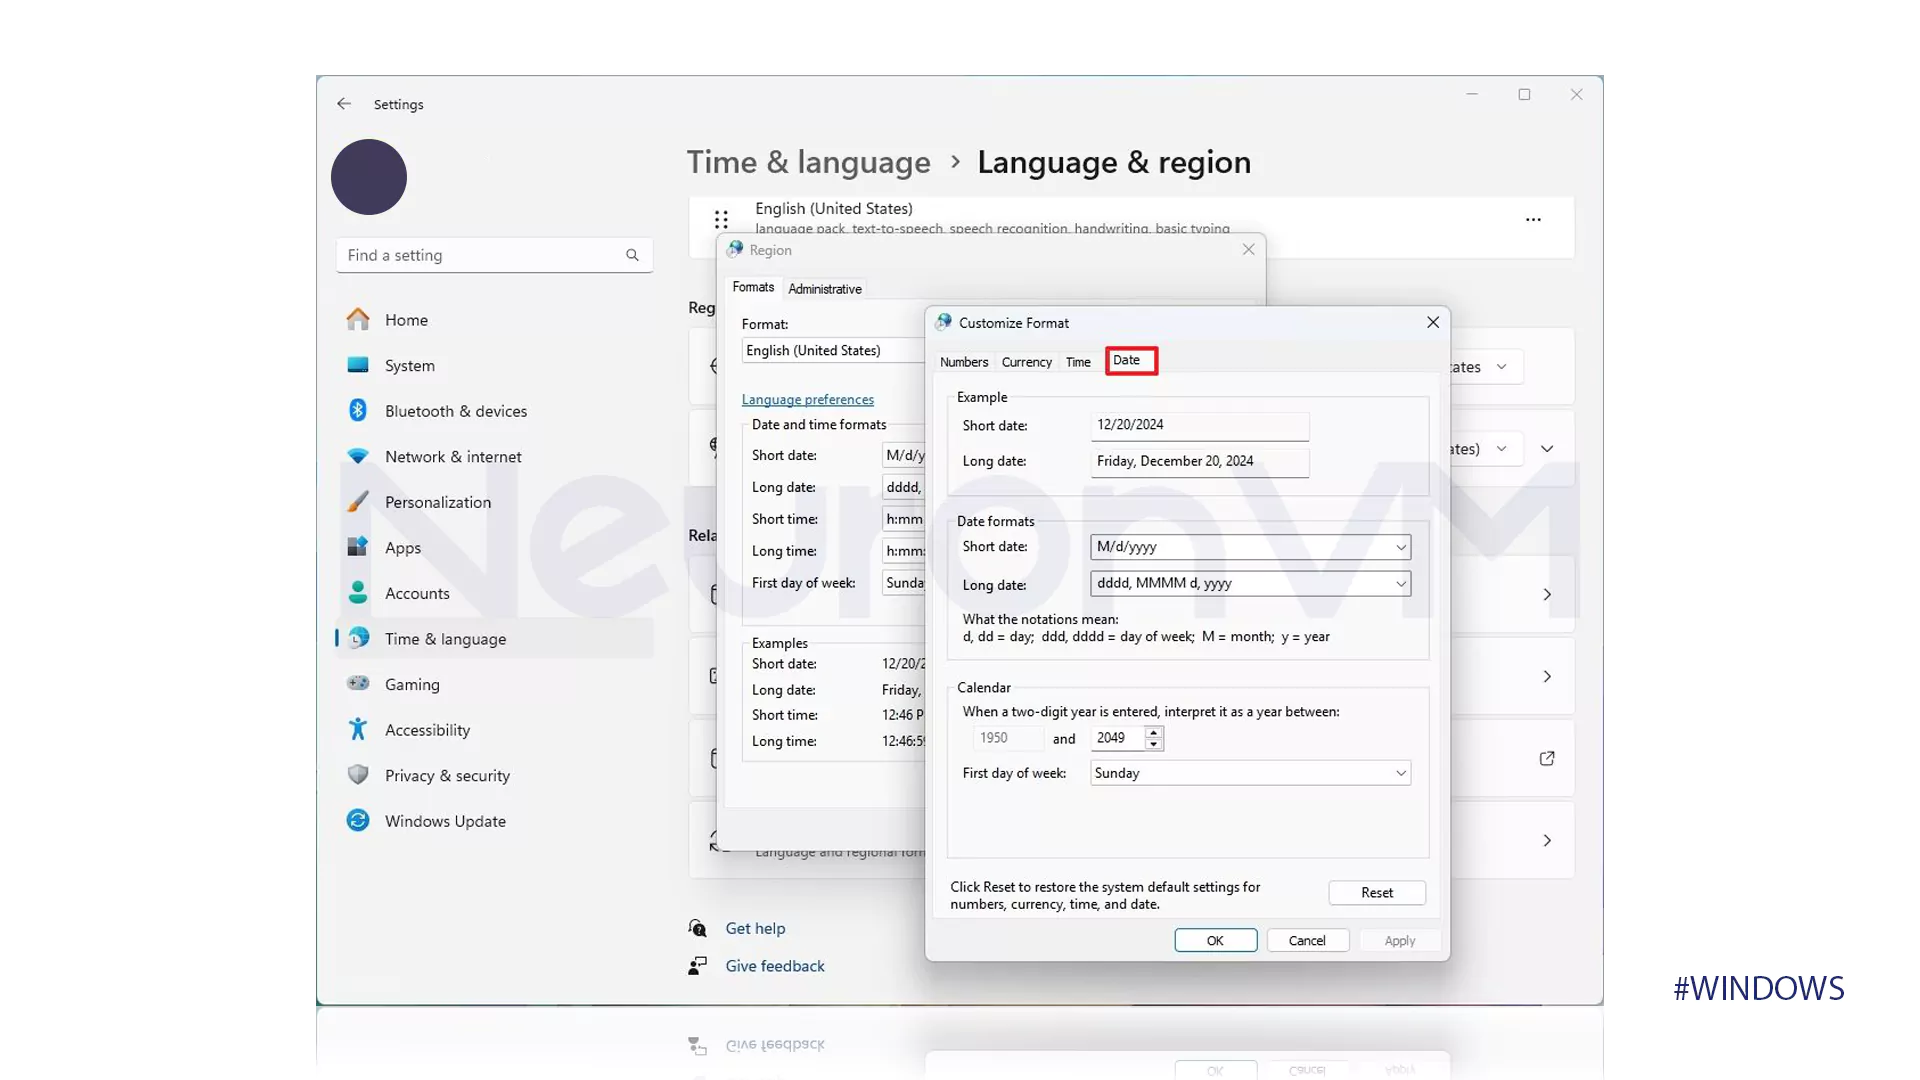
- Click the Date tab.
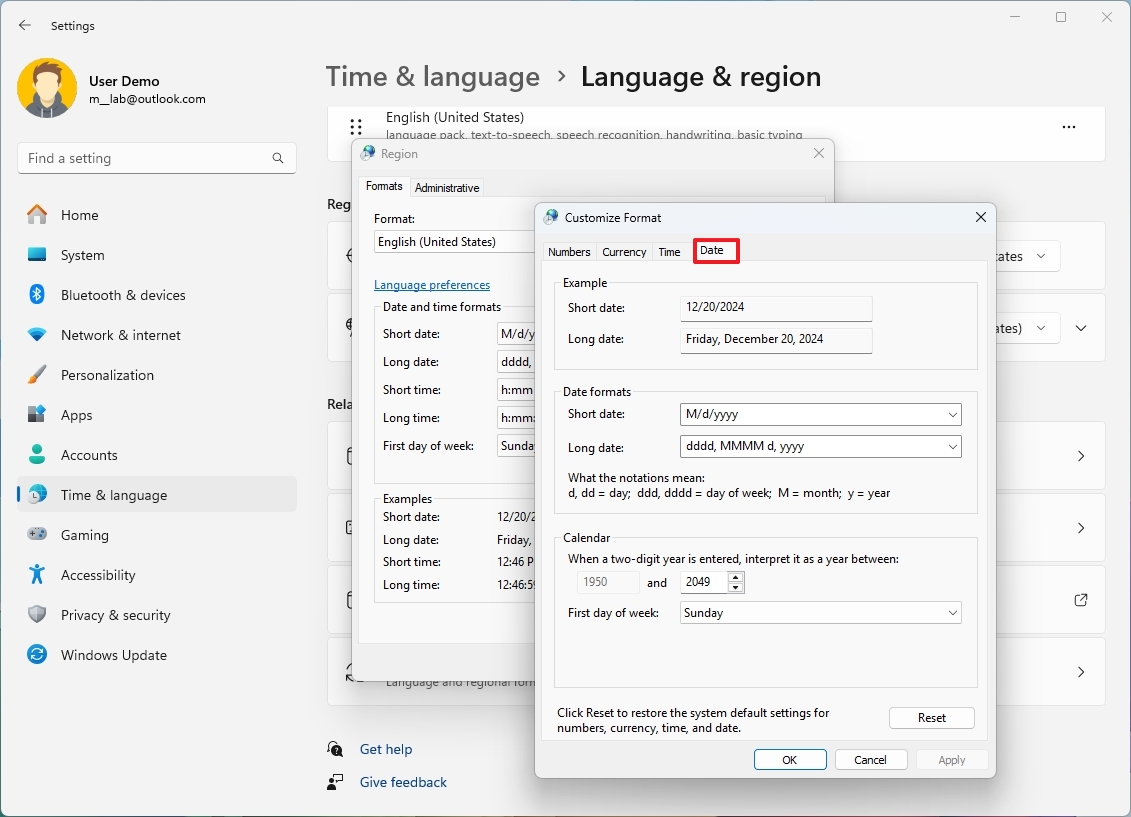
- Customize the date format more granularly.
Once you complete the steps, the new format for numbers, currency, time, and date will be reflected across the desktop and apps.
More resources
For more in-depth insights, troubleshooting tips, and the latest updates on Windows 11 and 10, be sure to explore these resources:
- Windows 11 on Windows Central — All you need to know
- Windows 10 on Windows Central — All you need to know
Mauro Huculak has been a Windows How-To Expert contributor for WindowsCentral.com for nearly a decade and has over 15 years of experience writing comprehensive guides. He also has an IT background and has achieved different professional certifications from Microsoft, Cisco, VMware, and CompTIA. He has been recognized as a Microsoft MVP for many years.

This tutorial will show you how to change your country or region for your account in Windows 11.
The country or region home location in Windows, referred to as geographic location (GeoID), indicates the country or region you are in.
Windows 11, Microsoft Store, and apps might use your country or region to give local content.
Stuff you get in one region might be region restrictive and not work in another region. This can include Xbox Live Gold, apps, games, movies, and the balance in your Microsoft account.
If you change your location by moving to or visiting some other country, you might need to change your country or region home location in Windows.
Your country or region location setting is saved to the Name and Nation string values in the registry key below.
HKEY_CURRENT_USER\Control Panel\International\Geo
Contents
- Option One: Change Your Country or Region in Settings
- Option Two: See Your Current Country or Region using Command
- Option Three: Change Your Country or Region using Command
Option One
Change Your Country or Region in Settings
1 Open Settings (Win+I).
2 Click/tap on Time & language on the left side, and click/tap on Language & region on the right side. (see screenshot below)

3 Select your location (ex: «United States») in the Country or region drop menu. (see screenshot below)

4 You can now close Settings if you like.
Option Two
See Your Current Country or Region using Command
1 Open Windows Terminal, and select either Windows PowerShell or Command Prompt.
2 Copy and paste the PowerShell Get-WinHomeLocation command into Windows Terminal, and press Enter. (see screenshot below)
3 You can now close Windows Terminal if you like.

Option Three
Change Your Country or Region using Command
1 Open Windows Terminal, and select either Windows PowerShell or Command Prompt.
2 Type the command below into Windows Terminal, and press Enter. (see screenshot below)
PowerShell Set-WinHomeLocation -GeoID <GeoID number>
3 You can now close Windows Terminal if you like.

That’s it,
Shawn Brink
Related Tutorials
- Enable or Disable Changing Country or Region GeoID in Windows 11
- Change Regional Format in Windows 11
- Copy Language and Region Settings to Welcome Screen and New Users in Windows 11
- Change Country or Region for Copilot app in Windows 11
Are you looking for a way to guide you in changing the region on Windows 11? How to change region on Windows 11 is one of the questions that is asked by many Windows users. To adapt the local needs and preferences of users to the system you need to change region on Windows. Changing the region has a great impact on Windows services and features, including language settings, date, and time format, and even access to some services and programs. In this guide, we will review the steps and methods of changing the region in Windows 11 and provide important points in this field. Stay with us to help you get the most out of this new feature.
Recommended service: windows vps
Unlock Your Windows Power: The Ultimate Guide to Changing Regions Step by Step
Maybe you made a mistake during the initial setup, or you are looking for an app or feature in the Microsoft Store that’s only available in a different region, or you want to view the date, time, numbers, or currency in a different format on your desktop.
All these demands are easily possible by learning how to change region on Windows 11. Window 11 adjusts your region settings, system content, and apps based on your location. For example, The Microsoft Store shows you the apps, games, and videos that are available in your region based on regional information.
These changes can be useful for users who live in different countries or work with different languages too! Follow the steps below:
Step 1: Change region settings
- Go to Settings and click on the tab shown in the picture below.
- Find the Language & region option and click on it.
- In the Region section, click on the option shown in the picture.
- Choose the Country or the region you want.
Step 2: Change regional format settings
- Find the Language & region option and click on it.
- Click on the “Regional format” option.
- Then click on the option that is shown in the picture below.
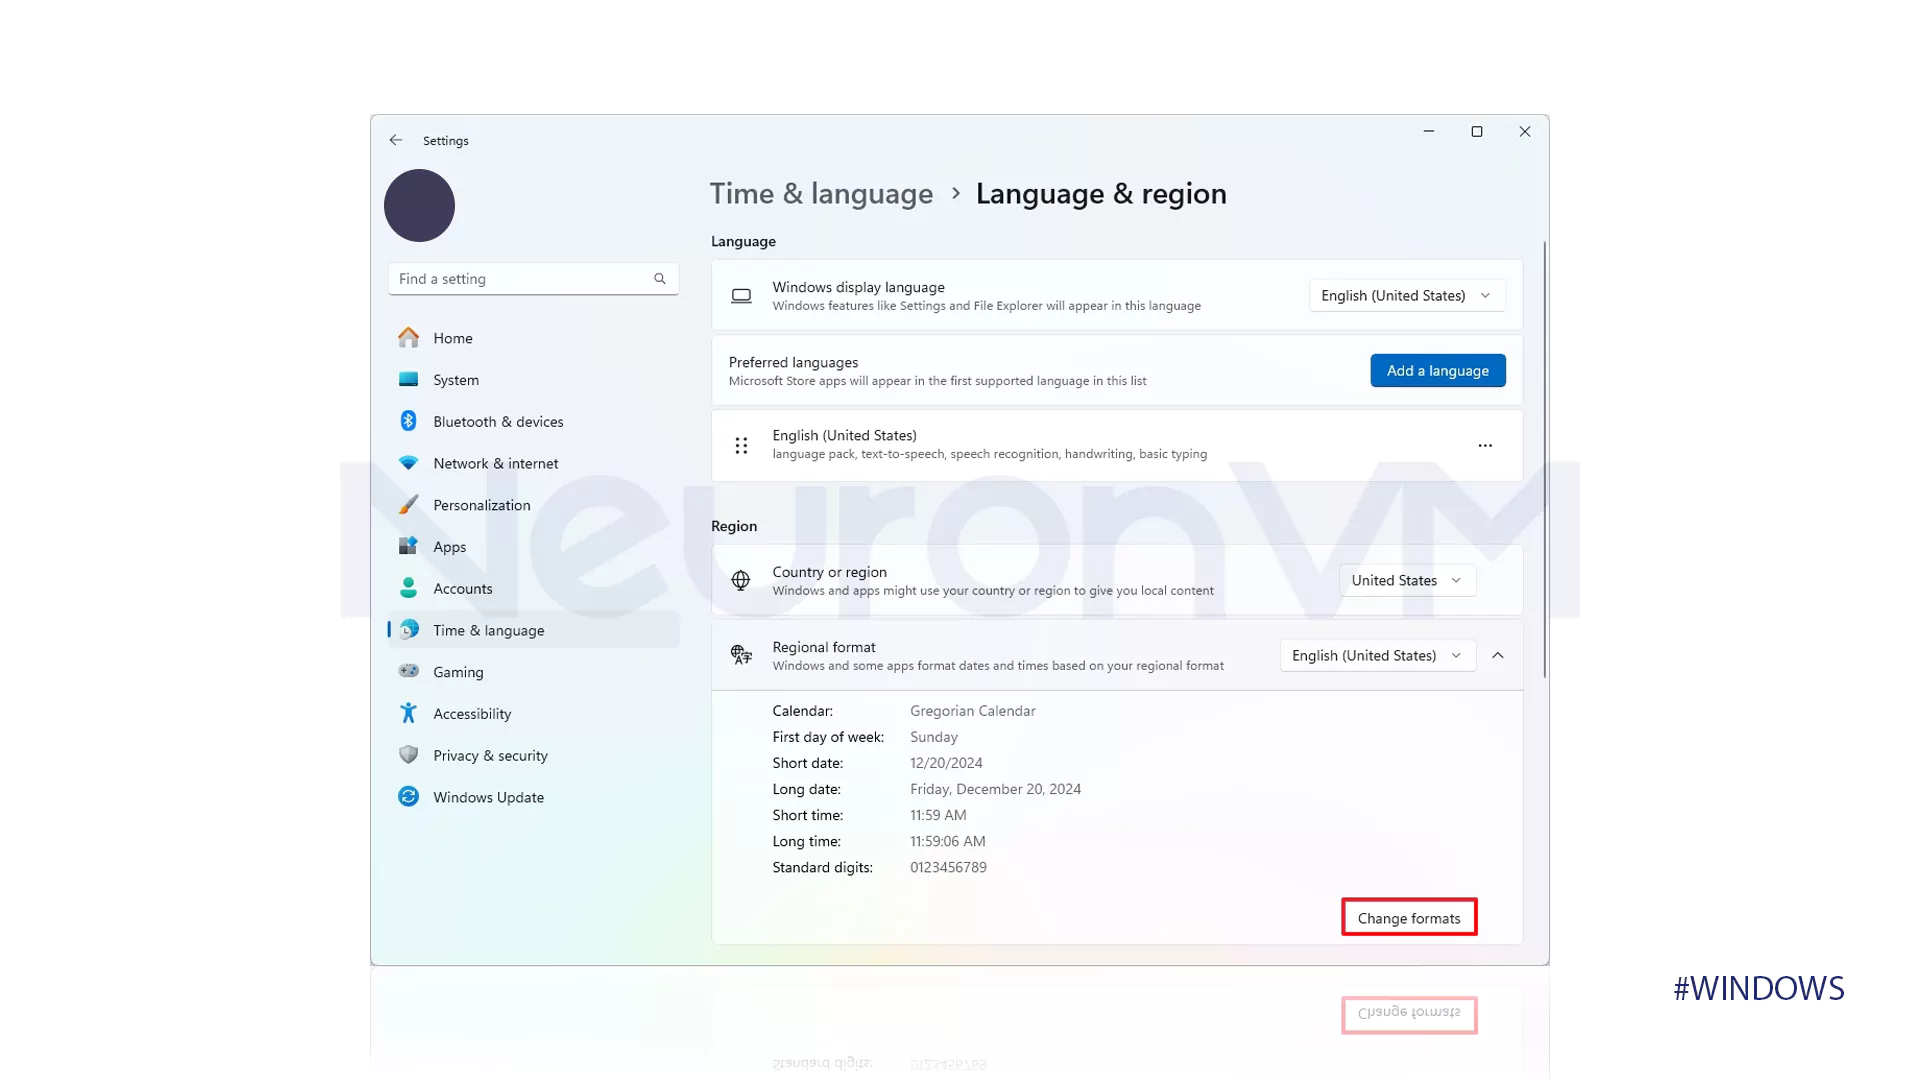
- In the “First day of week” section, choose the day when your week starts.
- In the first “short date” section, enter the day, month, and date in numbers.
- In the first “Long date” section, enter the day, month, and date in words.
- In the second “short date” section, enter the time on the clock.
- In the second “Long date” section, enter the time on the clock, including seconds.
Step 3: Change advanced region format settings
- Find the Language & region option and click on it.
- Go to the #Related Settings section.
- Click on the option that is shown in the picture below.
- In the “Formats”, click on the shown button in the picture below.
- In the opened window, go to the tab which is shown in the picture below.
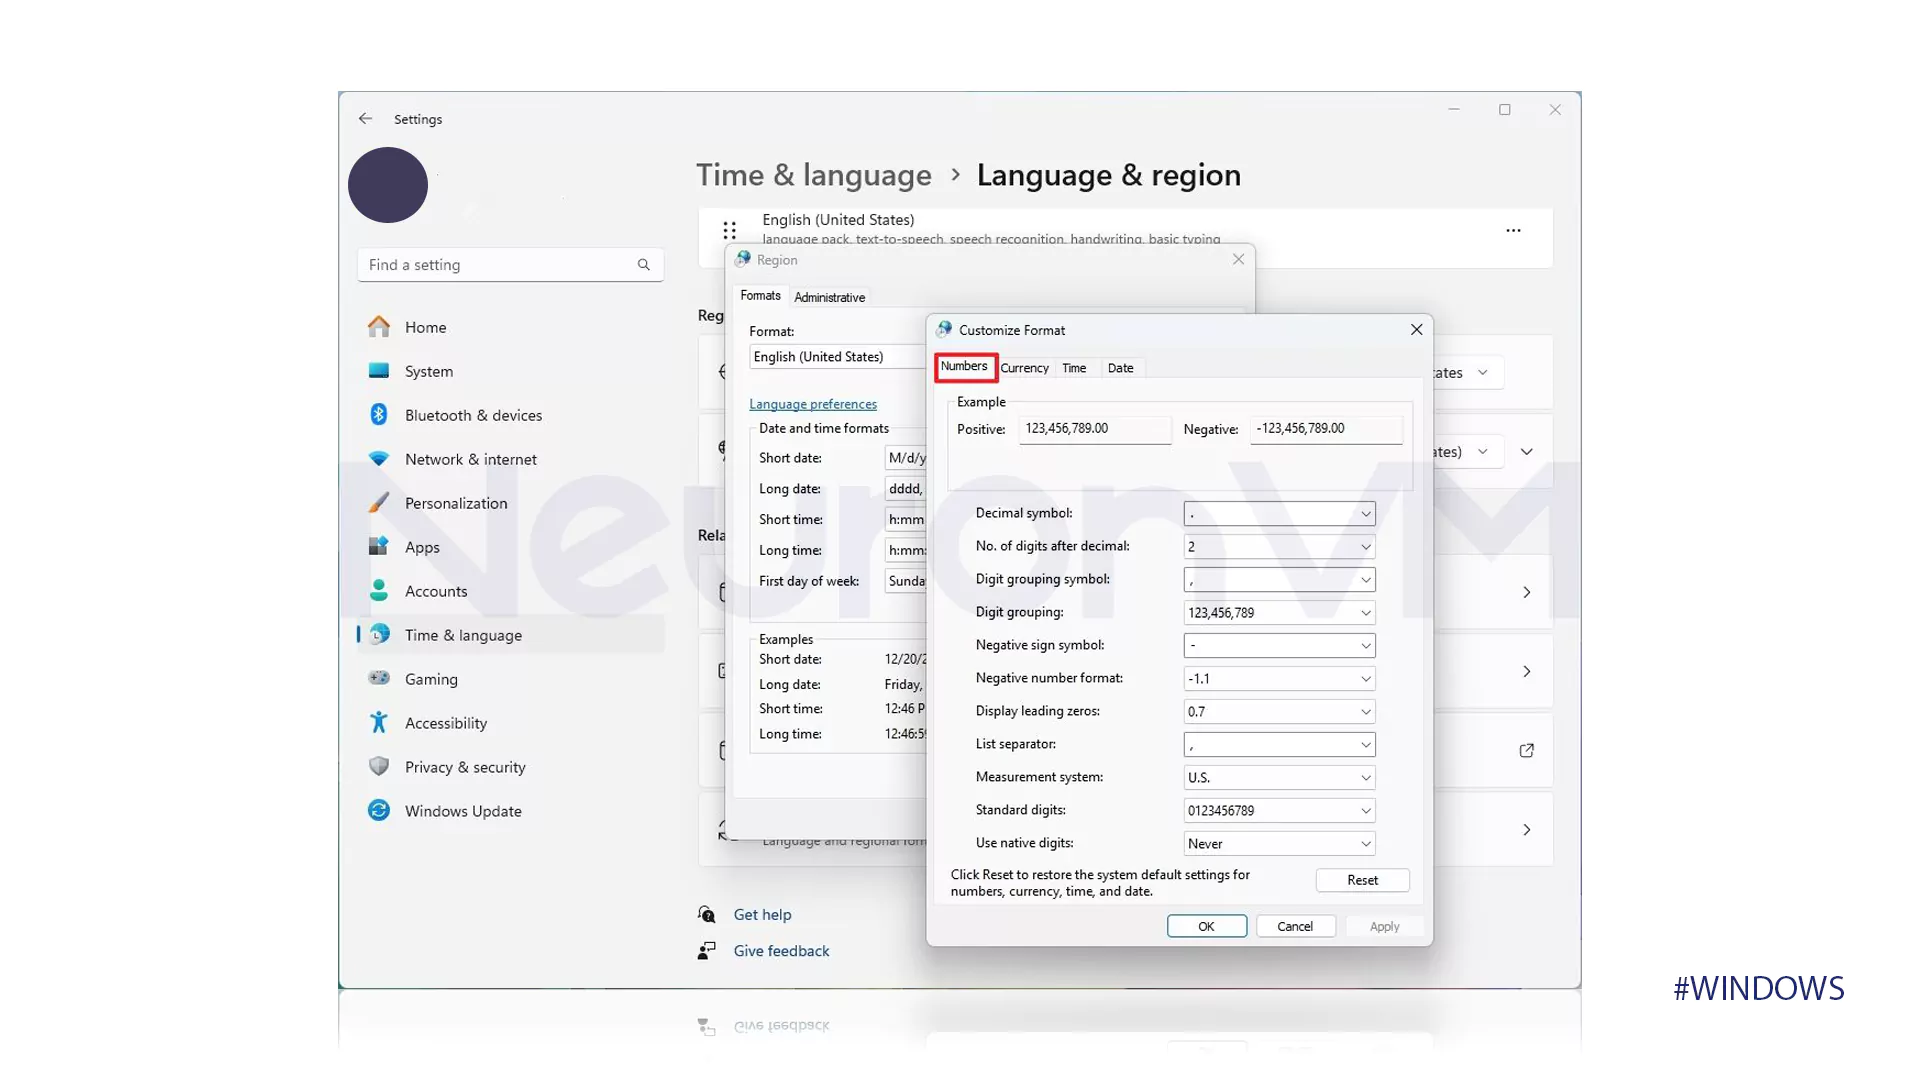
- Change the formats for numbers and symbols according to your taste.
- Then, click on the “Currency” tab.
- Change the formats for numbers and symbols in this tab too.
- Go to the “Time” tab.
- Change the formats for numbers and symbols with more details.
- Go to the “Date” tab.
- Change the formats for numbers and symbols with more details.
Conclusion
Changing the region in Windows 11, besides helping to improve the user experience, also helps users in doing their daily tasks and professions. Considering the universality of using Windows and the need to interact with different cultures and languages, getting to know this feature and using it correctly can help users to easily adapt to different environments. We recommend that you Windows users, according to your needs, regularly check your regional settings and change them if necessary to help improve the performance of your system and experience a better user experience. So, start today, and by reading this guide, learn how to change region on Windows 11!
Windows 11 allows you to choose your system region and country during the initial setup process, but what if you want to change it later? There could be several reasons why you might need to change the system region or country in Windows 11, such as testing Android apps that are only available in certain regions or simply moving to a new country. This guide will show you how to change the country or region in Windows 11 through the Settings app, so you can access the features and content that are specific to your desired location.
How to Change Country or Region in Windows 11?
Since the Android app’s support is limited only to the US for now, you might want to change the current region to the US to install the Android app if you are based out of the country. To set up a new country or region in Windows 11, do the following:-
Step 1. First, open the Settings app by pressing the Windows + I keys.
Step 2. Select Time & language category from the left side pane in the Windows Settings.
Step 3. Then on the right-side pane, click Language & region.
Step 4. After that, in the Language & region settings page, under the “Region” section, select your preferred country besides the “Country or region” option.
When you’re done, you can close the settings app safely. All the changes will be saved automatically.
That’s it!
Conclusion
To sum up, changing the country or region in Windows 11 is a simple process that can help you access region-specific features and content. By following the easy steps outlined in this guide, you can change your Windows 11 system region or country quickly and easily. Whether you need to test Android apps or simply want to switch to a different location, the Settings app in Windows 11 has got you covered. So go ahead and change your country or region in Windows 11 today and enjoy all the benefits of your desired location!
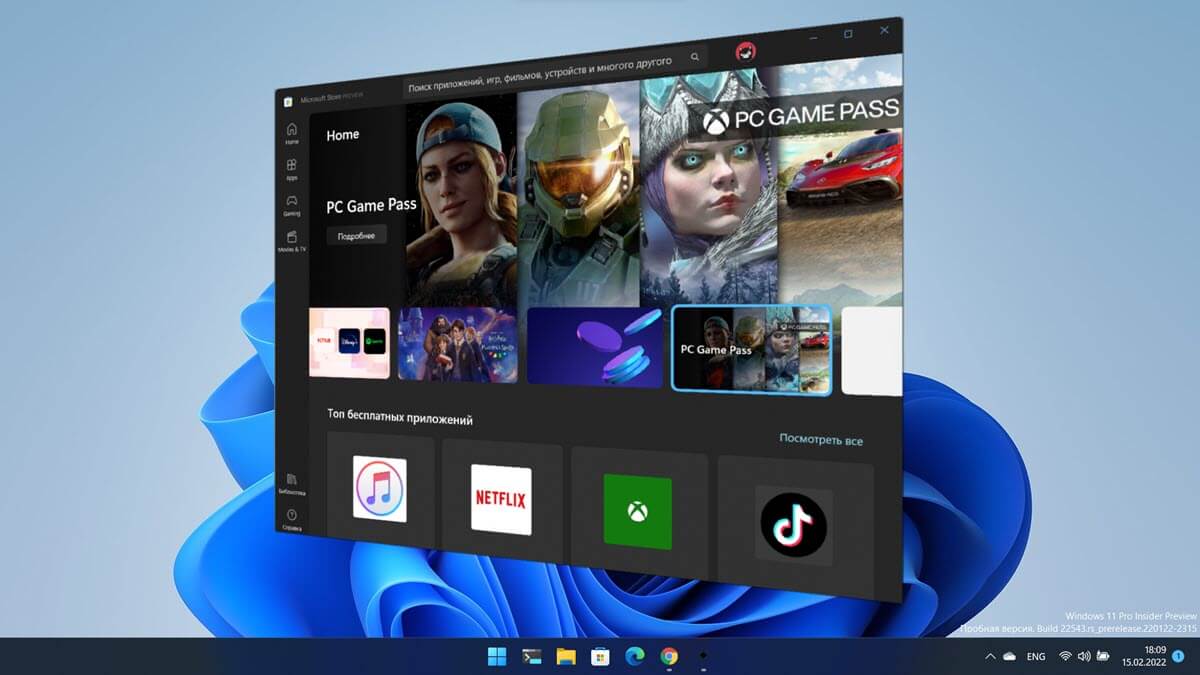
В Windows 11 приложение магазина Microsoft Store позволяет загружать игры и приложения в зависимости от региона вашей системы. В таком случае, что, если новое приложение или игра доступны исключительно в США, они могут быть недоступны для пользователей в других частях мира.
Тем не менее, это не значит, что вы не можете получить эту игру или приложение. Поскольку магазин Microsoft Store использует настройки региона системы для фильтрации содержимого, значит если вы поменяете настройки региона Windows 11, то, сможете устанавливать недоступные приложения в вашем текущем местоположении.
Например, часто бывает, что приложение или игра находится в разработке и доступно только для пользователей в другом регионе в виде предварительной версии, чтобы получить это приложение или игру, вам необходимо изменить регион вашей ОС.
В этом руководстве вы узнаете, как изменить регион Windows 11 или 10, чтобы поменять локализацию магазина Microsoft Store.
В самом приложении Магазина нет возможности изменить страну или регион. Вам потребуется внести изменения с помощью приложения «Параметры». Вот как это сделать.
Изменить страну или регион магазина Microsoft Store в Windows 11\10
Шаг 1: Откройте приложение «Параметры Windows» с помощью меню «Пуск» или используйте сочетание клавиш Win + I.
Шаг 2: В открывшемся приложении перейдите в раздел «Время и язык» → «Регион и язык».
Шаг 3: В разделе «Регион» в выпадающем меню выберите необходимую страну.
Шаг 4: Закройте параметры и перезагрузите проводник Windows или компьютер.
Шаг 5: Все! Откройте магазин Microsoft Store, теперь вы будете видеть игры и приложения для того региона, который выбрали в Шаге 3. После загрузки и установки приложения вы можете вернуть свой регион.
Хорошо, что Microsoft сделала эту настройку вполне доступной. Но немногие пользователи, знают, что они должны изменить страну или регион в параметрах Windows, для того чтобы изменить его в приложении магазина Microsoft Store.