
Download Windows Speedup Tool to fix errors and make PC run faster
If you are trying to stop Windows Update service using Command Prompt, but you receive a message The Windows Update service could not be stopped, here is what you can do to stop the Service. This message appears only when you use the Command Prompt to stop the Windows Update service – and if CMD doesn’t have the admin privilege. Many people are trying to disable automatic Windows 10 Update, but you cannot stop the service for some reason, then this article will help you.
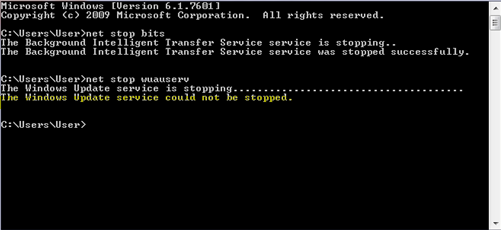
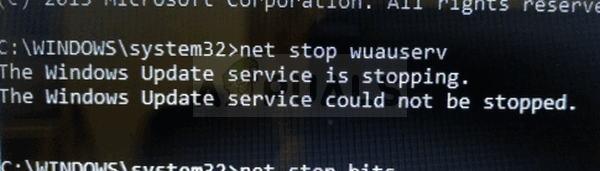
The usual command to stop the Windows Update service using CMD is:
net stop wuauserv
But this may at times return the error message. If you cannot stop it even via the Windows Services Manager, then read on.
If Windows Update Service won’t stop then this post will show you how to stop this WUAUSERV service on Windows 11/10:
- Stop Windows Update service using PID
- Check Service dependencies.
1] Stop Windows Update service using PID
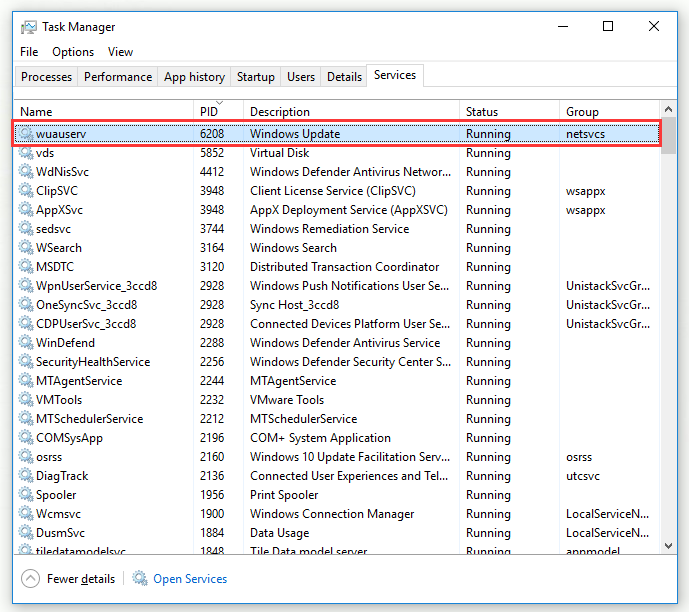
Every running process or service has a unique ID or PID. You can find it in the Task Manager and then use it to stop the service.
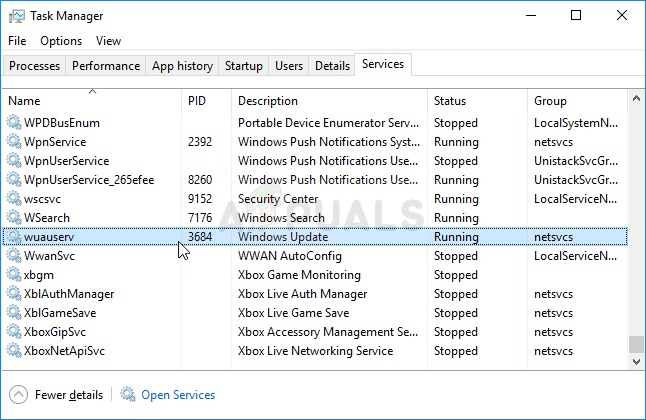
Open the Task Manager and go to the Services tab. Here you should find a service named wuauserv. You need to get the PID of that running service.

After that, open Command Prompt with administrator privilege and enter this command-
taskkill /f /pid <PID>
Do not forget to replace <PID> with original PID that you copied earlier from the Task Manager – which in our case is 6676.
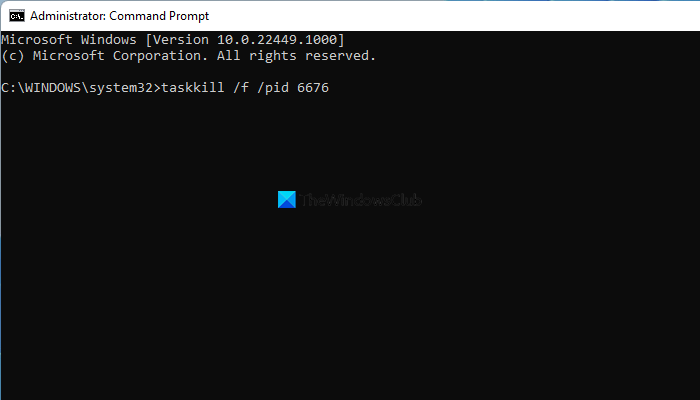
You should be greeted with a message like this-
SUCCESS: The process with PID 6676 has been terminated.
This means you have successfully stopped the Windows Update service.
2] Check Service dependencies
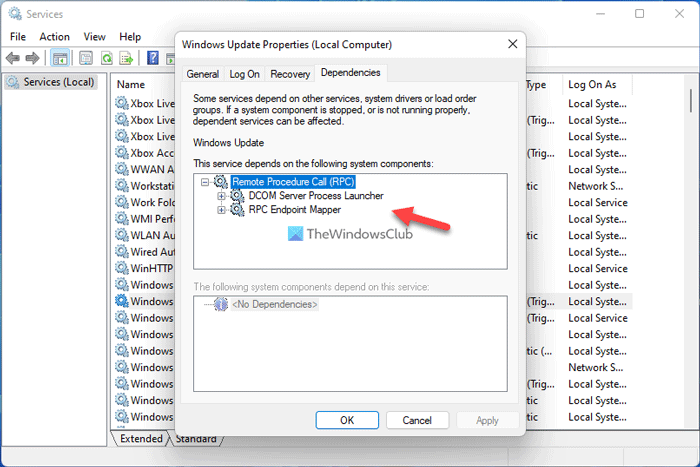
Most Windows services depend on other services. Sometimes those services can cause an issue due to some internal conflict. At such times, you should check the dependencies. In this case, you need to find Dependencies of this Windows Service. If any running service is using the WU service, then you may be required to stop that service first.
Hope this helps!
How do I force Windows Update Service to stop?
You can use Command Prompt to force the Windows Update service to stop in Windows 11/10. For that, you need to take the help of the Task Manager to find the PID, which is assigned with every running task. After that, you can open elevated Command Prompt and enter taskkill /f /pid <PID> command to stop the service from running on your PC.
Why can I not stop Windows Update service?
You must have administrative privilege to stop the Windows Update service. If your account doesn’t belong to the Administrator group, you might not be able to stop this service on your computer. Therefore, log in to your Administrator account and stop the Windows Update service using Services or Command Prompt. On the other hand, it is recommended to check the service dependencies as well.
Anand Khanse is the Admin of TheWindowsClub.com, a 10-year Microsoft MVP (2006-16) & a Windows Insider MVP (2016-2022). Please read the entire post & the comments first, create a System Restore Point before making any changes to your system & be careful about any 3rd-party offers while installing freeware.
Have you ever been in a situation when you get the issue saying the Windows Update service could not be stopped? Fortunately, there are some methods that you can try to fix the issue. Feel free to try these but you are recommended to try the first one and then move to another.
Fix 1: Stop Wuauserv process
When the Windows Update service cannot be stopped, you can try to use the Command Prompt with administrative permissions in order to get rid of the issue. You will use the command to end the process that is recognized by its PID. In case you want to use the Windows Update functionality in the future, you can just have to restart the process with the Service tool once you stop it.

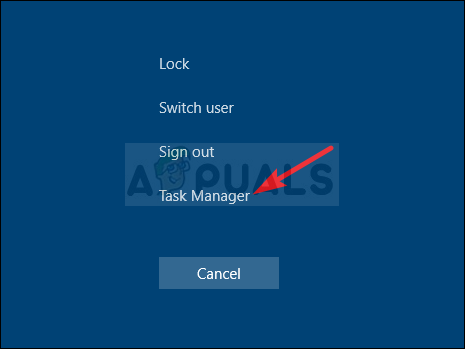
First of all, you will have to press the Ctrl + Shift + Esc keys at once to run the Task Manager utility. Another way is to press the Ctrl + Alt + Del key simultaneously and then select the Task Manager from the pop up window to open the Task Manager utility. Once it opens, click More details to expand the Task Manager. do not forget to click the Services tab and navigate to the wuauserv service located under the Name column. Do not forget to write down the PID number. Next, enter “cmd” in the search bar, right click Command Prompt and select Run as administrator. After that, type the command “taskkill /f /pid PID” and hit Enter on your keyboard. If the Command Prompt displays that the process with the PID has been terminated, meaning you have successfully solved the issue.
Fix 2: Clear the contents of the update folder
When resetting the components of the Windows Update or trying to solve the issue of the automatic updates, this set of commands can be used. They can delete the contents of the folder to stop the Windows Update service.
To be able to clear the contents of the update folder, you will need to type “cmd” in the search bar, right click Command Prompt and then select Run as administrator. Then, type the command “net stop wuauserv” and “net stop bits” and hit Enter on the keyboard. After that, open the Windows Explorer, click This PC, and navigate to the location: C:\Windows\SoftwareDistribution on the computer. In the next step, click SoftwareDistribution if you want to open it and press Ctrl + A key at once to select all files, right click on this window, and press Delete from the content menu in order to delete the contents placed in the SoftwareDistribution folder. You can just type the command “net start wuauserv” and “net start bits” in the Command Prompt and hit Enter to run them if you want to restart the Windows Update service and the BITS. After you have followed all the instructions above, you can stop the Windows Update service successfully.

Fix 3: Perform a repair installation
Performing a repair installation requires you to create bootable Windows 10 media and then perform a repair installation. Do not worry if you are afraid of losing your personal files with this method as you will not lose anything. This way will install the newest version of Windows. It means if you want the Windows Update to work, please try this one last time.
-
Make bootable Windows media
To make the Windows media bootable, the first thing that you will have to do is to click Download tool now to download the media creation tool from Microsoft. Please open the file that you have downloaded before, read the Applicable notices and license term well and click the Accept button to continue. Then, select Create installation media (USB flash drive, DVD, or ISO file) for another PC and press Next. The next thing that you will have to do is to choose the language, architecture, and edition that you want to use. You can also check the Use the recommended options for this PC and then click Next to continue. Another thing that you need to choose is the media that you want to use. Feel free to select either USB flash drive or ISO file. Actually, everything depends on the device that you want to use to store the image on. Please click Next if you want to continue. By doing so, the storage media that is connected to your computer will be displayed on the list. Please choose a USB or DVD drive from the list and click Next. In the end, the Media Creation Tool will download the important files and the process of downloading may take a few times, so please wait patiently. Once you have completed all the steps above, you will have your recovery media. In this stage, please start the recovery drive in order to fix the booting issue through the following steps.
-
Perform a repair installation
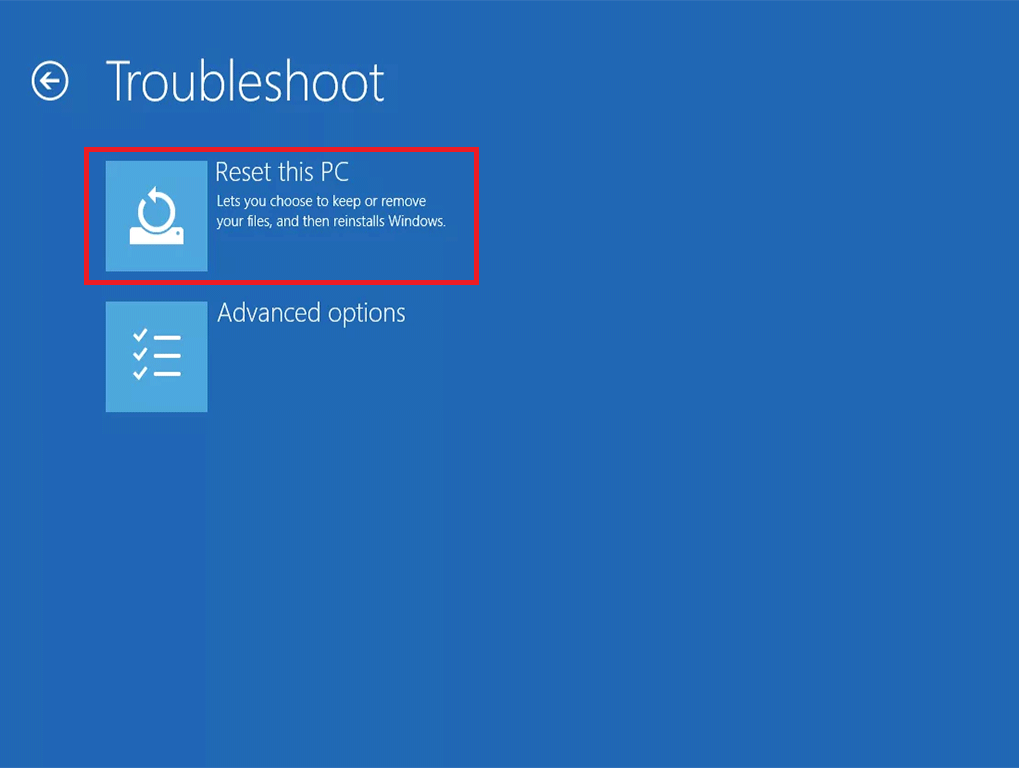
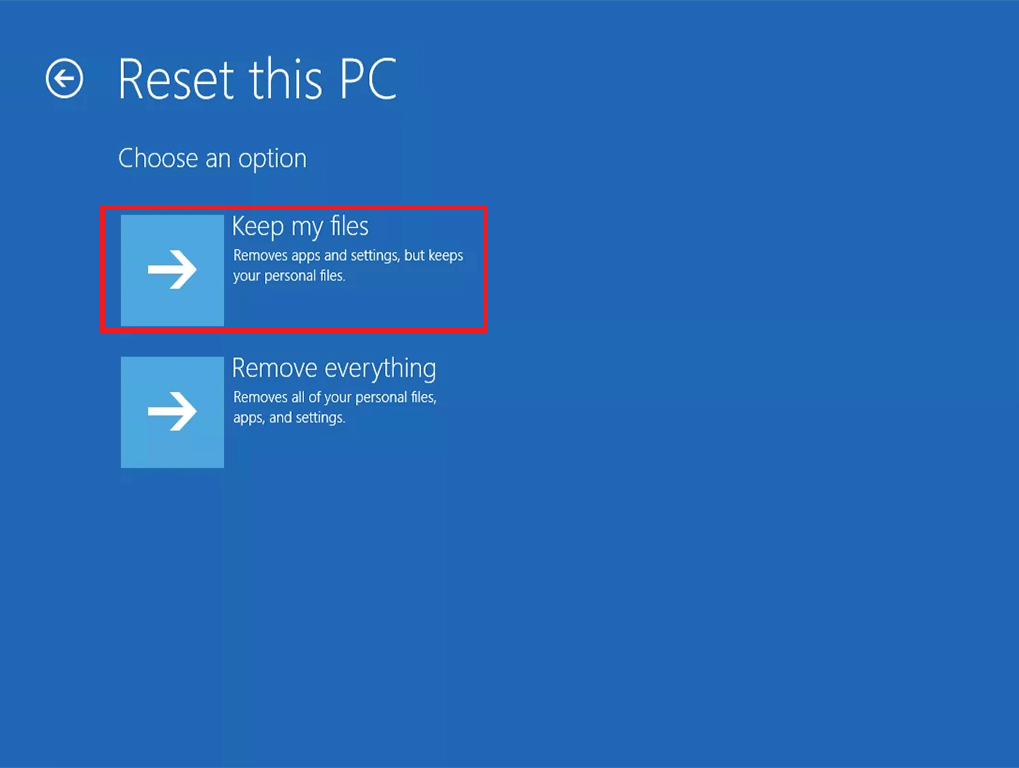
First, insert the installation drive that you just have created in order to boot the computer. Keep in mind that the initial screen will be different, depending on the operating system that you have installed. Second, choose the language to install, time, and currency format and keyboard or input method, and then hit Next. Third, click the Repair your computer option to enter the Windows Recovery Environment. Fourth, choose Troubleshoot first and then select Reset this PC. Fifth, choose Keep my files and wait while the Reset this PC process prepares to start. Sixth, once Reset this PC is on its way, type in the password for the account and then click Continue. Seventh, click the Reset button once you are really sure that it is what you want to do. After following the process of Reset this PC, you should be able to get access to your Windows. Now, it is time for you to check to see if the BSODs still show up in a loop.
There are some common reasons that cause the Windows Update service could not be stopped. Some of them include missing administrator privileges and there is something wrong with your computer. To fix the issue, you can try to stop Wuauaserv, clear the contents of the update folder, or perform a repair installation.
AUTHOR BIO
On my daily job, I am a software engineer, programmer & computer technician. My passion is assembling PC hardware, studying Operating System and all things related to computers technology. I also love to make short films for YouTube as a producer. More at about me…
Have you ever met the problem “Windows Update service could not be stopped”? This post will introduce you 3 methods to fix this issue and show you a powerful program — MiniTool ShadowMaker. With this program, you can back up your data in advance to keep it safe. Get more information from MiniTool website.
Windows Update Service Could Not Be Stopped
Have you ever met the situation that Windows Update service could not be stopped and do you know what causes this error?

It is often unknown what causes this problem, but there are still some common reasons.
Missing Administrator Privileges
This could prevent Windows Update service from stopping. In order to stop it, you need to use an elevated Command Prompt.
Something is Wrong with Your Computer
This is a more serious problem, so you need to consider upgrading in place or fixing the installation.
Fix “Windows Update Service Could Not Be Stopped”
- Stop WUAUSERV Process
- Clear the Contents of Update Folder
- Perform a Repair Installation
How to Fix “Windows Update Service Could Not Be Stopped” Problem
While automatically downloading and installing updates is great in theory, it’s a problem for most of you in reality. Meanwhile, you may wonder how to stop them.
Automatic updates are usually a good thing, so I recommend not turning them off in general. Therefore, the following methods should primarily be used to prevent automatic reinstallation of a troublesome update or to stop the installation of a potentially troublesome update.
Tip: If you are a Windows 10 Home user, you can’t stop security updates which are not delivered using the Windows Update service. You are not recommended to stop these security updates in any case.
The following part will offer you 3 potential methods to fix “Windows Update service could not be stopped” problem.
Tip: If Windows Update is not working, you can read this post to get methods: Bothered by Windows Update Not Working? Here’s What to Do.
Method 1: Stop WUAUSERV Process
If you can’t stop Windows Update service, you can use Command Prompt with administrative permissions to circumvent this issue. Using the command to end the process which is recognized by its PID. If you want to use the Windows Update functionality in the future, you need to restart the process with the Services tool once you stop it.
Step 1: Press the Ctrl + Shift + Esc keys at the same time to run the Task Manager utility. Alternatively, you can also press the Ctrl + Alt + Del key at the same time and then choose Task Manager from the pop-up window to open the Task Manager utility.
Step 2: In order to expand Task Manager, click More details. Click the Services tab, and navigate to the wuauserv service under the Name column. Note down the PID number.
Step 3: Type cmd in the search bar, right-click Command Prompt and then choose Run as administrator.
Step 4: Type the command taskkill /f /pid PID and press Enter on your keyboard.
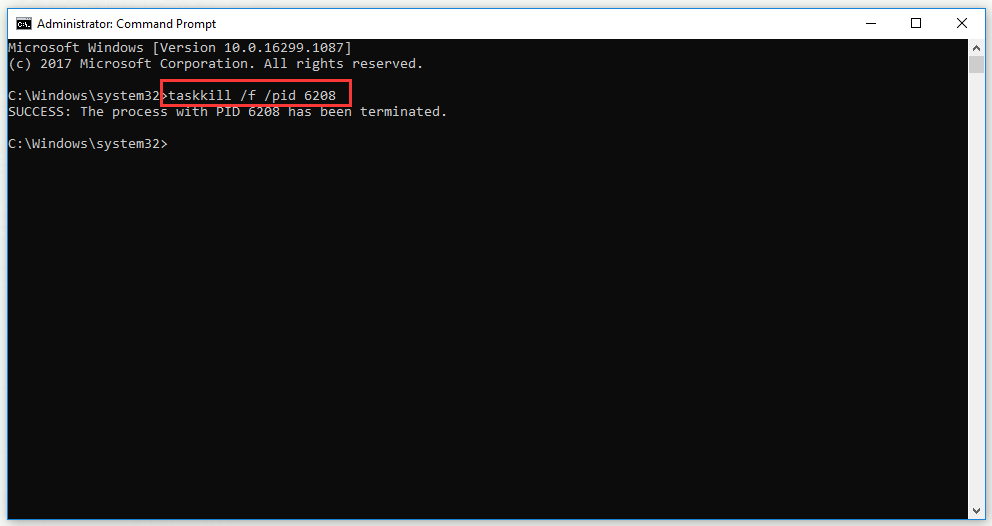
Tip: Make sure you replace PID with the wuauserv service number you noted down before.
If Command Prompt shows that the process with your PID has been terminated, it means you successfully fix “Windows Update service could not be stopped” problem.
Method 2: Clear the Contents of Update Folder
When you are resetting Windows Update components or you are just trying to fix an issue of the automatic updates, you can use this set of commands which will delete the contents of a folder to stop the Windows Update service.
Step 1: Type cmd in the search bar, right-click Command Prompt and then choose Run as administrator.
Step 2: Type the command net stop wuauserv and net stop bits and press Enter on your keyboard.
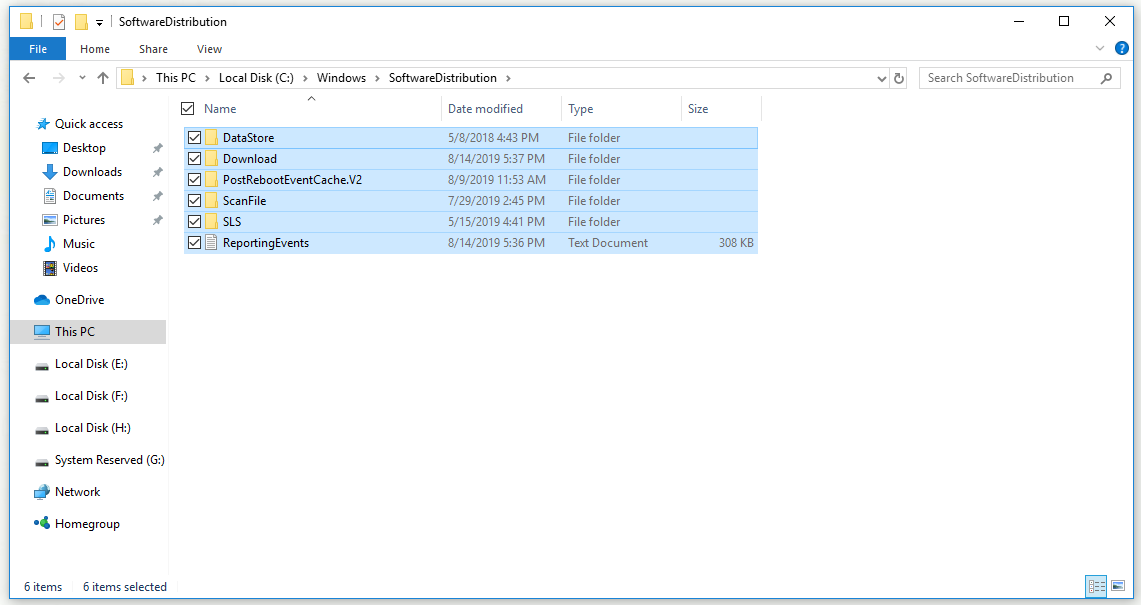
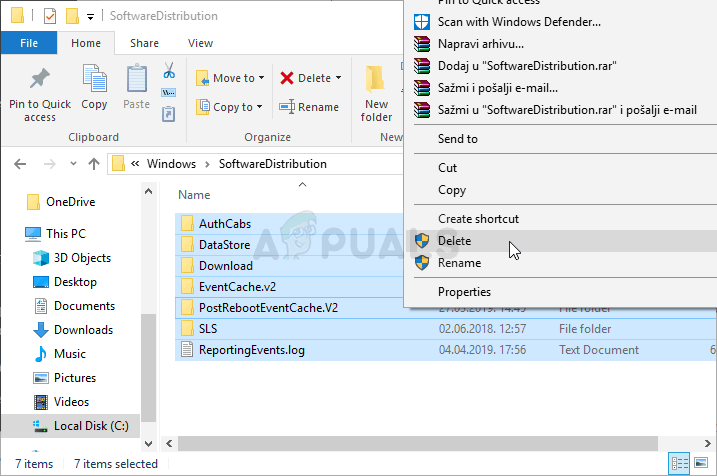
Step 3: Open Windows Explorer, click This PC and navigate to the location C:\Windows\SoftwareDistribution on your computer.
Step 4: Click SoftwareDistribution to open it and press the Ctrl+ A key at the same time to choose all files, right-click on this window and click Delete from the context menu to delete the contents of SoftwareDistribution folder.
Step 5: If you want to restart the Windows Update service and the BITS, type the commands net start wuauserv and net start bits in Command Prompt and press Enter to run them.
After you finish all the steps above, you can stop the Windows Update service successfully.
Method 3: Perform a Repair Installation
This method needs you to create bootable Windows 10 media and then perform a repair installation. You will not lose your personal files with this method. This method will install the latest version of Windows, so if you want Windows Update to work, you should try this one last time.
Create Bootable Windows 10 Media
Step 1: Click Download tool now to download the media creation tool from Microsoft. Open the file you just downloaded, read Applicable notices and license term carefully and click Accept to continue.
Step 2: Choose Create installation media (USB flash drive, DVD, or ISO file) for another PC and click Next.
Step 3: Select language, architecture, and edition you want to use. Or just check Use the recommended options for this PC. Click Next to continue.
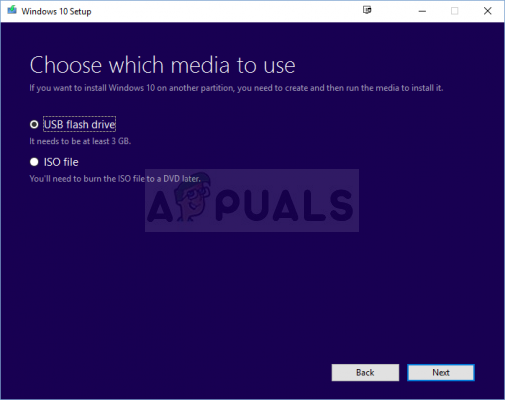
Step 4: Choose which media you want to use. You can choose USB flash drive or ISO file, which depends on the device you want to use to store this image on. Click Next to continue.
Step 5: The storage media connected to your computer will show up on the list. Select a USB or DVD drive from the list and click Next.
Step 6: The Media Creation Tool will download the necessary files. This process will take you a few time, please wait patiently.
After you complete all the steps above, you will have your recovery media. Now that you can start the recovery drive to solve the booting problem through the steps below.
Perform a Repair Installation
Step 1: Insert the installation drive which you have just created to boot your computer. Depending on the operating system you have installed, the initial screen will be different.
Step 2:Select language to install, time and currency format and keyboard or input method, and then click Next.
Step 3: Click the Repair your computer option to enter the Windows Recovery Environment.
Step 4: Select Troubleshoot firstly and then choose Reset this PC.
Step 5: Select Keep my files. Wait while the Reset this PC process prepares to start.
Step 6: Once Reset this PC is loaded, enter the password for your account and then click Continue.
Step 7: Click the Reset button once you’re absolutely sure that this is what you want to do.
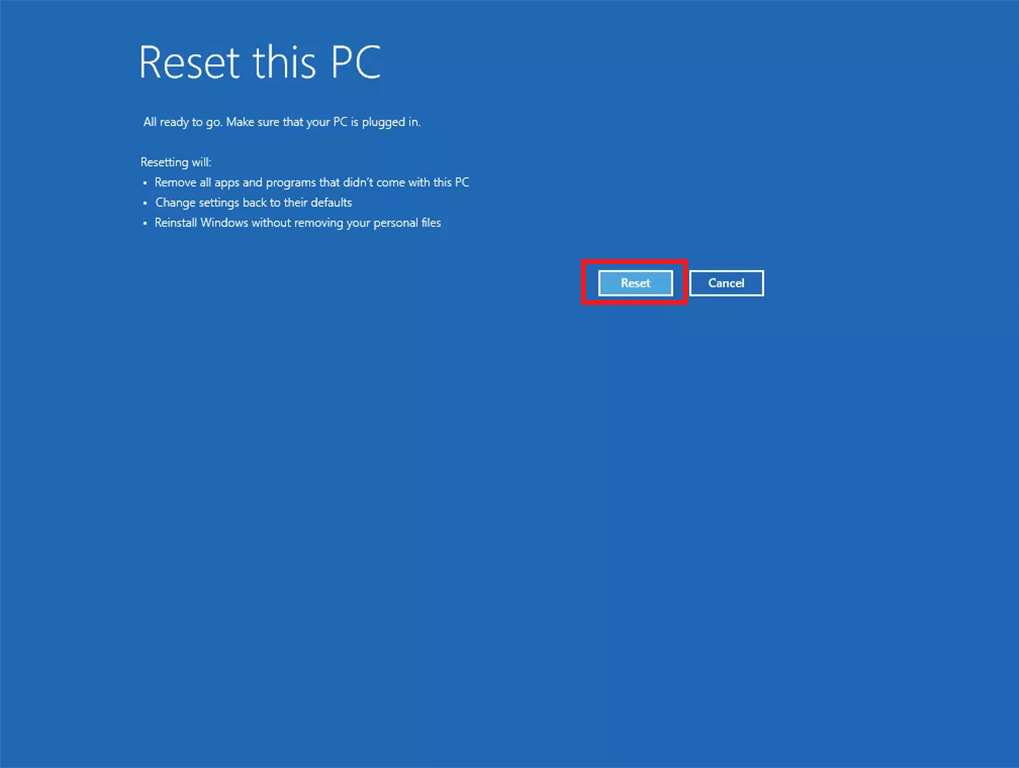
After completing the process of Reset this PC, you should again have working access to your Windows. Right now, you can check to see if the BSODs still appear in a loop.
Make a Backup with MiniTool ShadowMaker to Protect Your Windows
- Choose the Source File
- Choose a Destination Path to Save Backup Files
- Perform Backup Operation
Further Reading: An Useful Method to Protect Your Windows
Sometimes, an automatic Windows update can cause data loss. Thus, in order to keep your data safe, you need to back up your data in advance. You are highly recommended to use great backup software – MiniTool ShadowMaker.
Tip: It’s best to back up your system before Windows updates automatically so that you can restore the operating system to its previous state.
MiniTool ShadowMaker is a data protection and disaster recovery solution for your PC. With it, you can back up files, partitions, OS and even the whole disk and you are allowed to restore data if you encounter system crash, hard drive failure, and more.
Tip: If your hard drive is corrupted all of a sudden, read this post to find the way to recover data: This Tells How To Recover Data After Hard Drive Crash On Windows.
In addition, when your computer fails to boot, you can also restore the system to a normal state with created bootable media. It is also a powerful piece of file sync software that allows you to sync files and folders.
Right now, you can download MiniTool ShadowMaker Trial Edition to back up your data to prevent your data loss.
MiniTool ShadowMaker TrialClick to Download100%Clean & Safe
The following part will show you how to make a file backup with the Backup function of MiniTool ShadowMaker.
Step 1: Choose the Source File
1.Run MiniTool ShadowMaker to enter its interface.
2.After entering the main interface of MiniTool ShadowMaker, click the Backup tab to continue.
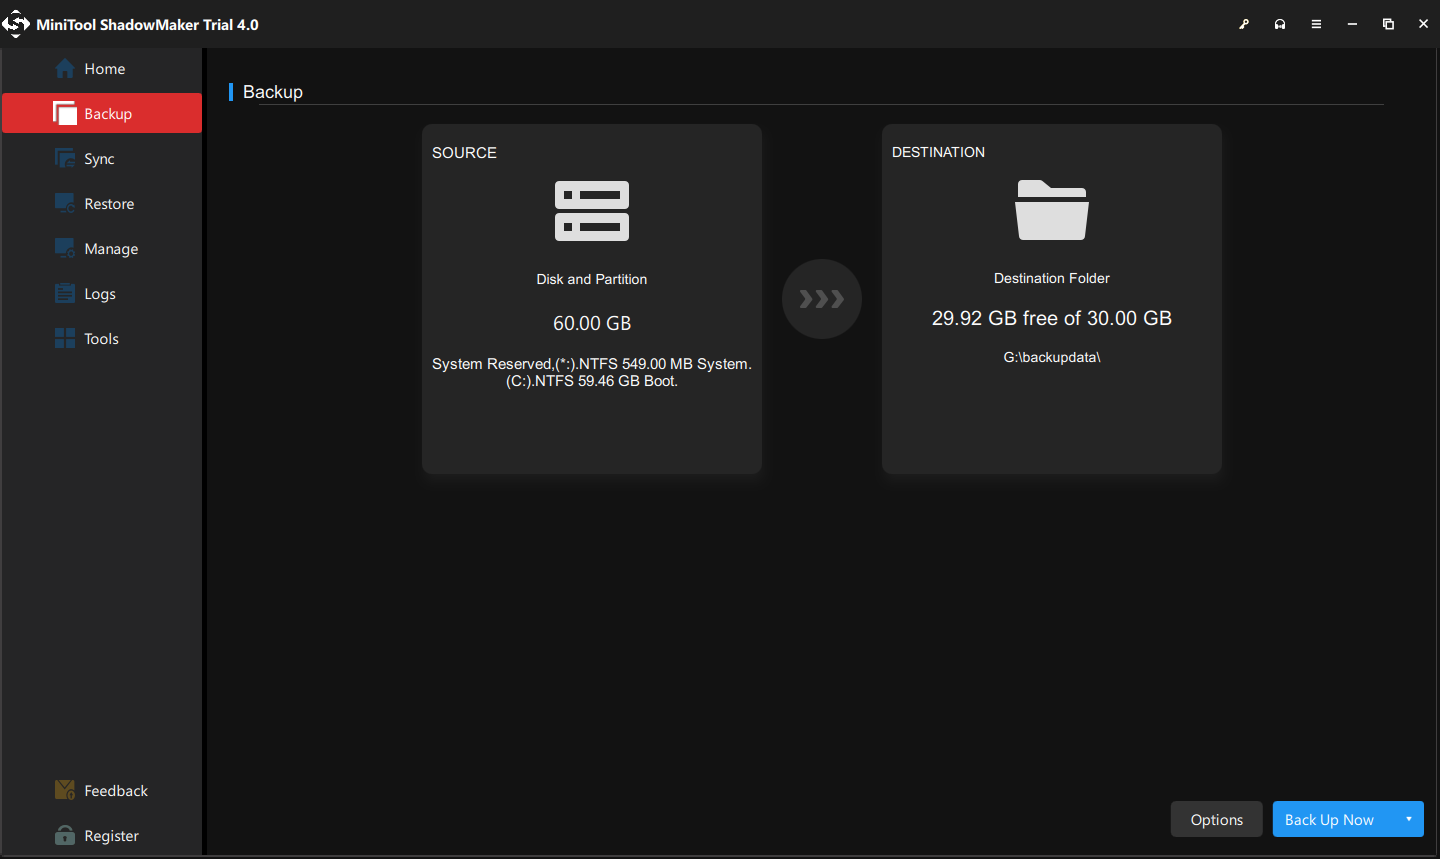
Tip: In general, the system reserved partition and C drive are selected by default. You can choose another backup source – file/folder/disk/partition which you want to back up.
3.Click the SOURCE module firstly and then select the source type you want to back up. Here, you should choose files as backup source to avoid losing data.
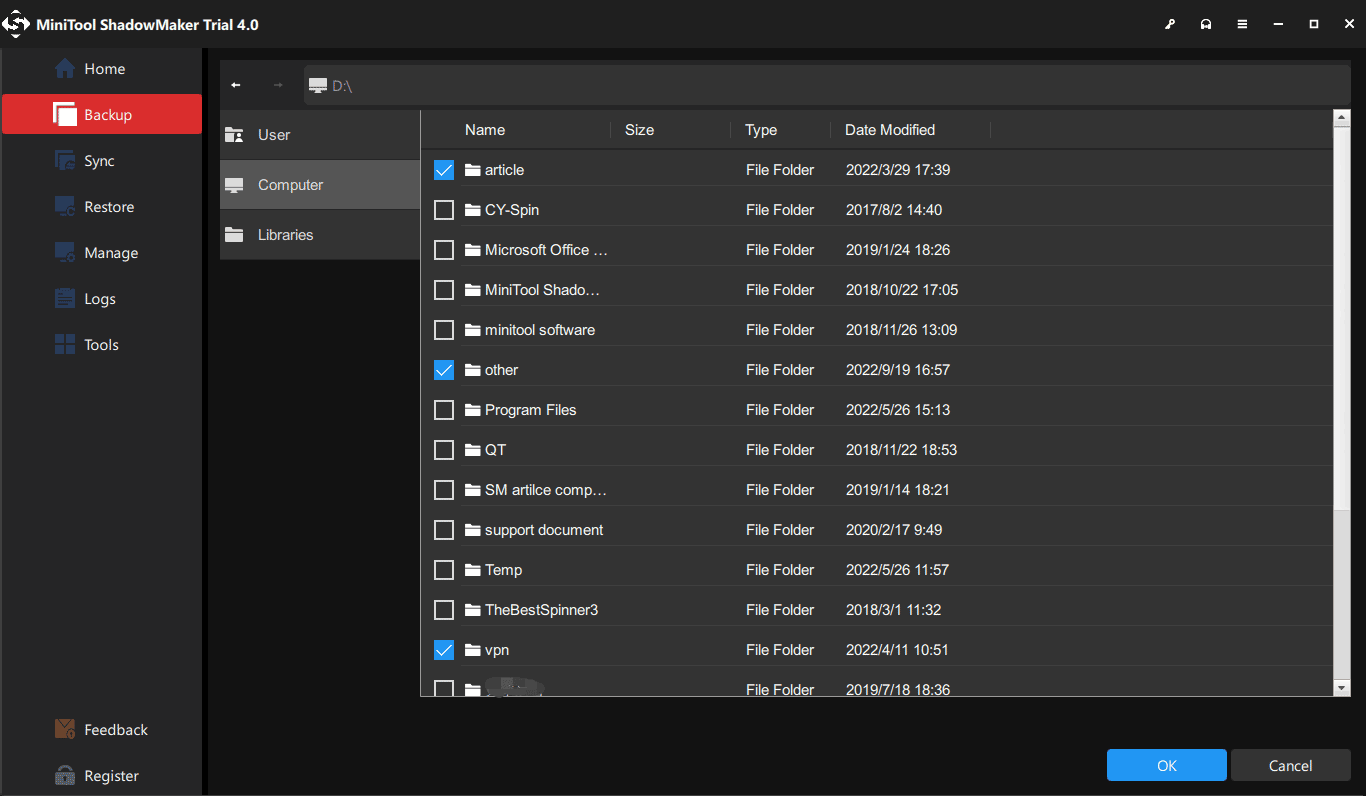
Step 2: Choose a Destination Path to Save Backup Files
1.Click the DESTINATION module.
2.Then click a destination where you want to save backup files. There are 5 types of destination paths for you to choose – User, Libraries, Computer, Shared. Click OK to continue.

Step 3: Perform Backup Operation
1.Click Back Up Now to execute the backup operation immediately.
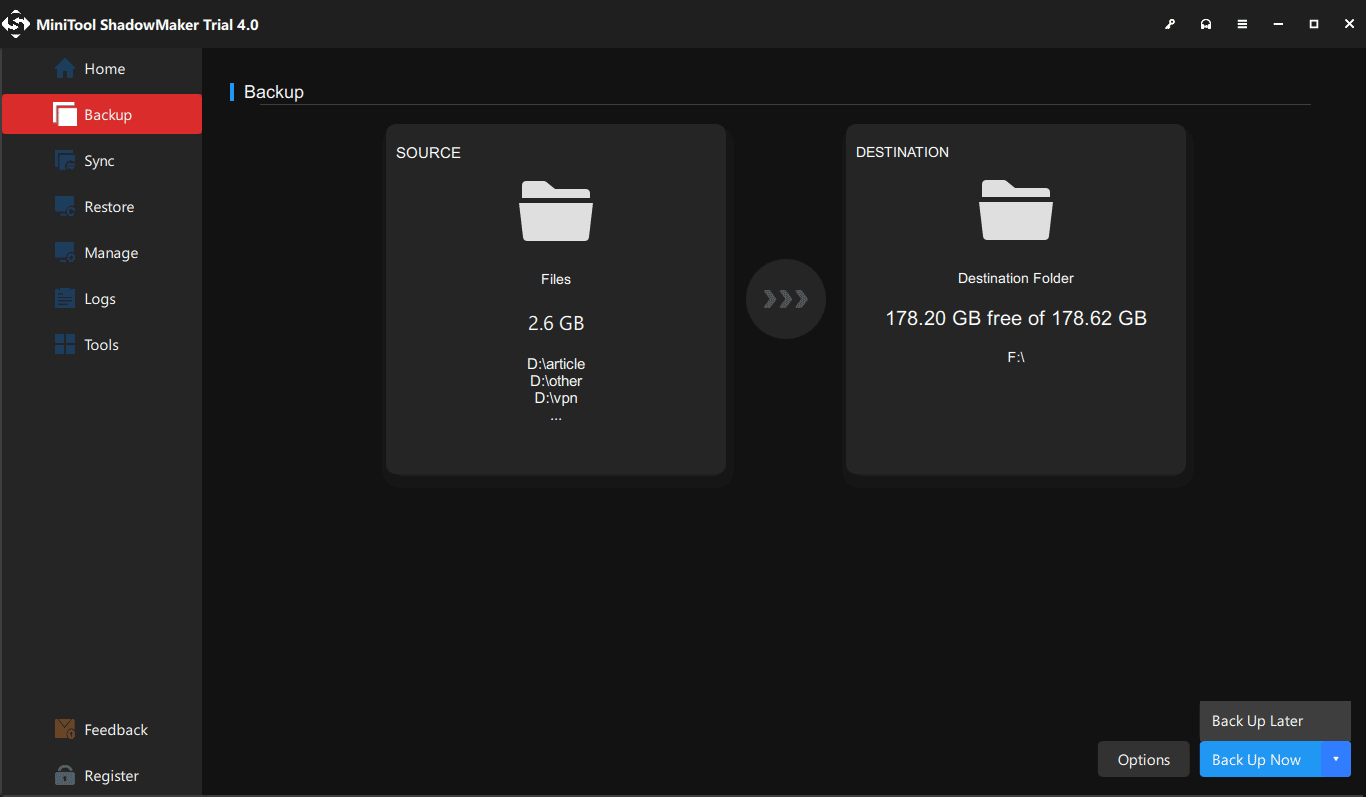
Tip: You can also choose Back Up Later to carry out the operation later, and you need to click Back Up Now in the Manage page to execute the pending operation.
2.Read the confirmation and click OK to continue. You can also check Shut down the computer when all the running backup tasks are finished.

Tip: If you want to make some advanced settings for backup files, you can click Schedule Settings, Backup Options, and Backup Scheme in Options, but you need to change the settings before you click Back up Now. If you are interested in the Scheme function, read this post – 3 Types of Backup: Full, Incremental, Differential – MiniTool
In addition to Backup, Sync is also a powerful tool of MiniTool ShadowMaker to protect your data. With this function, you can sync files and folders. The following part will show you how to sync files with this tool briefly.
Step 1: Run MiniTool ShadowMaker to enter its interface.
Step 2: Select the files you want to sync from the SOURCE tab and then select a destination where you want to save the synced files from the DESTINATION tab.
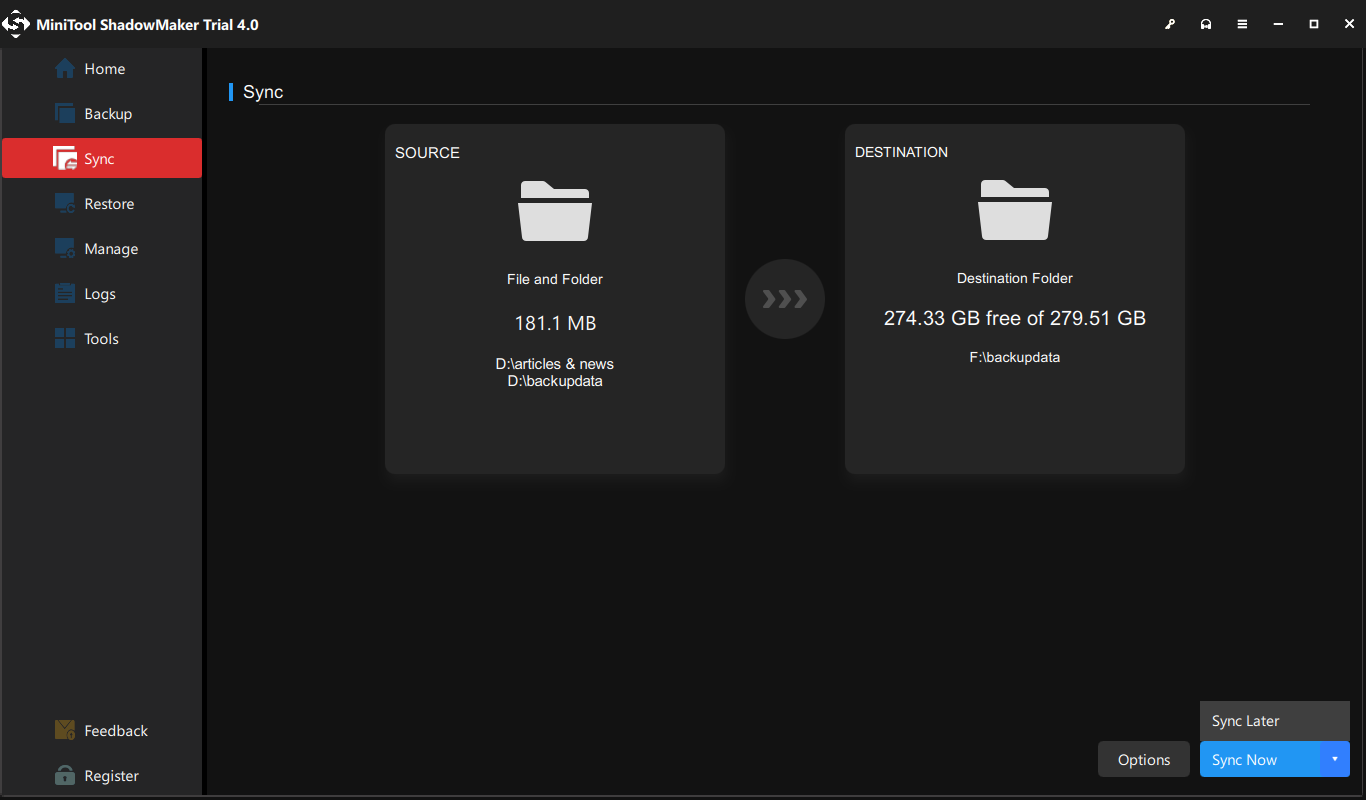
Step 3: Click Sync Now to perform this operation immediately.
Tip: You can also choose Sync Later to carry out the operation later, and you need to click Sync Now in the Manage page to execute the pending operation.
After you complete all the steps above, you can successfully sync files with MiniTool ShadowMaker.
If you want to learn more about sync and get more details of syncing files with MiniTool ShadowMaker, click to read this post – The Best File Synchronization Software – MiniTool ShadowMaker.
After reading this post, I successfully solve “Windows Update service could not be stopped” issue. Meanwhile, with MiniTool ShadowMaker, I create a backup in advance.Click to Tweet
Conclusion
This post has shown you 3 useful methods to solve “Windows Update service could not be stopped” issue. It also introduces you a useful tool to back up your data when you encounter this issue. If you cannot disable Windows Update service either, you can try methods above.
If you have any problems when you are using our program, feel free to contact us with the email [email protected].
Windows Update Service Could Not Be Stopped FAQ
How do I force Windows Update Service to stop?
- Press Win + R to open the Run command. Next, type services.msc and press Enter to open Services.
- From the Services list, find the Windows Update service and open it.
- Under the General tab, change Startup type to Disabled. Click Apply > OK.
- Restart you PC.
How do I manually kill a service in Windows?
- Right-click the Start menu and select Run.
- Look for the service, check the Properties and identify its service name.
- Once found, open a command prompt. Type sc queryex [servicename] and press Enter.
- Identify the PID.
- In the same command prompt type taskkill /pid [pid number] /f and press Enter.
What service is Windows Update?
It is a free service offered by Microsoft. It provides updates such as service packs and patches for the Windows operating system and other Microsoft software. It can also be used to update drivers for popular hardware devices.
What service is Wuauserv?
By default, the Windows update service is set to trigger manually. Recommended setting is Windows 10. One loads automatically at startup. Manually load when the process requires it (which can cause errors for services that require automatic services).
Windows is one of the most extensively used operating systems around the globe by both home users and professionals; the system maintains its smooth functioning by relying on key updates from time to time. To assure the same seamless experience for the user’s convenience System has come up with an automated function that downloads and installs all Windows updates, regardless of their nature. Unfortunately, some users are still getting “Update service was shutting down” error.
Automated service does not always work and can become the pivotal reason for witnessing the error, “we could not complete the install because an update service was shutting down”. This can render the system obsolete for an extended period, and users may begin to notice detrimental impacts on Windows computer. However, when such automatic update fails and users have to do it manually, it may be rather unpleasant. There can be several possible causes for this, but the most common is that the Windows update service may have crashed or been deactivated. See – How to Fix Update Error Code 80072EFE in Windows (Solved!).
We could not complete the Install because an update service was shutting down
Here is how to fix Update service was shutting down” in Windows 11 or 10 –
Way-1: Windows Update Service needs to be Restarted
Main possibility behind the error We could not complete the Install because an update service was shutting down is the failure of the associated service. Go with the steps listed below to fix it:
- Press the Windows key and R simultaneously.
- Type services.msc.
- Press OK.
- Scroll down in the window to locate and double-click on Windows Update Service.
- Click the dropdown for Startup type.
- Select – Automatic
- Under Service status click on Start.
- Then, click Apply and OK.
- Once done, Restart your PC, and let the changes take effect.
Way-2: Try Using Windows Update Troubleshooter
Windows update troubleshooter can be the go-to tool as this utility scans for any possible obstacles that may be restricting your system functionalities and resolves the error. So try using these steps to run the repair:
Windows 11:
- Click on Search.
- Type troubleshoot.
- Press Enter to launch the associated Settings page.
- Select Other troubleshooters.
- Go to the Windows update section and click on Run.
Windows 10:
- Select Start followed by Settings.
- Then, go to Updates & Security.
- Select Troubleshoot and Additional troubleshooter.
- Navigate to Windows Update and then click on Run the troubleshooter.
Way-3: Temporarily Disabling Third-Party Antivirus
We could not complete the installation because an update service was shutting down, error like this is majorly caused by third-party antivirus programs. Therefore, you can try temporarily disabling the antimalware app to rescue this Windows update installation error through the steps mentioned below:
- Press Windows+S.
- Type – appwiz.cpl and press Enter.
- Select the program you want to remove, then click the Uninstall button.
- Restart your PC and check if the problem is solved.
After uninstalling the third-party antivirus suite, reboot your computer and run Windows Update again to see whether the problem has been resolved or not. If, the error persists follow the next way.
Way-4: Installing Recent Serving Stack Update
Servicing stack updates are an important component of Windows as they increase the dependability of the update process to prevent potential errors while installing the feature updates in the system. However, to fix the concerned error you can try downloading and installing the most current servicing stack update
Before downloading you must be sure of your Windows, whether it’s 32-bit or 64-bit.
First, check out, how to determine your Windows version and download the servicing stack update.
- Press Winkey+I.
- When the Settings app appears, choose System.
- Scroll down the right side to look for About (In Windows 10, About is located in the left pane).
- Note down OS build under Windows Specifications on the right panel to determine which version you are running.
- Click here to reach Microsoft Update catalog.
- Type the OS build number in the search bar and hit Enter.
- Find the servicing stack update that corresponds to your Windows version.
- Click on Download to open a separate page.
- Click on the solitary link lying there to download the standalone copy of the SSU.
- Double-click on the .MSU file and confirm the installation process by clicking Yes on the prompt.
- Then, reboot your machine and run a check for updates again to see whether the issue stating we could not complete the installation because an update service was shutting down has been resolved or not.
Way-5: Try Fixing Windows Update Database
Windows update database if corrupted or malfunctioned could hinder the upgrading process in Windows to and force the user to receive the abovementioned error. In such case, you must repair the damaged Windows update database with the following steps:
- In the Windows search field, type Command Prompt.
- Then click on Run as administrator.
- Select Yes on the User account control dialog.
- Put the following commands into the Command Line window and press Enter after each one:
net stop wuauserv
net stop cryptSvc
net stop bits
net stop msiserver
ren c:\windows\SoftwareDistribution softwaredistribution.old
Ren C:\Windows\System32\catroot2 Catroot2.old
net start wuauserv
net start cryptSvc
net start bits
net start msiserver- Sit tight till it’s done, and then try again.
Way-6: Try Running System File Checker
To repair this error, which reads, “We could not complete the install because an update service was shutting down,” consider using the SFC utility program, which has the capability to remediate the installation problem.
- Open Command Prompt as administrator.
- Type the following command and hit Enter to proceed:
sfc /scannow.
- The tool will quickly begin verification phase of system scan.
- When an error message is displayed after running SFC, enter the following lines of command one at a time:
DISM /Online /Cleanup-Image /CheckHealth
DISM /Online /Cleanup-Image /ScanHealth
DISM /Online /Cleanup-Image /RestoreHealth
Way-7: Use In-place upgrade to fix Update service was shutting down
In-place upgrade is the method which can upgrade the Windows system to the most recent edition which includes the latest release of quality patch. In this scenario where the update issues are portraying the error message Update service was shutting down will come to end through the following steps:
- Search the keyword ‘Windows 11/10 download’ and go to the official page.
- Navigate down to the section displaying “Download Windows 11 Disk Image (ISO)”.
- Choose – Select Download.
- Click – Windows 11 (multi-edition ISO).
- Now, select – Download.
- Opt for a Language and Confirm.
- Next, download the ISO file (xx-bit) and right-click on it.
- Select – Mount.
- Once you’re in the next folder, double-click on the executable setup file.
- Select Next.
- Then the license agreement wizard will be upfront; click on – Accept.
- The program will scan the system to confirm that there is required free space on your system.
- On the “Ready to install” window, mark the option – “Keep personal files and apps”.
Select – Install. - The computer will restart multiple times and bring you forward to the lock screen where you’ll need to sign in only to get access to the desktop.
With these 7 ways, we believe that you must be able to fix this error that states we could not complete the Install because an update service was shutting down in windows.
Methods:
Way-1: Windows Update Service needs to be Restarted
Way-2: Try Using Windows Update Troubleshooter
Way-3: Temporarily Disabling Third-Party Antivirus
Way-4: Installing Recent Serving Stack Update
Way-5: Try Fixing Windows Update Database
Way-6: Try Running System File Checker
Way-7: Use In-place upgrade
That’s all!!
This problem appears when users are unable to stop the Windows Update Service using the Services tool or Command Prompt. The reasons for trying to stop the service are numerous and many problems regarding Windows Update can be resolved simply by stopping the service and starting it once again.
This article will feature some modules which may cause this problem to occur as well as some workarounds which can be used to stop the service forcefully. Make sure you follow the instructions carefully and the problem should be resolved in no time.
What Causes the Windows Update Service to prevent being Stopped?
The causes of this problem are often unknown and this problem often needs to be circumvented rather than resolved. Nonetheless, when Windows Update service stops misbehaving, new updates are installed and they often resolve the problem. However, here are some common causes:
- Missing administrator privileges may prevent Windows Update Service from stopping and you should use an elevated Command Prompt in order to stop it.
- Something is wrong with your computer on a more serious note and you should consider an in-place upgrade or a repair installation.
Solution 1: Stopping wuauserv Process
Command Prompt with administrative permissions can be used to circumvent this problem. The command you will use will end the process recognized by its PID and it should be stopped. Note that you will need to use the Services tool to restart the process once you stop it if you wish to use the Windows Update functionality in the future.
- Use the Ctrl + Shift + Esc key combination by pressing the keys at the same time to open the Task Manager utility.
- Alternatively, you can use the Ctrl + Alt + Del key combination and select Task Manager from the popup blue screen which will appear with several options. You can also search for it in the Start menu.
- Click on More details at the bottom left part of the window in order to expand Task Manager. Navigate to the Services tab and right-click somewhere around the names of the columns and check the box next to the PID entry in the context menu.
- Locate the Windows Update service by checking the Description column or by looking for the ‘wuauserv’ service under the Name column. Note down its PID number.
- Search for “Command Prompt” either right in the Start menu or by tapping the search button right next to it. Right-click on the first result which appears at the top and select the “Run as administrator” option.
- Users who are using an older version of Windows can use the Windows Logo Key + R key combination in order to bring up the Run dialog box. Type in “cmd” in the box and use the Ctrl + Shift + Enter key combination in order to run Command Prompt as an administrator.
- Copy and paste the command shown below and make sure you click the Enter key on your keyboard.
taskkill /f /pid [PID]
- Make sure you replace [PID] with the number you noted down regarding Windows Update Service. If the Command Prompt reports that the service was successfully stopped, your problem is resolved!
Solution 2: Clearing the Contents of Update Folder
If you want to stop the Windows Update Service because you are either resetting Windows Update components or if you are simply trying to solve a problem regarding the automatic updates, you can follow this set of commands along with deleting the contents of a folder. The method is similar to Solution 1 but the command is different.
- Search for “Command Prompt” either right in the Start menu or by tapping the search button right next to it. Right-click on the first result which appears at the top and select the “Run as administrator” option.
- Users who are using an older version of Windows can use the Windows Logo Key + R key combination in order to bring up the Run dialog box. Type in “cmd” in the box and use the Ctrl + Shift + Enter key combination in order to run Command Prompt as an administrator.
Running CMD using Run box - Copy and paste the command shown below and make sure you click the Enter key on your keyboard.
net stop wuauserv
net stop bits
- Navigate to the following location on your computer by opening the Windows Explorer and clicking on This PC:
C:\Windows\SoftwareDistribution
- Use the Ctrl+ A key combination to select all files, right-click on one of them and choose Delete from the context menu.
- If you wish to restart both the BITS and the Windows Update service, run the following set of commands in Command Prompt:
net start wuauserv
net start bits
Solution 3: Perform a Repair Installation
This method might seem desperate as it includes creating a bootable Windows 10 media and actually performing a repair installation but it can help you since you won’t lose any of your personal files. This has helped plenty of users deal with the problem and you should check it out as a last resort, especially if you are trying to get Windows Update to work as this will also install the latest version of Windows.
- Download the Media Creation Tool software from Microsoft’s website. Open the downloaded file you just downloaded and accept the terms and conditions.
- Select the Create installation media (USB flash drive, DVD, or ISO file) for another PC option from the initial screen.

- The language, architecture, and other settings of the bootable drive will be chosen based on your computer’s settings, but you should uncheck the Use the recommended options for this PC in order to select the correct settings for the PC which has the password attached to it (if you are creating this on a different PC, and you probably are).
- Click Next and click on the USB drive or DVD option when prompted to choose between USB or DVD, depending on which device you want to use to store this image on.
- Click Next and choose the USB or DVD drive from the list which will show the storage media connected to your computer.
- Click Next and the Media Creation Tool will proceed to download the files necessary to install create the installation device.
Now that you probably have your recovery media, we can start actually solving the booting issue by starting the recovery drive which you should boot from.
- Insert the installation drive you own or which you have just created and boot your computer. The initial screen will differ depending on the operating system you have installed.
- Windows Setup should open prompting you to enter the preferred language and time and date settings. Enter them correctly and choose the Repair your computer option at the bottom of the window.
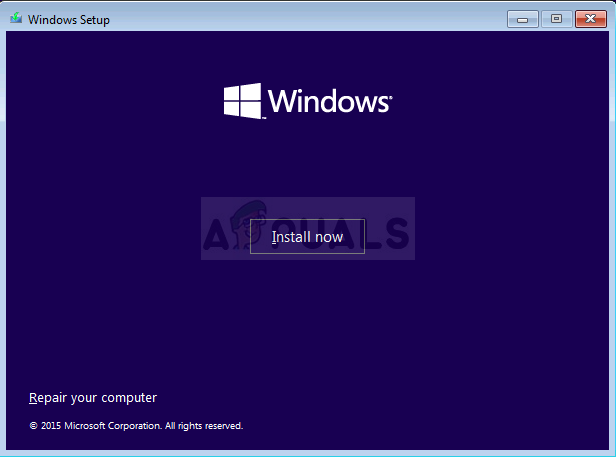
- The Choose an option screen will appear so navigate to Troubleshoot >> Reset this PC. This will let you keep your personal files but it will delete the apps you have installed. Follow the further set of instructions on-screen and wait for the process to finish. Check to see if the BSODs still appear in a loop!
Kevin Arrows
Kevin Arrows is a highly experienced and knowledgeable technology specialist with over a decade of industry experience. He holds a Microsoft Certified Technology Specialist (MCTS) certification and has a deep passion for staying up-to-date on the latest tech developments. Kevin has written extensively on a wide range of tech-related topics, showcasing his expertise and knowledge in areas such as software development, cybersecurity, and cloud computing. His contributions to the tech field have been widely recognized and respected by his peers, and he is highly regarded for his ability to explain complex technical concepts in a clear and concise manner.