
In Windows 11/10, users sometimes come across an issue, where the Location services is reported to be greyed out. It could happen due to the Operating System or some third-party software. When this issue arises, users cannot enable or disable the Location services. Also, they cannot make any changes to the Location settings. So, how to fix Location settings greyed out in Windows 11/10?
Before you move on, it is better to perform a clean boot. After performing it, check if the issue related to the Location settings has been resolved. If not, then keep on reading.
In this post, learn how you can fix the location settings greyed out issue using different methods easily.
Page Contents
Fix 1: Using Registry Editor
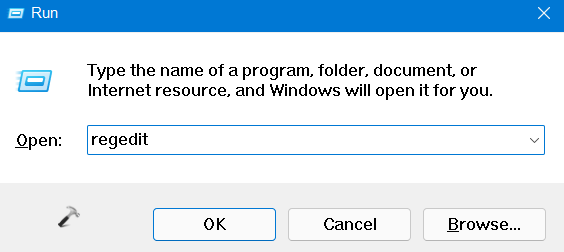
1. In the first place, you need to open the Run dialog box. For this, press the Windows + R keys simultaneously on your keyboard. Once opened, type regedit in the Run dialog box to open Registry Editor.
2. After that, navigate to the following location:
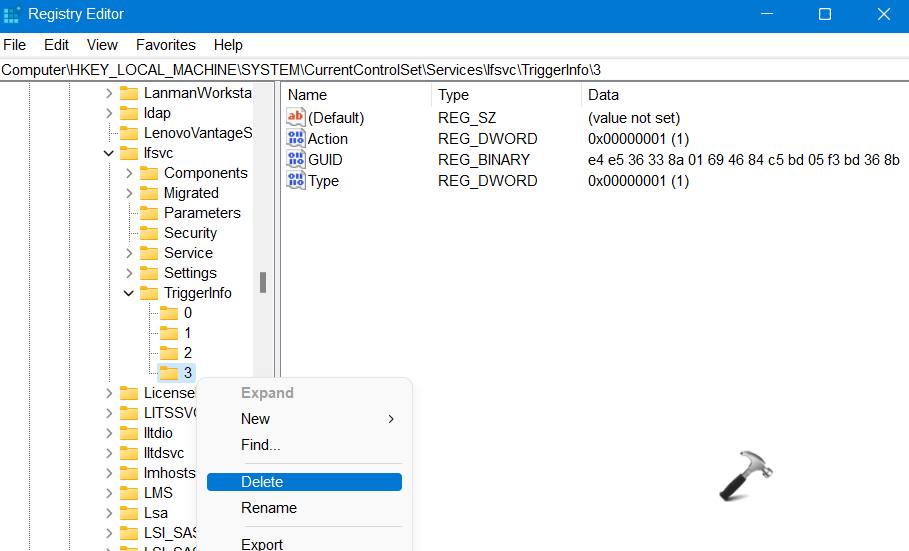
HKEY_LOCAL_MACHINE\SYSTEM\CurrentControlSet\Services\lfsvc\TriggerInfo
3. Once there, right-click on the folder named 3. Now, select the Delete option from the context menu.
4. Lastly, close Registry Editor. Once done, check if the issue has been fixed.
Fix 2: Using the Windows Services Manager
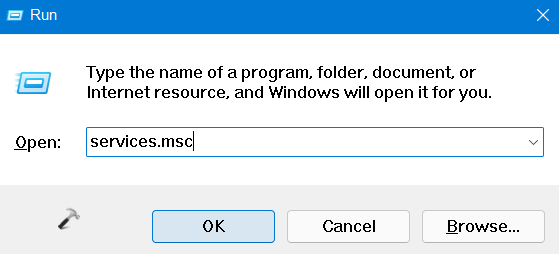
1. Firstly, open the Windows Services Manager. To do this, open the Run dialog box and type services.msc in the Run dialog box. Then, press Enter.
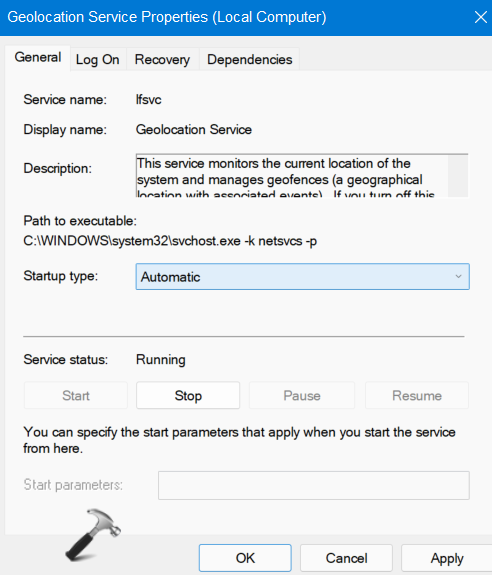
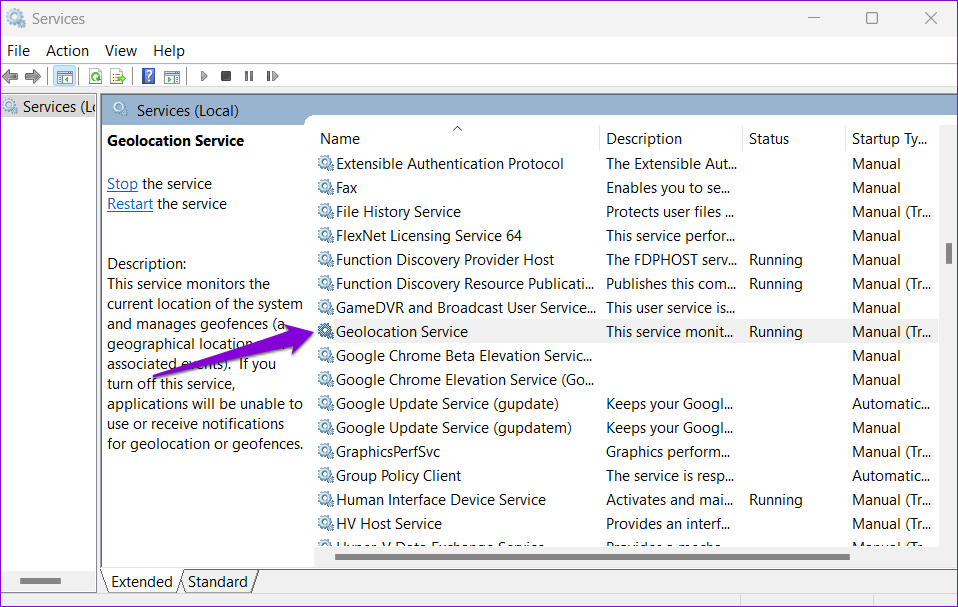
2. Now, look for Geolocation service and double-click on it. This will open its Properties window.
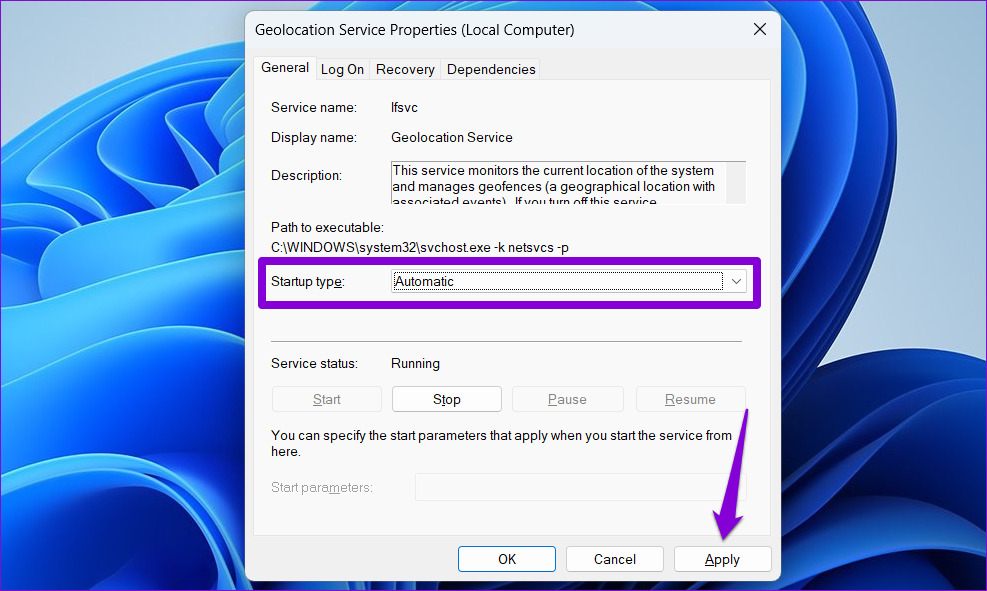
3. In the Properties tab, ensure that the Startup type is set to Automatic and Service status is Running. Make the changes if necessary and click on Apply and then, press OK.
So, this is how to fix location settings greyed out in Windows 11/10 issue. Both of these methods are quite effective. It is recommended to follow them carefully.
RELATED ARTICLES
Location services is a built-in tool in Windows 10 is a useful tool that offers users location information even when your laptop or desktop computer does not have a GPS since it uses Wi-Fi positioning as well as your device’s IP address. However, there are instances when you might encounter some problems when using this service. One instance is when you suddenly find the toggle button for Location service greyed out.
This kind of program could be due to some glitch in the system or some third-party application on your computer. Because of this problem, you won’t be able to toggle the Location service on or off and you won’t be able to make any changes in its settings. Worry not, for this post will guide you on what you can do to fix the greyed-out toggle button of Location services in Windows 10.
Before you perform some troubleshooting steps, you might want to restart your computer and see if it fixes the problem. If it didn’t, then this problem is not just some minor glitch. Thus, you have to follow the potential fixes provided below to fix the problem but before you do that, make sure that you create a System Restore point first. After that, follow each one of the following options.
Option 1 – Put your PC in a Clean Boot State
The first thing you can do to resolve the problem is to put your computer in a Clean Boot State. It could be that there is a third-party program that’s preventing the toggle button from functioning. To isolate this possibility, you need to put your computer in a Clean Boot State.
- Log onto your PC as an administrator.
- Type in MSConfig in the Start Search to open the System Configuration utility.
- From there, go to the General tab and click “Selective startup”.
- Clear the “Load Startup items” check box and make sure that the “Load System Services” and “Use Original boot configuration” options are checked.
- Next, click the Services tab and select the “Hide All Microsoft Services” check box.
- Click Disable all.
- Click on Apply/OK and restart your PC. (This will put your PC into a Clean Boot State. And configure Windows to use the usual startup, just simply undo the changes.)
- Now check if you can now use the toggle button of the Location service or not.
Option 2 – Try to use the Registry Editor
If putting your computer in a Clean Boot state didn’t fix the problem, you might want to make some adjustments in the Windows Registry via Registry Editor.
- Tap the Win + R keys to open the Run utility and type “regedit” in the field and then tap Enter to open the Registry Editor.
- After that, navigate to this registry path: HKEY_LOCAL_MACHINESYSTEMCurrentControlSetServiceslfsvcTriggerInfo
- From there, select the Key (folder) named as “3” and right-click on it, and then delete it.
- Once done, exit the Registry Editor and restart your computer.
Option 3 – Try to use the Windows Services Manager
- Tap the Win + R keys to open the Run dialog box and type “services.msc” in the field and hit Enter to open the Services Manager.
- Next, look for the “Geolocation Service” entry from the list of services.
- Once you find it, right-click on it and select Properties. This will open a new mini window.
- From there, make sure that it is “Running” and its Startup Type is set to “Automatic”.
- After that, close the Services Manager and check if the problem is now resolved.
Option 4 – Try to use the Group Policy Editor
- Tap the Win + R keys to launch Run and type “gpedit.msc” in the field and click OK to open the Group Policy Editor.
- After that, navigate to this path: Administrative TemplatesWindows ComponentsLocation and Sensors
- Next, double click on each one of the following settings and select the “Not configured” or “Disabled” option.
- Turn off location scripting
- Turn off location
- Turn off sensors
- Once done, navigate to this path: Administrative TemplatesWindows ComponentsLocation and SensorsWindows Location Provider
- From there, double click on the “Turn off Windows Location Provider” policy setting and set its configuration to either “Disabled” or “Not configured”. You should see the following description of the policy setting in the window:
“This policy setting turns off the Windows Location Provider feature for this computer. If you enable this policy setting, the Windows Location Provider feature will be turned off, and all programs on this computer will not be able to use the Windows Location Provider feature. If you disable or do not configure this policy setting, all programs on this computer can use the Windows Location Provider feature.”
- Now restart your computer.
Do You Need Help with Your Device?
Our Team of Experts May Help
Troubleshoot.Tech Experts are There for You!
GET HELP
Troubleshoot.Tech experts work with all versions of Microsoft Windows including Windows 11, with Android, Mac, and more.
Share this article:
You might also like
The Winload.efi file is an Extensible Firmware Interface or EFI file. EFI files are executable files for the firmware of the computers that are mainly based on UEFI and execute the tasks of loading the files to the bootloader of the computer. They are used for a specific set of tasks such as turning on the computer, installing Windows, restarting the computer or resetting it, and so on. This is why the Winload.efi file is a significant file so if it gets corrupted, lost, or damaged, it would be impossible for the Windows operating system to proceed.
Here are some errors you can encounter that are related to the Winload.efi file:
- efi is missing
- efi cannot be found
- efi is missing or contains errors
- This program can’t start because winload.efi is missing from your computer
- This application requires the file winload.efi, which was not found on this system.
- There was a problem starting [path]winload.efi. The specified module could not be found.
In addition, the 0xc0000225 , 0xc00000e and 0xc0000001error codes are also associated with the Winload.efi file.
Before you start troubleshooting the problem, you can try to perform System Restore first. This will help undo any changes you’ve made in your computer that might have triggered the Blue Screen error. To perform System Restore, here’s what you have to do:
- First, press the Win + R keys to open the Run dialog box.
- After that, type in “sysdm.cpl” in the field and tap Enter.
- Next, go to the System Protection tab then click the System Restore button. This will open a new window where you have to select your preferred System Restore point.
- After that, follow the on-screen instructions to finish the process and then restart your computer and check if the problem is fixed or not.
If System Restore didn’t help in fixing the Blue Screen error, now’s the time for you to resort to the troubleshooting tips provided below but before you get started, make sure that your create a System Restore point first.
Option 1 – Try rebuilding the Boot Configuration Data (BCD) and repairing MBR
- Once you get to the Welcome Screen part, click on Next.
- Afterwards, click on the Repair your computer option located on the bottom-left part of the window.
- Then click on Troubleshoot.
- Next, select the Advanced Options and then Command Prompt.
- Once Command Prompt has been pulled up, the following commands to rebuild BCD files and repair MBR. Don’t forget to hit Enter right after you type each command.
- bootrec /repairbcd
- bootrec /osscan
- bootrec /repairmbr
- Once the command line is successful in finding out a Windows installation, hit Y to let it boot from the list which will successfully rebuild BCD.
- Now type “exit” to close Command Prompt and then restart your computer to successfully apply the changes made.
Option 2 – Disable the Secure Boot in the BIOS
Disabling the Secure Boot in the BIOS settings is definitely recommended to resolve errors related to the Winload.efi file. To disable Secure Boot, here’s what you have to do:
- First, boot your computer into Windows 10.
- Next, go to Settings > Windows Update. From there, check if there is anything that you have to download and install if you see any available updates. Usually, OEMs send and update the list of trusted hardware, drivers, and operating systems for your computer.
- After that, go to the BIOS of your computer.
- Then go to Settings > Update & Security > Advanced Startup options. If you click on Restart Now, it will restart your computer and give you all the advanced options.
- Next, select Troubleshoot > Advanced Options. As you can see, this screen offers you further options including System restore, Startup repair, Go back to the previous version, Command Prompt, System Image Recovery and UEFI Firmware Settings.
- Select the UEFI Firmware Settings which will take you to the BIOS.
- From there, go to Security > Boot > Authentication tab where you should see Secure Boot. Note that every OEM has its own way of implementing the options so it varies.
- Next, set Secure Boot to Disabled and set Legacy Support to On or Enabled.
- Save the changes made and exit. Afterward, your computer will reboot.
Option 3 – Run System File Checker scan
You might also try running the System File Checker or SFC scan to fix the error. System File Checker is a command utility built into your computer that helps restore corrupted files and missing files. Refer to the following steps to run it:
- Hit the Win + R keys to launch Run.
- Type in cmd in the field and tap Enter.
- After opening Command Prompt, type in sfc /scannow
The command will start a system scan which will take a few whiles before it finishes. Once it’s done, you could get the following results:
- Windows Resource Protection did not find any integrity violations.
- Windows Resource Protection found corrupt files and successfully repaired them.
- Windows Resource Protection found corrupt files but was unable to fix some of them
- Reboot your computer.
Option 4 – Disable the Early Launch Anti-Malware Protection
- You need to restart your computer in the Start Menu first while holding down the Shift key on your keyboard.
- After that, it will restart your computer to Startup Settings.
- Now ensure that the 8th option is labeled as “Disable early launch anti-malware protection.
- Then tap the F8 key since the aforementioned option above is listed at number 8. This should launch and load Windows on your PC with the Early Anti-malware protection disabled for that session only when you try to carry out the same task and then check if the error related to the Winload.efi file is now fixed.
Read More
Error 0x80070003 — What is it?
Error 0x80070003 is a type of Windows file backup and restore error code. This error occurs when you copy files or try to create backup and restore files and folders by using Windows Backup and Restore.
This error stops you from using browse for files or folders. It hampers your ability to browse and restore files in the File Restore Wizard on your PC.
Solution
Error Causes
Error 0x80070003 may occur due to numerous reasons such as:
- Registry files are corrupted and damaged
- Missing directories
- Boot sector corrupted
- Outdated drivers
- Faulty software installation
- Malware infection
- Improper maintenance and incomplete installation
Further Information and Manual Repair
Here are some manual and easy do-it-yourself methods that you can try at home and resolve the issue on your own and save hundreds of dollars that you would be otherwise spending to hire a professional for the job.
Method 1 — Use Search Functionality in the File Restore Wizard to restore files
To work out and resolve error 0x80070003 on your system simply use the search functionality in the File Restore Wizard to locate and restore the files. This can be done by going to the start menu and then click on search.
Now enter the keywords in the search for box and then click search again. Click to select the files that you want to restore from the list and then click OK. This will help you restore the files and resolve the issue.
Method 2 — Recreate the Missing Directory
If the re-parse point is deleted, then you will have to recreate the missing directory.
The deletion of the re-parse point can be identified if the error code is displayed in this format ‘Filename: C:\Myfolder\11111.txt, Error: the system cannot find the path specified (0x80070003)’.
To resolve, simply follow the path that is pointed out in the error and create the corresponding folder. Create the folder Myfolder in Drive C.
Then try the restore operation again. Now click to clear the Restore the files to their original subfolders check box and then run the File Restore Wizard. This is most likely going to resolve the issue.
Method 3 — Scan for Viruses
Sometimes error 0x80070003 may occur due to malware. This stops you from creating file backup and restore files. If this is the cause then simply download and run an antivirus to remove malware programs on your PC.
Method 4 — Clean and Repair the Corrupted Registry
Error 0x80070003 can be triggered due to registry corruption. If this is the cause then simply download Restoro. This is a user-friendly and powerful multi-functional PC Fixer integrated with a registry cleaner.
The registry cleaner scans for all registry-related errors, wipe out all unnecessary and junk files, and also cleans and repairs the damaged registry in seconds.
Click here to download Restoro and resolve error 0x80070003 today!
Read More
Having a PC is a great thing, more often we are enjoying it than we have issues, but as time passes it seems that our computer is slowing more and more as new applications and games are coming which demand more powerful computers.
Before you decide to throw away your computer and buy a new one because you feel it is a bit slow, read through this guide where we will guide you to common tips & trick to make your PC run faster:
-
Keep your PC clean and tidy
Slowdowns and many other issues, even hardware failures can come from dirty PC. Make sure your PC is clean and tidy for maximum performance.
-
Optimize airflow through PC casing
Airflow is very important so your GPU and CPU and overall all hardware components can be kept in optimal working temperatures. If any device inside the casing is working in abnormal temperatures you will experience slowdowns and freezing on daily basis. Make sure that all fans are working and that your temperatures are in the optimal range to prevent overheating and make sure to have maximum performance.
-
Check PC for malware
Viruses, worms, and overall all malware can drastically reduce system performance. Make sure that your protection software is up to date with the latest definitions and that you have the latest Windows updates installed.
-
Create a Hi-Performance power plan
Windows power plans can be a very useful feature, especially if you are working on laptop but in order to boost performance and drain maximum, you will need to switch to a hi-performance power plan.
-
Free space on the system drive
Having little to no space on your Windows system drive can lead to extreme slowdowns, make sure that your hard drive is not on red when viewed from File explorer or you will experience even 50% poorer performance.
-
Choose startup applications
If you have many applications starting up with your Windows and many of them running in the background you will experience performance issues. Each application that runs in the background is taking RAM and CPU time for themselves which could be free and used for the program that you need.
-
Do not open too many tabs in Browser
Having too many tabs in Browser while working on a computer can also cause slowdowns, each tab is taking RAM for itself and even can cause Browser poor performance if a tab is LIVE and refreshing with new content all the time.
-
Remove browser extensions
Speaking of browser, having too many installed extensions which are active as soon as the browser is up and running can also lead to poor performances. Remove all which you really do not need and your computer will gain in speed.
-
Make hardware upgrade
Sometimes your system is just a little outdated, upgrading more RAM or switching to a new SSD with the greater speed can cause a world of difference in PC performance. Check to see how RAM is standard and upgrade accordingly, you can also upgrade the CPU and other bottlenecks in your system this way instead of completely buying a new PC.
-
Format and reinstall system
Drives, application traces, registry entries, etc. are piling up in your system over time, and if enough time is given it will clog your computer. From time to time it is a good idea to backup files and do a completely clean full format of HD and install a new and fresh copy of Windows with new and clean copies of applications and drivers.
That’s it, 10 tips on how to make your Windows and PC perform better and speed it up. I hope that you found the read informative and helpful and I hope that I will see you soon.
Read More
As you know, Microsoft’s consumer cloud storage platform is none other than OneDrive. It is where users can save any of their files albeit it’s mostly used to store common files like documents and photos. However, there are times when you might encounter some problems when saving these files. Recently, some users reported that they had problems saving Word documents to OneDrive and if you experience the same issue, then you’ve come to the right place as this post will guide you on how to resolve it.
According to users who encountered the problem, when they try to save Word documents on OneDrive, an error message appears instead stating, “This is not a valid file name”. This kind of error only occurs when the file is opened from within OneDrive for saving in a different folder. In other words, if the file is saved in the same folder, the error won’t pop up but if it is saved in a separate folder, that’s when the error appears. Worry not though for fixing this error is not complicated and won’t take too long.
It seems that this error is due to the 259-character limitation when creating and saving files as far as the Office products are concerned. To resolve it, there are several workarounds you can check out. Before you proceed with these workarounds, make sure that you have a stable internet connection.
Option 1 – Try renaming the file with a shorter name
The first thing you can do to fix the problem is to rename the file with a shorter name. Just right-click on the file and select the Rename option from the menu and then type in the new name and click OK or tap Enter to rename the file.
Option 2 – Try renaming the folders where the file is located
Like what you did in the first given option, all it takes is a right-click but this time on a folder. Rename the folder with a different name and save the changes made and then check if you can now save the Word document on OneDrive.
Option 3 – Try moving the file to a folder with a shorter path
If the first two options didn’t work, you can try moving the file to a folder with a shorter path. Note that it is not the same as doing it locally on a Windows 10 computer so you have to right-click on the file and select the “Move to” option. After that, locate the folder where you want to move the file and select it and then click on the Move button to complete the task.
Option 4 – Try making some changes in the document
You could also try to make some modifications to the document. Once you’ve done that, click the File tab and select the Save As option and then go to the folder where you want to save the file and tap enter.
Read More
Running the Windows Update service does not always go well as from time to time, you could encounter some errors when using it. One of these errors is the Windows Update Error 0xc1900403. In such cases, you will see the following error message under the Windows Update section:
“There were problems installing some updates, but we’ll try again later, If you keep seeing this and want to search the web or contact support for information, this may help – 0xc1900403”
The log files displayed in the error message may include, “0XC1900403 – MOSETUP_E_UA_CORRUPT_PAYLOAD_FILES”. This indicates that the payload files are corrupted which is why you’re getting the Windows Update Error 0xc1900403 and to fix it, you can try to restart your computer and install the updates again or reset the Windows Update-related folders. You could also run the Windows Update troubleshooter or use either the Standalone Installer or the Media Creation tool. For more details, refer to each one of the options provided below.
Option 1 – Restart your computer and try installing the Updates again
Restarting your computer can also help in fixing the Windows Update failed to install error 0x80240034. There are cases where the issue resolves on its own as it could just be some simple network or PC error.
Option 2 – Delete the contents in the Software Distribution folder and Catroot2 folder
- Open the WinX Menu.
- From there, open Command Prompt as admin.
- Then type in the following command – don’t forget to hit Enter right after typing each one of them.
net stop wuauserv
net start cryptSvc
net start bits
net start msiserver
- After entering these commands, it will stop the Windows Update Service, Background Intelligent Transfer Service (BITS), Cryptographic, and the MSI Installer
- Next, go to the C:/Windows/SoftwareDistribution folder and get rid of all the folders and files thereby tapping the Ctrl + A keys to select them all and then click on Delete. Note that if the files are in use, you won’t be able to delete them.
After resetting the SoftwareDistribution folder, you need to reset the Catroot2 folder to restart the services you just stopped. To do that, follow these steps:
- Type each one of the following commands.
net start wuauserv
net start cryptSvc
net start bits
net start msiserver
- After that, exit Command Prompt and restart your computer, and then try to run Windows Update once more.
Option 3 – Try running the Windows Update troubleshooter
You might also want to run the Windows Update Troubleshooter as it could also help in fixing Windows Update Error 0xc1900403. To run it, go to Settings and then select Troubleshoot from the options. From there, click on Windows Update and then click the “Run the troubleshooter” button. After that, follow the next on-screen instructions and you should be good to go.
Option 4 – Try to use the Media Creation tool
The Media Creation tool in Windows allows you to use the ISO installation file to make a bootable device that you can use to install Windows on your PC. Note that this is kind of different from the usual installation process as it could erase your computer’s current settings and data on the primary drive. Thus, before you proceed, you need to backup all your data into some removable drive and then use the Media Creation Tool to make a bootable drive.
- After making the bootable drive, you need to plug it into your computer and then reboot.
- Next, tap the F10 or Esc key to open the boot options.
- Now set the boot priority of the removable drive the highest. Once the setup comes forth, follow the next onscreen instructions and install Windows without any problems.
Read More

BigTech platforms Google and Facebook were hit with a series of antitrust lawsuits by the US federal government and states on charges they are operating monopolies and abusing their power.
Below is the status of the cases, as well as government probes of Apple and Amazon in their current states
Two lawsuits against Facebook
In a defeat, Judge James Boasberg said the Federal Trade Commission, which had sued Facebook in December asking that Facebook be forced to sell WhatsApp and Instagram, failed to show that Facebook had monopoly power in the social-networking market, among other problems. However, the FTC could file a new complaint by July 29.
He threw out a related state lawsuit entirely, saying that the attorney’s general had waited too long. They are looking at their options.
Four lawsuits against Google
The US Justice Department sued Google in October, accusing the $1 trillion company of illegally using its market muscle to hobble rivals. A trial date was set for September 12, 2023.
A lawsuit by 38 US states and territories accuses Google of abusing its market power to try to make its search engine as dominant inside cars, TVs, and speakers as it is in phones. This was consolidated with the federal lawsuit for purposes of discovery.
Texas, backed by other states, filed a separate lawsuit against Google, accusing it of breaking antitrust law in how it runs its online advertising business.
Dozens of state attorneys general sued Google on July 7, alleging that it bought off competitors and used restrictive contracts to unlawfully maintain a monopoly for its app store on Android phones.
Justice Department investigates Apple
This probe, revealed in June 2019, appears to focus on Apple’s app store. Some app developers have accused Apple of introducing new products very similar to existing apps created by other developers and sold in the Apple Store, and then trying to banish the older apps from the store because they compete with Apple’s new product. Apple says it seeks to have only the highest-quality apps in the app store.
Justice Department probing Facebook and Amazon
In July 2019, the Justice Department said it was expanding its Big Tech probes to include «search, social media, and some retail services online», an apparent reference to Facebook and Amazon.
Federal Trade Commission on Amazon
In its investigation of Amazon, the FTC is likely looking at the inherent conflict of interest of Amazon competing with small sellers on its marketplace platform, including allegations that it used information from sellers on its platform to decide what products it would introduce.
Read More
ListenToTheRadioNow is a Browser Extension that allegedly lets you listen to radio from your browser. However, all this extension does is add links to the popular radio stations on your home page.
This extension hijacks your home page and changes your default search provides to MyWay. While running it monitors browsing data from your browser, mining information such as website visits, clicked links, and sometimes even personal information. This information is later used to display targeted ads through your browser.
Several anti-virus scanners have marked this extension as a possible Browser Hijackers, and due to its data mining nature, it is not recommended to keep it on your computer.
About Browser Hijackers
Browser hijacking is a type of unwanted software, commonly a browser add-on or extension, which then causes modifications in the web browser’s settings. Browser hijackers could do more than just modifying homepages. In most cases, browser hijacking is used for earning ad revenue that comes from forced advert clicks and website visits. Even though it may seem naive, all browser hijackers are dangerous and therefore always regarded as security threats. They don’t just ruin your internet browsers, but browser hijackers could also modify the system registry to make your PC susceptible to other malicious programs.
How you can know whether the browser is hijacked?
There are several symptoms of browser hijacking:
1. home-page is changed
2. new bookmarks pointing to porn websites have been added to your bookmarks
3. the default internet search engine and/or the default web browser settings are altered
4. find new toolbars that you did not add
5. unstoppable flurries of popup ads show up on your PC screen
6. webpages load very slowly and often incomplete
7. you have prohibited entry to certain web pages, for example, the site of an anti-malware software firm like SafeBytes.
So how does a browser hijacker infect a PC
A browser hijacker could be installed on your computer or laptop if you visit an infected website, click on an e-mail attachment, or download something from a file-sharing website. They also come from add-on programs, also referred to as browser helper objects (BHO), browser plug-ins or toolbars. Also, some shareware and freeware can put the hijacker inside your computer through “bundling”. A good example of some popular browser hijackers includes Babylon, Anyprotect, Conduit, SweetPage, DefaultTab, Delta Search, and RocketTab, but the names are regularly changing.
Tips on how to get rid of a browser hijacker
Some hijackers can be removed by uninstalling the freeware they were included with or by eliminating any extension you’ve recently added to your computer. However, most hijacking codes are not very easy to eliminate manually, since they go deeper into your operating system. Furthermore, manual removal expects you to perform several time-consuming and tricky actions that are hard to do for new computer users.
Professionals always recommend users to get rid of any malicious software including browser hijacker with an automatic malware removal tool, which is simpler, safer, and faster than the manual removal technique. One of the top tools for correcting browser hijacker malware is SafeBytes Anti-Malware. It can help you eliminate any pre-existing malicious software in your computer and provides you real-time monitoring and protection from the latest internet threats. Employ a PC optimizer along with your anti-malware software to correct various registry problems, remove computer vulnerabilities, and improve your computer overall performance.
Help! Malware Preventing Antivirus Installation And Access To The Internet
All malware is bad, but certain kinds of malware do a lot more damage to your computer than others. Some malware sits in between the computer and the net connection and blocks some or all internet sites that you want to check out. It will also prevent you from installing anything on your system, especially anti-virus applications. If you’re reading this, chances are you’re stuck with a malware infection that is preventing you to download and install the Safebytes Anti-Malware program on your computer. Do as instructed below to get rid of the malware by alternate methods.
Install the anti-malware in Safe Mode
Safe Mode is actually a special, basic version of Windows in which just minimal services are loaded to counteract viruses and other troublesome programs from loading. In the event, the malicious software is set to load automatically when the computer boots, switching to this mode may well prevent it from doing so. To start the computer into Safe Mode, hit the “F8” key on your keyboard just before the Windows logo screen comes up; Or right after normal Windows boot up, run MSConfig, check Safe Boot under Boot tab, and click Apply. Once you’re in Safe Mode, you can attempt to download and install your antivirus software application without the hindrance of the virus. After installation, run the malware scanner to get rid of most standard infections.
Download the security program using an alternate web browser
Some malware mainly targets particular browsers. If this sounds like your case, use another web browser as it could circumvent the virus. If you appear to have a virus attached to Internet Explorer, then switch over to an alternate browser with built-in security features, such as Firefox or Chrome, to download your preferred anti-malware program – Safebytes.
Install and run anti-virus from the Thumb drive
Another solution is to store and operate an anti-malware program entirely from a Pen drive. Do these simple steps to clear up your affected PC using a portable antivirus.
1) Download the anti-malware on a virus-free PC.
2) Insert the USB drive onto the same system.
3) Run the setup program by double-clicking the executable file of the downloaded software, with a .exe file format.
4) Choose the drive letter of the pen drive as the place when the wizard asks you where you would like to install the antivirus. Follow the instructions on the computer screen to complete the installation process.
5) Unplug the pen drive. You may now utilize this portable anti-virus on the affected computer.
6) Double-click the EXE file to open the Safebytes software right from the pen drive.
7) Click the “Scan” button to run a full system scan and remove viruses automatically.
Protect Your PC and Privacy With SafeBytes Anti-Malware
To help protect your laptop or computer from many different internet-based threats, it’s important to install an anti-malware program on your laptop. However, with so many antimalware companies in the marketplace, nowadays it is hard to decide which one you should buy for your laptop. Some of them are great and some are scamware applications that pretend as genuine anti-malware software waiting to wreak havoc on your computer. While looking for an anti-malware tool, choose one that offers dependable, efficient, and complete protection against all known computer viruses and malware. On the list of recommended software by industry analysts is SafeBytes Anti-Malware, a popular security application for Windows computers.
SafeBytes anti-malware is really a powerful, highly effective protection software made to assist users of all levels of computer literacy in finding and removing harmful threats from their computer. Through its cutting-edge technology, this software protects your computer against infections caused by different kinds of malware and similar threats, including spyware, adware, viruses, worms, trojans, keyloggers, ransomware, and potentially unwanted program (PUPs).
SafeBytes anti-malware provides a myriad of advanced features that sets it apart from all others. Below are some of the great features included in the tool.
Robust Anti-malware Protection: Built on a highly acclaimed anti-virus engine, this malware removal application can find and get rid of many obstinate malware threats like browser hijackers, PUPs, and ransomware that other common antivirus applications will miss.
Live Protection: SafeBytes provides complete and real-time security for your computer. This software will continuously keep track of your computer for suspicious activity and updates itself continuously to keep current with the latest threats.
Web Filtering: Through its unique safety rating, SafeBytes informs you whether a site is safe or not to visit it. This will make sure that you’re always certain of your safety when browsing the web.
Faster Scanning: SafeBytes Anti-Malware possesses a multi-thread scan algorithm that works up to five times faster than any other antivirus software.
Lightweight Application: SafeBytes gives you complete protection from online threats at a fraction of the CPU load due to its enhanced detection engine and algorithms.
24/7 Live Expert Support: You will get 24/7 technical support to promptly resolve any issue with your security application.
SafeBytes can keep your PC safe from most advanced malware threats automatically, thus keeping your online experience secure and safe. Malware issues can become a thing of the past when you put this application to use. If you want sophisticated forms of protection features & threat detections, buying SafeBytes Anti-Malware will be worth the dollars!
Technical Details and Manual Removal (Advanced Users)
If you do not wish to use malware removal software and like to get rid of ListenToTheRadioNow manually, you might accomplish this by going to the Windows Add/Remove Programs menu in the control panel and deleting the offending software; in cases of web browser plug-ins, you could remove it by visiting the browser’s Add-on/Extension manager. You will likely also want to reset your web browser.
Finally, check your hard drive for all of the following and clean your Windows registry manually to get rid of leftover application entries after uninstalls. Please keep in mind that only experienced users should attempt to manually edit the system files because removing any single critical registry entry results in a serious problem or even a system crash. In addition, certain malware is capable of replicating or preventing removal. It is highly recommended that you carry out the removal process in Safe Mode.
Files:
%LOCALAPPDATA%\Google\Chrome\User Data\Default\Sync Extension Settings\mlpfmcjpkbijcpegdbkplcddgacjlgpf
%UserProfile%\Local Settings\Application Data\Google\Chrome\User Data\Default\Sync Extension Settings\mlpfmcjpkbijcpegdbkplcddgacjlgpf
%LOCALAPPDATA%\Google\Chrome\User Data\Default\Extensions\mlpfmcjpkbijcpegdbkplcddgacjlgpf
%UserProfile%\Local Settings\Application Data\Google\Chrome\User Data\Default\Extensions\nhpggpakfcgbidnmlheodkbccemlenag
%LOCALAPPDATA%\Google\Chrome\User Data\Default\Extensions\nhpggpakfcgbidnmlheodkbccemlenag
%USERPROFILE%\AppData\Local\Google
Registry:
HKEY_LOCAL_MACHINE\Software\ListenToTheRadioNow\Microsoft\Windows\CurrentVersion\Uninstall..Uninstaller
ListenToTheRadioNow
Read More
Rundll Error — What is it?
Rundll Error, DLL is also known as Dynamic Link Library is a Window library that basically consists of instructions and codes used and shared by multiple programs installed on your system. It helps programs load and run smoothly.
Rundll error is generated when the system fails to access DLL files thereby hampering your ability to successfully run your desired program.
Solution
Error Causes
The rundll error code is triggered due to multiple reasons such as:
- DLL file affected by virus and malware
- Poor program installation
- Invalid Windows registry entries
It is advisable to fix the run.dll error immediately without any delay because this error exposes your PC to serious threats such as system crash, freeze, failure, data loss, and even privacy threats like cybercrime, data breaches, and identity thefts.
Further Information and Manual Repair
To resolve the rundll error on your system, here are some solutions that you can try:
Solution 1: Reboot your System
Sometimes rebooting your system can also resolve the issue. However, if it doesn’t then you need to try some other solution to fix it.
Solution 2: Identify the Program Triggering the Error
To fix rundll error, the first thing that you need to do is to identify the program generating this error and check it for validity. For this, simply analyze the rundll error dialog box. Let’s say you get the following run.dll error on your system Error loading
C:\WINDOWS\system32\usvdgpo.dll.
This error message indicates that the program ‘usvdgpo’ is causing the run.dll error on the system.
Once the program is identified, the next step is to stop it manually. For this, you go to the start menu and click run, now type ‘services.msc’ in the dialog box, and press ‘Enter’.
After that right-click the related process to your rundll error and then click the ‘Stop’ button to stop the program. Now close the window.
Though this action will stop the process it will not remove the reference to the bogus items. To remove that you will have to remove the program from the Windows Registry. This can be done by typing ‘Regedit’ in the Run dialog box.
This will open the registry editor. From the keys listed in the left panel, navigate to the following key: HKEY_LOCAL_MACHINE/Software/Microsoft/Windows/CurrentVersion/Run.
Now right-click on this key and click delete and then simply close the windows registry and reboot your system.
After this, you will then have to uninstall the program to completely eradicate the rundll error. To do this, go to the control panel, Add/remove programs, and right-click to uninstall the program causing the run.dll error on your system. Click yes to confirm your decision.
Once the program is uninstalled, reinstall the program using the program CD to get yourself an error-free program.
This procedure is tricky, time-consuming, and maybe slightly challenging for you especially if you are not a computer programmer.
Solution 3: Run an Antivirus
If the cause of the run.dll error is a malware attack then you need to download an antivirus and run it on your system. However, this may impact the speed of your PC.
Antivirus is notorious for slowing down PC speed.
Solution 4: Download Restoro.
If you are not a computer programmer, then running Restoro is possibly the easiest way for you to resolve rundll errors on your system in seconds. Restoro is an innovative, cutting edge, and multi-functional feature-filled PC repair tool that can be used to repair all kinds of system-related errors including rundll errors.
The registry cleaner utility cleans up the RAM by removing unnecessary and obsolete files like junk files, invalid registry entries, and files from the uninstalled programs. It resolves disk fragmentation issues, repairs dll files, and the registry.
In just a few clicks you can easily repair the registry and remove malware thereby resolving rundll errors on your system. Operating Total System Care is quite simple. It has a user-friendly interface and easy navigation.
It is safe, efficient, bug-free, and compatible with all Windows versions
Click here to download Restoro and resolve ‘rundll errors’ and access/run programs on your system smoothly.
Read More
Error Code 0xc004fc03 – What is it?
Error code 0xc004fc03 occurs when Windows users fail to activate their Windows operating system due to a networking problem. The error code’s common symptoms include the following:
- Inability to activate Windows 10 operating system
- Message box with error code 0xc004fc03
Solution
Error Causes
Error code 0xc004fc03 in Windows 10 usually occurs due to issues related to a Windows user’s network. Your computer may be having problems connecting to the Internet or your firewall may be blocking or interrupting your device’s ability to activate Windows 10. In some cases, users may simply need to wait a day or two to reattempt to activate their system using a valid product key, as there may be an issue with the Windows activation servers. Failure to promptly fix this error code might result in other Windows 10 error messages, such as error code 0xc004f034.
Further Information and Manual Repair
To rectify the error code, Windows 10 users will need to perform manual repair procedures that fix the underlying problems causing error code 0xc004fc03. These procedures may include reconnecting to one’s network, checking your firewall settings, or activating your Windows operating system via phone. The manual repair methods are simple and do not require technical knowledge of the Windows operating system. If your attempts at manually repairing this error code fail, however, you may need to try a few other procedures.
Method One: Verify Internet Connection
To check your Internet connection, you’ll need to access the Network & Internet tab in Windows 10. Follow the instructions below to access this tab and fix Internet connectivity issues if they are preventing you from activating Windows on your machine.
- Step one: Click the Start button and select Settings
- Step two: Select Network & Internet
- Step three: Click the Status section of the Network & Internet tab
If your status shows that you are not connected to a network, you will need to fix your connection. Simply use the Network Troubleshooter to troubleshoot your connection. You will be able to activate your copy of Windows once your connectivity issues are resolved.
If, however, the problem persists and error code 0xc004fc03 occurs during the activation process, this simply means that the existence of the error code is not due to connectivity or networking problems. In such a case, move to the next manual repair method listed below and follow the exact instructions given.
Method Two: Check Firewall Settings
Windows Firewall protects your PC from hackers, worms, and other malicious programs. However, in some cases, it may result in error codes like error code 0xc004fc03. If your firewall is interfering with the Windows 10 activation, you’ll be able to rectify the problem by simply adjusting your settings. Follow the steps below to check – and adjust if necessary – your Windows Firewall settings.
- Step one: Click search bar and type firewall
- Step two: Select Windows Firewall
- Step three: Select Turn Windows Firewall on or off
In some cases, Windows users may not be able to adjust settings within the Windows Firewall tab, as your firewall settings may be controlled by a third party antivirus software. If this is the case, open the antivirus software and turn off the firewall if the software does not prevent you from making such changes to its settings.
Note, however, that you will need to readjust the settings as soon as you activate your version of Windows 10. This is due to the fact that turning off your firewall settings permanently may lead to exposure to worms and other malicious programs.
Method Three: Activate Windows by Phone
Activation of Windows via phone is another option for individuals experiencing error code 0xc004fc03. The activate by phone option in the Update & Security tab will be available once you fail to activate Windows 10. To complete this manual repair method, follow the steps below.
- Step one: Select Settings
- Step two: Click Update & security
- Step three: Select Activate by phone
- Step four: Follow the instructions provided thereafter.
This is one of the most effective ways to fix error code 0xc004fc03. If the issue persists, however, you can proceed to the last resort.
Method Four: Download an Automated Tool
If you wish to always have at your disposal a utility tool to fix these Windows 8 and other related issues when they do arise, download and install a powerful automated tool.
Read More
Shortcut virus is an easily spreadable and annoying combination of Worm and Trojan that hides all of your files and folders and then replaces them with shortcuts that look identical to replaced files and folders.
Once disguised it will wait patiently for a user’s click and once that happens it will replicate itself and further infect the system. This rapid spread can lead to stolen personal data, some system hick-ups, and other system-related issues.
This malware mainly affects physical file transfer devices like for example and most USB drives, hard drives, and SD memory cards and it can easily transfer itself to the computer.
The advantage of this shortcut virus comparing it to others is that it is mostly undetected by a vast variety of antivirus software. So running just anti-virus software maybe not be enough to remove it from your system. Luckily for all unfortunate users that have caught this annoyance, it can be easily removed fully manually in a short time.
How to Remove Virus from USB and other removable media
Firstly plugin USB, SD, or removable drive. The infection will transfer to your computer when the infected drive is plugged in so before we go to clean the computer itself, clean each removable drive that you have. Also know that infection will spread from computers into removable devices as well if it is not cleaned.
Open the File Explorer and remember under which letter is removable drive registered. Open Command prompt but with administrator privileges and go to infected rive by typing its letter followed with “:” (for example D:) and press ENTER
Once you have successfully gone to infected drive type in command prompt:
Attrib -s -r -h /s /d *.*
This will unlock all original files back into removable storage, next copy all files to your computer, and format the removable drive. Once the format is complete, unplug the removable device. Continue to clean all devices with the same method.
How to Permanently Remove a Shortcut Virus from Your PC
Now once we have cleaned all removable devices it is time to fully clean the PC
Firstly open the task manager ( CTRL + SHIFT + ESC ), in the process tab find wscript.exe or wscript.vbs, right-click on it (or both if present), and select End Task. Now close the task manager and press Start. Inside start typing in registry editor to search for it and once found open it.
Find the following key inside the registry editor:
HKEY_CURRENT_USER/Software/Microsoft/Windows/CurrentVersion/Run
In the right panel, look for any strange-looking key names, such as odwcamszas, WXCKYz, OUzzckky, etc. For each one, run a Google search to see if it’s related to shortcut viruses.
If any returns a positive match, right-click on them and select Delete. !!! Accidentally deleting an important key can cause Windows to become unstable, so double-check everything !!!.
Close the Registry Editor
Now press ⊞ WINDOWS + R to open the run dialog and type in it Msconfig followed by ENTER. Once the System Configuration window opens go to the Startup tab. In the Startup tab, look for any strange-looking .EXE or .VBS programs, select each one and click Disable. Close the Window.
Once again open the run dialog and type inside %TEMP% and press ENTER in order to open the Windows temp folder. Inside this folder delete everything.
Next in the File explorer go to
C:\Users\[username]\AppData\Roaming\Microsoft\Windows\Start Menu\Programs\Startup
Look for any strange-looking .EXE or .VBS files and delete them.
Read More
Copyright © 2023, ErrorTools. All Rights Reserved
Trademark: Microsoft Windows logos are registered trademarks of Microsoft. Disclaimer: ErrorTools.com is not affiliated with Microsoft, nor claims direct affiliation.
The information on this page is provided for information purposes only.
Quick Tips
- Configure the Geolocation Service to run automatically at startup on your computer.
- Ensure that location services aren’t disabled in the Group Policy settings.
- If the issue persists, try booting your PC in a clean boot state to determine if any third-party apps or programs are causing the problem.
Fix 1: Configure Geolocation Service
Geolocation Service is a small program that needs to run in the background for the location services to work. Ideally, the service should start every time your system boots. However, if that isn’t happening, location services may appear grayed out on Windows. Here’s what you can do to fix it.
Step 1: Press the Windows key + R to open the Run dialog, type services.msc, and press Enter.
Step 2: Locate and double-click on Geolocation Service on the list.
Step 3: Change the Startup type to Automatic and hit Apply.
If the service is not running, click on the Start button. After that, see if you can access location services.

Fix 2: Tweak Registry Files
You can fix the problem by modifying some registry files if the location services continue to appear grayed out. Here’s how:
Step 1: Press the Windows key + S to open the search menu. Type registry editor in the box and select the first result that appears.

Step 2: In the Registry Editor window, paste the following path in the address bar at the top and press Enter.
HKEY_LOCAL_MACHINE\SYSTEM\CurrentControlSet\Services\lfsvc\TriggerInfo

Step 3: Right-click on the key named 3, and select Delete.

Restart your PC for changes to take effect and see if the issue is still there.
Fix 3: Use Local Group Policy Editor
Like using the Registry Editor, you can also make changes to your PC via the Local Group Policy Editor on Windows. For that, you must be running the Pro, Enterprise, or Education editions of the Windows operating system. If you’re using the Home edition of Windows 11, this method won’t work for you.
Step 1: Press the Windows key + R to open the Run dialog box. Type gpedit.msc in the Open field and press Enter.
Step 2: In the Local Group Policy Editor window, use the left pane to navigate to the following folder.
Administrative Templates\Windows Components\Location and Sensors
Step 3: On your right, you’ll see three policies: Turn off location scripting, Turn off location, and Turn off sensors.

Step 4: Double-click “Turn off location scripting,” select Disabled, and hit Apply.

Step 5: Disable the Turn off location and Turn off sensors policies as well.
Step 6: Click on the Windows Location Provider folder.

Step 7: Double click on Turn off Windows Location Provider.

Step 8: Select the Disabled option and click Apply.

Restart your PC and you should be able to access location services as before.
Fix 4: Try Clean Boot
At times, third-party apps and services running on your PC can also prevent you from accessing certain Windows features. To verify this, you can boot your PC in a clean boot state.
Step 1: Press the Windows key + R to open the Run dialog, type msconfig.msc, and press Enter.
Step 2: Under the Services tab, mark the box that reads Hide all Microsoft services box and click the Disable all button.

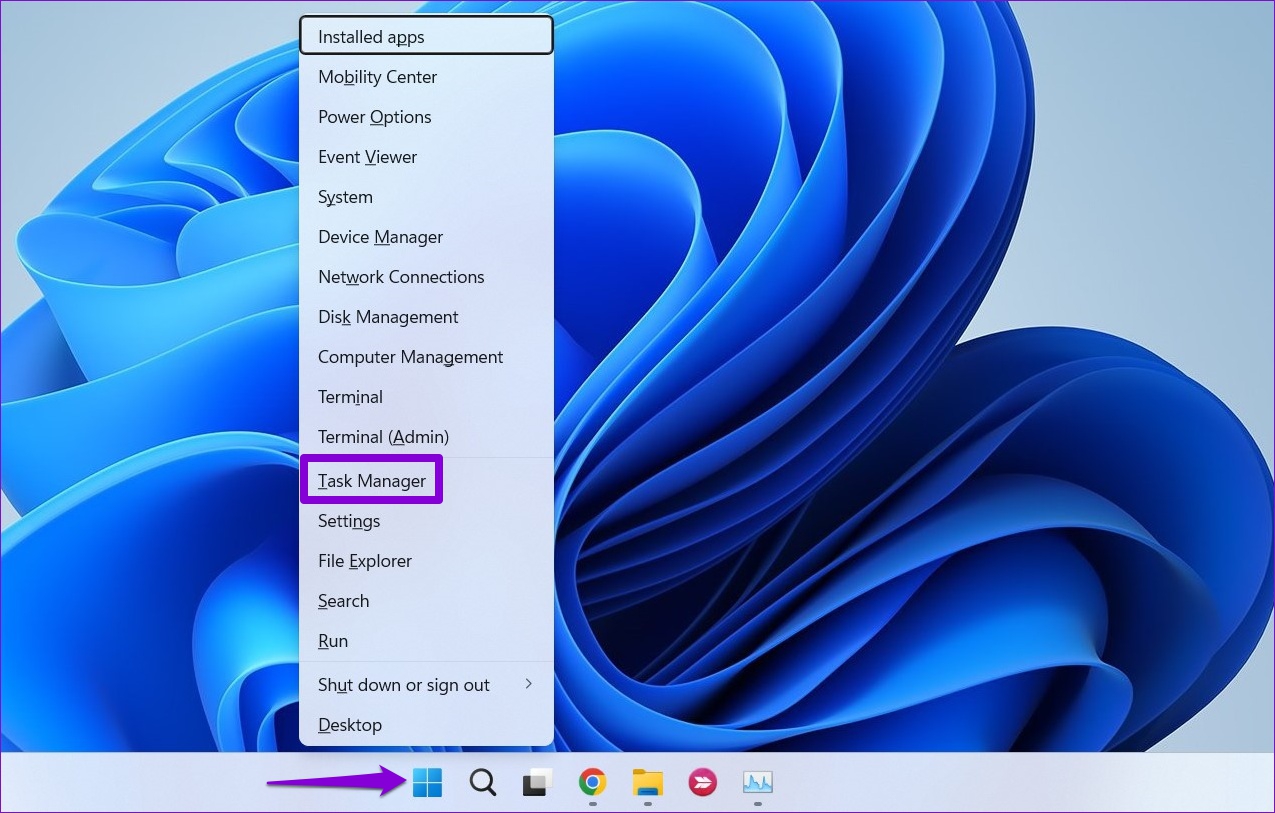
Step 3: Switch to the Startup tab and click on Open Task Manager.
Step 4: In the Startup tab, disable all the third-party apps one by one.

Restart your PC after this to enter the clean boot state and see if you can access the location services. If this helps, you’ll need to look through any recently installed apps and programs and remove them.
To boot in normal mode again, follow the steps above to enable all Startup apps and services, and then reboot your PC.
Was this helpful?
Thanks for your feedback!
The article above may contain affiliate links which help support Guiding Tech. The content remains unbiased and authentic and will never affect our editorial integrity.
Methods to Enable and Disable Location Services in Windows 10 with steps. – Multiple apps and third-party tools need and use the location of your PC to provide their services. Map traces the location of PC and helps you in exploring nearby restaurants. But there are many users who don’t want certain applications to use the location service. Well, for those users, Windows includes few location settings so that they can have control over it. So, in this guide, we present you the guidelines to Enable and Disable Location Services on Windows 10.
There are certain applications that need to know the location information of your device before it can render its service. So, when these applications are run for the first time, they seek your approval to track the location details of the device. After granting permission, in future if you don’t want to share the location of the device with any app, you can anytime disable location services on Windows 10. Pursue a similar guide on [How To] Change App Permissions On Windows 10. So, Windows 10 includes specific location settings to manage location services for account, apps, and device respectively.
Ways to Enable and Disable Location Services on Windows 10
Method 1 – Through Action Center
Step 1 – Launch Action Center and to do so click the tiny icon that exists on the extreme right of the taskbar. Alternatively, you can also make it appear by pressing Win+A keys altogether.
You can Determine App Notification Count to Show in Action Center Windows 10.
Step 2 – If you cannot see the buttons on the Action Center, click Expand to view all of them. Now, locate Location button and click on it to enable or disable it. If Location button is highlighted, then the service is enabled and if it is not highlighted, the feature is disabled.
Method 2 – Using Settings Application
Step 1 – Open Settings program by jointly pressing Win&I keys. When various categories appear on its homepage, locate and select Privacy.
Read our similar guide on How to Avoid Privacy Issues on Windows 10.
Step 2 – Privacy settings page provides few segments on its left sidebar, so click Location.
a. Enable and Disable Location Services for this Device
Note – Settings program gives you the provision to control location services for your device (PC). In addition, keep in mind that you must possess administrative authorities before performing the below steps.
Step 3 – Shift to its right pane and click the Change button that appears underneath Location heading.
Step 4 – On another pop-up, use the slider and turn ON the slider for the option Location for this device. This will enable the location service for this (your) device.
Noteworthy point is that Location service for this device is enabled by default.
Step 5 – To disable the service, click on Change button and moreover, toggle OFF the slider of Location for this device by pulling it towards left.
b. Enable and Disable Location Services for Apps and Account
Note – Before you follow the below directions, make sure that the Location service for this device is enabled by the administrator either using Method 2a or 3a.
Step 6 – On the right panel of Location, find the option Location service. Switch ON the setting and this will enable location service for apps and account (This is the default setting).
Step 7 – Switch OFF the option Location service and specifically disable the feature for both your account and applications.
Method 3 – Via Registry Editor
Step 1 – On Cortana search field, type the command regedit and when she displays the same command, click on it.
For reference, you can read How to Access Registry Editor in Windows 10 – 5 Simple Tips.
Step 2 – UAC prompt will come up displaying the details of the tool. Give permission by clicking Yes and let Registry Editor open.
a. Enable and Disable Location Services for this Device
Note – Registry Editor also gives provision to enable and disable location service for this device but to carry out this procedure you must hold admin authorities.
Step 3 – On the Registry Editor, browse to the below path.
HKEY_LOCAL_MACHINE => SYSTEM => CurrentControlSet => Services => lfsvc => Service => Configuration
Step 4 – Shift to the right pane of Configuration key where a DWORD with a name Status will be visible, double-click on it.
Step 5 – To Enable Location for this device, input the value 1 on its edit box. Click OK to implement the change in the service.
Step 6 – To Disable Location service for this device, set 0 as its value and finally, click OK to make the changes effective.
b. Enable and Disable Location Services for Apps and Account
In order to follow this way, ensure that Location for this device is enabled using Method 2a or 3a.
Step 7 – After opening Registry Editor, navigate to the below path on the left sidebar.
HKEY_CURRENT_USER => SOFTWARE => Microsoft => Windows => CurrentVersion => DeviceAccess => Global => {BFA794E4-F964-4FDB-90F6-51056BFE4B44}
Step 8 – Once you reach the above key, find the string value with a name Value on the right pane and double-click on it.
Step 9 – To enable location services for apps and account, set its value as Allow on the edit box. Click OK.
Step 10 – To disable location services for apps and account, assign the value as Deny and click OK.
Step 11 – Once you change the string value, you have to modify DWORD also. To do so, travel to the below path.
HKEY_CURRENT_USER => SOFTWARE => Microsoft => Windows NT => CurrentVersion => Sensor => Permissions => {BFA794E4-F964-4FDB-90F6-51056BFE4B44}
Step 12 – On its right pane, find and double-click the DWORD SensorPermissionState.
Step 13 – A small edit box will pop-up, so, type 1 to enable or insert 0 to Disable Location Services for Apps and Account.
Conclusion
Hence, to Enable and Disable Location Services on Windows 10, the OS provides you a few distinct ways. Well, Registry Editor is generally for the advanced users. Normal users can manage location services using other ways pretty much easily. If you have more tips to manage location services on Windows 10, please write down to us.
Sometimes you face an issue where the Location settings option is greyed out in Windows 11. As a result, you cannot turn on or off the location settings. You can find this option at Settings > Privacy & Security > Location > Location Services.

Location services play a vital role in the proper functioning of apps and services that relies on the location. For example, a weather app that shows current weather with the help of location services. What if you’re unable to manage location services? This will be an incredible mess, isn’t it?
Usually, this issue occurs due to a bug, operating system, or conflict between third-party apps installed on your PC. There could be other reasons as well.
If you made up to this blog post, then it’s highly possible that the option to manage location services is greyed out in Windows 11, then try the solutions discussed below to fix the issue:
Note – If the Location Services or Settings option is Greyed Out in Windows 10, then you can try these solutions
Use Registry Editor Hack
The very first troubleshooting method to fix Location Settings greyed out is by using the Registry Editor. To do so, follow the steps given below-
Press the Windows key on your keyboard, and then in the Start Menu, search for Registry Editor. Click on Registry Editor from the search result.

In the Registry Editor, head to the following location: KEY_LOCAL_MACHINE\SYSTEM\CurrentControlSet\Services\lfsvc\TriggerInfo
On the left side, right-click on the folder named 3 and click on Delete.

Once done, close the Registry Editor and restart your PC and the issue will be fixed.
Restart Geolocation Service
On the basis of various reports from multiple affected users, they manage to fix the location settings greyed out in Windows 11 by restarting the Geolocation service. So should try it as well:
Open Start Menu by pressing the Windows key and searching for Services. Open the Services from the Start Menu.

In the Services app window, search for Geolocation Services. Right-click on it, and then click on Properties.

Click on the drop-down menu next to Startup and set it to Automatic. Ensure the Service Status is Running, and if not, then click on Start.

Once done, click on Apply and OK to save your changes.
Both solutions discussed above will help in fixing the location settings options disabled in Windows 11. Let us know which one worked for you.
If you know any other solution that misses covering feel free to share in the comment for other readers.
Avyukt Atri fearlessly delves into the offbeat corners of technology, uncovering hidden gems and unraveling untold stories. With a quirky approach and boundless curiosity, he uncovers haunted servers, code-breaking cats, and WiFi signals from parallel dimensions.