
In Windows 11/10, users sometimes come across an issue, where the Location services is reported to be greyed out. It could happen due to the Operating System or some third-party software. When this issue arises, users cannot enable or disable the Location services. Also, they cannot make any changes to the Location settings. So, how to fix Location settings greyed out in Windows 11/10?
Before you move on, it is better to perform a clean boot. After performing it, check if the issue related to the Location settings has been resolved. If not, then keep on reading.
In this post, learn how you can fix the location settings greyed out issue using different methods easily.
Page Contents
Fix 1: Using Registry Editor
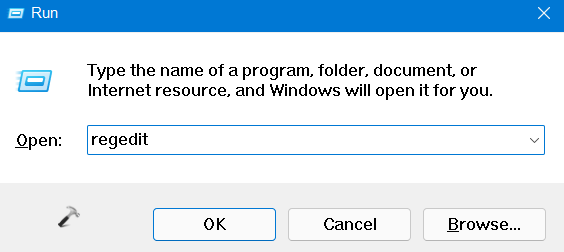
1. In the first place, you need to open the Run dialog box. For this, press the Windows + R keys simultaneously on your keyboard. Once opened, type regedit in the Run dialog box to open Registry Editor.
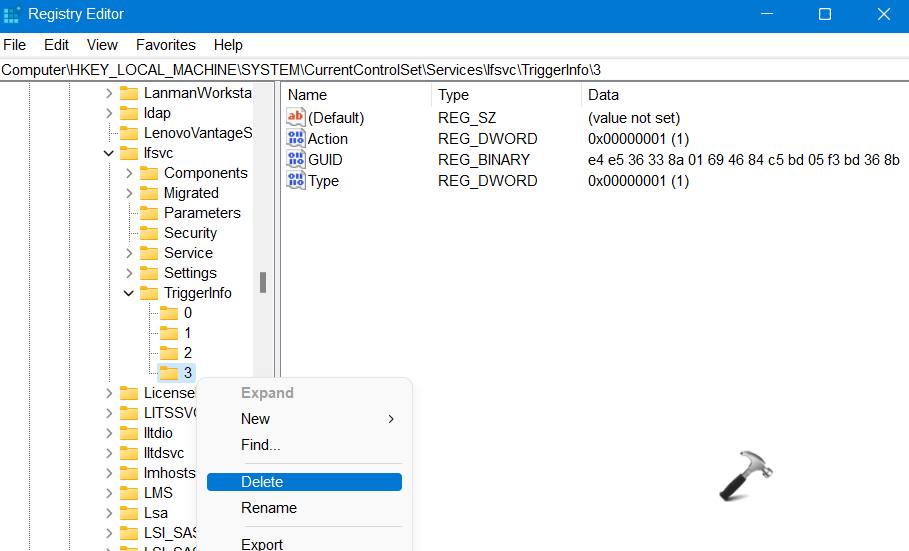
2. After that, navigate to the following location:
HKEY_LOCAL_MACHINE\SYSTEM\CurrentControlSet\Services\lfsvc\TriggerInfo
3. Once there, right-click on the folder named 3. Now, select the Delete option from the context menu.
4. Lastly, close Registry Editor. Once done, check if the issue has been fixed.
Fix 2: Using the Windows Services Manager
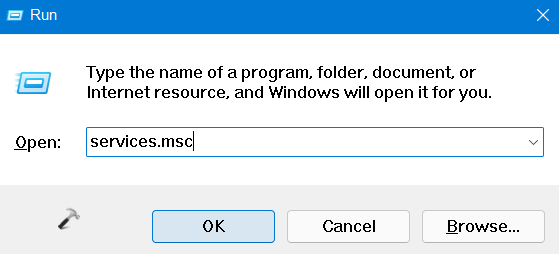
1. Firstly, open the Windows Services Manager. To do this, open the Run dialog box and type services.msc in the Run dialog box. Then, press Enter.
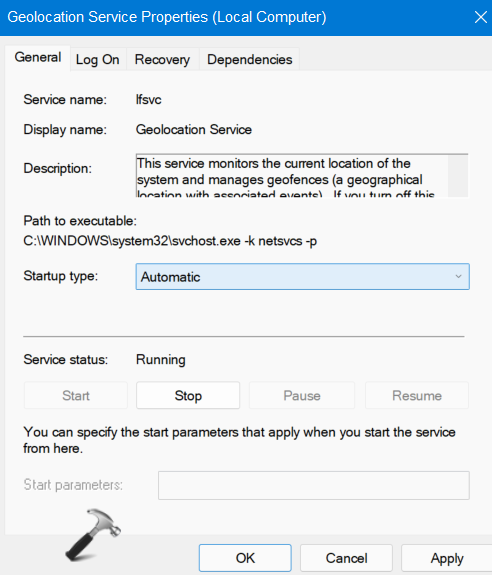
2. Now, look for Geolocation service and double-click on it. This will open its Properties window.
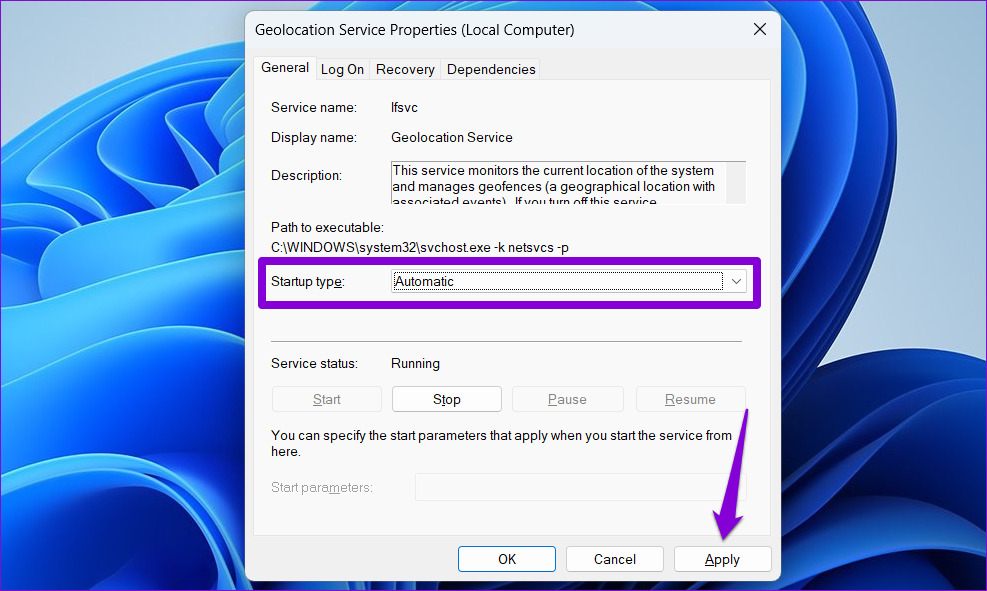
3. In the Properties tab, ensure that the Startup type is set to Automatic and Service status is Running. Make the changes if necessary and click on Apply and then, press OK.
So, this is how to fix location settings greyed out in Windows 11/10 issue. Both of these methods are quite effective. It is recommended to follow them carefully.
RELATED ARTICLES
Location services is a built-in tool in Windows 10 is a useful tool that offers users location information even when your laptop or desktop computer does not have a GPS since it uses Wi-Fi positioning as well as your device’s IP address. However, there are instances when you might encounter some problems when using this service. One instance is when you suddenly find the toggle button for Location service greyed out.
This kind of program could be due to some glitch in the system or some third-party application on your computer. Because of this problem, you won’t be able to toggle the Location service on or off and you won’t be able to make any changes in its settings. Worry not, for this post will guide you on what you can do to fix the greyed-out toggle button of Location services in Windows 10.
Before you perform some troubleshooting steps, you might want to restart your computer and see if it fixes the problem. If it didn’t, then this problem is not just some minor glitch. Thus, you have to follow the potential fixes provided below to fix the problem but before you do that, make sure that you create a System Restore point first. After that, follow each one of the following options.
Option 1 – Put your PC in a Clean Boot State
The first thing you can do to resolve the problem is to put your computer in a Clean Boot State. It could be that there is a third-party program that’s preventing the toggle button from functioning. To isolate this possibility, you need to put your computer in a Clean Boot State.
- Log onto your PC as an administrator.
- Type in MSConfig in the Start Search to open the System Configuration utility.
- From there, go to the General tab and click “Selective startup”.
- Clear the “Load Startup items” check box and make sure that the “Load System Services” and “Use Original boot configuration” options are checked.
- Next, click the Services tab and select the “Hide All Microsoft Services” check box.
- Click Disable all.
- Click on Apply/OK and restart your PC. (This will put your PC into a Clean Boot State. And configure Windows to use the usual startup, just simply undo the changes.)
- Now check if you can now use the toggle button of the Location service or not.
Option 2 – Try to use the Registry Editor
If putting your computer in a Clean Boot state didn’t fix the problem, you might want to make some adjustments in the Windows Registry via Registry Editor.
- Tap the Win + R keys to open the Run utility and type “regedit” in the field and then tap Enter to open the Registry Editor.
- After that, navigate to this registry path: HKEY_LOCAL_MACHINESYSTEMCurrentControlSetServiceslfsvcTriggerInfo
- From there, select the Key (folder) named as “3” and right-click on it, and then delete it.
- Once done, exit the Registry Editor and restart your computer.
Option 3 – Try to use the Windows Services Manager
- Tap the Win + R keys to open the Run dialog box and type “services.msc” in the field and hit Enter to open the Services Manager.
- Next, look for the “Geolocation Service” entry from the list of services.
- Once you find it, right-click on it and select Properties. This will open a new mini window.
- From there, make sure that it is “Running” and its Startup Type is set to “Automatic”.
- After that, close the Services Manager and check if the problem is now resolved.
Option 4 – Try to use the Group Policy Editor
- Tap the Win + R keys to launch Run and type “gpedit.msc” in the field and click OK to open the Group Policy Editor.
- After that, navigate to this path: Administrative TemplatesWindows ComponentsLocation and Sensors
- Next, double click on each one of the following settings and select the “Not configured” or “Disabled” option.
- Turn off location scripting
- Turn off location
- Turn off sensors
- Once done, navigate to this path: Administrative TemplatesWindows ComponentsLocation and SensorsWindows Location Provider
- From there, double click on the “Turn off Windows Location Provider” policy setting and set its configuration to either “Disabled” or “Not configured”. You should see the following description of the policy setting in the window:
“This policy setting turns off the Windows Location Provider feature for this computer. If you enable this policy setting, the Windows Location Provider feature will be turned off, and all programs on this computer will not be able to use the Windows Location Provider feature. If you disable or do not configure this policy setting, all programs on this computer can use the Windows Location Provider feature.”
- Now restart your computer.
Do You Need Help with Your Device?
Our Team of Experts May Help
Troubleshoot.Tech Experts are There for You!
GET HELP
Troubleshoot.Tech experts work with all versions of Microsoft Windows including Windows 11, with Android, Mac, and more.
Share this article:
You might also like
Quest 2 has been crowned as the best overall VR headset by many websites, and to be honest it is really a great piece of equipment deserving of every praise it gets. It seems that Meta feels that it can do better so the new upcoming Quest Pro is upgraded and a new line of VR sets from this company. The economic standard Quest line will not be shut down and it will still remain as an economic version of Meta’s VR product line.

Quest Pro will be added as a new line of the better product line with better performance and better quality. It is the first VR headset that is packing Qualcomm Snapdragon XR3+ Gen 1 chipset, 12GB of RAM, 256GB of internal storage, and 10 high-resolution sensors. Of course, this much power and improvement come with a higher price tag, this time that price tag is $1,499.99.
The new VR headset promises industry-leading visuals with a new optical stack instead of Fresnel lenses in Meta Quest 2 with thin-layer pancake optics that fold light reducing the depth of the optical module by 40% and at the same provides clear and sharp visuals.
The headset will give display more vivid colors, richer colors, and higher contrast by incorporating local dimming and quantum dot technology. It composes of specialized backlight hardware accompanied by software algorithms that can control more than individual LED blocks independently.
The Quest Pro will also come packed with new Meta Quest Touch Pro controllers. They will feature three built-in sensors to track the controller’s position completely independent of the headset which means that tracking and range of motion will be improved. These new controllers will also be sold separately at the cost of $299.99 and they can be used with Quest 2.
The headset is available for preorder and it will start shipping in late October on the Meta website
Read More
As you know, Windows allows you to share files between systems that are on the same network even though they are not connected physically. All you have to do is to make sure that the folder administrator allows access to the intended use and that your computer should be connected to the internet. Once you meet these conditions, you can share files between systems. However, recently a number of users reported that despite fulfilling these conditions, they end up getting errors instead when they try to access the shared drive. The error states:
“Error code: 0x80070035. The network path was not found.”
One of the common causes of this error is the antivirus program or the Firewall installed on your computer. It could also be that the drive is not shared in the first place or there are some issues with your network drivers. Whichever the case is, here are some potential fixes you need to check out to fix the Error code: 0x80070035.
Option 1 – Try to temporarily disable anti-virus and Windows Defender Firewall
As mentioned, the error could be due to the antivirus program or the Windows Defender Firewall installed on your computer. Thus, disabling them or any security software installed in your computer is always a good idea you can try when you’re not able to access the shared drive on your computer. There are times when you encounter problems like Error code: 0x80070035 due to interference of antivirus or security programs. Thus, you have to disable both your antivirus program and Windows Defender Firewall for the meantime and check if it fixes the error or not.
Option 2 – Check if the drive is shared
Before you further troubleshoot the problem, make sure that the drive you are trying to access is shared first. To do so, follow these steps:
- Right-click on the folder and select Properties.
- Go to the Sharing tab and check the status of the Network File and Folder Sharing.
- And if the status is “Not Shared”, you need to select Share.
- Next, select the intended Network User for sharing the file and choose the permission level for the user.
- After that, click on the Apply and OK buttons to save the changes made. You or the intended user should now be able to access the shared folder or file.
Option 3 – Try to ping the IP address of the targeted computer
Even though the shared folder or file is shared correctly, it is possible that the network channel is not connected properly which is why you have to test it by pinging the IP address of the targeted computer from the primary computer.
- Tap the Win + R keys to launch the Run dialog box.
- Type “cmd” in the field and tap Enter to open Command Prompt.
- Next, type the “ipconfig/all” command and tap Enter to execute it. This will populate various details.
- From the given details, take note of the IPv4 address.
- Afterward, open Command Prompt on the primary computer and then type the “ping <IPv4 address of the target computer>” command and hit Enter.
- Now check if you get 4 confirmation replies or not. If not, you can try to access the Network Adapter Troubleshooter.
To run the Network Troubleshooter, refer to these steps:
- Open the Search bar on your computer and type in “troubleshoot” to open the Troubleshoot settings.
- Next, scroll down and select the “Network Adapter” option from the right pane.
- Then click on the Run Troubleshooter” button.
- After that, your computer will check for any possible errors and will pinpoint the root cause of the problem if possible.
- Restart your computer.
Option 4 – Verify if Network Discovery is enabled
All you have to do is go to Start > Settings > Network & Internet and from there, click on the “Change connection properties” option and shift the radio button for Network profile to Private. After that, check if folder sharing is now working.
Option 5 – Try to modify the Network Security settings
There are times when the Network Security settings interfere with the folder or file sharing process. And if that’s the case, you can modify it to resolve the problem. How? Refer to these steps:
- Tap the Win + R keys to open the Run dialog box.
- Then type “secpol.msc” in the field and tap Enter to open the Local Security Policy manager window.
- After that, go to Local Policies > Security Options located on the left pane.
- Next, double click on Network security: LAN Manager authentication level in the right pane to open its Properties.
- And then select the “Send LM & NTLM-use NTLMv2 session security if negotiated” option from the drop-down menu.
- Now click on Apply and OK buttons to save the changes made.
- Reboot your computer.
Option 6 – Try to enable NetBIOS over TCP/IP
- Tap the Win + R keys to open the Run dialog box.
- Then type “ncpa.cpl” in the field and tap Enter to open the Network Connections window.
- After that, right-click on your network and select Properties.
- Next, double click on Internet Protocol Version 4 and click on the Advanced button.
- From there, go to the WINS tab and shift the radio button to Enable NetBIOS over TCP/IP.
- Now click OK to save the changes made and then restart your computer.
Option 7 – Update the Network Adapter drivers
You might also want to update the Network Adapter drivers by following these steps:
- Tap the Win + R keys to launch the Run window and then type in the “MSC” command and hit Enter to open the Device Manager window.
- Under the Device Manager, you will see a list of drivers. From there, look for the Network Adapters and expand it.
- Then right-click on each one of the Network drivers and update them all.
- Restart your PC and see if it helped in fixing the BSOD error.
Note: If updating the network drivers didn’t help in fixing Error code: 0x80070035, you can also try to uninstall the very same drivers and restart your Windows 10 PC. After that, the system itself will reinstall the drivers you just uninstalled. Alternatively, you can also download and install the drivers from the manufacturer’s website directly.
To reinstall the network adapter driver, refer to these steps:
- Open the Devices Manager from the Win X Menu.
- Then locate the device drivers and right-click on them to open the Properties.
- After that, switch to the Driver tab and click on the Uninstall Device button.
- Follow the screen option to completely uninstall it.
- Finally, restart your computer. It will just reinstall the device drivers automatically.
Read More
The new razer modular table looks like something that came out from Star Trek. Project Sophia is a desk but, it is a special kind of desk. It comes with modules that attach themselves underneath the table itself for customization purposes so each user can somewhat create a layout on the table itself as he or she desires. The table itself comes packed with intel CPU and Nvidia GPU but it is said that this component and PC parts will overall be easily upgraded to different ones as users desires.

The table itself looks very basic and it comes with a very large OLED screen between two different sizes depending on your table choice. You can choose between 65” or 77” screen sizes and OLED is mounted on the table itself so you cannot move it or adjust the angle of it that I somewhat find annoying but that comes from th4e fact I am used to adjusting my screens, but for this large screen maybe you do not need to adjust its rotation in order to get best viewing angle.
Modules themselves will offer some on-the-fly information and quick settings for the PC itself while being modular in a sense they could be mounted in different positions on the table itself providing some customization and order to suit users needs. Modules, for now, are: THX Spatial Surround Sound Controls, system monitoring, programmable hotkey module, Thunderbolt™ Powered eGPU, RAID Controller, Network Performance Module, 15W Wireless Charger, Thunderbolt™ 4 Hub, Media Controls.
Of course table, itself will have Razer chroma RGB on its surface and Razer says it will have a total of 13 different modules available on launch for a true level of personalization.
Conclusion
Is this Razer table something that you really need or just another expensive toy? Personally, I would not mind this table at all but I would choose modules for work, not gaming. Having some things like media controls or RAID controllers all the time at your fingertips is a great time saver and productivity asset. Razer also advertises some modules and setup already for streamers, creators, or team members and has some according modules like touch screen digitizer with stylus and similar.
Read More
Error Code 0x80070004 on Windows 10 – What Is It?
Some users trying to upgrade from Windows 7 or Windows 8/8.1 reported experiencing installation rollback with error code 0x80070004. This error normally appears when the Computer Name is set to names that can’t be used for the computer. It’s also possible this error occurs if users or program files folder were redirected to a different partition.
Solution
Error Causes
The Error code 0x80070004 on Windows 10 is normally caused if any of the following were used as the Computer Name and the user tried to upgrade to Windows 10:
- System (or SYSTEM)
- SELF
- LOCAL
- Network
Failure to fix this error message might result in others, including error code 0xc0000001.
Further Information and Manual Repair
If you don’t solve this error, you won’t be able to upgrade from Windows 7 or Windows 8/8.1 to Windows 10. Note that this error will continuously bring you back to the original OS unless fixed.
Please note that if you’re not confident in doing these steps, you might want to consider seeking the help of an expert or using an automated tool that will help fix this.
Here are a few methods to try.
Method 1: Check and Change the Computer Name
The most common cause of this error is if your computer uses any of the following reserved names:
- LOCAL
- System (or SYSTEM)
- Network
- SELF
These reserved names are not meant to be used as computer names. If this is what your computer uses and you try to upgrade to Windows 10, you will surely get this error. Check your computer name and if you see any of the reserved names, change it right away.
Changing Computer Name in Windows 8.1
If you’re trying to upgrade from Windows 8.1, you can change the name of the computer by following these steps:
- Step 1: Open the Start menu then simply type “rename computer”. After that, choose “Rename this computer”
- Step 2: A dialog box will open. Just click the “Change” button
- Step 3: A new dialog box will open. Type the new name. Click Apply then Ok.
Changing Computer Name in Windows 7
If you’re trying to upgrade from Windows, you can follow the steps below to change the name of your computer.
- Step 1: Go to the Start menu then on the Computer section, right-click the mouse and choose “Properties”.
- Step 2: A new dialog box will appear. Go to “Computer name, domain, and workgroup settings” then click “Change settings”. In case you’re asked for administrative access, make sure to grant it.
- Step 3: Find the “Computer Name” tab then click “Change”
- Step 4: Change the computer name and click Ok.
Method 2: Fix the “Users” directory issue
If the first method doesn’t work, it probably means the computer name isn’t the cause of this error. Another reason why users experience Error code 0x80070004 when upgrading to Windows 10 is if the “Users” directory was relocated. So, when you try upgrading to Windows 10, the installer wasn’t able to find the user profiles on the “%systemdrive%”, where the current operating system is installed.
If you changed or moved any of the Users, Program Data, or Program Files folders, this will cause the error. Before you upgrade to Windows 10, you might be required to reset or reinstall your current operating system (Windows 7 or Windows 8.1).
If you haven’t made any changes or haven’t moved any of the mentioned folders, there’s a great chance that your users’ profiles are corrupted. You can also reinstall your current operating system. However, you might want to check for the corrupter user profile first. To do this, follow the steps below:
- Step 1: Go to the Start menu and type System
- Step 2: Click System then go to the Advanced tab
- Step 3: Go to Settings, which you’ll find under User Profiles
On the Users Profiles, make a copy of all the accounts somewhere. Sign out from the current user account then try logging in back using the accounts you’ve copied. For each account, you get an error, delete it. However, make sure that you don’t delete the UpdateUser and Administrator account ever.
After this is done, try upgrading your operating system to windows 10 again.
Method 3: Try a trusted and secured Automated Tool
If the above methods still not useful, you might want to rely on an automated tool. Find a secured and trusted tool. It will help fix this issue.
Read More
The world today is still sadly under pandemic and by the looks of it, COVID-19 is here to stay, well at least for some time in the near future. Razer seems to think so as well since their upcoming gear is not really what you would expect.
Enter Hazel, a new and upcoming Razer smart mask.
Protection
Hazel mask has a high bacterial surgical N95 filter with fluid resistance that will protect you against large droplets and splashes. A detachable active ventilator regulates airflow and is capable of filtering around 95% of airborne particles. Mask comes with a special charging case that has an auto sterilization UV light that will kill bacteria and viruses inside the case interior while it charges.
When the mask is recharging it will change color from red to green visually showing the level of the current charge. Mask of course has easy to replace filters inside ventilators and Razer is standing by that fully charged mask will last enough for full-day use.
An active ventilation system brings cool air while releasing breathing heat at the same time drastically reducing CO2 inside the mask that could produce dizziness and headache.
Silicon guard is on its edge gluing to around your face in order to prevent exterior air sneaking inside the mask and positioning it firmly so it does not rest on your lips in order for easier and clearer communication.
Hazel personalization and technical features
Hazel has a clear and transparent design making it better for social interaction since other people will be able to see your lips and smiles thus making it more natural. A low light mode that turns on automatically when it is dark outside is also aimed for easier communication.
Speaking of communication, the mask comes with voice Amp technology that has a built-in mic and amplifier thus making your voice lines clear so you are not muffled when wearing the mask itself. Your friends and other people will be able to hear you like you are not wearing a mask at all.
Thicker air loops apply less pressure on ears and can be adjusted for a more secure fit, while the mask itself can be custom-made to fit your face shape.
And of course Hazel comes with 16.8 million colors and a suite of effects with Razer Chroma RBG
Read More

REevil is one of the most active and successful hacking groups connected to Russia and operating all over the world. The group recently demanded a huge bitcoin ransom for an attack targeting IT firm Kaseya in the USA.
Since Tuesday blog and payment site run by REvil group cannot be longer reached without any kind of explanation or why.
The reason behind the disappearance is unknown but has sparked speculation that the group may have been targeted deliberately by authorities.
US President Joe Biden said he raised the issue with Vladimir Putin during a phone call on Friday, after discussing the subject during a summit with the Russian president in Geneva last month.
Mr. Biden told reporters that he had «made it very clear to him…we expect them to act» on information and also hinted the US could take direct digital retaliation on servers used for intrusions.
The timing of Tuesday’s outage has sparked speculation that either the US or Russian officials may have taken action against REvil — though officials have so far declined to comment and cyber experts say sudden disappearances of groups are not necessarily uncommon.
The development comes after a series of high-profile ransomware attacks which have hit major US businesses this year.
The FBI accused REvil — also known as Sodinokibi — of being behind a ransomware attack on the world’s largest meat processing company JBS last month.
Read More
D3dx9_43.dll Error — What is it?
D3dx9_43.dll is a type of Dynamic Link Library containing small programs. This file is associated with Microsoft DirectX software. It is used and utilized by most Windows-based games and DirectX advanced graphic programs.
The error D3dx9_43.dll pops on your computer screen when there is some issue when running or loading Microsoft DirectX programs.
This error is often displayed in any one of the following formats:
- “D3dx9_43.DLL Not Found»
- «D3dx9_43.dll not found. Reinstalling might help fix this.»
- «The file d3dx9_43.dll is missing»
- «File d3dx9_43.dll not found»
The good news is that this error code is not fatal.
This means it will not result in system crashes, failure, or data loss. But it may hamper your ability to access, run and load Windows-based games associated with DirectX therefore to avoid the inconvenience it is advisable to repair it immediately.
Solution
Error Causes
D3dx9_43.dll error code can occur due to several reasons. These include but are not limited to:
- Missing or corrupt D3dx9_43.dll file
- Outdated drivers
- Corrupt registry
- Viral infection
Further Information and Manual Repair
To fix the D3dx9_43.dll error on your PC, try the manual easy to do methods illustrated below. To perform these methods to repair the issue, you don’t need to be a technical whiz. These are simple methods and easy to perform.
Method 1 — Check Your Recycle Bin or Download D3dx9_43.dll File
If you just recently uninstalled a program from your PC, then there is a possibility that the D3dx9_43.dll file got accidentally deleted during the process.
This happens because DLL is a shared file. The program you uninstalled might be running with the same file. In case of accidental deletion of the D3dx9_43.dll file, it is advisable to check your recycle bin to repair the issue.
Simply go to the recycle bin and look for the deleted file; if you locate it simply reinstall. However, if you are unable to find it, then if you have access to an internet connection, simply download the D3dx9_43.dll file from a reliable DLL website.
Method 2 — Update Drivers
If the error code occurs due to outdated drivers, then it is recommended to update drivers on your system. For example, the D3dx9_43.dll file error indicates an outdated video card driver since this file is linked to video game software.
Therefore, simply update the drivers for your video card. Drivers can be updated in Windows by using a driver update wizard from within Device Manager. The wizard will walk you through the entire driver update process, making the updating task a lot simple and hassle-free.
Method 3 — Install an Antivirus
In case of malware infection, it is advisable to install a powerful antivirus. Simply run it to scan your entire PC for viruses. Then remove them to resolve the issue.
Method 4 — Clean and Repair the Registry
D3dx9_43.dll error may also pop up due to registry corruption.
This happens when the registry loads with unnecessary and obsolete files like cookies, junk files, internet history, and bad registry entries.
These files take up all the space and damage the registry. It also results in DLL file corruption and disk fragmentation.
To resolve this it is important to clean the registry and repair it.
A quick way to perform registry clean-up is to download Restoro. This is an advanced PC Fixer embedded with a powerful registry cleaner. It scans for all registry-related errors instantly, removes them, cleans the registry, and repairs the damaged files.
Click here to download Restoro on your PC and resolve error D3dx9_43.dll today!
Read More
So you just have turned your computer ON only to find out that your device which was working perfectly yesterday is not working anymore. This situation can be very stressful and disappointing but do not despair, before you toss your device through the window know that this kind of behavior can be traced back to a software issue.
In this article, we will give you hints on what to do and where to pay attention when something like this happens so you get the device back in working order.
-
Check if it not a hardware malfunction
To save yourself time and unnecessary frustration with juggling through Windows first inspect the device to be sure that indeed it is working properly, check all led lamps which could indicate that the device is working and receiving power, and if it is an internal device try opening the case and visually check if there are signs of working like rotating fans or led lamps on it.
-
Check Cables
If it is an external device that has stopped working try checking power cables and cables which go to your computer, see if they are tightly connected. If it is an internal device also check cables, nudge them and if possible disconnect and clean them.
-
Disconnect and reconnect the device
Try this solution to see will Windows register the device again and start it.
-
Update Windows
If there is a Windows update not installed, install it and see if the device will start working.
-
Update device drivers
Go to device manager and update the device driver to its latest version or go to the manufacturer’s site and download the latest driver version.
-
Reinstall the device
In the device manager, uninstall the device driver and reboot Windows. When Windows boots it will recognize the device and install the necessary drivers for it.
-
Disable antivirus and firewall
Sometimes antivirus can prevent certain devices from working properly, especially if they rely on some system files to which antivirus or firewall has cut access. Try disabling your PC protection to see if this will resolve the issue.
-
Use dedicated error software
Use DRIVERFIX to automatically search and fix driver issues.
Read More
Booting the Windows computer system includes loading it from the various boot devices such as drivers, network as well as USB drives when the computer is turned on. The instant the startup sequence is done loading the operating system the system hardware will be ready to perform some complex operations – in this process, the Boot Log in Windows 10 is a record that maintains the list of success or failure of many pieces of Windows 10 system during the booting process. In other words, the Boot Log is the one that keeps a record of all that has happened while loading from the computer storage system to the memory during the boot process. It is available for several devices like network, hardware devices, and the operating system which assist in detecting issues during the boot process and other issues with regards to troubleshooting. Through Boot Log, you’ll know which drivers were unloaded and loaded from the start of the system during the boot process. You have the option to either disable or enable this feature on your Windows 10 PC.
Named as “ntbtlog.txt”, the log file lists all the successfully loaded processes and the unsuccessful ones during the boot process. It is saved to the drive C:Windowsntbtlog.txt. As mentioned, you can enable or disable this feature in two ways – the first one is by using the System Configuration or MSConfig while the second one is using the Command Prompt. In this post, we’ll show you how you can enable or disable Boot Log in Windows 10 either way.
Option 1 – Enable or Disable Boot Log using System Configuration
Enable Boot Log:
- Tap the Win + R keys to open the Run dialog box.
- Then type in “msconfig” and click OK to open System Configuration.
- After that, go to the boot tab and check the checkbox labeled “Boot Log” under the Boot options so that you can enable the Boot Log feature.
- Then click on OK to save the changes made.
- Next, click on the Restart button in the prompt window to get started with the Boot Log process.
- After restarting your PC, go to C:Windowsntbtlog.txt to open the boot log.
Note: As pointed out earlier, the log file contains a list of all the successfully loaded drivers and also the list of drivers that failed to load during the boot process and every time you restart the system, the boot log file will keep on updating and will eventually increase the list of entries. For you to locate the drivers and make your troubleshooting a lot easier, I advised disabling the boot log after troubleshooting. To disable the boot log using System Configuration, refer to the steps below.
Disable Boot Log:
- Tap the Win + R keys to open the Run dialog box.
- Then type in “msconfig” and click OK to open System Configuration.
- After that, go to the boot tab and unmark or uncheck the checkbox labeled “Boot Log” under the Boot options so that you can disable the Boot Log feature.
- Then click on OK to save the changes made.
Option 2 – Enable or Disable Boot Log using Command Prompt
Enable Boot Log:
- Go to the Start Menu and then type in “command prompt” in the search bar.
- After that, right-click on the Command Prompt option and select the “Run as administrator” option.
- After opening Command Prompt, type in “bcdedit” and tap Enter.
Note: You have to find the Identifier of the current operating system first to enable the Boot log. You can find it under the Windows Boot Loader section in the “Description” field and in this case, it’s Windows 10. You can also find the operating system identifier under the Windows Boot Loader section next to the field name identifier.
- To check if the boot log entry is disabled or enabled, go check the “Bootlog” field under the Windows Boot Loader. And if it turns out that the “bootlog” entry is enabled, the entry will be “Yes”. Otherwise, the entry will be “No”.
- Next, type in the following command with the operating system identifier to enable the boot log.
bcdedit /set {identifier} bootlog Yes
Note: In the command given above, make sure that you replace the given system identifier with your computer’s system identifier. For instance:
In this example, the identifier was replaced with the actual operating system identifier as current.
bcdedit /set {current} bootlog Yes
- Afterward, restart the system to start the Boot log process.
- After the restart, go to C:Windowsntbtlog.txt to open the boot log.
Note: Every time you restart your computer, the boot log file will keep on updating which will increase the size of the log eventually. So if you want seamless and easier troubleshooting, it is advised to disable the Boot log after you troubleshoot. To disable it using the Command Prompt, here’s what you have to do.
Disable Boot Log:
- Go to the Start Menu and then type in “command prompt” in the search bar.
- After that, right-click on the Command Prompt option and select the “Run as administrator” option.
- Once the Command Prompt is opened, type in the following command and then tap Enter to disable the boot log feature.
bcdedit/ set {identifier} bootlog No
Note: In the command given above, you need to replace the given system identifier with your computer’s system identifier. For instance:
In this example, the {identifier} was replaced with the actual operating system identifier as {current}.
bcdedit /set {current} bootlog No
- Now close the Command Prompt.
Read More
A recent update in Windows 10 has caused a couple of glitches. One of these glitches is having trouble signing into Windows 10. Some users reported that they were not able to sign in to their computers using a PIN and they weren’t also able to reset it either. If you are one of these users, then you’ve come to the right place as this post will help you resolve issues that you are having in signing in to your computer using your PIN or fingerprint with Windows Hello.
When you encounter this issue, you will get an error message on your screen stating:
“Your PIN is no longer available due to a change in the security setting on this device on this device.”
To resolve this problem, you need to follow the steps laid out below carefully.
- Step 1: The first thing you need to do is to make sure that you are using an administrator account. After signing in as admin, tap the Win + E keys to open the File Explorer.
- Step 2: After that, under the View menu, enable Hidden items.
- Step 3: Next, navigate to the following path:
C:\Windows\Service\Profiles\Local\Service\AppData\Local\Microsoft
Note: From there, you should see a folder named “Ngc”. This folder might be the one that’s causing the problem so you are going to fix it by making some changes. This folder contains all the files responsible for any PIN-related settings. So if you are not able to access the Ngc folder, or it has gotten corrupted for some reason during an update here’s how to fix it.
- Step 4: Try opening the Ngc folder. If you are able to open it, just skip to step 11 but if you can’t open it and you got the “Permission Denied” error message, proceed to the next few steps.
- Step 5: Right-click on the Ngc folder and select Properties.
- Step 6: Under Properties, go to the Security tab and click on the Advanced button.
- Step 7: Next, click on the Change link which corresponds to the Owner field.
- Step 8: Then click on Object Types and ensure that everything is selected.
- Step 9: After that, enter your username in the field. You can just use the email that corresponds to your Microsoft account or you can also use the Check Names button to verify it. Now click OK.
- Step 10: You should now see a change in the owner’s name. Just make sure that you enable the checkbox below it which is labeled, “Replace owner on subcontainers and objects” and then click Apply and close everything.
- Step 11: Next, try opening the Ngc folder again. You should now be able to access it. After opening the folder, delete all of its contents and make sure that it’s empty.
- Step 12: Restart your PC. After your computer has booted, go to the Account Settings and try setting up a new PIN. You should now be able to set up a new PIN and use it to sign in to your PC.
Read More
Copyright © 2023, ErrorTools. All Rights Reserved
Trademark: Microsoft Windows logos are registered trademarks of Microsoft. Disclaimer: ErrorTools.com is not affiliated with Microsoft, nor claims direct affiliation.
The information on this page is provided for information purposes only.
Quick Tips
- Configure the Geolocation Service to run automatically at startup on your computer.
- Ensure that location services aren’t disabled in the Group Policy settings.
- If the issue persists, try booting your PC in a clean boot state to determine if any third-party apps or programs are causing the problem.
Fix 1: Configure Geolocation Service
Geolocation Service is a small program that needs to run in the background for the location services to work. Ideally, the service should start every time your system boots. However, if that isn’t happening, location services may appear grayed out on Windows. Here’s what you can do to fix it.
Step 1: Press the Windows key + R to open the Run dialog, type services.msc, and press Enter.
Step 2: Locate and double-click on Geolocation Service on the list.
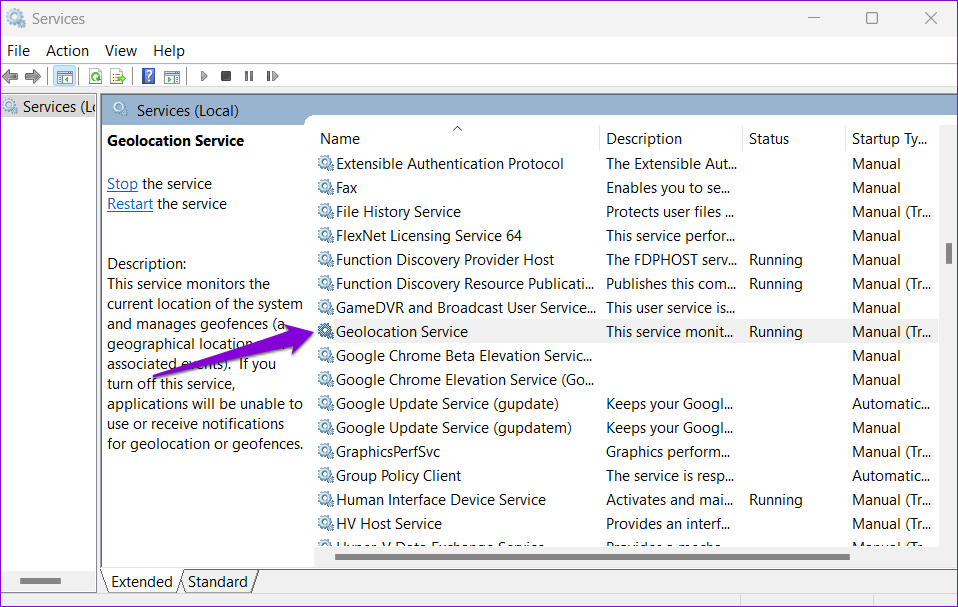
Step 3: Change the Startup type to Automatic and hit Apply.
If the service is not running, click on the Start button. After that, see if you can access location services.

Fix 2: Tweak Registry Files
You can fix the problem by modifying some registry files if the location services continue to appear grayed out. Here’s how:
Step 1: Press the Windows key + S to open the search menu. Type registry editor in the box and select the first result that appears.

Step 2: In the Registry Editor window, paste the following path in the address bar at the top and press Enter.
HKEY_LOCAL_MACHINE\SYSTEM\CurrentControlSet\Services\lfsvc\TriggerInfo

Step 3: Right-click on the key named 3, and select Delete.

Restart your PC for changes to take effect and see if the issue is still there.
Fix 3: Use Local Group Policy Editor
Like using the Registry Editor, you can also make changes to your PC via the Local Group Policy Editor on Windows. For that, you must be running the Pro, Enterprise, or Education editions of the Windows operating system. If you’re using the Home edition of Windows 11, this method won’t work for you.
Step 1: Press the Windows key + R to open the Run dialog box. Type gpedit.msc in the Open field and press Enter.
Step 2: In the Local Group Policy Editor window, use the left pane to navigate to the following folder.
Administrative Templates\Windows Components\Location and Sensors
Step 3: On your right, you’ll see three policies: Turn off location scripting, Turn off location, and Turn off sensors.

Step 4: Double-click “Turn off location scripting,” select Disabled, and hit Apply.

Step 5: Disable the Turn off location and Turn off sensors policies as well.
Step 6: Click on the Windows Location Provider folder.

Step 7: Double click on Turn off Windows Location Provider.

Step 8: Select the Disabled option and click Apply.

Restart your PC and you should be able to access location services as before.
Fix 4: Try Clean Boot
At times, third-party apps and services running on your PC can also prevent you from accessing certain Windows features. To verify this, you can boot your PC in a clean boot state.
Step 1: Press the Windows key + R to open the Run dialog, type msconfig.msc, and press Enter.
Step 2: Under the Services tab, mark the box that reads Hide all Microsoft services box and click the Disable all button.

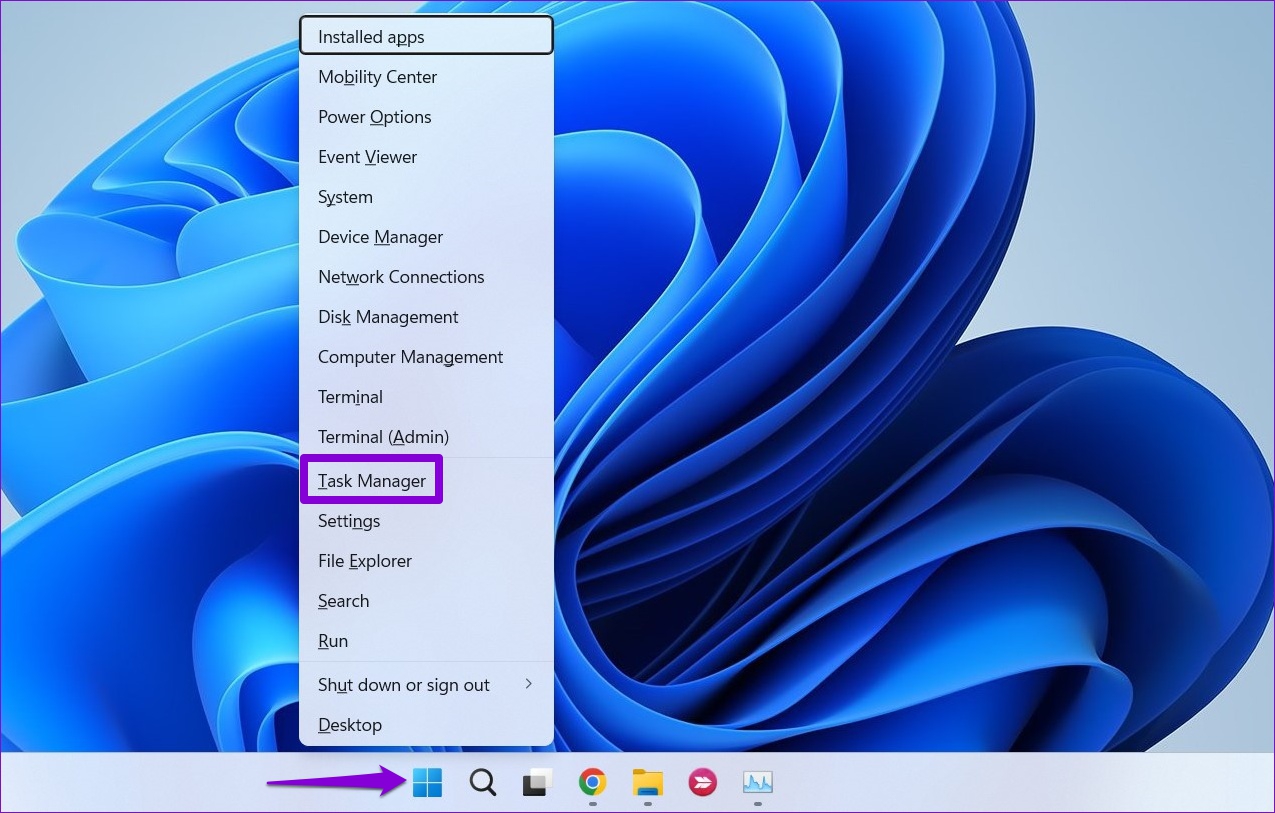
Step 3: Switch to the Startup tab and click on Open Task Manager.
Step 4: In the Startup tab, disable all the third-party apps one by one.

Restart your PC after this to enter the clean boot state and see if you can access the location services. If this helps, you’ll need to look through any recently installed apps and programs and remove them.
To boot in normal mode again, follow the steps above to enable all Startup apps and services, and then reboot your PC.
Was this helpful?
Thanks for your feedback!
The article above may contain affiliate links which help support Guiding Tech. The content remains unbiased and authentic and will never affect our editorial integrity.
Methods to Enable and Disable Location Services in Windows 10 with steps. – Multiple apps and third-party tools need and use the location of your PC to provide their services. Map traces the location of PC and helps you in exploring nearby restaurants. But there are many users who don’t want certain applications to use the location service. Well, for those users, Windows includes few location settings so that they can have control over it. So, in this guide, we present you the guidelines to Enable and Disable Location Services on Windows 10.
There are certain applications that need to know the location information of your device before it can render its service. So, when these applications are run for the first time, they seek your approval to track the location details of the device. After granting permission, in future if you don’t want to share the location of the device with any app, you can anytime disable location services on Windows 10. Pursue a similar guide on [How To] Change App Permissions On Windows 10. So, Windows 10 includes specific location settings to manage location services for account, apps, and device respectively.
Ways to Enable and Disable Location Services on Windows 10
Method 1 – Through Action Center
Step 1 – Launch Action Center and to do so click the tiny icon that exists on the extreme right of the taskbar. Alternatively, you can also make it appear by pressing Win+A keys altogether.
You can Determine App Notification Count to Show in Action Center Windows 10.
Step 2 – If you cannot see the buttons on the Action Center, click Expand to view all of them. Now, locate Location button and click on it to enable or disable it. If Location button is highlighted, then the service is enabled and if it is not highlighted, the feature is disabled.
Method 2 – Using Settings Application
Step 1 – Open Settings program by jointly pressing Win&I keys. When various categories appear on its homepage, locate and select Privacy.
Read our similar guide on How to Avoid Privacy Issues on Windows 10.
Step 2 – Privacy settings page provides few segments on its left sidebar, so click Location.
a. Enable and Disable Location Services for this Device
Note – Settings program gives you the provision to control location services for your device (PC). In addition, keep in mind that you must possess administrative authorities before performing the below steps.
Step 3 – Shift to its right pane and click the Change button that appears underneath Location heading.
Step 4 – On another pop-up, use the slider and turn ON the slider for the option Location for this device. This will enable the location service for this (your) device.
Noteworthy point is that Location service for this device is enabled by default.
Step 5 – To disable the service, click on Change button and moreover, toggle OFF the slider of Location for this device by pulling it towards left.
b. Enable and Disable Location Services for Apps and Account
Note – Before you follow the below directions, make sure that the Location service for this device is enabled by the administrator either using Method 2a or 3a.
Step 6 – On the right panel of Location, find the option Location service. Switch ON the setting and this will enable location service for apps and account (This is the default setting).
Step 7 – Switch OFF the option Location service and specifically disable the feature for both your account and applications.
Method 3 – Via Registry Editor
Step 1 – On Cortana search field, type the command regedit and when she displays the same command, click on it.
For reference, you can read How to Access Registry Editor in Windows 10 – 5 Simple Tips.
Step 2 – UAC prompt will come up displaying the details of the tool. Give permission by clicking Yes and let Registry Editor open.
a. Enable and Disable Location Services for this Device
Note – Registry Editor also gives provision to enable and disable location service for this device but to carry out this procedure you must hold admin authorities.
Step 3 – On the Registry Editor, browse to the below path.
HKEY_LOCAL_MACHINE => SYSTEM => CurrentControlSet => Services => lfsvc => Service => Configuration
Step 4 – Shift to the right pane of Configuration key where a DWORD with a name Status will be visible, double-click on it.
Step 5 – To Enable Location for this device, input the value 1 on its edit box. Click OK to implement the change in the service.
Step 6 – To Disable Location service for this device, set 0 as its value and finally, click OK to make the changes effective.
b. Enable and Disable Location Services for Apps and Account
In order to follow this way, ensure that Location for this device is enabled using Method 2a or 3a.
Step 7 – After opening Registry Editor, navigate to the below path on the left sidebar.
HKEY_CURRENT_USER => SOFTWARE => Microsoft => Windows => CurrentVersion => DeviceAccess => Global => {BFA794E4-F964-4FDB-90F6-51056BFE4B44}
Step 8 – Once you reach the above key, find the string value with a name Value on the right pane and double-click on it.
Step 9 – To enable location services for apps and account, set its value as Allow on the edit box. Click OK.
Step 10 – To disable location services for apps and account, assign the value as Deny and click OK.
Step 11 – Once you change the string value, you have to modify DWORD also. To do so, travel to the below path.
HKEY_CURRENT_USER => SOFTWARE => Microsoft => Windows NT => CurrentVersion => Sensor => Permissions => {BFA794E4-F964-4FDB-90F6-51056BFE4B44}
Step 12 – On its right pane, find and double-click the DWORD SensorPermissionState.
Step 13 – A small edit box will pop-up, so, type 1 to enable or insert 0 to Disable Location Services for Apps and Account.
Conclusion
Hence, to Enable and Disable Location Services on Windows 10, the OS provides you a few distinct ways. Well, Registry Editor is generally for the advanced users. Normal users can manage location services using other ways pretty much easily. If you have more tips to manage location services on Windows 10, please write down to us.
Sometimes you face an issue where the Location settings option is greyed out in Windows 11. As a result, you cannot turn on or off the location settings. You can find this option at Settings > Privacy & Security > Location > Location Services.

Location services play a vital role in the proper functioning of apps and services that relies on the location. For example, a weather app that shows current weather with the help of location services. What if you’re unable to manage location services? This will be an incredible mess, isn’t it?
Usually, this issue occurs due to a bug, operating system, or conflict between third-party apps installed on your PC. There could be other reasons as well.
If you made up to this blog post, then it’s highly possible that the option to manage location services is greyed out in Windows 11, then try the solutions discussed below to fix the issue:
Note – If the Location Services or Settings option is Greyed Out in Windows 10, then you can try these solutions
Use Registry Editor Hack
The very first troubleshooting method to fix Location Settings greyed out is by using the Registry Editor. To do so, follow the steps given below-
Press the Windows key on your keyboard, and then in the Start Menu, search for Registry Editor. Click on Registry Editor from the search result.

In the Registry Editor, head to the following location: KEY_LOCAL_MACHINE\SYSTEM\CurrentControlSet\Services\lfsvc\TriggerInfo
On the left side, right-click on the folder named 3 and click on Delete.

Once done, close the Registry Editor and restart your PC and the issue will be fixed.
Restart Geolocation Service
On the basis of various reports from multiple affected users, they manage to fix the location settings greyed out in Windows 11 by restarting the Geolocation service. So should try it as well:
Open Start Menu by pressing the Windows key and searching for Services. Open the Services from the Start Menu.

In the Services app window, search for Geolocation Services. Right-click on it, and then click on Properties.

Click on the drop-down menu next to Startup and set it to Automatic. Ensure the Service Status is Running, and if not, then click on Start.

Once done, click on Apply and OK to save your changes.
Both solutions discussed above will help in fixing the location settings options disabled in Windows 11. Let us know which one worked for you.
If you know any other solution that misses covering feel free to share in the comment for other readers.
Avyukt Atri fearlessly delves into the offbeat corners of technology, uncovering hidden gems and unraveling untold stories. With a quirky approach and boundless curiosity, he uncovers haunted servers, code-breaking cats, and WiFi signals from parallel dimensions.