
In Windows 11/10, users sometimes come across an issue, where the Location services is reported to be greyed out. It could happen due to the Operating System or some third-party software. When this issue arises, users cannot enable or disable the Location services. Also, they cannot make any changes to the Location settings. So, how to fix Location settings greyed out in Windows 11/10?
Before you move on, it is better to perform a clean boot. After performing it, check if the issue related to the Location settings has been resolved. If not, then keep on reading.
In this post, learn how you can fix the location settings greyed out issue using different methods easily.
Page Contents
Fix 1: Using Registry Editor
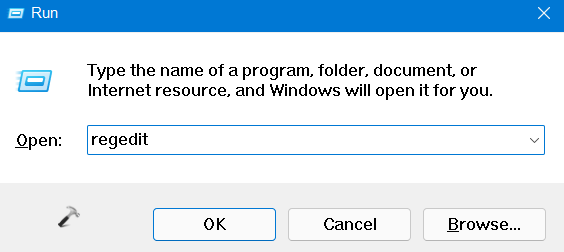
1. In the first place, you need to open the Run dialog box. For this, press the Windows + R keys simultaneously on your keyboard. Once opened, type regedit in the Run dialog box to open Registry Editor.
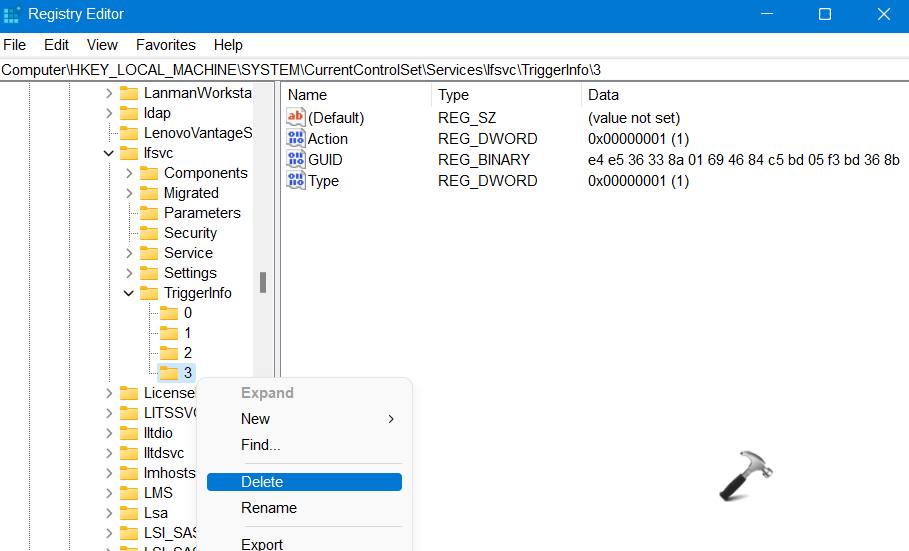
2. After that, navigate to the following location:
HKEY_LOCAL_MACHINE\SYSTEM\CurrentControlSet\Services\lfsvc\TriggerInfo
3. Once there, right-click on the folder named 3. Now, select the Delete option from the context menu.
4. Lastly, close Registry Editor. Once done, check if the issue has been fixed.
Fix 2: Using the Windows Services Manager
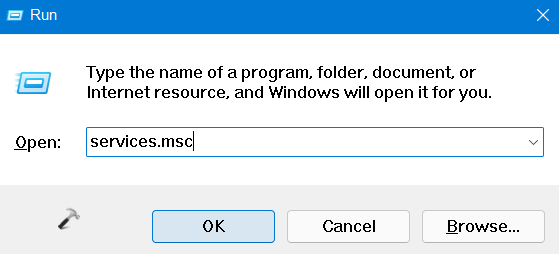
1. Firstly, open the Windows Services Manager. To do this, open the Run dialog box and type services.msc in the Run dialog box. Then, press Enter.
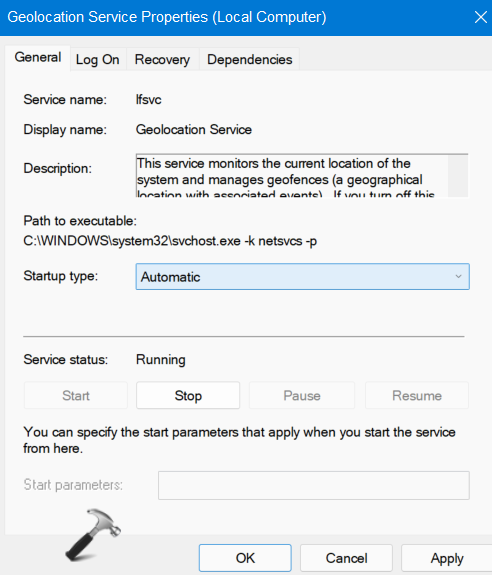
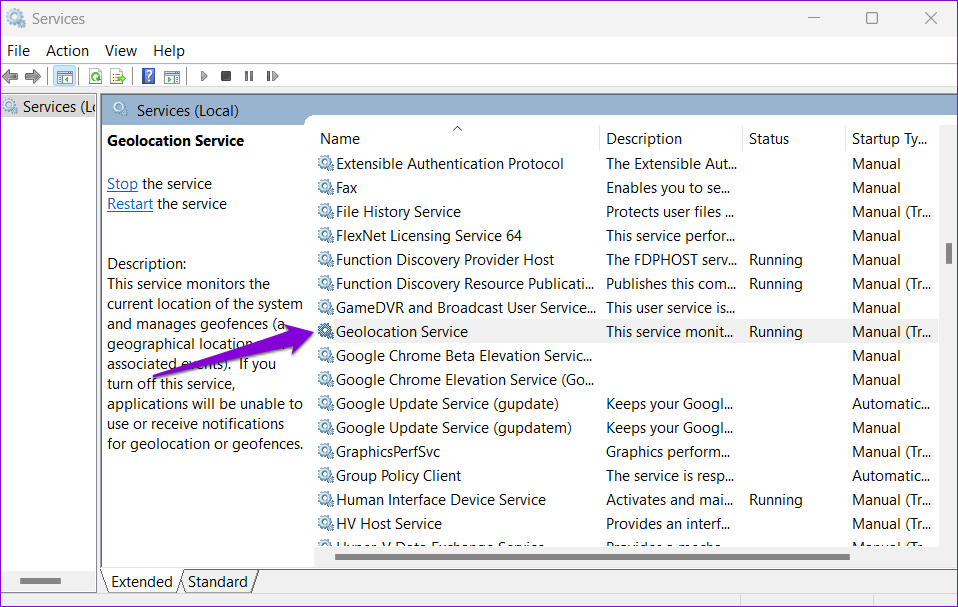
2. Now, look for Geolocation service and double-click on it. This will open its Properties window.
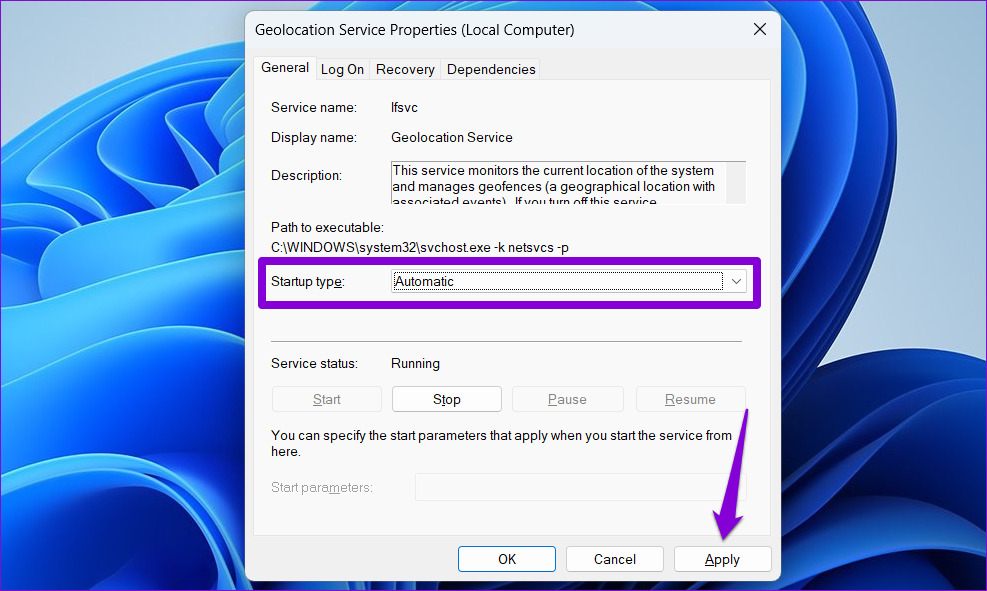
3. In the Properties tab, ensure that the Startup type is set to Automatic and Service status is Running. Make the changes if necessary and click on Apply and then, press OK.
So, this is how to fix location settings greyed out in Windows 11/10 issue. Both of these methods are quite effective. It is recommended to follow them carefully.
RELATED ARTICLES
Location services is a built-in tool in Windows 10 is a useful tool that offers users location information even when your laptop or desktop computer does not have a GPS since it uses Wi-Fi positioning as well as your device’s IP address. However, there are instances when you might encounter some problems when using this service. One instance is when you suddenly find the toggle button for Location service greyed out.
This kind of program could be due to some glitch in the system or some third-party application on your computer. Because of this problem, you won’t be able to toggle the Location service on or off and you won’t be able to make any changes in its settings. Worry not, for this post will guide you on what you can do to fix the greyed-out toggle button of Location services in Windows 10.
Before you perform some troubleshooting steps, you might want to restart your computer and see if it fixes the problem. If it didn’t, then this problem is not just some minor glitch. Thus, you have to follow the potential fixes provided below to fix the problem but before you do that, make sure that you create a System Restore point first. After that, follow each one of the following options.
Option 1 – Put your PC in a Clean Boot State
The first thing you can do to resolve the problem is to put your computer in a Clean Boot State. It could be that there is a third-party program that’s preventing the toggle button from functioning. To isolate this possibility, you need to put your computer in a Clean Boot State.
- Log onto your PC as an administrator.
- Type in MSConfig in the Start Search to open the System Configuration utility.
- From there, go to the General tab and click “Selective startup”.
- Clear the “Load Startup items” check box and make sure that the “Load System Services” and “Use Original boot configuration” options are checked.
- Next, click the Services tab and select the “Hide All Microsoft Services” check box.
- Click Disable all.
- Click on Apply/OK and restart your PC. (This will put your PC into a Clean Boot State. And configure Windows to use the usual startup, just simply undo the changes.)
- Now check if you can now use the toggle button of the Location service or not.
Option 2 – Try to use the Registry Editor
If putting your computer in a Clean Boot state didn’t fix the problem, you might want to make some adjustments in the Windows Registry via Registry Editor.
- Tap the Win + R keys to open the Run utility and type “regedit” in the field and then tap Enter to open the Registry Editor.
- After that, navigate to this registry path: HKEY_LOCAL_MACHINESYSTEMCurrentControlSetServiceslfsvcTriggerInfo
- From there, select the Key (folder) named as “3” and right-click on it, and then delete it.
- Once done, exit the Registry Editor and restart your computer.
Option 3 – Try to use the Windows Services Manager
- Tap the Win + R keys to open the Run dialog box and type “services.msc” in the field and hit Enter to open the Services Manager.
- Next, look for the “Geolocation Service” entry from the list of services.
- Once you find it, right-click on it and select Properties. This will open a new mini window.
- From there, make sure that it is “Running” and its Startup Type is set to “Automatic”.
- After that, close the Services Manager and check if the problem is now resolved.
Option 4 – Try to use the Group Policy Editor
- Tap the Win + R keys to launch Run and type “gpedit.msc” in the field and click OK to open the Group Policy Editor.
- After that, navigate to this path: Administrative TemplatesWindows ComponentsLocation and Sensors
- Next, double click on each one of the following settings and select the “Not configured” or “Disabled” option.
- Turn off location scripting
- Turn off location
- Turn off sensors
- Once done, navigate to this path: Administrative TemplatesWindows ComponentsLocation and SensorsWindows Location Provider
- From there, double click on the “Turn off Windows Location Provider” policy setting and set its configuration to either “Disabled” or “Not configured”. You should see the following description of the policy setting in the window:
“This policy setting turns off the Windows Location Provider feature for this computer. If you enable this policy setting, the Windows Location Provider feature will be turned off, and all programs on this computer will not be able to use the Windows Location Provider feature. If you disable or do not configure this policy setting, all programs on this computer can use the Windows Location Provider feature.”
- Now restart your computer.
Do You Need Help with Your Device?
Our Team of Experts May Help
Troubleshoot.Tech Experts are There for You!
GET HELP
Troubleshoot.Tech experts work with all versions of Microsoft Windows including Windows 11, with Android, Mac, and more.
Share this article:
You might also like
Although the Google Chrome browser is one of the most used browsers, a lot of things could still go wrong when browsing the web using it. One of the errors you might encounter is the “ NETWORK_FAILED ” error. This kind of error in Chrome indicates that Chrome wasn’t able to send your request through the network connection. It could be that your computer has trouble connecting to a stable internet connection or there is some plugin in your Chrome browser that is causing the issue. The worst-case would be malware. But worry not for this post will guide you on what you can do when you encounter the NETWORK_FAILED error in Google Chrome. Make sure to follow each one of the options given below and see which one of them worked best for you.
Option 1 – Disable or remove any unwanted extensions in Chrome
As you know, browser extensions help in enhancing the browsing experience but there are also times when it does exactly the opposite, and such is the case with the NETWORK_FAILED error in Chrome. It could be that one of the extensions in your browser is the one that’s causing the trouble. To disable or remove these unwanted extensions, here’s what you have to do:
- Launch Google Chrome, press Alt + F, move to More tools, and click Extensions.
- Look for Search.tb.ask.com or any other unwanted add-ons, click the Recycle Bin button, and choose Remove.
- Restart Google Chrome, then tap Alt + F, and select Settings.
- Navigate to the On Startup section at the bottom.
- Select “Open a specific page or set of pages”.
- Click the More actions button next to the hijacker and click Remove.
Option 2 – Run the Malware Scanner and Cleanup tool in Chrome
If removing or disabling the unwanted extension didn’t help in fixing the error, you can try using the built-in malware scanner and cleanup tool in Google Chrome. These tools help you get rid of any unwanted pop-ups, ads, unusual Startup pages, toolbars, and even malware.
Option 2 – Run the Malware Scanner and Cleanup tool in Chrome
- Launch Google Chrome and then tap the Alt + F keys.
- After that, click on Settings.
- Next, scroll down until you see the Advanced option, once you see it, click on it.
- After clicking the Advanced option, go to the “Restore and clean up the option and click on the “Restore settings to their original defaults” option to reset Google Chrome.
- Now restart Google Chrome.
Option 3 – Try to disable the Proxy
If you are using a proxy, you might want to consider disabling it as it could have something to do with the NETWORK_FAILED error.
- Tap the Win + R keys to open the Run dialog box.
- Then type “cpl” and hit Enter or click OK to open the Internet Properties.
- After that, go to the Connections tab where you should see the LAN settings. Click on it.
- Next, uncheck the “Use a Proxy Server for your LAN” and ensure that the “Automatically detect settings” option is checked as well.
- Then click Ok and then Apply to save the changes made.
- Restart your PC.
Option 4 – Flush DNS and reset TCP/IP
- Click the Start button and type in “command prompt” in the field.
- From the search results that appear, right click on Command Prompt and select the “Run as administrator” option.
- After opening Command Prompt, you have to type each one of the commands listed below. Just make sure that after you type each command, you hit Enter
- ipconfig /release
- ipconfig /all
- ipconfig /flushdns
- ipconfig /renew
- netsh int ip set dns
- netsh winsock reset
After you key in the commands listed above, the DNS cache will be flushed and the Winsock, as well as the TCP/IP, will reset.
- Now restart your computer and open Google Chrome then try opening the website you were trying to open earlier.
Option 5 – Delete the WLAN Profiles
Deleting the WLAN Profiles might be a good idea if you are not able to connect to the internet on your computer and if you’re using Wi-Fi. It could be that the networks that were connected previously have gone rogue which is why it is not connecting properly. And so deleting the WLAN profiles would be for the best.
That should do it.
Read More
If you have suddenly run into a problem when trying to connect or pair your Bluetooth keyboard with your Windows 10 computer, read on as this post will guide you on how exactly you can resolve the problem.
This kind of problem typically occurs when you’ve disabled the Bluetooth option. However, this option is already enabled and you still encountered the same error message saying, “Check the PIN and try connecting again”, then you need to troubleshoot the problem further.
In most cases, this kind of issue can be fixed when you restart your computer and go to the Windows Settings and select the “Add Bluetooth or other devices” option and then put the keyboard into pairing mode. And when the keyboard appears in the “Add a device” dialog box, just select it. On the other hand, if your Bluetooth keyboard won’t get connected to your Windows 10 computer and you encounter an error that says, “Can’t pair Bluetooth keyboard, Check the PIN and try connecting again”, then you need to check out the options provided below but before you do so, make sure that you create a System Restore point first as some of the troubleshooting options provided involves the Windows Registry.
Option 1 – Try to use the Device Pairing Wizard
The Device Pairing Wizard is the one that allows your computer to look for any new devices and display them underneath it. All you have to do to use this wizard is to follow its instructions to connect your Bluetooth device to Windows 10. To get started, follow these steps:
- First, tap the Win + R keys to launch the Run utility and type “devicepairingwizard” in the field, and then hit Enter to run the Device Pairing Wizard.
- After that, wait for a couple of seconds until the devices appear. Once they do, select the Bluetooth device you wish to add.
- A new screen with a passcode should appear instantly. You need to take note of the given passcode and type them on your Bluetooth keyboard.
- Once done, tap Enter. This should help in pairing your computer to your Bluetooth keyboard.
Option 2 – Try to use the Registry Editor
The next thing you can do to resolve the pairing issue with your Bluetooth keyboard is to use the Registry Editor by following these steps:
- Tap the Win + R keys to open the Run utility and type “Regedit” in the field and then hit Enter to open the Registry Editor.
- Next, navigate to this registry path: HKEY_USERS/.DEFAULT/Software/Microsoft/Windows/CurrentVersion/Bluetooth/ExceptionDB
- From there, look for the folder named “Addrs” and expand it. If you see any folders or keys under it, select them and delete them. These keys represent the MAC address of your Bluetooth devices.
- Once you’re done, restart your computer and try to pair your Bluetooth keyboard once more.
Option 3 – Try running the Bluetooth Troubleshooter
As you know, Windows 10 has various troubleshooters with user-friendly interfaces where you can utilize them to fix issues in your PC. And since you’re dealing with some Bluetooth problem, you have to run the Bluetooth Troubleshooter.
- Open the Windows 10 Settings.
- Then go to Update & Security > Troubleshoot.
- You should find the option for Bluetooth on your right-hand side – click on it then click on the “Run the troubleshooter” option.
- Now follow the next screen options.
Option 4 – Try to reinstall or update the Bluetooth driver
The issue might have something to do with the Bluetooth drivers. It could be that it is outdated and needs to be updated or that you recently updated it and since you have trouble pairing your Bluetooth keyboard, you can update, rollback, or uninstall the Bluetooth drivers. How? Follow the steps below.
- Tap the Win + X keys to open the Device Manager.
- Next, look for the Bluetooth device and right-click on it.
- Select the option “Update driver”.
- After that, a new popup window will appear. In there, select the option, “Search automatically for updated driver software”.
Note: Checking the update may take a few minutes so you’ll have to wait until it finishes. If it is able to find an update, you must install it.
Read More
A command is not recognized Error, what it is? If you are constantly using programs like CMD or DISM directly from the Run prompt, you might have wondered how they launched instantly and how is it that the Windows operating system is able to find them right away. For instance, when you create a shortcut of a program, the shortcut knows where exactly the program is located and launches it quickly.
The Windows operating system keeps a list of paths where the most common system programs are located so when you use the Run prompt, it opens easily. The list kept by Windows is called the Windows Environment Variables. If something goes wrong with this list, the programs won’t work. So in this guide, you will be guided on how you can troubleshoot the problem where any command you use is not recognized as an internal or external command, operable program, or batch file.
Before you start troubleshooting the problem, you need to make sure that the program you are trying to run really exists. In fact, this can also happen to the Run program which is pulled up using the Win + R shortcut. To check, go to C:\Windows\System32 and there, check if the program exists or not or you can also try searching for the EXE in the System 32 folder. After making sure that the program exists, refer to the instructions given below.
Modify the Windows Environment Variables:
- Step 1: Tap the Win + X keys and then select System. After that, it will open the section where you can see all the properties on your computer.
- Step 2: Next, select the Advanced system setting located on the left pane and click on the Environment Variables.
- Step 3: After that, locate Path under the System Variables and select EDIT.
- Step 4: Before you edit, you need to copy the entire string and paste it into the Notepad app so that in case something went wrong, you can paste it back.
- Step 5: Next, look for the directory path, “C:\Windows\System32”. If you can’t find it, try adding a semi-colon at the end.
- Step 6: Afterwards, click OK to save the changes made and then exit.
- Step 7: Now restart your computer as all the paths are picked up when your computer restarts.
Note: Now all you have to do is to try executing the programs once again – the ones where you got the error, “ is not recognized as an internal or external command, operable program or batch file” every time you open them and then see if you can now open these programs or not.
Read More
On September 18th, 2017, Cisco’s Talos announced that CCleaner, a popular utility with billions of worldwide users, had been compromised by hackers, and was used to unwittingly distribute hidden malware in its installer. Later in the day, Piriform, the publisher of CCleaner, confirmed the problem.
Undetected by all but 1 major antivirus including CCleaner’s own parent company, this occurred for over a month and impacted over 2.7 million users. Users of CCleaner v5.33.6162 and CCleaner Cloud v1.07.3191 for 32-bit Windows are affected. These downloads were live on CCleaner’s official site from August 15th to September 12th, 2017. Anyone who downloaded the program during this time could be affected.
The company claims that while the hackers set up the backdoor and many users were impacted, that the perpetrators have been arrested and that the malware never successfully performed its full task and compromised user’s PCs or sent out their data; in the wake of recent security breaches such as Equifax, users are understandably worried. Given the severity of the threat of hacking and data theft, users should take action immediately if they have CCleaner.
Technical Details of CCleaner Malware Injection
First reported by Talos, the malware, which was hidden in the CCleaner installer without the publisher noticing (despite them being owned by Avast, a massive Anti-virus company), modified a core program DLL file to evade detection, and creates several registry keys. Not only were these files not flagged by any major Anti-Virus, but they were also even digitally signed by Piriform via their Symantec certificate, meaning your PC and security program would likely whitelist and trust the malicious installer. The malware gathers personal information on a user’s PC, including IP address and running programs, and sends it to a remote server. In our testing, the program sent data to IP 216.126.225.148.
Restore Your PC (If Possible)
As of the publication of this article, there have been no assurances given that updating or even uninstalling CCleaner will remove the malware is installed. The only action thus far has been shutting down the remote server where user data was being sent has been shut down by authorities. For this reason, it is best to remove the underlying malware separately, as its presence represents a serious security threat. Unfortunately, as this could have been installed as far back as August 15th, 2017, your System Restore points may not go back that far, or even if they do, restoring to such an outdated point may cause unintended problems with other programs you use and potentially lost files and data. Manually backing up files and doing a full format or clean Windows installation would likely be successful in fully removing the malware, but is extremely time-consuming and can be difficult for many PC users. Unfortunately, this makes a PC Restore or format an unattainable option for many.
Update CCleaner to the Latest Version
While CCleaner has told users to update to the latest version of the program. Prior to doing so, we recommend fully uninstall CCleaner, ensuring you check its program files folders and registry keys, manually deleting any remnants, and then re-downloading the latest version from the official site and reinstalling clean.
Read More
If you suddenly see a black border in your computer’s display then you might be wondering how come this happened but worry not for this post will give you a couple of suggestions that could help you resolve the problem.
The black bar could appear at the bottom or just the sides of the screen. Whichever it may be, there are options you can check out. Refer to the options givens below and make sure to follow them carefully.
Option 1 – Try checking the screen resolution
You might want to try checking the resolution of your screen.
- Open the Windows 10 Settings and go to Display.
- Next, go for the “100% (Recommended)” option under Scale and layout for the size of the text, apps, and other items.
- After that, select the Recommended setting again under Resolution.
Now check to see if the black bars are still there. They should be gone at this point, but if for some strange reason nothing has changed, then attempt the steps below.
Option 2 – Try updating Graphics & Monitor drivers
You might want to try updating your graphics and monitor drivers if you haven’t updated them for some time now. To do that, refer to these steps:
- First, boot your computer into Safe Mode.
- After that, tap the Win + R keys to launch Run.
- Type in devmgmt.msc into the box and tap Enter or click OK to open the Device Manager.
- After that, a list of device drivers will be displayed. From there, look for the Graphics drivers or the Monitor drivers and then click each one of them.
- After that, right-click on each entry and select the “Uninstall Device” option from the menu.
- Now restart your computer.
- After restarting your computer, go to the Settings app and Check for Updates in the Windows Update section.
Note: You can also try to roll back the graphics and monitor drivers back to their previous versions if updating them didn’t work. You can also try visiting the manufacturer’s website and download the graphics or monitor driver setup for your operating system.
Option 3 – Try to run the DISM tool
You can also run the DISM Tool as it might also help in getting rid of the black border or bar on your Windows 10 computer. Using this built-in tool, you have various options such as the “/ScanHealth”, “/CheckHealth”, and “/RestoreHealth” which could help you resolve the problem.
- Open the Command Prompt with admin privileges.
- Then type in the following commands and make sure to hit Enter right after you type each one of them:
- Dism /Online /Cleanup-Image /CheckHealth
- Dism /Online /Cleanup-Image /ScanHealth
- exe /Online /Cleanup-image /Restorehealth
- Do not close the window if the process takes a while as it will probably take a few minutes to finish.
Option 4 – Troubleshot the problem in a Clean Boot State
There are some instances that some conflicting programs installed in your computer might be the one that’s causing the Black border issue. To identify which program is causing the problem, you need to put your computer in a Clean Boot State. To do so, follow the steps below.
- Log onto your PC as an administrator.
- Type in MSConfig in the Start Search to open the System Configuration utility.
- From there, go to the General tab and click “Selective startup”.
- Clear the “Load Startup items” check box and make sure that the “Load System Services” and “Use Original boot configuration” options are checked.
- Next, click the Services tab and select the “Hide All Microsoft Services” check box.
- Click Disable all.
- Click on Apply/OK and restart your PC. (This will put your PC into a Clean Boot State. And configure Windows to use the usual startup, just simply undo the changes.)
- From there, start to isolate the problem by checking which one of the programs you installed recently is the root cause of the problem.
Read More
The Get Coupons Fast Toolbar is a Browser Extension for Google Chrome developed by Mindspark Inc. This extension allows quick access to the most popular coupon websites available. While this might look like a good useful idea, keep in mind that it has been classified as a Browser Hijacker by Several anti-virus applications.
When installed this extension will hijack your new tab page, changing it to a customized version of Search.MyWay.com. While active It records user browser activity, this data is later used to better target ads.
While browsing the internet with this extension installed you will see additional pop-up ads, sponsored content, and injected ads into your browser search results and pages. GetCouponsFast usually comes bundled with other PUP-s or Browser Hijackers that may harm your computer and it is recommended you remove it from your PC.
About Browser Hijackers
Browser hijacking means that a malicious code has taken control over and altered the settings of your internet browser, without your permission. They are created to disrupt browser functions for various reasons. It redirects you to the sponsored sites and inserts ads on your internet browser that assists its developer to generate revenue. While it might seem harmless, these tools were created by malicious people who always look to take advantage of you, so that they could make money from your naivety and distraction. They did not just ruin your browsers, but browser hijackers can also modify the system registry, making your computer or laptop susceptible to various other types of attacks.
Signs of browser hijacker infection
There are plenty of signs that indicate the web browser has been highjacked:
1. you notice unauthorized modifications to your web browser’s home-page
2. you find re-directed to internet sites you never intended to visit
3. the default browser configurations have been modified and/or your default web engine is altered
4. you’ll see many toolbars on your browser
5. you might see never-ending pop-up adverts on your computer screen
6. your browser has become unstable or starts running slowly
7. you are blocked to access the websites of antivirus solution providers.
How does a computer get infected with a browser hijacker?
Browser hijackers might use drive-by downloads or file-sharing networks or an email attachment in order to reach a targeted computer system. They could also come from add-on applications, also known as browser helper objects (BHO), web browser extensions, or toolbars. Some internet browser hijackers spread in user’s computers using a deceptive software distribution method called “bundling” (often through freeware and shareware).
Browser hijackers will affect the user’s web browsing experience severely, monitor the websites visited by users and steal sensitive information, cause difficulty in connecting to the web, and eventually create stability problems, making programs and systems freeze.
Removal
Some hijackers can be simply removed by deleting the free software they were included with or by deleting any add-ons you have recently added to your browser. Unluckily, the majority of the software applications utilized to hijack an internet browser are deliberately designed to be difficult to detect or get rid of. And there is no denying the very fact that manual repairs and removal can certainly be a difficult task for a novice PC user. Moreover, there are various risks connected with tinkering around with the system registry files.
Installing and running anti-malware software on the affected computer will automatically erase browser hijackers as well as other unwanted programs. In order to get rid of persistent browser hijackers effectively, install the award-winning Anti-Malware tool Safebytes Anti-Malware. Employ a pc optimizer (such as Total System Care) along with your anti-malware to repair various computer registry problems, remove computer vulnerabilities, and improve your computer performance.
How To Get Eliminate Virus That Is Blocking Antivirus Downloads?
Malware could cause all sorts of damage once they invade your computer, starting from stealing your private details to erasing data files on your computer system. Some malware is created to hinder or block things that you wish to do on your PC. It may not permit you to download anything from the net or it will prevent you from accessing a few or all of the websites, in particular the anti-virus sites. If you are reading this article right now, you may have perhaps realized that a malware infection is a reason for your blocked internet connectivity. So what to do if you want to download and install an anti-virus application like Safebytes? There are some steps you can take to circumvent this problem.
Boot Windows in Safe Mode
Safe Mode is actually a unique, simplified version of Windows in which just bare minimum services are loaded to prevent malware and also other troublesome programs from loading. If the malicious software is set to load automatically when the PC starts, shifting into this mode may prevent it from doing so. In order to enter into Safe Mode or Safe Mode with Networking, press the F8 key while the system is booting up or run MSCONFIG and find the “Safe Boot” options under the “Boot” tab. Once you are in safe mode, you can attempt to install your anti-malware program without the hindrance of the malicious software. Right after installation, run the malware scanner to remove standard infections.
Use an alternate web browser to download security software
Web-based malware can be environment-specific, aiming for a particular browser or attacking particular versions of the browser. The best solution to avoid this issue is to choose an internet browser that is known for its security features. Firefox contains built-in Malware and Phishing Protection to keep you secure online.
Run anti-virus from a pen drive
Another option would be to make a portable anti-malware program onto your USB flash drive. To run anti-virus using a pen drive, follow these simple measures:
1) Download Safebytes Anti-Malware or Windows Defender Offline onto a virus-free PC.
2) Plug the USB drive into the clean computer.
3) Double-click the Setup icon of the anti-malware program to run the Installation Wizard.
4) Select thumb drive as the place when the wizard asks you where you wish to install the application. Follow the directions to complete the installation process.
5) Unplug the flash drive. Now you can utilize this portable anti-virus on the infected computer.
6) Double click the Safebytes Anti-malware icon on the pen drive to run the application.
7) Click the “Scan Now” button to start the virus scan.
SafeBytes Anti-Malware Overview
Want to download the best anti-malware application for your desktop? There are many applications on the market that comes in free and paid versions for Windows systems. Some are very good ones, some are ok types, while some are just fake anti-malware programs that will damage your personal computer themselves! While looking for an antimalware program, pick one that offers reliable, efficient, and total protection against all known viruses and malware. On the list of recommended software is SafeBytes AntiMalware. SafeBytes has a good history of quality service, and customers appear to be happy with it.
Safebytes is among the well-established PC solutions companies, which provide this all-inclusive anti-malware application. With its outstanding protection system, this tool will automatically detect and remove most of the security threats, which include adware, viruses, browser hijackers, PUPs, trojans, worms, and ransomware.
SafeBytes possesses a variety of wonderful features that can help you protect your computer from malware attacks and damage. Listed below are a few of the great ones:
Real-time Protection: SafeBytes provides round-the-clock protection for your computer restricting malware intrusions in real-time. They are very efficient in screening and getting rid of numerous threats because they’re regularly improved with new updates and alerts.
Robust Anti-malware Protection: Built on a highly acclaimed antivirus engine, this malware removal tool has the capacity to find and remove various stubborn malware threats such as browser hijackers, PUPs, and ransomware that other common antivirus programs will miss.
Web protection: SafeBytes checks the hyperlinks present on a webpage for possible threats and tells you if the website is safe to explore or not, through its unique safety rating system.
Minimal CPU and Memory Usage: SafeBytes is a lightweight and simple to use antivirus and anti-malware solution. As it utilizes very low computer resources, this software leaves the computer power exactly where it belongs: with you.
24/7 Customer Service: Support service is available 24 x 7 x 365 days via chat and email to answer your queries.
Overall, SafeBytes Anti-Malware is a solid program since it has lots of features and could identify and remove any potential threats. Now you may realize that this tool does more than just scan and delete threats on your computer. So when you need advanced forms of protection features and threat detections, purchasing SafeBytes Anti-Malware could be well worth the dollars!
Technical Details and Manual Removal (Advanced Users)
If you don’t want to use malware removal software and prefer to eliminate GetCouponsFast manually, you could do so by going to the Windows Add/Remove Programs menu in the control panel and deleting the offending program; in cases of browser extensions, you can remove it by visiting the browser’s Add-on/Extension manager. Additionally, it is advised to reset your web browser settings to their default state.
Lastly, check your hard disk for all of the following and clean your registry manually to remove leftover application entries after uninstallation. Please keep in mind that only advanced users should attempt to manually edit the system files since deleting any single vital registry entry results in a serious problem or even a PC crash. Moreover, certain malicious programs are capable to defend against its removal. It is recommended that you do the removal process in Windows Safe Mode.
Files:
%LOCALAPPDATA%\Google\Chrome\User Data\Default\Extensions\iadmakoacmnjmcacmhlcjcameijgcopj
%UserProfile%\Local Settings\Application Data\Google\Chrome\User Data\Default\Extensions\iadmakoacmnjmcacmhlcjcameijgcopj
%UserProfile%\Local Settings\Application Data\GetCouponsFastTooltab
%LOCALAPPDATA%\GetCouponsFastTooltab
Registry:
HKEY_LOCAL_MACHINE\Software\[APPLICATION]\Microsoft\Windows\CurrentVersion\Uninstall..Uninstaller
Read More
If you always use Google Chrome when browsing the internet, then you might have come across an error saying, “This webpage is not available, DNS PROBE FINISHED BAD CONFIG”. If you do, then this problem certainly has something to do with the DNS since any error code which has “DNS” in it points out a network issue in the computer.
Getting the DNS_PROBE_FINISHED_BAD_CONFIG error indicates that your computer is not able to connect the website because the Domain Name Server or DNS wasn’t able to resolve the website name into IP address or it is not available at all. So in this guide, we’ll help you sort out this issue in Chrome on your Windows 10 PC.
Option 1 – Check the Network Cables and restart your router then reconnect
The most obvious thing you can do first is to try checking if the network cables connected to your computer or router are properly connected or not. If it turns out that some network cables are not connected properly, then it’s probably why you’re getting the DNS_PROBE_FINISHED_BAD_CONFIG error in Chrome.
And if your computer is connected via Wi-Fi, you need to make sure to restart your router once. In addition, you can also forget the Wi-Fi your computer is currently connected to and then try reconnecting again to see if it would work.
Option 2 – Flush the DNS and reset TCP/IP
Flushing the DNS and reset TCP/IP could also help in fixing the DNS_PROBE_FINISHED_BAD_CONFIG error in Chrome. To do so, refer to these steps:
- Click the Start button and type in “command prompt” in the field.
- From the search results that appear, right-click on Command Prompt and select the “Run as administrator” option.
- After opening Command Prompt, you have to type each one of the commands listed below. Just make sure that after you type each command, you hit Enter
- ipconfig /release
- ipconfig /all
- ipconfig /flushdns
- ipconfig /renew
- netsh int ip set dns
- netsh winsock reset
After you key in the commands listed above, the DNS cache will be flushed and the Winsock, as well as the TCP/IP, will reset.
Option 3 – Try to remove the Proxy
You can also try to remove the Proxy as it might also help you in fixing the DNS_PROBE_FINISHED_BAD_CONFIG error. Here’s how you can do it:
- Tap the Win + R keys to open the Run dialog box.
- Then type “inetcpl.cpl” in the field and hit Enter to pull up the Internet Properties.
- After that, go to the Connections tab and select the LAN settings.
- From there. Uncheck the “Use a Proxy Server” option for your LAN and then make sure that the “Automatically detect settings” option is checked.
- Now click the OK and the Apply buttons.
- Restart your PC.
Note: If you are using a third-party proxy service, you have to disable it.
Option 4 – Change the DNS
Try to use the Google Public DNS
If the first option didn’t work, you can try to use the Public DNS by Google and see if it can help fix the DNS error. You have to modify the DNS settings in your system explicitly and use the DNS IP addresses.
- The first thing you have to do is right-click on the network icon in the Taskbar and select Network and Sharing Center.
- Next, click on the “Change Adapter Settings” option.
- After that, search for the network connection that you are using to connect to the internet. Note that the option might be “Wireless Connection” or “Local Area Connection”.
- Right-click on your network connection and click on Properties.
- Then select the new window to choose the “Internet Protocol 4 (TCP/IPv4)” option.
- After that, click on the Properties button and click the checkbox in the new window for the option “Use the following DNS server addresses”.
- Type in “8.8.8” and “8.8.4.4” and click OK and exit.
Option 5 – Clear Chrome’s browsing data
If your browsing data in Chrome hasn’t been cleared for some time now then that might be the reason why you’re suddenly getting the DNS_PROBE_FINISHED_BAD_CONFIG error when you browse the web. To fix this error, you need to clear your web browsing data. Refer to the following steps to do so.
- Tap the Ctrl + Shift + Delete buttons to go to the Clear browsing data section in Chrome.
- Next, set the time range to “All time” and tick all the boxes and then click on the Clear data button.
- After that, restart the Chrome browser and try to open the website you were trying to open earlier.
Option 6 – Try running the Chrome Cleanup tool
In case you don’t know, there is actually a built-in malware scanner and cleanup tool in Chrome that helps you get rid of any unwanted ads, pop-ups, and even malware, as well as unusual startup pages, toolbars, and other things that could affect the performance of the browser.
Read More
Windows 11 has arrived and it is being adopted all around the globe as we are writing this article. People are adapting it daily and today we will take a look at some advanced security features of the new Windows and do you really need an antivirus in it.

It is not a secret that Windows 11 is the most secure Windows ever created, well at least up until now. It is packed with advanced security features like S-mode, Secure Boot, and Trusted Platform Module (TMP 2.0). All these new security features that Microsoft has advertised made people question are enough for security or do you still need third-party Antivirus software.
In order to get an answer to this question, let us first take a detailed look at what each one of them does, and then we will give you our opinion on a given subject.
Windows S mode
For everyday home use, Windows 11 S mode is the most secure feature to have on your PC. This is a safety protocol where only apps from Microsoft Store are allowed to be installed. This eliminates the risk of installing third-party apps that may contain viruses or malware. Furthermore, S-mode protects your web browsing activity through the Microsoft Edge browser. S-mode does not allow you to use other browsers for security reasons. If you are using Windows 11 in S-mode, your PC and data will be secure in most parts. You need not buy antivirus when using Windows 11 in S-mode.
Windows Defender
The inbuilt security suite, Windows Defender was launched for the first time in 2006. Earlier to that it had existed and was known as Microsoft AntiSpyWare. Windows Defender has undergone significant improvements over the years. In its latest version available with Windows 11, Windows Defender offers a comprehensive range of security features. It is available under the Windows Security system. Some key security features include real-time virus and threat protection, account protection, firewall & network protection, app and browser control, parental controls, and device (hardware) security. This is comparable to security features offered by third-party antivirus programs.
Microsoft Account
In Windows 11, it is necessary to use a Microsoft account that will be linked to your device. This ensures the security of your data in case your device is lost or stolen. You just need to make sure that you have set a strong password for your device. Windows 11 also has Bitlocker that keeps your data in encrypted form.
Ransomware protection
In view of rising cases of ransomware, Microsoft has introduced dedicated ransomware protection in Windows 11. It works by stopping apps from carrying out unauthorized changes to files and folders. Users can choose their important files and folders that they want to be protected from ransomware.
Conclusion
As we went through Windows 11 security features, we can clearly see that it is packed heavily with many security features that aim to protect your data and your identity. Looking at them, one can clearly come to the conclusion that you do not really need any third-party software and that Windows itself can catch and protect most of the issues, and they would be right.
If you use Windows 11 carefully, meaning that you go only to trusted websites, do not open suspicious emails, and click on suspicious links, if you do not use extensively external USB devices or mass media you really do not need any kind of third party protection, Windows built-in tools will do well and keep you protected.
However, if you do come in contact with other people’s USB devices if you surf over the net, and overall if you really want to be at peace of mind that you are protected you will still need a well-established third-party software protection solution.
Windows 11 has great security features, best so far in any Windows but it is still far from being a solution that does not require dedicated protection solution. So do yourself a favor and grab one.
We recently had a top antivirus software review, find the article here and pick one that is best for you.
https://errortools.com/viruses/the-best-antivirus-software-of-2021/
Read More
If you have multiple keyboards, things can get quite tricky. There are times when the keyboard language changes on its own since the keyboard changes while you are typing. The thing is, the keyboard changes because sometimes we accidentally tap shortcuts like Win key + Space key or Alt + Shift or Ctrl + Shift which changes the keyboard pairs or language. Thus, if your keyboard language changes on its own, there are two ways to resolve it. First, you have to make sure that Windows 10 does not add keyboards without your permission. Second, you have to make sure that the shortcut keys don’t change the keyboard language. This second option is what we’re going to discuss in this post.
You need to first set a different input method for each app window. To do that, you have to disable the change in layout. Refer to these steps:
- Go to Settings > Language and input.
- Next, type “switching input methods” to open the Advanced keyboard settings with this option inside.
- After that, select the checkbox labeled as “Let me set a different input method for each app window” and then click the Save button.
- Restart your computer.
Now that you’ve disabled the change in layout, you now have to find the keyboard settings. Just go to Settings > Devices > Typing > Advanced Keyboard settings. From there, you have the option to select which keyboard is going to be used for any app. When you change the keyboard every time you use an app, usually, Windows remember it so that you won’t have to set it up all over again. In addition, the Advanced keyboard settings page also allows you to override the default input method which could be different from the first one in your language list. Aside from that, there is also a Language bar option that comes in handy as you can quickly switch between keyboards. And if you removed it, you have the option to restore the language bar back as well.
Now all that’s left for you to do is to change the Language Settings under the Administrative tab. A user from a forum that came up with this solution, reported that the issue occurred when he started typing in some program with non-Unicode characters which caused Windows to use the default system local language to interpret these characters even though the language is unavailable in the Language bar. To change the Language Settings under the Administrative tab, follow these steps:
- Go to Settings > Time and Language > Language > Administrative language settings.
- After that, click on Copy Settings under the Administrative tab.
- Now make sure that all the Display language, Input language, and Format are English (United States) or any language you prefer.
- Then mark the two checkboxes in “Copy your current settings to Welcome screen and system accounts & New user accounts”.
- After that, click OK and then exit.
Note: You also have the option to disable those shortcut combinations which can change your keyboard settings accidentally.
Read More
If you are trying to upgrade your computer but encounter the Windows Update Error 0x800F081F – 0x20003 instead, then read on as this post will guide you in fixing this Windows Update error. This kind of error is commonly encountered when upgrading your copy of Windows 10 and is caused by errors with various developer-related settings that are being enabled in the system.
When you encounter Windows Update Error 0x800F081F – 0x20003, you will see either of these error messages:
“We couldn’t install Windows 10. The installation failed in the SAFE_OS phase with an error during INSTALL_UPDATES operation: Error 0x800F081F”
“The installation failed in the Safe_OS phase with an error during apply_image operation: Error: 0x800f081f – 0x20003”
To fix this kind of Windows Update error, you need not use external programs but you can try to disable the Developer Mode, run the Windows Update troubleshooter or restart all the Windows Update-related services and components. For more details, refer to the options provided below.
Option 1 – Try to disable Developer Mode
You might have to disable Developer Mode to fix the Windows Update Error 0x800F081F – 0x20003. How? Refer to these steps:
- Tap the Win + I keys on your keyboard to open the Settings app.
- Next, go to Update & Security > For Developers.
- From there, select the toggle for Sideload apps or Microsoft Store apps located on the right-side panel.
- If you get any prompt, just click on Yes.
- After that, navigate to Apps > Apps & features and then click on Optional features on the right-side panel.
- Then scroll down to locate the Windows Developer Mode entry and select it and click on Uninstall.
- Once you’re done uninstalling the Windows Developer Mode component, close the Settings app and restart your computer to apply the changes made.
Option 2 – Try to run the Windows Update Troubleshooter
You should also try to run the built-in Windows Update troubleshooter as it could help you resolve the Windows Update Error 0x800F081F – 0x20003. To run it, go to Settings and then select Troubleshoot from the options. From there, click on Windows Update and then click the “Run the troubleshooter” button. After that, follow the next on-screen instructions and you should be good to go.
Option 3 – Try restarting various Windows Update-related services and components
- Tap the Win + X key combination and select Command Prompt (Admin) to open Command Prompt with admin privileges.
- After opening Command Prompt, copy and paste each one of the commands listed below one by one and tap Enter right after you enter each command.
- net stop wuauserv
- net stop bits
- net stop appidsvc
- ren %systemroot%SoftwareDistribution SoftwareDistribution.bak
- ren %systemroot%system32catroot2 catroot2.bak
- Once you’ve entered all the commands given above, they will stop all the Windows Update services that are running on your computer as well as clear the SoftwareDistribution folder, and reset the Catroot2 folder. Now you have to start all these Windows Update services you’ve just stopped by executing the following commands:
- net start wuauserv
- net start bits
- net start appidsvc
- net start cryptsvc
- After that, restart your computer and try to run the setup again, and see if the error is now fixed.
Read More
Copyright © 2023, ErrorTools. All Rights Reserved
Trademark: Microsoft Windows logos are registered trademarks of Microsoft. Disclaimer: ErrorTools.com is not affiliated with Microsoft, nor claims direct affiliation.
The information on this page is provided for information purposes only.
Quick Tips
- Configure the Geolocation Service to run automatically at startup on your computer.
- Ensure that location services aren’t disabled in the Group Policy settings.
- If the issue persists, try booting your PC in a clean boot state to determine if any third-party apps or programs are causing the problem.
Fix 1: Configure Geolocation Service
Geolocation Service is a small program that needs to run in the background for the location services to work. Ideally, the service should start every time your system boots. However, if that isn’t happening, location services may appear grayed out on Windows. Here’s what you can do to fix it.
Step 1: Press the Windows key + R to open the Run dialog, type services.msc, and press Enter.
Step 2: Locate and double-click on Geolocation Service on the list.
Step 3: Change the Startup type to Automatic and hit Apply.
If the service is not running, click on the Start button. After that, see if you can access location services.

Fix 2: Tweak Registry Files
You can fix the problem by modifying some registry files if the location services continue to appear grayed out. Here’s how:
Step 1: Press the Windows key + S to open the search menu. Type registry editor in the box and select the first result that appears.

Step 2: In the Registry Editor window, paste the following path in the address bar at the top and press Enter.
HKEY_LOCAL_MACHINE\SYSTEM\CurrentControlSet\Services\lfsvc\TriggerInfo

Step 3: Right-click on the key named 3, and select Delete.

Restart your PC for changes to take effect and see if the issue is still there.
Fix 3: Use Local Group Policy Editor
Like using the Registry Editor, you can also make changes to your PC via the Local Group Policy Editor on Windows. For that, you must be running the Pro, Enterprise, or Education editions of the Windows operating system. If you’re using the Home edition of Windows 11, this method won’t work for you.
Step 1: Press the Windows key + R to open the Run dialog box. Type gpedit.msc in the Open field and press Enter.
Step 2: In the Local Group Policy Editor window, use the left pane to navigate to the following folder.
Administrative Templates\Windows Components\Location and Sensors
Step 3: On your right, you’ll see three policies: Turn off location scripting, Turn off location, and Turn off sensors.

Step 4: Double-click “Turn off location scripting,” select Disabled, and hit Apply.

Step 5: Disable the Turn off location and Turn off sensors policies as well.
Step 6: Click on the Windows Location Provider folder.

Step 7: Double click on Turn off Windows Location Provider.

Step 8: Select the Disabled option and click Apply.

Restart your PC and you should be able to access location services as before.
Fix 4: Try Clean Boot
At times, third-party apps and services running on your PC can also prevent you from accessing certain Windows features. To verify this, you can boot your PC in a clean boot state.
Step 1: Press the Windows key + R to open the Run dialog, type msconfig.msc, and press Enter.
Step 2: Under the Services tab, mark the box that reads Hide all Microsoft services box and click the Disable all button.

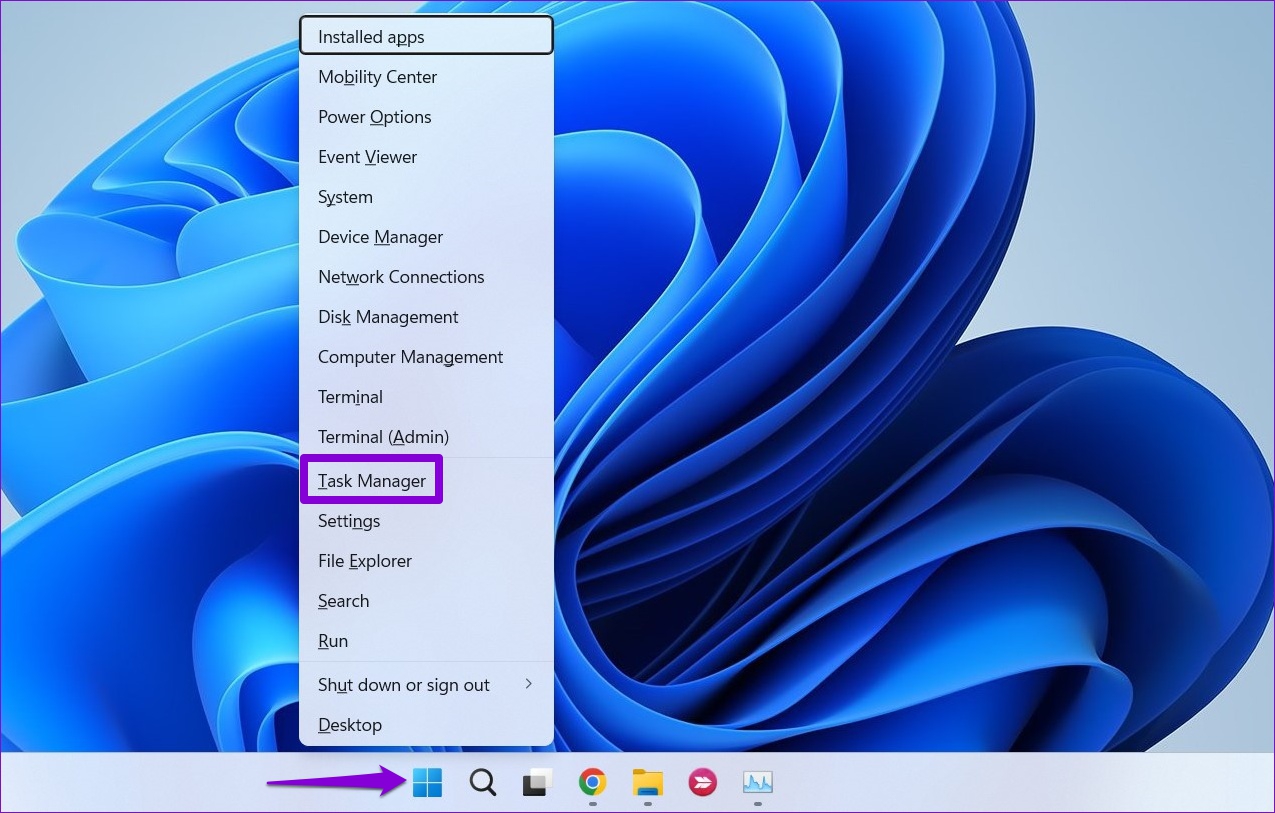
Step 3: Switch to the Startup tab and click on Open Task Manager.
Step 4: In the Startup tab, disable all the third-party apps one by one.

Restart your PC after this to enter the clean boot state and see if you can access the location services. If this helps, you’ll need to look through any recently installed apps and programs and remove them.
To boot in normal mode again, follow the steps above to enable all Startup apps and services, and then reboot your PC.
Was this helpful?
Thanks for your feedback!
The article above may contain affiliate links which help support Guiding Tech. The content remains unbiased and authentic and will never affect our editorial integrity.
Methods to Enable and Disable Location Services in Windows 10 with steps. – Multiple apps and third-party tools need and use the location of your PC to provide their services. Map traces the location of PC and helps you in exploring nearby restaurants. But there are many users who don’t want certain applications to use the location service. Well, for those users, Windows includes few location settings so that they can have control over it. So, in this guide, we present you the guidelines to Enable and Disable Location Services on Windows 10.
There are certain applications that need to know the location information of your device before it can render its service. So, when these applications are run for the first time, they seek your approval to track the location details of the device. After granting permission, in future if you don’t want to share the location of the device with any app, you can anytime disable location services on Windows 10. Pursue a similar guide on [How To] Change App Permissions On Windows 10. So, Windows 10 includes specific location settings to manage location services for account, apps, and device respectively.
Ways to Enable and Disable Location Services on Windows 10
Method 1 – Through Action Center
Step 1 – Launch Action Center and to do so click the tiny icon that exists on the extreme right of the taskbar. Alternatively, you can also make it appear by pressing Win+A keys altogether.
You can Determine App Notification Count to Show in Action Center Windows 10.
Step 2 – If you cannot see the buttons on the Action Center, click Expand to view all of them. Now, locate Location button and click on it to enable or disable it. If Location button is highlighted, then the service is enabled and if it is not highlighted, the feature is disabled.
Method 2 – Using Settings Application
Step 1 – Open Settings program by jointly pressing Win&I keys. When various categories appear on its homepage, locate and select Privacy.
Read our similar guide on How to Avoid Privacy Issues on Windows 10.
Step 2 – Privacy settings page provides few segments on its left sidebar, so click Location.
a. Enable and Disable Location Services for this Device
Note – Settings program gives you the provision to control location services for your device (PC). In addition, keep in mind that you must possess administrative authorities before performing the below steps.
Step 3 – Shift to its right pane and click the Change button that appears underneath Location heading.
Step 4 – On another pop-up, use the slider and turn ON the slider for the option Location for this device. This will enable the location service for this (your) device.
Noteworthy point is that Location service for this device is enabled by default.
Step 5 – To disable the service, click on Change button and moreover, toggle OFF the slider of Location for this device by pulling it towards left.
b. Enable and Disable Location Services for Apps and Account
Note – Before you follow the below directions, make sure that the Location service for this device is enabled by the administrator either using Method 2a or 3a.
Step 6 – On the right panel of Location, find the option Location service. Switch ON the setting and this will enable location service for apps and account (This is the default setting).
Step 7 – Switch OFF the option Location service and specifically disable the feature for both your account and applications.
Method 3 – Via Registry Editor
Step 1 – On Cortana search field, type the command regedit and when she displays the same command, click on it.
For reference, you can read How to Access Registry Editor in Windows 10 – 5 Simple Tips.
Step 2 – UAC prompt will come up displaying the details of the tool. Give permission by clicking Yes and let Registry Editor open.
a. Enable and Disable Location Services for this Device
Note – Registry Editor also gives provision to enable and disable location service for this device but to carry out this procedure you must hold admin authorities.
Step 3 – On the Registry Editor, browse to the below path.
HKEY_LOCAL_MACHINE => SYSTEM => CurrentControlSet => Services => lfsvc => Service => Configuration
Step 4 – Shift to the right pane of Configuration key where a DWORD with a name Status will be visible, double-click on it.
Step 5 – To Enable Location for this device, input the value 1 on its edit box. Click OK to implement the change in the service.
Step 6 – To Disable Location service for this device, set 0 as its value and finally, click OK to make the changes effective.
b. Enable and Disable Location Services for Apps and Account
In order to follow this way, ensure that Location for this device is enabled using Method 2a or 3a.
Step 7 – After opening Registry Editor, navigate to the below path on the left sidebar.
HKEY_CURRENT_USER => SOFTWARE => Microsoft => Windows => CurrentVersion => DeviceAccess => Global => {BFA794E4-F964-4FDB-90F6-51056BFE4B44}
Step 8 – Once you reach the above key, find the string value with a name Value on the right pane and double-click on it.
Step 9 – To enable location services for apps and account, set its value as Allow on the edit box. Click OK.
Step 10 – To disable location services for apps and account, assign the value as Deny and click OK.
Step 11 – Once you change the string value, you have to modify DWORD also. To do so, travel to the below path.
HKEY_CURRENT_USER => SOFTWARE => Microsoft => Windows NT => CurrentVersion => Sensor => Permissions => {BFA794E4-F964-4FDB-90F6-51056BFE4B44}
Step 12 – On its right pane, find and double-click the DWORD SensorPermissionState.
Step 13 – A small edit box will pop-up, so, type 1 to enable or insert 0 to Disable Location Services for Apps and Account.
Conclusion
Hence, to Enable and Disable Location Services on Windows 10, the OS provides you a few distinct ways. Well, Registry Editor is generally for the advanced users. Normal users can manage location services using other ways pretty much easily. If you have more tips to manage location services on Windows 10, please write down to us.
Sometimes you face an issue where the Location settings option is greyed out in Windows 11. As a result, you cannot turn on or off the location settings. You can find this option at Settings > Privacy & Security > Location > Location Services.

Location services play a vital role in the proper functioning of apps and services that relies on the location. For example, a weather app that shows current weather with the help of location services. What if you’re unable to manage location services? This will be an incredible mess, isn’t it?
Usually, this issue occurs due to a bug, operating system, or conflict between third-party apps installed on your PC. There could be other reasons as well.
If you made up to this blog post, then it’s highly possible that the option to manage location services is greyed out in Windows 11, then try the solutions discussed below to fix the issue:
Note – If the Location Services or Settings option is Greyed Out in Windows 10, then you can try these solutions
Use Registry Editor Hack
The very first troubleshooting method to fix Location Settings greyed out is by using the Registry Editor. To do so, follow the steps given below-
Press the Windows key on your keyboard, and then in the Start Menu, search for Registry Editor. Click on Registry Editor from the search result.

In the Registry Editor, head to the following location: KEY_LOCAL_MACHINE\SYSTEM\CurrentControlSet\Services\lfsvc\TriggerInfo
On the left side, right-click on the folder named 3 and click on Delete.

Once done, close the Registry Editor and restart your PC and the issue will be fixed.
Restart Geolocation Service
On the basis of various reports from multiple affected users, they manage to fix the location settings greyed out in Windows 11 by restarting the Geolocation service. So should try it as well:
Open Start Menu by pressing the Windows key and searching for Services. Open the Services from the Start Menu.

In the Services app window, search for Geolocation Services. Right-click on it, and then click on Properties.

Click on the drop-down menu next to Startup and set it to Automatic. Ensure the Service Status is Running, and if not, then click on Start.

Once done, click on Apply and OK to save your changes.
Both solutions discussed above will help in fixing the location settings options disabled in Windows 11. Let us know which one worked for you.
If you know any other solution that misses covering feel free to share in the comment for other readers.
Avyukt Atri fearlessly delves into the offbeat corners of technology, uncovering hidden gems and unraveling untold stories. With a quirky approach and boundless curiosity, he uncovers haunted servers, code-breaking cats, and WiFi signals from parallel dimensions.