
In Windows 11/10, users sometimes come across an issue, where the Location services is reported to be greyed out. It could happen due to the Operating System or some third-party software. When this issue arises, users cannot enable or disable the Location services. Also, they cannot make any changes to the Location settings. So, how to fix Location settings greyed out in Windows 11/10?
Before you move on, it is better to perform a clean boot. After performing it, check if the issue related to the Location settings has been resolved. If not, then keep on reading.
In this post, learn how you can fix the location settings greyed out issue using different methods easily.
Page Contents
Fix 1: Using Registry Editor
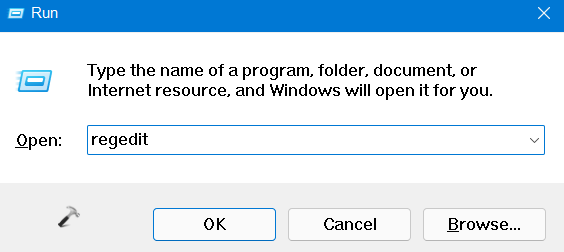
1. In the first place, you need to open the Run dialog box. For this, press the Windows + R keys simultaneously on your keyboard. Once opened, type regedit in the Run dialog box to open Registry Editor.
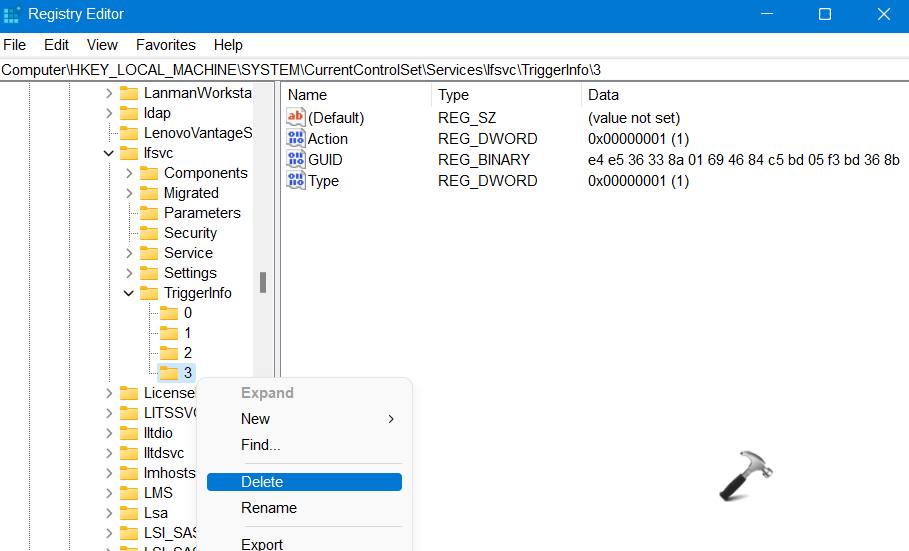
2. After that, navigate to the following location:
HKEY_LOCAL_MACHINE\SYSTEM\CurrentControlSet\Services\lfsvc\TriggerInfo
3. Once there, right-click on the folder named 3. Now, select the Delete option from the context menu.
4. Lastly, close Registry Editor. Once done, check if the issue has been fixed.
Fix 2: Using the Windows Services Manager
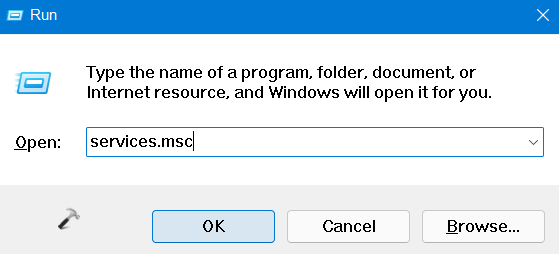
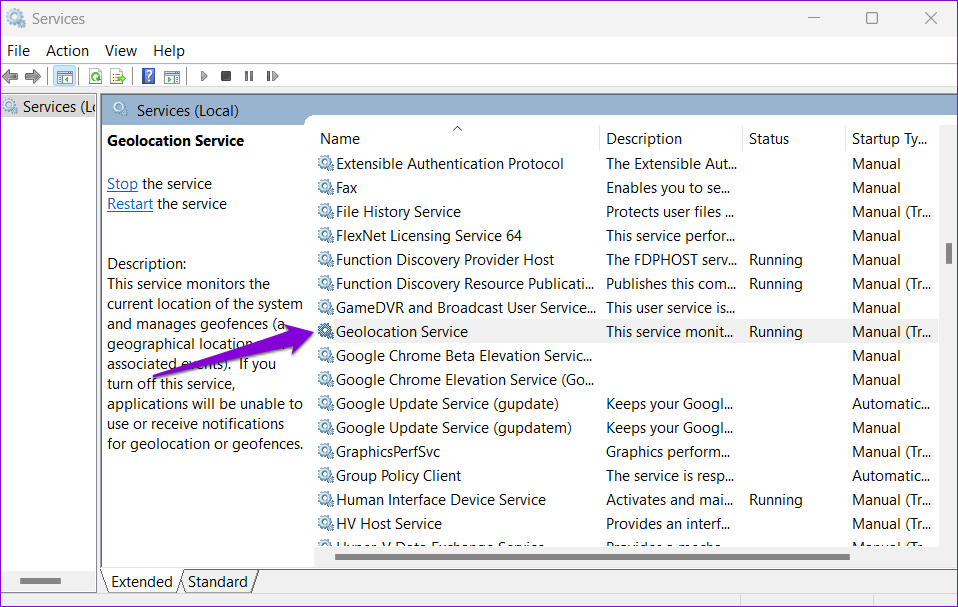
1. Firstly, open the Windows Services Manager. To do this, open the Run dialog box and type services.msc in the Run dialog box. Then, press Enter.
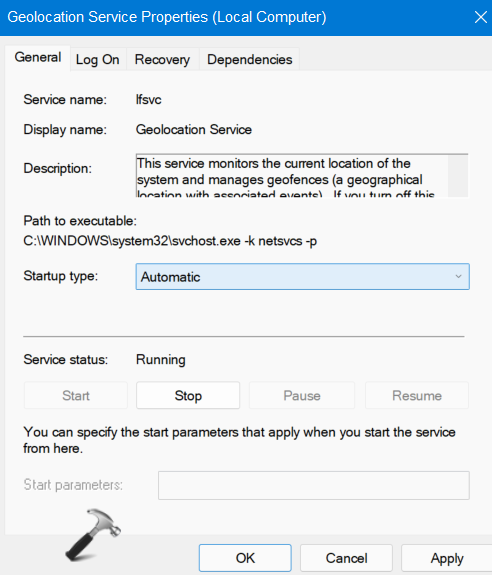
2. Now, look for Geolocation service and double-click on it. This will open its Properties window.
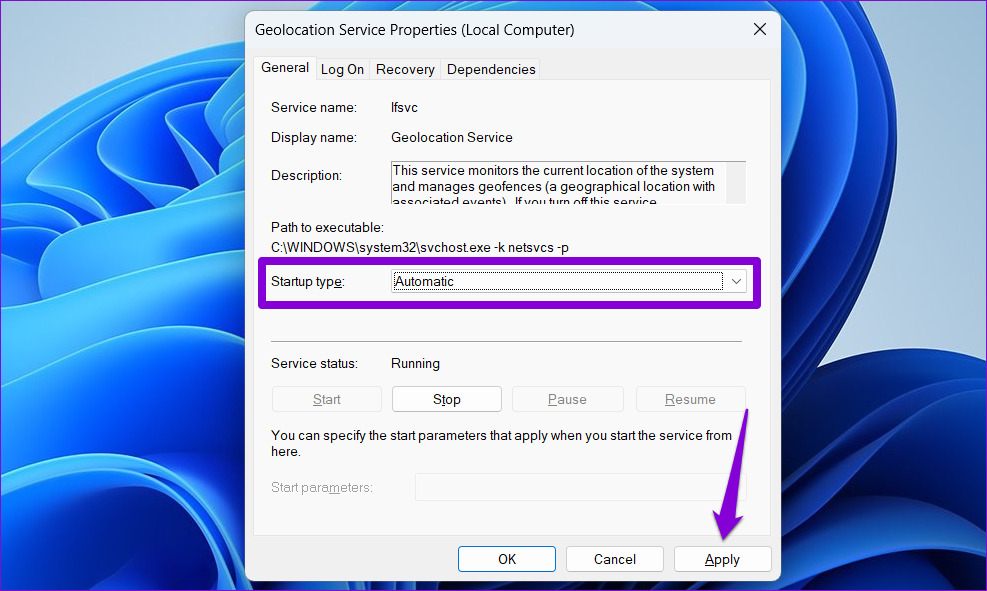
3. In the Properties tab, ensure that the Startup type is set to Automatic and Service status is Running. Make the changes if necessary and click on Apply and then, press OK.
So, this is how to fix location settings greyed out in Windows 11/10 issue. Both of these methods are quite effective. It is recommended to follow them carefully.
RELATED ARTICLES
Location services is a built-in tool in Windows 10 is a useful tool that offers users location information even when your laptop or desktop computer does not have a GPS since it uses Wi-Fi positioning as well as your device’s IP address. However, there are instances when you might encounter some problems when using this service. One instance is when you suddenly find the toggle button for Location service greyed out.
This kind of program could be due to some glitch in the system or some third-party application on your computer. Because of this problem, you won’t be able to toggle the Location service on or off and you won’t be able to make any changes in its settings. Worry not, for this post will guide you on what you can do to fix the greyed-out toggle button of Location services in Windows 10.
Before you perform some troubleshooting steps, you might want to restart your computer and see if it fixes the problem. If it didn’t, then this problem is not just some minor glitch. Thus, you have to follow the potential fixes provided below to fix the problem but before you do that, make sure that you create a System Restore point first. After that, follow each one of the following options.
Option 1 – Put your PC in a Clean Boot State
The first thing you can do to resolve the problem is to put your computer in a Clean Boot State. It could be that there is a third-party program that’s preventing the toggle button from functioning. To isolate this possibility, you need to put your computer in a Clean Boot State.
- Log onto your PC as an administrator.
- Type in MSConfig in the Start Search to open the System Configuration utility.
- From there, go to the General tab and click “Selective startup”.
- Clear the “Load Startup items” check box and make sure that the “Load System Services” and “Use Original boot configuration” options are checked.
- Next, click the Services tab and select the “Hide All Microsoft Services” check box.
- Click Disable all.
- Click on Apply/OK and restart your PC. (This will put your PC into a Clean Boot State. And configure Windows to use the usual startup, just simply undo the changes.)
- Now check if you can now use the toggle button of the Location service or not.
Option 2 – Try to use the Registry Editor
If putting your computer in a Clean Boot state didn’t fix the problem, you might want to make some adjustments in the Windows Registry via Registry Editor.
- Tap the Win + R keys to open the Run utility and type “regedit” in the field and then tap Enter to open the Registry Editor.
- After that, navigate to this registry path: HKEY_LOCAL_MACHINESYSTEMCurrentControlSetServiceslfsvcTriggerInfo
- From there, select the Key (folder) named as “3” and right-click on it, and then delete it.
- Once done, exit the Registry Editor and restart your computer.
Option 3 – Try to use the Windows Services Manager
- Tap the Win + R keys to open the Run dialog box and type “services.msc” in the field and hit Enter to open the Services Manager.
- Next, look for the “Geolocation Service” entry from the list of services.
- Once you find it, right-click on it and select Properties. This will open a new mini window.
- From there, make sure that it is “Running” and its Startup Type is set to “Automatic”.
- After that, close the Services Manager and check if the problem is now resolved.
Option 4 – Try to use the Group Policy Editor
- Tap the Win + R keys to launch Run and type “gpedit.msc” in the field and click OK to open the Group Policy Editor.
- After that, navigate to this path: Administrative TemplatesWindows ComponentsLocation and Sensors
- Next, double click on each one of the following settings and select the “Not configured” or “Disabled” option.
- Turn off location scripting
- Turn off location
- Turn off sensors
- Once done, navigate to this path: Administrative TemplatesWindows ComponentsLocation and SensorsWindows Location Provider
- From there, double click on the “Turn off Windows Location Provider” policy setting and set its configuration to either “Disabled” or “Not configured”. You should see the following description of the policy setting in the window:
“This policy setting turns off the Windows Location Provider feature for this computer. If you enable this policy setting, the Windows Location Provider feature will be turned off, and all programs on this computer will not be able to use the Windows Location Provider feature. If you disable or do not configure this policy setting, all programs on this computer can use the Windows Location Provider feature.”
- Now restart your computer.
Do You Need Help with Your Device?
Our Team of Experts May Help
Troubleshoot.Tech Experts are There for You!
GET HELP
Troubleshoot.Tech experts work with all versions of Microsoft Windows including Windows 11, with Android, Mac, and more.
Share this article:
You might also like
One of the useful features that came with Windows 10 is the Mobile Hotspot although there’s a downside to it – it drains your battery faster especially if your Windows 10 device is running on battery. Another one of its flaws in the implementation of this feature is that it stays activated even when the connection is idle. In other words, it is still activated even if no devices are connected to it. As a result, it consumes battery life and affects it. There are also instances when it affects the performance of the network connection. At the time of writing, Microsoft hasn’t done anything about this dilemma yet so in the meantime, you can continue reading this post to resolve this issue on your Windows 10 device.
You can remedy this Mobile Hotspot issue by running a command in Windows PowerShell. To get started, follow the given instructions below.
Turn off Mobile Hotspot Automatically:
Step 1: The first thing you have to do is to copy the following command:
powershell -windowstyle hidden -command «Start-Process cmd -ArgumentList ‘/s,/c,net stop «icssvc» & REG ADD «HKLMSYSTEMCurrentControlSetServicesicssvcSettings» /V PeerlessTimeoutEnabled /T REG_DWORD /D 1 /F & net start «icssvc»‘ -Verb runAs»
Step 2: After copying the command given above, open the Notepad app and paste the command you copied there and save it. And when saving it, select the “Save as” option and its File type as “All files”.
Step 3: After that, put “TurnOnTimer.bat” as the file’s name and save it on your Desktop.
Step 4: Once done, run the file you just created, and when a User Account Control or UAC prompt appears, just click on Yes.
Step 5: After you run the file, it will run a series of scripts in a command line which will turn off the Mobile Hotspot automatically when idle.
And that’s how you automatically turn off the Mobile Hotspot when your Windows 10 device is idle. On the other hand, if you want to undo the changes made, you can always do so using the steps provided below.
Turn on Mobile Hotspot:
Step 1: Copy and paste the following command in the Notepad app:
powershell -windowstyle hidden -command «Start-Process cmd -ArgumentList ‘/s,/c,net stop «icssvc» & REG ADD «HKLMSYSTEMCurrentControlSetServicesicssvcSettings» /V PeerlessTimeoutEnabled /T REG_DWORD /D 0 /F & net start «icssvc»‘ -Verb runAs»
Step 2: After copying and pasting the command, save it as “TurnOffTimer.bat” on the Desktop.
Step 3: Once done, run the file like what you did earlier and select Yes when a UAC prompt pops up. This will run a series of scripts on a command line which will revert the changes back to their default state.
Read More
If when trying to start Autodesk applications you receive a Network license not available error then please keep on reading, this guide is for you:
Causes of the error:
- The license on the License Server is invalid.
- The port for Autodesk Network License Manager is blocked.
- The client computer is configured with incorrect license server information.
- The license request is timing out on the client’s computer before the license is obtained.
Solutions for the error:
Verify that the Autodesk License Server is setup with the correct license file.
To set up a license server for Windows, perform the following:
- Download and install the Network License Manager for Windows:
- Open LMTools and access the System Settings tab. Make a note of the «hostname» and «ethernet address» of the license server.
- Generate a Network License File in Autodesk Account.
- On the Service/License tab, select Configuration Using Services and LMTOOLS ignores license file path environment variables.
- On the Config Services tab, enter a name for the new service in the Service Name field.
- Fill the following fields, using the Browse buttons:
- Path to the lmgrd.exe — Navigate to this file: C:\Autodesk\Network License Manager.
- Path to the License file — Navigate to the new Autodesk.lic file, typically placed in: C:\Autodesk\Network License Manager\Licenses.
- Path to the Debug Log file: C:\Autodesk\Network License Manager.
- If no file is present, create a TXT file in Notepad and rename it “Debug.log.”
- Make sure the «Start Server at Power Up» and the «Use Services» boxes are checked. Then click Save Services.
- On the Start/Stop/Reread tab, click Start Server.
- On the Server Status tab, click Perform Status Enquiry.
- Licenses should display as active.
How to set up the Autodesk Network License Manager on a Mac.
Note: The Autodesk License Server Manager (version 11.16.2.0) is supported only on the following Mac operating systems:
- Apple macOS High Sierra 10.13
- Apple macOS Sierra 10.12
- Apple Mac OS X El Capitan 10.11
- Download Autodesk Network License Manager version 11.16.2.0 for Mac
- Download the nlm11.16.2.0_ipv4_ipv6_mac_universal.tar.gz file to the Desktop.
- To install the Autodesk Network License Manager:
- Double click on nlm11.16.2.0_ipv4_ipv6_mac_universal.tar.gz to unpack the installer package.
- After unpacking nlm11.16.2.0_ipv4_ipv6_mac_universal.pkg, will be /Downloads/adlm/FLEXnet folder.
- Double click on nlm11.16.2.0_ipv4_ipv6_mac_universal.pkg to start installation and follow the installation wizard.
- The license server will be installed in /usr/local/flexnetserver/ directory.
- Change permissions for /usr/local/flexnetserver/ directory to 777
- Open Terminal (located in /Applications/Utilities/Terminal) and enter the following command:
sudo chmod -R 777 /usr/local/flexnetserver
- Note: Administrator password may be asked. While typing no characters are shown, just type out the password and hit return key.
- Note: To start the license server only with elevated permissions (using sudo command), change permissions to 755 instead of 777.
- Create /usr/local/flexnetserver/licenses directory for network license file location
sudo mkdir /usr/local/flexnetserver/licenses
- Find the license server Host Name and Host ID.
- Generate the Network License File in the Autodesk Account
- Once the license file is generated, make sure it has a .lic extension (e.g. adsk_license.lic) and is in a plain text format and place it in /usr/local/flexnetserver/licenses directory
Note: In this article we will refer to adsk_license.lic as network license file name. Feel free to change the actual name of the license file, but make sure to reflect the new name when using the commands below.
- Create a debug.log file in the /usr/local/flexnetserver/ directory using the following command:
- To start the Network License Server use the following command:
/usr/local/flexnetserver/lmgrd -c /usr/local/flexnetserver/licenses/adsk_license.lic -l /usr/local/flexnetserver/debug.log
Note: If folder permissions for /usr/local/flexnetserver/ are set to 775, then use sudo command to start the server. For example:
sudo /usr/local/flexnetserver/lmgrd -c /usr/local/flexnetserver/licenses/adsk_license.lic -l /usr/local/flexnetserver/debug.log
- To obtain license server status enquiry:
/usr/local/flexnetserver/lmutil lmstat -a -c /usr/local/flexnetserver/licenses/adsk_license.lic
- To stop the license server:
/usr/local/flexnetserver/lmutil lmdown -q -force
- Alternatively, run ps command to obtain process ids for lmgrd and adskflex and then kill those processes:
ps -ax | grep lmgrd
ps -ax | grep adskflex
kill -9
- (provide process ids obtained by previous commands individually)
How to set up the Autodesk Network License Manager on Linux.
Note: The Autodesk License Manager (11.16.2.0) is supported only on the following Linux distros:
- Red Hat® Enterprise Linux® 7
- Red Hat Enterprise Linux 6
- SUSE Linux Enterprise 12
- SUSE Linux Enterprise 11
To configure the license manager use the following steps:
- Download Autodesk Network License Manager v. 11.16.2 for Linux from this link
- Download the nlm11.16.2.0_ipv4_ipv6_linux64.tar.gz file to your desktop.
- To install the Autodesk Network License Manager run following command as root.
- tar –zxvf nlm11.16.2.0_ipv4_ipv6_linux64.tar.gz
- rpm -vhi nlm11.16.2.0_ipv4_ipv6_linux64.rpm
- The license server will be installed in /opt/flexnetserver/ directory.
- Find the license server Host Name and Host ID
- To obtain the license server system hostid run the following command
/opt/flexnetserver/lmutil lmhostid
From the command output note the hostid in quotes, if the system has two active NIC cards, select the first MAC address.
lmutil — Copyright (c) 1989-2018 Flexera. All Rights Reserved.
The FlexNet host ID of this machine is «000c297949e0»
- To obtain the license server system hostname run the following command
/opt/flexnetserver/lmutil lmhostid hostname
From the command output note the hostname of the license server.
mutil — Copyright (c) 1989-2018 Flexera. All Rights Reserved.
The FlexNet host ID of this machine is «HOSTNAME=Centos7.localdomain»
- Generate your Network License File in Autodesk Account
- Once the license file is generated, make sure it has .lic extension (e.g. adsk_license.lic) and place it in /opt/flexnetserver/licenses directory. If the directory doesn’t exits, create it with this command: sudo mkdir /opt/flexnetserver/licenses
Note: in this article we will refer by adsk_license.lic your network license file name.
- To start the Network License Server
- /opt/flexnetserver/lmgrd -c /opt/flexnetserver/licenses/adsk_license.lic -l /opt/flexnetserver/server_log.log
- To obtain license server status enquiry
- /opt/flexnetserver/lmutil lmstat -a -c /opt/flexnetserver/licenses/adsk_license.lic
- To stop your license server service
- /opt/flexnetserver/lmutil lmdown -q -force
- alternatively you can also run ps command to obtain process ids for lmgrd and adskflex and then kill those processes
- ps -aw | grep lmgrd
- ps -aw | grep adskflex
- kill -9 (provide process ids obtained by previous commands individually)
- To start the license server automatically after the system reboot
- Open /etc/rc.d/rc.local script as root and enter license server start up command in it.
touch /var/lock/subsys/local
/opt/flexnetserver/lmgrd -c /opt/flexnetserver/licenses/adsk_license.lic -l /opt/flexnetserver/server_log.logNote: To ensure that the script will be executed during boot, run following command as root.
chmod +x /etc/rc.d/rc.local
- Make sure that all necessary ports are open:
- lmgrd.exe needs ports 27000 to 27009.
- adskflex.exe needs port 2080.
Note: Errors may occur if the network license file is corrupt or in the case of a combined network license it has incorrectly combined licenses. To learn more about combining licenses, see Combining License Files for Multiple Autodesk Products. Use the License File Parser to verify that the license contains the appropriate products and FLEXnet feature codes and does not display an error
Verify that TCP ports (2080, 27000-27009) used by Autodesk Network License Manager are not blocked by Firewall.
The FLEXlm® based version uses the following incoming ports:
- TCP ports 2080 (for the adskflex vendor daemon)
- TCP ports 27000 to 27009 (for the lmgrd master daemon, which uses the first open port in the range)
Note: If these port addresses are restricted by a router or firewall software, users on the remote side of the router will not have access to licenses controlled by the Network License Manager.
Verify that the client computer is configured with the correct license server name or IP.
Windows:
Clear license server information from the system registry.
- Type regedit in the Windows Search box and hit Enter key.
- Select the following registry key
- [HKEY_CURRENT_USER\SOFTWARE\FLEXlm License Manager]
- As the key is selected, in right panel ADSKFLEX_LICENSE_FILE will be visible.
- Right click on the key and delete it.
Specify the license server in ADSKFLEX_LICENSE_FILE system variable
- Go to Start > Control Panel > System and Security > System.
- Select Advanced system settings.
- On the System Properties dialog, click Environment Variables.
- Under System Variables, click New.
- Enter ADSKFLEX_LICENSE_FILE for the variable name and 2080@SERVER_NAME _OR _IP for the variable value.
Note: the license server information most often is recorded in LICPATH.lic file and can be verified there too. ADSKFLEX_LICENSE_FILE system variable supersedes LICPATH.lic. Thus, setting the system variable is preferable when this error is seen.
If the license server is on a VPN or a remote network set the FLEXLM_TIMEOUT environment variable:
- Go to Start > Control Panel > System and Security > System.
- Select Advanced system settings.
- On the System Properties dialog, click Environment Variables.
- Under System Variables, click New.
- Enter FLEXLM_TIMEOUT for the variable name and 5000000 for the variable value.
- Click OK to save the setting.
Note: if needed the variable value can be increased to 10000000.
Mac/Linux:
Specify the Autodesk Network License server information in $HOME/.flexlmrc file.
Use a text editor to create a flexlmrc.txt file and save it in Plain text format (In TextEdit on Mac: Format — Make Plain Text) on desktop.
The file content should look like this, except with the name or IP address of the license server.
- ADSKFLEX_LICENSE_FILE=@SERVER_NAME _OR _IP
If the license server is on the same machine as the Autodesk software, use localhost as the license server name. Thus, the content of flexlmrc file could look like this:
- ADSKFLEX_LICENSE_FILE=@localhost
Note: On firewall restricted network or when accessing the license server via VPN, need to include TCP port/s (usually 27000 or 2080) into Autodesk License Server service as follows: ADSKFLEX_LICENSE_FILE=2080@SERVER_NAME _OR _IP
Once flexlmrc file is created move it to user’s $HOME folder as follows:
- Open a Terminal window
- Type open ~ (Mac) or nautilus ~ (Linux) to open $HOME folder
- Drag and drop flexlmrc.txt file from Desktop to the home folder.
- To make the file a configuration file, rename it to .flexlmrc (please note . [DOT] in front of the file name) by running the following command:
- mv flexlmrc.txt .flexlmrc (Mac)
- mv flexlmrc .flexlmrc (Linux)
Verify that the license server information registered with the product is correct (versions 2020 and later only)
In versions 2020 and later, the license server information is registered with the AdskLicensing service running locally on the workstation. When changing to a new license server, the old server information may still be registered with AdskLicensing and result in the error above, if this is not appropriately updated.
See the below steps to solve this:
- Click the Start menu and type cmd.
- Right-click on the Command prompt and choose «Run As Administrator.»
- In the Command prompt, run the following command, followed by ENTER:
«C:\Program Files (x86)\Common Files\Autodesk Shared\AdskLicensing\Current\helper\AdskLicensingInstHelper.exe» change -pk PRODKEY -pv VER.0.0.F -lm «» -ls «» -lt«»
Note:
- Replace PRODKEY with the product key correspondent to your product(s). See Look Up Product Keys for the full list.
- Replace VER with the version you are using. E.g. 2020 for AutoCAD 2020.
- Repeat this step for each software you need to reset.
- Open Registry Editor (Start > type regedit > ENTER).
- Navigate to HKEY_CURRENT_USER\Software\FLEXlm License Manager.
- On the right-side, verify of the ADSKFLEX_LICENSE_FILE key exists. If yes, remove it (right-click > Delete).
- Run the software again.
- Select Multi-user in the Let’s Get Started screen.
- Follow the steps to connect to your license server.
Read More

A not long time ago we had an article about the deep WEB and dark WEB here on errortools.com explaining its origins and its purpose. The article can be found here if you are interested: https://errortools.com/windows/what-is-deep-and-dark-web/
Now at this point in time, we want to present you with 15 great Deep WEB sites that could offer you some information not found anywhere else, that could offer you some privacy, or simply to have some fun and safely explore how it is like to be part of deep WEB.
Take notice that for successful visiting of given sites you will need to have installed TOR browser. More about Tor browser itself can be found here: https://errortools.com/blog/software-review-series-tor-browser/ and its official website for download here: https://www.torproject.org/download/
Make sure that you copy the onion link and paste it into your TOR browser in order to access the site. That being said, let’s begin.
Mail2Tor
http://mail2tor2zyjdctd.onion/
If you want secure and private ways of sending your emails then look no further. Mail2Tor uses a webmail client and encrypts each email received or sent, combine that for not storing IP addresses and you have a private and safe environment for your emails.
The Hidden Wiki
http://zqktlwiuavvvqqt4ybvgvi7tyo4hjl5xgfuvpdf6otjiycgwqbym2qad.onion/wiki/index.php/Main_Page
The Hidden Wiki is the go-to site if you want to explore more of deep WEB since it is the site of collected .onion sites. Think of it as a registry of onion sites that want to be accessed publicly but offer anonymity.
TorLinks
http://torlinksd6pdnihy.onion/
TorLinks is another site focusing on .onion site listings. Site themselves are divided into categories and are easy to find. Take note that .onion sites come and go so make sure to visit frequently both The Hidden Wiki and TorLinks in order to be updated.
Torch Search Engine
ttp://xmh57jrzrnw6insl.onion/
Torch is the oldest and most well-known search engine for dark web links, with its database of over a million .onion websites there is a chance that you will find what you are looking for on it.
DuckDuckGo
http://3g2upl4pq6kufc4m.onion/
Integrated into TOR itself as a default search engine DucDuckGo has proven itself to be a great competitor and challenger to Google. But unlike Google, DuckDuckGo will not track you nor store your search activities making it a great general private search engine.
https://www.facebookwkhpilnemxj7asaniu7vnjjbiltxjqhye3mhbshg7kx5tfyd.onion/
Yup, Facebook has its own .onion version of its popular platform. Now since Facebook itself is a social media platform anonymity is out of the question but with .onion routing, you can have and maintain a Facebook account from locations where you normally could not like in some countries where Facebook.com is banned.
Galaxy3
http://galaxy3bhpzxecbywoa2j4tg43muepnhfalars4cce3fcx46qlc6t3id.onion/
Galaxy3 is also a social platform, the site is mostly populated with code experts and other individuals posting all kinds of stuff.
The Dark Lair
http://vrimutd6so6a565x.onion/index.php/Board
Dark Lair was the first image exchange website that evolved into a social network. One difference from the other two mentioned is that you can engage in the website without registration as an anonymous user.
Pro Publica
https://www.propub3r6espa33w.onion/
The aim of the five-time Pulitzer Prize winner ProPublica is “To expose abuses of power and betrayals of the public trust by government, business, and other institutions, using the moral force of investigative journalism to spur reform through the sustained spotlighting of wrongdoing.”
It’s the first major online publication to have a .onion address. The non-profit newsroom is funded by organizations such as the Sandler Foundation and has made countless contributions to the fight for free speech and privacy.
Soylent News
http://7rmath4ro2of2a42.onion/
Soylent news is an onion site that well brings news. The difference from other sites of the same content is that Soylent news is community moderated without any big names involved so it is authentic in its content.
CIA
ttp://ciadotgov4sjwlzihbbgxnqg3xiyrg7so2r2o3lt5wz5ypk4sxyjstad.onion/
Tor’s history is an unlikely tale. It was created by the U.S Navy with the purpose of helping informants in foreign nations to communicate safely over the Internet. The Central Intelligence Agency (CIA), in that spirit, released a .onion site so that people from across the globe can browse their resources securely and anonymously.
Secure drop
https://secrdrop5wyphb5x.onion/
Secure drop is a platform for changing leaked information and for journalists to communicate with their leads in private. It is used by Washington Post, Pro Publica, and The Guardian.
Hidden Answers
http://answerszuvs3gg2l64e6hmnryudl5zgrmwm3vh65hzszdghblddvfiqd.onion/
Hidden Answers is Reddit or Quora of the dark web but as in the spirit of the dark web, all discussed topics and stories are in total anonymity.
SCI-HUB
http://scihub22266oqcxt.onion/
With over 50 million research papers in the domain of science shared freely, Sci-Hub eliminates all barriers of free knowledge and offers a unique approach to education and scientific information.
Smartmixer.IO
http://smrtmxdxognxhv64.onion/
Smartmixer is a bitcoin mixer. The service scrambles your bitcoin with other users making your purchases completely anonymous.
And that’s it. 15 dark WEB onion sites you need to visit. I hope that you enjoyed the list and found something useful in it. Also, note that onion links can change overnight so if any of provided links do not work just go to DuckDuckGo and search for the site with the onion at the end.
Read More

Today most people have Facebook accounts where they keep in touch with friends and family. But large Facebook network of users is also very interesting to another party as well, hackers.
There are many ways hackers can steal your data via direct hacks, trickery, and social engineering in order to get your credentials, emails, and many other things using them to wreak further havoc.
Once a hacker has needed information it is very difficult to minimize impact and all of your information could be compromised from a list of friends to credit card numbers. Keep on reading to learn how can you protect yourself against these attacks and learn about common practices that hackers use in order to steal your data.
Stealing Facebook data via email
A couple of years ago there was a lot of talk about not opening suspicious emails. Well, it still holds today. The difference is that today’s fake emails have become very difficult to differentiate from official ones since hackers put the effort into creating them copying fonts and layout, making them identical to original ones.
So if emails look and feel like original ones how do you know if it is fake? Very simple, you do not click anything in it. If Facebook or for that matter any company wants to contact you they will do via their platform.
Clicking inside a hacker’s email will lead you probably to a fake Facebook website replica where you will have to type in your username and password providing an attacker with your login credentials, etc.
If you receive this kind of mail where there are threats about terminating an account, missing payments, etc. it is always the best thing to go directly to Facebook and see if you have any kind of notifications there. Do not trust any emails that ask for account information, request money, or threaten to suspend your account.
Phishing attacks
As stated previously if you click on the link inside fake mail it will probably lead you to a website replica of the original.
Although hackers can pretty much copy all things from an original website like layout, fonts, colors, etc. There is one thing that he cannot, web address. Take a good look into your browser address bar to see if there is a typo or anything strange in the address of a website.
Also, make sure to check for the secure icon in the web address before signing in.
Fake Facebook buttons
If by any chance and for whatever reason, you end up on a fake Facebook site be vary careful about like and other buttons since buttons themselves behave and act like links inside your browser.
IF when you click on like you get a prompt to sign in, it is almost 100% that you ended up on a phishing fake website.
Password brute force attack
Having complex and long passwords is a must. If your Facebook password is 12345 there is a very high chance that if a hacker wants he can easily guess it via trying out the most used and simple passwords via simple guessing.
To avoid being hacked just for having poor passwords try to think of something longer, combine letters and numerical characters, place special characters inside it or just simply as the best solution use a password manager and create passwords with it.
Password grab outside Facebook
If you use the same password for multiple accounts which is a big no-no and you should not do it then hackers can use passwords from other services and login into your Facebook in order to steal data.
Avoid these situations by having different passwords for different accounts or use a password manager to keep everything in order.
Hacking via key logger
Some time ago we have made an article which explained in detail everything you need to know about key loggers here: https://errortools.com/windows/how-to-know-if-you-have-keylogger-in-windows/
Anyway, this is a more advanced hacking technique in order for hackers to steal your data and it includes placing malicious applications into your system that records your keystrokes and sends them directly to hackers.
Since this is an application best protection against this type of attack is to have a security suite installed and active on your PC or device you use to go to Facebook.
Connecting and surfing on an unsecured network
Using no password and unsecured WI FI or any other type of network is risky at least. You can have all protection installed on your device and have a strong password but hackers also logged in to the same network can track all outgoing stuff going through mentioned network leaving you again exposed to attacks.
It is better to connect to your mobile operator network than on free WI FI, at least there is some level of security in your operator network while free WI FI is completely unsecured.
Getting a virtual private network or VPN is also one thing you could think about for protection since almost all VPN services will encrypt your data thus providing you with a security layer even on unsecured Wi-FI.
Conclusion
Hacking and stealing have come a long way from their infant stages and in today’s world when we use a lot of gadgets and have plenty of online presence taking some steps for security is a must.
I hope that you have found anything here informational and helpful so you can avoid getting your data compromised.
Read More
As you know, Windows 10 has a complicated mechanism for Activation which helps in the verification of a genuine copy of Windows 10. However, there are times when you might encounter some errors during the activation process. One of these errors is the error code 0xc000f074. This kind of error could be due to the Key Management Service or KMS which is unreachable by the client computer or if the key used in the SLSetAuthenticationData function call is incorrect.
This kind of error mostly affects surfaces on computers that are upgraded from either Windows 7 or Windows 8.1 to Windows 10. In such cases, you may encounter any of the following error messages:
“Windows is unable to reach your company’s activation service. Please connect to your corporate network. If you are connected and continue to see the error, contact your system administrator. You can also click on the error detail to find the exact error. Error code: 0xC004F074.”
“Activating Windows(R),
(Key hash)…
Error: 0xC004F074 The Software Licensing Service reported that the computer could not be activated. No Key Management Service (KMS) could be contacted.
Please see the Application Event Log for additional information.”
“Error 0xC004F074, SL_E_AUTHN_MISMATCHED_KEY, The Software Licensing Service reported that the key is mismatched.”
To fix the Windows 10 Activation error 0xC004F078, you have to use the correct key for your type of Windows copy or use Command Prompt to reinstall the key or you could also try running the Activation troubleshooter.
Option 1 – Try running the Windows 10 Activation Troubleshooter
The first thing you can do to resolve the Activation error code 0xc000f074 is to run the Windows 10 Activation Troubleshooter. To do so, follow these steps:
- Go to Settings and then select Activation.
- After that, click on the Windows Activation and then troubleshoot. This will help you address most of the commonly found activation issues in Windows devices.
The Windows 10 Activation Troubleshooter will determine if your license key is a valid Windows 10 digital license for an edition that is not currently installed. If it turns out that it’s not, then the troubleshooter will show you how to install the correct edition.
Option 2 – Try to use the correct key for the type of Windows version you have
If the Windows Activation troubleshooter wasn’t able to resolve the error, then you can try using the correct key for your type of Windows version. All you have to do so is check the type of your Windows copy if it’s OEM, retail, or volume. And make sure that you have the correct, valid product key for your operating system.
Option 3 – Try to use Command Prompt to reinstall the key
- In the Start Search, type “command prompt” and right-click on Command Prompt from the search results, and then select “Run as administrator”.
- After that, execute this command to uninstall the existing key: vbs /upk
- Next, you need to install the KMS product key by executing this command: vbs /ipk <The KMS Product Key>
- Once you’re done, you will see a prompt that’ll tell you whether the operation was either successful or not.
- To active, the KMS product key online, use this command: vbs /ato
- Use this command to activate the key using the telephone: exe 4
- After you’ve activated the KMS product key, restart the Software Protection Service. You can also verify the Activation Status to check if your fix was successful or not.
Option 4 – Contact Microsoft Support for assistance
If you’re at your wits’ end in trying to upgrade your computer, you should consider contacting Microsoft Support for help as they can offer you various options that would make fixing Windows Activation error code 0xc000f074 a lot easier and faster.
Read More
Booting the Windows computer system includes loading it from the various boot devices such as drivers, network as well as USB drives when the computer is turned on. The instant the startup sequence is done loading the operating system the system hardware will be ready to perform some complex operations – in this process, the Boot Log in Windows 10 is a record that maintains the list of success or failure of many pieces of Windows 10 system during the booting process. In other words, the Boot Log is the one that keeps a record of all that has happened while loading from the computer storage system to the memory during the boot process. It is available for several devices like network, hardware devices, and the operating system which assist in detecting issues during the boot process and other issues with regards to troubleshooting. Through Boot Log, you’ll know which drivers were unloaded and loaded from the start of the system during the boot process. You have the option to either disable or enable this feature on your Windows 10 PC.
Named as “ntbtlog.txt”, the log file lists all the successfully loaded processes and the unsuccessful ones during the boot process. It is saved to the drive C:Windowsntbtlog.txt. As mentioned, you can enable or disable this feature in two ways – the first one is by using the System Configuration or MSConfig while the second one is using the Command Prompt. In this post, we’ll show you how you can enable or disable Boot Log in Windows 10 either way.
Option 1 – Enable or Disable Boot Log using System Configuration
Enable Boot Log:
- Tap the Win + R keys to open the Run dialog box.
- Then type in “msconfig” and click OK to open System Configuration.
- After that, go to the boot tab and check the checkbox labeled “Boot Log” under the Boot options so that you can enable the Boot Log feature.
- Then click on OK to save the changes made.
- Next, click on the Restart button in the prompt window to get started with the Boot Log process.
- After restarting your PC, go to C:Windowsntbtlog.txt to open the boot log.
Note: As pointed out earlier, the log file contains a list of all the successfully loaded drivers and also the list of drivers that failed to load during the boot process and every time you restart the system, the boot log file will keep on updating and will eventually increase the list of entries. For you to locate the drivers and make your troubleshooting a lot easier, I advised disabling the boot log after troubleshooting. To disable the boot log using System Configuration, refer to the steps below.
Disable Boot Log:
- Tap the Win + R keys to open the Run dialog box.
- Then type in “msconfig” and click OK to open System Configuration.
- After that, go to the boot tab and unmark or uncheck the checkbox labeled “Boot Log” under the Boot options so that you can disable the Boot Log feature.
- Then click on OK to save the changes made.
Option 2 – Enable or Disable Boot Log using Command Prompt
Enable Boot Log:
- Go to the Start Menu and then type in “command prompt” in the search bar.
- After that, right-click on the Command Prompt option and select the “Run as administrator” option.
- After opening Command Prompt, type in “bcdedit” and tap Enter.
Note: You have to find the Identifier of the current operating system first to enable the Boot log. You can find it under the Windows Boot Loader section in the “Description” field and in this case, it’s Windows 10. You can also find the operating system identifier under the Windows Boot Loader section next to the field name identifier.
- To check if the boot log entry is disabled or enabled, go check the “Bootlog” field under the Windows Boot Loader. And if it turns out that the “bootlog” entry is enabled, the entry will be “Yes”. Otherwise, the entry will be “No”.
- Next, type in the following command with the operating system identifier to enable the boot log.
bcdedit /set {identifier} bootlog Yes
Note: In the command given above, make sure that you replace the given system identifier with your computer’s system identifier. For instance:
In this example, the identifier was replaced with the actual operating system identifier as current.
bcdedit /set {current} bootlog Yes
- Afterward, restart the system to start the Boot log process.
- After the restart, go to C:Windowsntbtlog.txt to open the boot log.
Note: Every time you restart your computer, the boot log file will keep on updating which will increase the size of the log eventually. So if you want seamless and easier troubleshooting, it is advised to disable the Boot log after you troubleshoot. To disable it using the Command Prompt, here’s what you have to do.
Disable Boot Log:
- Go to the Start Menu and then type in “command prompt” in the search bar.
- After that, right-click on the Command Prompt option and select the “Run as administrator” option.
- Once the Command Prompt is opened, type in the following command and then tap Enter to disable the boot log feature.
bcdedit/ set {identifier} bootlog No
Note: In the command given above, you need to replace the given system identifier with your computer’s system identifier. For instance:
In this example, the {identifier} was replaced with the actual operating system identifier as {current}.
bcdedit /set {current} bootlog No
- Now close the Command Prompt.
Read More
Microsoft has been bringing new lock-screen features with every iterative feature release of Windows 10 in order to improve user experience. However, Windows 10 users have different opinions regarding it. Some users are pleased with it while some users simply do not like it. So if you are one of the users who seem to not approve of this feature, read on as this post will be about enabling or disabling the Console Mode sign-in feature in Windows 10.
Before you proceed, take note that you will not be able to use your mouse pointer in this Consol Mode login screen and you can only use your keyboard to navigate around various options. You might also want to create a System Restore point just in case.
To enable or disable the Console Mode sign-in in your Windows 10 computer, refer to the given steps below.
Step 1: Tap the Win + R keys to open the Run dialog box.
Step 2: Then type in “Regedit” in the field and tap Enter to open the Registry Editor.
Step 3: Next, navigate to the following registry path:
ComputerHKEY_LOCAL_MACHINESOFTWAREMicrosoftWindowsCurrentVersionAuthenticationLogonUITestHooks
Step 4: From there, look for a DWORD named “ConsoleMode”. If you don’t see this DWORD, you can just create a new DWORD and name it as “ConsoleMode” and make sure that its base is set to Hexadecimal.
Step 5: After that, double click on ConsoleMode and change its value to “0” to disable it and “1” to enable it.
Step 6: Now restart your computer to apply the changes made.
Like pointed out, you can only use your keyboard when you’re in the Console Mode login window or screen. You can just use the ESC button to go back to the menu while you can utilize the arrow keys so you can go through the options that are mostly vertically arranged and the Enter key to select an option. In the Console Mode, sign-in using the Passwords and PINs worked efficiently.
Read More
Microsoft has cut out Russia from downloading ISO files for Windows 10 and Windows 11 as well as installation tools without any explanation or reason behind this.

If you connect via VPN to a Russian server and try to download either ISO files or installation tools you will be greeted with the error 404 and an explanation of File or Directory not found or There was a problem with your request.
At this time you can still download Windows 11 Media creation tool but once you run it will throw a 0x80072F8F-0x20000 error with text: For some unknown reason, this tool failed to run on your computer.
People in Russia can still download files if they connect via VPN and go to a server located outside Russia.
Microsoft has not published any explanation why is this happening, it might be technical difficulty or it could be on purpose.
Other histories of Microsoft vs Russia
Since the beginning of the Russian military operation in Ukraine Microsoft has been putting restrictions on Russia starting with a suspension of all sales in March, next month in April Microsoft started suspending developer’s accounts on GitHub linked to sanctioned companies and the suspension was even if the developer is not working for a given company or left it.
At the beginning of this month, Microsft laid off 400 employees inside Russia as they began scaling back operations in the country but has also stated that they would continue to provide services to all contractors and customers inside Russia so this sudden blocking of downloads is unexpected and it goes against their statement.
Read More
Error Code 35 — What is it?
Error Code 35 is a typical Device Manager error. It indicates information missing to properly configure your device. Error code 35 is usually displayed in the following format:
“Your computer’s system firmware does not include enough information to properly configure and use this device. To use this device, contact your computer manufacturer to obtain a firmware or BIOS update. Code 35”
Solution
Error Causes
The 2 common reasons for Device Manager error code 35 are:
- Outdated BIOS
- Mis-configured, corrupted, or outdated Drivers
No matter what the reason may be, it is advisable to resolve the problem immediately without any delay otherwise you will be unable to use your hardware device.
Further Information and Manual Repair
Below is the list of the most effective and easy to perform solutions to resolve error code 35 on your PC. These solutions do not require any technical knowledge or understanding. Simply follow the instructions to resolve this error code.
Method 1 — Update the BIOS
BIOS (Basic Input/Output System) is the embedded software on the computer’s motherboard.
Though not all PCs have the same BIOS manufacturer, but the steps for updating the BIOS are similar for all versions.
Before you get started with the updating process, first identify your current BIOS version.
- For this, go to the start menu and type msinfo32, and press enter.
- Now click System Summary to view your BIOS version. Here you will see the version number and date.
- Now check your PC motherboard manufacturer’s website to download the BIOS update for the model you own. Also, download any Read Me Files and documentation. These contain guidelines and precautions that you should know before you update.
- Backup all your data and existing BIOS before you update the BIOS version. This will keep your data protected in case the attempt to update BIOS fails.
- Also, when updating, make sure to use an uninterruptible power supply. Remember power outage or even a small power fluctuation can corrupt the BIOS which is something you don’t want.
- Now it’s time to perform the update. Run the downloaded installer for the BIOS updating software. Double click on the executable file.
- Look for a button names Update, Flash, or Run.
- Click on it to start updating the new version
- After the update is complete, your computer will restart automatically.
This will hopefully resolve the problem. However, if the error still persists then there is a possibility that the error code is related to outdated drivers. To resolve, try method 2.
Method 2 — Download Driver Assist to Update Drivers Automatically
Update drivers to repair error code 35 on your PC by simply downloading DriverFIX. This is a cutting-edge program deployed with an intelligent programming system.
It is compatible with all Windows versions.
It scans your PC for problematic drivers and updates them with the latest and compatible versions automatically and in a few seconds thereby repairing all Device Manager error codes including error code 35 generated due to outdated/corrupted drivers.
In addition to this, it updates all device drivers on a regular basis, so you don’t have to stress over and keep a track of what drivers on your PC need to be updated and when.
Click here to download DriverFIX to resolve Device Manager error code 35 today!
Read More
Lately, Microsoft has trying to fix Print Nightmare with various methods and patches. The last patch has seemingly fixed Print Nightmare but it has broken the Alt-tab key combination.
It has been reported that the latest patch has broken famous key combinations for quickly switching from window to window. It seems that combination is not working or it is switching to desktop, even going to blank screen if switching from the full-screen game.
Fixing the issue
Luckily this issue is easily fixable.
The first and easier fix for this issue is surprising to turn off the news and info widget, right-click on it and choose News and interests and then click on turn off.
The second solution would be to uninstall the update. Go to Settings, then to Update & Security, and from there view Update History and remove the update.
Read More
Copyright © 2023, ErrorTools. All Rights Reserved
Trademark: Microsoft Windows logos are registered trademarks of Microsoft. Disclaimer: ErrorTools.com is not affiliated with Microsoft, nor claims direct affiliation.
The information on this page is provided for information purposes only.
Quick Tips
- Configure the Geolocation Service to run automatically at startup on your computer.
- Ensure that location services aren’t disabled in the Group Policy settings.
- If the issue persists, try booting your PC in a clean boot state to determine if any third-party apps or programs are causing the problem.
Fix 1: Configure Geolocation Service
Geolocation Service is a small program that needs to run in the background for the location services to work. Ideally, the service should start every time your system boots. However, if that isn’t happening, location services may appear grayed out on Windows. Here’s what you can do to fix it.
Step 1: Press the Windows key + R to open the Run dialog, type services.msc, and press Enter.
Step 2: Locate and double-click on Geolocation Service on the list.
Step 3: Change the Startup type to Automatic and hit Apply.
If the service is not running, click on the Start button. After that, see if you can access location services.

Fix 2: Tweak Registry Files
You can fix the problem by modifying some registry files if the location services continue to appear grayed out. Here’s how:
Step 1: Press the Windows key + S to open the search menu. Type registry editor in the box and select the first result that appears.

Step 2: In the Registry Editor window, paste the following path in the address bar at the top and press Enter.
HKEY_LOCAL_MACHINE\SYSTEM\CurrentControlSet\Services\lfsvc\TriggerInfo

Step 3: Right-click on the key named 3, and select Delete.

Restart your PC for changes to take effect and see if the issue is still there.
Fix 3: Use Local Group Policy Editor
Like using the Registry Editor, you can also make changes to your PC via the Local Group Policy Editor on Windows. For that, you must be running the Pro, Enterprise, or Education editions of the Windows operating system. If you’re using the Home edition of Windows 11, this method won’t work for you.
Step 1: Press the Windows key + R to open the Run dialog box. Type gpedit.msc in the Open field and press Enter.
Step 2: In the Local Group Policy Editor window, use the left pane to navigate to the following folder.
Administrative Templates\Windows Components\Location and Sensors
Step 3: On your right, you’ll see three policies: Turn off location scripting, Turn off location, and Turn off sensors.

Step 4: Double-click “Turn off location scripting,” select Disabled, and hit Apply.

Step 5: Disable the Turn off location and Turn off sensors policies as well.
Step 6: Click on the Windows Location Provider folder.

Step 7: Double click on Turn off Windows Location Provider.

Step 8: Select the Disabled option and click Apply.

Restart your PC and you should be able to access location services as before.
Fix 4: Try Clean Boot
At times, third-party apps and services running on your PC can also prevent you from accessing certain Windows features. To verify this, you can boot your PC in a clean boot state.
Step 1: Press the Windows key + R to open the Run dialog, type msconfig.msc, and press Enter.
Step 2: Under the Services tab, mark the box that reads Hide all Microsoft services box and click the Disable all button.

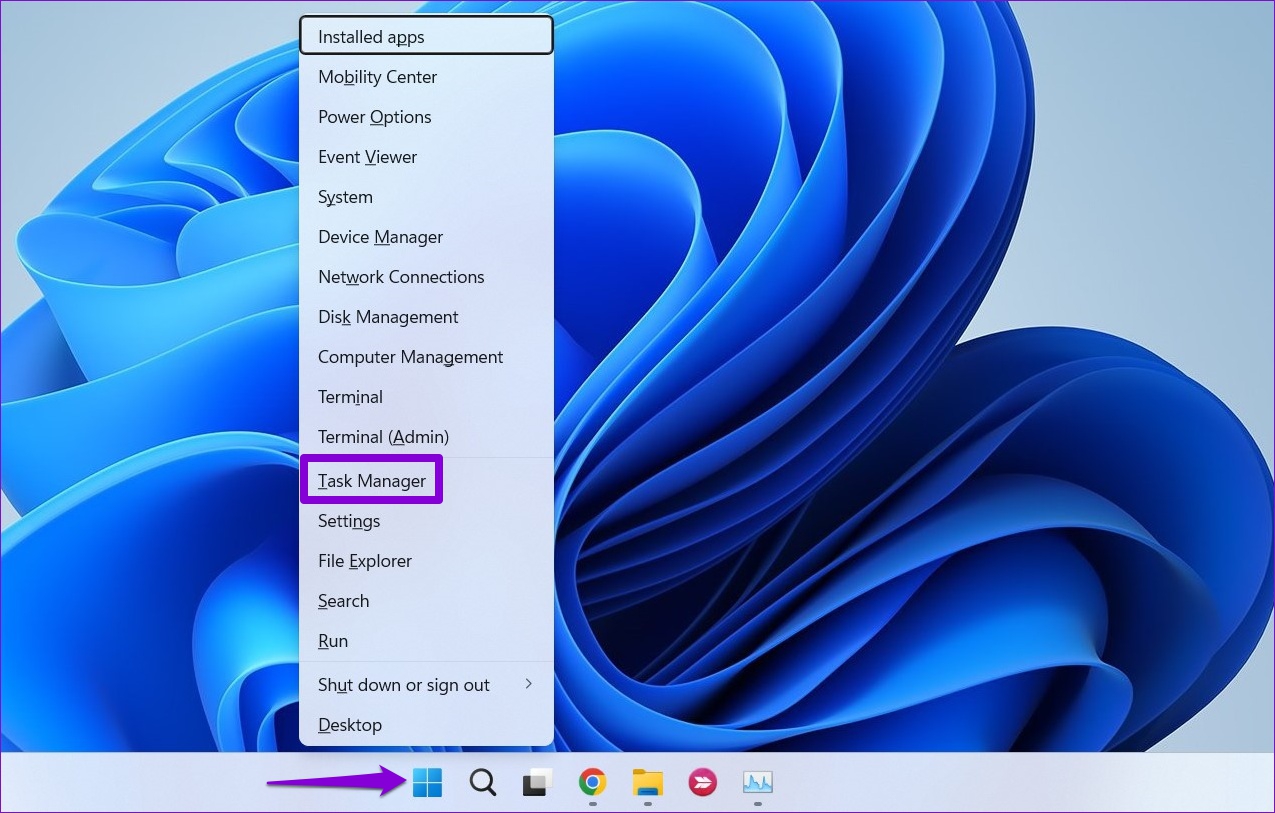
Step 3: Switch to the Startup tab and click on Open Task Manager.
Step 4: In the Startup tab, disable all the third-party apps one by one.

Restart your PC after this to enter the clean boot state and see if you can access the location services. If this helps, you’ll need to look through any recently installed apps and programs and remove them.
To boot in normal mode again, follow the steps above to enable all Startup apps and services, and then reboot your PC.
Was this helpful?
Thanks for your feedback!
The article above may contain affiliate links which help support Guiding Tech. The content remains unbiased and authentic and will never affect our editorial integrity.
Methods to Enable and Disable Location Services in Windows 10 with steps. – Multiple apps and third-party tools need and use the location of your PC to provide their services. Map traces the location of PC and helps you in exploring nearby restaurants. But there are many users who don’t want certain applications to use the location service. Well, for those users, Windows includes few location settings so that they can have control over it. So, in this guide, we present you the guidelines to Enable and Disable Location Services on Windows 10.
There are certain applications that need to know the location information of your device before it can render its service. So, when these applications are run for the first time, they seek your approval to track the location details of the device. After granting permission, in future if you don’t want to share the location of the device with any app, you can anytime disable location services on Windows 10. Pursue a similar guide on [How To] Change App Permissions On Windows 10. So, Windows 10 includes specific location settings to manage location services for account, apps, and device respectively.
Ways to Enable and Disable Location Services on Windows 10
Method 1 – Through Action Center
Step 1 – Launch Action Center and to do so click the tiny icon that exists on the extreme right of the taskbar. Alternatively, you can also make it appear by pressing Win+A keys altogether.
You can Determine App Notification Count to Show in Action Center Windows 10.
Step 2 – If you cannot see the buttons on the Action Center, click Expand to view all of them. Now, locate Location button and click on it to enable or disable it. If Location button is highlighted, then the service is enabled and if it is not highlighted, the feature is disabled.
Method 2 – Using Settings Application
Step 1 – Open Settings program by jointly pressing Win&I keys. When various categories appear on its homepage, locate and select Privacy.
Read our similar guide on How to Avoid Privacy Issues on Windows 10.
Step 2 – Privacy settings page provides few segments on its left sidebar, so click Location.
a. Enable and Disable Location Services for this Device
Note – Settings program gives you the provision to control location services for your device (PC). In addition, keep in mind that you must possess administrative authorities before performing the below steps.
Step 3 – Shift to its right pane and click the Change button that appears underneath Location heading.
Step 4 – On another pop-up, use the slider and turn ON the slider for the option Location for this device. This will enable the location service for this (your) device.
Noteworthy point is that Location service for this device is enabled by default.
Step 5 – To disable the service, click on Change button and moreover, toggle OFF the slider of Location for this device by pulling it towards left.
b. Enable and Disable Location Services for Apps and Account
Note – Before you follow the below directions, make sure that the Location service for this device is enabled by the administrator either using Method 2a or 3a.
Step 6 – On the right panel of Location, find the option Location service. Switch ON the setting and this will enable location service for apps and account (This is the default setting).
Step 7 – Switch OFF the option Location service and specifically disable the feature for both your account and applications.
Method 3 – Via Registry Editor
Step 1 – On Cortana search field, type the command regedit and when she displays the same command, click on it.
For reference, you can read How to Access Registry Editor in Windows 10 – 5 Simple Tips.
Step 2 – UAC prompt will come up displaying the details of the tool. Give permission by clicking Yes and let Registry Editor open.
a. Enable and Disable Location Services for this Device
Note – Registry Editor also gives provision to enable and disable location service for this device but to carry out this procedure you must hold admin authorities.
Step 3 – On the Registry Editor, browse to the below path.
HKEY_LOCAL_MACHINE => SYSTEM => CurrentControlSet => Services => lfsvc => Service => Configuration
Step 4 – Shift to the right pane of Configuration key where a DWORD with a name Status will be visible, double-click on it.
Step 5 – To Enable Location for this device, input the value 1 on its edit box. Click OK to implement the change in the service.
Step 6 – To Disable Location service for this device, set 0 as its value and finally, click OK to make the changes effective.
b. Enable and Disable Location Services for Apps and Account
In order to follow this way, ensure that Location for this device is enabled using Method 2a or 3a.
Step 7 – After opening Registry Editor, navigate to the below path on the left sidebar.
HKEY_CURRENT_USER => SOFTWARE => Microsoft => Windows => CurrentVersion => DeviceAccess => Global => {BFA794E4-F964-4FDB-90F6-51056BFE4B44}
Step 8 – Once you reach the above key, find the string value with a name Value on the right pane and double-click on it.
Step 9 – To enable location services for apps and account, set its value as Allow on the edit box. Click OK.
Step 10 – To disable location services for apps and account, assign the value as Deny and click OK.
Step 11 – Once you change the string value, you have to modify DWORD also. To do so, travel to the below path.
HKEY_CURRENT_USER => SOFTWARE => Microsoft => Windows NT => CurrentVersion => Sensor => Permissions => {BFA794E4-F964-4FDB-90F6-51056BFE4B44}
Step 12 – On its right pane, find and double-click the DWORD SensorPermissionState.
Step 13 – A small edit box will pop-up, so, type 1 to enable or insert 0 to Disable Location Services for Apps and Account.
Conclusion
Hence, to Enable and Disable Location Services on Windows 10, the OS provides you a few distinct ways. Well, Registry Editor is generally for the advanced users. Normal users can manage location services using other ways pretty much easily. If you have more tips to manage location services on Windows 10, please write down to us.
Sometimes you face an issue where the Location settings option is greyed out in Windows 11. As a result, you cannot turn on or off the location settings. You can find this option at Settings > Privacy & Security > Location > Location Services.

Location services play a vital role in the proper functioning of apps and services that relies on the location. For example, a weather app that shows current weather with the help of location services. What if you’re unable to manage location services? This will be an incredible mess, isn’t it?
Usually, this issue occurs due to a bug, operating system, or conflict between third-party apps installed on your PC. There could be other reasons as well.
If you made up to this blog post, then it’s highly possible that the option to manage location services is greyed out in Windows 11, then try the solutions discussed below to fix the issue:
Note – If the Location Services or Settings option is Greyed Out in Windows 10, then you can try these solutions
Use Registry Editor Hack
The very first troubleshooting method to fix Location Settings greyed out is by using the Registry Editor. To do so, follow the steps given below-
Press the Windows key on your keyboard, and then in the Start Menu, search for Registry Editor. Click on Registry Editor from the search result.

In the Registry Editor, head to the following location: KEY_LOCAL_MACHINE\SYSTEM\CurrentControlSet\Services\lfsvc\TriggerInfo
On the left side, right-click on the folder named 3 and click on Delete.

Once done, close the Registry Editor and restart your PC and the issue will be fixed.
Restart Geolocation Service
On the basis of various reports from multiple affected users, they manage to fix the location settings greyed out in Windows 11 by restarting the Geolocation service. So should try it as well:
Open Start Menu by pressing the Windows key and searching for Services. Open the Services from the Start Menu.

In the Services app window, search for Geolocation Services. Right-click on it, and then click on Properties.

Click on the drop-down menu next to Startup and set it to Automatic. Ensure the Service Status is Running, and if not, then click on Start.

Once done, click on Apply and OK to save your changes.
Both solutions discussed above will help in fixing the location settings options disabled in Windows 11. Let us know which one worked for you.
If you know any other solution that misses covering feel free to share in the comment for other readers.
Avyukt Atri fearlessly delves into the offbeat corners of technology, uncovering hidden gems and unraveling untold stories. With a quirky approach and boundless curiosity, he uncovers haunted servers, code-breaking cats, and WiFi signals from parallel dimensions.