
In Windows 11/10, users sometimes come across an issue, where the Location services is reported to be greyed out. It could happen due to the Operating System or some third-party software. When this issue arises, users cannot enable or disable the Location services. Also, they cannot make any changes to the Location settings. So, how to fix Location settings greyed out in Windows 11/10?
Before you move on, it is better to perform a clean boot. After performing it, check if the issue related to the Location settings has been resolved. If not, then keep on reading.
In this post, learn how you can fix the location settings greyed out issue using different methods easily.
Page Contents
Fix 1: Using Registry Editor
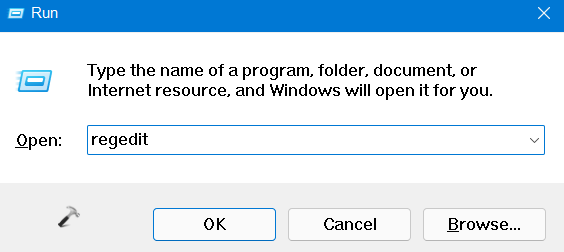
1. In the first place, you need to open the Run dialog box. For this, press the Windows + R keys simultaneously on your keyboard. Once opened, type regedit in the Run dialog box to open Registry Editor.
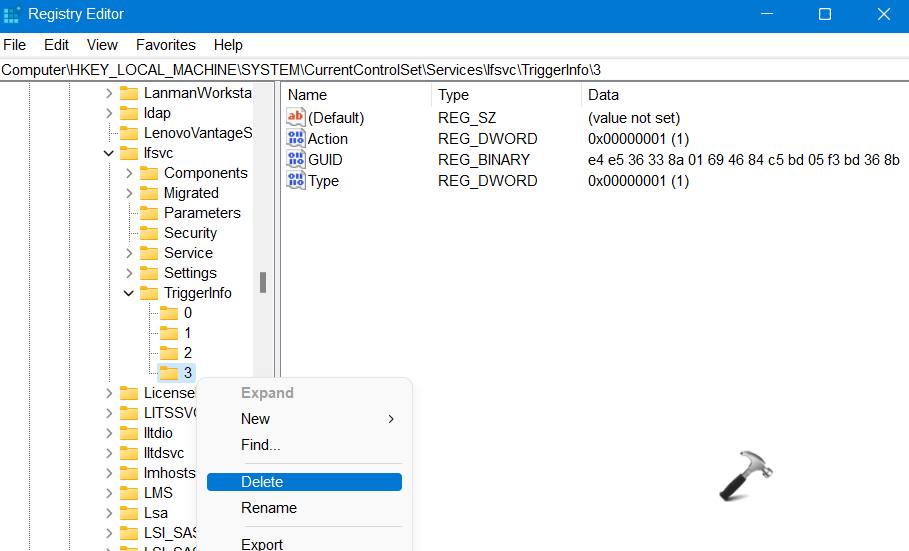
2. After that, navigate to the following location:
HKEY_LOCAL_MACHINE\SYSTEM\CurrentControlSet\Services\lfsvc\TriggerInfo
3. Once there, right-click on the folder named 3. Now, select the Delete option from the context menu.
4. Lastly, close Registry Editor. Once done, check if the issue has been fixed.
Fix 2: Using the Windows Services Manager
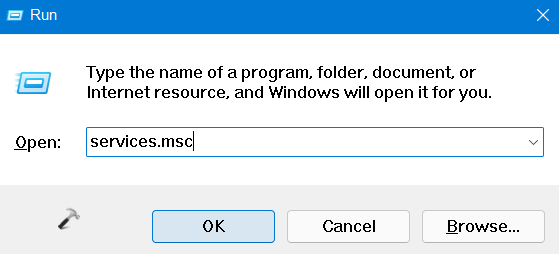
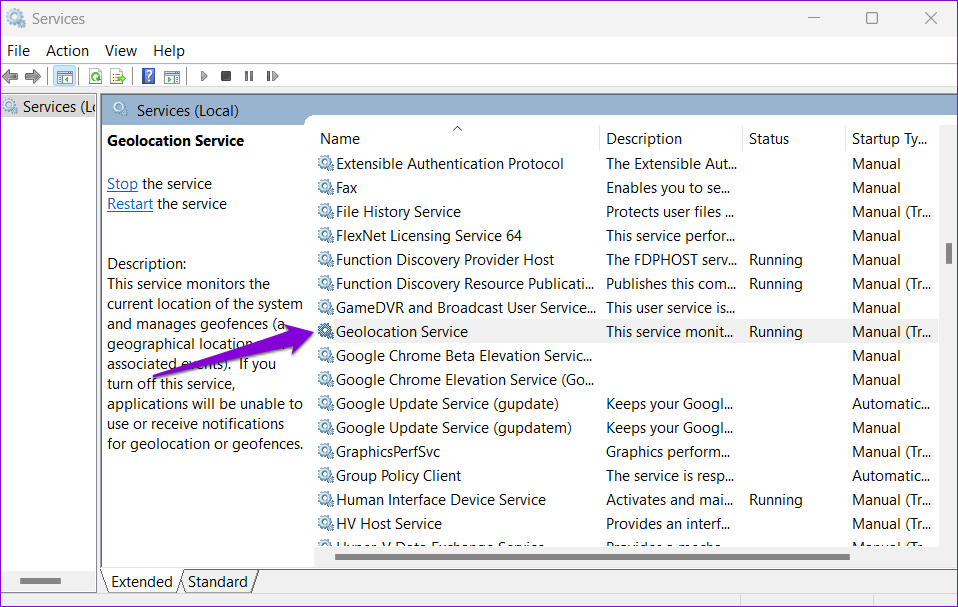
1. Firstly, open the Windows Services Manager. To do this, open the Run dialog box and type services.msc in the Run dialog box. Then, press Enter.
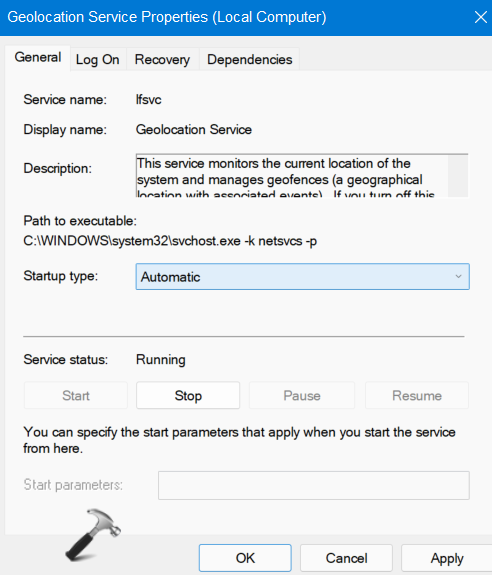
2. Now, look for Geolocation service and double-click on it. This will open its Properties window.
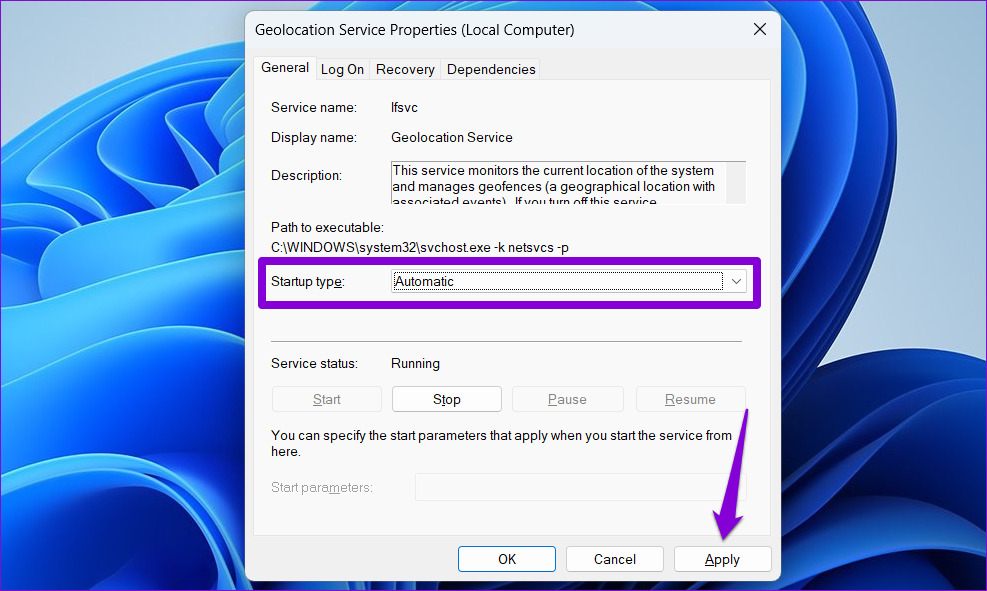
3. In the Properties tab, ensure that the Startup type is set to Automatic and Service status is Running. Make the changes if necessary and click on Apply and then, press OK.
So, this is how to fix location settings greyed out in Windows 11/10 issue. Both of these methods are quite effective. It is recommended to follow them carefully.
RELATED ARTICLES
Location services is a built-in tool in Windows 10 is a useful tool that offers users location information even when your laptop or desktop computer does not have a GPS since it uses Wi-Fi positioning as well as your device’s IP address. However, there are instances when you might encounter some problems when using this service. One instance is when you suddenly find the toggle button for Location service greyed out.
This kind of program could be due to some glitch in the system or some third-party application on your computer. Because of this problem, you won’t be able to toggle the Location service on or off and you won’t be able to make any changes in its settings. Worry not, for this post will guide you on what you can do to fix the greyed-out toggle button of Location services in Windows 10.
Before you perform some troubleshooting steps, you might want to restart your computer and see if it fixes the problem. If it didn’t, then this problem is not just some minor glitch. Thus, you have to follow the potential fixes provided below to fix the problem but before you do that, make sure that you create a System Restore point first. After that, follow each one of the following options.
Option 1 – Put your PC in a Clean Boot State
The first thing you can do to resolve the problem is to put your computer in a Clean Boot State. It could be that there is a third-party program that’s preventing the toggle button from functioning. To isolate this possibility, you need to put your computer in a Clean Boot State.
- Log onto your PC as an administrator.
- Type in MSConfig in the Start Search to open the System Configuration utility.
- From there, go to the General tab and click “Selective startup”.
- Clear the “Load Startup items” check box and make sure that the “Load System Services” and “Use Original boot configuration” options are checked.
- Next, click the Services tab and select the “Hide All Microsoft Services” check box.
- Click Disable all.
- Click on Apply/OK and restart your PC. (This will put your PC into a Clean Boot State. And configure Windows to use the usual startup, just simply undo the changes.)
- Now check if you can now use the toggle button of the Location service or not.
Option 2 – Try to use the Registry Editor
If putting your computer in a Clean Boot state didn’t fix the problem, you might want to make some adjustments in the Windows Registry via Registry Editor.
- Tap the Win + R keys to open the Run utility and type “regedit” in the field and then tap Enter to open the Registry Editor.
- After that, navigate to this registry path: HKEY_LOCAL_MACHINESYSTEMCurrentControlSetServiceslfsvcTriggerInfo
- From there, select the Key (folder) named as “3” and right-click on it, and then delete it.
- Once done, exit the Registry Editor and restart your computer.
Option 3 – Try to use the Windows Services Manager
- Tap the Win + R keys to open the Run dialog box and type “services.msc” in the field and hit Enter to open the Services Manager.
- Next, look for the “Geolocation Service” entry from the list of services.
- Once you find it, right-click on it and select Properties. This will open a new mini window.
- From there, make sure that it is “Running” and its Startup Type is set to “Automatic”.
- After that, close the Services Manager and check if the problem is now resolved.
Option 4 – Try to use the Group Policy Editor
- Tap the Win + R keys to launch Run and type “gpedit.msc” in the field and click OK to open the Group Policy Editor.
- After that, navigate to this path: Administrative TemplatesWindows ComponentsLocation and Sensors
- Next, double click on each one of the following settings and select the “Not configured” or “Disabled” option.
- Turn off location scripting
- Turn off location
- Turn off sensors
- Once done, navigate to this path: Administrative TemplatesWindows ComponentsLocation and SensorsWindows Location Provider
- From there, double click on the “Turn off Windows Location Provider” policy setting and set its configuration to either “Disabled” or “Not configured”. You should see the following description of the policy setting in the window:
“This policy setting turns off the Windows Location Provider feature for this computer. If you enable this policy setting, the Windows Location Provider feature will be turned off, and all programs on this computer will not be able to use the Windows Location Provider feature. If you disable or do not configure this policy setting, all programs on this computer can use the Windows Location Provider feature.”
- Now restart your computer.
Do You Need Help with Your Device?
Our Team of Experts May Help
Troubleshoot.Tech Experts are There for You!
GET HELP
Troubleshoot.Tech experts work with all versions of Microsoft Windows including Windows 11, with Android, Mac, and more.
Share this article:
You might also like
It has been reported that there are systems out there with Windows 11 operating systems that do not use the whole RAM memory installed in the system. If by any chance you are one of the unfortunate users that has encountered this issue, fear not, we have a solution for you.

Run the Windows Memory Diagnostic tool
- Press ⊞ WINDOWS + S to open the search menu
- Type in Windows Memory Diagnostic tool
- Click on the found app
- Select Restart now and check for problems
- Wait for the tool to finish
Memory Diagnostic tool is a built-in tool in Windows, it was designed to automatically find and repair memory issues and should be your first step toward resolving this issue.
Check page file
- Press ⊞ WINDOWS + S to open the search menu
- Type in View advanced system settings
- Click on the search result
- Click on settings under performance
- Click on the Advanced tab
- Click on Change under Virtual memory
- Uncheck the box for Automatically manage paging file size for all drives
- Then select the drive and check the No paging file option
- Click on Set
- Repeat for all drives on the system
- Reboot the system for changes to take effect
If after reboot system still does not see and use whole available RAM, repeat this process and turn back ON paging. After you are done move to the next solution.
Modify usable RAM
- Press ⊞ WINDOWS + S to open the search menu
- Type in System configuration
- Click on the search result
- Go to the Boot tab and click on Advanced options
- Check the box for Maximum memory
- Enter the installed RAM on your system in the field box and click on OK
- Confirm once again on the OK and close the System configuration window
- Restart the system
If the provided solution has not worked, uncheck the Maximum memory checkbox and save the changes. Move to the next solution.
Change and modify the registry
- Press ⊞ WINDOWS + R to open the run menu
- Type in Regedit and press the OK button or hit ENTER
- Click on YES if prompted by UAC
- Locate the HKEY_LOCAL_MACHINE\SYSTEM\CurrentControlSet\Control\Session Manager\Memory
- On the right side find and double click on the ClearPageFileAtShutdown DWORD
- Enter 1 under Value data and click on OK to save the changes
- Close the registry and reboot the system
Enable memory remapping inside BIOS
In order to do this fix, you will need to enter BIOS on your system. How entering BIOS is different from system to system depending on your manufacturer, especially if it is a laptop this step you will have to do alone. Go to your motherboard manufacturer or laptop manufacturer and see how to enter BIOS.
- Enter BIOS (80% of the time this can be done by pressing DEL or F12 while the system is turned ON)
- Locate System Agent Configuration option
- Select Memory Remap Feature and Enable it
Your BIOS might be different from ours and you might not have the System Agent Configuration option, in this case, go through the setting and try to locate Memory Remap Feature. If this feature is missing as well move to the next step.
Rearrange RAM modules on the motherboard
Sometimes RAM memory cannot be slotted properly or just purely switching them in slots can solve the issue. Take RAM out, clean memory slots, clean motherboard connectors for them, and place them back in a different order.
If by any chance none of the methods worked, then the issue might be in the hardware itself, either memory banks themselves, motherboard, power supply, etc. If this is sadly the case, you will have to locate the issue and replace the faulty part.
If you are not technical enough for this adventure, the best solution is to take a PC to a computer repair shop.
Read More
If you recently made some changes in your Windows 10 computer using the Group Policy Editor but they were not reflected and you got errors instead, it could be that your Windows computer wasn’t able to read the Group Policy file (registry.pol). To resolve this kind of issue, you have to repair the potentially corrupted Group Policy using the options given in this post.
.As you know, Group Policy is a feature in the Microsoft Windows Active Directory which allows an admin to make changes in the features on Windows PCs that are on the network. So if the modifications you just made weren’t successfully applied, then there could be something wrong with the registry.pol file on the client or it could also be that the Group Policy folder is missing.
To fix this issue in the Group Policy, you need to refer to the given suggestions below and make sure that you have admin privileges as you execute them.
Option 1 – Try to delete or recreate the missing registry.pol file
The entire settings of the Group Policy are stored in the registry.pol file so if it went missing, all the changes you make will not be reflected. The good thing is that you can recreate it but if the file exists and is corrupted, you need to delete it first before you recreate it.
- First, go to the C:/Windows/System32/GroupPolicy/Machine location.
- And from there, check if the registry.pol file exists or not. If it’s there, just delete it permanently by tapping the Shift + Delete keys.
- Now it’s time to recreate the file. Just open Windows PowerShell with admin privileges by tapping Win + X + A keys.
- After opening PowerShell, type this command: gpupdate /force
- The command you entered will recreate the registry.pol file and will refresh the Group Policy. Restart your computer.
Option 2 – Try recreating the secedit.sdb file
The security settings of Group Policy are stored in the secedit.sdb file so if you made some changes to security and they weren’t reflected, you can try to delete and recreate the secedit.sdb file instead of deleting the Group Policy file. All you have to do is navigate to the C:/WINDOWS/security/Database folder and look for the secedit.sdb file and rename it or move it to another folder. After that, restart your computer. Once your computer has restarted, the secedit.sdb file will be created again.
Option 3 – Try to reset the Group Policy to default
You can also try to reset the Group Policy back to its default state. There are several ways you can do that. You can either use the gpupdate or the secedit command in the Windows PowerShell to do that. Resetting the Group Policy will resolve any issues that could be caused by its current settings.
Option 4 – Try to perform System Restore
System Restore can also help resolve the Group Policy issue. It could be that prior to the issue, you’ve made some changes in the system that might have affected the Group Policy. To undo these changes, perform System Restore.
- First, tap the Win + R keys to open the Run dialog box.
- After that, type in “sysdm.cpl” in the field and tap Enter.
- Next, go to the System Protection tab then click the System Restore button. This will open a new window where you have to select your preferred System Restore point.
- After that, follow the on-screen instructions to finish the process and then restart your computer and check if the problem is fixed or not.
Option 5 – Use the DISM tool
You can also try running the Deployment Imaging and Servicing Management or DISM tool. This tool will repair the Windows System Image as well as the Windows Component Store in your Windows 10 computer. So if there are any missing or corrupted folders and files, the DISM tool can restore and repair them. As a result, any system consistencies and corruptions will be fixed. To run this tool, follow these steps:
- Tap the Win + X keys and click on the “Command Prompt (Admin)” option.
- After that, input each one of the commands listed below sequentially to execute them:
- Dism /Online /Cleanup-Image /CheckHealth
- Dism /Online /Cleanup-Image /ScanHealth
- Dism /Online /Cleanup-Image /RestoreHealth
- Once you’ve executed the commands given above, restart your computer.
Read More
If you are using your computer and you notice that Hard drive shows high space utilization even if you only have a few applications installed on your computer, then you’ve come to the right place as this post will guide you on what you can do to sort this problem.
Upon noticing the odd state of your hard drive and you check the actual volume that’s occupied by the apps in your drive and you see that they are not really occupying a lot of space. This kind of issue could indicate that your hard drive is not showing the correct value for the free storage space of the drive-in your Windows 10 computer.
This kind of problem could be passed off as a system bug, however, it could also be a serious problem. In fact, as you are aware, there are hidden folders and files in your computer that could be occupying space and since most of them are associated with system applications, you might not realize it unless you thoroughly check the folders.
The most common causes of the issue are as follows:
- The system information folder might be utilizing a lot of space. If you wonder where the information for the system restore points is stored, they are stored in the system information folder which in turn is stored in the drive as a hidden file.
- An issue with system maintenance could cause the problem.
- Malware or some other software might have created an undetectable hidden file.
- Space could be occupied by the trashbin folder.
- These hidden files could occupy significant space in the folder, thus slowing down the system and impacting its performance. If you face this issue, try our suggestions and see if they help you.
- Run ChkDsk
- Clear all Junk files
- Reduce the space occupied by the system restore points
- Run the System Maintenance troubleshooter
Option 1 – Run CHKDSK utility to check the drive for errors
When it comes to some issues concerning the hard drive or removable devices, there is a utility in Windows that might help which is called “chkdsk”. To use it, follow the steps below.
- Tap the Win + S keys to open the Search box.
- Then type “command prompt” in the field and from the search results that appear, right-click on Command Prompt and select “Run as administrator”.
- After opening an elevated command prompt, copy and paste the following command and hit Enter:
CHKDSK [volume [[path] filename]] [/F] [/V] [/R] [/X] [/C] [: size]]
Note: In the command given above, “[/F]” will try to fix the system errors while “[/R]” will be the one to fix the bad sectors.
- Now if you are prompted to run CHKDSK after your reboot your PC, just tap Y and reboot your PC.
- If CHKDSK is not able to find any errors, tap the Win + E keys and navigate the access window. From there, right-click on the concerned drive and click on Properties.
- After opening Properties, click on the tab Tools and then click on the “Check” button under the Error-checking section.
- Wait until the process is completed and then restart your computer.
Option 2 – Try to delete the temporary files
The error could be caused by some temporary or junk files in your computer and so you need to clear them up to fix the problem. You can achieve that using the Storage Sense feature.
- Open Setting > System > Storage from the WinX Menu.
- From there, you will see a list of all the local and connected storage devices along with the details on the free space. Make sure that Storage Sense is on.
- Next, find a link that says “Free Up Space” and click it to open.
- After that, a screen which is the built-in program in Windows 10 will appear and will scan your computer for the following junk files so you can free up disk space:
- Windows Upgrade Log Files
- The system created Windows Error Reporting Files
- Thumbnails
- Temporary Internet Files
- Previous Windows Installation Files
- Delivery Optimisation Files
- DirectX Shader Cache
- Choose the files you want to get rid of and then click on the remove files option. Note that you’ll have an idea of the total size as you select any of the junk files listed above.
- Now go to the “Free Up Space Now” section and click the Clean Now button. This will get rid of all the temporary or junk files in your computer and should hopefully fix the error.
Option 3 – Try to reduce the space occupied by the system restore points
In case you don’t know, system restore points actually occupy a significant space in your computer which is stored in the System Information folder. Thus, you need to check the size of this folder and unhide the folders and files and then click on the folder. The size of the folder should be displayed in the right pane of the window. To fix the storage space problem, you could delete all the old System Restore Points as well as Previous versions of files or you could also restrict the disk usage of the System Restore points.
Option 4 – Try to run the System Maintenance troubleshooter
The problem could also be caused by the System Maintenance and to fix it, you have to run the System Maintenance troubleshooter by following these steps:
- In the Windows Search bar, type “control panel” and double click on Control Panel from the search results.
- Next, go to this path: Control PanelAll Control Panel ItemsTroubleshootingSystem and Security.
- After that, click on the System Maintenance troubleshooter to run it.
- Once the process is completed, restart your computer.
Read More
Hal.dll Error — What is it?
Hal.dll error is a type of dynamic link library error that is common in Windows.
Hal.dll is the critical file in all Windows installations and the error occurs when this file cannot be correctly loaded. Hal is the abbreviation for ‘Hardware Abstraction Layer’. Communication between Windows and different PC hardware is facilitated with this file.
The error causes inconvenience and hampers your ability to use the hardware.
The error message is displayed in either one of the following formats:
- «Windows could not start because the following file is missing or corrupt: C:Windowssystem32hal.dll. Please re-install a copy of the above file.»
- «Cannot find WindowsSystem32hal.dll»
- «C:WindowsSystem32Hal.dll missing or corrupt: Please re-install a copy of the above file.»
Solution
Error Causes
Hal.dll error occurs due to multiple reasons. These include:
- BIOS are not configured properly
- Damaged hard drive
- Hal.dll file is missing, damaged, or corrupt
- Viral Infection
Further Information and Manual Repair
To fix and resolve the Hal.dll error code on your system, you don’t always have to hire a professional technician for the job.
Though Hal.dll error is critical but easy to resolve, here are some solutions that you can try to fix it right away even if you don’t have any technical expertise.
1) Restart Your PC
Sometimes this can be a temporary error, so try restarting your PC. If the error is resolved then that’s great. However, if it still persists, then try other solutions.
2) Change the Boot Order
The underlying cause for the Hal.dll error is often not properly configured BIOS; if this is the cause, simply change the boot order of the bootable devices like your hard drive.
The BIOS setup utility is used to change boot order settings. This can be done by restarting your PC. Once you restart, press F2 to enter the setup. Now go to SATA operation and change RAID AHCI to RAID ATA.
Save changes and then exit. By doing so, you will be able to re-configure the BIOS and resolve the error.
3) Use BOOTMGR
Another way to resolve is to update the volume boot code to use BOOTMGR.
To do this, access advanced startup options, open the command prompt and type bootsect command and then press Enter. Run the command and then you’ll get the following message:
C: (\?Volume{37a450c8-2331-11e0-9019-806e6f6e6963})
Successfully updated NTFS filesystem bootcode.
Bootcode was successfully updated on all targeted volumes.
After that close the command prompt. This is most likely to resolve the error.
4) Repair Registry With Restoro.
In case the error is still not fixed, then this means that the problem is bigger than you thought. It may be due to hard drive failure, viral infection, or sometimes because of hal.dll file corruption. In the event of these error causes, it is recommended to download Restoro.
Restoro is an advanced, next-generation, and multi-functional PC repair tool embedded with numerous utilities like a registry cleaner, an antivirus, and a system optimizer. The registry cleaner utility:
- Scans for all registry issues
- Wipes out the unnecessary files saved in the hard drive like the junk files, cookies, internet history, and temporary files
- Cleans the disk
- Repairs damaged and corrupt files
- Restores the registry
The antivirus utility scans and removes all malicious software from your PC including viruses, Trojans, malware, adware, and spyware. Simultaneously, it also boosts the speed of your system.
It is safe and efficient PC repair software. It has simple navigation and a user-friendly interface. Whether you are using Windows 7, 8 or Vista, it is compatible with all. It can also be used on Windows XP.
Click here to download Restoro and resolve the Hal.dll error today!
Read More
- Open the Steam app and select Add a Game.
- Click Add a Non-Steam Game and choose Browse.
- Access: C:\Windows\
- Then, scroll down, open explorer.exe, and click Add Selected Programs.
- Hold Windows + R keyboard shortcut, type shell:AppsFolder, then press Enter.
- Select the game you want to add, right-click on it, and choose Create Shortcut.
- Right-click on the desktop shortcut, go to Properties, type in Target Type or Target, delete the shortcut.
- Go to Steam, access Library, select Games, right-click on the game explorer, choose Properties, choose the name of the game you want to add.
- Choose Select Launch Options, write: shell:AppsFolder\<Target Type or Target Here>
- Click OK, then Close.
If you would like to read more helpful articles and tips about various software and hardware visit errortools.com daily.
Read More
The Windows 10 Orange Screen of Death, unlike Blue Screen of Errors, is quite an uncommon error where the hardware is the culprit which is mostly caused by some issues with the GPU. If you are currently facing this problem, then you’ve come to the right place as this post will guide you on what you can do to fix it.
There have been reports from users that the Orange Screen of Death is caused by various reasons. Some users reported that they encountered Orange Screen of Death when they were watching a YouTube video, while some were not able to boot into their Windows 10 PCs and encountered an error instead of that either says, FAULTY_HARDWARE_CORRUPTED_PAGE or WHEA_UNCORRECTABLE_ERROR error. In addition, this error can also occur when your computer wakes up from Sleep or while using BitLocker, or while you use a second monitor. Whatever the case is, you can try updating your drivers or lower the clock speed of the GPU. You could also try to fix the DRIVER_IRQL issue in case it’s the one that triggers the error or performs Automatic Repair or uninstalls any recently installed software.
Option 1 – Update your Graphics card drivers
One of the possible reasons why you’re getting the Orange Screen of Death error is most likely related to the Graphics card drivers in your computer. Thus, the first thing you can do to resolve it is to update these drivers by following these steps:
- First, boot your computer into Safe Mode.
- After that, tap the Win + R keys to launch Run.
- Type in msc into the box and tap Enter or click OK to open the Device Manager.
- After that, a list of device drivers will be displayed. From there, look for the Display Adapters and click on them.
- After that, right-click on each entry under the Display Adapters and select the “Uninstall Device” option from the menu.
- Now restart your computer.
- After restarting your computer, go to the Settings app and Check for Updates in the Windows Update section.
Note: You also have the option to go directly to the website of your graphics card manufacturers like NVIDIA, Intel, or AMD and go to the section called Drivers then check if there’s a new available update – if there is, download and install it.
Option 2 – Try to uninstall software you’ve installed recently
If you have installed a software or two recently and then suddenly encounter this Orange Screen of Death, then they are most likely the culprits. The best thing you can do is to first check the System Log in the Event Viewer for any additional information in case it’s not the GPU but some other driver or device that’s causing the error. Once you have identified the culprits, uninstall them and see if the error is fixed.
Option 3 – Try disabling Overclocking
If overclocking is enabled, you might have to disable it as some users reported that the WHEA_UNCORRECTABLE_ERROR 0x00000124 error started to appear right after overclocking. To disable it, follow the steps below.
- Go to the Start Menu and open Settings.
- Next, select Update and Security and go to the Recover tab.
- From there, click on Restart now in Advanced startup. This will restart your computer.
- Once you’re in the Advanced startup, go to Troubleshoot and then select Advanced Options.
- From there, select the UEFU Firmware Settings.
- Now click on Restart. Once your computer has restarted, it will automatically open BIOS.
- From the BIOS, go to the Advanced tab and navigate to Performance and then look for Overclocking.
- Once you’ve found Overclocking, make sure that it is disabled. If it’s not, then disable it and then save the changes made by tapping the F10 key.
- Start your computer normally and check if the WHEA_UNCORRECTABLE_ERROR 0x00000124 error is now fixed.
Option 4 – Use the Driver Verifier Manager
The Driver Verifier Manager is another tool in Windows that could help you fix driver-related issues. And so if you want to fix the Wdf01000.sys Blue Screen error, you need to use the Driver Verifier Manager:
- Type in the keyword “Verifier” in the Cortana search box to search for Verifier in Windows 10.
- After that, select the option “Create custom settings”.
- Make sure that you have checked everything except the options “DDI compliance checking” and “Randomized low resources simulation”.
- Next, select the option “Select driver names from a list” option.
- Afterward, you have to select all the drivers from any unofficial or third-party provider. To simply put it, you have to select all the drivers that are not supplied by Microsoft.
- Then click on the Finish button.
- Open Command Prompt as administrator and execute this command – verifier /querysettings
- The command you just executed will display the Driver Verifier settings so if you see any of the flags enabled boot your Windows 10 PC into Safe Mode.
- Open the Command Prompt as admin again and run this command – verifier /reset
- The command will reset the Driver Verifier. Once the process is done, restart your PC and check.
Option 5 – Try to run the Automatic Repair Utility
You might also want to use Automatic Repair in fixing the error. To do so, follow the steps below.
- You can start by creating and booting from a bootable Windows 10 USB Stick.
- After that, click on Repair your computer located on the bottom left corner when you are on the initial Windows Startup screen.
- Next, click on Troubleshoot, and then on the other screen, click the Startup Repair option.
- Now select the operating system you want to repair. Once you do that, it will start to repair your operating system. Wait until the process is completed and then check if the problem’s now fixed.
Read More
Microsoft has released Windows 11 as a public beta release for all the people that are not willing to be in the insider program.
Beta release as of this moment is identical to Insider Preview build 22000.100. and updates will not roll so fast as in insider preview and it is marked as unstable release, same as insider build.
I would not install Windows 11 beta on the main PC since some drivers still have issues and may lead to some blue screens.
Be aware that the beta build will have all Windows 11 system requirements including TPM 2.0. This is a big difference from insider build which can be installed on systems lacking official requirements.
So basically if you have a spare PC that could run Windows 11 install it so you can see what it brings and feel it so you can make a decision will upgrade once it is released later this year.
Read More
What is Error Code 37?
Error Code 37 is a Device Manager Error Code that you may come across when you are unable to use an installed hardware device on your PC. It will pop up on your screen with the following display:
“Windows cannot initialize the device driver for this hardware. (Code 37)”
If you receive the above message, it means that your operating system was unable to acknowledge the drivers for a particular peripheral device.
Solution
Error Causes
Error Code 37 mainly occurs due to device driver corruption. However, there are other factors that can trigger this error code, some of which are the following:
- Missing device drivers
- Out-of-date device drivers
- Presence of malware or spyware in the system
- The particular device is not compatible with your PC
Device driver corruption or other data corruption is not uncommon and part of everyday PC use.
From an installation gone wrong to an unexpected shutdown, commonly generated data errors are considered the main culprit behind error codes.
Further Information and Manual Repair
Just like most PC error codes, Error Code 37 isn’t that difficult to get rid of. There are many DIY methods you can try to have your PC running smoothly in no time. Here are a few methods to resolve this issue:
Method 1: Restart your PC
It is possible that the display of the error code is merely due to a temporary issue with your peripheral device and not anything serious.
Therefore, the quickest and easiest method to solve the error code 37 is to simply restart your PC.
Method 2: Scan for Viruses
If restarting does not do the trick, a quick scan for viruses and removing them is another simple method you can follow to fix your PC.
Since the error code is due to corruption of data, viruses such as malware or spyware create error in your PC’s registry and eliminating them can help restore some of the corrupt data, which also speeds up your PC.
Method 3: Undo recent changes
A possible explanation for the error code may be the recent changes in your Device Manager or due to the peripheral device installation. You can thus undo the changes by either:
- Remove or change settings of the installed peripheral device
- Roll back the version of the driver to the one before the update.
- Use System Restore to reverse the changes made in the Device Manager
Method 4: Manually uninstall and reinstall the drivers
If the above stated methods do not help in speeding up your PC and is still giving you an error code, you may want to manually uninstall and reinstall the corrupt or missing drivers. Here are the following steps:
- Double-check if the installed external device is properly connected and working smoothly
- Open Device Manager and double click on the device that is causing problems
- When it opens, click on the ‘Driver’ tab and click ‘Update Driver’
Method 5: Use DriverFIX
However, updating the missing or corrupt drivers can be time consuming and may also require having a hardware documentation ready that contains specific details about the driver that you should download.
To avoid this time-consuming process, you can use DriverFIX software.
DriverFIX will help you to download the required driver without you having to waste your precious time and effort looking it up in a user manual. This latest software technology is embedded with its own database that tracks the missing or corrupt driver according to your PC’s motherboard version and specific details.
It is user-friendly, which means that it will relieve you from the frustration of such PC error codes appearing from time to time and enable your PC to work efficiently in no time.
Click here to download DriverFIX to resolve Device Manager error code 37 today!
Read More
In case you don’t know, Groove Music is due to retire its OneDrive streaming service this month. Despite that being the case, there is actually a workaround you can try to still continue enjoying music streaming. The app also allows you to play your own local files and if required, you can also modify or tailor the experience with new features – for instance, Groove Music brings an Equalizer to the settings of the app.
As the name suggests, the equalizer allows you to tweak frequency responses to your liking. On top of being able to tweak individual bands, the equalizer supports few pre-set settings to enable quick changes. This post will guide you on the process of accessing and using the equalizer in the Groove Music app. To get started, refer to the instructions provided below.
Step 1: You need to make sure that you are running the latest version of the Groove Music app or version 10.18011.1211.0 or higher in order to use the equalizer in Groove Music. If needed, you can check the version number from Windows Store.
Step 2: Open Windows Store and then click on the ellipses icon and select the Downloads and Updates option.
Step 3: Next, search for Groove Music and check its version number.
Step 4: Now that you’ve verified the version number of Groove Music, you need to open the equalizer setting. It is enabled by default and to access it, click on the gear icon for Settings and select equalizer under the Playback settings.
Step 5: After that, the Equalizer window will pop up. It is where you can configure the equalizer settings using the drop-down menu. Here are the following presets you can choose from:
- Flat
- Treble Boost
- Bass Boost
- Headphones
- Laptop
- Portable speakers
- Home Stereo
- TV
- Car
- Custom
Step 6: Drag the dots upwards or downwards to set your own preferences, as needed.
Note: The only downside to this setting is that there is no shortcut available for quick access as you have to navigate through the Settings section manually to access it and change the preset configurations. In addition, the Groove Music app also works on the mobile version of Windows 10.
Read More
If you are using Windows PowerShell and it suddenly throws an error message saying, “File cannot be loaded because running scripts is disabled on this system”, then read on as this post will guide you on how you can fix this issue your Windows 10 computer. This kind of error in PowerShell is most likely due to the fact that your user account does not have the required permissions to execute the script. Although this does not mean that you need to have administrator-level permissions as it could also indicate that you have to be unrestricted to run these types of PowerShell scripts or cmdlets. Thus, to fix the error and carry out the task, you have to set the execution policy to be unrestricted. And to do that, you need to use the steps provided below as a reference.
Step 1: To get started, you have to check what policies are set for the individual user groups on your computer by tapping the Win + X key combination or by right-clicking on the Start button and clicking on Windows PowerShell (Admin). You can also search for PowerShell in the Start Search and then right-click on Windows PowerShell and select Run as administrator.
Step 2: If a User Account Control or UAC prompt appears, just click Yes to proceed. Once you’ve pulled up Windows PowerShell, type the following command to get the List of Execution Policy for all the scopes on your computer.
Get-ExecutionPolicy –List
Step 3: After you execute the command, it will give you a list of the User Groups as well as their Execution Policy status, and under the Scope column, look for “LocalMachine”. Once you find its Execution Policy you will notice that it’s either set to Undefined or Restricted.
Step 4: Now that you’ve determined the Execution Policy, you need to set it to Unrestricted if it is set to Restricted. To do that, you have to enter the following command in the very same PowerShell window.
Set-ExecutionPolicy Unrestricted
Step 5: After you execute the command, you will see a message that asks for various permissions for which you either have to tap Y to say Yes to each one of the messages individually or tap the A key to say Yes to all the messages to once. However, if the command throws another error, you can just force the Execution Policy to change by executing the following command.
Set-ExecutionPolicy Unrestricted -Force
Step 6: Once you’re done, it will finally set the Execution Policy for the Windows PowerShell scripts as well as cmdlets to be Unrestricted and fix the “File cannot be loaded because running scripts is disabled on this system” error.
Read More
Copyright © 2023, ErrorTools. All Rights Reserved
Trademark: Microsoft Windows logos are registered trademarks of Microsoft. Disclaimer: ErrorTools.com is not affiliated with Microsoft, nor claims direct affiliation.
The information on this page is provided for information purposes only.
Quick Tips
- Configure the Geolocation Service to run automatically at startup on your computer.
- Ensure that location services aren’t disabled in the Group Policy settings.
- If the issue persists, try booting your PC in a clean boot state to determine if any third-party apps or programs are causing the problem.
Fix 1: Configure Geolocation Service
Geolocation Service is a small program that needs to run in the background for the location services to work. Ideally, the service should start every time your system boots. However, if that isn’t happening, location services may appear grayed out on Windows. Here’s what you can do to fix it.
Step 1: Press the Windows key + R to open the Run dialog, type services.msc, and press Enter.
Step 2: Locate and double-click on Geolocation Service on the list.
Step 3: Change the Startup type to Automatic and hit Apply.
If the service is not running, click on the Start button. After that, see if you can access location services.

Fix 2: Tweak Registry Files
You can fix the problem by modifying some registry files if the location services continue to appear grayed out. Here’s how:
Step 1: Press the Windows key + S to open the search menu. Type registry editor in the box and select the first result that appears.

Step 2: In the Registry Editor window, paste the following path in the address bar at the top and press Enter.
HKEY_LOCAL_MACHINE\SYSTEM\CurrentControlSet\Services\lfsvc\TriggerInfo

Step 3: Right-click on the key named 3, and select Delete.

Restart your PC for changes to take effect and see if the issue is still there.
Fix 3: Use Local Group Policy Editor
Like using the Registry Editor, you can also make changes to your PC via the Local Group Policy Editor on Windows. For that, you must be running the Pro, Enterprise, or Education editions of the Windows operating system. If you’re using the Home edition of Windows 11, this method won’t work for you.
Step 1: Press the Windows key + R to open the Run dialog box. Type gpedit.msc in the Open field and press Enter.
Step 2: In the Local Group Policy Editor window, use the left pane to navigate to the following folder.
Administrative Templates\Windows Components\Location and Sensors
Step 3: On your right, you’ll see three policies: Turn off location scripting, Turn off location, and Turn off sensors.

Step 4: Double-click “Turn off location scripting,” select Disabled, and hit Apply.

Step 5: Disable the Turn off location and Turn off sensors policies as well.
Step 6: Click on the Windows Location Provider folder.

Step 7: Double click on Turn off Windows Location Provider.

Step 8: Select the Disabled option and click Apply.

Restart your PC and you should be able to access location services as before.
Fix 4: Try Clean Boot
At times, third-party apps and services running on your PC can also prevent you from accessing certain Windows features. To verify this, you can boot your PC in a clean boot state.
Step 1: Press the Windows key + R to open the Run dialog, type msconfig.msc, and press Enter.
Step 2: Under the Services tab, mark the box that reads Hide all Microsoft services box and click the Disable all button.

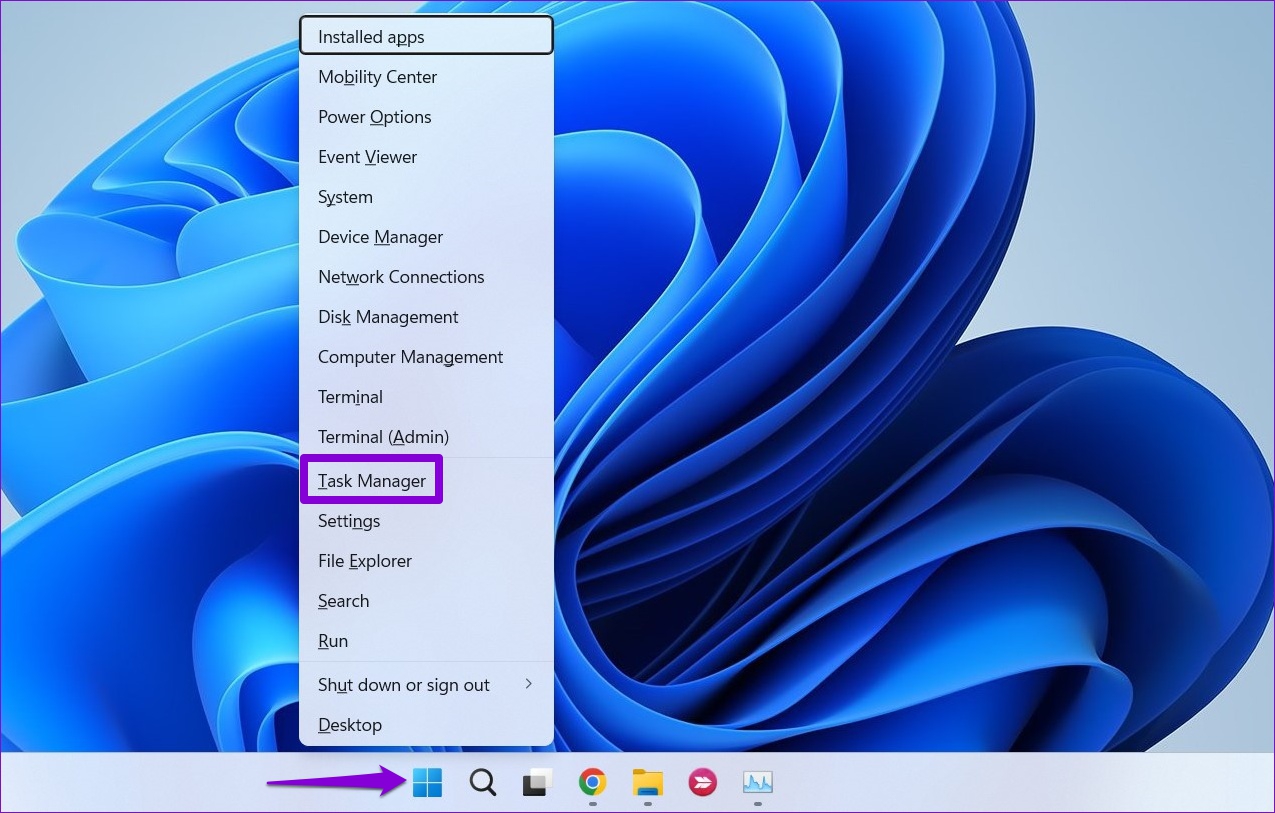
Step 3: Switch to the Startup tab and click on Open Task Manager.
Step 4: In the Startup tab, disable all the third-party apps one by one.

Restart your PC after this to enter the clean boot state and see if you can access the location services. If this helps, you’ll need to look through any recently installed apps and programs and remove them.
To boot in normal mode again, follow the steps above to enable all Startup apps and services, and then reboot your PC.
Was this helpful?
Thanks for your feedback!
The article above may contain affiliate links which help support Guiding Tech. The content remains unbiased and authentic and will never affect our editorial integrity.
Methods to Enable and Disable Location Services in Windows 10 with steps. – Multiple apps and third-party tools need and use the location of your PC to provide their services. Map traces the location of PC and helps you in exploring nearby restaurants. But there are many users who don’t want certain applications to use the location service. Well, for those users, Windows includes few location settings so that they can have control over it. So, in this guide, we present you the guidelines to Enable and Disable Location Services on Windows 10.
There are certain applications that need to know the location information of your device before it can render its service. So, when these applications are run for the first time, they seek your approval to track the location details of the device. After granting permission, in future if you don’t want to share the location of the device with any app, you can anytime disable location services on Windows 10. Pursue a similar guide on [How To] Change App Permissions On Windows 10. So, Windows 10 includes specific location settings to manage location services for account, apps, and device respectively.
Ways to Enable and Disable Location Services on Windows 10
Method 1 – Through Action Center
Step 1 – Launch Action Center and to do so click the tiny icon that exists on the extreme right of the taskbar. Alternatively, you can also make it appear by pressing Win+A keys altogether.
You can Determine App Notification Count to Show in Action Center Windows 10.
Step 2 – If you cannot see the buttons on the Action Center, click Expand to view all of them. Now, locate Location button and click on it to enable or disable it. If Location button is highlighted, then the service is enabled and if it is not highlighted, the feature is disabled.
Method 2 – Using Settings Application
Step 1 – Open Settings program by jointly pressing Win&I keys. When various categories appear on its homepage, locate and select Privacy.
Read our similar guide on How to Avoid Privacy Issues on Windows 10.
Step 2 – Privacy settings page provides few segments on its left sidebar, so click Location.
a. Enable and Disable Location Services for this Device
Note – Settings program gives you the provision to control location services for your device (PC). In addition, keep in mind that you must possess administrative authorities before performing the below steps.
Step 3 – Shift to its right pane and click the Change button that appears underneath Location heading.
Step 4 – On another pop-up, use the slider and turn ON the slider for the option Location for this device. This will enable the location service for this (your) device.
Noteworthy point is that Location service for this device is enabled by default.
Step 5 – To disable the service, click on Change button and moreover, toggle OFF the slider of Location for this device by pulling it towards left.
b. Enable and Disable Location Services for Apps and Account
Note – Before you follow the below directions, make sure that the Location service for this device is enabled by the administrator either using Method 2a or 3a.
Step 6 – On the right panel of Location, find the option Location service. Switch ON the setting and this will enable location service for apps and account (This is the default setting).
Step 7 – Switch OFF the option Location service and specifically disable the feature for both your account and applications.
Method 3 – Via Registry Editor
Step 1 – On Cortana search field, type the command regedit and when she displays the same command, click on it.
For reference, you can read How to Access Registry Editor in Windows 10 – 5 Simple Tips.
Step 2 – UAC prompt will come up displaying the details of the tool. Give permission by clicking Yes and let Registry Editor open.
a. Enable and Disable Location Services for this Device
Note – Registry Editor also gives provision to enable and disable location service for this device but to carry out this procedure you must hold admin authorities.
Step 3 – On the Registry Editor, browse to the below path.
HKEY_LOCAL_MACHINE => SYSTEM => CurrentControlSet => Services => lfsvc => Service => Configuration
Step 4 – Shift to the right pane of Configuration key where a DWORD with a name Status will be visible, double-click on it.
Step 5 – To Enable Location for this device, input the value 1 on its edit box. Click OK to implement the change in the service.
Step 6 – To Disable Location service for this device, set 0 as its value and finally, click OK to make the changes effective.
b. Enable and Disable Location Services for Apps and Account
In order to follow this way, ensure that Location for this device is enabled using Method 2a or 3a.
Step 7 – After opening Registry Editor, navigate to the below path on the left sidebar.
HKEY_CURRENT_USER => SOFTWARE => Microsoft => Windows => CurrentVersion => DeviceAccess => Global => {BFA794E4-F964-4FDB-90F6-51056BFE4B44}
Step 8 – Once you reach the above key, find the string value with a name Value on the right pane and double-click on it.
Step 9 – To enable location services for apps and account, set its value as Allow on the edit box. Click OK.
Step 10 – To disable location services for apps and account, assign the value as Deny and click OK.
Step 11 – Once you change the string value, you have to modify DWORD also. To do so, travel to the below path.
HKEY_CURRENT_USER => SOFTWARE => Microsoft => Windows NT => CurrentVersion => Sensor => Permissions => {BFA794E4-F964-4FDB-90F6-51056BFE4B44}
Step 12 – On its right pane, find and double-click the DWORD SensorPermissionState.
Step 13 – A small edit box will pop-up, so, type 1 to enable or insert 0 to Disable Location Services for Apps and Account.
Conclusion
Hence, to Enable and Disable Location Services on Windows 10, the OS provides you a few distinct ways. Well, Registry Editor is generally for the advanced users. Normal users can manage location services using other ways pretty much easily. If you have more tips to manage location services on Windows 10, please write down to us.
Sometimes you face an issue where the Location settings option is greyed out in Windows 11. As a result, you cannot turn on or off the location settings. You can find this option at Settings > Privacy & Security > Location > Location Services.

Location services play a vital role in the proper functioning of apps and services that relies on the location. For example, a weather app that shows current weather with the help of location services. What if you’re unable to manage location services? This will be an incredible mess, isn’t it?
Usually, this issue occurs due to a bug, operating system, or conflict between third-party apps installed on your PC. There could be other reasons as well.
If you made up to this blog post, then it’s highly possible that the option to manage location services is greyed out in Windows 11, then try the solutions discussed below to fix the issue:
Note – If the Location Services or Settings option is Greyed Out in Windows 10, then you can try these solutions
Use Registry Editor Hack
The very first troubleshooting method to fix Location Settings greyed out is by using the Registry Editor. To do so, follow the steps given below-
Press the Windows key on your keyboard, and then in the Start Menu, search for Registry Editor. Click on Registry Editor from the search result.

In the Registry Editor, head to the following location: KEY_LOCAL_MACHINE\SYSTEM\CurrentControlSet\Services\lfsvc\TriggerInfo
On the left side, right-click on the folder named 3 and click on Delete.

Once done, close the Registry Editor and restart your PC and the issue will be fixed.
Restart Geolocation Service
On the basis of various reports from multiple affected users, they manage to fix the location settings greyed out in Windows 11 by restarting the Geolocation service. So should try it as well:
Open Start Menu by pressing the Windows key and searching for Services. Open the Services from the Start Menu.

In the Services app window, search for Geolocation Services. Right-click on it, and then click on Properties.

Click on the drop-down menu next to Startup and set it to Automatic. Ensure the Service Status is Running, and if not, then click on Start.

Once done, click on Apply and OK to save your changes.
Both solutions discussed above will help in fixing the location settings options disabled in Windows 11. Let us know which one worked for you.
If you know any other solution that misses covering feel free to share in the comment for other readers.
Avyukt Atri fearlessly delves into the offbeat corners of technology, uncovering hidden gems and unraveling untold stories. With a quirky approach and boundless curiosity, he uncovers haunted servers, code-breaking cats, and WiFi signals from parallel dimensions.