
Applies ToWindows Server 2012 R2 Datacenter Windows Server 2012 R2 Standard Windows Server 2012 R2 Essentials Windows Server 2012 R2 Foundation
This article describes an issue that occurs after Active Directory Federation Services (AD FS) certificate rollover is complete, and the original certificate expires in Windows Server 2012 R2. A hotfix is available to resolve this issue. The hotfix has a prerequisite.
Cause
This issue occurs because the AD FS server can have more than one token-signing certificates configured. The Work Folders server reads the set of signing certificates from the AD FS server, but only uses the first certificate on the list to validate token signatures. If the first certificate is not the primary, Work Folders server treats tokens as not signed and rejects them.
Hotfix information
Important Do not install a language pack after you install this hotfix. If you do, the language-specific changes in the hotfix will not be applied, and you will have to reinstall the hotfix. For more information, see Add language packs to Windows.
A supported hotfix is available from Microsoft. However, this hotfix is intended to correct only the problem that is described in this article. Apply this hotfix only to systems that are experiencing this specific problem.
If the hotfix is available for download, there is a «Hotfix Download Available» section at the top of this Knowledge Base article. If this section does not appear, submit a request to Microsoft Customer Service and Support to obtain the hotfix.
Note If additional issues occur or if any troubleshooting is required, you might have to create a separate service request. The usual support costs will apply to additional support questions and issues that do not qualify for this specific hotfix. For a complete list of Microsoft Customer Service and Support telephone numbers or to create a separate service request, visit the following Microsoft website:
Prerequisites
To apply this hotfix, you must have April 2014 update rollup for Windows RT 8.1, Windows 8.1, and Windows Server 2012 R2 (2919355) installed in Windows Server 2012 R2.
Registry information
To use the hotfix in this package, you do not have to make any changes to the registry.
Restart requirement
You may have to restart the computer after you apply this hotfix.
Hotfix replacement information
This hotfix does not replace a previously released hotfix.
The global version of this hotfix installs files that have the attributes that are listed in the following tables. The dates and the times for these files are listed in Coordinated Universal Time (UTC). The dates and the times for these files on your local computer are displayed in your local time together with your current daylight saving time (DST) bias. Additionally, the dates and the times may change when you perform certain operations on the files.
Windows Server 2012 R2 file information and notes
Important Windows 8.1 hotfixes and Windows Server 2012 R2 hotfixes are included in the same packages. However, hotfixes on the Hotfix Request page are listed under both operating systems. To request the hotfix package that applies to one or both operating systems, select the hotfix that is listed under «Windows 8.1/Windows Server 2012 R2» on the page. Always refer to the «Applies To» section in articles to determine the actual operating system that each hotfix applies to.
-
The files that apply to a specific product, milestone (RTM, SPn), and service branch (LDR, GDR) can be identified by examining the file version numbers as shown in the following table:
Version
Product
Milestone
Service branch
6.3.960 0.16 xxx
Windows Server 2012 R2
RTM
GDR
6.3.960 0.17xxx
Windows Server 2012 R2
RTM
GDR
-
The MANIFEST files (.manifest) and the MUM files (.mum) that are installed for each environment are listed separately in the «Additional file information» section. MUM, MANIFEST, and the associated security catalog (.cat) files, are very important to maintain the state of the updated components. The security catalog files, for which the attributes are not listed, are signed with a Microsoft digital signature.
For all supported x64-based versions of Windows Server 2012 R2
|
File name |
File version |
File size |
Date |
Time |
Platform |
|---|---|---|---|---|---|
|
Ecsserver.mof |
Not applicable |
3,158 |
14-Sep-2013 |
04:45 |
Not applicable |
|
Ecsserver_uninstall.mof |
Not applicable |
873 |
01-Jul-2013 |
16:50 |
Not applicable |
|
Syncserversetting.cdxml |
Not applicable |
2,354 |
01-Jul-2013 |
16:50 |
Not applicable |
|
Syncshare.cdxml |
Not applicable |
11,597 |
14-Sep-2013 |
04:45 |
Not applicable |
|
Syncshare.psd1 |
Not applicable |
732 |
30-Jul-2013 |
18:47 |
Not applicable |
|
Syncshareres.dll |
6.2.9200.16384 |
2,048 |
22-Aug-2013 |
11:44 |
x64 |
|
Syncsharesrv.dll |
6.3.9600.17714 |
1,270,272 |
26-Feb-2015 |
02:52 |
x64 |
|
Syncsharesvc.config |
Not applicable |
6,891 |
01-Jul-2013 |
16:50 |
Not applicable |
|
Syncsharesvc.dll |
6.3.9600.17714 |
418,816 |
26-Feb-2015 |
02:52 |
x64 |
|
Syncsharettlib.dll |
6.3.9600.17714 |
96,256 |
26-Feb-2015 |
21:34 |
x86 |
|
Syncsharettsvc.exe |
6.3.9600.17714 |
147,456 |
26-Feb-2015 |
04:38 |
x64 |
|
Syncuserstatus.cdxml |
Not applicable |
1,047 |
01-Jul-2013 |
16:50 |
Not applicable |
|
Syncserversetting.cdxml |
Not applicable |
2,354 |
01-Jul-2013 |
16:50 |
Not applicable |
|
Syncshare.cdxml |
Not applicable |
11,597 |
14-Sep-2013 |
04:45 |
Not applicable |
|
Syncshare.psd1 |
Not applicable |
732 |
30-Jul-2013 |
18:47 |
Not applicable |
|
Syncuserstatus.cdxml |
Not applicable |
1,047 |
01-Jul-2013 |
16:50 |
Not applicable |
Additional file information
Additional file information for Windows Server 2012 R2
Additional files for all supported x64-based versions of Windows Server 2012 R2
|
File property |
Value |
|---|---|
|
File name |
Amd64_e818fe748732d80d503d6c4ca30547e0_31bf3856ad364e35_6.3.9600.17714_none_b1c077df4e7ad138.manifest |
|
File version |
Not applicable |
|
File size |
1,080 |
|
Date (UTC) |
26-Feb-2015 |
|
Time (UTC) |
21:37 |
|
Platform |
Not applicable |
|
File name |
Amd64_microsoft-windows-e..seclientsync-server_31bf3856ad364e35_6.3.9600.17714_none_688ed1524fa89e53.manifest |
|
File version |
Not applicable |
|
File size |
68,693 |
|
Date (UTC) |
26-Feb-2015 |
|
Time (UTC) |
21:37 |
|
Platform |
Not applicable |
|
File name |
Wow64_microsoft-windows-e..seclientsync-server_31bf3856ad364e35_6.3.9600.17714_none_72e37ba48409604e.manifest |
|
File version |
Not applicable |
|
File size |
46,621 |
|
Date (UTC) |
26-Feb-2015 |
|
Time (UTC) |
05:29 |
|
Platform |
Not applicable |
Status
Microsoft has confirmed that this is a problem in the Microsoft products that are listed in the «Applies to» section.
References
See the terminology that Microsoft uses to describe software updates.
Need more help?
Want more options?
Explore subscription benefits, browse training courses, learn how to secure your device, and more.
Способ 1: «Панель управления»
Через классическую «Панель управления» в Windows 10 можно отключить «Центр синхронизации» всего за несколько шагов:
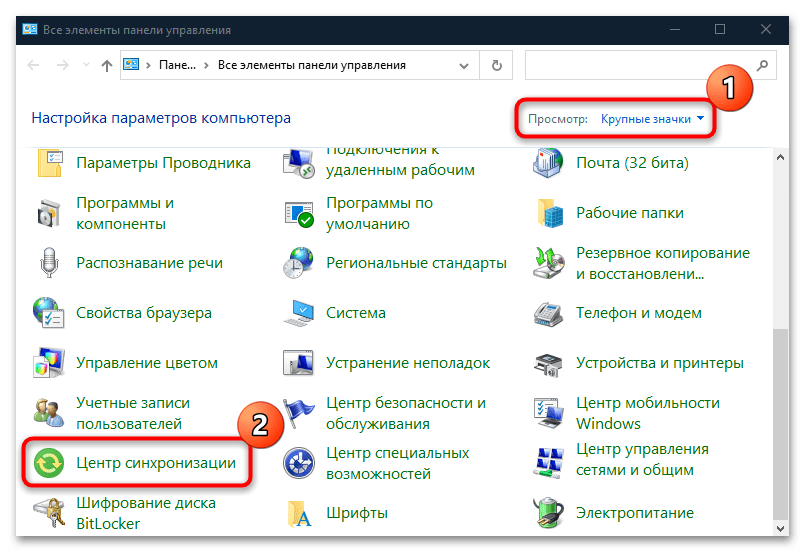
- Через системный поиск отыщите средство «Панель управления» и запустите его.
- Нажмите на выпадающее меню у строки «Просмотр» и для удобства установите «Крупные значки». Нажмите на раздел «Центр синхронизации».
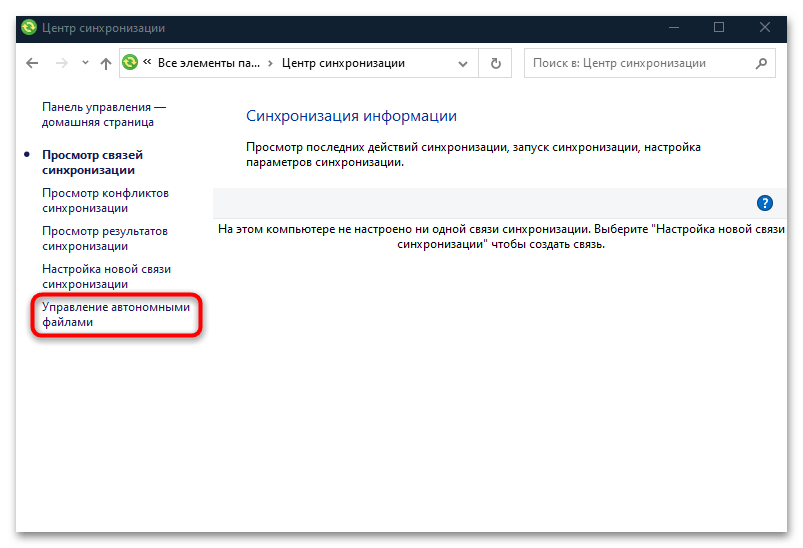
- В новом окне на панели слева кликните по строке «Управление автономными файлами».
- Нажмите на кнопку «Отключить автономные файлы», затем подтвердите настройки, нажав на «ОК» внизу. Затем может быть предложено перезагрузить компьютер для вступления новых параметров в силу. Нажмите на «Да», чтобы осуществить это сразу.

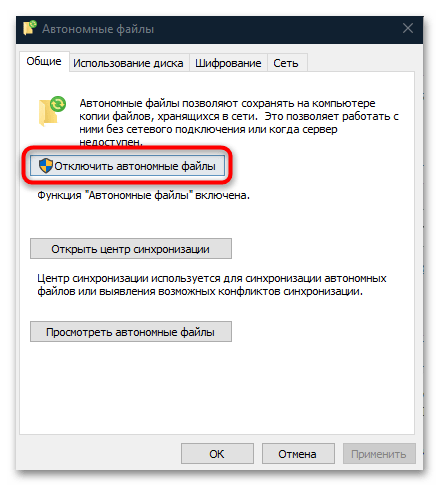
После того как Windows запустится, «Центр синхронизации» перестанет работать в фоновом режиме, а автономная синхронизация файлов будет полностью отключена.
Этот способ больше подойдет для владельцев редакции Home, потому что следующий метод предполагает работу с «Редактором локальной групповой политики», которого нет в этой версии операционки.
Способ 2: «Редактор локальной групповой политики»
Как уже говорилось, работа с локальной групповой политикой доступна только в Windows 10 Pro и Enterprise. Если предыдущий метод вам не подошел, следуйте инструкции ниже:
- Нажмите на клавиши «Win + R», чтобы вызвать диалоговое окно «Выполнить», затем в строке «Открыть» выполните команду
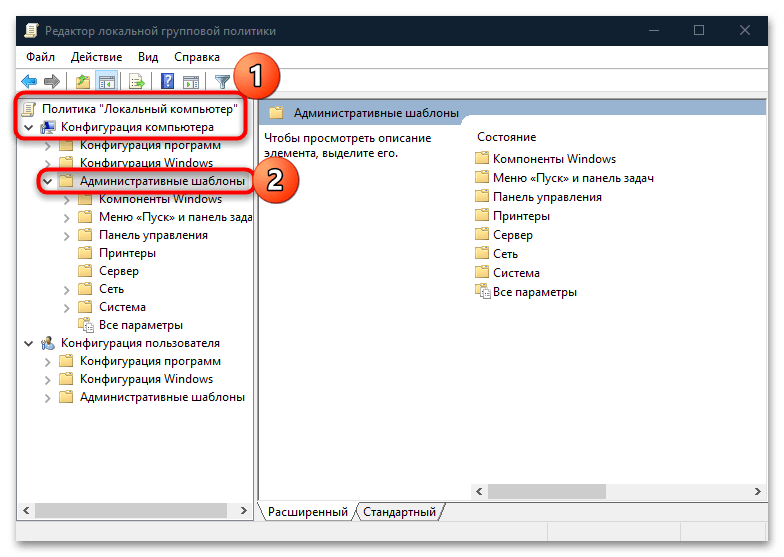
gpedit.msc, нажав на кнопку «ОК». - На панели слева в разделе «Политика «Локальный компьютер»» выберите «Конфигурация компьютера», затем — «Административные шаблоны».
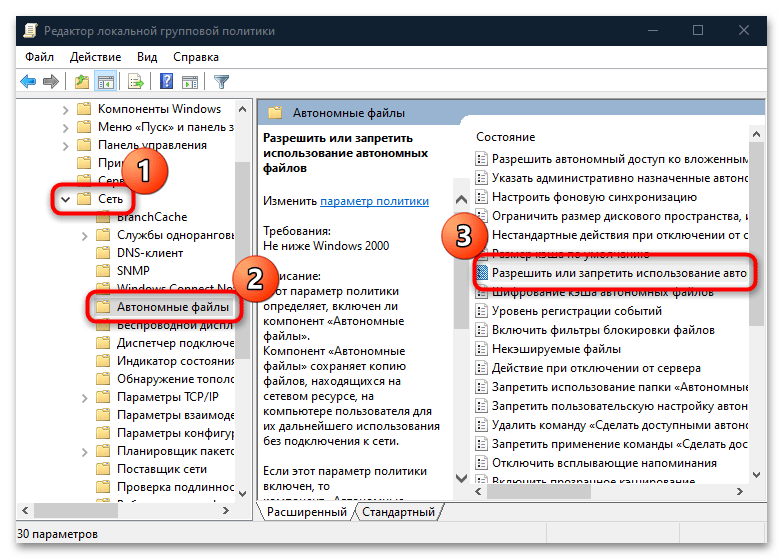
- В папке «Сеть» нажмите на «Автономные файлы», а в центральной части окна в списке найдите строку «Разрешить или запретить использование автономных файлов» и дважды кликните по ней левой кнопкой мыши.
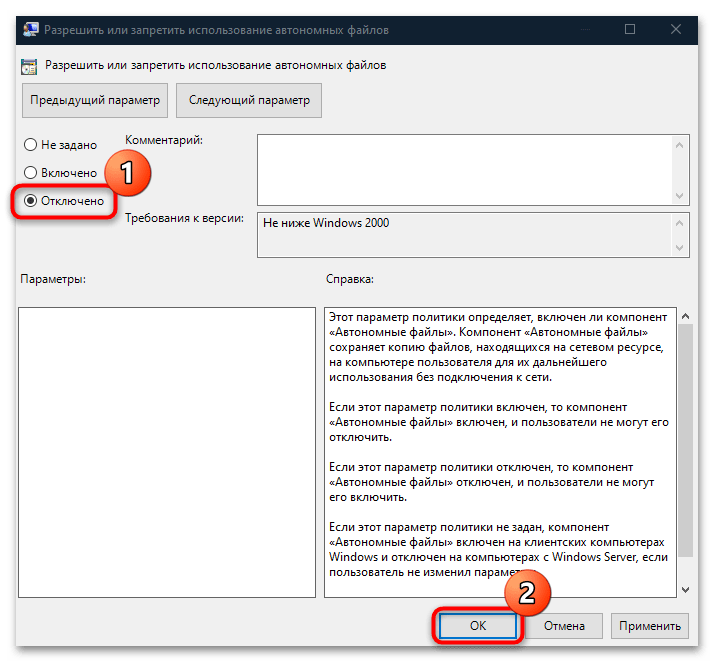
- Отметьте пункт «Отключено» в новом окне, затем примените и сохраните настройки.

После редактирования параметров локальной политики закройте редактор и перезагрузите Windows 10. В отличие от предыдущего способа, настройки применяются не к конкретной учетной записи, с которой осуществлялись изменения, а к системе в целом.
Активировать работоспособность «Центра синхронизации» можно аналогичным способом, но при этом нужно выбрать пункт «Не задано» или «Включено».
Наша группа в TelegramПолезные советы и помощь
-
Home
-
News
- Fixed – Outlook Stuck on Synchronizing Subscribed Folders
By Tina |
Last Updated
What is the error of Outlook stuck synchronizing subscribed folders? How to fix the issue that Outlook cannot synchronize subscribed folder? This post from MiniTool shows you the solutions. In addition, you can visit MiniTool to find more Windows tips and solutions.
What Is Synchronizing Subscribed Folders?
Some users reported that they encounter the error that Outlook cannot synchronize subscribed folders when trying to synchronize an IMAP account in Outlook application. Sometimes, this error comes with the error code 0x800ccc0e. This Outlook error refers that the Outlook server is not recognizing IMAP configuration for subscribed folder structures.
This error Outlook stuck synchronizing subscribed folder may occur if there are a lot of attachments. Or when any IMAP account is configured in the Outlook application and Send/Receive option is used to update the email synchronization, you may come across this issue.
However, do you know how to fix the issue of Outlook stuck synchronizing subscribed folders? If not, keep on your reading and you will find solutions in the following part.
How to Fix Outlook Stuck Synchronizing Subscribed Folders?
In this part, we will show you how to fix the issue that Outlook cannot synchronize subscribed folders.
Way 1. Re-Add the IMAP Account
In order to fix the issue of Outlook synchronizing subscribed folders, you can choose to re-add the IMAP account.
Now, here is the tutorial.
- Open Microsoft Outlook.
- Then navigate to File > Account Settings > Account Settings.
- Then select your account name under the Emails tab and click the Remove button to remove it.
- Then it will remove your configured email account.
- Now, run Microsoft Outlook again.
- Go to the File Then click Add Account option under the right panel.
- Enter your IMAP account and password.
- Click the Connect button to continue.
After all steps are finished, reboot your Microsoft Outlook and check whether the issue of Outlook stuck synchronizing subscribed folders is fixed.
Way 2. Check IMAP Folder
In order to fix the issue of Outlook synchronizing subscribed folders, you can try checking the IMAP folder.
Now, here is the tutorial.
- After setting up your IMAP email account in Outlook, right click on your email account and select IMAP Folders.
- Click Subscribed and click Query.
- Then select all items in the list.
- Select all tabs as we are now going to sync folders we wish or need to sync including Drafts, Inbox, Junk, Sent, Templates, and Trash.
- Next, uncheck the option When displaying hierarchy in Outlook, show only subscribed folders.
- Last, click OK to continue.
After all steps are finished, reboot your Outlook and check whether the error that Outlook cannot synchronize subscribed folders is fixed.
Apart from the above solutions, you can also try to boot your computer into clean mode and run Outlook again to check whether the error of Outlook stuck synchronizing subscribed folders is fixed.
To sum up, in order to fix the issue of Outlook synchronizing subscribed folders, this post has shown 2 reliable solutions. If you come across the same error, you can try the above solutions. If you have any better idea to fix it, you can share it in the comment zone.
About The Author
Position: Columnist
Tina is a technology enthusiast and joined MiniTool in 2018. As an editor of MiniTool, she is keeping on sharing computer tips and providing reliable solutions, especially specializing in Windows and files backup and restore. Besides, she is expanding her knowledge and skills in data recovery, disk space optimizations, etc. On her spare time, Tina likes to watch movies, go shopping or chat with friends and enjoy her life.
Quick Tips
- Windows allows you to sync various settings, such as your wallpapers, passwords, language, and more when using the same Microsoft account.
- Enabling sync settings can be helpful if you work on multiple Windows devices.
- You can turn sync settings on or off using the Settings app, Registry Editor, or Group Policy Editor.
Method 1: Turn Sync Settings On or Off Using the Settings App
The Settings app gives you several options for managing your account preferences, including the ability to enable or disable sync. Whether you want to configure a single setting or stop syncing altogether, you can use the following steps to manage sync settings in Windows.
Step 1: Press the Windows + I keys to open the Settings app. Then, head to Accounts > Windows backup.

Step 2: Click on Remember my preferences to expand it. Then, use the checkboxes to enable or disable sync for accessibility, passwords, language preferences, and other Windows settings.

Alternatively, you can use the toggle next to Remember my preferences to enable or disable sync entirely.
Method 2: Turn Sync Settings On or Off With the Registry Editor
The Registry Editor is a useful tool that lets you configure various system settings by modifying a few registry files. However, as registry files contain important settings for Windows and its system apps, it’s important to be cautious while making any changes.
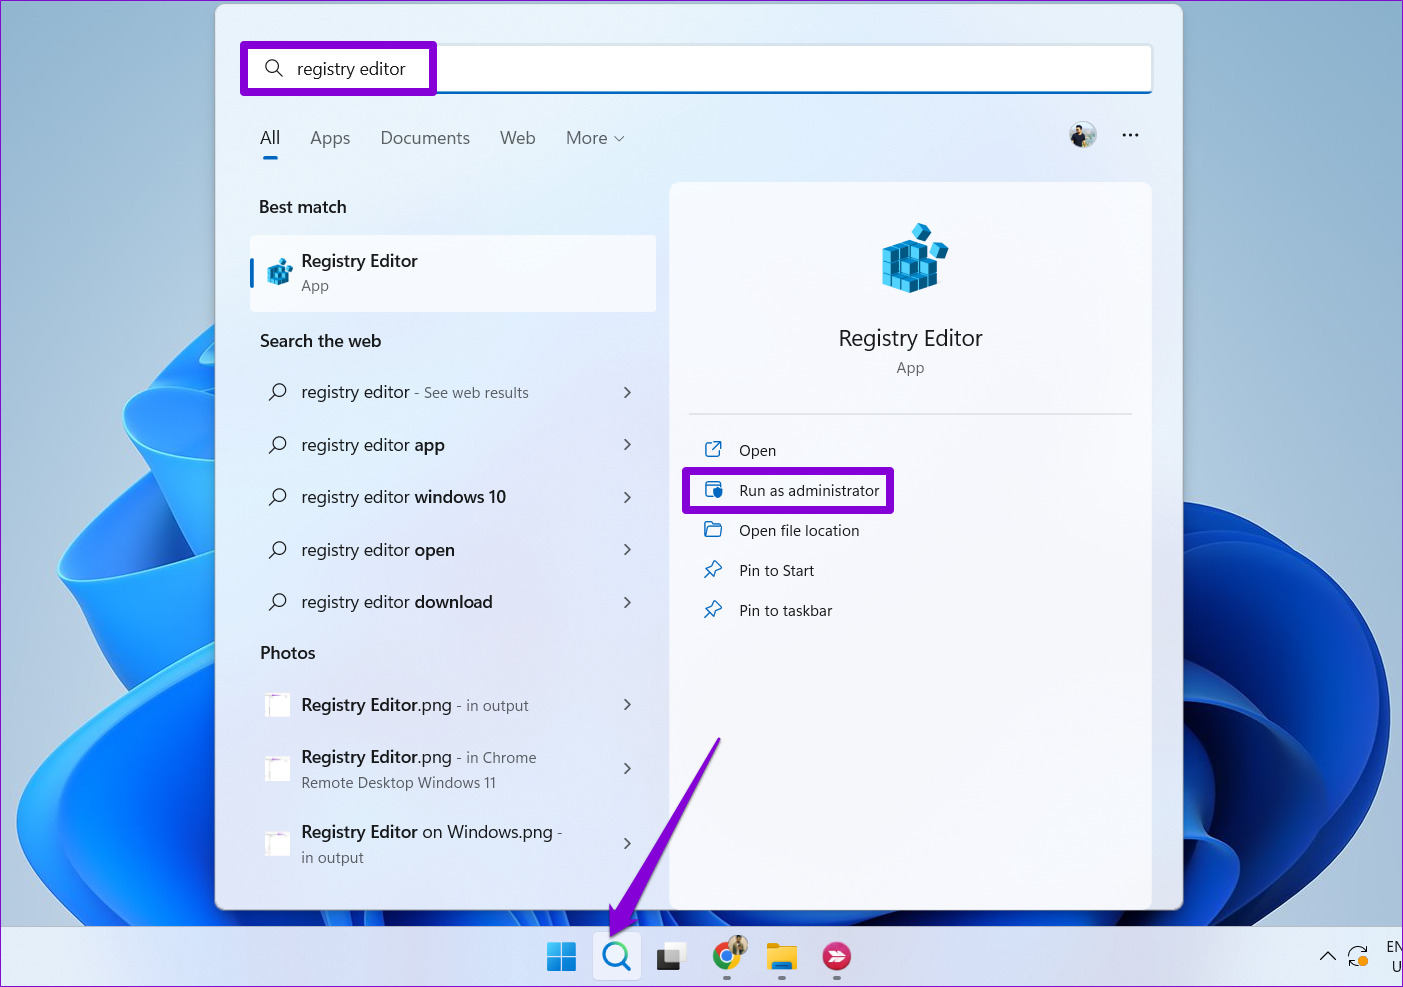
Step 1: Click the search icon on the taskbar and type in registry editor. Select Run as administrator.
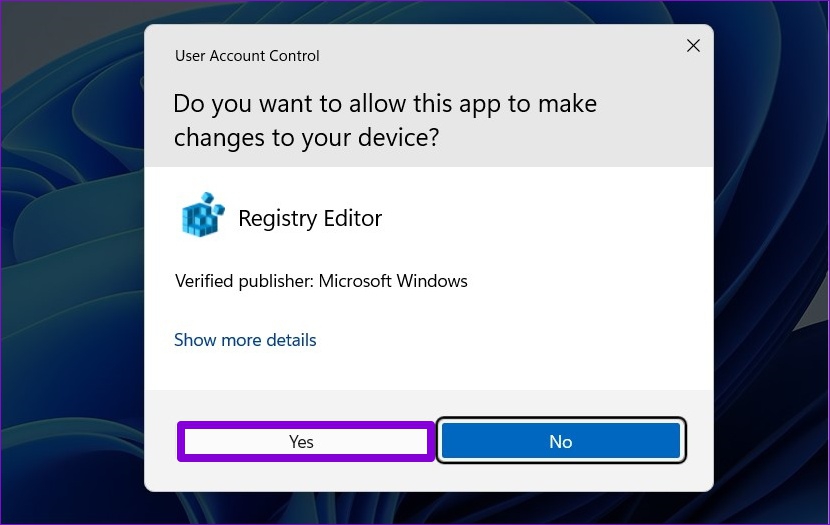
Step 2: Select Yes when the User Account Control (UAC) prompt appears.
Step 3: Paste the following path in the address bar at the top and press Enter to quickly navigate to the SettingSync key.
HKEY_CURRENT_USER\SOFTWARE\Microsoft\Windows\CurrentVersion\SettingSync

Step 4: Right-click on the SettingSync key in the left sidebar and choose New > DWORD (32-bit) Value. Name the new DWORD DisableSettingSync.

Step 5: Right-click on the SettingSync key in the left sidebar and choose New > DWORD (32-bit) Value. Name the new DWORD DisableSettingSyncUserOverride.

Step 6: Double-click the DisableSettingSync DWORD and change its value data to 2 to disable sync settings. Then, click OK.

Step 7: Double-click the DisableSettingSyncUserOverride DWORD and set its value data to 1 to disable sync settings. Then, click OK.

Similarly, if you want to configure Windows to sync settings across your devices, set the value of the DisableSettingSync and DisableSettingSyncUserOverride DWORDs to 0. Then, restart your PC to apply the changes.
Method 3: Turn Sync Settings On or Off Using the Group Policy Editor
The Group Policy Editor provides yet another way to configure sync settings on your Windows computer. However, you can only use this method if you’re using Windows 10 or Windows 11 Professional, Education, or Enterprise editions. If you’re using Windows Home Edition, you will have to use the Settings app or the Registry Editor solutions above to enable or disable sync settings.
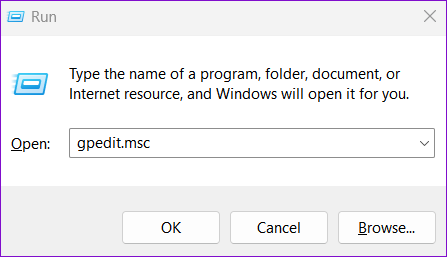
Step 1: Press the Windows + R keys to open the Run dialog box. Type gpedit.msc in the text box and hit OK.
Step 2: When the User Account Control (UAC) prompt appears, select Yes to proceed.
Step 3: Use the left pane to navigate to the following folder:
Computer Configuration\Administrative Templates\Windows Components\Sync your settings
Step 4: Double-click the Do not sync policy from the right pane.

Step 5: Select the Enabled option if you want to stop Windows from syncing settings across devices. If you want to turn on sync settings, select Disabled or Not Configured instead.
Step 6: Click Apply followed by OK.

Was this helpful?
Thanks for your feedback!
The article above may contain affiliate links which help support Guiding Tech. The content remains unbiased and authentic and will never affect our editorial integrity.