
Все способы:
- Что делать, если слетает драйвер видеокарты NVIDIA
- Способ 1: Переустановка драйвера
- Способ 2: Поиск перегрева
- Способ 3: Устранение конфликта драйвера и специальных приложений
- Способ 4: Настройка TDR
- Вопросы и ответы: 37
Для правильной работы видеокарты требуется специальное программное обеспечение, его актуальная версия. Очень часто с продукцией компания NVIDIA случается так, что драйвера слетают без видимой причины.
Что делать, если слетает драйвер видеокарты NVIDIA
Есть несколько способов решения этой проблемы, и каждый из них будет подробно рассмотрен в данной статье.
Способ 1: Переустановка драйвера
Самый простой, оттого и самый первый, способ – банальная переустановка драйвера. Даже актуальный драйвер в таком случае потребуется сначала удалить.
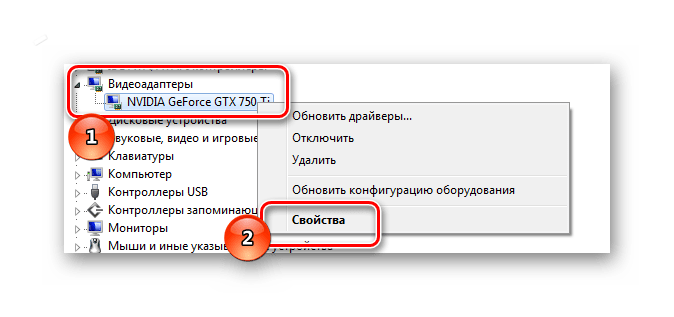
- Для начала нужно зайти в «Диспетчер устройств». Самый простой путь: «Пуск» — «Панель управления» — «Диспетчер устройств».
- Далее находим пункт «Видеоадаптеры», делаем одиночный клик, после которого появляется та видеокарта, которая установлена в компьютере. Нажимаем на нее правой кнопкой мыши и выбираем пункт «Свойства».
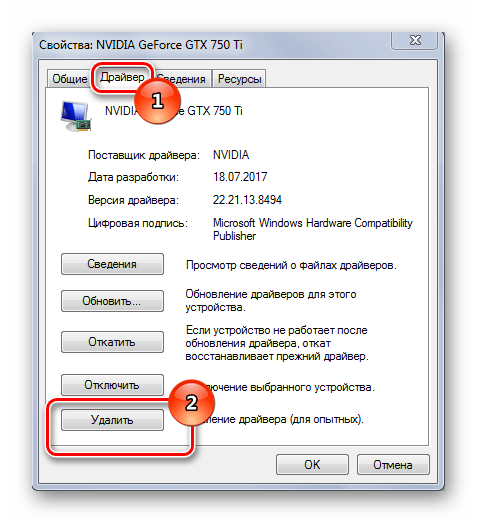
- В окне «Свойства» находим пункт «Драйвер». Делаем одиночный клик. В самом низу будет кнопка «Удалить». Нажимаем на нее и дожидаемся полного удаление драйвера.

Не стоит переживать по поводу безопасности таких действий. После совершенных манипуляций Windows самостоятельно установит стандартный драйвер. Он будет актуален до того момента, пока система не обнаружит ПО компании NVIDIA.
Случается так, что установка ПО протекает не совсем правильно, что чревато разного рода проблемами и сбоями в работе устройства. Синий экран, выключение изображения, зависания картинки – все это можно исправить одной лишь переустановкой софта. На нашем сайте есть замечательная статья о том, как правильно переустанавливать драйвера для видеокарт NVIDIA, рекомендуем с ней ознакомиться.
Подробнее: Установка драйверов с помощью NVIDIA GeForce Experience
Однако это не панацея от подобной проблемы. Довольно часто видеокарта просто не воспринимает новый драйвер. Ошибка ли это разработчиков или что-то иное, сказать трудно. В любом случае, необходимо отработать и этот вариант тоже, а для этого потребуется установить более старый софт. Это немного труднее, чем просто его обновить или переустановить.
- Для начала заходим на сайт компании NVIDIA.
- Далее в шапке сайта находим раздел «Драйверы».
- После этого нам не нужно указывать модель видеокарты, так как мы ищем не актуальный драйвер, а более старый. Поэтому находим строку «BETA драйверы и архив».
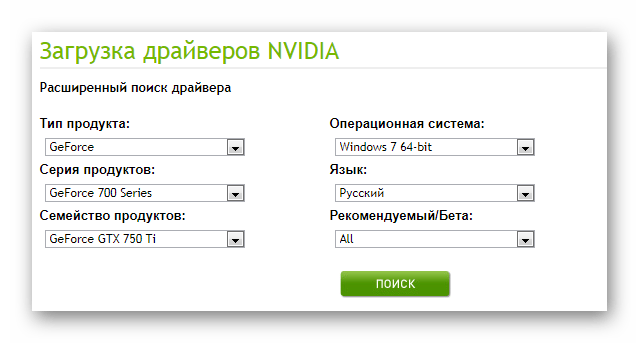
- А вот теперь нам нужно указать ту видеокарту, которая установлена в компьютере. Указав необходимые сведения об адаптере и ОС, нажимаем «Поиск».
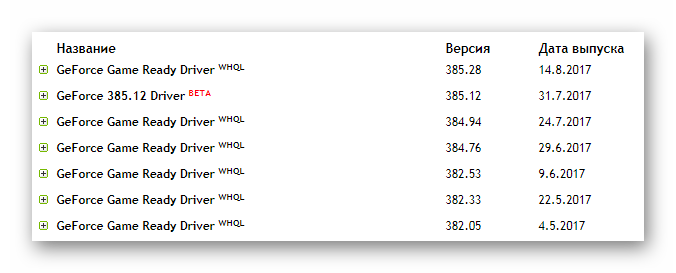
- Перед нами появляется архив драйверов. Скачивать лучше всего тот, который наиболее близок к актуальному и помечен, как «WHQL».
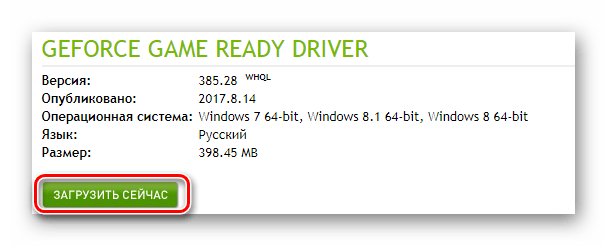
- Для загрузки нажимаем на название ПО. Открывается окно, где нам нужно нажать «Загрузить сейчас».
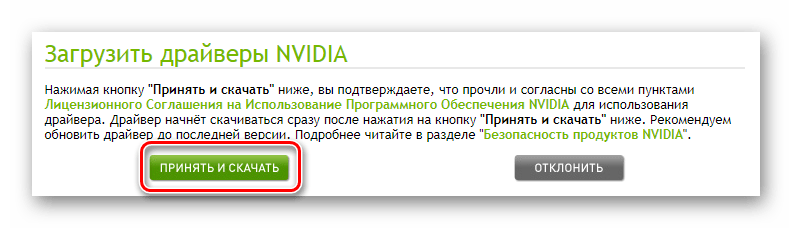
- Далее нам предлагают прочитать лицензионное соглашение. Нажимаем на «Принять и скачать».
- После этого начинается загрузка файла формата EXE. Дожидаемся окончания загрузки и запускаем его.
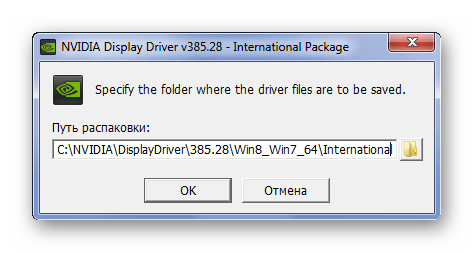
- Первым делом программа попросит указать путь для установки, оставляем стандартный.
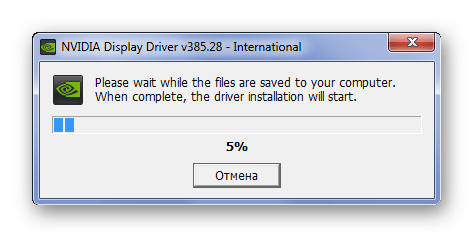
- Далее начинается распаковка необходимых файлов, после которого начнется установка драйвера, поэтому остается только ждать.


В конце требуется лишь перезагрузить компьютер, чтобы изменения вступили в силу. Если такой способ вам не помог, то следует обратить внимание на другие причины возникновения проблемы, которые описаны далее.
Способ 2: Поиск перегрева
Самая частая проблема видеокарт – перегрев. На это явно указывает то, что драйвер слетает именно во время игр или работы требовательных к системе программ. Если же это не очень похоже на ваш случай, то не стоит пролистывать далее, ведь проверка все равно требуется. На нашем сайте вы сможете найти статью, в которой приведен пример самых популярных программ и утилит, способных мониторить температуру видеокарты.
Подробнее: Мониторинг температуры видеокарты
Если после проведенных тестов выяснилось, что видеокарта перегревается, то необходимо предпринять целый комплекс мер по улучшению её состояния.
- Проверить чистоту системного блока, надежность крепления каждого кулера и его работоспособность. Если вы заметили, что где-то в вентиляторе слишком много пыли и достать её невозможно, то лучше всего снять винт и прочистить его.
- Улучшить систему подачи и выхода воздуха методом установки дополнительных кулеров.
- Удалить программы, которые разгоняют видеокарту, либо просто отключить их.
Большинство проблем с перегревом должны отступить, если выполнить вышеуказанные действия. Однако сама проблема с вылетом драйвера может остаться актуальной. Если так и получилось, то переходим к следующим способам.
Разгон видеокарты, даже если он заводской, не сулит оборудованию многолетней работы. Поэтому если хотите, чтобы устройство радовало вас гораздо дольше, то отключите все ускорения.
Способ 3: Устранение конфликта драйвера и специальных приложений
Достаточно серьезной проблемой является конфликт драйвера и приложений, установленных для видеокарты. В первую очередь стоит подумать о стандартных программах, которые установлены на каждом компьютере с продукцией NVIDIA.
Чаще всего, проблемы возникают во время настроек 3D графики или сглаживания. Иначе говоря, в программе видеокарты какие-либо параметры отключены, а в приложении или игре они требуются. Происходит конфликт и драйвер отключается. Самым простым вариантом решения такой проблемы будет сброс настроек к значению по умолчанию. Делается это очень просто.
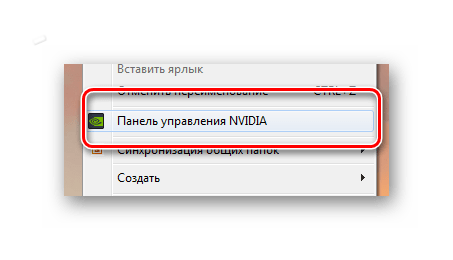
- Нажимаем правой кнопкой мыши на рабочем столе. В появившемся окне выбираем «Панель управления NVIDIA». Делаем одиночный клик.
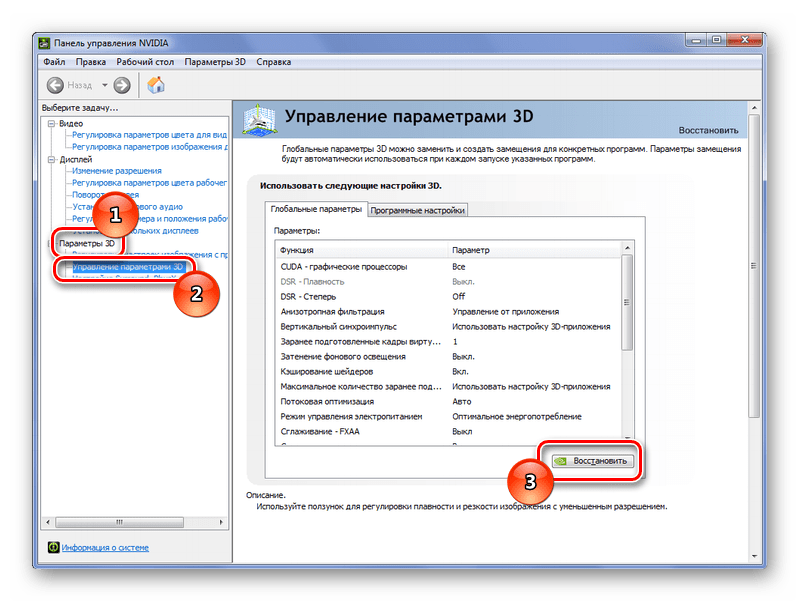
- После этого переходим на вкладку «Параметры 3D», где выбираем «Управление параметрами 3D». В появившемся окне необходимо нажать кнопку «Восстановить».
Такой простой метод порой может оказаться самым эффективным. Однако, справедливости ради, стоит отметить, что сброс драйвера из-за сглаживания или 3D настроек происходит лишь в определенные моменты, в определенных приложениях или играх, что является типичным показателем конфликта драйвера и софта.
Способ 4: Настройка TDR
В каждой операционной системе Windows есть встроенный механизм TDR. Примечателен он тем, что может перезапускать драйвер, когда тот не отвечает на запросы. Непосредственно в нашем случае необходимо попытаться увеличить время задержки отзыва от видеокарты. Для этого мы создадим специальный файл, в котором и пропишем необходимые параметры. Стоит сразу отметить, что частить с использованием этого метода нельзя, так как могут быть проблемы с работой видеоадаптера.
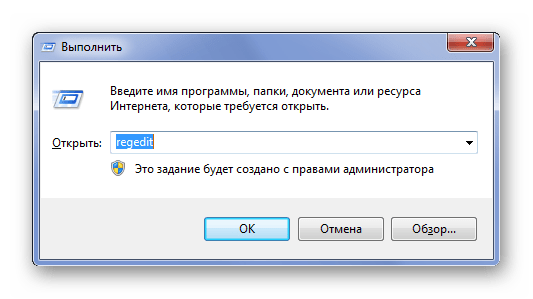
- Итак, для начала заходим в раздел «Выполнить», для этого набираем комбинацию клавиш «Win+R». В появившемся окне пишем «regedit». После чего нажимаем «ОК».
- После этого необходимо пройти по следующему пути:
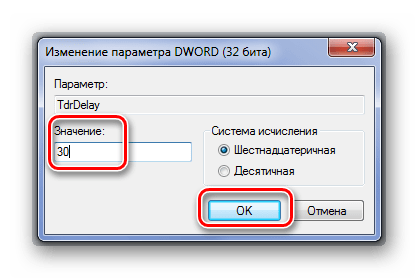
- Теперь нужно проверить наличие файла «TdrDelay». Если он есть, то открываем и меняем значения задержки. По умолчанию может стоять любое число, просто увеличиваем его. Лучше всего менять его на 5 шагов — если было «10», меняем на «15». Если начинает появляться синий экран, необходимо установить цифру поменьше.
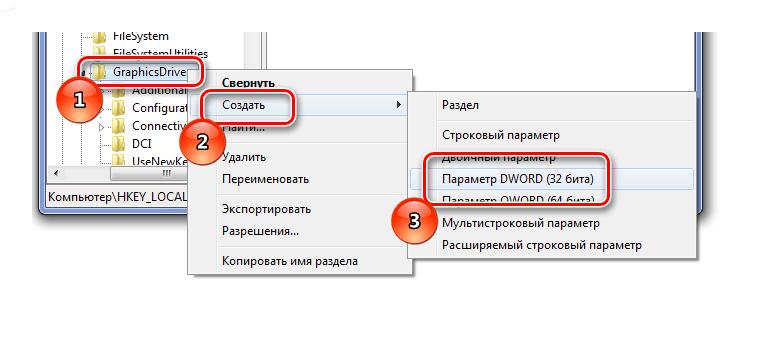
- Если же такого файла нет, то его нужно сначала создать. Для этого нажимаем правой кнопкой мыши по папке «GraphicsDrivers» и в появившемся окне выбираем «Создать» — «Параметр DWORD 32 бита».
- Созданный файл переименовываем в «TdrLevel». После этого можно устанавливать параметры, отличные от нуля.
HKEY_LOCAL_MACHINE\System\CurrentControlSet\Control\GraphicsDrivers
Если поставить параметр «0», то мы попросту отключим механизм TDR. Такой вариант тоже рассматривается и если увеличение времени задержки не помогло, то используем его.
Возможно, что дело вовсе не в операционной системе или драйвере, а в самом «железе». Видеокарта может использоваться уже очень долгое время и за этот период просто исчерпать все свои возможности. Но, для начала, необходимо попробовать все способы, перечисленные выше. Вполне возможно, что решение проблемы кроется где-то в них.
Наша группа в TelegramПолезные советы и помощь
-
Home
-
News
- NVIDIA Driver Keeps Uninstalling Itself? Try These Fixes!
By Vera | Follow |
Last Updated
What if NVIDIA driver keeps uninstalling itself in Windows 10/11? This is a common issue on your PC. If you are plagued by this vexed issue, don’t panic. You can find multiple methods in this post. Without further ado, let’s go to see the guide from MiniTool.
NVIDIA Drivers Disappear after Reboot Windows 10/11
If you are an NVIDIA user, you may choose to install the latest drivers for your graphics card to keep the GPU running perfectly. However, according to reports, drivers uninstalled themselves. The following is one example of NVIDIA GeForce GPU uninstalls itself every day:
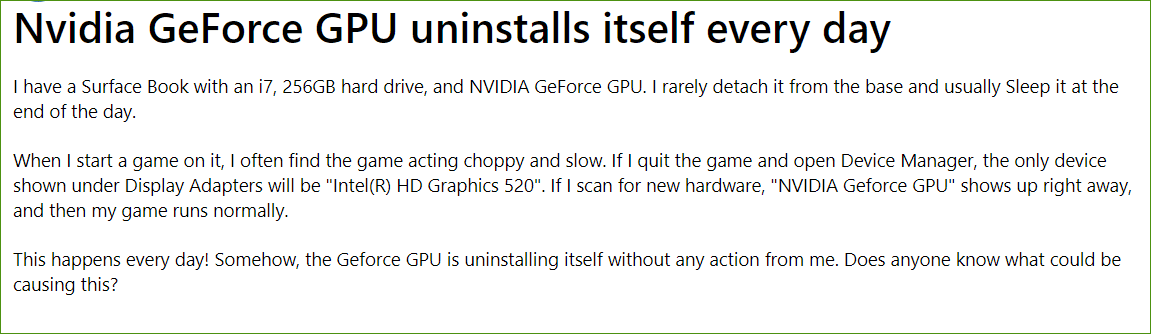
Perhaps you may also find NVIDIA driver keeps uninstalling itself. After installing the driver again, it works properly but it is also gone after a few days. Even sometimes you have a more severe problem – the graphics driver uninstalled itself after every reboot.
Tip: In addition, if you are an AMD user, you may also run into a similar issue – AMD drivers uninstalled themselves.
Fortunately, you can try to troubleshoot this issue by trying the solutions below.
Fixes – NVIDIA Driver Keeps Uninstalling Itself
Stop Windows from Automatically Downloading New Drivers
Windows can automatically download and install drivers for your PC, which can trigger the situation – NVIDIA drivers disappear after reboot or AMD drivers uninstalled themselves. You can take action to stop Windows from that thing although it is not recommended see the steps below:
Step 1: Type control panel in the search box and click the result to open this app.
Step 2: Click System and Security > System.
Step 3: Click Advanced system settings.
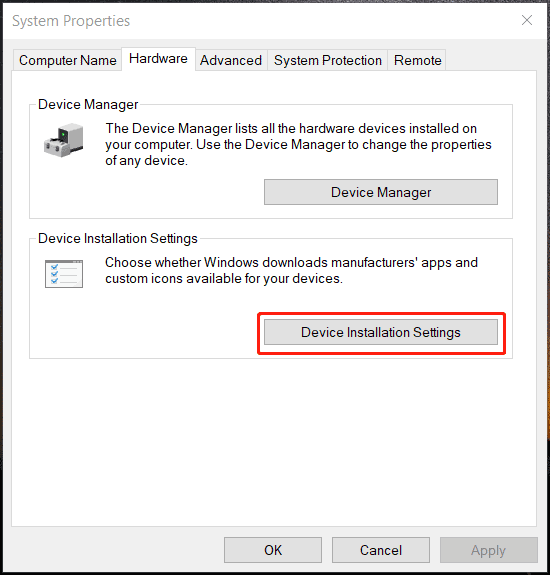
Step 4: Under the Hardware tab, click the Device Installation Settings button.
Step 5: Check the option of No (your device might not work as expected) and click Save Changes.
Step 6: Click OK and exit the System Properties window.
After that, reinstall the NVIDIA driver for your graphics card.
Step 1: Visit the NVIDIA official website and click DRIVERS from the navigation bar.
Step 2: Choose the proper driver based on your NVIDIA product, Windows version, etc., and then click SEARCH.
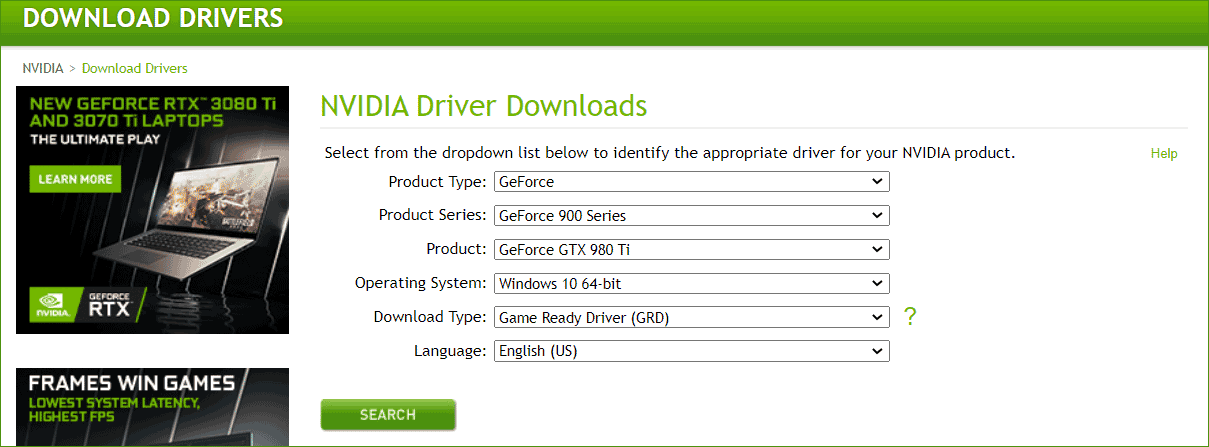
Step 3: Click DOWNLOAD to get the installation file.
Step 4: Double-click on it and start installing the NVIDIA driver on your Windows 10/11 PC.
Restart your PC and see if the situation “NVIDIA drivers disappear after reboot” still persists.
Uninstall All NVIDIA Items and Delete the Logging File
If the NVIDIA driver keeps uninstalling itself, you can try to uninstall & delete all the NVIDIA items & processes and then delete the logging file. See what you should do:
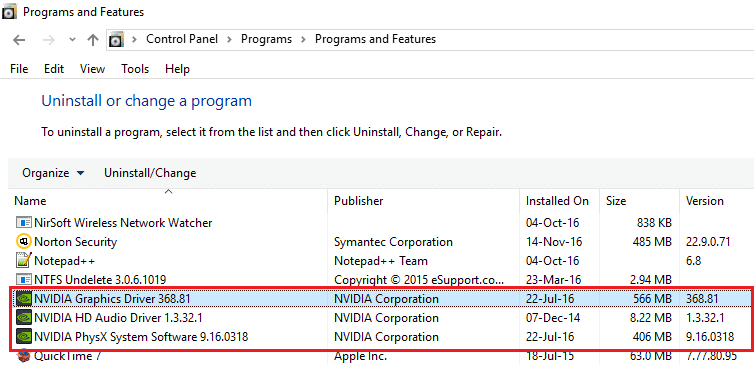
Step 1: Go to Control Panel > Uninstall a program.
Step 2: Delete all NVIDIA programs in the Programs and Features interface.
Step 3: Press Win + R, type services.msc and click OK. Choose and stop all the NVIDIA services by right-clicking each item and selecting Stop.
Step 4: Also, you should end all NVIDIA processes in Task Manager.
Step 5: Type regedit to the Run window and press Enter.
Step 5: Navigate to these locations:
HKEY_LOCAL_MACHINE\SOFTWARE\NVIDIA Corporation\Logging
HKEY_LOCAL_MACHINE\SOFTWARE\WOW6432Node\NVIDIA Corporation\Logging
Step 6: Right-click the logging file and choose Delete.
After these operations, go to download the needed NVIDIA driver from the official website and install it on your Windows 10/11 PC.
Make Sure Your NVIDIA Driver Is Updated
If your NVIDIA driver isn’t updated or it is missing, corrupt, or installed improperly, the issue of NVIDIA drivers disappear after reboot may be triggered. Thus, you should choose to update the driver.
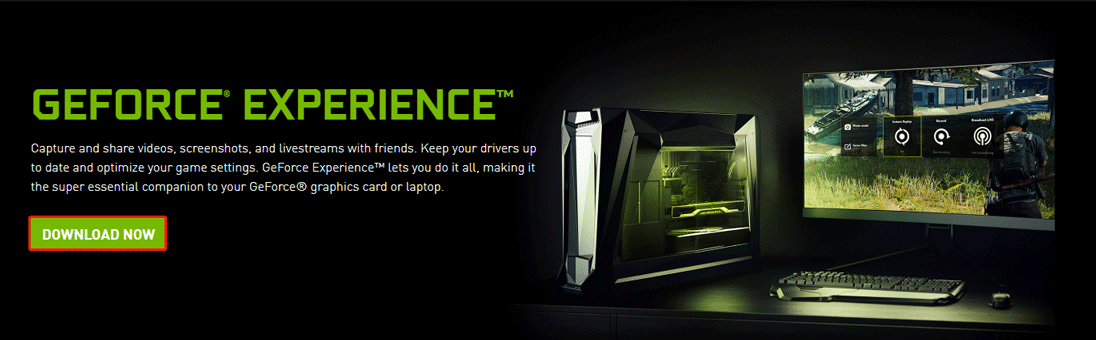
As mentioned in method 1, we show you how to install the latest driver from the NVIDIA website. Besides, you can go to Device Manager for this task. Or, use a driver update tool to perform the driver update. Or, you can download GeForce Experience and install it on your computer for automatic driver updates.
Final Words
NVIDIA driver keeps uninstalling itself on Windows 10/11? If NVIDIA drivers disappear after reboot, try these methods above and you can get rid of trouble. Have a shot now.
About The Author
Position: Columnist
Vera is an editor of the MiniTool Team since 2016 who has more than 7 years’ writing experiences in the field of technical articles. Her articles mainly focus on disk & partition management, PC data recovery, video conversion, as well as PC backup & restore, helping users to solve some errors and issues when using their computers. In her spare times, she likes shopping, playing games and reading some articles.
Fix NVIDIA Drivers Constantly Crash on Windows 10: Users are reporting that NVIDIA drivers keep on crashing on Windows 10 and they might not be able to play games, also they are experiencing lag and rendering issues. In addition to this, they are also experiencing Display freeze or stuck for few minutes then the NVIDIA drivers again recover which make everything back to normal. But the main problem is that this happens every 5-10 minutes which is very annoying, thankfully there are different ways you could fix this issue in Windows 10.

The possible reason for this problem seems to be corrupted or outdated drivers but in some cases, the newer drivers are the main reason for the crash and uninstalling then going back to older drivers seems to fix the issue. So without wasting any time let’s see how to fix this issue with the below-listed troubleshooting steps.
Table of Contents
Make sure to create a restore point just in case something goes wrong.
Method 1: Enable Graphic Card and Update Drivers
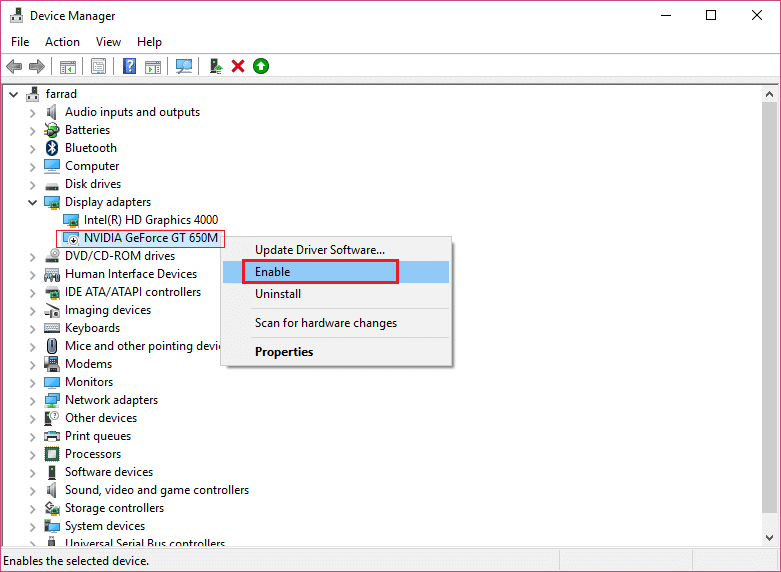
1.Press Windows Key + R then type devmgmt.msc and hit Enter to open Device Manager.

2.Next, expand Display adapters and right-click on your NVIDIA Graphic Card and select Enable.
3.Once you have done this again right-click on your graphic card and select “Update Driver Software.“
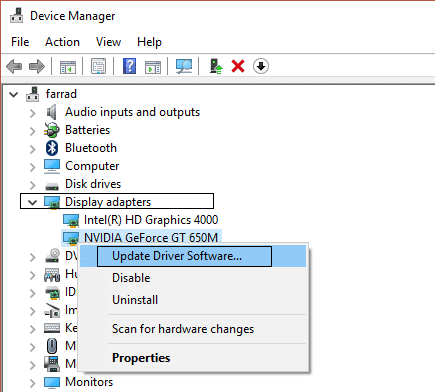
4A.Select “Search automatically for updated driver software” and let it finish the process.

4B. Again select “Update Driver Software” but this time on the next screen select “Browse my computer for driver software.“

5.Now select “Let me pick from a list of device drivers on my computer.”

6.Finally, select the compatible driver from the list for your NVIDIA Graphic Card and click Next.
7.Let the above process finish and restart your PC to save changes. After updating Graphic card you may be able to Fix NVIDIA Drivers Constantly Crash on Windows 10.
Method 2: Update Drivers from NIVIDA website
1.Press Windows Key + R and in the dialog box type dxdiag and hit Enter.
2.After that, click on the Display 2 tab and find out your graphic card.

3.Now go to the NVIDIA driver download website and enter the product details which we just find out.
4.Search your drivers after inputting the information, click Agree and Download the drivers.

5.After successful download, install the driver and you have successfully updated your NVIDIA drivers manually. This installation will take some time but you will have successfully updated your driver after that.
Method 3: Roll back Drivers
1.Again go to Device Manager then expand Display adapters and right-click on your NVIDIA graphic card and select Properties.
2.Now switch to Driver tab and click Roll Back Driver.

3.Once the Drivers are rolled back, reboot your PC to save changes.
4.This would definitely Fix NVIDIA Drivers Constantly Crash on Windows 10 then continue with the next method.
Method 4: Install older version of NVIDIA drivers
1.Right-click on your NVIDIA graphic card in Device Manager and select Uninstall.
2.If asked for confirmation select Yes.
3.Press Windows Key + X then select Control Panel.
4.From Control Panel click on Uninstall a Program.
5.Next, uninstall everything related to Nvidia.
6.Reboot your system to save changes and again download the setup (follow Method 2). But this time make sure you only download the previous version setup, not the latest version.
5.Once you are sure that you have removed everything, try installing the drivers again. The setup should work without any problems.
Method 5: Disable Vsync and Select Maximum Performance Settings
1.Right-click on the desktop area then click NVIDIA Control Panel.
2.Now click on Manage 3D settings.
3.Set Power Settings to Maximum Performance and turn off Vertical Sync.
4.Click Apply to save changes.
5.Right click battery icon on the system tray and select Power Options.
6.In the Power Options window select High Performance under Choose or customize a power plan.
7.Reboot your PC to save changes.
Method 6: Update DirectX
To Fix NVIDIA Drivers Constantly Crash issue on Windows 10, you should always make sure to update your DirectX. The best way to make sure you have the latest version installed is to download DirectX Runtime Web Installer from Microsoft official website.
Method 7: Temporarily Disable Antivirus and Firewall
Sometimes the Antivirus program can cause nvxdsyn.exe error or NVIDIA Drivers Constantly Crash issue. you need to disable your antivirus for a limited time so that you can check if the error still appears when the antivirus is off.
1.Right-click on the Antivirus Program icon from the system tray and select Disable.
2.Next, select the time frame for which the Antivirus will remain disabled.

Note: Choose the smallest amount of time possible for example 15 minutes or 30 minutes.
3.Once done, again try to connect to the WiFi network and check if the error resolves or not.
4.Right click on Taskbar, select Control Panel.
5.Next, click on System and Security.
6.Then click on Windows Firewall.

7.Now from the left window pane click on Turn Windows Firewall on or off.
8.Select Turn off Windows Firewall and restart your PC. This would definitely Fix NVIDIA Drivers Constantly Crash on Windows 10.
If the above method doesn’t work make sure to follow the exact same steps to turn on your Firewall again.
Recommended for you:
- How to Remove File Type Associations in Windows 10
- Fix Setup couldn’t start properly. Please reboot your PC and run set up again
- 4 Ways To Fix Red X On Volume Icon
- Fix Windows Update Error 0x8024a000
That’s it you have successfully Fix NVIDIA Drivers Constantly Crash on Windows 10 if you still have any queries regarding this post feel free to ask them in the comment’s section.
|
|
|
0 / 0 / 0 Регистрация: 16.06.2015 Сообщений: 14 |
|
|
30.04.2016, 07:59. Показов 12782. Ответов 12 Здравствуйте, столкнулся с такой проблемой, играл в игры один день, все норм, работает, потом перезагружаю комп, и игры все абсолютно дико дико виснут. Ну решил зайти в настройки Nvidia через панель управления, а там бац, прекращение работы программы(ПУ Nvidia) и причину не пишет. Почитал, говорят что переустановить все дрова нужно, сделал, все заработало и игры виснуть перестали. Перезагрузил ПК, опять тот же синдром, ни в ПУ Nvidia зайти не удается и игры зависают. Что делать?
0 |
|
1047 / 531 / 66 Регистрация: 16.01.2013 Сообщений: 4,093 |
|
|
30.04.2016, 10:44 |
|
|
TheRevan, проверить на вирусы.
0 |
|
4826 / 3405 / 203 Регистрация: 29.11.2011 Сообщений: 5,629 |
|
|
02.05.2016, 05:00 |
|
|
Сообщение от TheRevan ни в ПУ Nvidia зайти не удается и игры зависают. Что делать? обрати внимание чтобы в автозагрузке был включен этот пункт Миниатюры
0 |
|
4826 / 3405 / 203 Регистрация: 29.11.2011 Сообщений: 5,629 |
|
|
02.05.2016, 05:16 |
|
|
TheRevan Миниатюры
1 |
|
Нарушитель 1796 / 1416 / 214 Регистрация: 03.05.2015 Сообщений: 7,486 |
|
|
02.05.2016, 17:27 |
|
|
Сообщение от лотос обрати внимание чтобы в автозагрузке был включен этот пункт лотос, но ведь это необязательно У меня к примеру в автозагрузке всё отключено. Но это не мешает работать нвидиевскому драйверу и выводить сигнал с нвидиевской вк Добавлено через 3 минуты
1 |
|
4826 / 3405 / 203 Регистрация: 29.11.2011 Сообщений: 5,629 |
|
|
02.05.2016, 17:29 |
|
|
Сообщение от CoD — MW2 лотос, но ведь это необязательно У меня к примеру в автозагрузке всё отключено. Но это не мешает работать нвидиевскому драйверу и выводить сигнал с нвидиевской вк в принципе вы правы, выводить сигнал не проблема, но здесь вроде про панель управления вопрос задали, поэтому и было рекомендовано как вариант(часто по причине ,,кривой,, работы display driver service) панель управления перестаёт корректно работать, кстати на десятке у меня был такой глюк панель после обновления слетала, решил проблему полным удалением старых версий драйверов
1 |
|
02.05.2016, 17:35 |
|
|
Не по теме: лотос, хорошо что у меня «стоит» Windows 10
0 |
 А уже всё больше и больше случаев сгоняния пользователей с Win7:(
|
4826 / 3405 / 203 Регистрация: 29.11.2011 Сообщений: 5,629 |
|
|
02.05.2016, 17:39 |
|
|
Сообщение от CoD — MW2 Может дело в какой то «хорошей» сборке Windows 10 скорее ,,в быстро написанных драйверах,, почему то именно на 10-ке после обновления начинаются проблемы, хотя категорично утверждать не берусь Добавлено через 2 минуты Не по теме: Сообщение от CoD — MW2 лотос, хорошо что у меня «стоит» Windows 10 А уже всё больше и больше случаев сгоняния пользователей с Win7 а у меня обе системы на одном железе и веришь по карте был такой глюк:sorry:
1 |
|
02.05.2016, 17:46 |
|
|
Не по теме: лотос, понял, спасибо! Не по теме: Добавлено через 3 минуты Сообщение от лотос а у меня обе системы на одном железе и веришь по карте был такой глюк конечно верю :). У меня вот случай — я нескольким людям устанавливал эту Win10, так у них всё работает. У меня ни в какую (в смысле вечно какие то проблемы типа как у ТС):(
0 |
|
4826 / 3405 / 203 Регистрация: 29.11.2011 Сообщений: 5,629 |
|
|
02.05.2016, 17:53 |
|
|
Сообщение от CoD — MW2 Может быть также, что для вашего железа так работают драйвера под Windows 10. Может дело в какой то «хорошей» сборке Windows 10 +++++++ Сообщение от CoD — MW2 — В биосе выставляем приоритет на дискретную (PCI-Ex) видеокарту желательно не на предыдущие версии драйверов!!!!удалять их полностью нужно! у меня сработало, а то с панелью были проблемы
1 |
|
Нарушитель 1796 / 1416 / 214 Регистрация: 03.05.2015 Сообщений: 7,486 |
|
|
02.05.2016, 17:57 |
|
|
Сообщение от лотос желательно не на предыдущие версии драйверов!!!!удалять их полностью нужно! у меня сработало, а то с панелью были проблемы +++
1 |
|
4826 / 3405 / 203 Регистрация: 29.11.2011 Сообщений: 5,629 |
|
|
02.05.2016, 18:02 |
|
|
Сообщение от CoD — MW2 Поможет утилита Display Driver Uninstaller, она хорошо подчищает остатки от видеодрайверов. Много раз выручала. Правда, удалять драйвера этой утилитой нужно в Безопасном режиме! Не по теме: а я их в ,,наглую,, в диспетчере устройств
0 |
|
02.05.2016, 18:08 |
|
|
Не по теме: Сообщение от лотос а я их в ,,наглую,, в диспетчере устройств Воха, ты знаешь, я тоже так :D. Но был случай, когда после такого удаления драйвер на дискретку напрочь отказывался ставится:( Правда было это в Win 8.1:)
0 |
|
Новые блоги и статьи
Все статьи Все блоги / |
||||
|
Создаем CLI приложение на Python с Prompt Toolkit
py-thonny 13.05.2025 Современные командные интерфейсы давно перестали быть черно-белыми текстовыми программами, которые многие помнят по старым операционным системам. CLI сегодня – это мощные, интуитивные и даже. . . |
Конвейеры ETL с Apache Airflow и Python
AI_Generated 13.05.2025 ETL-конвейеры – это набор процессов, отвечающих за извлечение данных из различных источников (Extract), их преобразование в нужный формат (Transform) и загрузку в целевое хранилище (Load). . . . |
Выполнение асинхронных задач в Python с asyncio
py-thonny 12.05.2025 Современный мир программирования похож на оживлённый мегаполис – тысячи процессов одновременно требуют внимания, ресурсов и времени. В этих джунглях операций возникают ситуации, когда программа. . . |
Работа с gRPC сервисами на C#
UnmanagedCoder 12.05.2025 gRPC (Google Remote Procedure Call) — открытый высокопроизводительный RPC-фреймворк, изначально разработанный компанией Google. Он отличается от традиционых REST-сервисов как минимум тем, что. . . |
CQRS (Command Query Responsibility Segregation) на Java
Javaican 12.05.2025 CQRS — Command Query Responsibility Segregation, или разделение ответственности команд и запросов. Суть этого архитектурного паттерна проста: операции чтения данных (запросы) отделяются от операций. . . |
|
Шаблоны и приёмы реализации DDD на C#
stackOverflow 12.05.2025 Когда я впервые погрузился в мир Domain-Driven Design, мне показалось, что это очередная модная методология, которая скоро канет в лету. Однако годы практики убедили меня в обратном. DDD — не просто. . . |
Исследование рантаймов контейнеров Docker, containerd и rkt
Mr. Docker 11.05.2025 Когда мы говорим о контейнерных рантаймах, мы обсуждаем программные компоненты, отвечающие за исполнение контейнеризованных приложений. Это тот слой, который берет образ контейнера и превращает его в. . . |
Micronaut и GraalVM — будущее микросервисов на Java?
Javaican 11.05.2025 Облачные вычисления безжалостно обнажили ахиллесову пяту Java — прожорливость к ресурсам и медлительный старт приложений. Традиционные фреймворки, годами радовавшие корпоративных разработчиков своей. . . |
Инфраструктура как код на C#
stackOverflow 11.05.2025 IaC — это управление и развертывание инфраструктуры через машиночитаемые файлы определений, а не через физическую настройку оборудования или интерактивные инструменты. Представьте: все ваши серверы,. . . |
Инъекция зависимостей в ASP.NET Core — Практический подход
UnmanagedCoder 11.05.2025 Инъекция зависимостей (Dependency Injection, DI) — это техника программирования, которая кардинально меняет подход к управлению зависимостями в приложениях. Представьте модульный дом, где каждая. . . |
Наверх
Nvidia Display Driver Keeps Crashing on Windows 10? Follow the Steps in This Article to Fix that
Nvidia’s GeForce series graphics card drivers may start to crash unexpectedly due to many reasons. This article contains to most effective troubleshooting steps to help you fix this issue.
A graphics (video) driver is necessary for the operating system and programs to use computer graphics hardware. Updated graphics drivers are essential and often deliver better performance.
Driver updates typically provide bug fixes and compatibility with newer software. In this case, specifically video games. Nvidia graphics cards are popular, but the drivers for said graphics cards sometimes cause problems.
Nvidia graphics card drivers may randomly start crashing. Sometimes, the driver may recover and allow you to continue playing your game, but that’s not always the case.
This guide features several methods to address an Nvidia driver crash, including downloading and installing the latest drivers or older driver versions (paradoxically), adjusting your Power Options settings, disabling Windows services, etc.
Video Showing How to Fix Nvidia Driver Crash on Windows 10:
Table of Contents:
- Introduction
- Change Your Screen Resolution
- Reinstall Nvidia Drivers
- Download Drivers From Your Laptop Manufacturer
- Stop Automatic Driver Updates
- Disable iGPU
- Manage 3D Settings in Nvidia Control Panel
- Disable Your Antivirus
- Clean Your Graphic Card
- Video Showing How to Fix Nvidia Driver Crash on Windows 10
Download Computer Malware Repair Tool
It is recommended to run a free scan with Combo Cleaner — a tool to detect viruses and malware on your device. You will need to purchase the full version to remove infections. Free trial available. Combo Cleaner is owned and operated by Rcs Lt, the parent company of PCRisk.com read more.
Change Your Screen Resolution
Screen resolution refers to the clarity of the text and images displayed on your screen. At higher resolutions (such as 1600 x 1200), items appear sharper.
They also appear smaller, so more items can fit on the screen. The opposite is true at lower resolutions (such as 800 x 600): fewer items fit on the screen, but they appear larger.
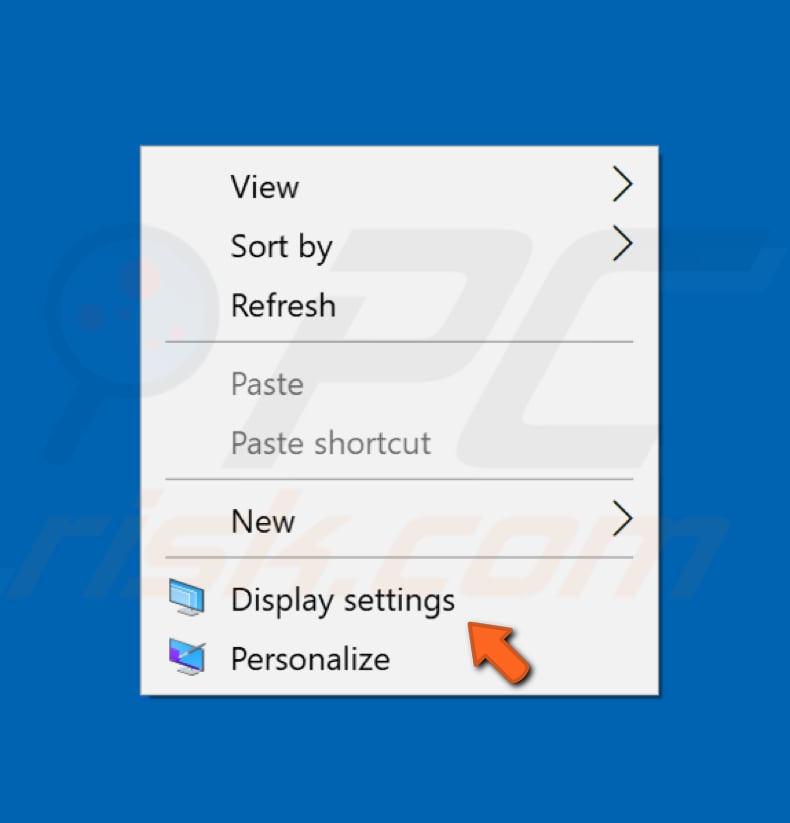
Some users have reported that changing (decreasing) the screen resolution fixes the Nvidia driver crash issue. To lower the screen resolution, simply right-click the background and select «Display settings» from the contextual menu.
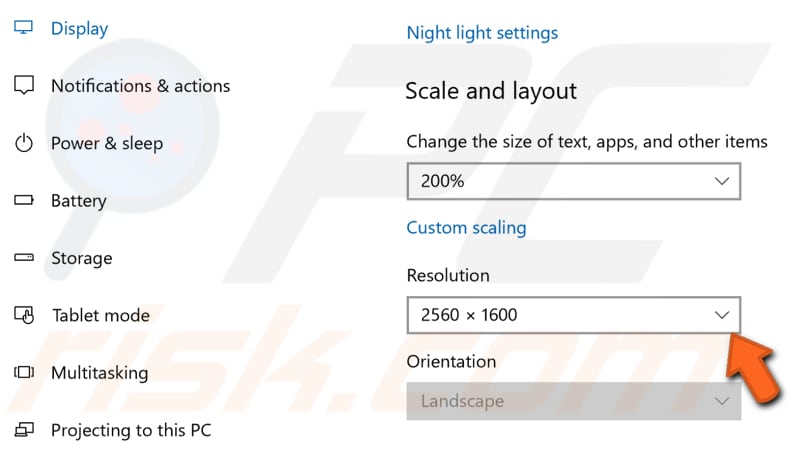
Now, click the arrow next to your screen resolution and select a lower resolution than the current setting. See if this solves the issue with the Nvidia driver.
[Back to Table of Contents]
Reinstall Nvidia Drivers
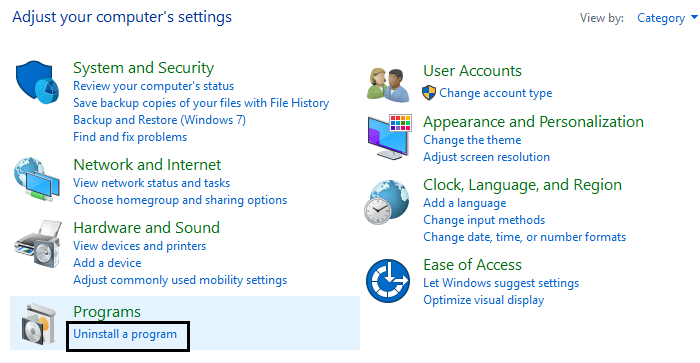
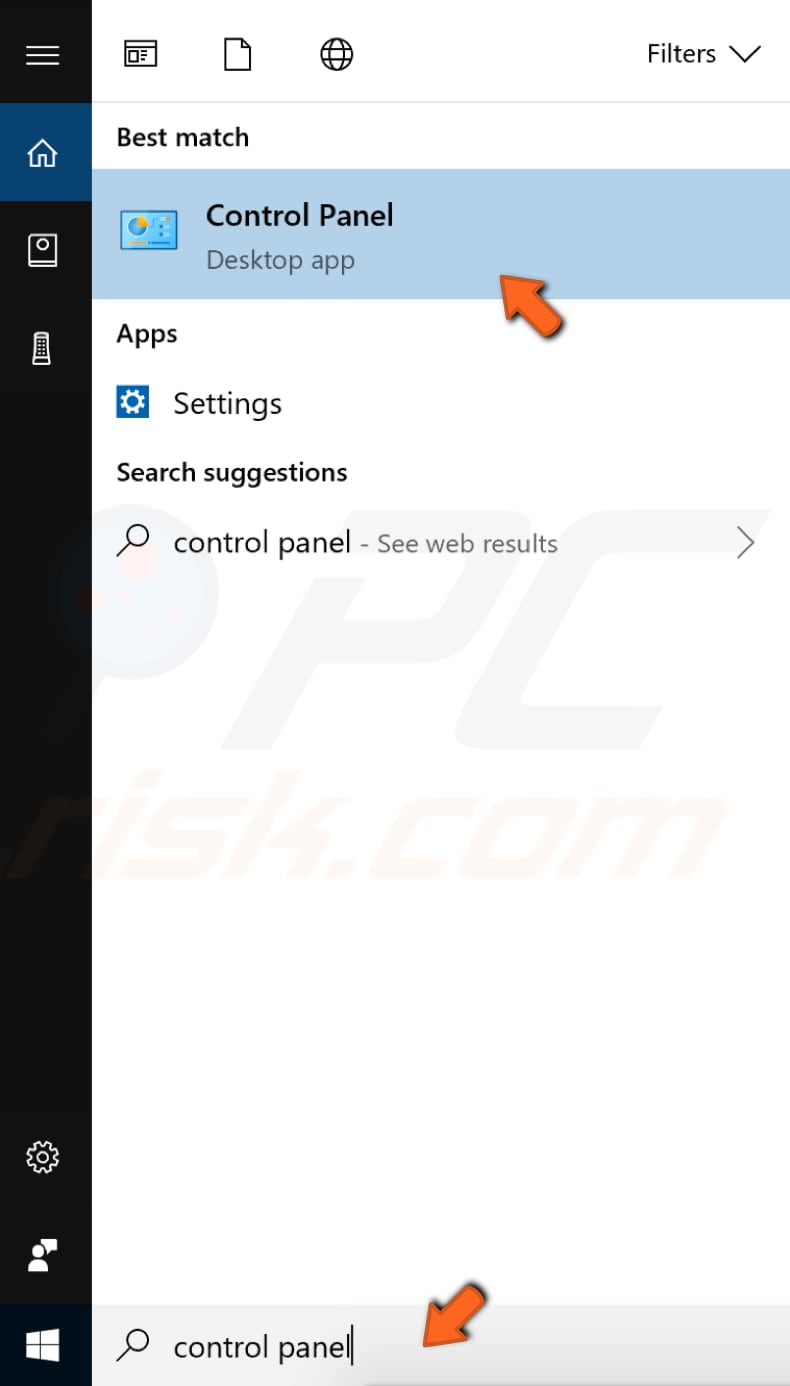
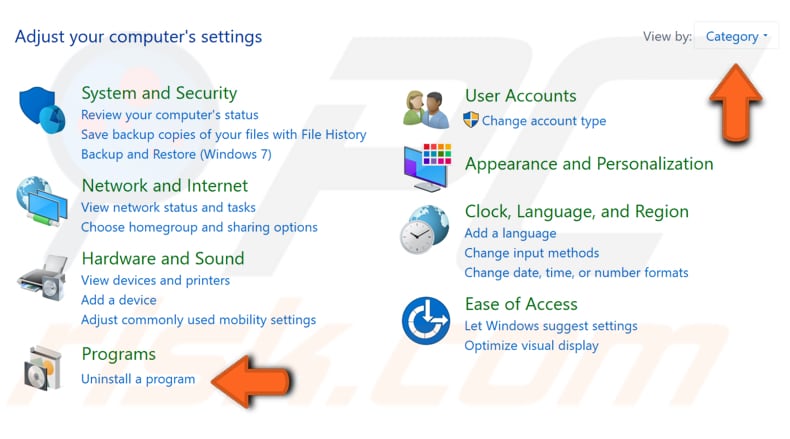
This method includes uninstalling current Nvidia drivers and installing the latest ones. To uninstall current Nvidia drivers, first go to Control Panel. Type «control panel» in Search and select the «Control Panel» result.
Now click «Uninstall a program» under Programs. If you do not see the Control Panel menu as shown in the image below, select «Category» in the «View by:» drop-down menu. You can find it in the top-right corner of the Control Panel window.
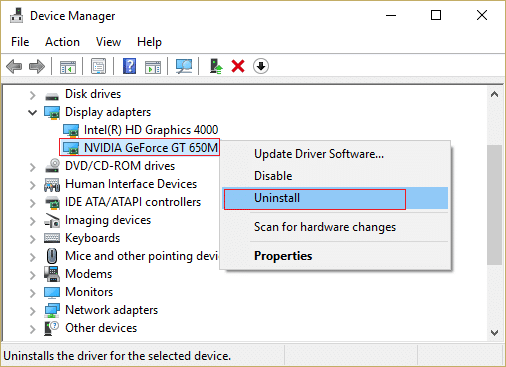
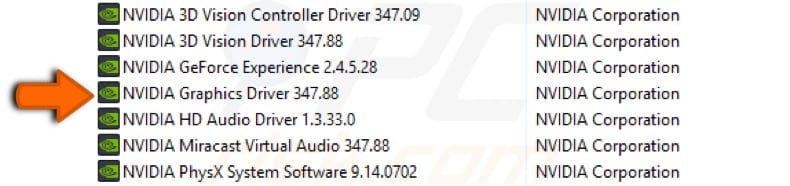
Locate the «NVIDIA Graphics Driver», right-click it and select «Uninstall» from the drop-down menu. You can click the «Uninstall» button positioned above the list to uninstall the driver.
Go to the Nvidia website and download the latest drivers for the graphics card.
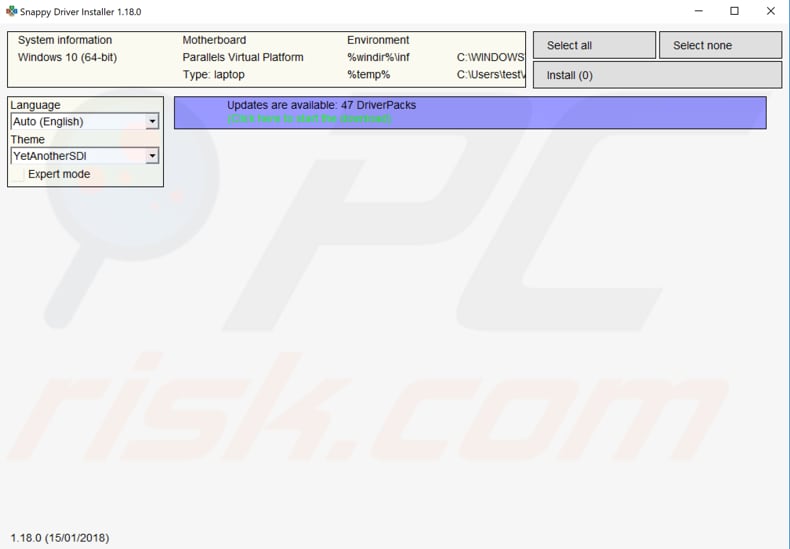
If you are unsure which drivers to download for the Nvidia graphics card, use third-party software such as Snappy Driver Installer. Snappy Driver Installer (SDI) is a powerful free driver updater tool for Windows that can store its entire collection of drivers offline. You can download Snappy Driver Installer from here.
[Back to Table of Contents]
Download Drivers From Your Laptop Manufacturer
This method applies only to laptop owners. If you are not using a laptop computer, skip this step.
Uninstall current drivers, applying the steps mentioned in the previous solution, and then go to the laptop manufacturer’s web page and download the latest graphics drivers. Some users have reported that this solution helped them to fix issues with crashing Nvidia graphics drivers.
[Back to Table of Contents]
Stop Automatic Driver Updates
This method includes stopping automatic driver updates and downloading older versions of Nvidia drivers. The latest drivers are usually recommended. However, in some cases, older drivers work better and provide a solution.
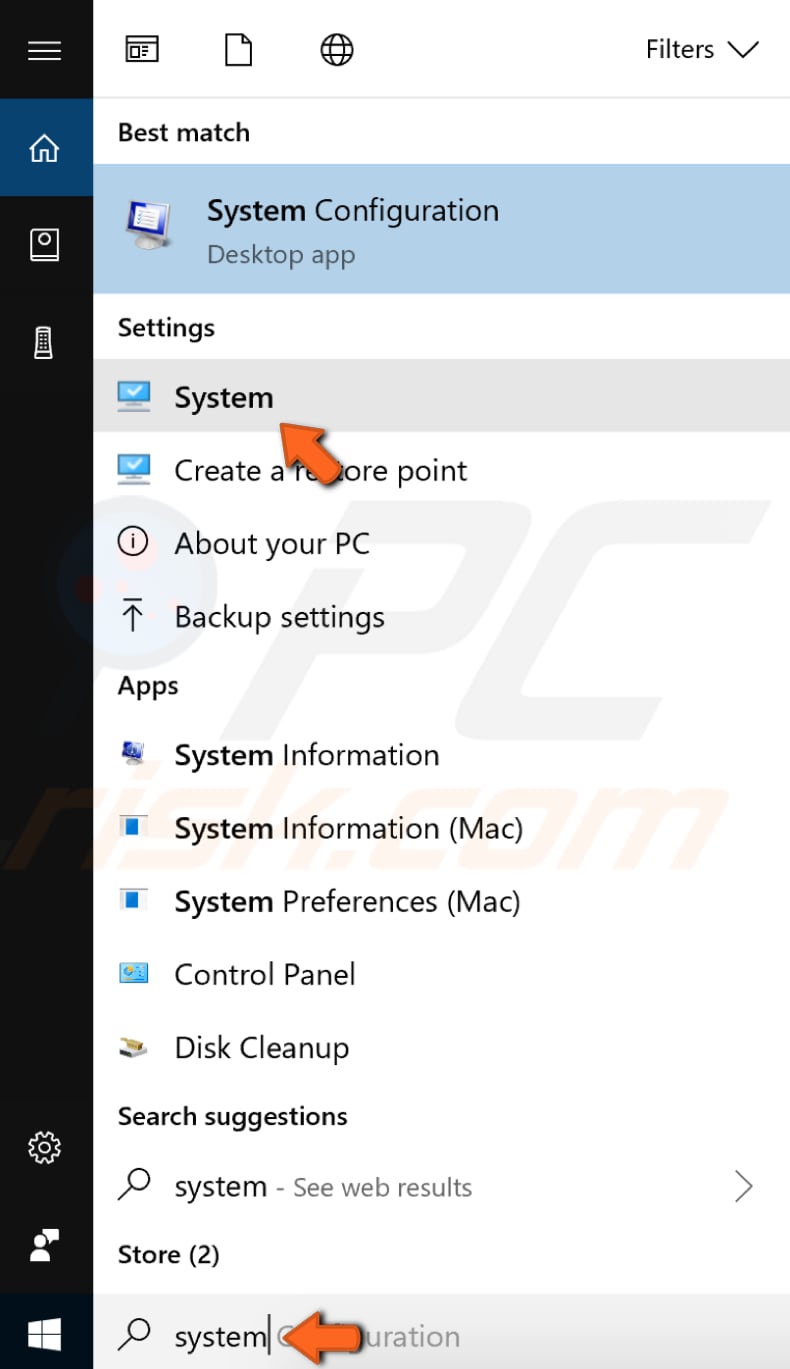
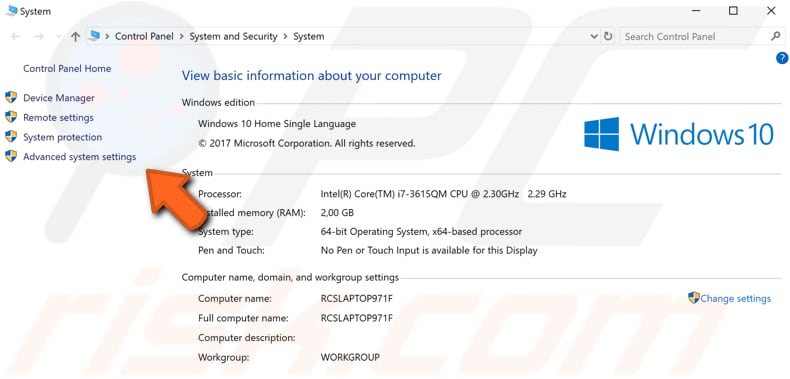
Before installing older drivers, you first need to stop automatic driver updates. Do this by typing «system» in Search and select the «System» result.
Locate «Advanced system settings» on the left pane and click it.
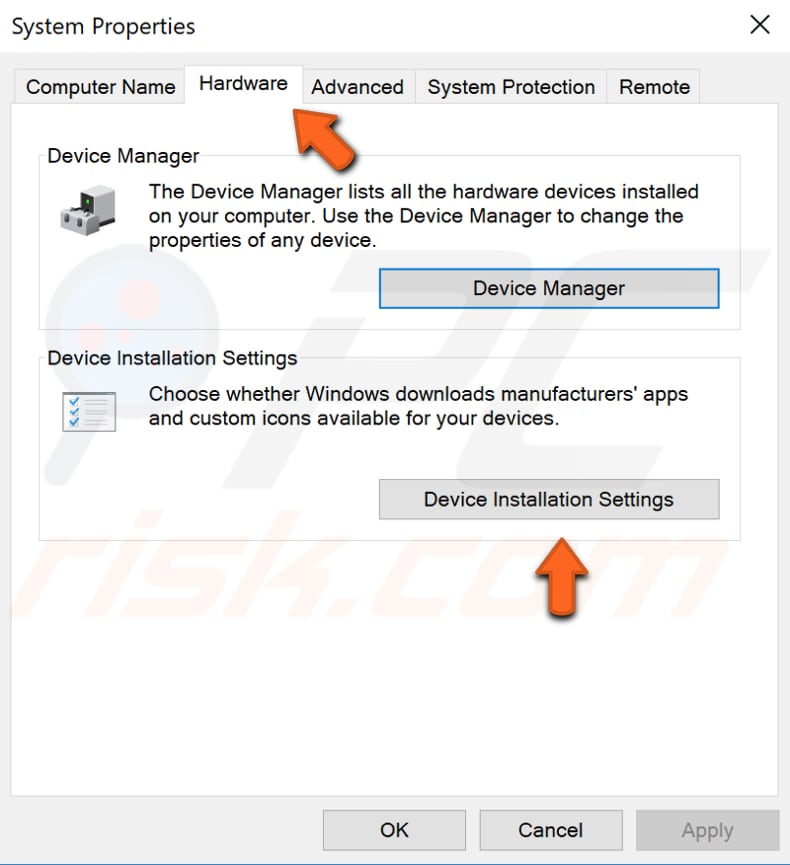
In the System Properties window, select the «Hardware» tab and click «Device Installation Settings».
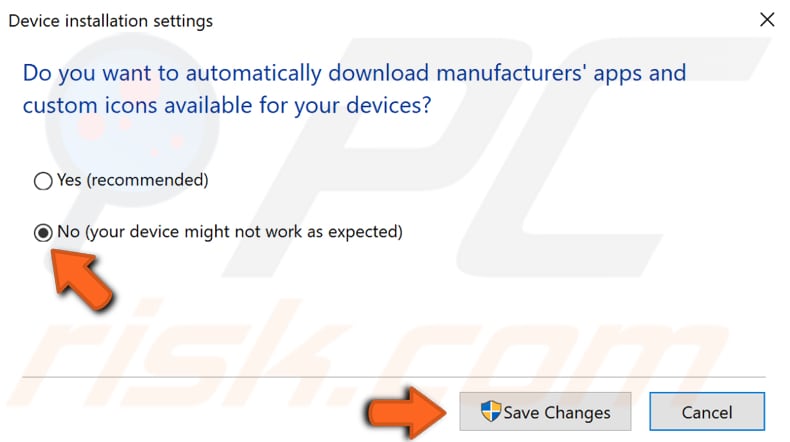
In the Device installation settings window, select «No (your device might not work as expected)» and click «Save changes».
Now that you have disabled automatic driver updates remove the current Nvidia graphics drivers and install older versions. We described the uninstall process in the first solution above. You can find ‘beta’ and older drivers for Nvidia products here.
[Back to Table of Contents]
Disable iGPU
A graphics processing unit (GPU) is a specialized electronic circuit designed to rapidly manipulate and alter memory to accelerate the creation of images in a frame buffer intended for output to a display device. GPUs are used in embedded systems, mobile phones, personal computers, workstations, and game consoles
iGPU is Integrated Graphics Processing Unit (or integrated GPU). This is a GPU made by the CPU (Central Processing Unit) manufacturer of the computer. There is another term, ‘dGPU’, which is a discrete GPU, a separate chip.
Now that we know the terminology, we will describe a solution that includes disabling the iGPU by accessing BIOS settings. BIOS (Basic Input Output System) is software stored in a small memory chip on the motherboard. You might need to access the BIOS to change how the device works, or to assist in troubleshooting a problem.
In this case, we need the BIOS to disable the iGPU. To access BIOS, press and hold the Del or F2 keys when starting the computer (or when it boots up). In the BIOS settings, locate the iGPU (or integrated graphic card) option and disable it. Save the changes and restart your computer. See if this helps to fix the issue with the Nvidia graphics driver.
[Back to Table of Contents]
Manage 3D Settings in Nvidia Control Panel
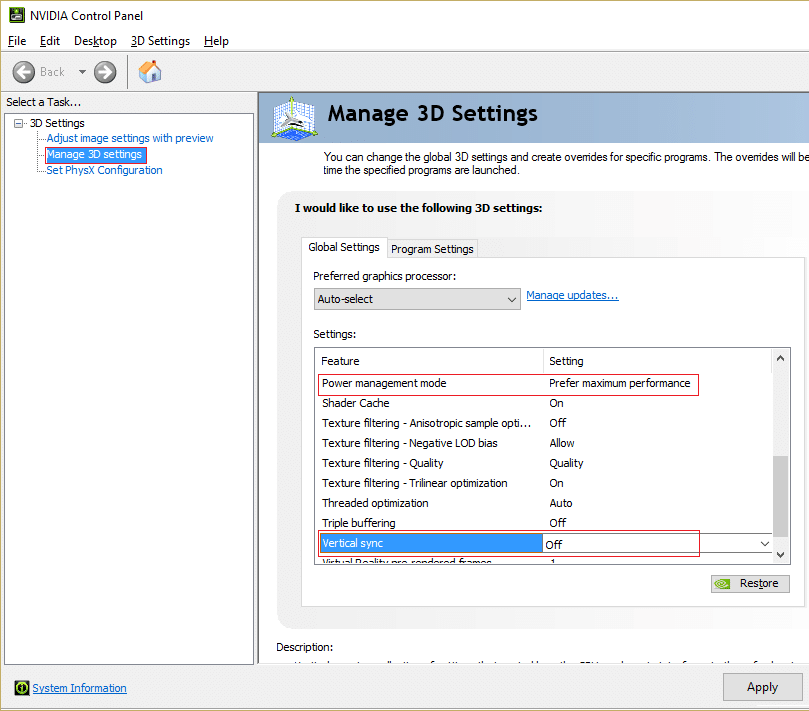
First, open the Nvidia Control Panel. Usually, you can access it by right-clicking on the desktop and selecting the «NVIDIA Control Panel». In the Nvidia Control Panel window, find «Manage 3D settings» on the left pane and select it.
Select «Power Management Mode» and set it to «Prefer Maximum Performance», and turn off the V-Sync (Vertical Synchronization) option. Click «Apply» to save changes and see if this fixes the problem with the Nvidia graphic driver.
NOTE: The Nvidia Control Panel settings might vary depending on the version on your computer, but generally, they should be similar to those described.
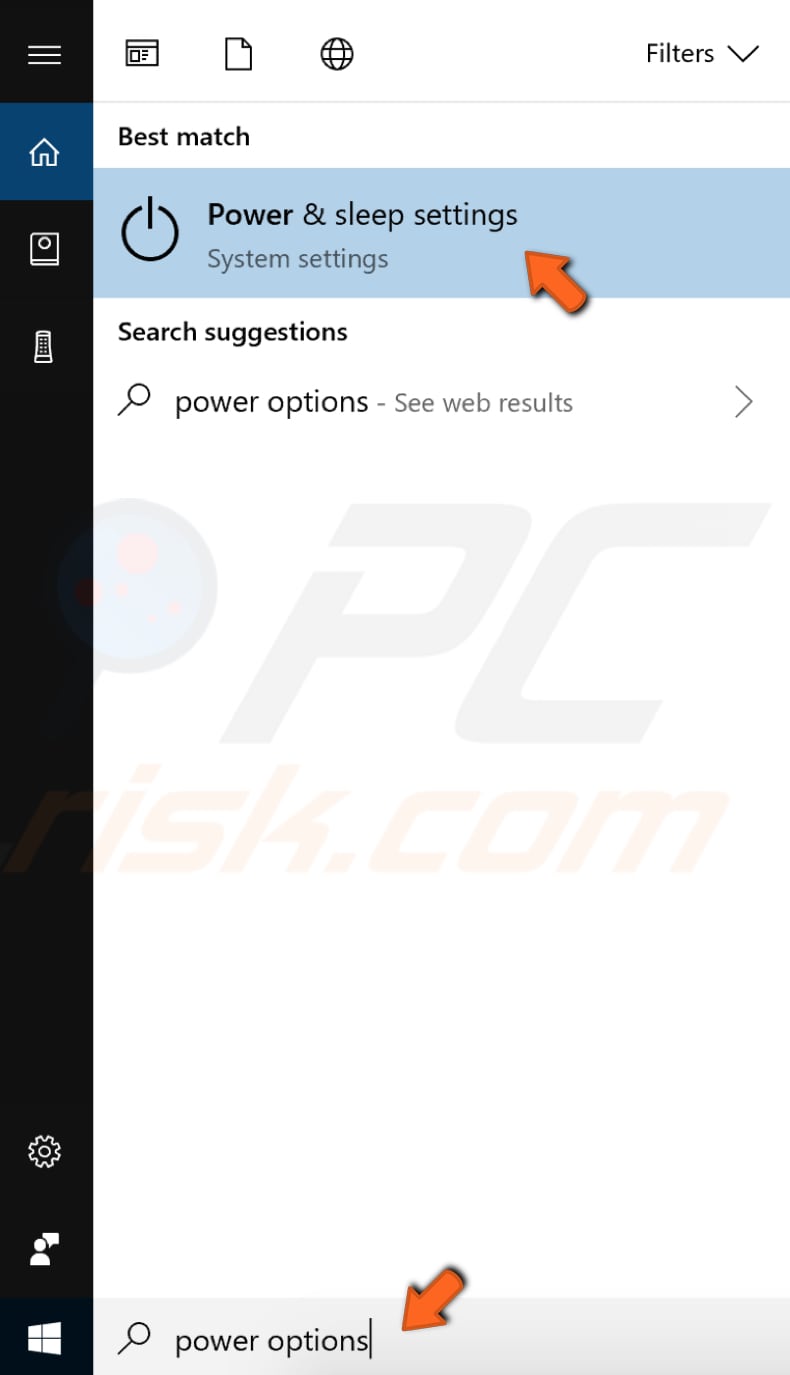
We also recommend that you set Power Options to High Performance by typing «power» in Search and select the «Power & sleep» result.
Click «Additional power settings» on the right pane.
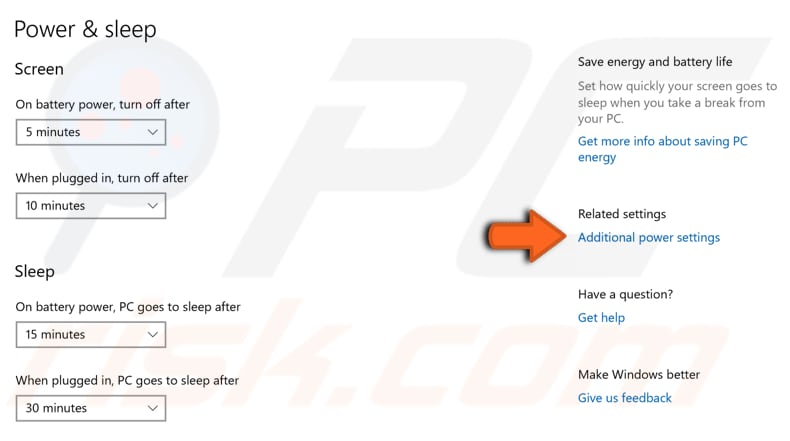
Now, click «Show additional plans» and select «High performance» option.

[Back to Table of Contents]
Disable Your Antivirus
It is also possible that antivirus software is causing Nvidia driver crashes. Temporarily disable the antivirus software to determine if the driver still crashes and is thus causing the problem.
If so, we suggest you consider using different antivirus software (and uninstall the current software). Some users have reported that Avast antivirus software, specifically, was causing Nvidia driver crashes and that removing this software solved the problem.
[Back to Table of Contents]
Clean Your Graphic Card
The graphic card may be overheating due to dust, in which case it requires cleaning. Open the computer case and remove the graphic card. Carefully clean and replace it. See if this solves the issue with driver crashes.
NOTE: You may invalidate your computer and/or graphic card warranty by removing your graphic card.
We hope that one of the solutions above helps you solve the issue of Nvidia drivers, and you can use your computer without any Nvidia-related problems.
[Back to Top]