
Personally, I prefer installing operating systems from a USB stick, so here’s a tutorial
TL;DR
If you already have some idea of what’s going on:
- Download the ISO from Microsoft — https://www.microsoft.com/en-ca/software-download/windows11
- Erase USB device and format in
MS-DOS/FAT32
diskutil eraseDisk MS-DOS "WINDOWS11" MBR /dev/diskX
- Copy all files over to the USB device except
install.wim
rsync -vha --exclude=sources/install.wim /Volumes/CCCOMA_X64FRE_EN-US_DV9/* /Volumes/WINDOWS11
- Split up the
install.wimfile into FAT32 sized chunks (trywimlib)
wimlib-imagex split /Volumes/CCCOMA_X64FRE_EN-US_DV9/sources/install.wim /Volumes/WINDOWS11/sources/install.swm 3800
Spelled-out Guide
Step 1: Download the Windows 11 ISO file
You can download the official ISO file from Microsoft directly
currently found here — https://www.microsoft.com/en-ca/software-download/windows11
As a brief primer — the .iso extension represents a disk image. In this case, it contains a collection of data/files that are required to «boot» the Windows 11 OS.
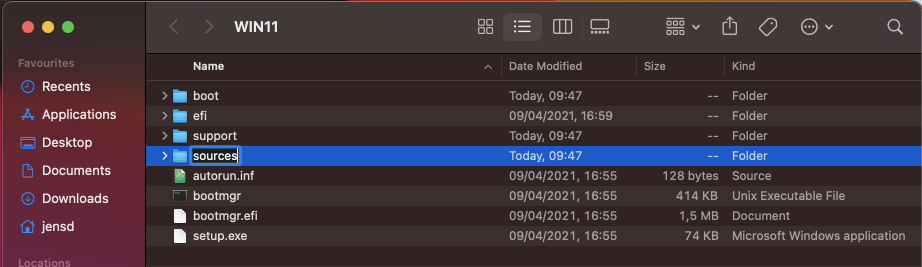
Once you’ve downloaded the file (probably looks something like this — Win11_22H2_English_x64v2.iso) you want to open it up. If you take a look inside (using du - Disk Usage), you’ll see that the largest file is under /Volumes/CCCOMA_X64FRE_EN-US_DV9/sources
bocchi@hitorilabs ~ $ du -hs /Volumes/CCCOMA_X64FRE_EN-US_DV9/*
2.0K	/Volumes/CCCOMA_X64FRE_EN-US_DV9/autorun.inf
 18M	/Volumes/CCCOMA_X64FRE_EN-US_DV9/boot
432K	/Volumes/CCCOMA_X64FRE_EN-US_DV9/bootmgr
2.4M	/Volumes/CCCOMA_X64FRE_EN-US_DV9/bootmgr.efi
 23M	/Volumes/CCCOMA_X64FRE_EN-US_DV9/efi
 94K	/Volumes/CCCOMA_X64FRE_EN-US_DV9/setup.exe
5.4G	/Volumes/CCCOMA_X64FRE_EN-US_DV9/sources
448K	/Volumes/CCCOMA_X64FRE_EN-US_DV9/support
Look inside that sources directory and see that there’s a huge file install.wim that contains the main contents of Windows 11.
bocchi@hitorilabs ~ $ du -hs /Volumes/CCCOMA_X64FRE_EN-US_DV9/sources/* | grep install.wim
4.7G	/Volumes/CCCOMA_X64FRE_EN-US_DV9/sources/install.wim
Note: .wim is an extension representing a «Windows Image» file which is some compressed representation of the data.
Step 2: Insert your USB storage drive into your Mac
First, check for the location of the USB we plugged in using diskutil.
You will see something like this:
bocchi@hitorilabs ~ $ diskutil list
/dev/disk0 (internal, physical):
   #:                       TYPE NAME                    SIZE       IDENTIFIER
   0:      GUID_partition_scheme                        *1.0 TB     disk0
   ...

/dev/disk3 (synthesized):
   #:                       TYPE NAME                    SIZE       IDENTIFIER
   0:      APFS Container Scheme -                      +994.7 GB   disk3
   ...

/dev/disk4 (external, physical):
   #:                       TYPE NAME                    SIZE       IDENTIFIER
   0:     FDisk_partition_scheme                        *30.8 GB    disk4
   1:                 DOS_FAT_32 WINDOWS11               30.8 GB    disk4s1

/dev/disk5 (disk image):
   #:                       TYPE NAME                    SIZE       IDENTIFIER
   0:                            CCCOMA_X64FRE_EN-US... +5.8 GB     disk5
It’s obvious here that /dev/disk4 ended up being my USB device since I already have Windows 11 installed and formatted, but you want to make sure you know which device is actually your USB so that you don’t accidentally wipe your own system.
You can pretty much expect that devices /dev/disk{1..3} are all internal and the next ones are external disks — otherwise, it’s usually easy to tell just by the SIZE of your USB storage. (i.e. /dev/disk5 is the .iso file or «disk image» you opened up earlier now visible under/Volumes/CCCOMA_X64FRE_EN-US_DV9)
Step 3: Erase and Reformat Your USB Device
In order to make a bootable drive, the USB device should be formatted in FAT32/MS-DOS by running the following command:
bocchi@hitorilabs ~ $ diskutil eraseDisk MS-DOS "WINDOWS11" MBR /dev/disk4
For some definitions of options we’re specifying:
MBR(Master Boot Record) — https://en.wikipedia.org/wiki/Master_boot_recordMS-DOS/FAT32(File Allocation Table) — https://en.wikipedia.org/wiki/File_Allocation_Table"WINDOWS11"— friendly name to identify our device
Step 4: Copy All Files Over To The Device
From the wiki page about FAT32, you’ll see
The maximal possible size for a file on a FAT32 volume is 4 GB minus 1 byte, or 4,294,967,295 (232 − 1) bytes.
Unfortunately, we can’t just dump the contents of the .iso file directly into this device yet because of the 4.7GB install.wim file. (no idea why they would ship the files over like this if they knew this would happen)
For now, we’re going to copy every file from the ISO file /Volumes/CCCOMA_X64FRE_EN-US_DV9 over to /Volumes/WINDOWS11 except for install.wim (I prefer to use rsync)
bocchi@hitorilabs ~ $ rsync -vha --exclude=sources/install.wim /Volumes/CCCOMA_X64FRE_EN-US_DV9/* /Volumes/WINDOWS11
Step 5: Split install.wim Into FAT32 Chunks
It’s pretty standard on macos to have homebrew installed. If you don’t already have it, install it at https://brew.sh.
Since most people probably never looked into the .wim Windows Image file format, we’re going to use a tool off the shelf called wimlib to do the splitting.
Here we’re splitting the file from /Volumes/CCCOMA_X64FRE_EN-US_DV9/sources/install.wim into 3.8GB chunks (to fit comfortably under MS-DOS/FAT32 limits) into the device location /Volumes/WINDOWS11/sources/install.swm
bocchi@hitorilabs ~ $ wimlib-imagex split /Volumes/CCCOMA_X64FRE_EN-US_DV9/sources/install.wim /Volumes/WINDOWS11/sources/install.swm 3800
Now you’re actually done — that’s all there is to it. Unmount the USB device and it should be detected as a bootable device in the UEFI/BIOS of your PC.
Author’s Note
Normally, I wouldn’t make a tutorial like this because anyone who’s clicking on gists and knows their way around a shell environment probably doesn’t need that much hand-holding — but I found it surprisingly difficult for someone who has some technical understanding.
Creating a bootable USB for a linux operating system is trivial if you’ve ever gone through the arch wiki (https://wiki.archlinux.org/title/USB_flash_installation_medium), but the same cannot be said for this.
As most know, it is possible, and quite easy, to install Windows 10 on your x86-based Mac. Wether it’s a Mac Pro, iMac, Mac mini or Macbook. Now, as Windows 11 has some specific hardware requirements like TPM 2.0 and Secure Boot, you will not pass the hardware check. An unmodified installation will fail to get installed exactly due to this. In this article, I’ll explain how to get around these limitations and to get Windows 11 properly installed and working on your Mac.
YouTube Video
If you are interested, I also created a YouTube video from this blogpost. If you prefer classic text, you can just follow the rest of this article:
Introduction
Windows 11 is about to be released at the time of writing this and I was very curious to find out if I would manage to get it to work on one of my Macs. As by default, due to the specific hardware requirements mentioned above, it refuses to get installed without any further changes. For this article I used a Macbook Air Early 2015 which has a Core I5-5250U and 8GB of RAM and with a few minor tweaks, I got Windows 11 to install and everything working just fine, including updates.
Keep in mind that running Windows 11 natively on a M1 Mac currently is not working with this method. There is an ARM-based version of Windows 11 on the way but I haven’t tested that yet. Nevertheless, nothing stops you in using a M1 Mac to create the USB installer.
Creating the bootable Windows 11 USB installer
The approach will be to use the “old” Windows 10 installer and combine that with the Windows 11 installation files. The result of that will be written to a USB drive which then can be used to boot from and launch the installation. That way there is no need for Bootcamp Assistant and you are free to choose how to partition your drive.
Getting the Windows 10 and Windows 11 ISO
First thing we need to do, is to download both the Windows 10 and Windows 11 ISO files. These can be downloaded from Microsoft’s website:
- You can download the Windows 10 ISO from: https://www.microsoft.com/en-us/software-download/windows10ISO
- and the Windows 11 insider build ISO from: https://www.microsoft.com/en-us/software-download/windows11
Prepare the USB drive for the Windows installer
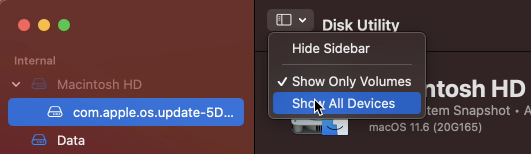
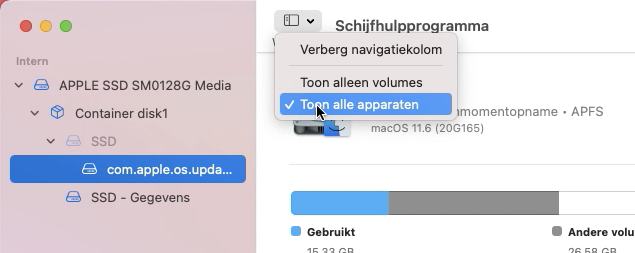
While both the ISOs are downloading, we can prepare our USB drive. You will need one that is at least 8GB. Insert the drive in your Mac and start Disk Utility.
In Disk Utility, choose to show all devices:
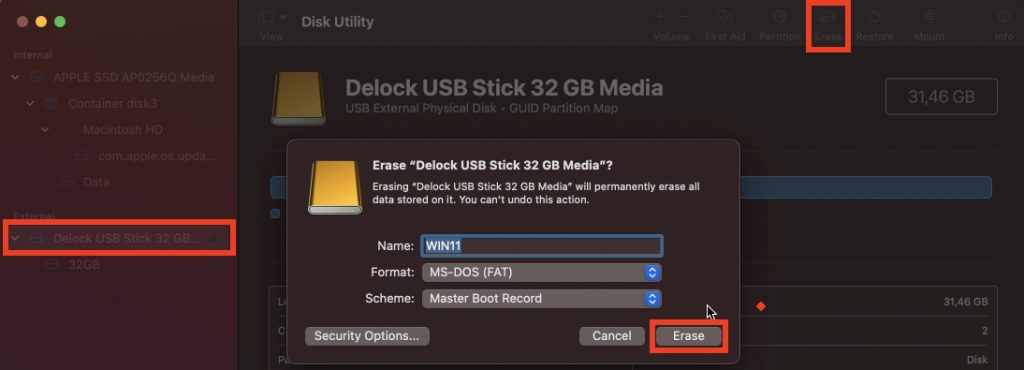
Then, on the left side, select your USB drive from the list and click Erase on the top left menu. In the dialog, enter a name for the drive (WIN11 here), choose to format as “MS-DOS (FAT)” and “Master Boot Record” as scheme. Finally click “Erase” to complete the process.
Copy Windows 10 files to the USB drive
After the previous step, our USB drive is prepared. As mentioned, the way I use to get around the hardware requirements check is to use the Windows 10 installer to install Windows 11. To do so, we need to copy all files from the Windows 10 ISO, with the exception of sources/install.wim to the USB drive.
Start by double-clicking on the Windows 10 ISO, called Win10_21H1_English_x64.iso, in order to mount it. Double-check to make sure you’re mounting the Windows 10 one and not the one for Windows 11. Once you did this, open it in Finder alongside the newly created partition on the USB drive, which I called WIN11 in Disk Utility.
I typically start by copying all separate files and folders, except for the sources folder:
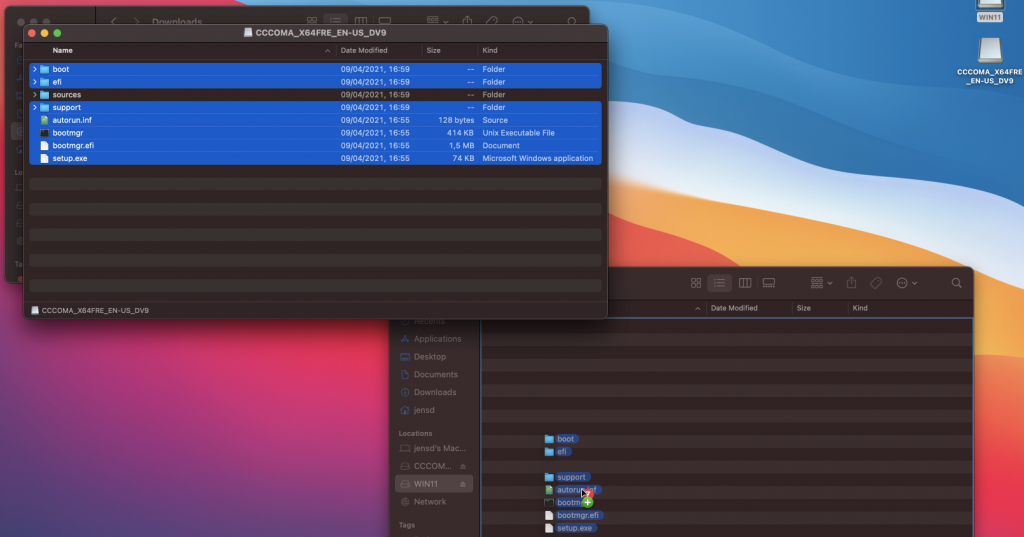
Then I create the sources folder and copy all files from sources with the exception of install.wim:
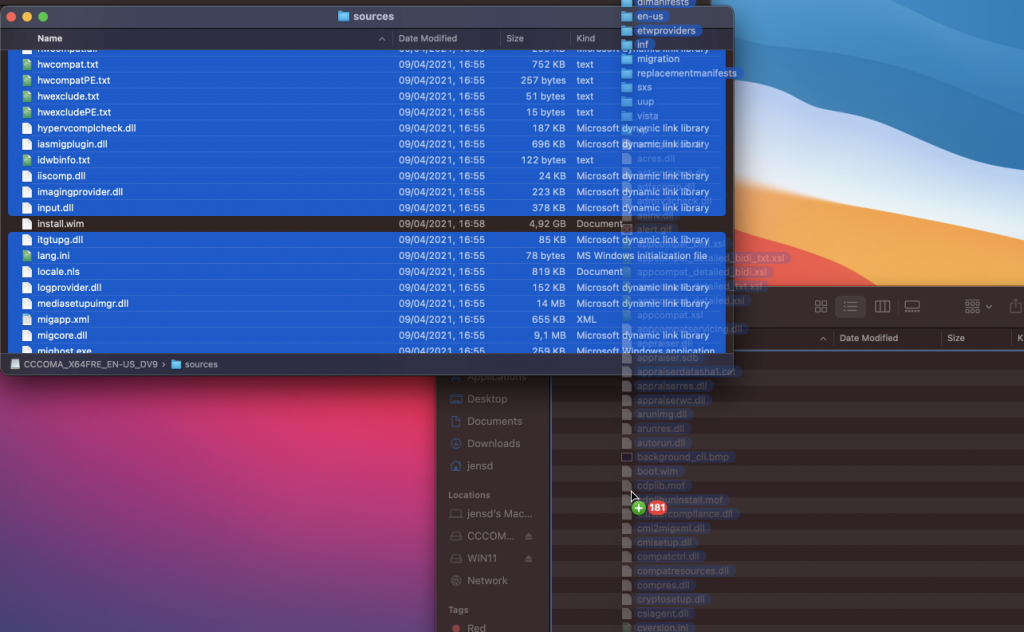
Prepare to split the Windows 11 install.wim
The next thing we need to do, is to copy the install.wim file from the Windows 11 ISO to the sources directory on the USB drive. Unfortunately, install.wim is over 4GB. As we formatted our USB drive with the FAT32 file system, it can handle files only up to 4GB. We could’ve theoretically also formatted the USB drive with exFAT but I’ve had mixed results doing so.
The solution is to split the file in two parts, smaller than the limit of our file system on the USB drive. To accomplish this, we can use Wimlib (https://wimlib.net/). This is a tool that is developed to work with, and modify, .wim files. The easiest way to get this installed on your Mac is by using Brew (https://brew.sh/).
So, as just mentioned, we start by installing Brew. As is instructed on the Brew website, copy and paste the mentioned line in a terminal and execute it.
jensd@jensds-MacBook-Air ~ % /bin/bash -c "$(curl -fsSL https://raw.githubusercontent.com/Homebrew/install/HEAD/install.sh)"
==> Checking for `sudo` access (which may request your password).
Password:
==> This script will install:
/opt/homebrew/bin/brew
/opt/homebrew/share/doc/homebrew
...
==> Next steps:
- Run these two commands in your terminal to add Homebrew to your PATH:
    echo 'eval "$(/opt/homebrew/bin/brew shellenv)"' >> /Users/jensd/.zprofile
    eval "$(/opt/homebrew/bin/brew shellenv)"
- Run `brew help` to get started
- Further documentation:
    https://docs.brew.sh
jensd@jensds-MacBook-Air ~ %
Once Brew is installed, we can can add it to the path as instructed in the Next steps of the previous output:
jensd@jensds-MacBook-Air ~ % echo 'eval "$(/opt/homebrew/bin/brew shellenv)"' >> /Users/jensd/.zprofile
jensd@jensds-MacBook-Air ~ % eval "$(/opt/homebrew/bin/brew shellenv)"
Then we can use it to install the tool which we need: Wimlib:
jensd@jensds-MacBook-Air ~ % brew install wimlib
==> Downloading
...
==> Installing wimlib dependency: openssl@1.1
==> Pouring openssl@1.1--1.1.1l.arm64_big_sur.bottle.tar.gz
==> Regenerating CA certificate bundle from keychain, this may take a while...
🍺  /opt/homebrew/Cellar/openssl@1.1/1.1.1l: 8,073 files, 18MB
==> Installing wimlib
==> Pouring wimlib--1.13.4.arm64_big_sur.bottle.tar.gz
🍺  /opt/homebrew/Cellar/wimlib/1.13.4: 65 files, 3.0MB
Split install.wim and get it on the USB drive
Now that we have Wimlib installed, we can use it to split the large install.wim file from the Windows 11 ISO and copy it to our USB drive.
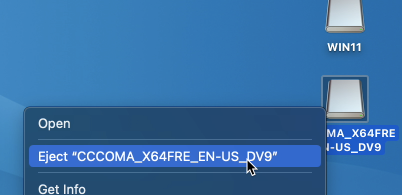
First, we need to unmount the Windows 10 ISO and mount the Windows 11 one instead. The Volume name is exactly the same so again, better to double-check here:

Now in the same or a new Terminal session, first list the volume names to make sure you pick the right ones to construct the command:
jensd@jensds-MacBook-Air ~ % ls -1 /Volumes
CCCOMA_X64FRE_EN-US_DV9
Macintosh HD
WIN11
Then construct the wimlib-imagex command parameters to match this:
jensd@jensds-MacBook-Air ~ % wimlib-imagex split /Volumes/CCCOMA_X64FRE_EN-US_DV9/sources/install.wim /Volumes/WIN11/sources/install.swm 4000
Splitting WIM: 4526 MiB of 4526 MiB (100%) written, part 2 of 2
Finished splitting "/Volumes/CCCOMA_X64FRE_EN-US_DV9/sources/install.wim"
In the command above, we told to execute the wimlib-imagex tool (part of Wimlib) and passed some arguments:
- “split” to indicate that we want to split this larger file
- “/Volumes/CCCOMA_X64FRE_EN-US_DV9/sources/install.wim” which is the source file to split. Keep in mind that the name under /Volumes depends on the ISO name so you need to adjust this to the output of the previous command (ls -1 /Volumes)
- “/Volumes/WIN11/sources/install.swm” the destination of where the split files should end. As with the ISO name, here WIN11 is the volume label I gave to my USB drive when erasing it with Disk Utility. Again, you need to adjust this to the output of the previous command (ls -1 /Volumes)
- 4000 the max. size of the destination file, so the file will be split in a part of 4000MB and the rest.
After this command completes, you can see that now two files were created on the USB drive:
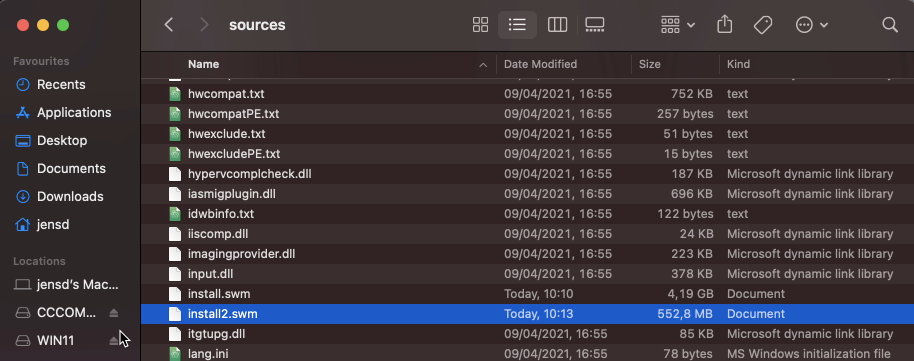
The Windows 10 installer knows how to deal with these and will just work fine. Even if these are actually for Windows 11.
(Optionally) download Windows drivers for your Mac
If you plan to use the USB drive, which you created with the above steps, to use this for installation on a Mac, it is a good idea to go through these additional steps.
The goal of this is to fetch the necessary drivers for use on Mac. I will use Brigadier for this. Brigadier, which is basically a script that will fetch all drivers based on the current or given Mac model identifier.
In case you plan to install Windows 11 on another Mac than the one which you are using to create the USB drive, first find the model identifier of that Mac by opening System Information (or top right Apple icon -> About This Mac -> System Report…):
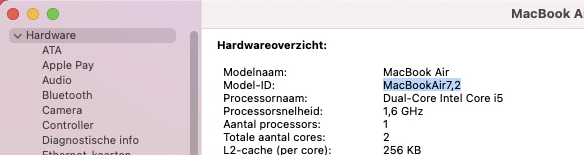
As you can seem the Model Identifier for the Macbook Air on which I plan to install Windows 11 is: MacBookAir7,2.
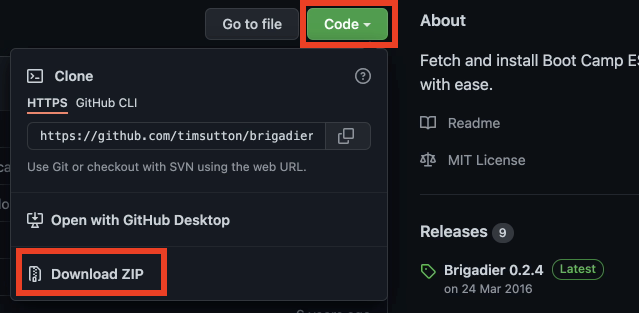
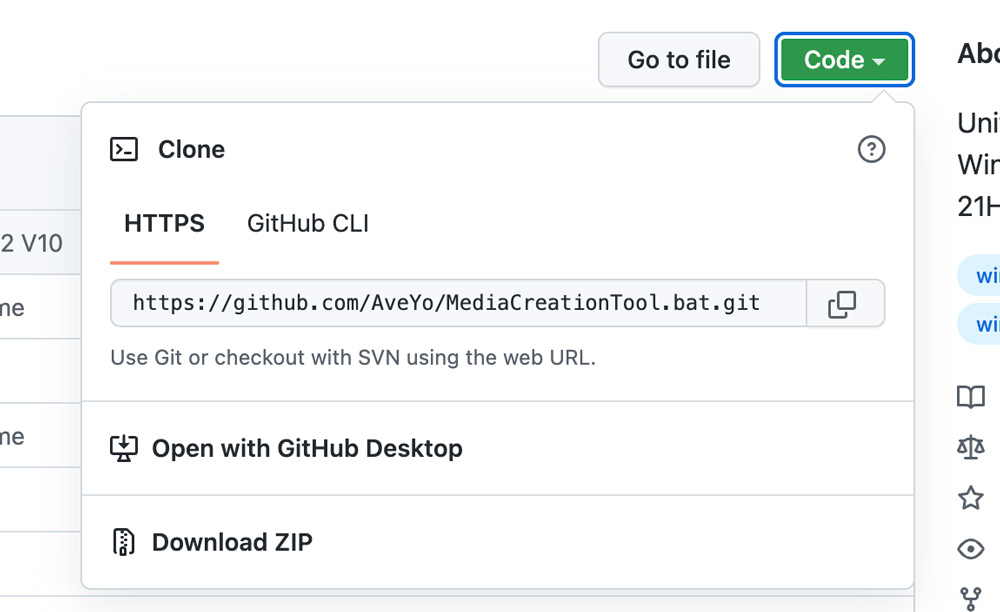
Now that we have that info, from the Github page of Brigadier: https://github.com/timsutton/brigadier, click the green Code button then choose to “Download ZIP”:
Once the file is downloaded, open a fresh Terminal session and navigate to the “brigadier-master” in your Downloads folder, then simply execute it using ./brigadier and pass the model number as an argument:
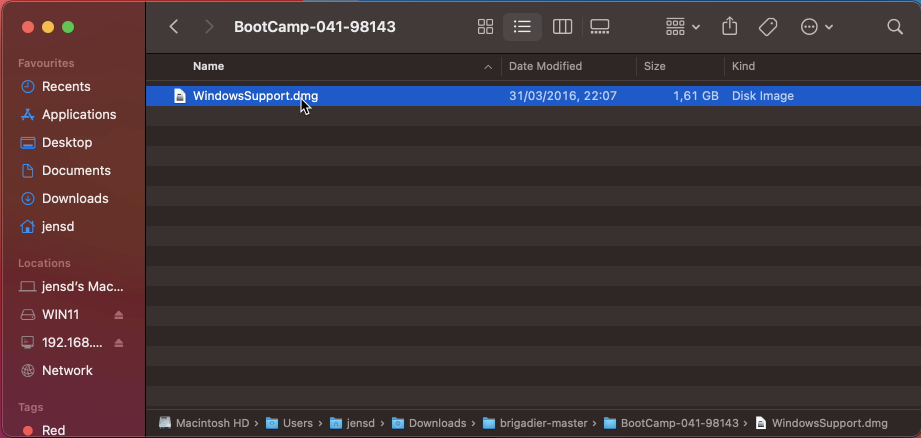
jensd@jensds-MacBook-Air ~ % cd Downloads/brigadier-master
jensd@jensds-MacBook-Air ~ % ./brigadier --model MacBookAir7,2
Using Mac model: MacBookAir7,2
...
Expanding flat package...
Extracting Payload...
Extracted to /Users/jensd/Downloads/brigadier-master/BootCamp-041-98143/WindowsSupport.dmg
jensd@jensds-MacBook-Air ~ %
As you can see in the output, the files got downloaded as a subfolder of brigadier-master as WindowsSupport.dmg:
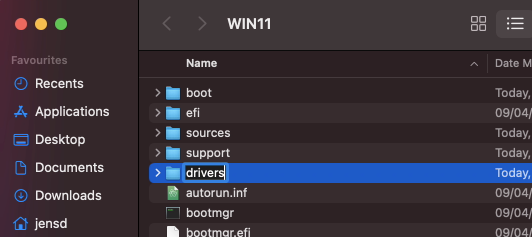
All that is left to do is to navigate to the folder using Finder, then to open WindowsSupport.dmg to mount it and to copy those files to the USB drive. I typically first create a folder drivers to put these in:
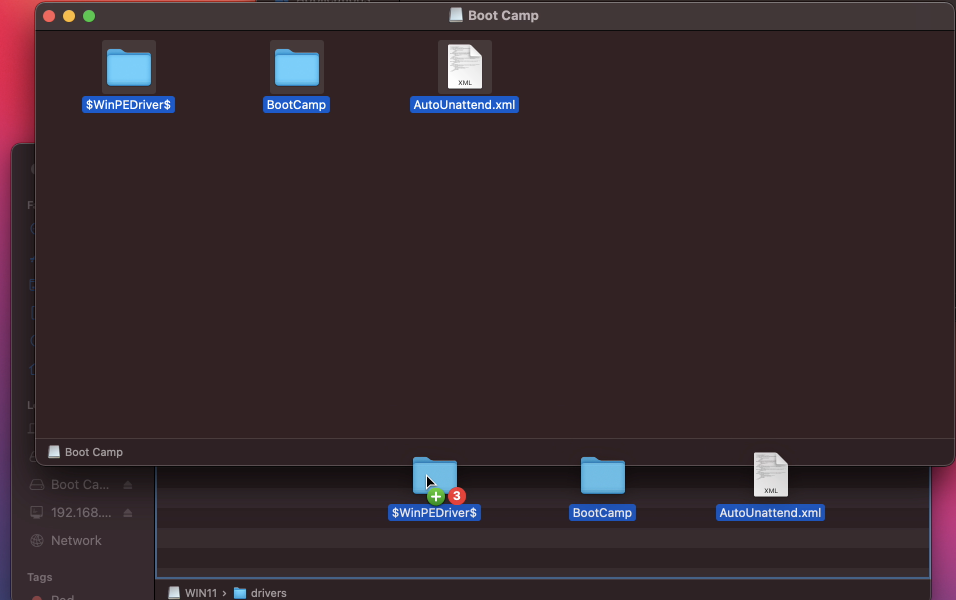
After going through the installation, executing BootCamp/setup.exe will install most of the required drivers or at least enough to continue the rest of the driver installation using Windows update.
Prepare your Mac for the Windows 11 installation
Now that we have the USB drive fully prepared, there is one more step to go through before we can do the installation. That is to partition your hard drive or SSD in order to have a place to install Windows 11. For this post, I will go for a dual boot where I will have Windows 11 and macOS next to each other on the same disk.
For this we need to launch Disk Utility on the Mac where you want to install Windows 11. In Disk Utility, just as we did for when preparing the USB drive, select to show All Devices first:
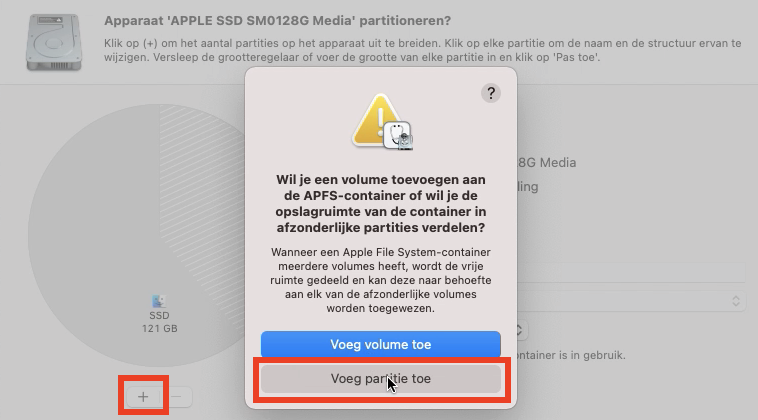
Then, select the SSD or Hard drive in your mac on the left side and choose “Partition”:

Click the + on the bottom of the window and choose to add a partition rather than a volume:
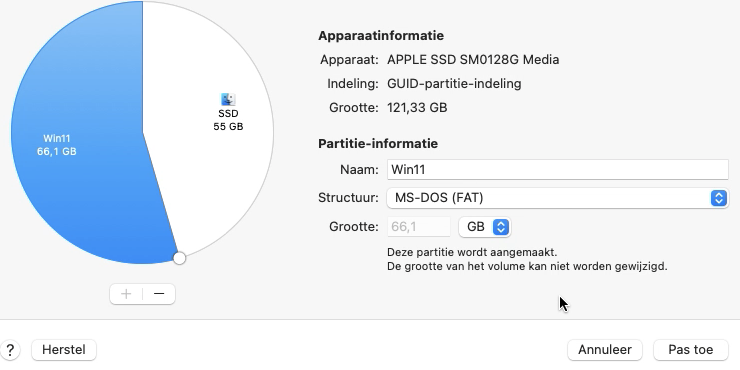
You can use the pie chart on the left side to resize the second, newly added partition, to the size which you prefer. Then give the partition a name, choose MS-DOS (FAT) as file system and click Apply:
Click continue when you get a warning that the system can become unresponsive for some time, while creating the partition and wait for the process to finish.
Don’t be surprised if you see the following or a similar error message:
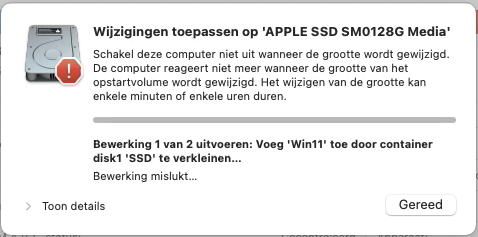
This is related to a bug in Big Sur and, as you might see, Disk Utility did not create a new partition for our Windows install but rather added a container disk.
To work around this, simply repeat the previous steps (select disk on the left side and click “Partition”). Now just change the type from APFS to MS-DOS (FAT):

After this, choose Partition and continue. This step shouldn’t take long at all and the result in Disk Utility looks like this:
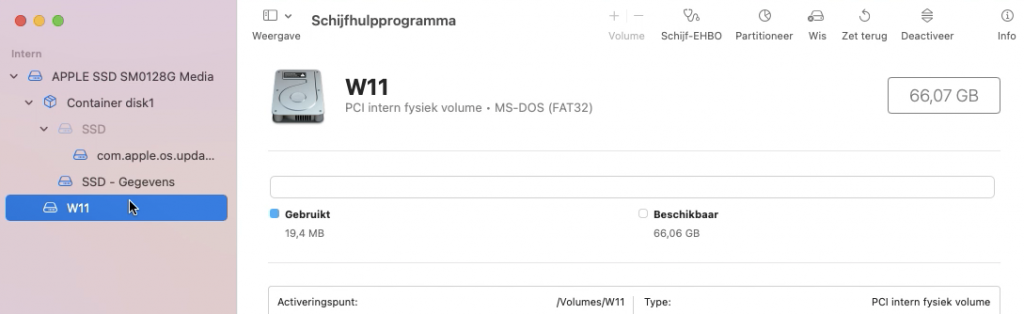
As you can see, another bug in Disk Utility changes the name to only keep the first letter of the Volume name… Nevertheless, we are good to continue to the next step and finally get Windows 11 installed on our Mac.
As the final step, the actual installation of Windows 11, we need to let the Mac on which you want to install boot from the USB drive. This is done by holding down the Alt key on boot and to select the USB drive from the boot loader. Don’t forget to first insert the USB drive you created in that machine 
If all goes well, you should see the bootloader after some time. In there you will see your current macOS installation and the USB drive which you created:
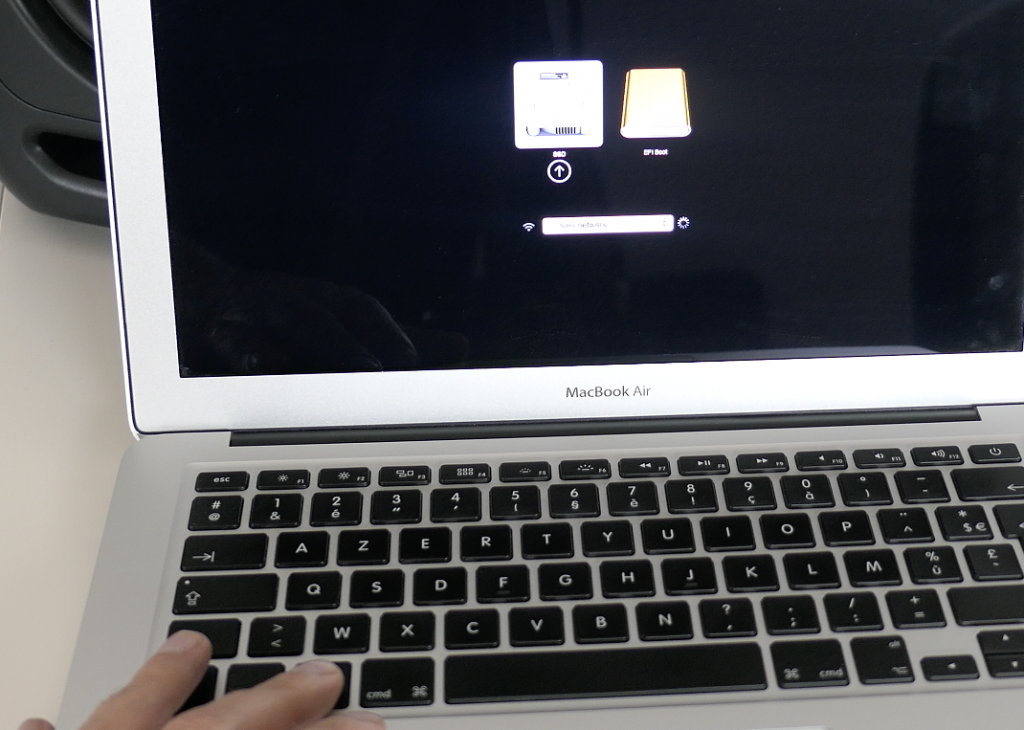
Select EFI Boot here to start the installation. Initially, it will have the look and feel as the Windows 10 installer. Which makes sense as that is actually what we are launching:
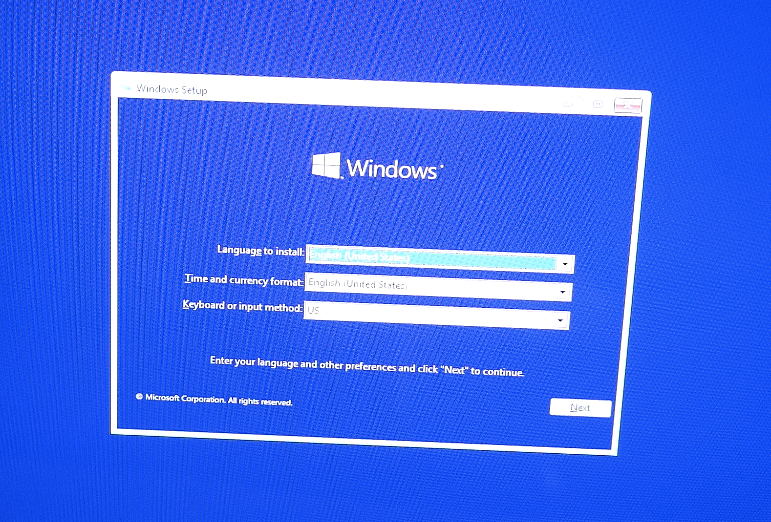
Select the language, region and keyboard of choice, click “Next”, then “Install Now”. In the next screen choose “I do not have a product key” and as soon as you arrive at the screen where you need to select which version to use, we can see the Windows 11 versions instead:
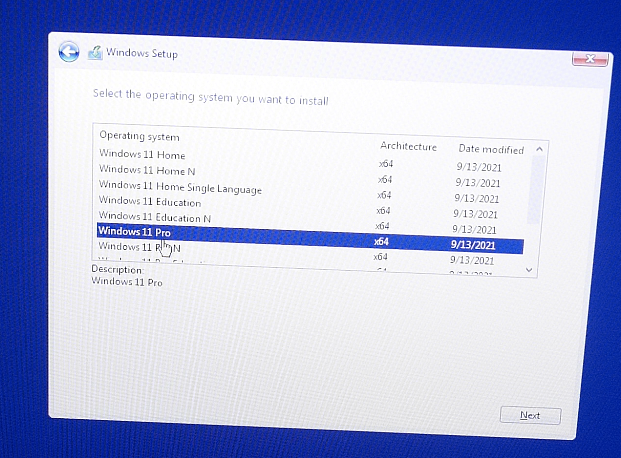
Here, select the version of choice and click “Next”. In the next screen, choose to accept the license and continue. Then choose for a custom install (Windows only (advanced)). In the next screen, you need to select where to install Windows 11:
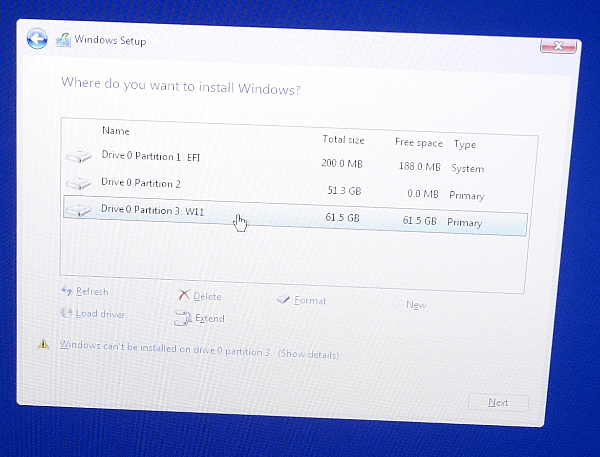
Here you have two options:
- If you only want Windows 11 on your Mac, you can delete all of the volumes shown here. Then click New, select it and click Next.
- In case you want to have both Windows 11 and macOS in dual boot, select only the volume which we created in the previous step (W11 in my case) and choose Format, then click Next.
The next steps are pretty straightforward and no different from a regular Windows 10/11 installation. After some time, you should be presented with the following dialog:
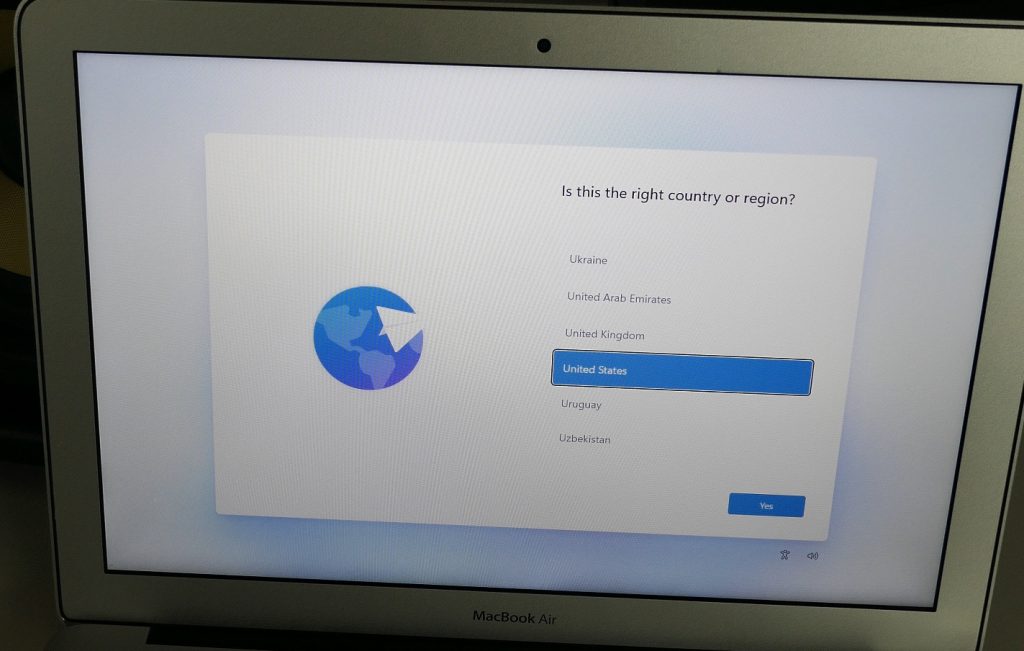
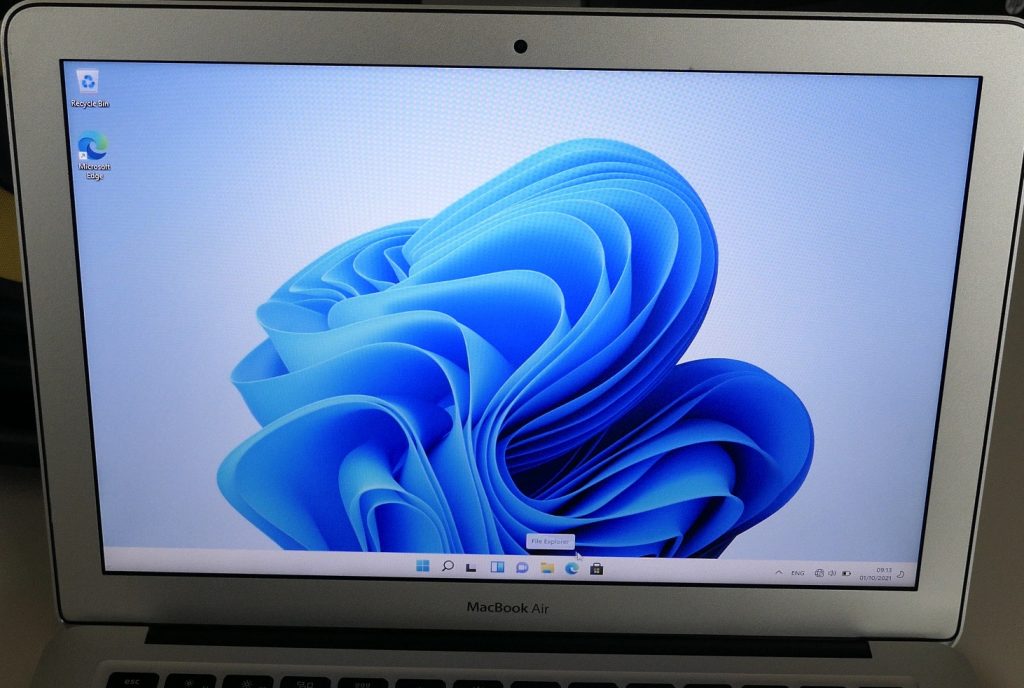
Here you need to answer some basic questions like your location, keyboard layout, network, username, password and some more questions regarding location and diagnostic info. After going through all of these and waiting a bit more, you should end up with the Windows 11 desktop on your Mac:
Install all drivers and tools
Although Windows 11 is now theoretically installed and working on your Mac, not everything is functioning just yet. Depending on your model of Mac and included drivers in Windows 11, some devices might not work yet. In my case for example, the wireless network adapter was not detected.
Exactly for this, we prepared those drivers with Brigadier. So we can simply navigate to our USB drive and launch Setup.exe from the drivers\BootCamp folder:
When the installer is complete, click Finish and choose to restart your device.
After the reboot, most devices and at least your device to connect to the network should be working again. From here, we will launch Windows Update and make sure we have the latest updates and potential remaining missing drivers:
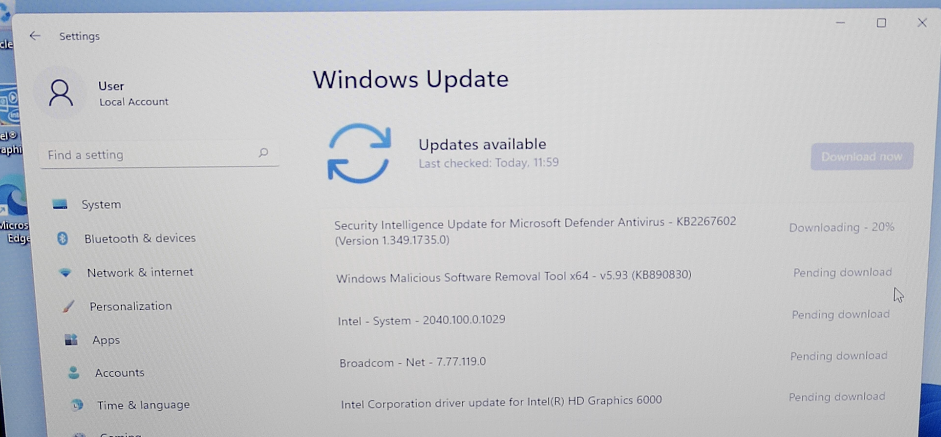
One more reboot later, you are done and have a Mac with Windows 11!
Switch between Windows and Mac when you decided to go for a dual boot install
After going through all the steps above, your Mac will boot by default in Windows 11. In order to switch back to macOS (temporarily), you can reboot and hold down the Alt key. Exactly the same as you did to boot from the USB drive when installing Windows 11.
In the boot loader, simply select the name of your macOS volume to boot to macOS and Windows to boot to Windows:
In case you want to change which one of these two boots by default, you can boot to macOS and start the “Startup Disk” utility. Here click the lock to be able to make changes, select the OS which you want to boot as default and click restart:
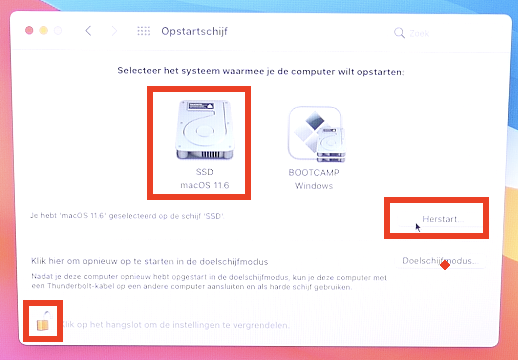
From here, the OS you selected will be the default.
Уровень сложностиПростой
Время на прочтение2 мин
Количество просмотров198K

В статье описана инструкция по установке Windows внутри MacOS.
На текущий момент автору статьи известно только два рабочих варианта:
-
Parallels Desktop — всё работает из коробки, но платно;
-
UTM — требует минимальных усилий, бесплатно;
В данной статье будет рассмотрен вариант установки через UTM.
Необходимо:
Установить brew
Необходимо в терминале выполнить команду:
/bin/bash -c "$(curl -fsSL https://raw.githubusercontent.com/Homebrew/install/HEAD/install.sh)"
Детальная инструкция по установке есть на официальном сайте.
Установить инструменты разработчика xcode
Необходимо в терминале выполнить команду:
xcode-select --install
Установить UTM
Необходимо в терминале выполнить команду:
brew install utm
Установить qemu
Необходимо в терминале выполнить команду:
brew install qemu
Скачиваем дамп Windows
Выбираем версию Windows:
-
Windows 10
-
Windows 11
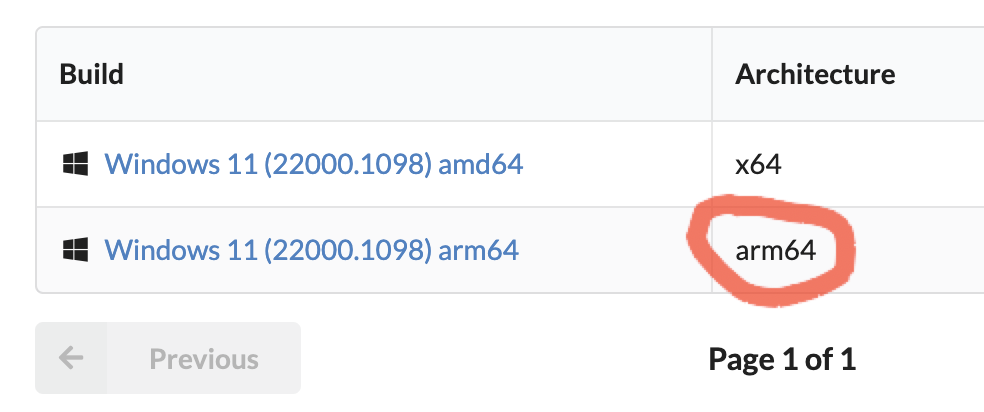
Скачиваем подходящую версию дампа с архитектурой arm64:
Выбираем язык:
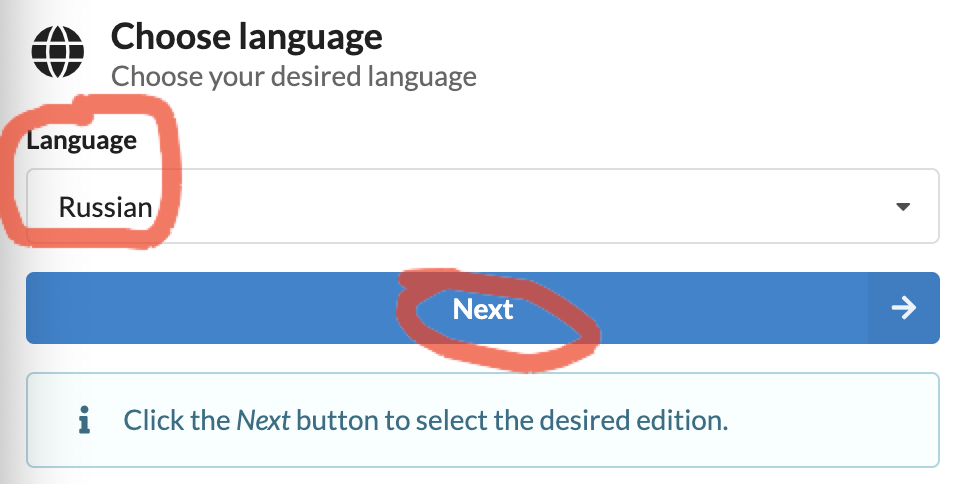
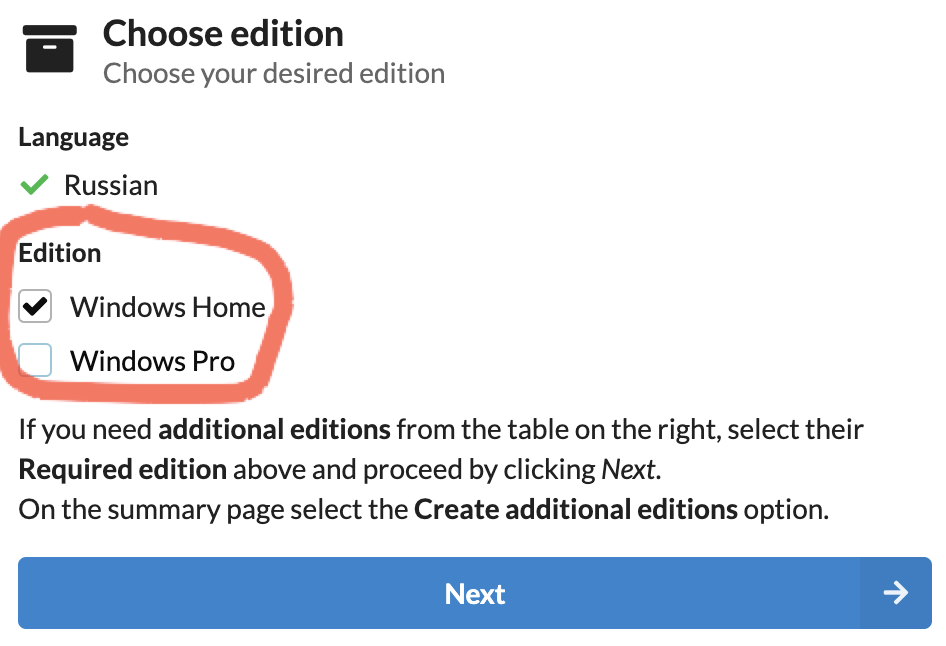
Выбираем выпуск:
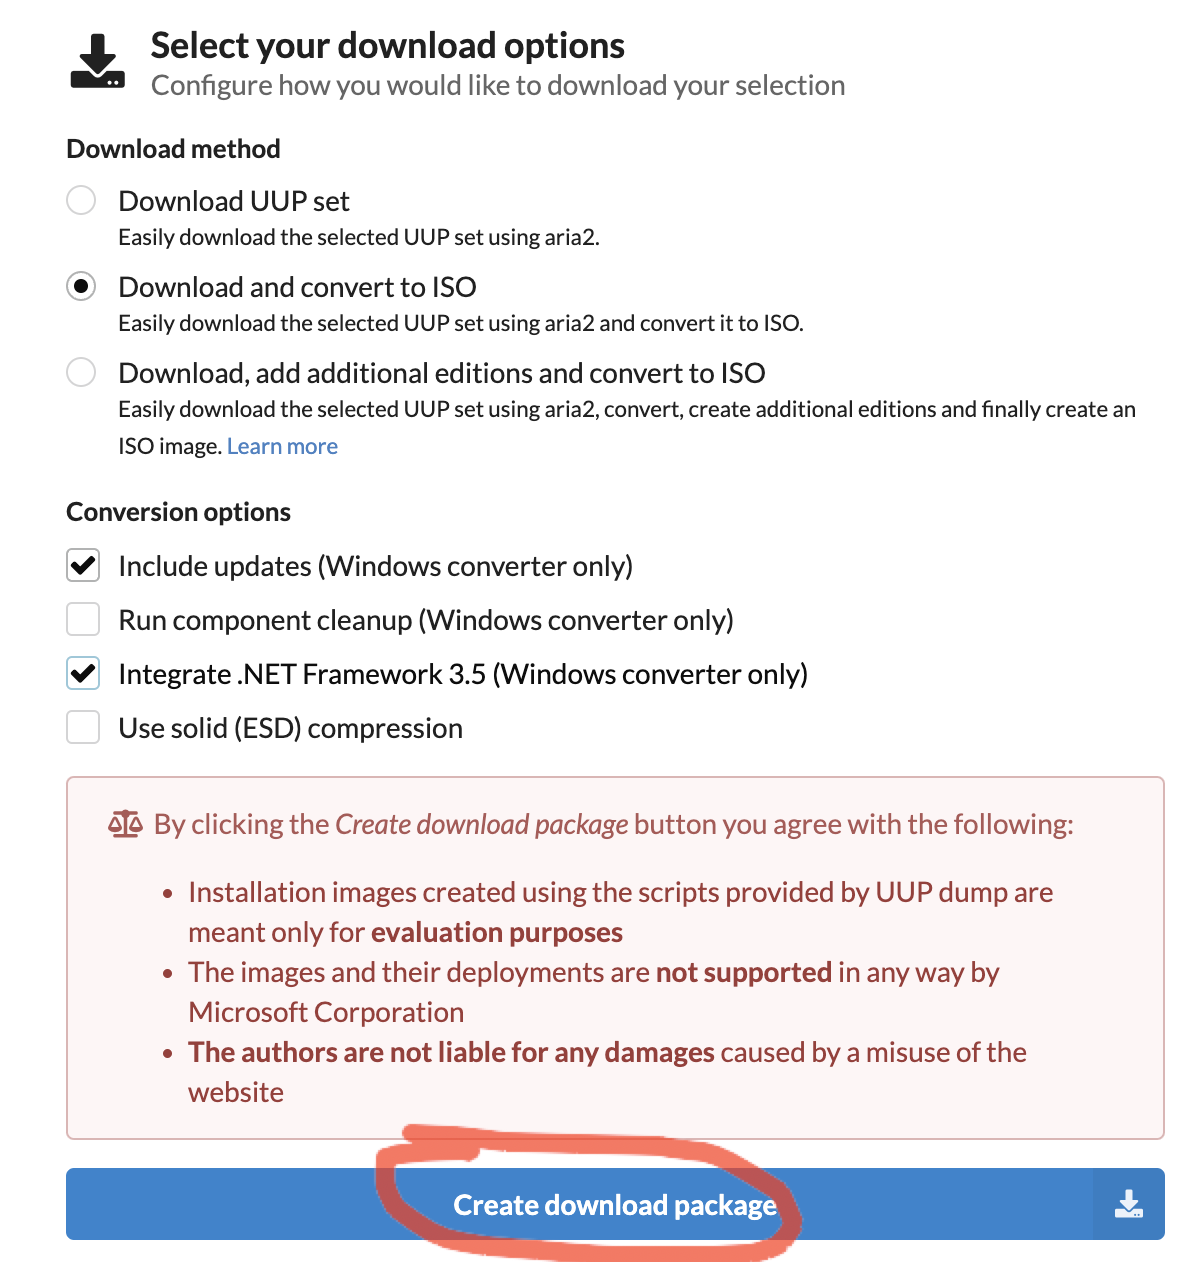
Скачиваем package:
Распаковываем архив, для этого два раза кликаем по нему:

В терминале необходимо перейти в скачанную папку.
И выполнить в ней команды:
brew install aria2
brew tap sidneys/homebrew
brew install cabextract wimlib cdrtools sidneys/homebrew/chntpw
sh uup_download_macos.sh
Ждём окончания загрузки, после этого в папке будет создан новый ISO-файл.
Устанавливаем образ Windows ч.1
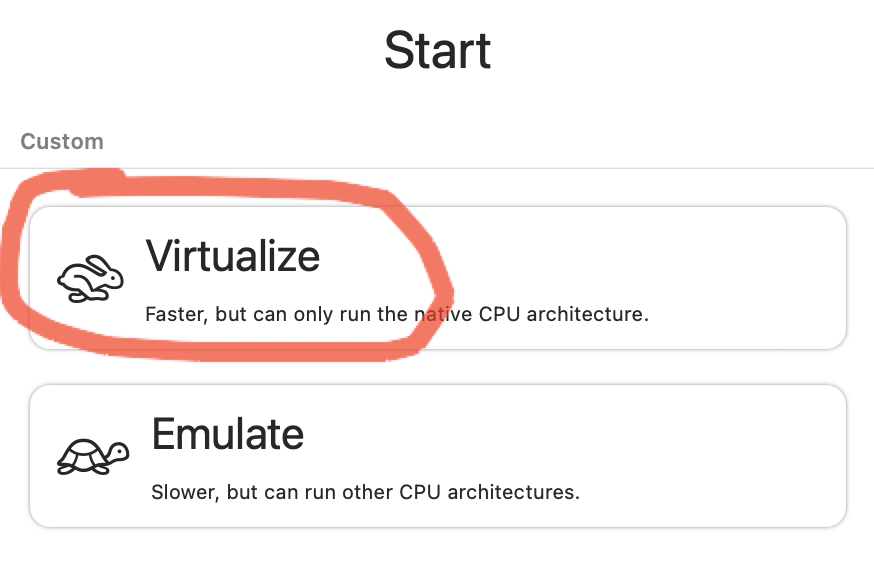
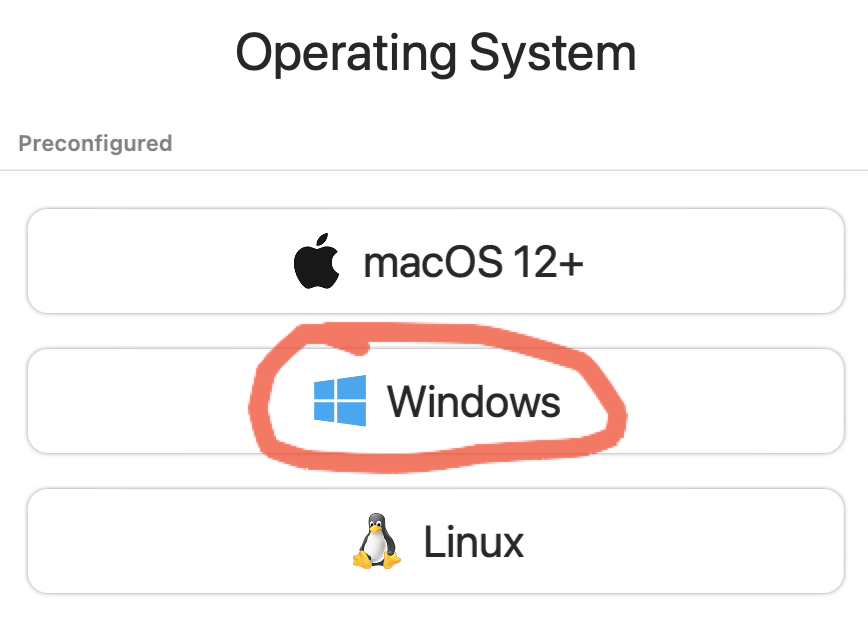
Запускаем ранее установленную программу UTM и выбираем:


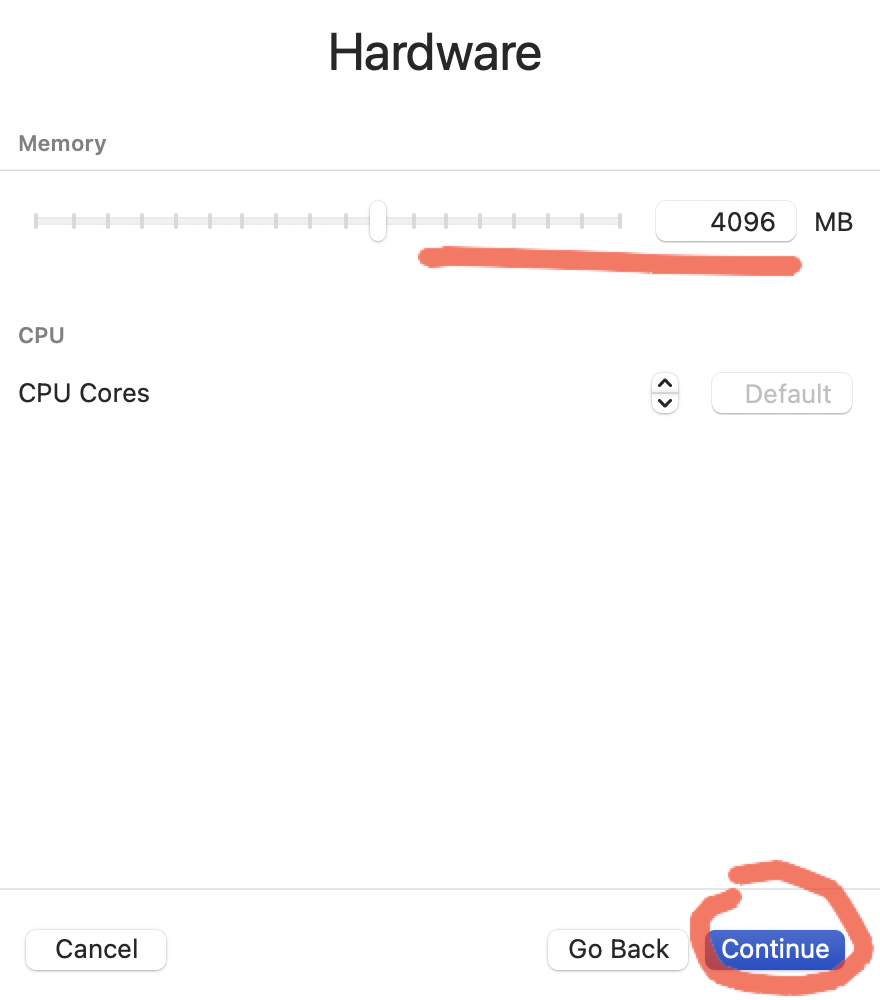
Выбираем количество ресурсов, больше — быстрее будет работать.
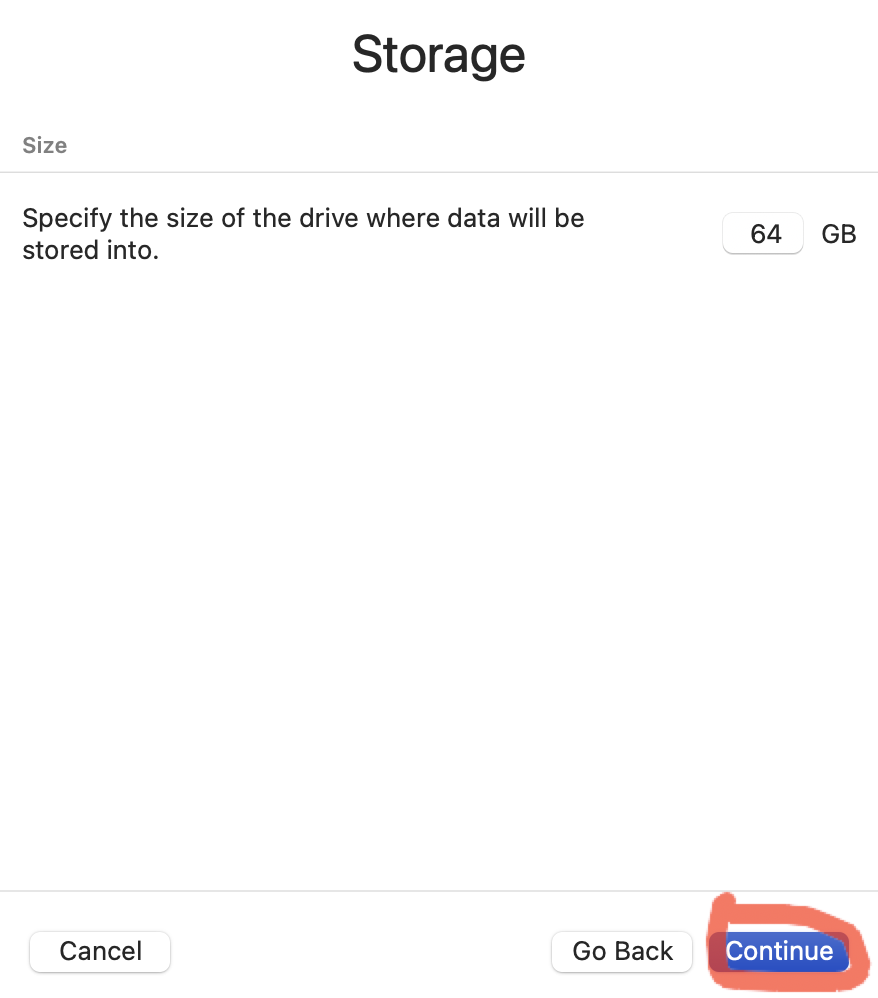
Выбираем размер выделяемого дискового пространства
Выбираем папку, которая будет общей для систем


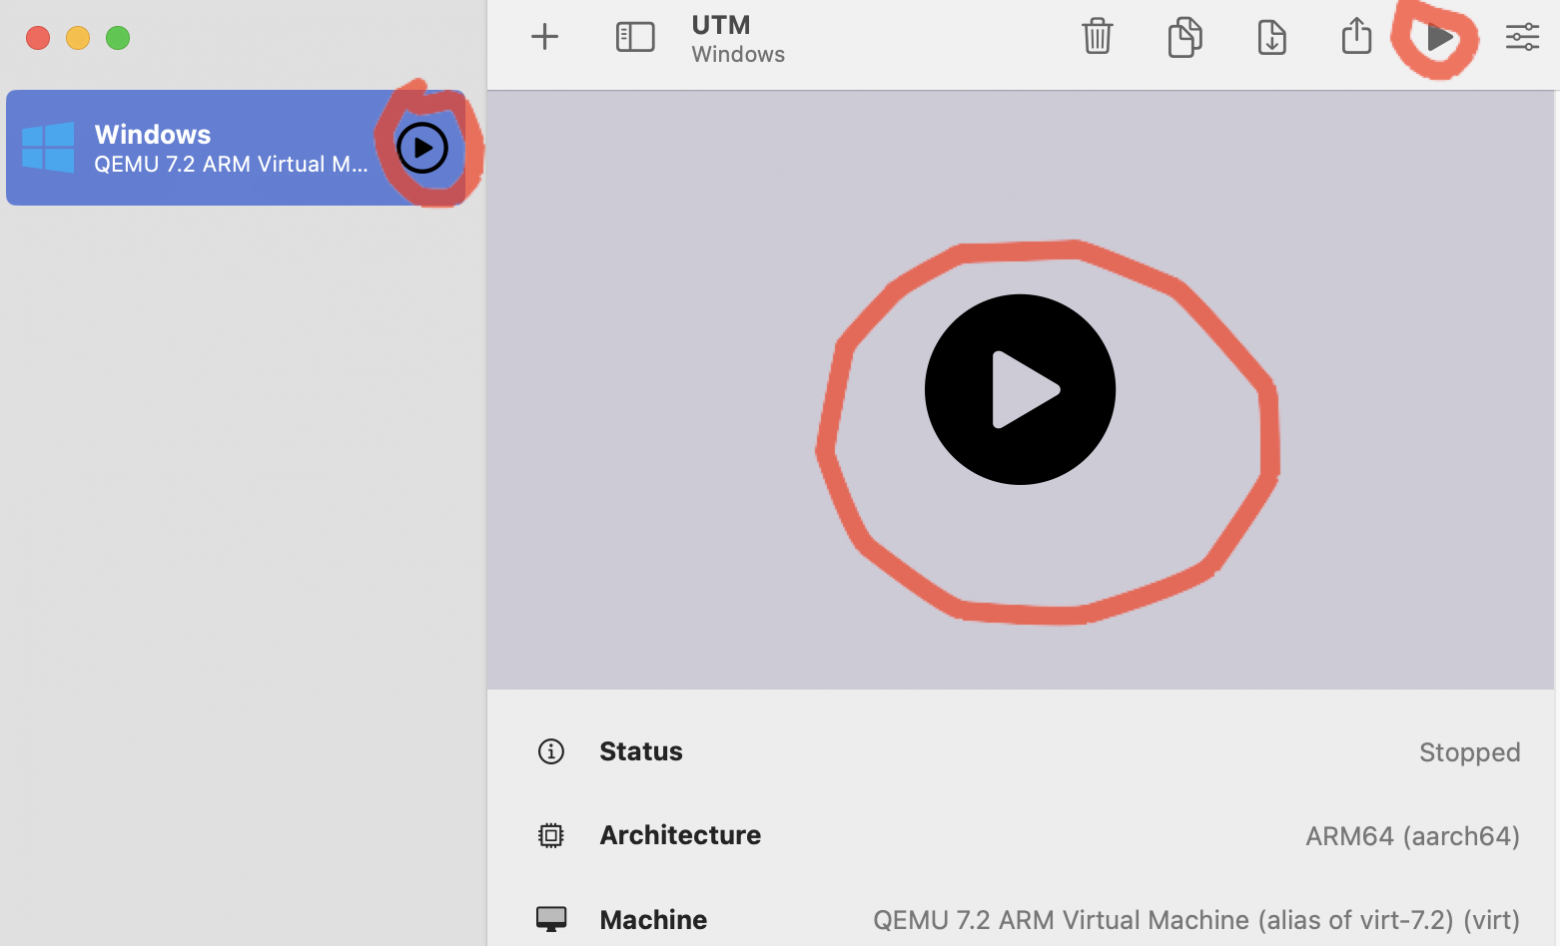
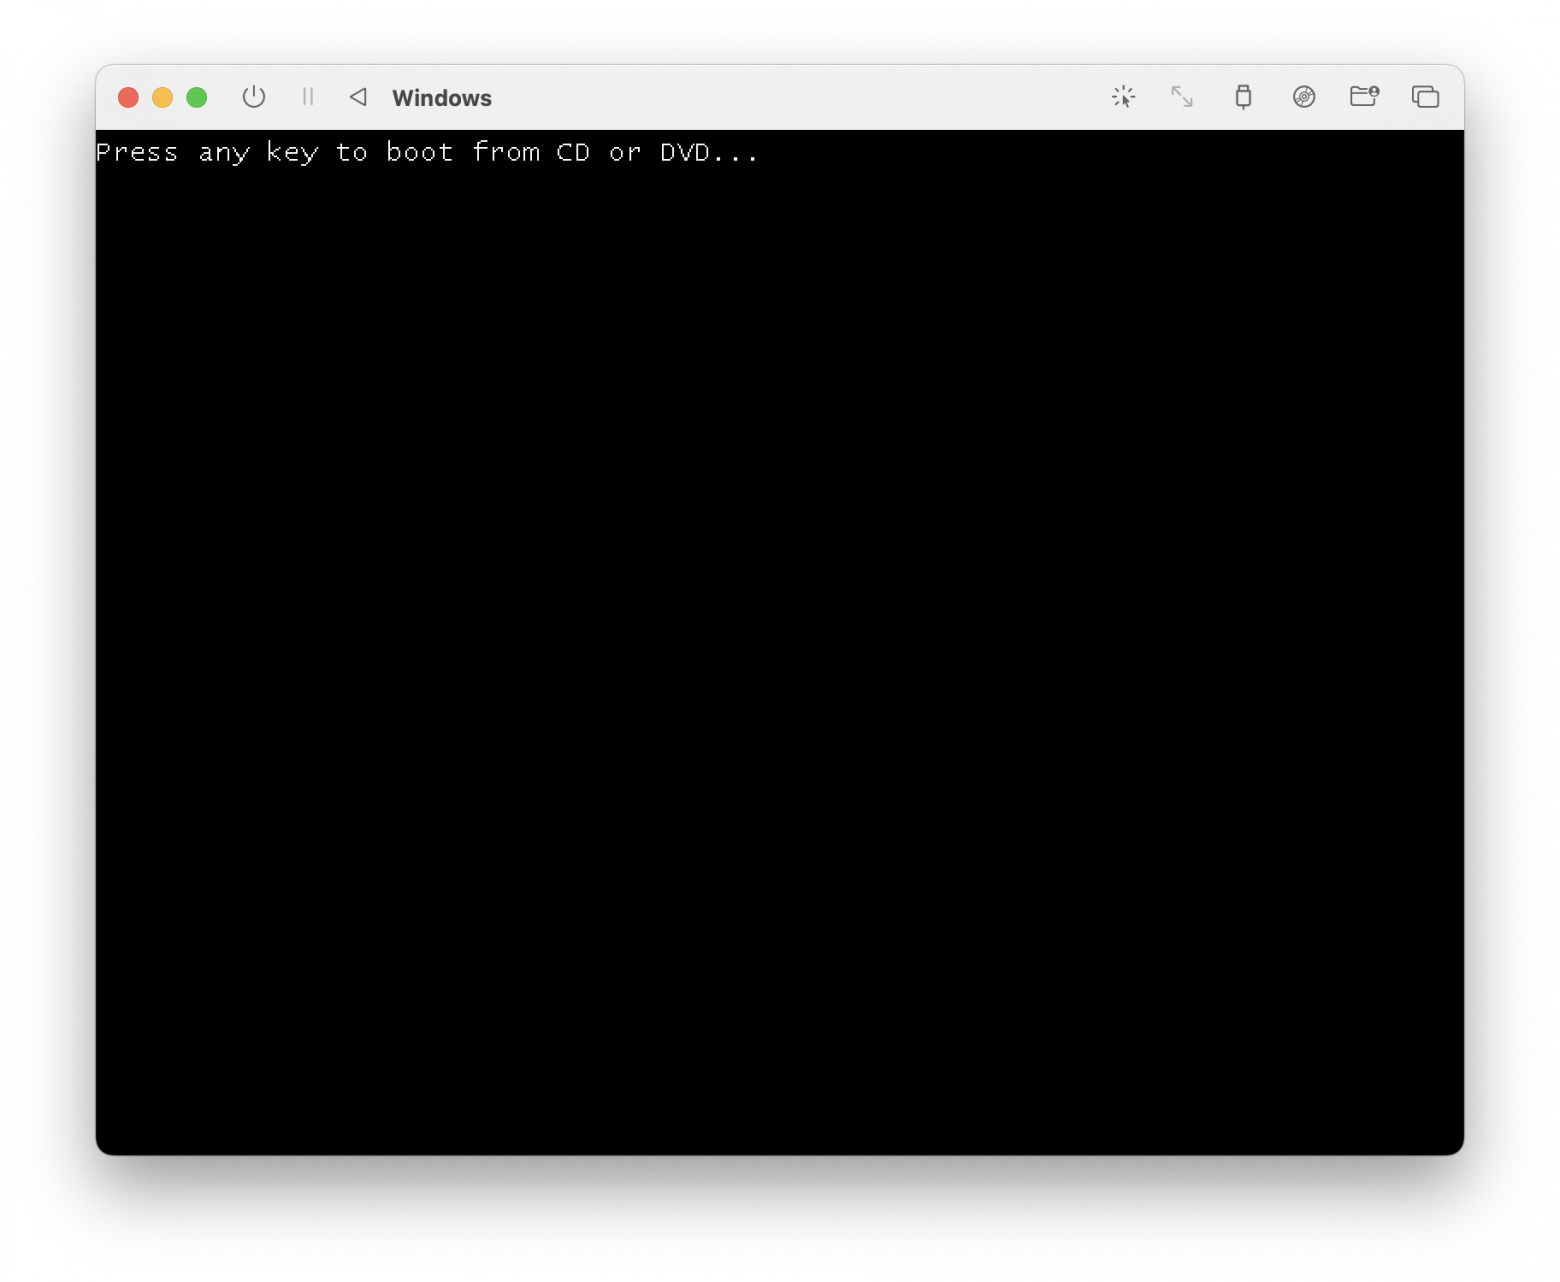
Запускаем Windows!
Выйдет вот такое окно и нужно успеть нажать какую-нибудь клавишу! Если не успели, то можно перезапустить виртуальную машину.
Необходимо набрать команду:
exit

Выбираем Boot Manager
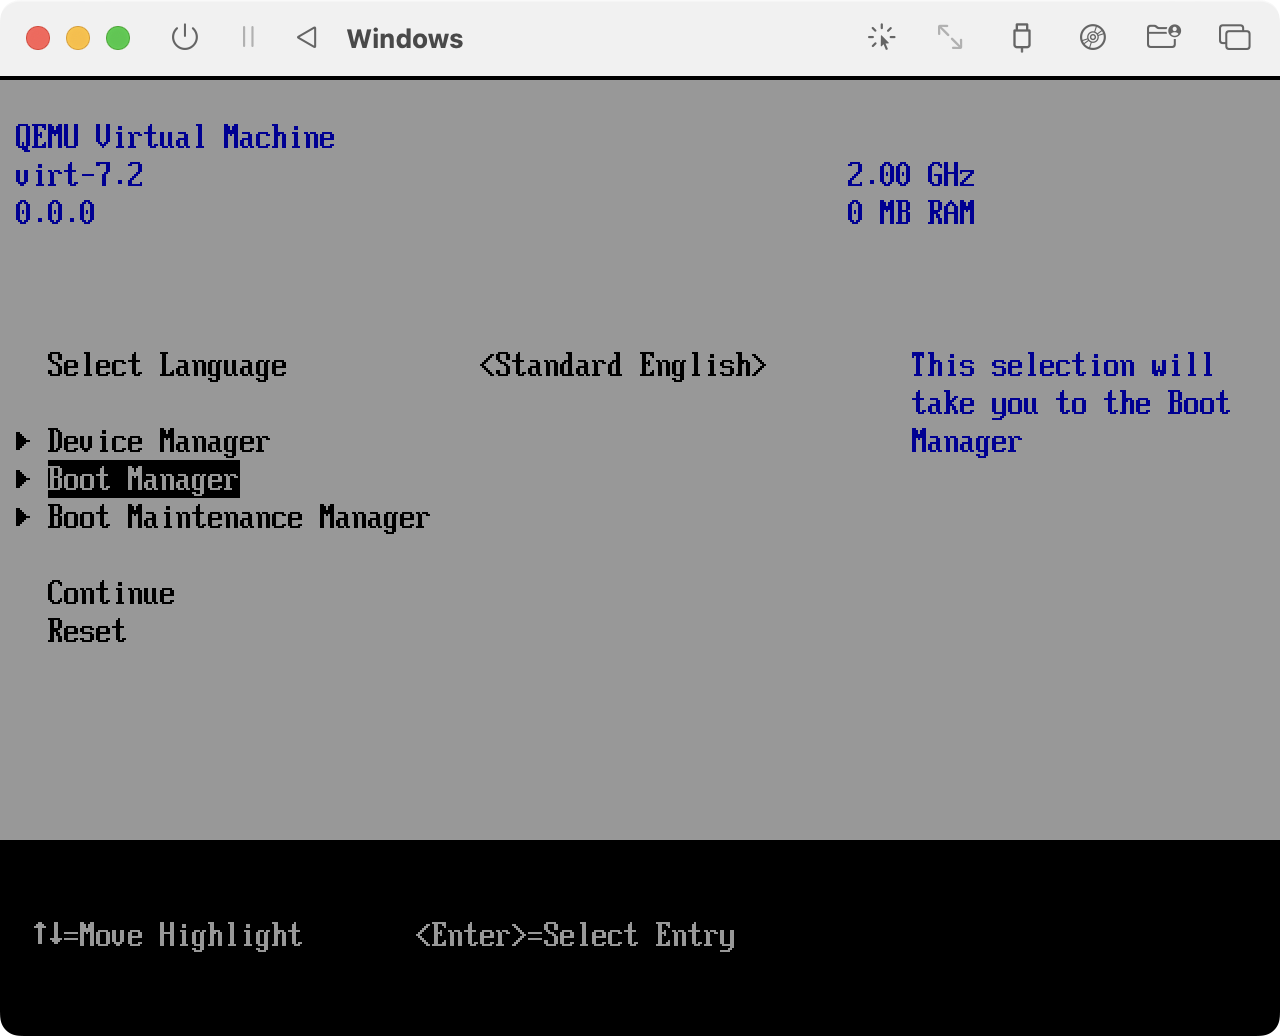
Выбираем первый пункт:


Устанавливаем образ Windows ч.2
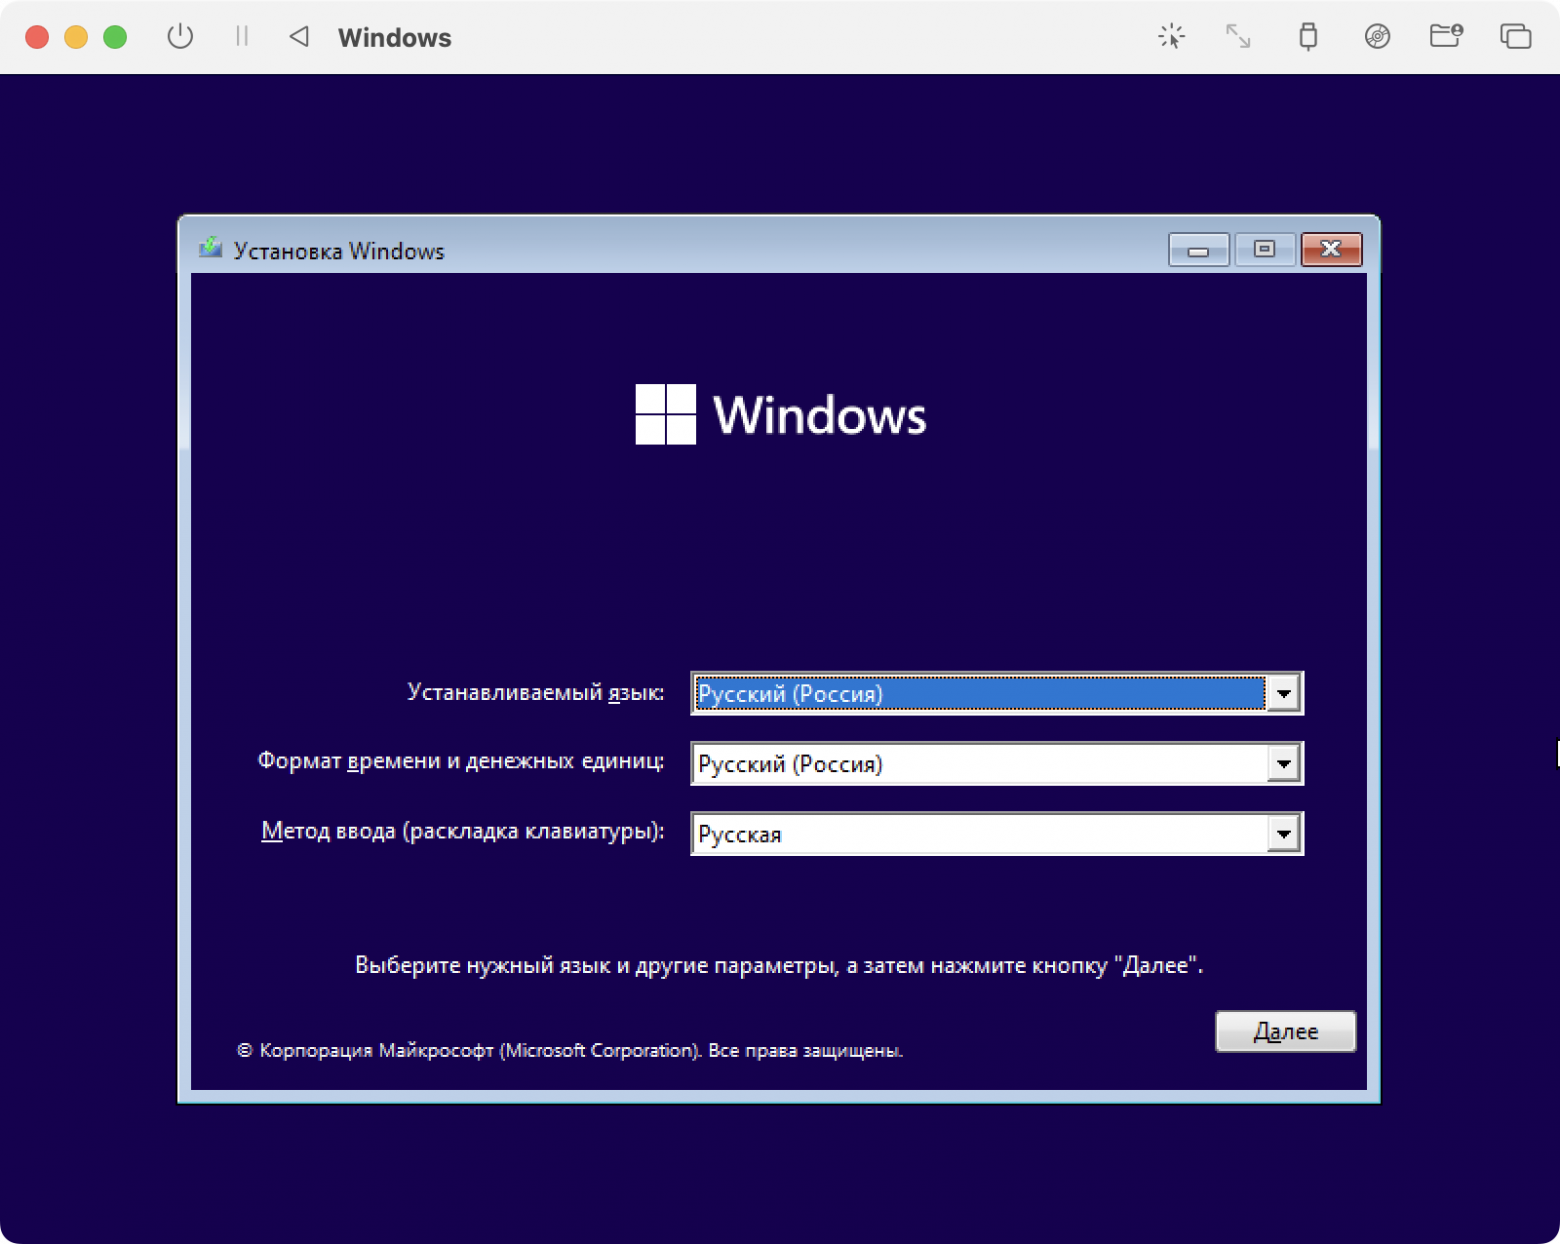
Далее следует стандартная процедура установки windows
На выходе мы получаем вот такой результат.
- To create a Windows 11 USB installer from macOS, you’ll have to download the official ISO file, format a USB flash drive using the “diskutil” tool, split the “install.wim” file with the “wimlib” tool, and transfer the files to the bootable USB drive.
- Alternatively, you can also use the WinDiskWriter app, which makes it easier to create a Windows USB installer similar to the Rufus tool.
UPDATED 7/12/2024: If you have to install Windows 11 (or 10) on a computer but only have a Mac running Apple’s macOS, you can create a bootable USB flash drive using a non-Windows machine in the same way you can use a Windows computer to create a macOS bootable USB installer.
Although you have multiple methods to create an installation media for Windows 11, they are only available for Windows devices. However, it’s also possible to use macOS. The only issue is that the operating system only lets you format the USB storage using the FAT32 file system that can only store files less than 4GB when the “install.wim” file (containing the installation files) is usually larger than 4GB (usually 5.6GB). As a result, we have to resource third-party tools to split the image into two smaller files to complete the process.
In addition, you can also use WinDiskWriter, which is a third-party app available through GitHub as a free download and streamlines the USB flash drive creation to process to only a few clicks without the need to use the Terminal command console.
In this guide, I will outline the steps to create a bootable USB using macOS to install Windows 11 as well as Windows 10 using the macOS Terminal command console and the WinDiskWrinter app.
- Create Windows 11 (or 10) bootable USB on macOS using Terminal
- Create Windows 11 (or 10) bootable USB on macOS using WinDiskWriter
Create Windows 11 (or 10) bootable USB on macOS using Terminal
To create a bootable USB to clean install Windows 11 using macOS, use these steps:
-
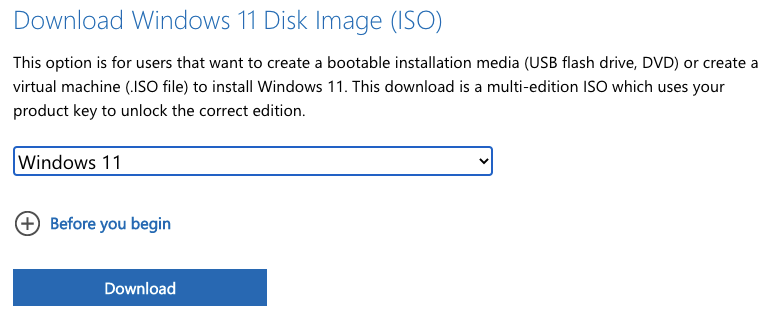
Open the Windows 11 ISO download page.
-
Choose the Windows 11 option under the “Download Windows 11 Disk Image (ISO) for x64 devices” setting.

-
Click the Download Now button.
-
Select the installation language.

-
Click the Confirm button.
-
Click the “64-bit Download” button to save the ISO file on your macOS device, more specifically in the “Downloads” folder.
-
Connect a USB flash drive of at least 8GB of storage.
Quick note: This process erases everything on the drive. As such, it’s recommended that any important data be backed up in the storage.
-
Open Launchpad.
-
Search for Terminal and click on the top result to open the command console.
-
Type the following command to identify the USB flash drive storage and press Return:
diskutil list

Quick note: In my case, the USB is identified as “disk4.”
-
Type the following command to clean and format the USB flash drive to make it bootable, and press Return:
diskutil eraseDisk MS-DOS "Windows_USB" MBR disk4
Quick tip: You can change “Windows_USB” to any name you want, but to avoid issues while running typing commands, make sure the name doesn’t include any space. I made that mistake and had to retype some of the commands because names with spaces have to be specified with quotation marks. Also, change “disk4” for the identifier of your USB flash drive.
-
Type the following command to open the “Downloads” folder where the ISO file is located and press Return:
cd Downloads
-
Type the following command to mount the Windows 11 ISO file to macOS and press Return:
hdiutil mount Win11_2xH2_English_x64vx.iso
-
Type the following command to transfer the installation files from the ISO file to the USB flash drive (excluding the install.wim file because it’s too large a FAT32 partition) and press Return:
rsync -avh --progress --exclude=sources/install.wim /Volumes/CCCOMA_X64FRE_EN-US_DV9/ /Volumes/Windows_USB
-
Type the following command to install the Homebrew tool on macOS and press Return:
/bin/bash -c "$(curl -fsSL https://raw.githubusercontent.com/Homebrew/install/HEAD/install.sh)"
Quick note: Homebrew is a package manager that will allow you to install the “wimlib” command tool to split the “install.wim” file and transfer it to the USB flash drive.
-
Confirm your macOS account password and press Return to continue.
-
Type the following command two commands to add Homebrew to your “PATH” and press Return on each line:
(echo; echo 'eval "$(/opt/homebrew/bin/brew sheval "$(/opt/homebrew/bin/brew shellenv)"ellenv)"') >> /Users/YOUR-ACCOUNT/.zprofile
eval "$(/opt/homebrew/bin/brew shellenv)"

In the command, update “YOUR-ACCOUNT” to match the name of your macOS account.
-
Type the following command to install the wimlib tool and press Return:
brew install wimlib
-
Type the following command to split the “install.wim” image and transfer the packages to the USB flash drive, and press Return:
wimlib-imagex split /Volumes/CCCOMA_X64FRE_EN-US_DV9/sources/install.wim /Volumes/Windows_USB/sources/install.swm 3500
Quick note: The “3500” number is the size in MiB of the file split. You can specify any number as long as it’s less than 4GB.


Once you complete the steps, you will end up with a bootable USB flash drive that you can connect to a computer to perform a clean install of the operating system.
Create Windows 11 (or 10) bootable USB on macOS using WinDiskWriter
To create a Windows 11 bootable USB with the WinDiskWriter tool, use these steps:
-
Open the Windows 11 ISO download page.
-
Choose the Windows 11 option under the “Download Windows 11 Disk Image (ISO) for x64 devices” setting.
-
Click the Download Now button.
-
Select the installation language.
-
Click the Confirm button.
-
Click the “64-bit Download” button to save the ISO file on your macOS device, more specifically in the “Downloads” folder.
-
Connect a USB flash drive of at least 8GB of storage.
Quick note: This process erases everything on the drive. As such, it’s recommended that any important data be backed up in the storage.
-
Open the WinDiskWrinter download page.
-
Click the WinDiskWriter.x.x.zip option to download the file on your Mac.

-
Press the Control key + click the WinDiskWriter Zip file, and choose the Open option to extract the tool.
-
Press the Control key + click the extracted WinDiskWriter tool file, and choose the Open option.
Quick note: Since this is not an official app, you will receive the “WinDiskWriter.app can’t be opened because Apple cannot check it for malicious software” message, which is an expected behavior for this app.
-
Press the Control key + click the extracted WinDiskWriter tool file again, and choose the Open option.

-
Click the Open button.
-
Click the Choose button in the “Windows Image” setting.

-
Select the Windows 11 (or 10) ISO image.
-
Click the Open button.
-
(Optional) Check the “Patch Installer Requirements” option to install Windows on unsupported hardware.
-
(Optional) Check the “Install Legacy BIOS Boot Sector” option to install the operating system on a device without UEFI firmware. (This option will require to reopen the app.)
-
Click the Start button.
-
Click the Start button again.
-
Click the Allow button.


After you complete the steps, you will have a bootable USB flash drive to install the operating system.
Update July 12, 2024: This guide has been updated to ensure accuracy and reflect changes to the process.
Why You Can Trust Pureinfotech
The author combines expert insights with user-centric guidance, rigorously researching and testing to ensure you receive trustworthy, easy-to-follow tech guides. Review the publishing process.
I should emphasize that I am providing these instructions so Mac users can enjoy the benefits of Windows 11 in their Boot Camp installs, not so that the product is downloaded for free.
Prerequisites of this guide
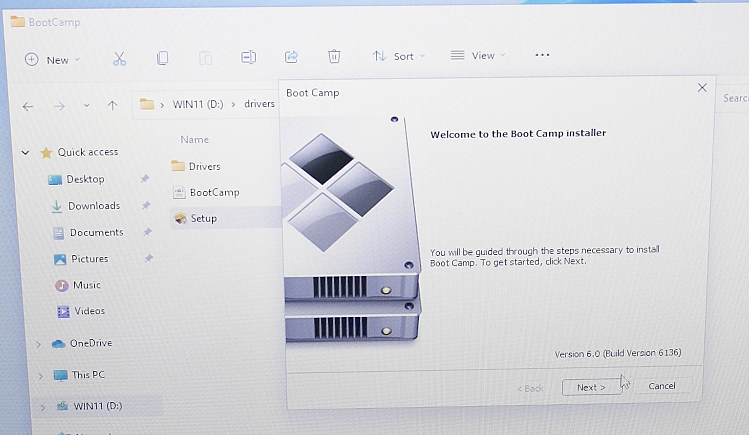
The first step to installing Windows 11 on your Mac with this guide is having Windows 10 already set up in Boot Camp. If you need help with this initial step, Apple provides instructions on its Boot Camp Support Page. This entire guide is meant to be followed while running your Windows 10 Boot Camp.
Guide Compatibility
It should be noted that in order to install any version of Windows with Boot Camp, your Mac needs to have an Intel chip. With that established, these steps should work on any Mac that can run Windows 10. This includes any MacBook Pro, MacBook Air or iMac with an Intel chip.
The Magic Tool
The program that makes installing Windows 11 on your Mac possible is called “MediaCreationTool.” I previously wrote about it in my 2021 article “Install Windows 11 on a 2015 MacBook Pro.” Since then, the program has been greatly improved and the install method is way simpler. Plus, it’s been so streamlined, I’m confident the steps will work on any Intel Mac that can run Windows 10 in Boot Camp. I’ve tested it on a 2013 iMac, 2015 MacBook Pro, 2015 MacBook Air and a 2019 MacBook Pro. As a bonus, these steps will also work for any Windows 10 virtual machine, such as those created by Parallels. Let’s get started.
Download MediaCreationTool.bat from GitHub
MediaCreationTool needs to be downloaded from its official project repo on GitHub. Don’t downloaded it from anywhere else.
The first link below is to the exact version of the program I used for this guide. Alternatively, you can use the second link, which is to the latest version of the program. Since MediaCreationTool could update at any time though and potentially break this install method, if you want to follow the steps in this guide exactly, use the first link.
Guided Version – 2024/01/04
https://github.com/AveYo/MediaCreationTool.bat/tree/2f1f304652175d1d8c9a3a2f8eff6bb0ff881b13
Latest Version
https://github.com/AveYo/MediaCreationTool.bat
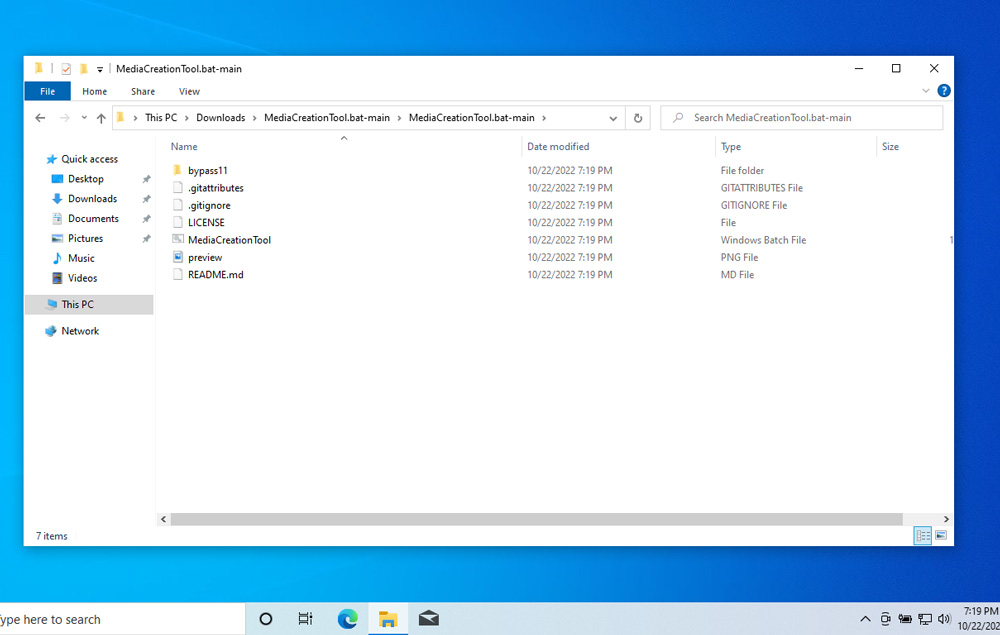
Once you’re on the program’s GitHub repo page, click the big green Code button and select “Download ZIP” from the drop-down. The image below should match what you’ve downloaded and unzipped.
Download the official Windows 11 23H2 ISO from Microsoft
Official Download Page
https://www.microsoft.com/software-download/windows11
- Scroll down to “Download Windows 11 Disk Image (ISO) for x64 devices”
- Select “Windows 11 (multi-edition ISO for x64 devices)” from the drop-down
- Click “Download Now”
- Select your language from the next drop-down
- Click “Confirm”
- Click “64-bit Download” and the ISO will begin downloading, most likely to your
Downloadsfolder
Pro Tip
Never download an ISO (a Windows file format) or DMG (a Mac file format) from a website you don’t completely trust.
Disable User Account Control (UAC)
Before using MediaCreationTool, disable User Account Control. It isn’t necessary, but it will save you from having to click confirm on a safety prompt after every single step. Open Windows Start menu, type UAC, and select “Change User Account Control settings.” Control Panel will open, and then move the slider to “Never notify” at the bottom and click OK.
Disabling User Account Control (UAC)
(If any of the Youtube videos fail to load, just refresh the page)
Time for MediaCreationTool
Unzip your downloaded folder and navigate into the directory bypass11. Double-click on Skip_TPM_Check_on_Dynamic_Update. A blue “Windows protected your PC” prompt will appear. Click “More info” and then “Run anyway.” A command prompt will appear saying “Installed.” Wait 6 seconds for the window to close on its own or hit Enter.
MediaCreationTool.bat folder and running Skip_TPM_Check_on_Dynamic_UpdateTime to install Windows 11 23H2
Locate your downloaded Windows 11 ISO (most likely it’s in your Downloads folder, right next to your MediaCreationTool.bat folder). Double-click the file – it will mount and then display its disc contents. Double-click setup, and after a brief pause, the “Install Windows 11” wizard will appear. Click “Change how Setup downloads updates” towards the top, select “Not right now”, and then “Next”. “Accept” the license, and it will then say “Making sure you’re ready to install”.
When it gets to “Ready to install”, it recaps that it will “Install Windows 11 Home” and “Keep personal files and apps”. Most likely you want to keep your existing files, but just in case you want a fully clean install, select “Change what to keep”. Finally click “Install” and a blue “Installing Windows 11” view will take over the whole screen. For the remainder of the install you don’t need to click anything.
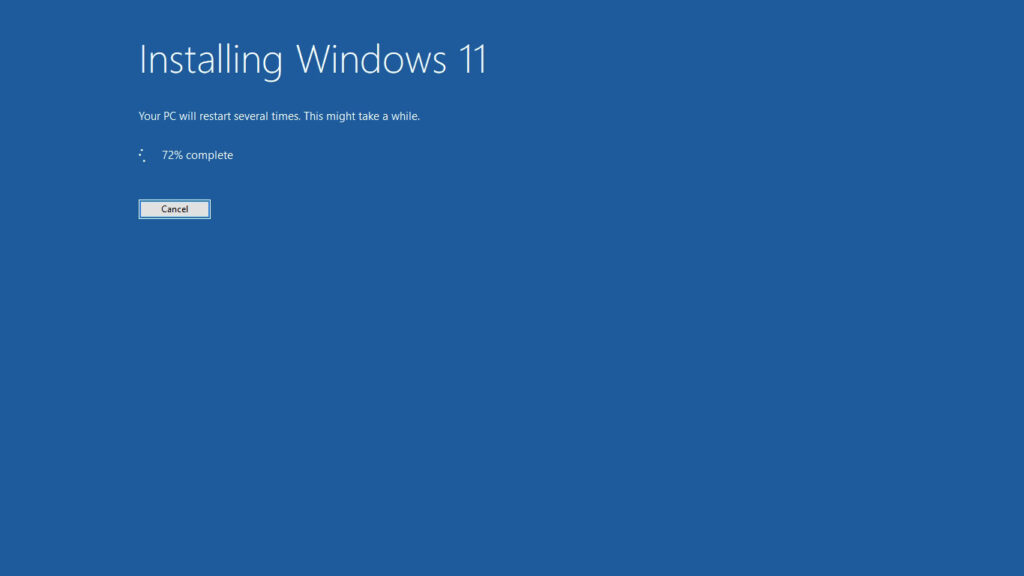
Eventually it will restart, and you will be greeted by the new Windows 11 logo.
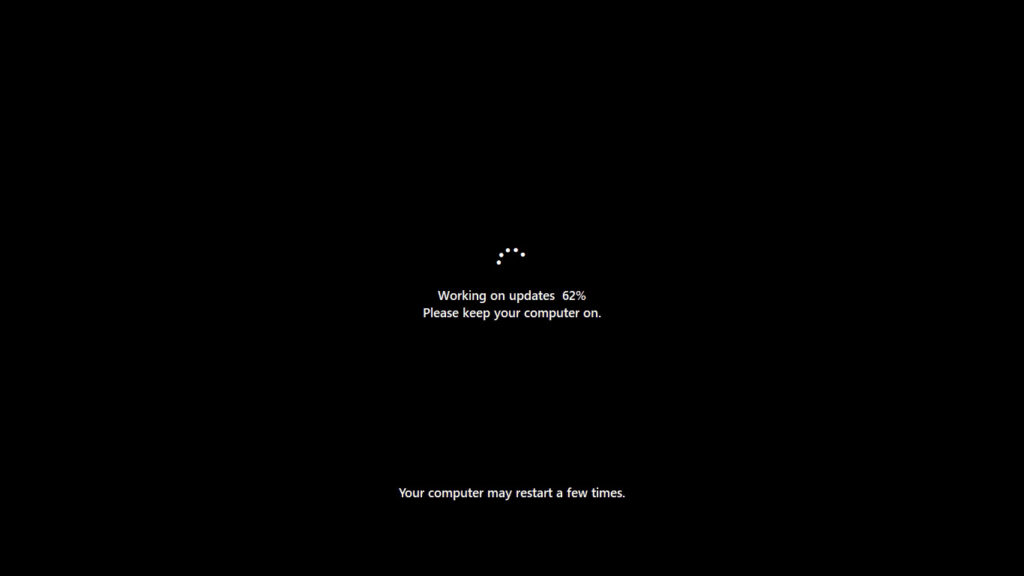
Then a black screen will appear with a “Working on updates” percentage-completion measure.
Once those updates are finished, you’ll be greeted by some “Please hold” messages over a color-changing background.

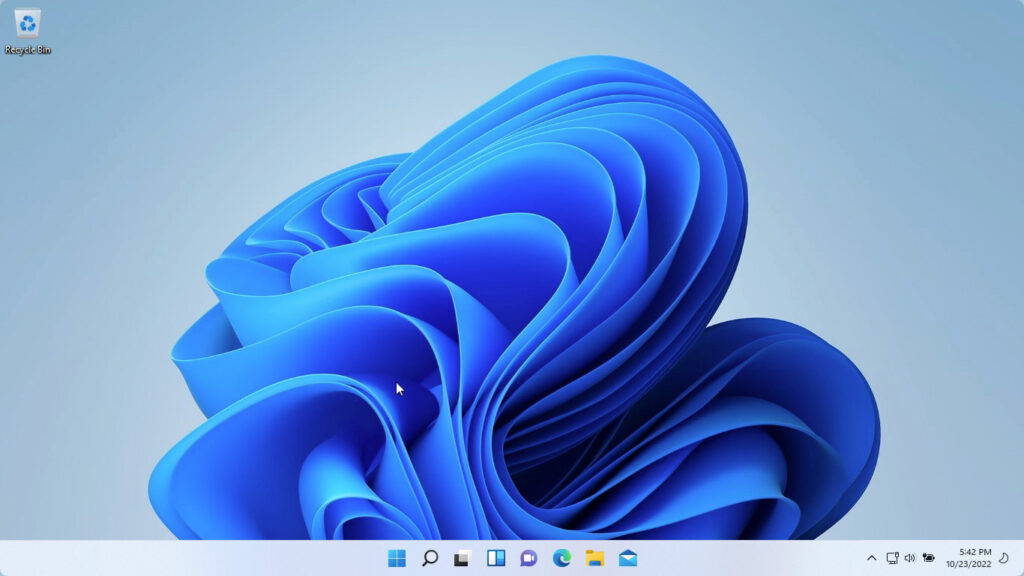
After the hold prompts are over, you’ll be logged into your new Windows 11 desktop.
If you found this guide helpful then spread the word! Enjoy your Windows 11 23H2 Boot Camp install.
I’m a web developer by trade and Mac enthusiast at heart. If you ever need help with either of those things you can always reach me at nico@studioncreations.com.