

Try Movavi Screen Recorder to easily capture the whole page.
-
Take scrolling screenshots on a PC or a laptop
-
Make edits: add arrows, highlights, and text
-
Export and share in a couple of clicks

Being able to take a scrolling screenshot on Windows 10 is important when you want to capture along web page, document, or Word file in one simple screenshot. But how to take a long screenshot on Windows? In this guide, we’ll cover all you need to know about how to take a scrolling screenshot on Windows 10.
Special pick: Movavi Screen Recorder
Our special pick for this guide is Movavi Screen Recorder. Available for both Windows and Mac, Movavi Screen Recorder helps you take long scrolling screenshots easily and then add highlights, captions, and callouts in the simple built-in editor. Besides, it can help you not only make screenshots and captures of your screen, but is also capable of recording part or all of your screen. It’s perfect for making videos, creating tutorials and guides, and more. Movavi Screen Recorder is super simple to use, ideal for beginners, and comes with lots of great features, like a built-in editor and the ability to record internal and external audio.
Below, you’ll find how to take a long screenshot on a laptop or a desktop computer.
How to take scrolling screenshot on Windows with Movavi Screen Recorder
Step 1. Download and install the software
Click the button below to download the installation file for your operating system. Then launch it and follow the on-screen instructions to complete the installation.
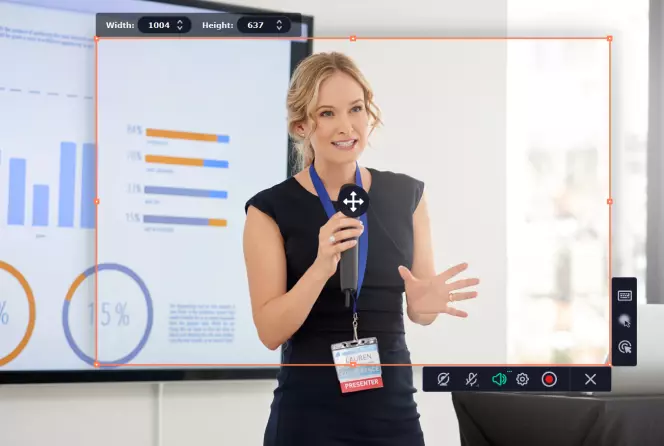
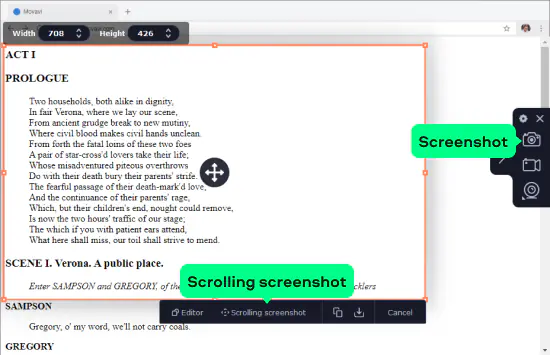
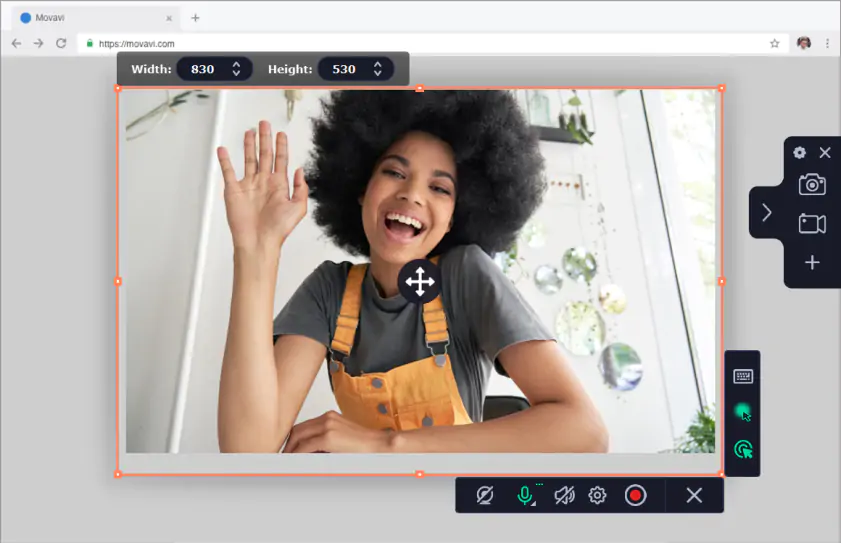
Step 2. Select the screenshotting area
Click the Screenshot button, then select the capture area. When it’s done, choose Scrolling screenshot and locate the window you want to screenshot. The app will start scrolling the area on its own. If what you’ve shot is enough, press Esc to stop the capturing.
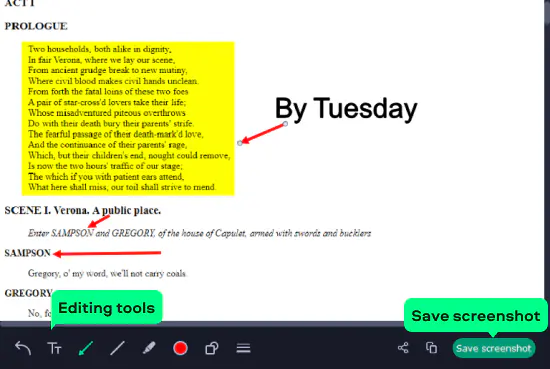
Step 3. Edit and save the result
To make the screenshot more informative, add arrows, lines, and text with the built-in tool. When you’re done, you can save the result to your hard drive or share with WhatsApp, Telegram, email, Google Drive or a direct link to Movavi Cloud.
How to take a long screenshot on Windows 10 in Google Chrome
Step 1. Download and install Movavi ScreenShot
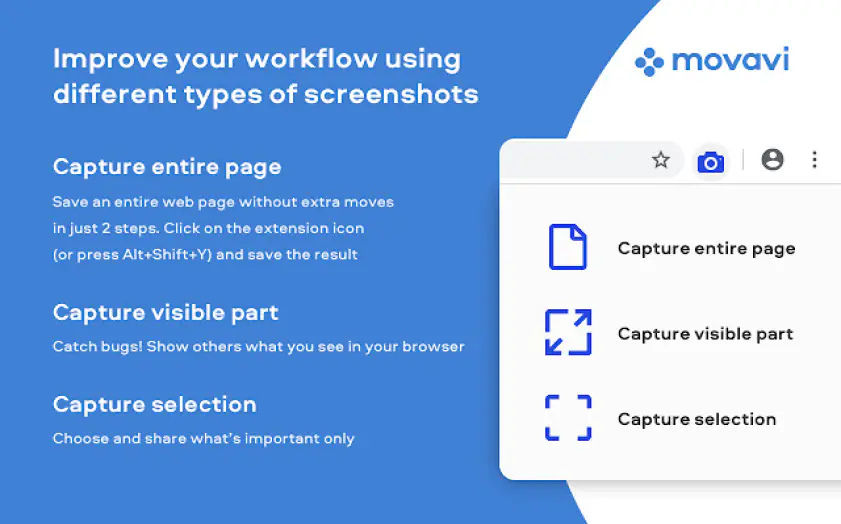
The first step for taking a Windows 10 scrolling screenshot in Google Chrome is to add the Movavi ScreenShot extension to the Chrome browser. This extension can be found in the Chrome Web Store and is free to add and use.
Get Movavi ScreenShot
Step 2. Open a page to capture
Next, you need to open the page you want to capture in your Chrome browser. This might be a web page or it could be a document that you can open in your browser, like a PDF. Open your chosen page, ready to be captured.

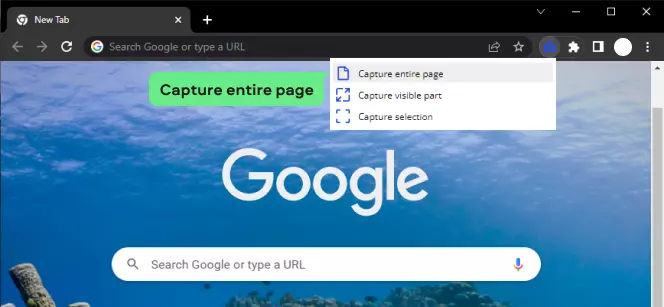
Step 3. Capture the page
After that, you can use the Movavi ScreenShot Chrome extension to capture your chosen page. To do this, click on the extension button in the top right corner of the browser window. Then, click on the Capture entire page button to capture the screenshot. After that, you just need to wait a moment for the screenshot to be created and saved to your device. Now you know how to use Movavi ScreenShot!
How to take a Windows scrolling screenshot in Microsoft Edge
Step 1. Open Microsoft Edge
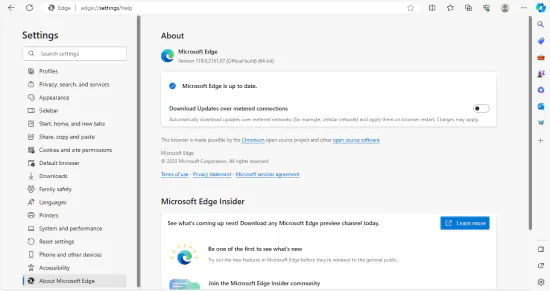
If you want to take a scrolling screenshot on Windows 11 or 10 using Microsoft Edge, you can do so with the browser’s built-in Web Capture feature. To get started with this feature, you simply need to open Microsoft Edge and make sure you have the latest version of the browser. You can do this by going to Settings > Help and Feedback > About Microsoft Edge. On the About page, you’ll see if an update is available or if your version is already up to date.
Step 2. Find a page to capture
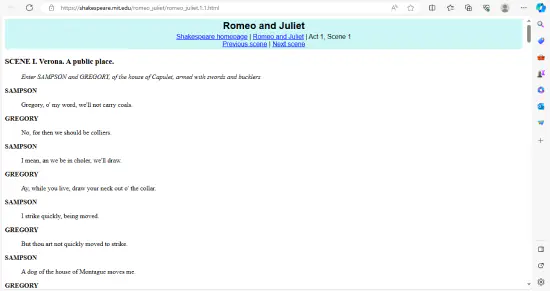
Next, you need to find a page that you want to capture and open it up in your browser as a screen capture scrolling window. You may want to take a capture of a long web page, for example.
Step 3. Capture the page
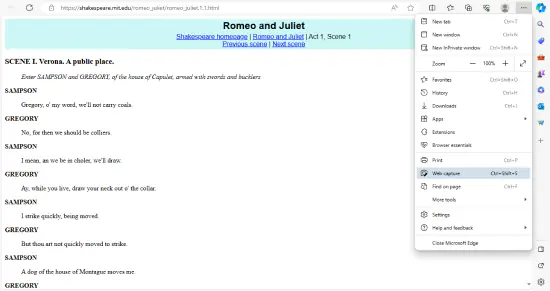
To use the Web Capture feature, click on the Settings menu in the top right corner of your browser. Then look down the list of options and find Web Capture. Click on it. You can also use the Ctrl + Shift + S shortcut to access this feature directly with your keyboard. To take a scrolling screenshot, hold down the selection tool and drag it out to the bottom of the page. It will automatically scroll and capture everything you need.
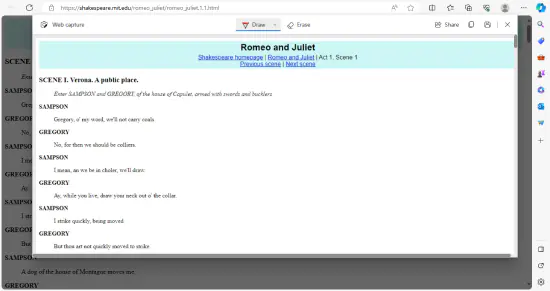
Step 4. Edit and save the screenshot
Once the capture is complete, you’ll be given a menu with two options: Copy and Add Notes. You can click Copy to copy the image to your clipboard and then paste it into another app to save it or send it. You can click on Add Notes to open the image in a new window and draw on it or add annotations, before saving.
How to take a Windows 10 scrolling screenshot in Firefox
Step 1. Open Firefox
It’s possible to take a scrolling screenshot on Windows 7, 8, 10, and 11 using Firefox without software or extensions. Firefox has its own built-in screenshot tool, so the first step of the process is to simply open up the Firefox browser on your device.
Step 2. Find a page
Next, you’ll need to find and open a page you wish to capture. You can find a web page to take a screenshot of or open a document in your browser if needed.
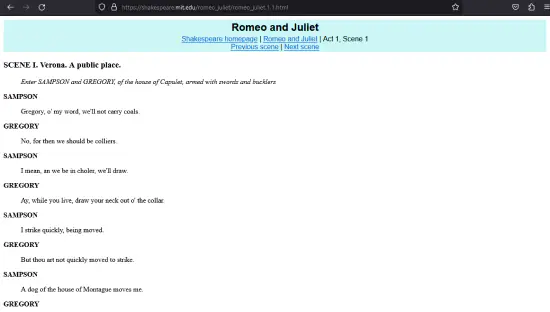
Step 3. Capture the screenshot
Once the page you want to capture is open, right-click on a blank area of the window and click on the Take Screenshot button. You can then click on the Save Full Page button to capture the whole web page without needing to manually scroll.

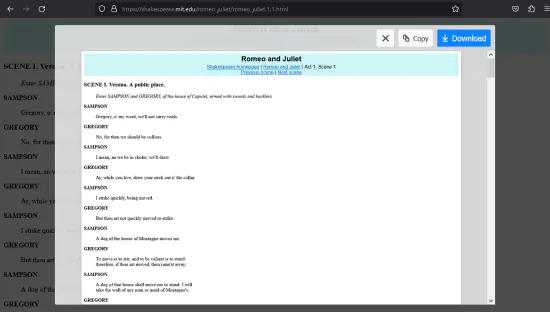
Step 4. Copy or save your picture
Next, you can choose from two options: Copy or Download. You can copy the image to your clipboard to paste it somewhere for editing or other purposes. Or you can simply download it as it is and save it to your device to be used later on.
Best tools to screen-capture a scrolling window

Here’s what Movavi’s team does to provide you with verified information:
-
When selecting products to include in our reviews, we research both demand and popularity.
-
All products mentioned in this article have been tested by Movavi Content Team.
-
When testing, we aim to highlight the best features of a product and what it’s best suited for.
-
We study user reviews from popular review platforms and make use of this information when writing our product reviews.
-
We collect feedback from our users and analyze their opinions of Movavi software as well as products from other companies.
-
Best for:
Simple screenshotting and screen capturing
-
Operating system:
Windows and macOS
-
Price:
$44.95 for a 1-year subscription
-
G2 rating:
4.5 out of 5, 50 reviews
Movavi Screen Recorder is a simple app that lets you take full-page screenshots and edit them in just a few clicks. This program for Mac and Windows has scrolling screenshot functionality as well as recording videos from your screen and webcam. Download the app and try it out for yourself!
Key features:
- Take full-page screenshots to capture the entire content
- Edit screenshots you’ve just taken – add text, arrows, or frames to highlight important elements
- Capture on-screen activity to improve efficiency with simple, lightweight recordings
- Save and share the results with your colleagues to keep your meeting summaries on point
Pros:
-
Taking and editing partial or scrolling screenshots is a snap
-
Capturing images from any browser
-
Smooth performance on Windows 10
Cons:
-
Only the full version of the program gives you all the means to express your ideas with this software
-
Best for:
Users who want to easily capture scrolling screenshots in Chrome or Firefox
-
Operating system:
Browser extension for Chrome and Firefox
-
Price:
Free
-
Chrome Web Store rating:
4.1 out of 5, 35 reviews
Movavi ScreenShot is a free-to-use screenshot tool which is available as an extension for two of the most popular internet browsers: Google Chrome and Mozilla Firefox. This tool can be used to take full-page, scrolling screenshots of any web page or document opened in your browser. It offers simple editing tools to let you alter your screenshots, as well as the ability to save them in various formats, like PDF, JPEG, and GIF.
Key features:
- Capture and save in PDF, JPEG, PNG, or GIF format
- Upload directly to OneNote or send via email via the extension
- Compatible with both Chrome and Firefox
Pros:
-
Very beginner-friendly and easy to use
-
Can be used for both full and partial screenshots
Cons:
-
Not available for other browsers
-
Best for:
Users who want a versatile and reliable screen capture extension
-
Operating system:
Browser extension for Chrome
-
Price:
Free version, premium for $1/month
-
Chrome Web Store rating:
4.9 out of 5, 60,890 reviews
GoFullPage is another great extension you can use to take scrolling screenshots on your Windows 10 device, as well as on other Windows systems and even Macs. It’s a Google Chrome extension that is free to use but also has a premium version for $1 per month that unlocks extra features. It’s simple to use, gives high-quality images, and offers easy saving and sharing, too.
Key features:
- One-click captures
- Save in PNG, JPG, PDF, and other formats
- Premium version available with editing and additional features
Pros:
-
Really easy to use
-
Ideal for Chrome users
-
Easy sharing and saving
Cons:
-
Only works in Chrome
-
Some features locked behind the paywall
-
Best for:
Users who want an advanced capture and design tool
-
Operating system:
Desktop program for Windows
-
Price:
From $29.99 per year
-
CNET rating:
3.5 out of 5, 137 reviews
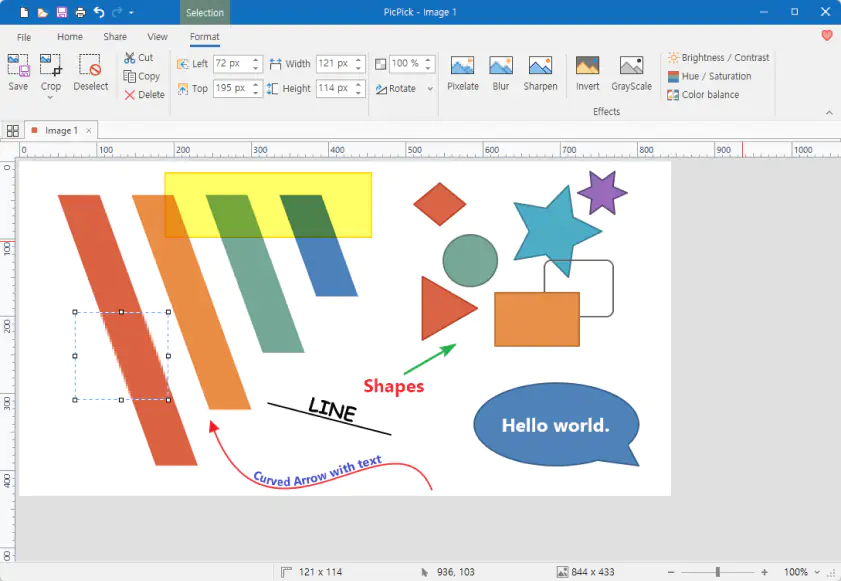
PicPick is an all-in-one design tool you can use on any Windows system. It offers screen capture, image editing, and many other features like color picker, color palette, pixel-ruler, and more. This is one of the most advanced screenshot apps out there, well-suited to editors, designers, artists, and content creators. It can let you capture scrolling windows, as well as specific regions and full-screen screenshots, too, and then edit, annotate, and enhance those images.
Key features:
- Lots of different kinds of screen capture
- Built-in editing and annotations
- Special effects like shadows, frames, motion blur, and watermarks
Pros:
-
Lots of great features to use
-
Much more advanced than many other screenshot tools
-
Fully customizable to suit your needs
Cons:
-
May be too complicated for beginners
-
Quite expensive compared to simple free tools and extensions
-
Best for:
Users who want a free and open-source screenshot tool
-
Operating system:
Desktop program for Windows
-
Price:
Free
-
TechRadar rating:
4.5 out of 5
ShareX is a free, open-source screenshot tool designed for Windows systems and capable of running on Windows 7, 8, 10, and 11. It has no ads or bloatware of any kind and is safe and easy to use, offering a wide range of capture methods like full screen, scrolling capture, window menu, custom region, and more. It also features various post-capture functions like editing, copying, printing, saving, and uploading, allowing you to do whatever you want with the screenshots you make.
Key features:
- A wide range of capture methods
- Built-in editing and annotations
- Share, copy, save, print, and upload your images directly
Pros:
-
Free and open source
-
No ads or bloat to worry about
-
Lots of useful features
Cons:
-
May be a little too complex for some users
-
Best for:
Users who want a screenshot maker that can also record videos
-
Operating system:
Browser extension for Chrome
-
Price:
Free version, premium from $4/month
-
Chrome Web Store rating:
4.6 out of 5, 16,176 reviews
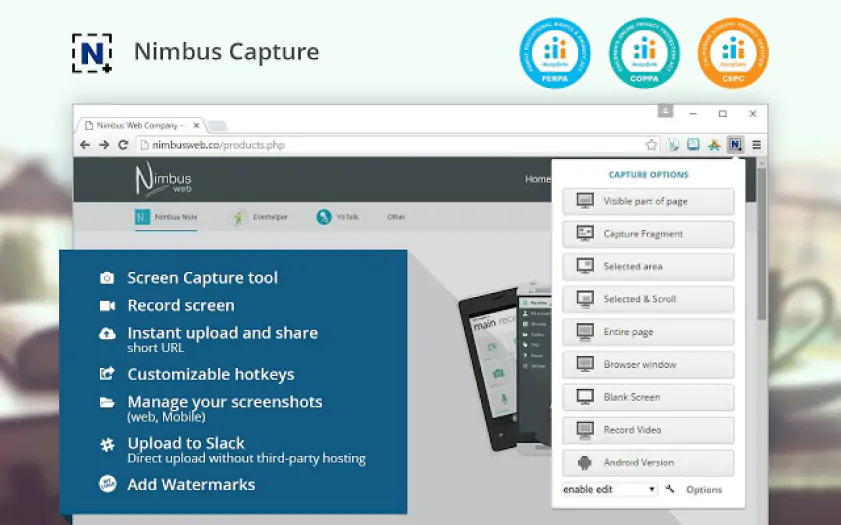
Nimbus, also known as Nimbus Screenshot & Screen Video Recorder, is a Google Chrome extension that is already being used by several million people around the world. It’s a trusted, popular tool for capturing whole, partial, and scrolling screenshots. It’s also able to record videos of your screen, making it quite a versatile and useful tool for people who need this kind of functionality. It offers editing and annotations, too, but many features are exclusive to the premium version.
Key features:
- Capable of screenshots and screen recordings
- Built-in editing and annotations
- Built-in conversion
Pros:
-
Lots of useful features
-
Easy to use editor
-
Can upload and share screenshots instantly
Cons:
-
Many features are exclusive to the premium version
-
Best for:
Users who want a screenshot tool for business use
-
Operating system:
Desktop program for Windows
-
Price:
15-day free trial, full version for $49.95
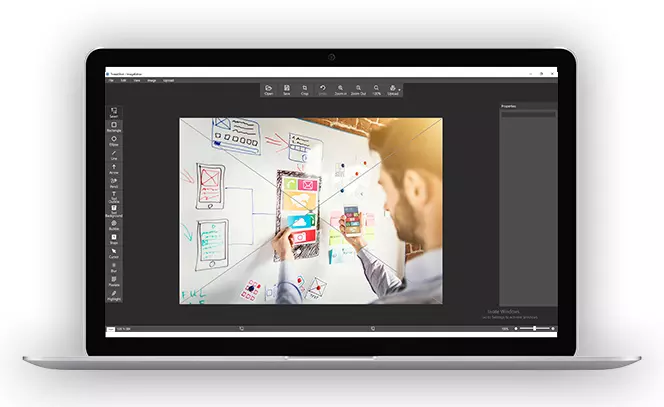
Tweakshot is another fully-featured screenshot program for Windows. It can run on most Windows systems without any issues and offers a range of functions and features that make it well-suited as a business app. Designed to help businesses and teams increase productivity, it’s ideal for capturing screens, making videos, enhancing and editing images, and recording events or webinars, too.
Key features:
- Can capture and record your screen
- Extra features like screen color picker
- Built-in image editor
Pros:
-
Ideal for business and study
-
Lots of different features and functions
-
Low system requirements
Cons:
-
Free trial is quite short
-
Best for:
Users who want to capture web pages without any extra downloads
-
Operating system:
Online tool
-
Price:
Free
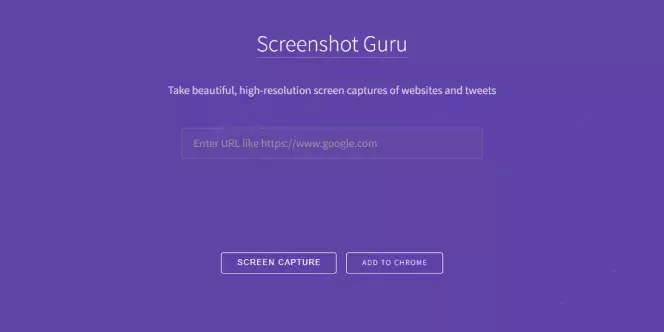
Finally, we have Screenshot Guru, one of the simplest and most user-friendly screenshot tools of them all. Screenshot Guru isn’t an app or an extension. It’s just a website that you can go to and paste in a URL of a page or post you want to capture. Then, you click a button and Screenshot Guru will find your page and capture it for you, letting you download the resulting screenshot to your device in a single click.
Key features:
- Works directly in the browser
- Can capture any web page
- One-click capture with no downloads needed
Pros:
-
Simple to use on almost any device
-
Very reliable and effective
-
Works well with social media posts
Cons:
-
Can be slow to load
-
No editing or extra features
What to look for in a screenshot tool
We hope that this guide has given you a great range of options to use when you need to take a scrolling screenshot, as well as answering the question of how to do screenshots. If you’re not sure which tool is the best one for you, here are some factors to keep in mind:
-
Ease of use: Make sure that the app or tool you use is simple for you to use. Some apps can be a little tricky or awkward to make use of, while others are much simpler and more beginner-friendly. Find one that meets your needs and matches your level of expertise.
-
Features: Some screenshot apps and extensions are very basic, simply offering screenshots and nothing else. Others can be more advanced, with features like editing, direct email, sharing, uploads, and so on. Find one with the features you need.
-
Price: You may have to pay for some screenshot tools, while others are free to use. Depending on your budget, you’ll want to find an app that can offer everything you need at a price that you feel is fair.
-
Support: It’s always smart to see if any kind of user support is available for the app or tool you’re using, just in case something goes wrong or you need some help with setting up or using the tool in question.
-
User reviews: We also recommend reading user reviews of any apps or tools you want to use to make scrolling screenshots. Users are usually unbiased and honest in their reviews and will let you know if the app is simple to use and effective, or if it has bugs and issues.
Best ways to take scrolling screenshots on Windows 10/11
- Movavi Screen Recorder – best for video and audio capture
- Built-in feature in Microsoft Edge – best for Microsoft Edge users who don’t want to install additional software
- Movavi ScreenShot – best for users who want to easily capture scrolling screenshots in Chrome
- Built-in feature in Firefox – best for users who want to take screenshots quickly and easily in Firefox
- GoFullPage – best for users who want a versatile and reliable screen capture extension
- PicPick – best for users who want an advanced capture and design tool
- ShareX – best for users who want a free and open-source screenshot tool
- Nimbus – best for users who want a screenshot maker that can also record videos
- TweakShot – best for users who want a screenshot tool for business use
- Screenshot Guru – suitable for users who want to capture web pages without any extra downloads
Conclusion
Now you have the full information on how to find your perfect screenshotting tool. So, now it’s time to try something out. Start with Movavi Screen Recorder! Download the free trial version and see if this program is just what you’ve been looking for.
The perfect way to record anything from your screen
Disclaimer: Please be aware that Movavi Screen Recorder does not allow capture of copy-protected video and audio streams.
Frequently asked questions
To take a scrolling screenshot, use Movavi Screen Recorder:
-
Download and install the program to your computer:
Get Movavi Screen Recorder for Windows -
Open the page that you want to take a screenshot of.
-
Click Screenshot on the side panel, select the window you want to capture, click Scrolling screenshot, and click on the desired tab.
-
Wait for the app to scroll through the page and save the result.
No, Snipping Tool is able to take partial screenshots, window screenshots, and full-screen screenshots. But, at this time, it does not have a scrolling screenshot functionality.
- Download and install Movavi Screen Recorder
- Select the window for capture
- Take a scrolling screenshot
- Edit and save the result
We recommend using Movavi Screen Recorder for all your screenshotting needs. This simple and intuitive program available for Windows 11 can make scrolling screenshots in just a couple of clicks. Movavi Screen Recorder also allows its users to edit screenshots by drawing over them and adding annotations.
Movavi Screen Recorder
The perfect way to record anything from your screen
An easy way to record from your screen in HD. Make video footage of any application, record online streaming video, webinars, even Skype calls, and save clips in all popular formats.
4.221,320 reviews
See other useful how-to guides
-
Best MacBook snipping tools
-
Mac screenshot not working
-
13 best Zoom recording apps for any device
-
21 best free screen recorders without watermarks
-
Is OBS safe? Your guide to safe screen recording
-
What Is Screen Recording? [Complete Guide] — Movavi
-
13 Best Free Screen Recorders No Time Limit [2025] – Movavi
-
How to Crop a Screenshot on a Mac | 6 Free Ways – Movavi
-
4 Ways to Record Audio from Website [2025] – Movavi
-
18 Best Free Audio-Recording Software [2025] – Movavi

Have questions?
If you can’t find the answer to your question, please feel free to contact our Support Team.
Join us for discounts, editing tips, and content ideas
1.5M+ users already subscribed to our newsletter
There’s no doubt that screen capture is imperative for communication today. You can use screenshots in customer success and boost workplace productivity through fast and clear communication.
We have covered different ways to capture screenshots on Windows with shortcuts – including on a Dell, Asus, and HP laptop. Unfortunately, most of the methods do not support scrolling capture. So, today, we want to share more ways to take a scrolling screenshot on Windows 10 and 11.
Read on and see how to use Zight to capture a scrolling screenshot as GIFs, as well as how to capture scrolling screenshots on your favorite browsers.
But first:
Scrolling capture, also known as a scrolling screenshot, is a method of capturing content that extends beyond the visible area of the display screen. It allows you to take a continuous screenshot of an entire webpage, document, or any other content that can be scrolled through, either vertically or horizontally.
This capture helps share information that cannot be displayed on a single screen—you can share or save long content pages like web articles, lengthy documents, or extensive spreadsheets without stitching multiple screenshots together.
Here’s how to capture scrolling screenshot windows:
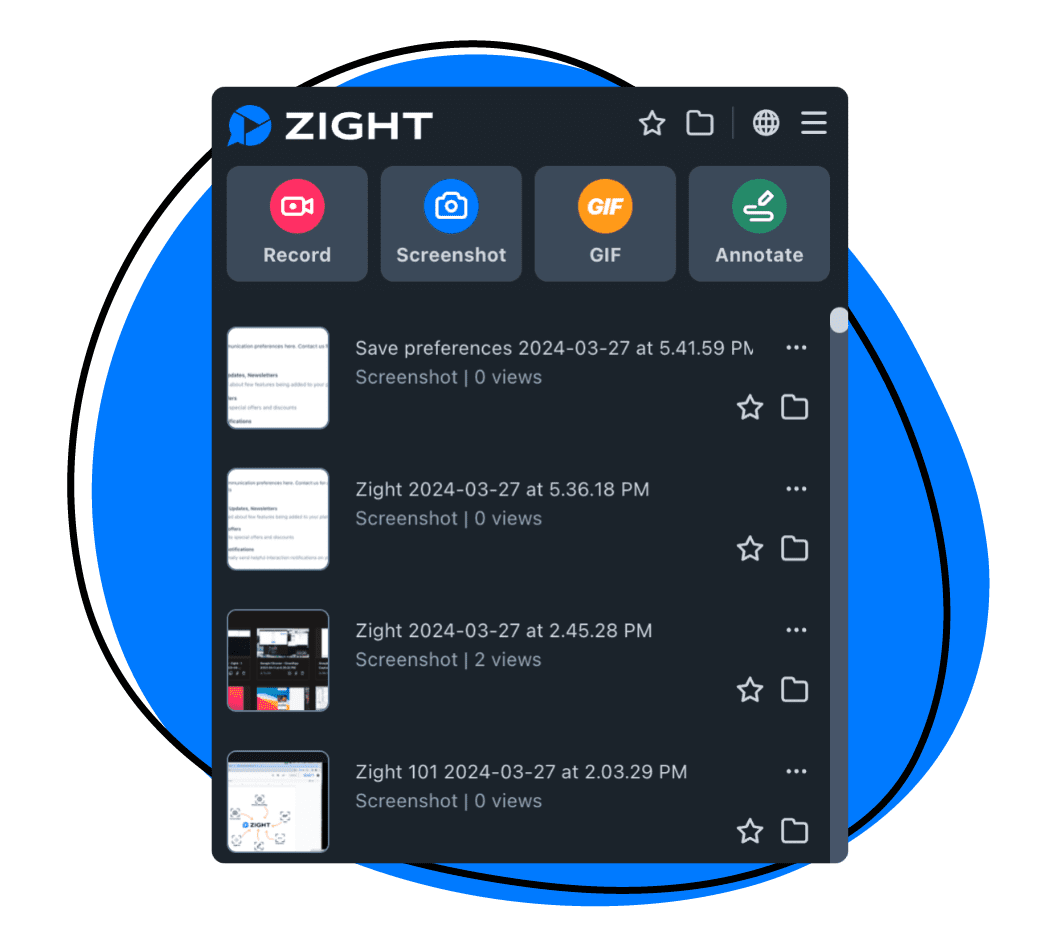
When you need a scrolling capture on Windows, you have to look beyond your native tools and, even then, choose between many screenshot tools to find one with the feature. If you already have Zight installed, you can capture the content of your full pages as GIFs using the Windows app and Chrome extension.
With this best screenshot tool, you record all content on your online and offline page as follows:
- Open your Zight app and click GIF. This allows you to scroll through all the content on your screen and record everything in a looping video that you can upload anywhere.
- Select Full Screen and Screen Only, then Start Recording. Wait out the three-second timer, then start scrolling your page to record all content.
- You can pause your recording at any moment to annotate. You have different features here, including adding a line, highlighter, ellipse, rectangle, or arrow.
- Once you’re done, click the finish button, and your GIF will upload to the cloud. You can then share it as a video link, eliminating the download and upload fuss that complicates fast and effective communication.
Alternatively, you can use the Zight extension to capture scrolling contents of any Google tab. Here’s how:
- Ensure you have installed and enabled the Zight extension, then open the Google Chrome page you want to capture.
- Then, open the Zight extension and click GIF.
- Choose the tab you want to capture, then click Share. You will get a three-second timer, after which Zight will start recording the content on that screen. To capture a scrolling screenshot, scroll down as you record and when done, click Stop Sharing.
- Zight will upload the GIF to the cloud, and you can then share the capture as a link.
A Zight GIF allows you to capture the entire page at a slow pace and annotate as you go. This helps you improve your communication, especially when you’d like to guide your recipient to crucial sections on the page.
Even better, the GIF will be hosted on the cloud, so once you share the link, your recipient will always have access to the page content as long as the link is active. You can leave comments (and tag your team members) on the Zight link, and they will be notified of the new changes instead of reseding the screenshot each time.
2. Using Google Chrome
You probably use Google Chrome daily, but did you know the browser has a built-in screenshot tool that supports scrolling screenshot capture? Here’s how to access and use it:
- Open the Inspect Panel: You can do this by either:
- Right-clicking on any part of the webpage and selecting “Inspect” from the context menu
- Using the keyboard shortcut Ctrl+Shift+I while within the browser
- Going to the three-dot menu at the top-right corner of Chrome, selecting “More tools,” and then choosing “Developer Tools”
- Open the Run Command Box:
- Once the Developer Tools panel is open, you can access the Run Command Box by pressing Ctrl+Shift+P
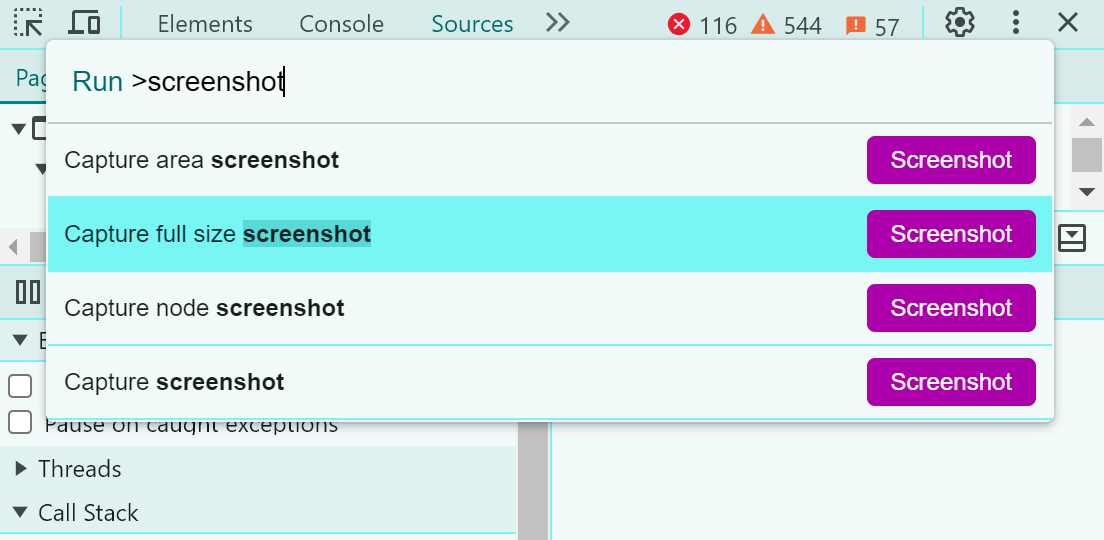
- Take the Screenshot:
- In the Run Command Box, type “Screenshot,” and several screenshot options will appear (see the screenshot above)
- Select “Capture full-size screenshot.” This command will capture the entire length of the webpage, not just what you see on your screen
- Download the Screenshot:
- The screenshot automatically downloads to your PC, typically saving to your default download folder
This is a straightforward method for capturing a full-page screenshot of your web page, and it works seamlessly on Windows 10 and 11.
To share the screen capture;
- Click the Chrome Downloads icon, then select the screenshot—it will automatically open on the Photos app, and you can click Alt+ Up (the up arrow on your keyboard) to see your sharing options.
- Alternatively, you can right-click on the download and click Show in Folder. Then, right-click again, click Send To and share via the different methods listed.
- You can also share the screenshot by uploading it through different apps like email, Slack, Trello, or any other that allows uploading.
3. Using Mozilla Firefox

Mozilla Firefox is another popular browser for Windows. If you use it frequently, you’ll need to know how to capture screenshots without leaving the browser. Like Chrome, it has a built-in screenshot tool that lets you capture long, scrolling screenshots in a few clicks. Here’s how to set it up for frequent use:
- Open Firefox: Launch the Mozilla Firefox browser and navigate to the page you wish to capture
- Customize the Toolbar: To do so;
- Click on the three horizontal lines (often called the “hamburger” menu) in the upper-right corner of the browser
- Select “More Tools” and then “Customize Toolbar”
- Add the Screenshot Icon:
- From the customization options, find the “Screenshot” icon (it has a pair of scissors and will highlight the name screenshot when you hover over it with your mouse). You may need to scroll through the available Mozilla tools to find it
- Drag the “Screenshot” icon to your toolbar for easy access
- Capture the Full Page:
- Go back to the web page you wish to capture
- Click the “Screenshot” icon on your toolbar
- Select “Save Full Page.” Firefox will capture the entire length of the webpage
- Save the Screenshot:
- The screenshot will be captured instantly, and you will be prompted to Copy or Download it
This method allows you to easily capture long webpages directly within Mozilla Firefox. And once you easily capture scrolling screenshots, you can share them as follows:
- If you select “Copy,” the screenshot will be copied to your clipboard. In this case, you can paste the image directly to your recipient without needing to save it on your PC
- If you click “Download,” the screenshot will be saved to your PC, and you can find it in the downloads list on Mozilla or the downloads folder on your PC. From here, you can open it in Photos or share it through communication platforms that allow uploading
4. Using Microsoft Edge
Another popular browser, Microsoft Edge, has some really good screen capture features, and it all takes just a few clicks. When you have a web page open that you want to capture, here’s how to do so:
- Open Microsoft Edge: Launch the browser and navigate to the web page you want to capture
- Access the Web Capture Feature: To do so;
- You can open the Web Capture tool by right-clicking on the web page (any part of the screen) and selecting “Screenshot” from the context menu
- You can also use the keyboard shortcut Ctrl+Shift+S
- Alternatively, you can click the three-dot menu icon at the top right corner of Edge and select “Screenshot” from the drop-down menu
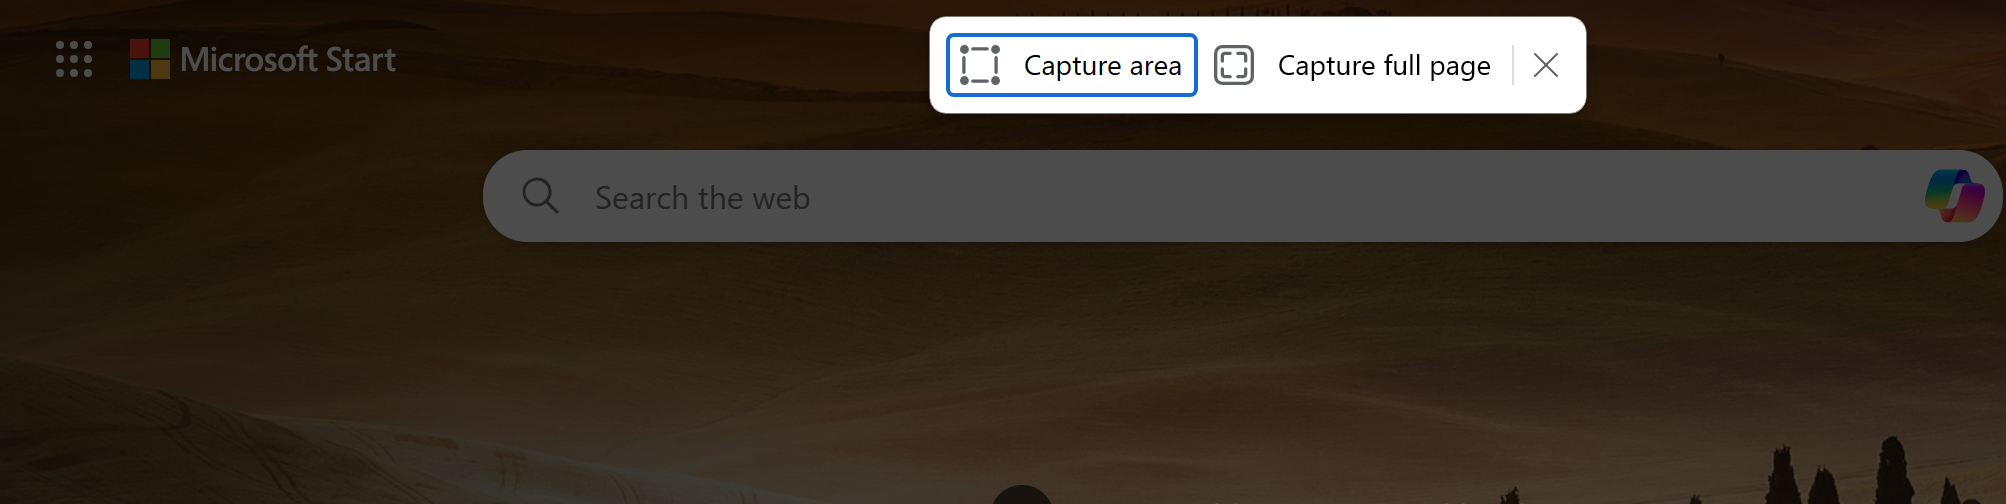
- Capture the Full Page:
- Once the Web Capture tool is open, you will see options such as “Capture area” and “Capture full page.” Click on “Capture full page” to take a long scrolling screenshot of the entire web page.
- Save or Edit the Screenshot:
- After capturing, you can view the screenshot directly in Edge. From here, if you need to make annotations or highlight specific parts of the screenshot, you can use the drawing and text tools provided within the Web Capture interface before saving.
- Then, you can save it to your device, copy it, or share it through Edge.
Sometimes, you want to capture a scrolling screenshot of your offline documents, especially PDFs and Word Documents. Since you can’t use the web-based features above, we recommend using ShareX, a free and open-source screenshot software that’s wildly popular with gamers. To use it:
- Download and launch ShareX:
- You can download it from the official website or through platforms like GitHub
- Then, launch ShareX on your computer. Then, open and maximize the window that contains the document or application you want to capture. Make sure it is the active window
- Select ‘Capture Scrolling Window’:
- In the ShareX main window, click on the “Capture” menu
- Choose “Scrolling capture” from the dropdown menu
- Start the Scrolling Capture:
- After selecting “Scrolling capture,” a new window will pop up, asking you to choose the window you want to capture. Click on the target window
- ShareX will then give you instructions to start the capture, usually pressing a specific key or clicking within the window to initiate scrolling
- Adjust Settings:
- ShareX offers settings for scrolling captures, such as delay before capture starts, the speed of scrolling, and the number of scrolls. Adjust these settings based on the length and complexity of the document you are capturing
- Review and Save:
- Once the capture is complete, the image will be shown in the ShareX image editor, where you can review it
- You can then edit, annotate, or directly save the image to your preferred location
6. Using DemoAir Online Web Page Screenshot Tool
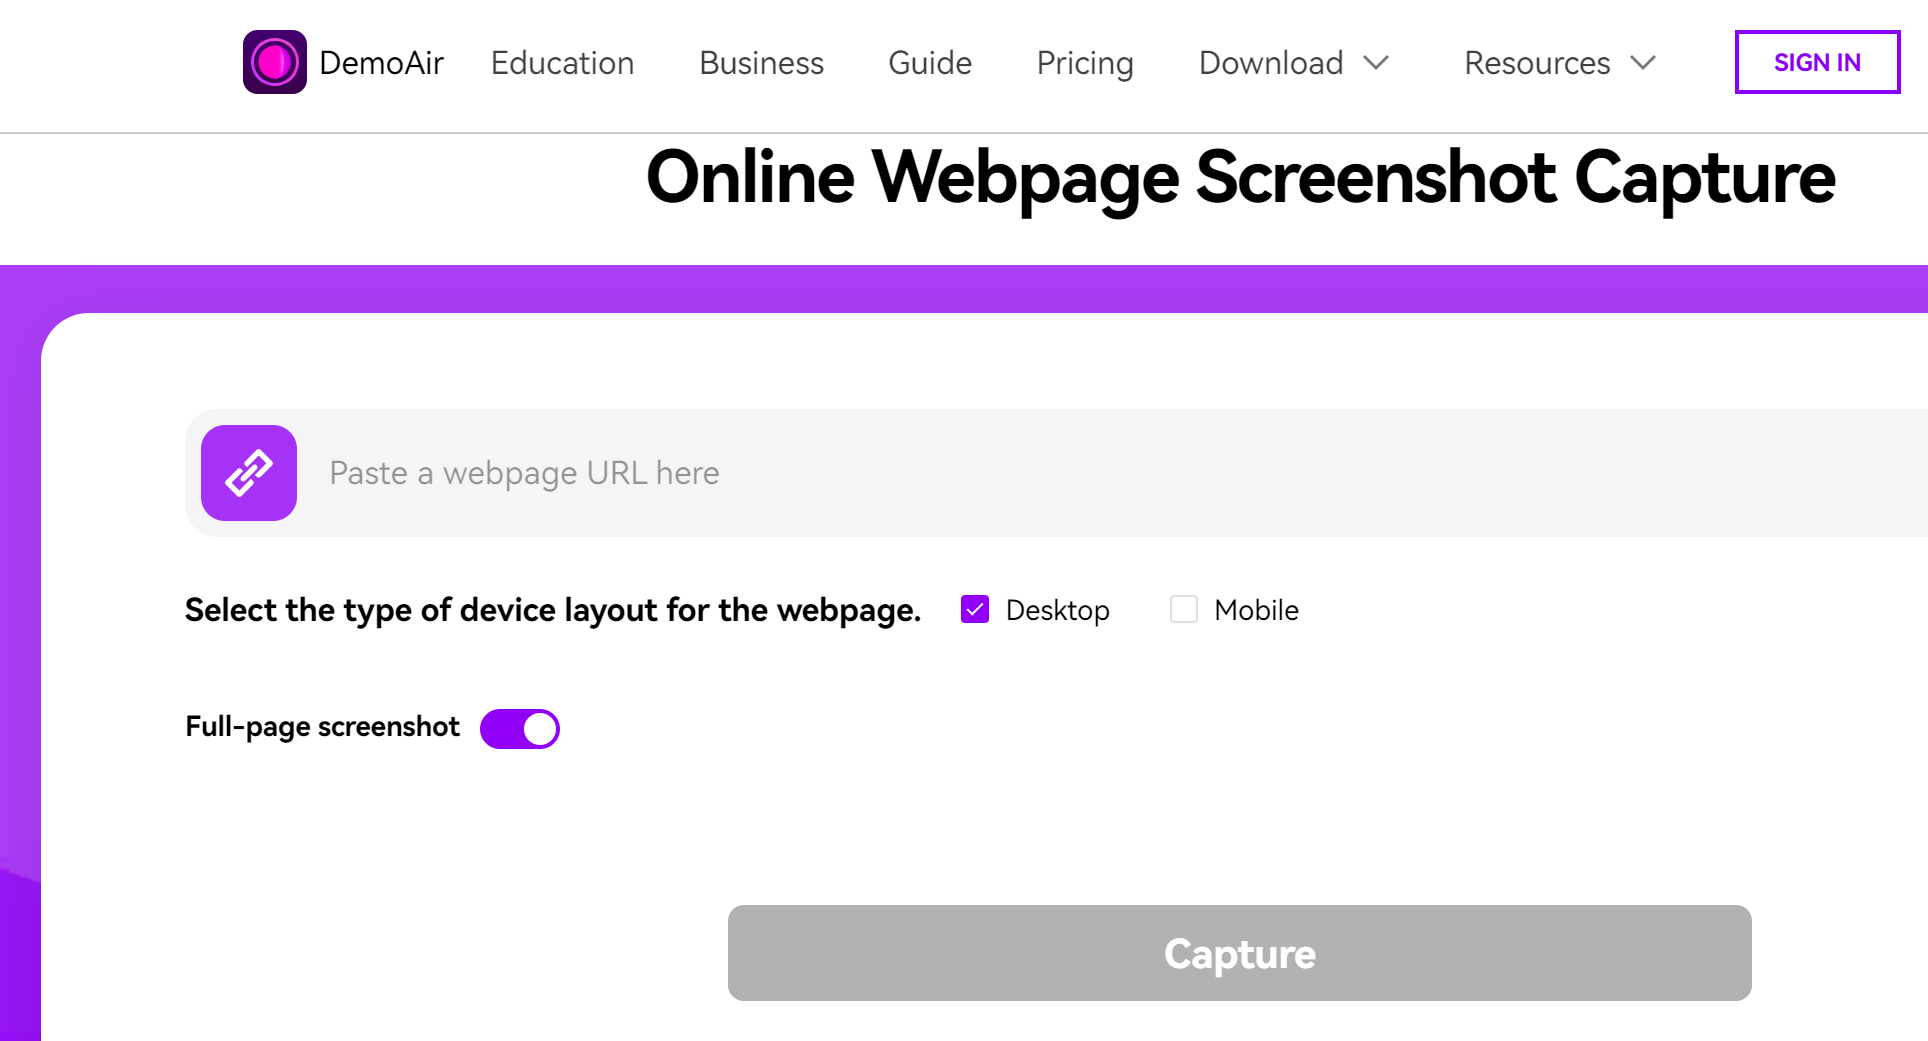
You still have more options for capturing scrolling screenshots of your live web pages. To do so on any browser, you need an online tool like Demo Air. It is simple to use and requires just a few steps.
Here’s how to use it:
- Go to the DemoAir webpage. This tool is accessible directly from your browser without the need to install software.
- Type or paste the URL of the webpage you want to capture into the designated field on DemoAir.
- Ensure that the “Full-page Screenshot” option is enabled to capture the entire webpage length.
- Click the “Capture” button to start the process. DemoAir will then generate a screenshot of the webpage.
- Once the screenshot is generated, you can edit it if necessary (e.g., crop, resize, blur). After editing, click Done to download and save the screenshot to your PC. Alternatively, you can save the image to the cloud through Wondershare Drive.
To Sum It Up
As we’ve seen, it is now better to capture scrolling screenshots rather than just what’s visible on your computer screen. Scrolling screenshots capture everything on a tab or open window, even when you can’t see it yourself.
This makes the screenshot invaluable when communicating visually with your teams, especially on a long document. You can later annotate and edit the screenshot using Zight and leave all instructions. It definitely makes work easier compared to when you’d need to capture several screenshots and stitch them together!
In this article, we’ve shared an easy way to capture scrolling screenshots as GIFs with Zight for easier viewing. But if you end up using any of the other methods we discussed, you can also upload the scrolling screenshots to Zight for cloud storage and easy sharing via a link. Even better, you can annotate the screenshots for better team communication!
Возможные причины:
-
Превышение лимита трафика.
В этом случае необходимо увеличить тарифный план в биллинге, в разделе «сайты» — «подробно» формируете заявку на смену тарифного плана, в разделе «неподтверждённые заявки» в этой заявке будет рассчитана сумма доплаты необходимая для смены тарифа. Если в чём-то ошиблись, то данную заявку можете удалить и сформировать другую. Если в сформированной заявке всё правильно — подтверждайте её, при необходимости пополняйте баланс.
-
Закончился оплаченный период.
Продлите срок действия сайта в биллинге в разделе «сайты» — «подробно» укажите необходимое количество месяцев для продления и нажмите «продлить», сформированную заявку подтвердите в разделе «неподтверждённые заявки», при необходимости пополните баланс любым удобным способом в разделе «баланс».
Рекомендуем включить бесплатное SMS уведомление об изменении статуса услуг.
-
Нарушение правил хостинга.
Если возникли дополнительные вопросы — пишите в службу технической поддержки.
Делать скриншоты экрана — это распространенный способ поделиться забавными и необычными вещами, сохранить что-нибудь важное и т. д. Однако объединение нескольких скриншотов экрана вместе, если вы хотите сделать скриншот экрана всей веб-страницы или документа PDF/Word/PowerPoint, будет раздражать. В этом случае кажется необходимым делать длинные скриншоты. Что ж, этот блог расскажет вам, как сделать скриншот с прокруткой на Windows и Mac/iPhone/Android.

- Содержание
-
Как делать длинные скриншоты в Windows в 3 браузерах
-
Как делать длинные скриншоты в Windows тремя простыми способами
-
Как сделать скриншот с прокруткой на Mac
-
Как делать длинные скриншоты на iPhone
-
Как сделать скриншот с прокруткой на Android
Как делать длинные скриншоты в Windows в 3 браузерах
Есть много способов сделать скриншот экрана в Windows, например, нажать Ctrl + PRTSC или Fn + PRTSC, чтобы сделать мгновенный скриншот экрана. Кроме того, в Windows 10/11 есть встроенный инструмент для скриншотов. Но все способы не помогут вам делать длинные скриншоты в Windows. Итак, как делать длинные скриншоты в Windows? Использование некоторых браузеров может помочь вам делать длинные скриншоты экрана на веб-странице. Вот три распространенных браузера для вас:
1. Google Chrome
Одним из лучших способов делать длинные скриншоты в Google Chrome является использование расширения для браузера, такого как GoFullPage. Это расширение для браузера может захватывать всю веб-страницу, которую вы просматриваете в своем браузере. Вот полное руководство по получению и использованию GoFullPage:
Шаг 1. Перейдите в Интернет-магазин Chrome, найдите GoFullPage и нажмите кнопку «Добавить в Chrome».

Шаг 2. Переключитесь на веб-страницу, для которой вы хотите сделать длинные скриншоты экрана в Chrome, а затем щелкните значок GoFullPage на панели инструментов Chrome.
Сделав скриншот с прокруткой, вы можете отредактировать и загрузить его в формате PDF или PNG.
2. Mozilla Firefox
Mozilla Firefox имеет встроенный способ делать длинные скриншоты экрана в браузере, и это единственный браузер, кроме Edge, который имеет эту функцию для создания длинных скриншотов экрана без использования расширений. Итак, как сделать скриншот с прокруткой в Mozilla Firefox? Выполните следующие действия:
Шаг 1. Щелкните значок трехстрочного меню в правом верхнем углу, а затем щелкните Дополнительные инструменты > Настроить панель инструментов.
Шаг 2. Найдите значок «Скриншот экрана» и перетащите его на панель инструментов Firefox.

Шаг 3. Перейдите на страницу, на которой вы хотите сделать скриншот экрана с прокруткой. Затем щелкните значок скриншота на панели инструментов и нажмите «Сохранить всю страницу».

3. Microsoft Edge
Как делать длинные скриншоты с помощью Microsoft Edge? Как упоминалось выше, Microsoft Edge включает встроенную функцию, позволяющую делать длинные скриншоты в виде прокручиваемого снимка экрана. Вот как это сделать:
Шаг 1. Щелкните значок меню с тремя точками в правом верхнем углу Edge, выберите параметр веб-захвата. Затем вы увидите оверлей на своей странице с несколькими вариантами скриншотов экрана.
Шаг 2. Выберите параметр «Захват всей страницы». Появится новое окно прокрутки со всей страницей.

Как только вы нажмете кнопку «Сохранить», длинный снимок экрана сохранится в папке «Загрузки».
Как делать длинные скриншоты в Windows тремя простыми способами
Удобнее делать длинные скриншоты на веб-странице с помощью браузеров. Но другой вопрос, как сделать скриншот с прокруткой с документами, играми или другим контентом. В этой ситуации вам нужно использовать безопасный и бесплатный рекордер экрана. Итак, вот три лучших инструмента для создания скриншотов с прокруткой в Windows:
1. iTop Screen Recorder
iTop Screen Recorder — это бесплатная и простая в использовании программа для записи экрана ПК, которая поможет вам делать скриншоты с прокруткой. С помощью этого рекордера экрана вы также можете записывать аудио / видео и редактировать свои записи с помощью бесплатного видеоредактора.
Записывайте видео & аудио с экрана бесплатно
- Записывайте высококачественное видео с экрана вашего ПК, а также звук с системы или устройства ввода синхронно с видео.
- Упростите количество шагов и кликов мыши, для более комфортного использования. Управляйте всем процессом записи без усилий.
- Поддержка вывода в несколько форматов и преобразование с использованием новейших технологий сжатия. Лучшее качество и меньший размер.
Преимущества использования iTop Screen Recorder для создания длинных скриншотов экрана
-
Сделайте скриншот с прокруткой
iTop Screen Recorder имеет встроенный iTop Screenshot, который на 100% бесплатен. Он позволяет вам захватывать все, что вы хотите, прокручивая вниз и объединяя их в одно целое.
-
Сохранение скриншотов с прокруткой в буфер обмена/на диск
iTop Screen Recorder предлагает два способа сохранения скриншотов. Вы можете сохранить скриншот экрана, скопировав его в файл или выбрав папку для его загрузки.
-
Простой в использовании и многофункциональный
Этот инструмент захвата прост в использовании для новичков. Более того, вы можете использовать его для записи части вашего экрана для онлайн-встреч, игр и многого другого.
Как сделать скриншот с прокруткой с помощью iTop Screen Recorder?
Сделать скриншот с прокруткой с помощью iTop Screen Recorder очень просто. Для этого выполните следующие действия:
Шаг 1: Загрузите бесплатно iTop Screen Recorder и установите его на свой Windows.
Шаг 2: Запустите iTop Screen Recorder в его основной интерфейс и выберите «Снимок экрана» слева.

Шаг 3: В этом маленьком окне щелкните «Окно прокрутки», чтобы захватить всю страницу или прокручиваемую страницу.
Вот как сделать скриншот с прокруткой с помощью iTop Screen Recorder. С помощью этого рекордера экрана вы также можете записывать онлайн-встречи / телепередачи, игровой процесс и все, что вы хотите записать. Между тем, он также поддерживает широкий спектр выходных форматов, быстрый обмен видео, запись по расписанию и многое другое.
2. ShareX
ShareX — отличный инструмент для создания скриншотов экрана с прокруткой для создания длинных скриншотов экрана в Windows, и его основные функции включают захват экрана с прокруткой, выбор региона, а также множество фильтров и эффектов, которые вы можете добавить к своим снимкам. Вот как делать скриншоты с прокруткой с помощью ShareX:
Шаг 1: Откройте основной интерфейс ShareX и нажмите «Захват» > «Захват с прокруткой».
Шаг 2: Перейдите к содержимому, которое вы хотите захватить, и нажмите «Начать захват с прокруткой».

3. PicPick
PicPick — один из лучших инструментов для прокрутки скриншотов. Помимо создания длинных скриншотов экрана, он имеет множество других функций, таких как палитра цветов, интуитивно понятный редактор изображений и многое другое. Итак, как его использовать?
Выполните следующие действия, чтобы сделать скриншот экрана с прокруткой с помощью PicPick:
Шаг 1: Откройте PicPick и выберите Окно прокрутки. Затем вы увидите крошечную панель инструментов с несколькими вариантами скриншотов экрана.

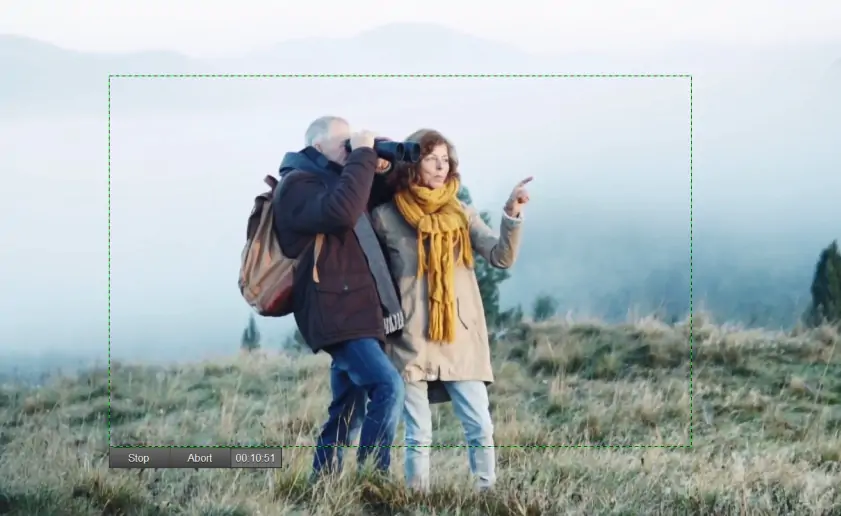
Шаг 2: Появится прямоугольное поле, выделенное красным. Удерживайте левую кнопку мыши, чтобы выбрать область, и автопрокрутка будет происходить медленно.
Шаг 3: Чтобы остановить создание скриншота с прокруткой, вам нужно всего лишь нажать клавишу Esc на клавиатуре.
Сделав длинный скриншот экрана, вы можете отредактировать захваченное изображение с прокруткой и сохранить его в различных форматах файлов, таких как JPG, PNG, GIF и PDF.
Как сделать скриншот с прокруткой на Mac
Выше приведены различные способы создания скриншотов с прокруткой в Windows. Итак, как сделать скриншот с прокруткой на Mac? Вам не нужно устанавливать какие-либо расширения для захвата экрана вашего Mac, если у вас есть Mac под управлением macOS 10.14 Mojave или более поздней версии. Вы можете легко делать скриншоты с прокруткой. Чтобы сделать скриншот с прокруткой, вам нужно:
Шаг 1: одновременно нажать Shift + Command + 5 на клавиатуре. (На экране появится панель захвата.)
Шаг 2: Нажмите кнопку «Запись всего экрана». Затем прокрутите веб-страницу или документ.
Шаг 3: снова нажмите Command + Shift + 5, а затем нажмите кнопку «Остановить запись экрана».
Если комбинация клавиш не работает на вашем Mac, вы также можете использовать браузеры, чтобы сделать скриншот с прокруткой на Mac.
Как делать длинные скриншоты на iPhone
Способ сделать скриншот с прокруткой на iPhone довольно прост. iPhone под управлением iOS 14 или более поздней версии предлагает длинные скриншоты в качестве встроенной функции, которая позволяет захватывать длинные страницы или разделы с помощью автоматической прокрутки до конца. Вот как сделать скриншот с прокруткой на iPhone:
Шаг 1: Нажмите кнопку увеличения громкости + боковую кнопку на iPhone с Face ID или боковую кнопку + кнопку «Домой» на устройствах Touch ID, чтобы сделать длинный скриншот экрана.
Шаг 2: Выберите вкладку «Полная страница» в редакторе скриншотов экрана. После этого iPhone сделает скриншот всего экрана и предложит вам предварительный просмотр.
Когда вы будете удовлетворены этим изображением, вы можете нажать кнопку «Готово» в правом верхнем углу и выбрать «Сохранить PDF в файлы».
Как сделать скриншот с прокруткой на Android
Телефоны под управлением Android 11 или более поздней версии поддерживают встроенную прокрутку скриншотов. Но, в отличие от iPhone, телефоны Android сохраняют ваш скриншот экрана в виде изображения, а не в формате PDF. Вот руководство о том, как сделать скриншот с прокруткой на Android:
Шаг 1: одновременно нажмите Power + Volume Down, чтобы активировать инструмент для создания скриншотов экрана.
Шаг 2: Нажмите кнопку «Захватить больше» на появившейся миниатюре.
Шаг 3: Вы найдете длинный снимок целевой страницы. Перетащите акцентированные границы в центре, чтобы скрыть то, что вы хотите, и нажмите «Сохранить», когда закончите.
Итог
Это все о том, как сделать скриншот с прокруткой на Windows/Mac/iPhone/Android. Способы делать скриншоты с прокруткой различны, и iTop Screen Recorder станет хорошим выбором для вашего ПК с Windows. Этот экранный рекордер не только поможет вам легко делать длинные скриншоты экрана, но и записывать экран, редактировать видео, вырезать видео и многое другое.
Записывайте видео & аудио с экрана бесплатно
- Записывайте высококачественное видео с экрана вашего ПК, а также звук с системы или устройства ввода синхронно с видео.
- Упростите количество шагов и кликов мыши, для более комфортного использования. Управляйте всем процессом записи без усилий.
- Поддержка вывода в несколько форматов и преобразование с использованием новейших технологий сжатия. Лучшее качество и меньший размер.
Readers help support Windows Report. We may get a commission if you buy through our links.
Read our disclosure page to find out how can you help Windows Report sustain the editorial team. Read more
Screenshots are necessary as it helps to save information without needing to note it down. You can always open the screenshot and refer to it for information. Windows offers the ability to take screenshots inbuilt. However, that is restricted to screenshots for the active window or a selected area.
It cannot take scrolling screenshots. This guide will give you multiple ways to take scrolling screenshots on your Windows 10 PC. This would also involve using several third-party apps to accomplish the task. Let us get right into it.
1. Capture a scrolling screenshot in the browser
1.1. Microsoft Edge
- Launch the Microsoft Edge browser.
- Click on the 3-dot menu icon.

- Click on Web Capture.

- Select Capture full page.


This will capture the scrolling screenshot on Microsoft Edge’s active tab. Do note that you can later edit this screenshot and annotate it.
1.2. Google Chrome
- Launch Google Chrome.
- Visit the Google Chrome web store.
- Type GoFullPage and download the extension.

- Click on the GoFullPage extension icon at the top toolbar.
- It will start taking a scrolling screenshot of the currently active webpage.

You can use this same extension for Microsoft Edge as well. However, since Edge already has a built-in option, you can use that, as shown above.
1.3. Mozilla Firefox
- Open Firefox.
- Click on the 3-line icon.
- Select More tools.

- Click on Customize Toolbar.
- Please search for the Screenshot and drag it to your Firefox toolbar.
- Go to the page on which to take a scrolling screenshot.
- Click on the Screenshot icon and select Save the full page.


- Microsoft Office Lens: A Powerful Tool for Capturing and Organizing Information
- Swap Left/Right Speaker in Realtek Audio Console [How to]
- How to Get DirectX 12 End-User Runtime and Fix Installation Issues
- Overclocking in OMEN Gaming Hub: How to Use it
2. Capture scrolling screenshots for Windows apps
2.1. ShareX
- Download ShareX on your PC.
- Install the application on your Windows 10 PC.
- Launch the application.
- Click on Capture from the left pane.

- Select Scrolling capture.

- Click on the webpage or Windows app of which you wish to take a scrolling screenshot.
- Click on Start scrolling capture.


ShareX is an excellent piece of software that lets you take different screenshots, such as scrolling screenshots. It also is a great video recording tool.
Using ShareX, you can take scrolling screenshots of a webpage or a browser and any Windows app, for that matter.
2.2. Tweakshot
- Download Tweakshot on your PC.
- Install the program on your PC.
- Launch the program.
- Among all the toolbar options, click on the fourth icon to take a scrolling screenshot.

- Select the page or window you wish to take a scrolling screenshot.
- The app will automatically take the scrolling screenshot.

Once the screenshot has been captured, you can easily edit the photo in the screenshot editor. It will open right after the screenshot has been taken.
Apart from scrolling screenshots, you can take Tweakshot to take regular and full-screen screenshots, capture windows, use the image editor, video record, screen color picker, and more.
2.3. PicPick
- Download the PicPick software on your PC.
- Install the program.
- Launch PicPick.
- Select the Scrolling Window option from the list that appears in the menu.

- Left-click on the area in which you wish to take a scrolling screenshot.
- PicPick will automatically start taking the scrolling screenshot.
- To stop the scrolling screenshot, simply right or left-click on the screen.
- The screenshot will immediately appear in the editor, where you can do all sorts of things to the image.


So, to take scrolling screenshots on your Windows PC, you have to rely on third-party tools, as mentioned above, if you want to take screenshots of a Windows app or games specifically.
Otherwise, popular browsers such as Firefox and Opera can take scrolling screenshots. You can use an extension on Google Chrome to take scrolling screenshots on Windows 10.
We have a dedicated guide that lists some of the best screenshot-taking tools you can opt for on your Windows 10 PC.
You can also refer to our guide that explains how you can disable the PrintScr button on your keyboard, which is usually meant to capture screenshots on a Windows PC.
We also have a guide that explains the different methods that will help you to add text in the Snipping Tool. For those who don’t know, Snipping Tool is Microsoft’s default screenshot tool on Windows OS.
Feel free to let us know in the comments below which methods you used to take scrolling screenshots on Windows 10.
Sagar Naresh
Sagar is a web developer and technology journalist. Currently associated with WindowsReport and SamMobile. When not writing, he is either at the gym sweating it out or playing country music on his guitar.
He is an avid traveler and has been to 15 countries, going to more places soon. TRAVEL and WORK is his mantra for a peaceful life.