
Все способы:
- Вариант 1: Определение причины через дамп памяти
- Вариант 2: Выполнение общих рекомендаций
- Способ 1: Исправление ошибок в работе RAM
- Способ 2: Отключение разгона
- Способ 3: Обновление драйверов
- Способ 4: Откат Windows
- Вопросы и ответы: 0
Вариант 1: Определение причины через дамп памяти
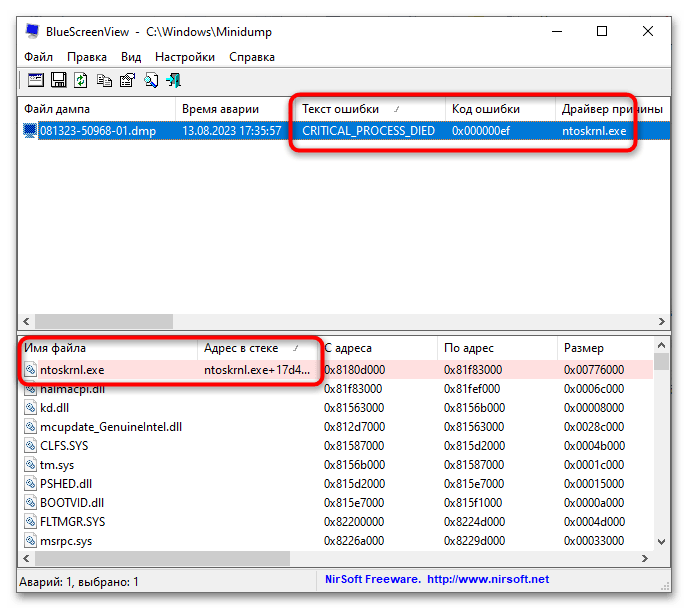
Лучшим способом выяснить причину ошибки является использование специального файла, который создается в момент сбоя и называется дампом памяти. В нем содержится подробная информация о происшедшем сбое, что позволяет определить источник проблемы. Этот метод особенно полезен, если синий экран исчезает слишком быстро, не давая времени рассмотреть код ошибки, или если нужные данные просто не отображаются.
По умолчанию Windows автоматически сохраняет дампы памяти при критических ошибках. Если эта функция не была отключена, файлы можно найти в папке C:\Windows\Minidump или в корневом каталоге диска C. Оба варианта имеют расширение DMP, но названия у них могут отличаться. Проще всего проанализировать дамп с помощью специального ПО, например, BlueScreenView — оно быстро укажет, какой файл вызвал сбой. Подробные инструкции по работе с утилитой, а также руководство по включению создания дампов памяти, если они у вас отсутствуют, можно найти в статье по ссылке ниже.
Подробнее: Как пользоваться BlueScreenView в Windows 10 и 11
Если вы не хотите пользоваться сторонним ПО и у вас есть HEX-редактор или Notepad++, попробуйте открыть файл DMP через любой из них, чтобы получить важную информацию о сбое. В этом файле содержатся ключевые строки, которые помогут понять, что именно стало причиной ошибки:
BUGCHECK_CODE— это числовой код, идентифицирующий проблему. Например, если в дампе указан c9, то полный код ошибки — 0xc9. Такие коды всегда начинаются с 0x, поэтому при поиске расшифровки в интернете важно добавлять этот префикс.IMAGE_NAME— название драйвера или библиотеки, вызвавших сбой (например, ntoskrnl.exe, dxgmms2.sys). Это помогает сузить круг возможных причин ошибки.PROCESS_NAME— процесс, который был активен во время сбоя. Однако он не всегда является виновником — иногда он оказывается пострадавшим из-за сбоя в другом компоненте.Пример: допустим, в результате расшифровки дампа памяти сбойными оказались процессы eamonm.sys, atikmdag.sys, atikmpag.sys. Тут виноват процесс eamonm.sys (это антивирус NOD32; в вашем случае через «Диспетчер задач» или хотя бы поиск в интернете можно понять, за что отвечает каждый из процессов), который вслед за собственным «падением» вызывает неустранимую ошибку в atikmdag.sys, atikmpag.sys (это драйверы видеокарт AMD), вследствие чего гаснет экран или появляется BSOD с кодом UNEXPECTED_KERNEL_MODE_TRAP. Решение в нашем примере довольно простое и заключается в переустановке или полном отказе от использования конкретно этого антивируса.
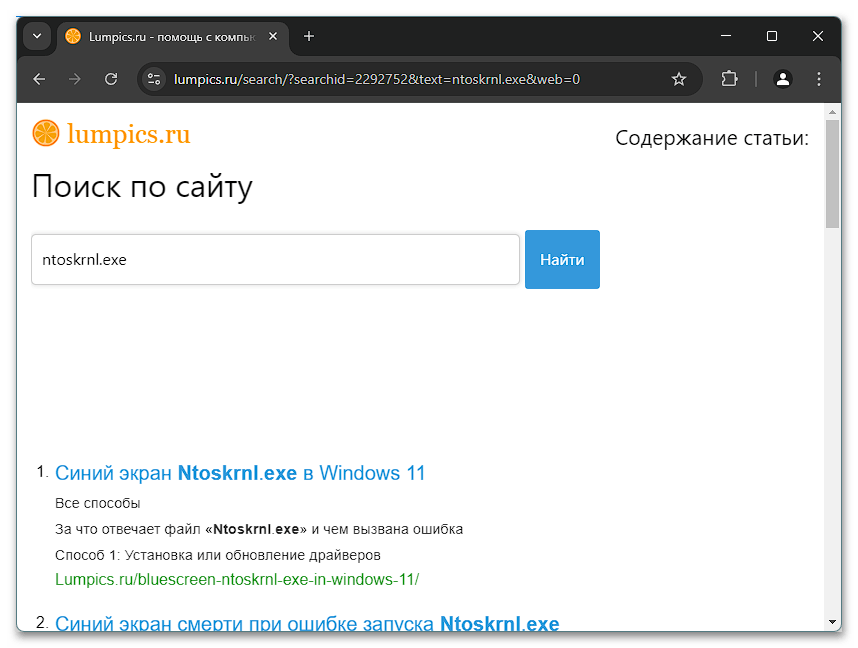
После того как вы определили проблемный файл, следующим шагом станет поиск выхода из сложившейся ситуации. Если сбой вызван драйвером или программой, попробуйте удалить их и установить заново, возможно, выбрав более старую версию. В случаях, когда причина связана с самой системой, могут потребоваться дополнительные исправления или даже полная переустановка Windows. Если вы не уверены, как исправить ошибку, попробуйте поискать ее расшифровку в интернете, введя значение BUGCHECK_CODE или название проблемного файла. Кроме того, на нашем сайте есть инструкции по устранению ошибок, связанных с файлами EXE и SYS — просто впишите их название в поиск, чтобы проверить, найдутся ли подходящие решения.
Вариант 2: Выполнение общих рекомендаций
Если дамп памяти не дает четкого ответа на причину сбоя — например, каждый раз фиксируются разные ошибки, не имеющие очевидной связи, — а самостоятельно проанализировать их затруднительно, стоит переключиться на универсальные методы устранения неполадки. Такие способы помогают в большинстве случаев и не требуют глубокого понимания системных процессов.
Способ 1: Исправление ошибок в работе RAM
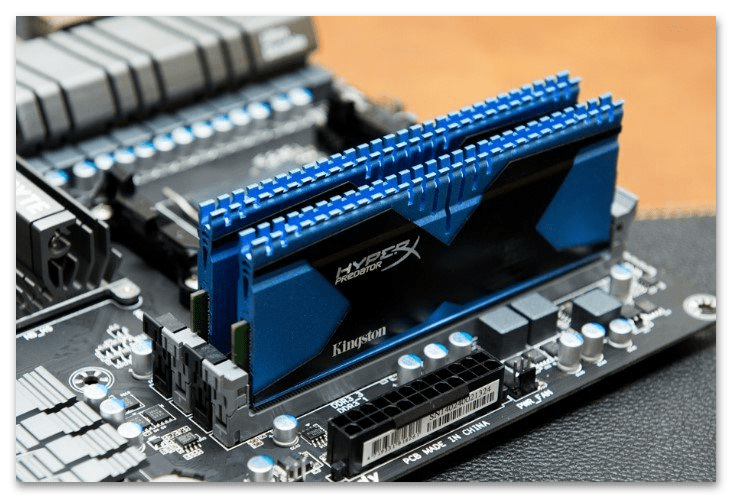
Проблемы с оперативной памятью являются одной из самых частых причин ошибки UNEXPECTED_KERNEL_MODE_TRAP. Они могут возникать из-за сбоев в модулях ОЗУ, носящих разный характер. Однако не все такие неисправности можно исправить самостоятельно — в некоторых случаях потребуется замена памяти или диагностика оборудования в сервисном центре.
Переподключение ОЗУ
В некоторых случаях ошибка UNEXPECTED_KERNEL_MODE_TRAP вызвана временными сбоями в контактах оперативной памяти. Со временем из-за пыли, окисления или незначительных смещений в разъеме модули ОЗУ могут работать нестабильно, что приводит к различным критическим ошибкам, включая BSOD. Простое извлечение планок из слотов и их повторная установка часто помогает восстановить нормальное соединение, устраняя перебои в передаче данных.
Кроме того, при наличии нескольких модулей стоит попробовать поменять их местами или оставить только один, чтобы проверить работоспособность каждого по отдельности. Иногда неисправным оказывается лишь один из них, и выявить его можно методом исключения. Также стоит обратить внимание на плотность установки — модули должны быть вставлены до характерного щелчка, иначе они могут работать с перебоями или не определяться системой.
Особенно внимательными к переподключению ОЗУ должны быть пользователи, недавно собравшие компьютер или заменившие старые модули на новые. В процессе сборки можно случайно установить планки неплотно или в неподходящие слоты, что приведет к ошибкам в работе системы. Кроме того, новые модули могут оказаться бракованными или несовместимыми с материнской платой, из-за чего компьютер начинает выдавать сбои.
Читайте также: Проверяем совместимость оперативной памяти и материнской платы
Программная проверка
Определить неисправность оперативной памяти можно только с помощью специализированных программ. В Windows для этого предусмотрена встроенная утилита диагностики, но она дает лишь базовые результаты. Гораздо точнее и надежнее работают сторонние инструменты, такие как MemTest, которые проводят глубокое сканирование, иногда продолжающееся несколько часов. Если в ходе проверки будут обнаружены повреждения, единственным решением станет замена модуля, так как восстановить или отремонтировать его, к сожалению, нельзя.
Подробнее: Проверка оперативной памяти в Windows
Способ 2: Отключение разгона
Разгон компонентов компьютера (оверклокинг) может стать причиной ошибки UNEXPECTED_KERNEL_MODE_TRAP. Это связано с тем, что при увеличении частоты работы процессора или изменении таймингов оперативной памяти компоненты могут работать нестабильно, что приводит к сбоям системы. Кроме того, разгон видеокарты также может вызвать данную ошибку, поскольку повышенные частоты и/или увеличенное напряжение могут привести к нестабильной работе графического процессора.
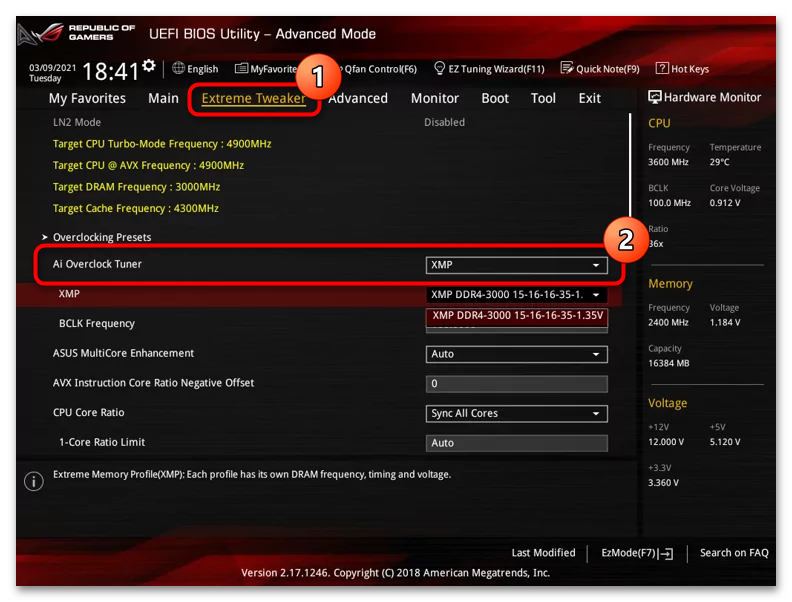
Если вы разгоняли процессор, оперативную память или видеокарту, рекомендуется вернуть их параметры к стандартным значениям. Сделать это можно через BIOS или с помощью программного обеспечения, использованного для разгона, — смотря каким методом был осуществлен разгон. Возврат к заводским настройкам с последующим тестированием поможет определить, связан ли оверклокинг с возникновением ошибки UNEXPECTED_KERNEL_MODE_TRAP.
Включенный XMP-профиль в BIOS для автоматического разгона оперативной памяти до заявленных производителем частот и таймингов сюда тоже относится. Даже если вы не включали его вручную, проверьте его состояние в БИОС и при необходимости отключите, а затем проверьте, отразилось ли это на стабильности работы ПК. Поскольку расположение опции (а точнее названия разделов) сильно зависит от модели материнской платы, проще всего вам будет узнать ее точное расположение через поиск в интернете, вписав в запросе ее название и дописав «xmp».
Способ 3: Обновление драйверов
Проблемные или устаревшие драйверы ключевых компонентов, таких как чипсет, видеокарта и других устройств, могут быть причиной ошибки UNEXPECTED_KERNEL_MODE_TRAP. Если драйвер работает некорректно, он может вызывать сбои в системе и приводить к критическим ошибкам. Чтобы устранить проблему, рекомендуется обновить драйверы до актуальных версий, скачав их с официальных сайтов производителей. Однако, если ошибка появилась как раз после установки обновления, возможно, лучше откатиться к предыдущей версии драйвера, так как новый вариант мог оказаться несовместимым с системой.
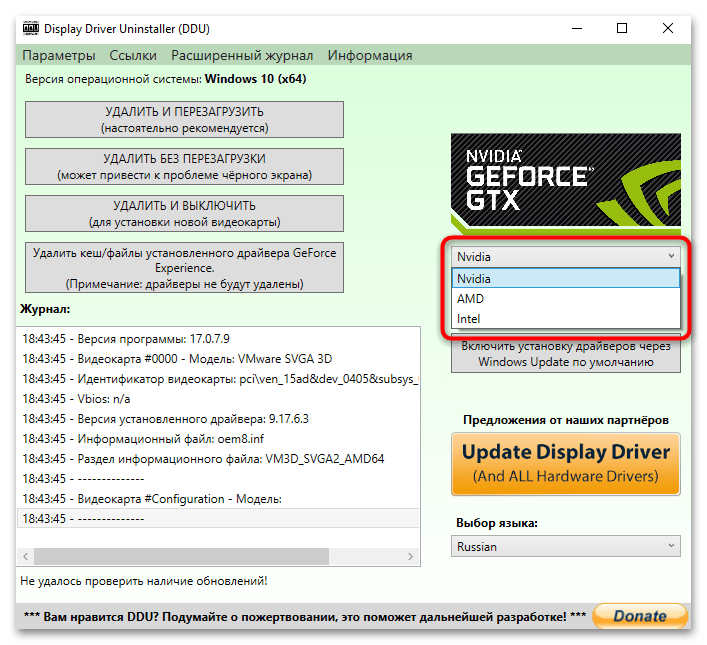
При переустановке драйверов видеокарт важно сначала полностью удалить старое программное обеспечение. Делать это вручную нежелательно, так как стандартное удаление может оставить в системе остаточные файлы, которые вызовут конфликты при установке новой версии. Для чистого удаления лучше использовать специализированные утилиты, способные удалить все следы драйверов перед их повторной установкой.
Подробнее: Удаляем драйверы видеокарты
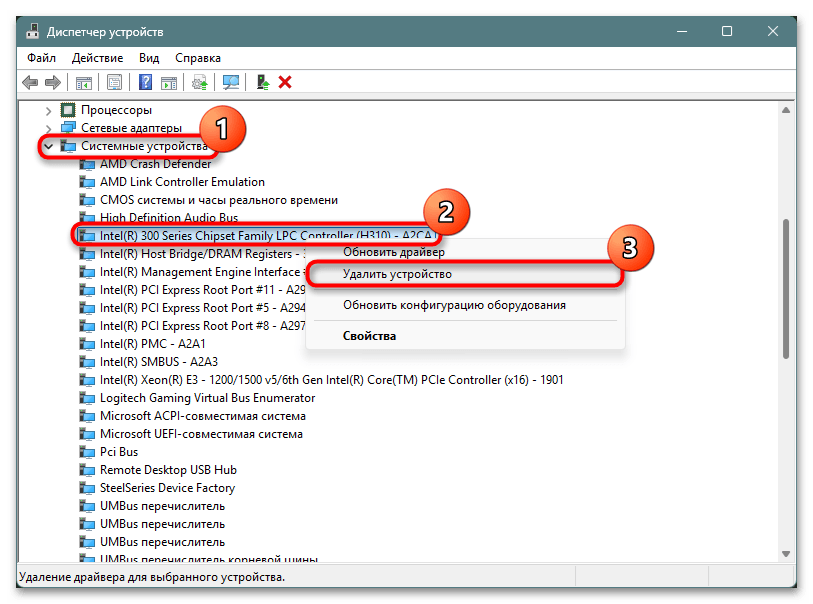
Драйверы других компонентов, к примеру того же чипсета, удаляются через «Диспетчер устройств». Для этого найдите его в соответствующей категории, кликните правой кнопкой мыши и выберите «Удалить устройство». После перезагрузки компьютера будет установлена стандартная версия ПО, и вы сможете установить другую версию или ту же самую (т. е. произвести чистую установку).
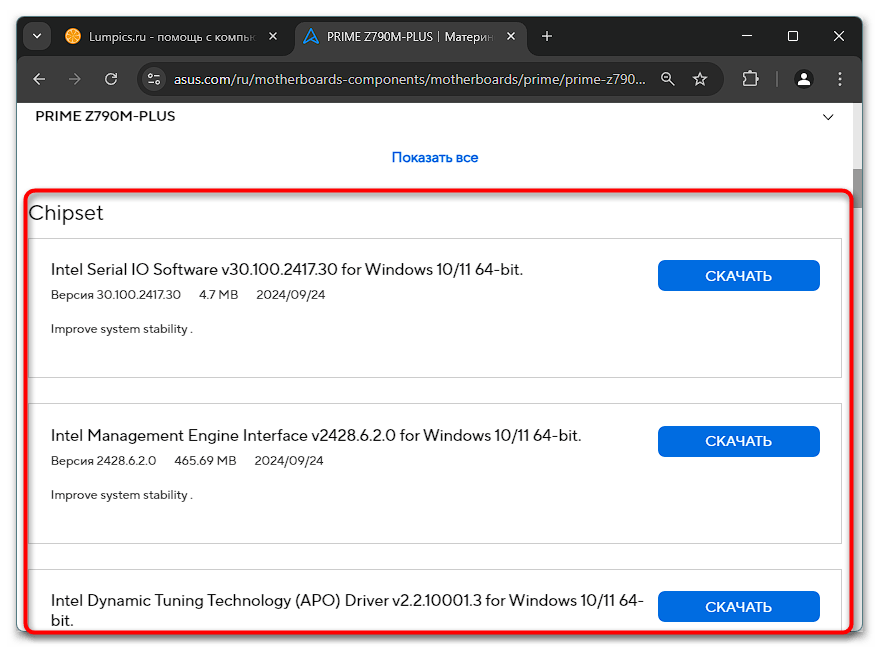
Скачиваются все необходимые и полностью совместимые драйверы с официальных сайтов производителей конкретной модели материнской платы или ноутбука.
Читайте также:
Просмотр характеристик материнской платы
Как узнать название своего ноутбука
Способ 4: Откат Windows
Случается, что обновления операционной системы провоцируют появления различных багов и ошибок, и UNEXPECTED_KERNEL_MODE_TRAP уже однажды появлялась как раз после одного из апдейтов. Обычно пользователи находят временное решение и выкладывают его на различные форумы типа Reddit и ему подобные. Или же остается ждать исправления, которое выпустит Microsoft. Пока оно не выйдет, рекомендуется пользоваться предыдущей версией операционной системы. Откатиться можно по-разному, и основные методы перечислены в инструкциях по следующим ссылкам.
Подробнее:
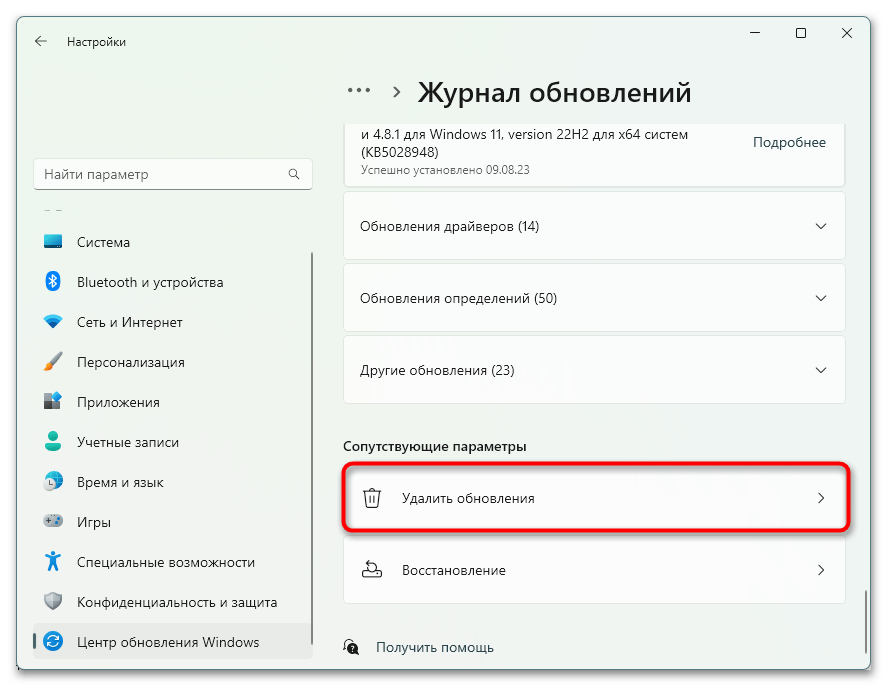
Откат последнего обновления в Windows 11 / Windows 10
Откат к точке восстановления в Windows
Наша группа в TelegramПолезные советы и помощь
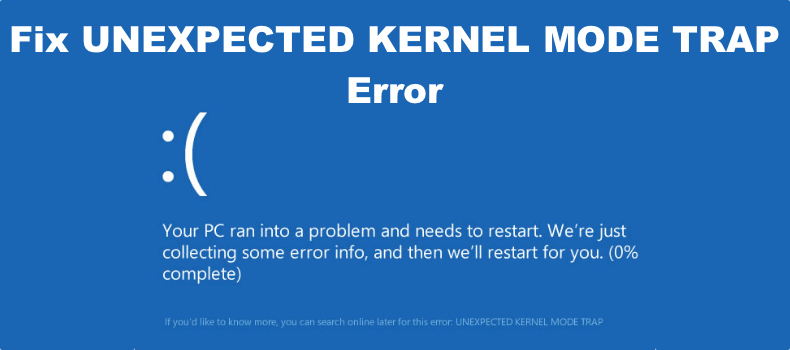
The Unexpected Kernel Mode Trap error is a form of Blue Screen of Death (BSOD) which could arise on Windows 10/11. This errors normally indicators a hassle with your hardware, drivers, or machine files. Although the mistake can be irritating, there are several solutions to help you solve it.
The Cause of the UNEXPECTED KERNEL MODE TRAP Error
To make subjects worse, a few users have experienced a plethora of UNEXPECTED KERNEL MODE mistakes as nicely, including the subsequent::
- UNEXPECTED KERNEL MODE TRAP wdf01000.sys, win32kfull.sys, usbxhci.sys, nvlddmkm.sys, ntfs.sys, ndu.sys, and netio.sys – This errors generally pops up observed by using the call of the file that induced it. Generally, that is due to a problematic driving force or 1/3-party software.
- UNEXPECTED KERNEL MODE TRAP Overclock – This blunders may additionally appear whilst you overclock your laptop. To repair this, just remove your overclock settings.
- UNEXPECTED KERNEL MODE TRAP ESET Smart Security, Avast, AVG, McAfee – According to some users who have visible this error, it’s far due to faulty security software.
- UNEXPECTED KERNEL MODE TRAP after a Windows Update – In some instances, this problem seemed after installing a Windows replace. To restoration this, customers absolutely uninstalled the elaborate replace.
- UNEXPECTED KERNEL MODE TRAP RAM – Hardware problems can trigger this mistake to appear. As the name of the mistake shows, it’s miles due to a tricky RAM module.
- UNEXPECTED KERNEL MODE TRAP BSOD – This errors message is often accompanied with the aid of a BSOD and a sudden restart. While this hassle is pretty annoying, fixing it ought to be smooth.
What Causes the Unexpected Kernel Mode Trap Error?
The error normally occurs when:
- Incompatible or malfunctioned drivers
- Faulty hardware such as bad RAM or badly wired wires
- Damaged system file
- Overclocking or interfering with security software
- Recent Windows update has resulted in an error
Read about common Windows Errors:
WHEA_UNCORRECTABLE_ERROR error
‘System Thread Exception Not Handled’ Error
DRIVER POWER STATE FAILURE Error
PAGE FAULT IN NONPAGED AREA Error
“Getting Windows Ready” Stuck
KMODE EXCEPTION NOT HANDLED Error
How to Fix the Unexpected Kernel Mode Trap Error
Following are some of the potential solutions to the UNEXPECTED KERNEL MODE TRAP error on a client computer running Windows 10/11:
Fix #1: Remove Faulty Device Drivers
Although removing the Bluetooth feature solved the problem for some users, it is highly recommended to check all the drivers, as other malfunctioning drivers might be the actual reason for this error. Here’s how to troubleshoot:
- Go to the Start menu and restart your computer. As your computer restarts, hold the Shift key to enter the Advanced Startup menu.
- Select Troubleshoot > Advanced Options > Startup Settings > Safe Mode.
- Once in Safe Mode, open Device Manager.
- Locate the problematic driver, right-click on it, and choose Uninstall.
After removing the driver, you could use Outbyte Driver Updater to scan and update your drivers automatically, so everything will be at its latest possible level without manually looking around. Download and install the Outbyte Driver Updater utility at your own discretion. It automatically launches a scan on your system for any outdated drivers. Go ahead and view the scan results, then update the drivers one by one or en masse. This helps you keep your system in a good state since it won’t allow wrong drivers to install.
Fix #2: Run the BSOD Troubleshooter
Using the built-in BSOD troubleshooter, fix the issue if the above did not work. Windows has built-in BSOD Troubleshooter to diagnose and resolve blue screen errors. You access it from Settings > Update & Security > Troubleshoot.
Fix #3: Run an SFC Scan
Another possible way to fix the UNEXPECTED KERNEL MODE TRAP BSOD error on your Windows 10/11 device is to perform an SFC scan. System File Checker, or SFC for short, will scan for corrupted system files that may lead to the problem; when found, it could be able to repair them.
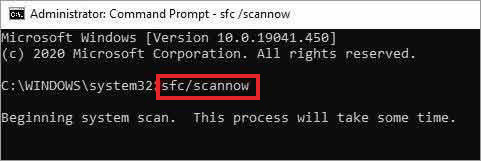
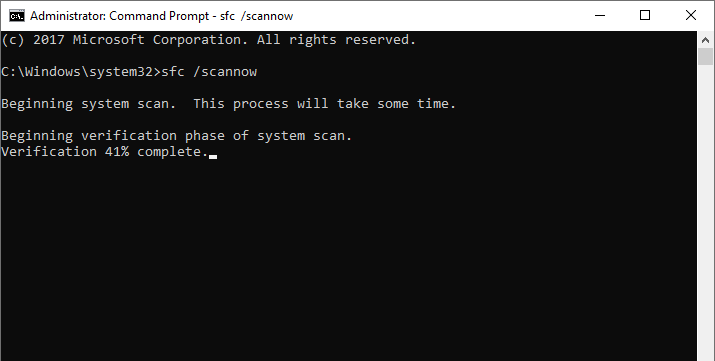
- Open Command Prompt in administrator mode.
- Type
sfc /scannowand click Enter. It will automatically fix any file issues that it will detect.
Fix #4: Install Windows Updates
The problem might go away by installing new or latest updates for Windows 10/11. Install available updates through Windows Updates. Microsoft often releases patches containing bug fixes and several system stability enhancements.
Fix #5: Check Cables and Connections
Ensure your cables are well connected, especially if you have recently upgraded your hardware. Poorly connected RAMs or other hardware components might cause this error.
Fix #6: Test Your RAM
You can also run a test on it after ensuring that your RAM is well-seated on your computer. Quite often, a problematic RAM stick may be the cause of this UNEXPECTED KERNEL MODE TRAP BSOD. If possible, isolate the problematic module by taking out one RAM stick at a time. This Memory testing software can conduct a more comprehensive test of your RAM.
Fix #7: Use the DISM Tool
Deployment Image Servicing and Management (DISM) can restore health to Windows images. Run it via the command below: DISM /Online /Cleanup-Image /RestoreHealth.
Fix #8: Use a Trusted PC Repair Tool
Installing a good PC repair tool, such as Outbyte PC Repair will help clean up unnecessary files and optimize your system to a healthy state, maybe resolve this error.
Fix #9: Disable or Uninstall Your Security Software
Sometimes, third-party programs for antivirus or firewalls may be the reason for the UNEXPECTED KERNEL MODE TRAP error. Try to temporarily disable your antivirus and firewalls; see if that works.
If that doesn’t work, consider uninstalling antivirus software entirely and check after that if the error is gone.
Fix #10: Reset Your Windows 10/11 PC
This is literally the last thing you will want to try if everything else doesn’t work. Note that a reset will clear all the files from your system drive; you’ll need to create a backup for whatever data you consider important.
Once that is done, follow these steps to reset your PC:
- Go to the Start menu and restart your computer; while it is booting, hold down the Shift key until it opens up to the Advanced Startup menu > Troubleshoot, then click Reset this PC.
- Select Remove everything.
- If asked, insert your installation media. Then, select the installation drive Windows is located on. Click Just remove my files.
- After reviewing the list of changes, click Reset to proceed.
At this point, follow through with the remaining instructions onscreen.
FAQs
1. What triggers an Unexpected Kernel Mode Trap error?
The error is usually triggered by faulty drivers, defective hardware, or corrupted files in the system.
2. How would I tell if my RAM is flawed or even at fault for this error?
You may remove each RAM stick and test them one at a time or diagnose bad RAM using memory test utilities.
3. Does this error come about as a result of outdated software?
Yes, using drivers and software that are outdated can cause compatibility issues, hence the error. Regular updating may avoid it.
4. Can this be an issue due to overclocking?
Well, yes, sometimes overclocking does lead to system instability and can cause the Unexpected Kernel Mode Trap error. Removing the settings for overclocking may resolve it.
Many users have reported about the UNEXPECTED_KERNEL_MODE_TRAP error in Windows 10. This error is quite annoying as it doesn’t let you operate the system smoothly. Your computer screen turns blue showing the UNEXPECTED_KERNEL_MODE_TRAP error, and you’re stuck.
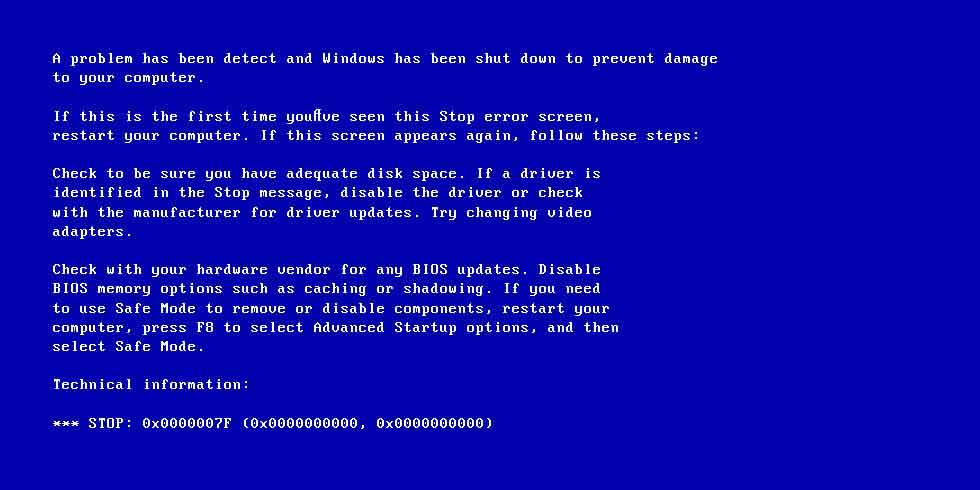
You may also see a message stating, “A problem has been detected and Windows has been shut down to prevent damage to your computer.” The stop code associated with this error is 0x0000007F (0x0000000000, 0x0000000000). If not fixed immediately, this BSOD error can stop you from accessing your system files and even lead to data loss.
The error usually results from an outdated device driver or a problematic Windows update. Also, check if all the cables are connected properly. Sometimes, a loose connection may cause the issue. Let’s explore all the causes in detail and see how to fix them.
Reasons behind the UNEXPECTED_KERNEL_MODE_TRAP Error in Windows 10 and their Solutions
- Faulty RAM Module
- Outdated Device Drivers
- Windows Upgrade Issues
- Missing or Corrupted File System
- Low Disk Space or Memory Errors
- Outdated Antivirus Protection
- Issues with Graphics Card Driver
Caution: Before you begin troubleshooting the UNEXPECTED_KERNEL_MODE_TRAP error, log into your Windows 10 using safe mode so that you don’t end up losing critical data if something goes wrong.
1. Faulty RAM Module
A fault in your system’s RAM may cause UNEXPECTED_KERNEL_MODE_TRAP error, boot failure, and other memory errors.
To fix a faulty RAM, you need to figure out which RAM module is corrupt or damaged. For this, test each memory slot to find which slot is faulty and then replace it. You may even have to replace your motherboard to fix this issue. If you’re unsure about the process, try to get an expert’s help.
Another way to fix a faulty RAM is to run the built-in BSOD troubleshooter program available in Windows 10. To do so, follow these steps:
- Go to the Settings menu and navigate to Update & Security.
- Click on Troubleshoot option on the left.
- Click Blue Screen on the right and select Run the troubleshooter.

- Follow the on-screen instructions. This should fix the UNEXPECTED_KERNEL_MODE_TRAP error.
2. Outdated Device Drivers
An outdated, faulty, or incompatible driver can cause the UNEXPECTED_KERNEL_MODE_TRAP error. Try updating your device drivers or remove a problematic one and see if the error is resolved. Here’s how to update or uninstall a device driver.
3. Windows Upgrade Issues
Many types of BSOD errors can be fixed with a simple Windows upgrade. By upgrading your Windows to the latest update, you can fix various hardware and software bugs. Follow these steps to check for latest Windows updates:
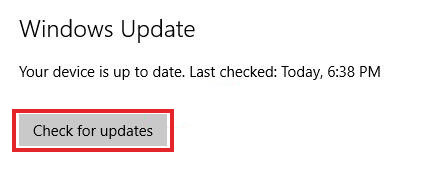
- Enter Windows Update in the search box and select Check for updates.
- Click the Check for updates button in the Windows Update information box.
Follow the instructions on screen and install any available update.
You may also try resetting your Windows 10 to see if the error has occurred due to improper installation of Windows. To do so, follow these steps:
- Launch the Start menu, press and hold Shift on keyboard, and then click Restart.
- In the Advanced Startup options, go to Troubleshoot.
- Select the Reset this PC option and click Remove everything.
- Now, install Windows 10 again on the system.
- Select the option Only the drive where Windows is installed and click Just remove my files.
- Now, Reset the system after seeing the changes the reset will enable.
- Follow the instructions on screen to complete the reset process.
Note: Resetting the PC may delete all existing files from the system. So make sure you have a backup available to avoid any impending data loss. If there’s no backup available and you lose your critical system data, the best option is to use a reliable professional data recovery software to recover the data.
4. Missing or Corrupted File System
A missing or corrupted file system can also cause the UNEXPECTED_KERNEL_MODE_TRAP error. You may fix this issue by running two types of scans on your system – SFC and DISM.
- SFC Scan – The SFC scan on your system helps to detect and repair any file system corruption. Follow these steps to perform this scan:
- Press the Windows key + X to launch the quick-access menu.
- Click Command Prompt and run it as administrator.
- Enter sfc /scannow in the command prompt and press Enter.
Once the scan is completed, restart your system to check if the error is resolved. If not, try the DISM scan as described below.
- DISM Scan – You can check the health of your OS or detect any missing or corrupted system file by running DISM scan on your system. To do so, follow these steps:
- Go to Start menu.
- Enter Command Prompt. Right-click and select Run as administrator.
- Enter the following command in the Command Prompt window and press Enter:
DISM /Online /Cleanup-Image /CheckHealth
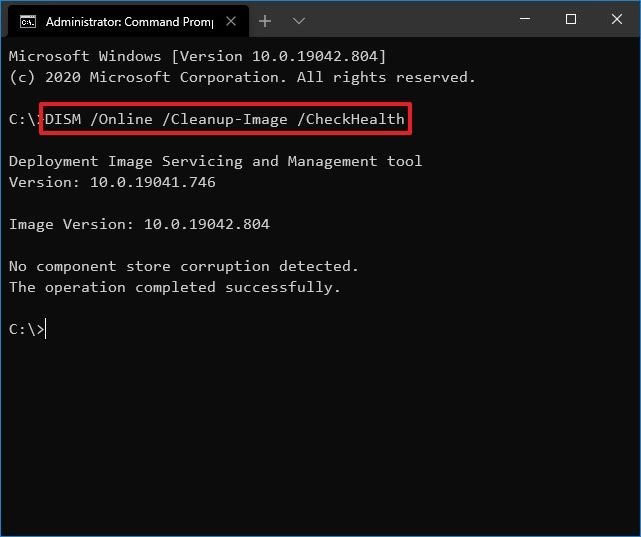
This scan may take some time but it will effectively detect any issues with the system that need to be fixed.
5. Low Disk Space or Memory Errors
Your system may be running out of memory or there may be some corruption issues, causing the error. To find the exact issue, you may run memory diagnostics on your computer. Follow these steps:
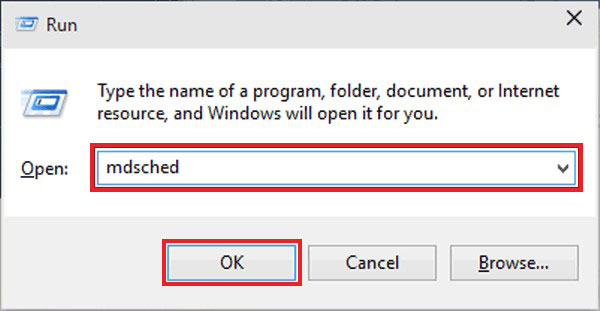
- Press Windows + R keysto open the Run dialog box.
- Enter mdsched.exe and click OK.
- Select the option Restart now and check for problems (recommended).
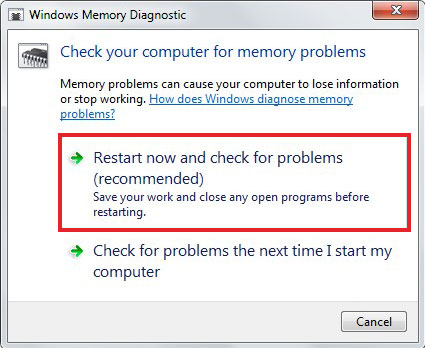
- Let Windows check the memory for any errors. Wait till the scan completes.
Once the testing is completed, Windows will restart automatically.
Another way to find whether the UNEXPECTED_KERNEL_MODE_TRAP error is caused by a storage or corruption issue on your system, is to run a chkdsk scan.
Run Chkdsk Scan
- Press and hold Windows + X keys and select Command Prompt (Admin), or PowerShell (Admin).
- Press and hold Windows + X keys and select Command Prompt (Admin), or PowerShell (Admin).
chkdsk/r c:
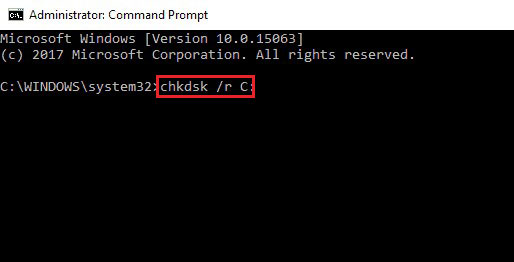
Running the Chkdsk command on your PC will help you detect any potential issues with the disk storage space or file system corruption.
6. Outdated Antivirus Protection
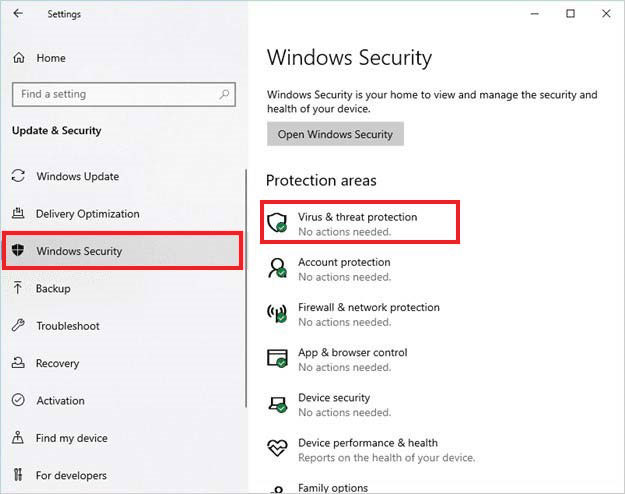
Your Windows Defender Antivirus protection may be expired or disabled, which is a possible cause of the UNEXPECTED_KERNEL_MODE_TRAP error. Check your system to see whether your antivirus protection is up-to-date and running. Follow these steps:
- Go to System Settings and navigate to Update & Security > Windows Security > Virus & threat protection.
- The antivirus will also scan the PC to detect any viruses.
- Follow the instructions on screen to remove malware, if any. Once done, restart your computer and check whether the problem is resolved.
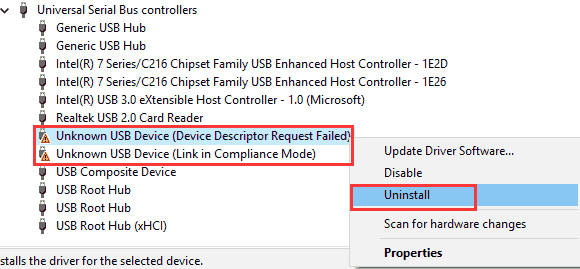
7. Issues with Graphics Card Driver
Sometimes, BSOD errors are caused due to an improperly installed or outdated graphics card driver. It is also being reported that the latest Nvidia driver is causing various errors in Windows 10. And, the best way to deal with this to roll back to the previous driver.
To do so, remove the Nvidia driver from the Device Manager.
Once the driver is removed, restart your PC. Windows will reinstall the default driver. Now check whether the error reappears after this.
End Note
The UNEXPECTED_KERNEL_MODE_TRAP error may occur due to various reasons, such as faulty RAM, outdated drivers, corrupted file system, etc. In this post, we’ve shared the causes and their fixes to resolve this error. One may run the built-in BSOD troubleshooter or check Windows for any impending updates.
Other methods include running system diagnostics to check for any memory or storage-related errors, keeping your antivirus updated, and uninstalling any outdated driver.
Found this information useful? Share your feedback in the comment section below.
Was this article helpful?
YES1
NO
Position: Resource — Disk Utilities — Fix UNEXPECTED KERNEL MODE TRAP in Windows 11 or Windows 10
What Is the Error Code For UNEXPECTED_KERNEL_MODE_TRAP?
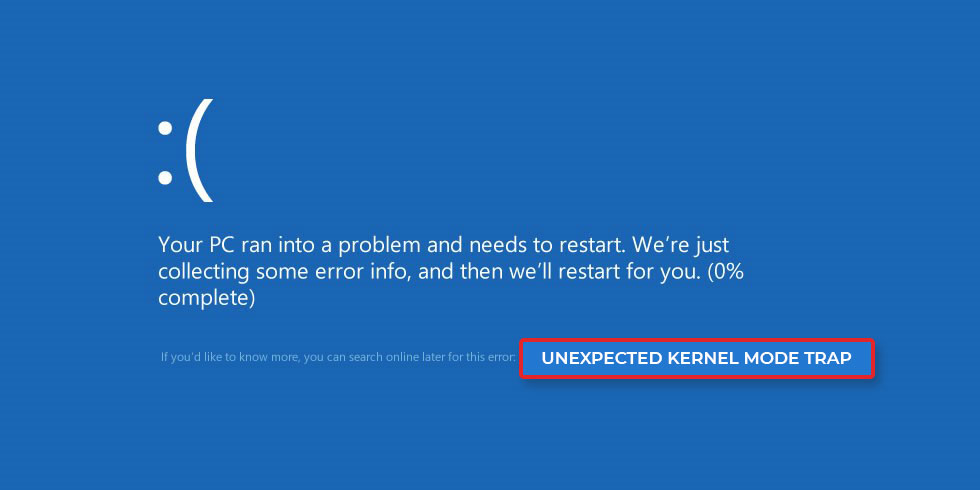
«Your device ran into a problem and needs to restart. We’re just collecting some error info, and then we’ll restart for you.
For more information about this issue and possible fixes, visit: https://www.windows.com/stopcode
If you all a support person, give them this info:
Stop code: UNEXPECTED KERNEL MODE TRAP»
The «UNEXPECTED KERNEL MODE TRAP» error is a type of blue screen error that occurs on Windows operating systems when the operating system detects an exception or trap in kernel mode that was not handled properly. The kernel is a core component of the operating system that manages system resources and communicates with hardware devices.
The «unexpected kernel mode trap» error typically indicates a serious problem with the system, such as a hardware failure, driver issue, or software conflict. Common causes of this error include corrupted system files, outdated or incompatible device drivers, faulty RAM or other hardware components, and malware infections.
When this error occurs, the system may stop working, automatically restart or display a blue screen with a specific error code, such as 0x0000007F. It is important to properly diagnose and troubleshoot the underlying cause of the error to prevent further system crashes and data loss.

Why is my PC doing an unexpected kernel mode trap? The error is typically caused by a hardware or software issue that leads to an exception or trap in kernel mode. Here are some of the common causes of this error:
- Malware or virus infections: Malware or virus infections can also cause this error by corrupting system files or interrupting system processes.
- Faulty hardware components: Hardware components such as RAM, hard drives, or motherboards can also cause the «unexpected kernel mode trap» error if they are malfunctioning or failing.
- Outdated or corrupted device drivers: Device drivers are software programs that allow your computer to communicate with hardware components. If a device driver is outdated, corrupted or incompatible with your system, it can cause the «unexpected kernel mode trap» error.
- Software conflicts: Conflicts between software programs or with the operating system can cause BSOD error.
- Corrupted system files: Corrupted system files can cause various errors, including the BSOD stop code error.
To fix this error, you can try solutions presented in the next section. Moreover, you can also seek assistance from a professional or knowledgeable technician if you are not familiar with these processes or if you are unsure about the underlying cause of the error.
How Do I Fix Unexpected Kernel Mode Trap Error?
Fix #1: Check for Hardware Issues
Step 1. Restart your computer and check for any hardware issues that may be causing the error.
Step 2. Check the system for overheating. Overheating can cause the computer to shut down suddenly.
Step 3. Check for any loose connections with the hardware components.
Fix #2: Update or Reinstall Drivers
Step 1. Press the Windows key + X and select «Device Manager».
Step 2. Check for any hardware devices with a yellow exclamation mark, which indicates that the driver needs to be updated or reinstalled.
Step 3. Right-click on the device and select «Update Driver» or «Uninstall Device».
Step 4. If you selected «Update Driver», select «Search automatically for updated driver software» and let Windows search for the latest driver updates. If you selected «Uninstall Device», restart your computer and Windows will automatically reinstall the driver.
Fix #3: Run a System File Check
Step 1. Press the Windows key + X and select «Windows PowerShell (Admin)».
Step 2. Type «sfc /scannow» and press Enter.
Step 3. Wait for the system scan to complete and repair any corrupted system files.
Fix #4: Use the Windows Memory Diagnostic Tool
Step 1. Press the Windows key + S and type «Windows Memory Diagnostic».

Step 2. Click on «Windows Memory Diagnostic» and select «Restart now and check for problems».
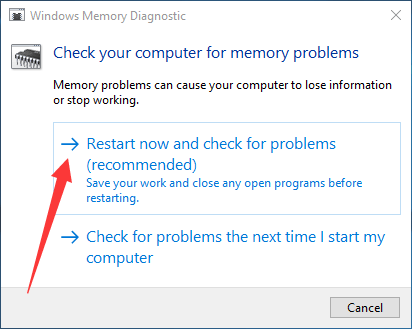
Step 3. Wait for the system scan to complete and repair any memory problems.
Fix #5: Check for Malware and Viruses
Step 1. Open the Windows Security app by pressing the Windows key + I and selecting «Update & Security».
Step 2. Click on «Windows Security» and select «Virus & threat protection».
Step 3. Click on «Scan options» and select «Full scan».
Step 4. Wait for the system scan to complete and remove any detected malware or viruses.
Fix #6: Install System Updates
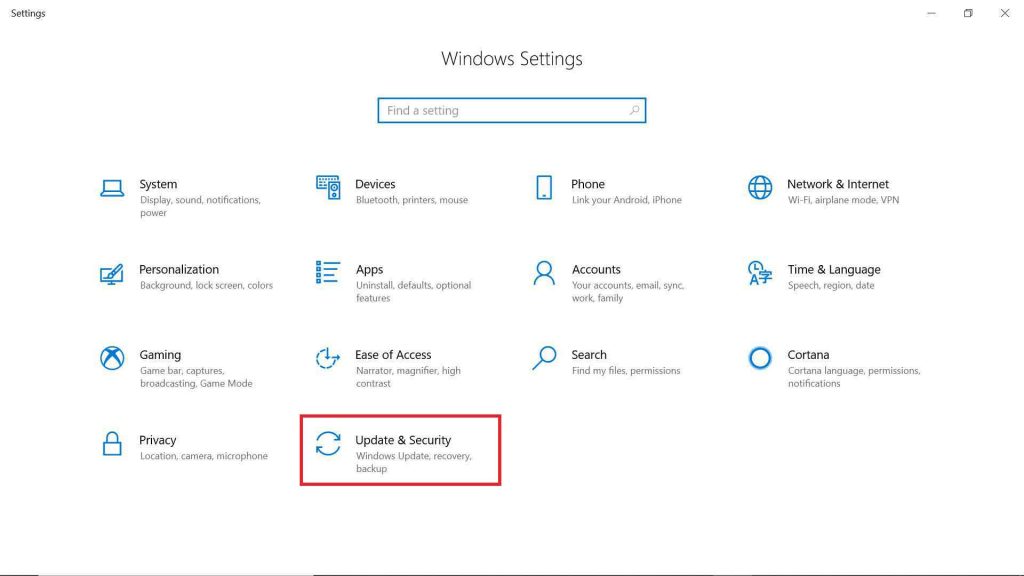
Step 1. Click on the «Start» menu and then click on the gear icon to open Windows Settings.
Step 2. In Windows Settings, click on «Update & Security» to navigate to the Windows Update section.
Step 3. In the Windows Update section, click on «Check for updates» to see if any updates are available for your system.
Step 4. If any updates are available, click on «Download and install» to start the download and installation process. Depending on the size of the update, this process may take some time.
Step 5. Once the update is installed, you will be prompted to restart your computer to complete the installation process. Click on «Restart now» to restart your computer and complete the update installation.
Fix #7 Disable Overclocking
Step 1: Restart your computer and enter the BIOS.
To enter the BIOS, restart your computer and look for a message that appears on the screen indicating which key you need to press to enter the BIOS setup utility. The key varies depending on your computer’s manufacturer, but it is usually one of the following: F1, F2, F10, DEL, or ESC.
Step 2: Locate the Overclocking settings in BIOS.
Once you are in the BIOS setup utility, navigate to the «Overclocking» or «Performance» section to find the overclocking settings.
Step 3: Disable Overclocking.
Find the option to disable overclocking and select it. The exact wording may vary depending on your motherboard manufacturer, but it is usually called «CPU overclocking» or «CPU multiplier». Set the option to «Disabled» or «Default».
Step 4: Save and Exit BIOS.
Once you have disabled overclocking, save the changes and exit the BIOS setup utility. This will restart your computer and apply the changes you made to the BIOS.
Frequently Asked Questions
1. What is the bug check 0x1000007F?
The bug check 0x1000007F is also known as «UNEXPECTED_KERNEL_MODE_TRAP» error. This is a type of blue screen of death (BSOD) error that occurs in Windows operating systems when the kernel detects an error that it cannot recover from or when it detects an unexpected condition that prevents it from executing correctly.
This error usually indicates a hardware or driver problem. It can be caused by a faulty device driver, a hardware malfunction, or an incompatible hardware component. Some common causes of this error include issues with the RAM, hard drive, CPU, or other hardware components.
To troubleshoot this error, you may need to perform hardware tests, update drivers, or run system diagnostics. If you are not familiar with these procedures, it is recommended that you seek the assistance of a qualified technician or contact Microsoft support for further guidance.
2. What is Windows bug check 0x0000007A?
The bug check 0x0000007A is also known as a «KERNEL_DATA_INPAGE_ERROR» error. This is a type of blue screen of death (BSOD) error that occurs in Windows operating systems when the operating system encounters a problem reading or writing data from or to the page file.
This error usually indicates a problem with the storage system, such as the hard drive, solid-state drive (SSD), or virtual memory. It can be caused by a variety of factors, including bad sectors on the hard drive, outdated or corrupted device drivers, faulty hardware, or software conflicts.
To troubleshoot this error, you may need to run a disk check to scan for and repair bad sectors on your hard drive, update your device drivers, perform a virus or malware scan, or check for any software conflicts. If you continue to experience this error after attempting these solutions, you may need to replace faulty hardware or seek further assistance from a qualified technician or Microsoft support.
3. How do I fix 0xc0000221 on Windows 10?
The error code 0xc0000221 in Windows 10 is typically associated with missing or corrupted system files. Here are some steps you can take to fix this error: boot into safe mode, run a system file checker scan, run a DISM scan, and perform a clean boot.
If none of these solutions work, you may need to perform a system restore, reset or reinstall Windows 10. It’s recommended to back up your important data before attempting any of these solutions. If you are not familiar with these procedures, it is recommended that you seek the assistance of a qualified technician or contact Microsoft support for further guidance.
4. What is Windows 11 install error 0xc0000221?
The Windows 11 install error code 0xc0000221 is typically associated with missing or corrupted system files. This error can occur during the installation process of Windows 11 and prevent the installation from completing. Here are some steps you can take to fix this error: check the installation media, run a memory diagnostic, run a system file checker scan, run a DISM scan, or perform a clean install of Windows 11.
5. How to debug kernel mode?
Debugging kernel mode in Windows can be a complex process that requires specialized tools and techniques. Here are some steps you can take to debug kernel mode in Windows: use Windows Debugger (WinDbg), enable kernel mode debugging, use kernel mode debuggers, use trace logging, use specialized tools like Driver Verifier or DebugView, etc.
6. How do I stop unexpected kernel?
To stop the «unexpected kernel mode trap» error, you can try these methods: update device drivers, run a malware scan, check for hardware issues, perform a system restore, reinstall the Windows operating system, etc. It is recommended to seek assistance from a professional or knowledgeable technician if you are not familiar with these processes or if you are unsure about the underlying cause of the error.
7. How to install kernel in Windows 11?
In Windows 11, the kernel is a critical component of the operating system that is responsible for managing system resources and handling system calls from applications. The kernel is an essential part of the operating system and is already installed when you install Windows 11. However, if you are looking to update or reinstall the kernel for any reason, here are some steps you can take: check for updates, use a third-party tool, or reinstall Windows.
Note that modifying the kernel or installing a non-Microsoft kernel is not recommended and can potentially cause instability and security issues in your system. Only perform these actions if you are familiar with the risks and consequences involved.
8. How to reset Windows kernel?
Resetting the Windows kernel is not a straightforward process, as the kernel is a critical component of the operating system and cannot be reset or replaced without potentially causing serious issues with the system. However, if you are experiencing issues with the kernel, there are some steps you can take to troubleshoot and resolve these issues: run SFC, check for system updates, use system restore points, carry out a clean install of Windows, etc.
9. What causes live kernel event?
A live kernel event on a Windows system is a type of error that occurs when the operating system detects a problem that could not be handled properly in kernel mode. Here are some common causes of live kernel events: faulty hardware components, overlocking, driver issues, power supply issues, overheating, etc.
To fix live kernel events, you can try updating your device drivers, checking for hardware issues, reducing overclocking settings, ensuring proper cooling, and performing a system restore or reinstalling the operating system. It is recommended to seek assistance from a professional or knowledgeable technician if you are not familiar with these processes or if you are unsure about the underlying cause of the error.
10. What is the code for CPU failure?
There is not a specific error code for CPU failure as it can manifest in various ways and can be caused by different factors. However, there are several error codes related to CPU issues that you may encounter on a blue screen of death (BSOD) in Windows operating systems, such as:
- 0x00000050: PAGE_FAULT_IN_NONPAGED_AREA
- 0x0000007F: UNEXPECTED_KERNEL_MODE_TRAP
- 0x0000009C: MACHINE_CHECK_EXCEPTION
- 0x00000101: CLOCK_WATCHDOG_TIMEOUT
- 0x00000124: WHEA_UNCORRECTABLE_ERROR
11. How do I remove kernel from my computer?
It is not recommended to remove the kernel from your computer as it is a core component of the operating system that manages system resources and hardware devices. Removing the kernel can cause your system to become unstable or even unbootable. However, if you are trying to uninstall a specific kernel update or version, you can follow these steps: open Control Panel app > Programs and Features > View installed updates > click the specific kernel you want to uninstall > click «Uninstall» button.
Note that removing a kernel update or version may cause compatibility issues with other software or hardware components. It is recommended to consult with a professional or knowledgeable technician before attempting to remove a kernel update or version.
12. How do I fix a corrupted kernel?
Fixing a corrupted kernel on Windows can be a complicated and potentially risky process. Here are some general steps you can take to fix a corrupted kernel: boot into Safe Mode, use SFC, run disk checking, or repair OS using Windows installation disc.
Note that attempting to fix a corrupted kernel can potentially cause further damage to your system if done incorrectly. It is recommended to back up your important data and seek assistance from a professional or knowledgeable technician.
13. How do I fix event ID 1001 Bugcheck?
Event ID 1001 with the Bugcheck error code usually indicates that a Windows system has experienced a critical system crash, commonly known as the «blue screen of death» or BSOD. Here are some steps you can take to fix this issue: check hardware issues, check driver issues, run a virus scan, check for system updates, perform a clean boot, etc.
Related Pages
- Fixed: IRQL_NOT_LESS_OR_EQUAL Stop Code in Windows 11/10/8/7
- Fix Stop Code System Service Exception in Windows 11/10 [17 Methods]
- Repairing Disk Errors This Might Take Over an Hour to Complete
- Fix SMART Failure Predicted on Hard Disk in Windows 11/10 (5 Methods)
- 9 Fixes to SYSTEM THREAD EXCEPTION NOT HANDLED Error in Windows 10/11
How to Fix the UNEXPECTED KERNEL MODE TRAP Error on Windows 11/10
The UNEXPECTED KERNEL MODE TRAP error occurs when the CPU generates a condition the kernel cannot catch, or the condition is an unrecoverable error. If you’re getting this error, the methods provided here will help you fix it.
What Causes UNEXPECTED KERNEL MODE TRAP?
As mentioned in the introduction, this error occurs when the CPU generates a condition the kernel cannot catch or the condition is an unrecoverable error. Our research shows these conditions may occur for the reasons listed below.
- Faulty/incompatible hardware. The most common cause for this error is defective hardware, particularly PCI and VGA cards. You may also get this error if the installed hardware is incompatible, i.e., was not designed to work on your system.
- Faulty or mismatched memory (RAM). RAM sticks rarely fail, but it can happen due to insufficient cooling, among other factors. Furthermore, mismatched memory sticks with different specifications can also trigger this error.
- Corrupted or incompatible device drivers. Incompatible, outdated, corrupted, or otherwise bad device drivers are also known to trigger this error.
Before you try any of our fixes, here are some things you should do:
- Back up or recover your data to prevent its loss if something goes wrong. You should try to recover your data, especially if your PC cannot boot up due to this error.
- Disconnect all external devices, such as printers, scanners, USB drives, etc.
- Remove CPU/GPU overclocking.
- Disable memory caching.
- Temporarily disable your anti-virus software.
Video Tutorial on How to Fix UNEXPECTED KERNEL MODE TRAP
Table of Contents:
- Introduction
- Method 1. Perform a System Memory Check
- Method 2. Run the Hardware and Devices Troubleshooter
- Method 3. Update the Device Driver Using the Device Manager
- Method 4. Run the Deployment Image & Servicing Management (DISM) and System File Checker (SFC) Scans
- Video Tutorial on How to Fix UNEXPECTED KERNEL MODE TRAP
Download Computer Malware Repair Tool
It is recommended to run a free scan with Combo Cleaner — a tool to detect viruses and malware on your device. You will need to purchase the full version to remove infections. Free trial available. Combo Cleaner is owned and operated by Rcs Lt, the parent company of PCRisk.com read more.
Method 1. Perform a System Memory Check
You may get the UNEXPECTED KERNEL MODE TRAP error due to faulty or mismatched memory sticks. The instructions below show how to check if your system’s memory is defective.
If your PC cannot stay running for long or doesn’t boot, try booting it in Safe Mode or Safe Mode with Networking. Your PC will boot into WinRE after two consecutive failed attempts to start Windows. You may also boot into Safe Mode by following steps 1-7.

1. Open the Windows Start menu and click the Power button.
2. Hold down the Shift key and click Restart.
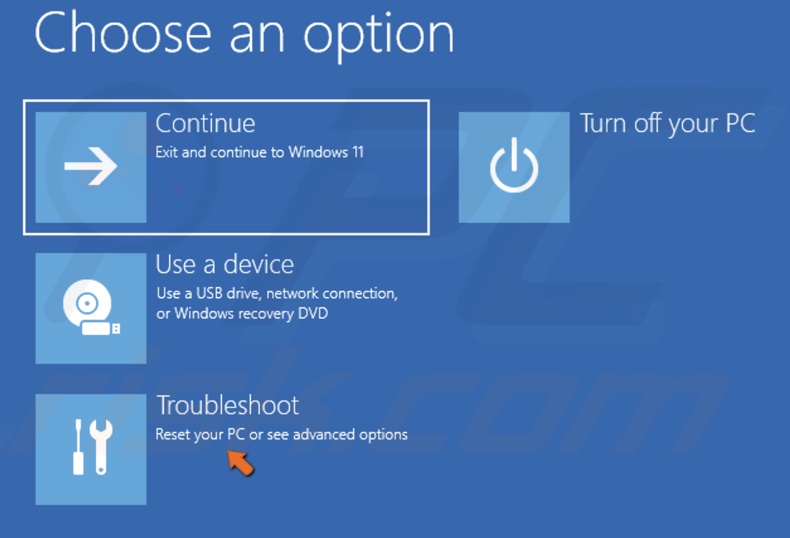
3. Select Troubleshoot.
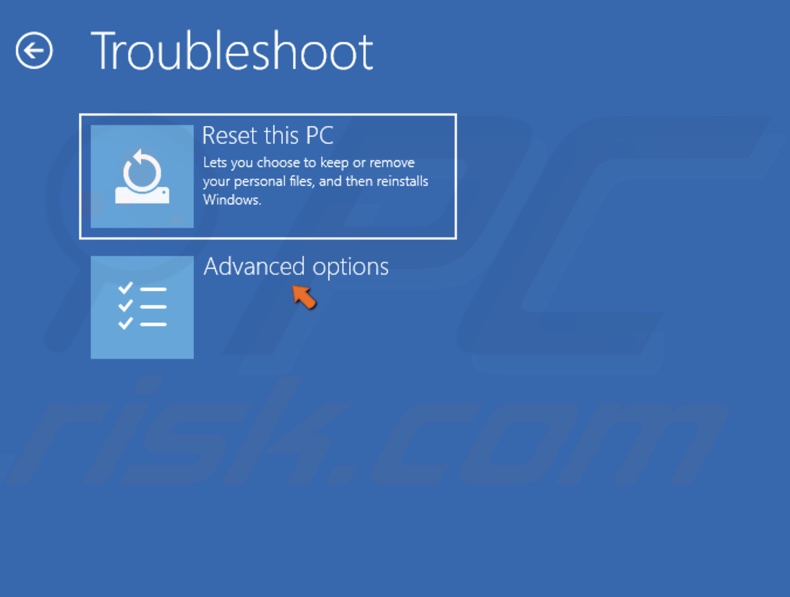
4. Select Advanced options.
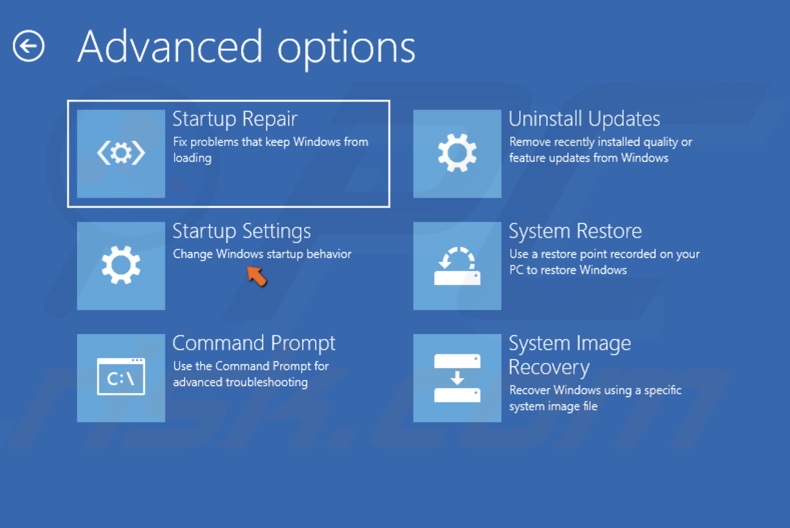
5. Select Startup Settings.
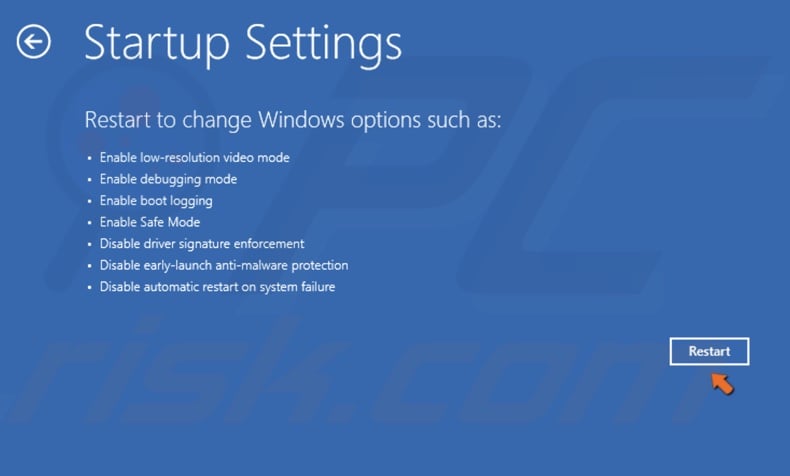
6. Click Restart.
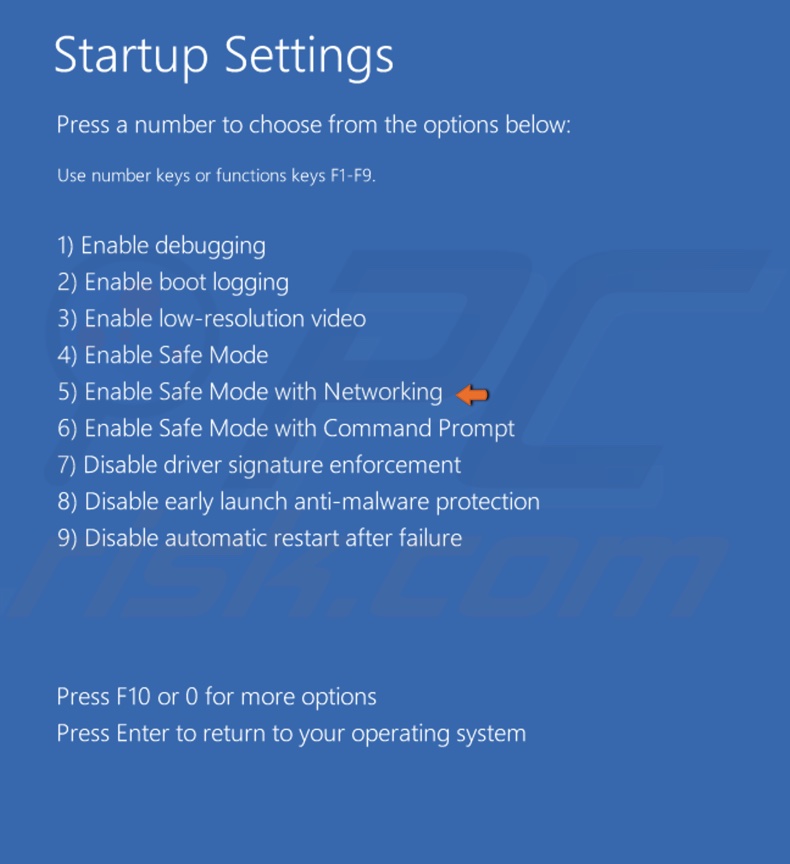
7. Press the 5 or F5 key to boot your PC into Safe Mode with Networking.
8. Hold down Windows+R keys to open Run.
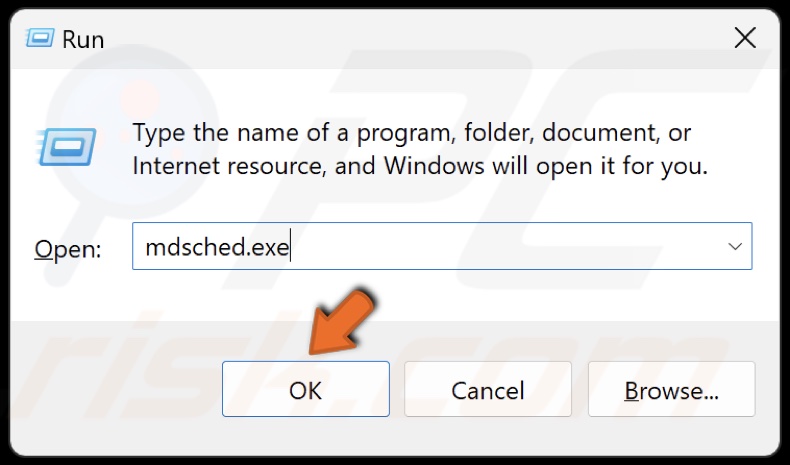
9. Type mdsched.exe in the Run dialog and click OK.
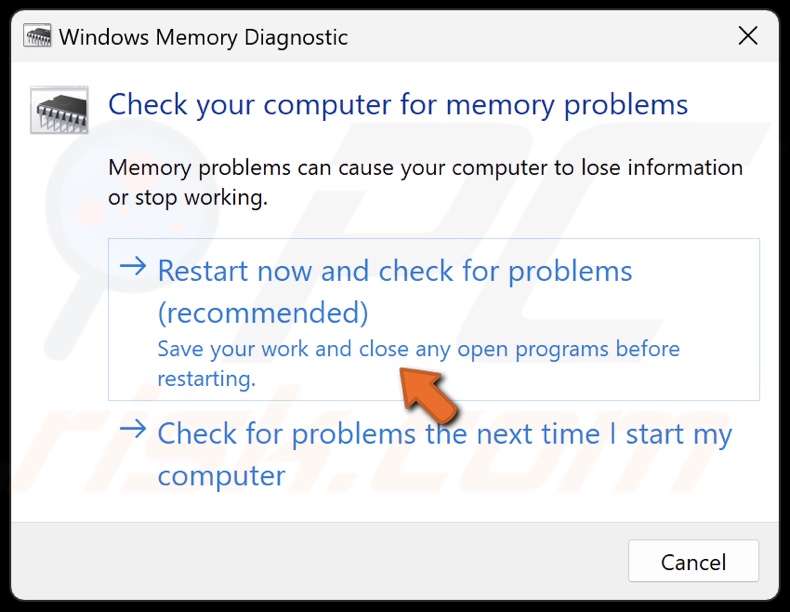
10. In the Windows Memory Diagnostic window, click Restart now and check for problems. Your PC will restart and diagnose the memory. Once the diagnostic process is complete, your PC will boot up normally.
11. Once your PC boots up, open the diagnosis report. The report will let you know if your memory is faulty.
12. Hold down Windows+R keys to open Run.
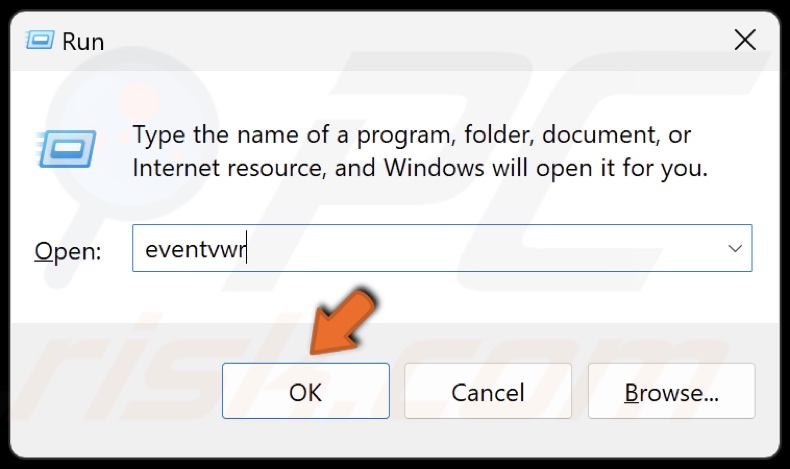
13. Type eventvwr in Run and click OK.
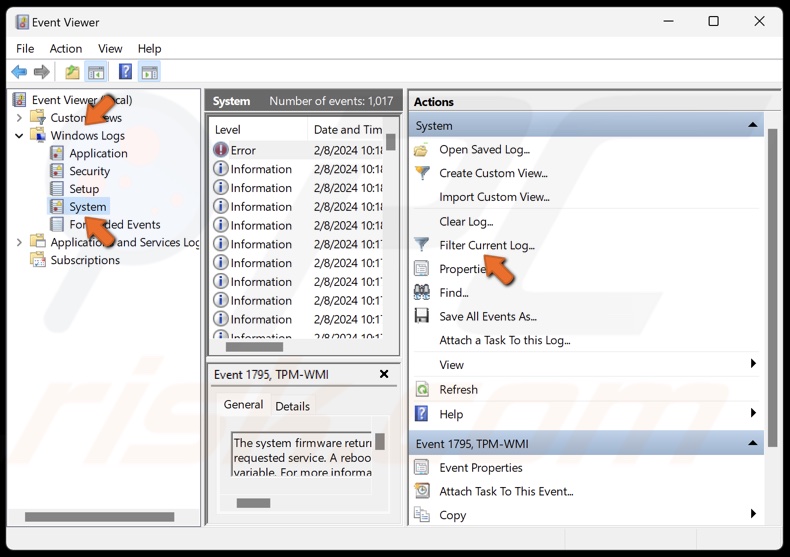
14. In Event Viewer, navigate to Windows Logs > System.
15. In the right pane, click Filter Current Log.
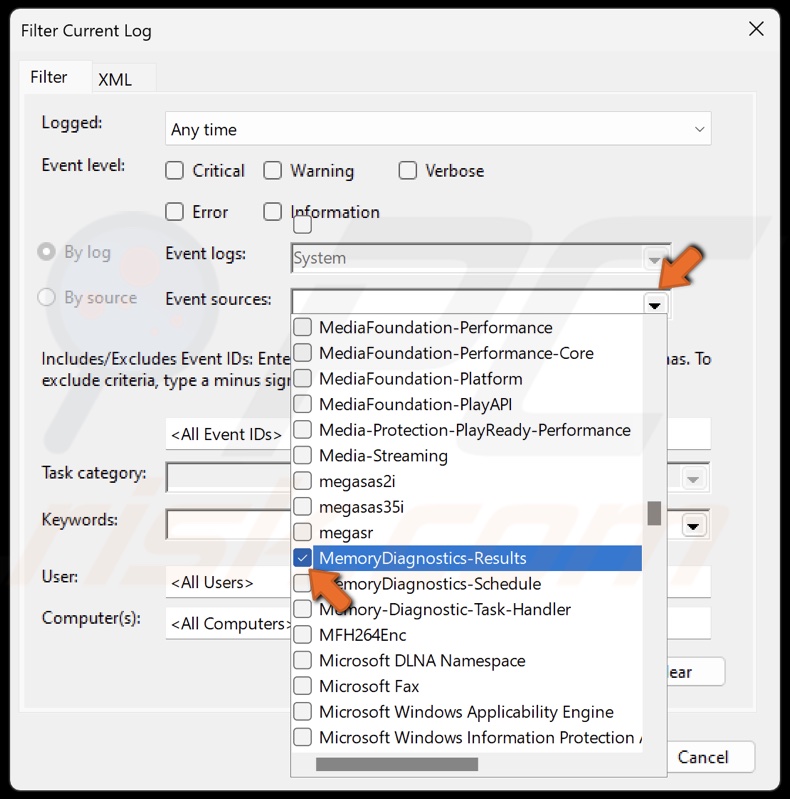
16. Open the Event sources drop-down menu and select MemoryDiagnostics-Results.
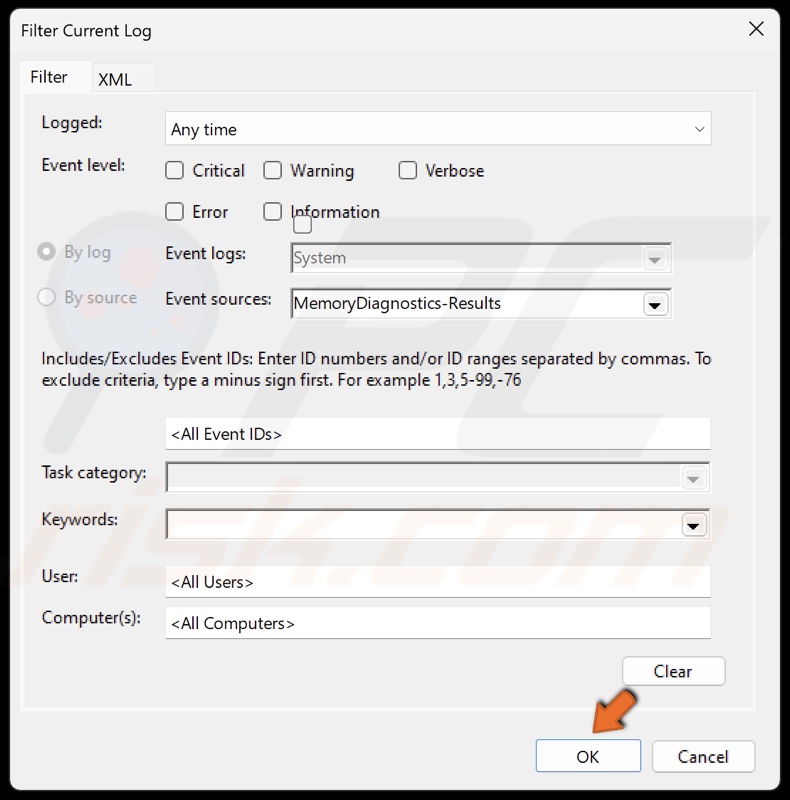
17. Click OK.
18. Double-click the results log. If there are memory errors, consider replacing your RAM. If there are no memory errors, proceed with the following fixes.
[Back to Table of Contents]
Method 2. Run the Hardware and Devices Troubleshooter
The UNEXPECTED KERNEL MODE TRAP error may occur due to incompatible or faulty hardware. If you recently upgraded or added new hardware, remove it and check if the error persists.
Note: If your system can’t run long enough to perform the following steps, boot Windows into Safe Mode, allowing your system to run without crashing.
1. Open the Windows Start menu and click the Power button.
2. Hold down the Shift key and click Restart.
3. Select Troubleshoot.
4. Select Advanced options.
5. Select Startup Settings.
6. Click Restart.
7. Press the 5 or F5 key to boot your PC into Safe Mode with Networking.
8. Hold down Windows+R keys to open Run.
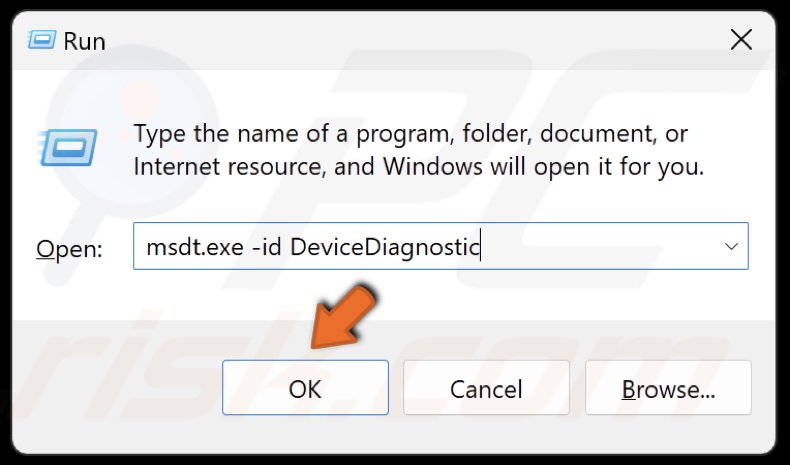
9. Type msdt.exe -id DeviceDiagnostic in Run and click OK.
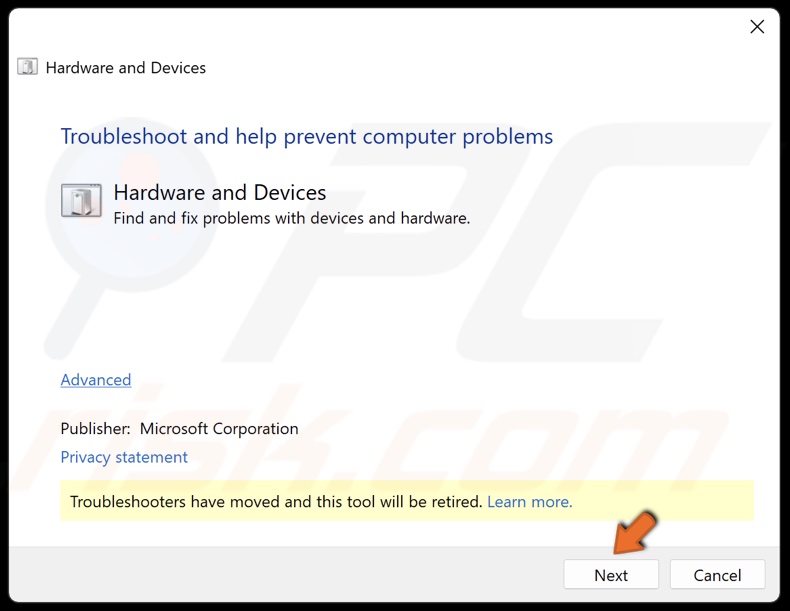
10. Click Next in the Hardware and Devices troubleshooter window.
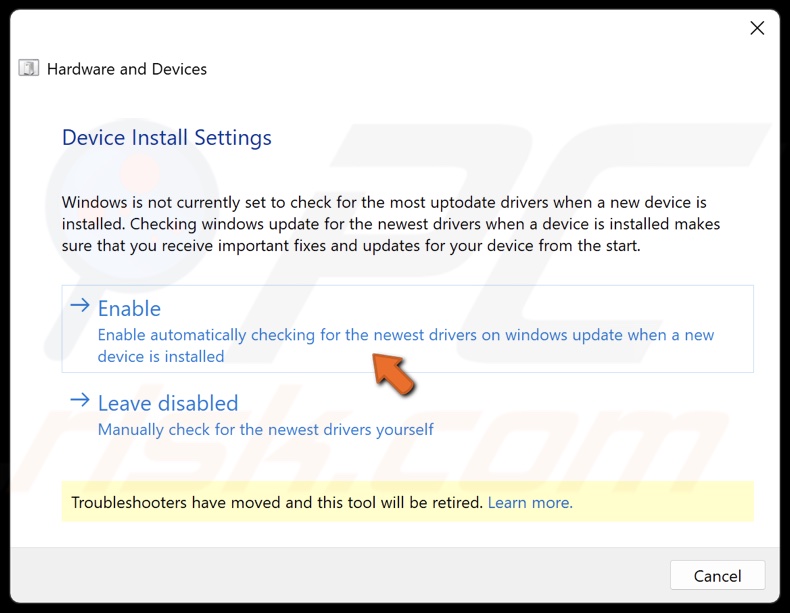
11. Apply the suggested fixes.
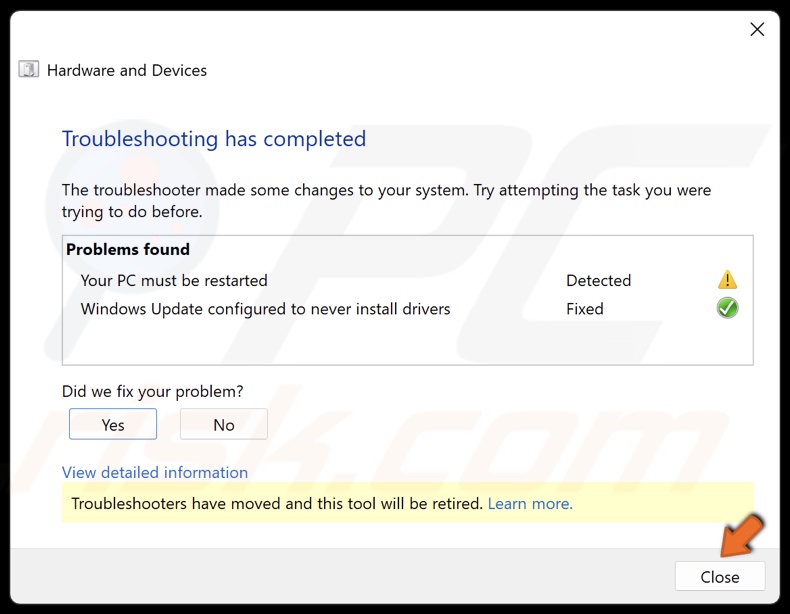
12. Click Close and restart your PC.
[Back to Table of Contents]
Method 3. Update the Device Driver Using the Device Manager
If you get the UNEXPECTED KERNEL MODE TRAP error after updating or installing an incompatible driver, try to roll back or install the correct driver.
Note: If your system can’t run long enough to perform the following steps, boot Windows into Safe Mode, allowing your system to run without crashing.
1. Open the Windows Start menu and click the Power button.
2. Hold down the Shift key and click Restart.
3. Select Troubleshoot.
4. Select Advanced options.
5. Select Startup Settings.
6. Click Restart.
7. Press the 5 or F5 key to boot your PC into Safe Mode with Networking.
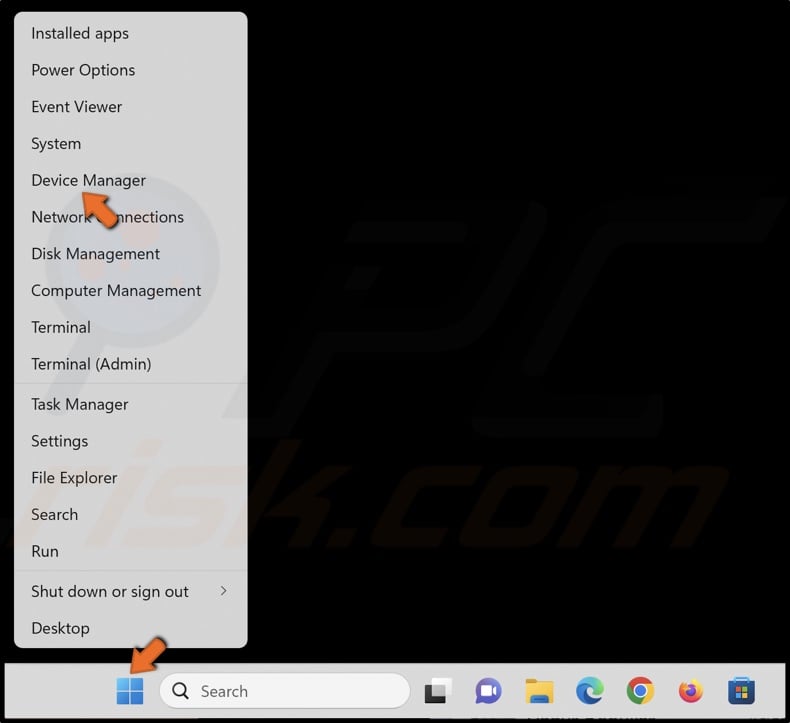
8. Right-click the Windows Start button and select Device Manager.
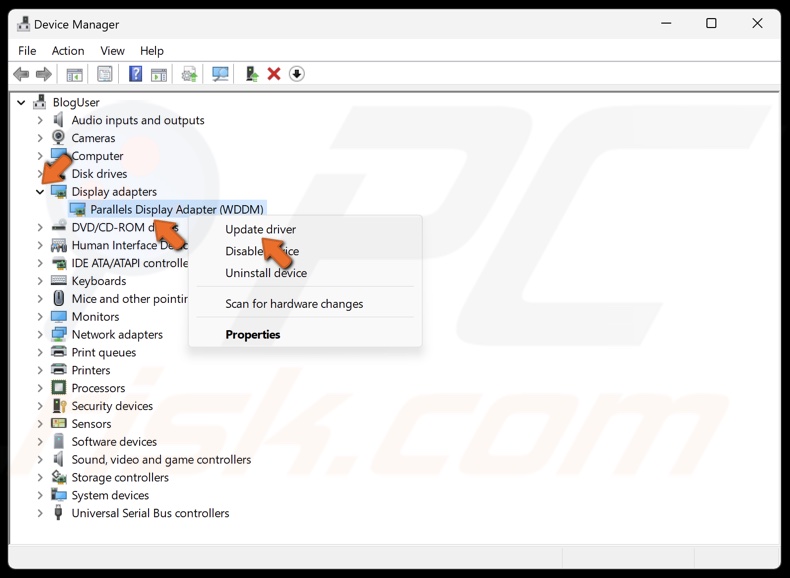
9. Go through the devices list and look for devices that have a yellow triangle with an exclamation mark. This symbol indicates an issue with the device.
10. Right-click the device and click Update driver.
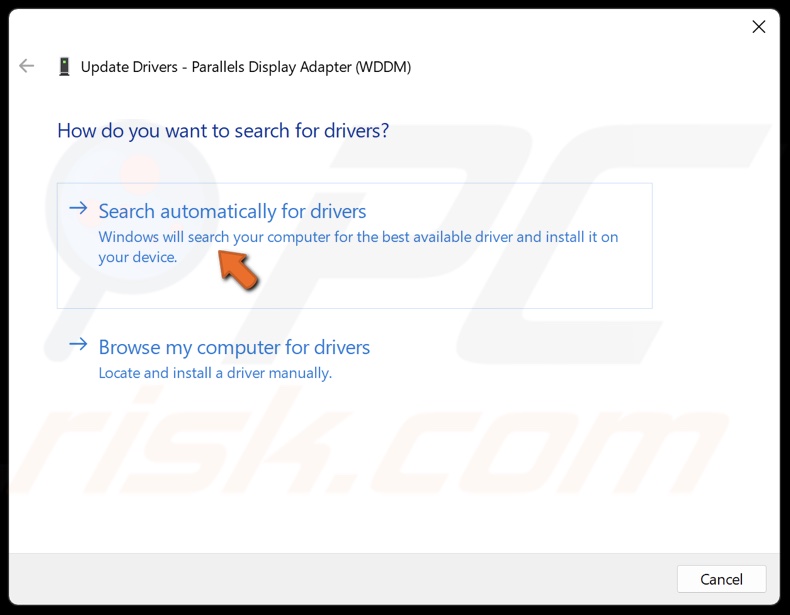
11. Select Search automatically for drivers. Windows will automatically install the best driver available on your computer.
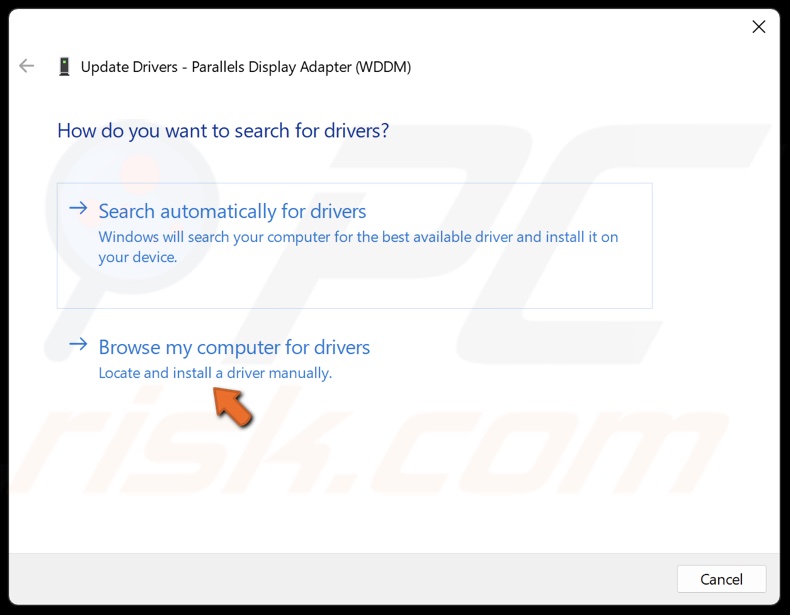
12. Alternatively, select Browse my computer for drivers.
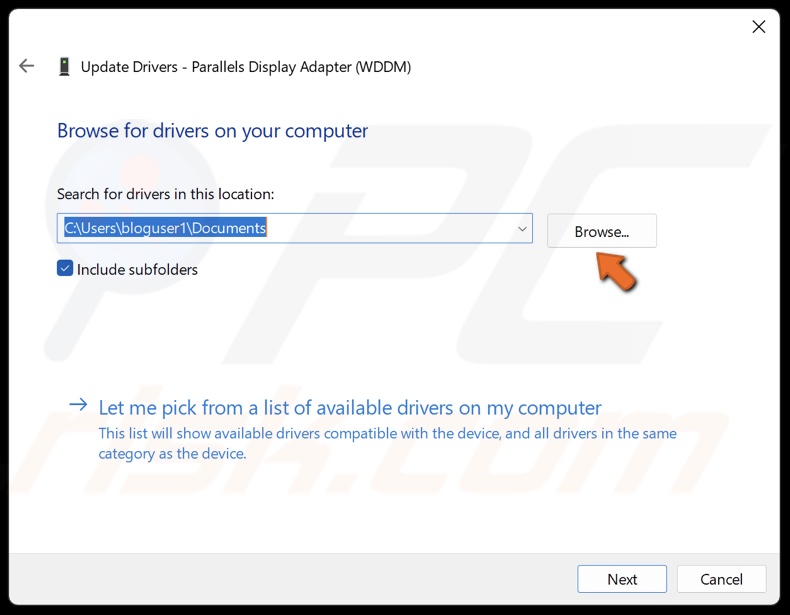
13. Click Browse and select a driver downloaded from the device vendor’s website.
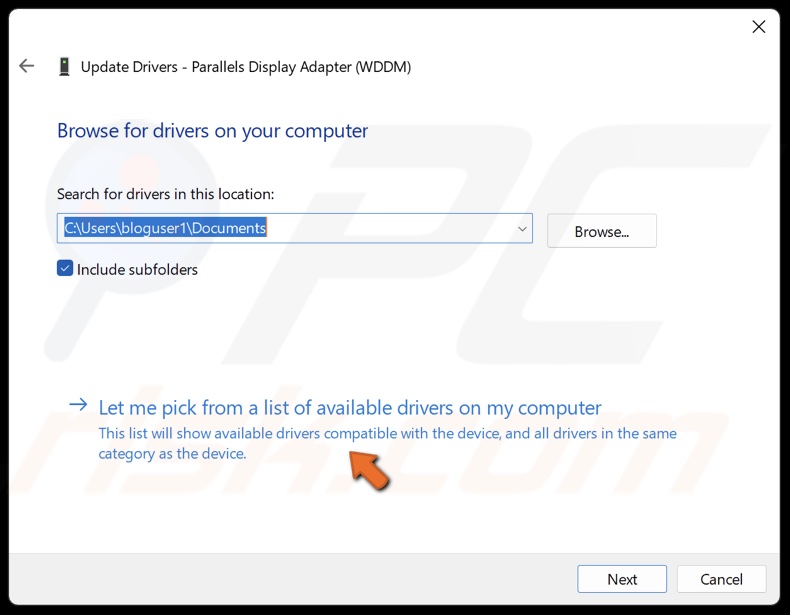
14. Alternatively, click Let me pick from a list of available drivers on my computer.
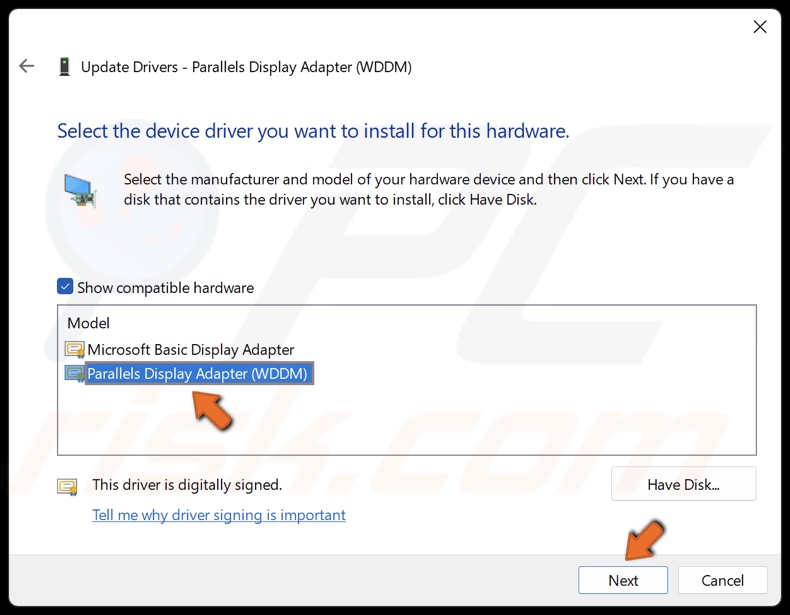
15. Select a compatible driver from the drivers list and click Next.
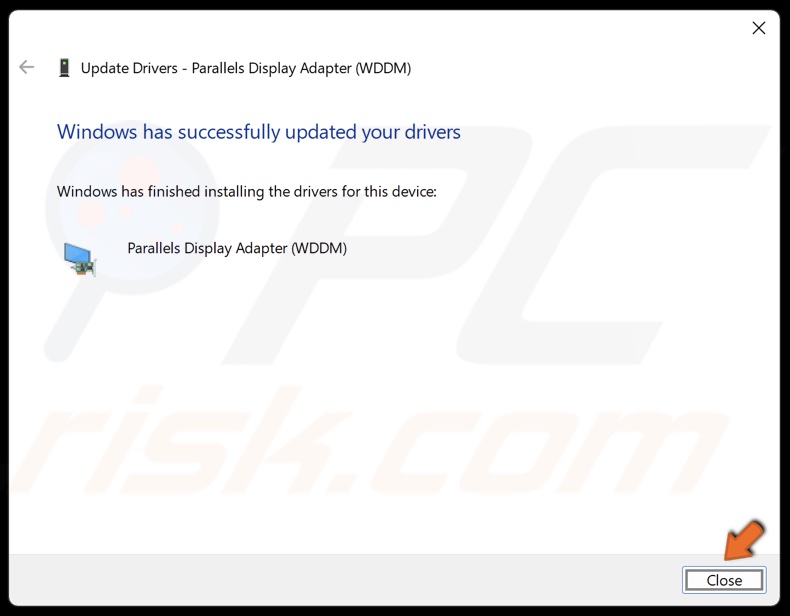
16. Click Close after installing the driver and restart your PC.
[Back to Table of Contents]
Method 4. Run the Deployment Image & Servicing Management (DISM) and System File Checker (SFC) Scans
Deployment Image & Servicing Management (DISM) tool that redeploys the system image to repair issues with system files and drivers. The System File Checker (SFC) is a tool that can replace problematic files from the DLL Cache.
Note: If your system can’t run long enough to perform the following steps, boot Windows into Safe Mode, allowing your system to run without crashing.
1. Open the Windows Start menu and click the Power button.
2. Hold down the Shift key and click Restart.
3. Select Troubleshoot.
4. Select Advanced options.
5. Select Startup Settings.
6. Click Restart.
7. Press the 5 or F5 key to boot your PC into Safe Mode with Networking.
8. Hold down Windows+R keys to open Run.
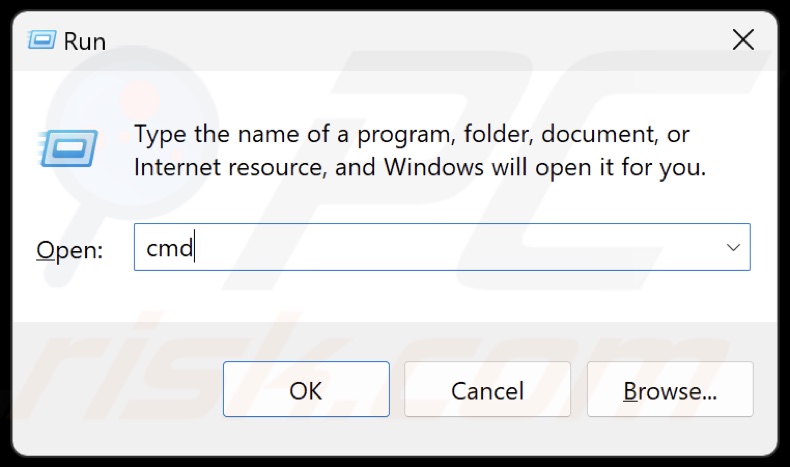
9. Type CMD in Run and hold down Ctrl+Shift+Enter keys to open the elevated Command Prompt.
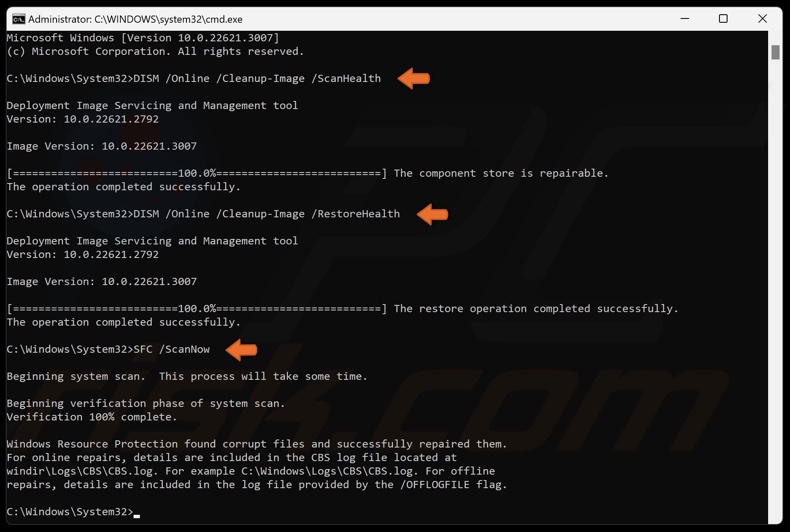
10. In the Command Prompt, type in DISM /Online /Cleanup-Image /ScanHealth and press Enter.
11. Type in DISM /Online /Cleanup-Image /RestoreHealth and press Enter.
12. Then, type in SFC /ScanNow and press Enter.
13. Close the Command Prompt and restart your PC.
If none of the tips and fixes in this article fix the error, try updating your system’s BIOS. However, note that updating your BIOS has some associated risks. Do this only as a last resort and perform in-depth research on how to do it since the process between hardware manufacturers is different.
[Back to Top]