
Пак синих иконок для Windows 11 С помощью данных иконок вы сможете спокойно найти нужный вам файл намного быстрее. Если вам понравится, то в дальнейшем я буду пополнять список иконок.
- Скачайте и распакуйте архив blue-icons-windows-11.7z с помощью WinRar.
- Для установки в Windows подойдут только файлы формата .ico. PNG потребуется предварительно конвертировать. Любым удобным инструментом, через онлайн сервисы или программу AveIconifier.
- Для рабочего стола: нажмите правой кнопкой мыши в пустой области и выберите пункт «Персонализация». В Windows 10/11 можно также перейти через Настройки (сочетание клавиш Win+I). Кликните по ссылке «Параметры значков рабочего стола» в боковой колонке. В открывшемся окне выделите нужный блок (корзина, сеть, компьютер) и нажмите «Сменить значок». Теперь, кнопкой «Обзор» найдите файл в проводнике. Используйте «ОК», чтобы сохранить изменения.
- Для папок: нажмите правой кнопкой мыши по нужной папке и выберите пункт «Свойства» в контекстном меню. В разделе «Настройка» нажмите «Сменить значок». Действуйте по аналогии с предыдущим пунктом (выбрать иконку в проводнике, сохранить).
- Для дисков: скопируйте файл .ico в корневую директорию диска. Создайте текстовый документ «autorun.inf» со следующим содержанием, где «vsthemes-org.ico» — название вашего файла:
[Autorun]
Icon=vsthemes-org.ico
Skip to content
Ads
Do you like Windows icons? Do you want to have Windows icon? This is really awesome icons , hope you like it, enjoy it and have fun!
1- Download and unpack the file archive using 7zip.
2- Only icons in .ico format are suitable for installation in Windows. PNG will need to be converted beforehand.
3- For the desktop: Right-click in an empty area and select “Personalize”. In Windows 10/11 you can also go through Settings (Win+I shortcut). Click the “Desktop icon options” link in the sidebar. In the window that opens, highlight the desired block (trash can, network, computer) and click “Change icon”. Now, use the “Browse” button to find the icon in Explorer. Use “OK” to save the changes.
4- For folders: right-click on the desired folder and select “Properties” in the context menu. In the “Setup” section, click “Change icon”. Proceed in the same way as in the previous point (select an icon in Explorer, save).
5- For disks: copy the .ico file to the root directory of the disk. Create a text document “autorun.inf” with the following content, where “skinpacks-com.ico” is the name of your file: [Autorun] Icon=skinpacks-com.ico
DOWNLOAD
Ads
Related Posts
Leave A Comment
Page load link
main menu
Discover more from SkinPack
Subscribe now to keep reading and get access to the full archive.
Continue reading
Go to Top
Sign in to your MUO account

Wouldn’t it be great if you could change the color of your folders in Windows? Unfortunately, no version of Windows has given us a way to customize folder colors. As such, the only way to achieve this goal is to turn to third-party customization software.
There are a few software packages that enable you to customize folders’ colors on Windows 11. For this article, we’ll be exploring the freeware program Rainbow Folders to add a little bit of color to your desktop.
How to Install Rainbow Folders
The Rainbow Folder program is a lightweight tool that you can install onto most Windows platforms. This software enables you to adjust the color for selected folders with Hue and Saturation bars. It also includes three alternative folder style options.
Here’s how to download and install Rainbow Folders on Windows 11:
- First, open the Rainbow Folders Softpedia page within your browser.
- Click the Download Now button to save its ZIP file to a folder.
-
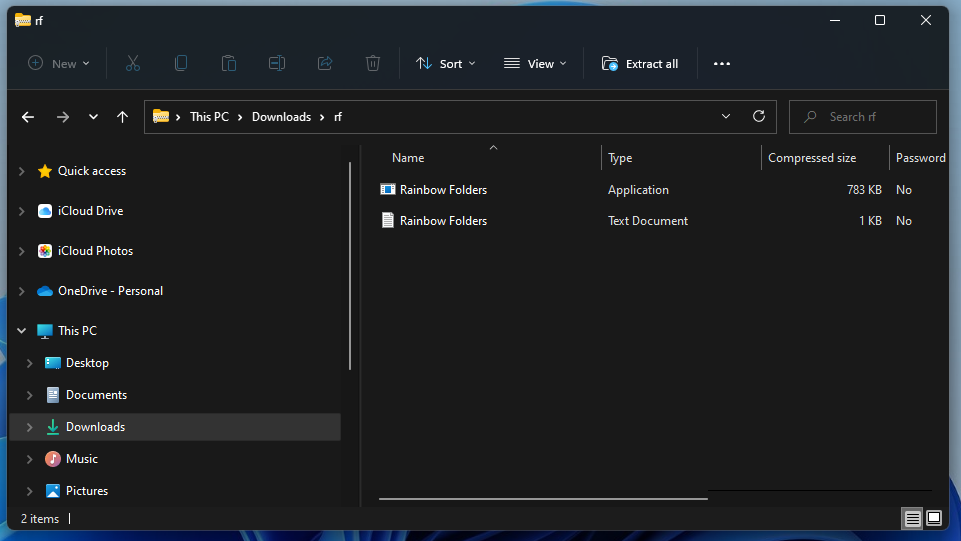
Select the rf ZIP archive, and click the Extract all button.

- Then click the Show extracted files when complete option.
-
Select the Extract option.

- Open the extracted rf folder.
-
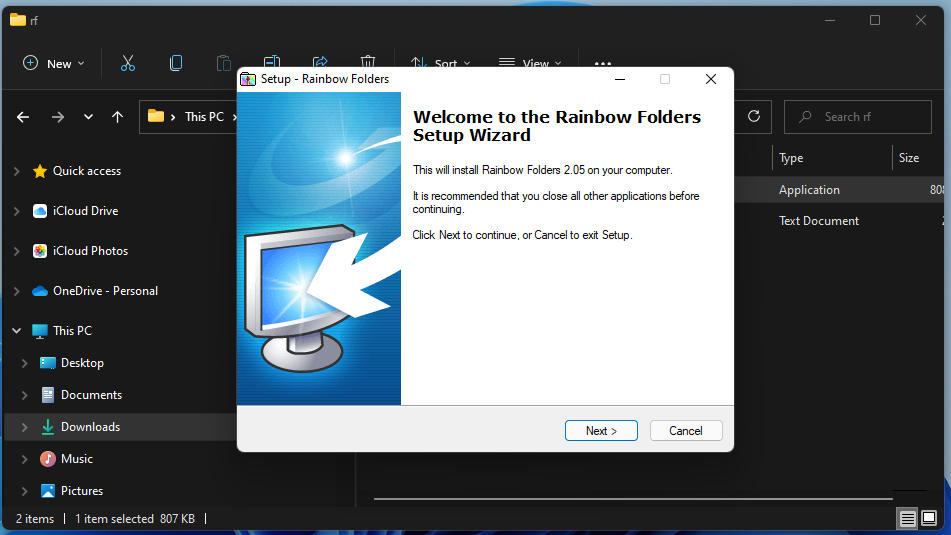
Click Rainbow Folders to open its setup wizard.

- Press the Next buttons, choose a folder for the software, and select the Install option.
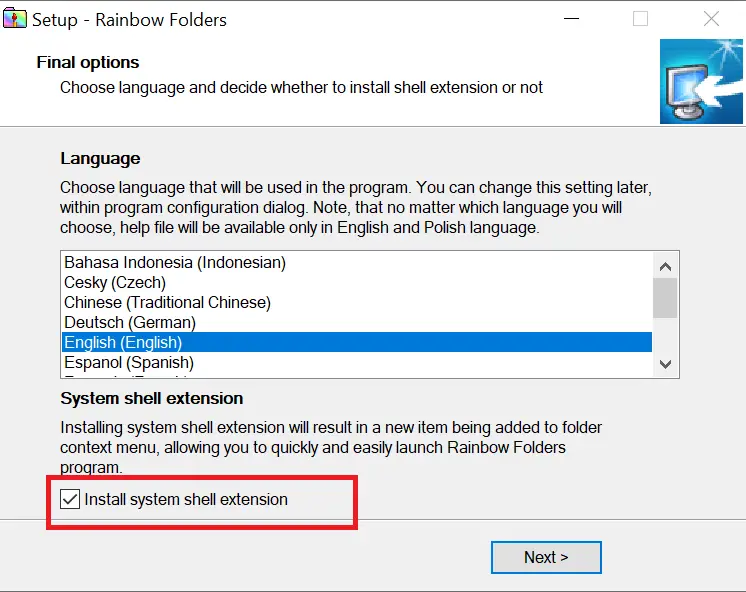
- Also, select the Install system shell extension checkbox.

How to Change Folders’ Colors on Windows 11
Once you’ve installed the software, it’s time to change the colors of your folders.
To do so, open the Rainbow Folders window. If you’re not sure where installed it, press the Win + S hotkey to enter Rainbow Folders within Windows 11’s search box. Then you can select to open its window from there.
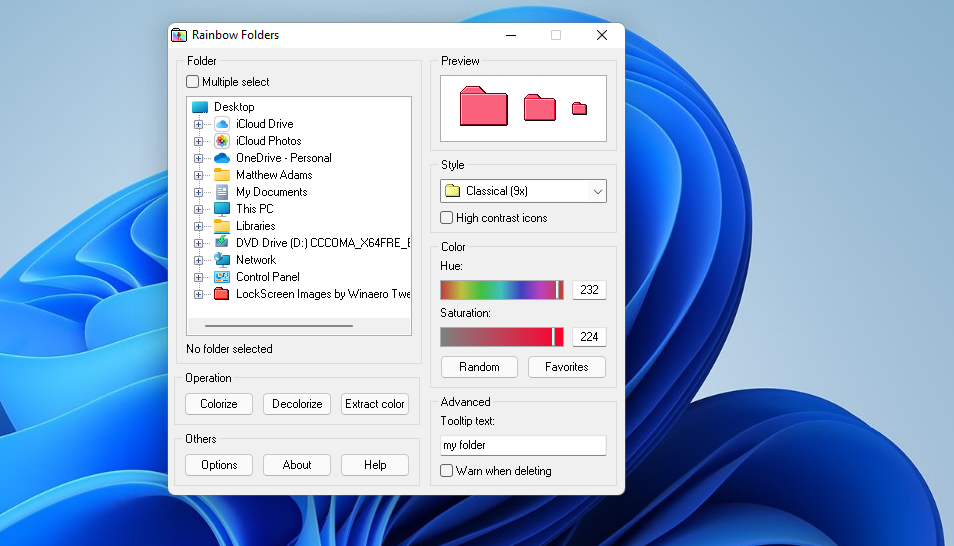
Click This PC within the directory selection section to expand that category. Then select Local Disk (C:) to view your directory tree. Choose a folder to change to the color for. You can choose multiple folders by clicking the Multiple select option.
Now drag the Hue bar slider left or right to choose a color. Drag the Saturation bar’s slider to further configure your selected color. Press the Colorize button to apply the selected color.
After that, open File Explorer’s window. Open the folder you changed the color for there to see the effect. It will have the color you chose for it with Rainbow Folder.

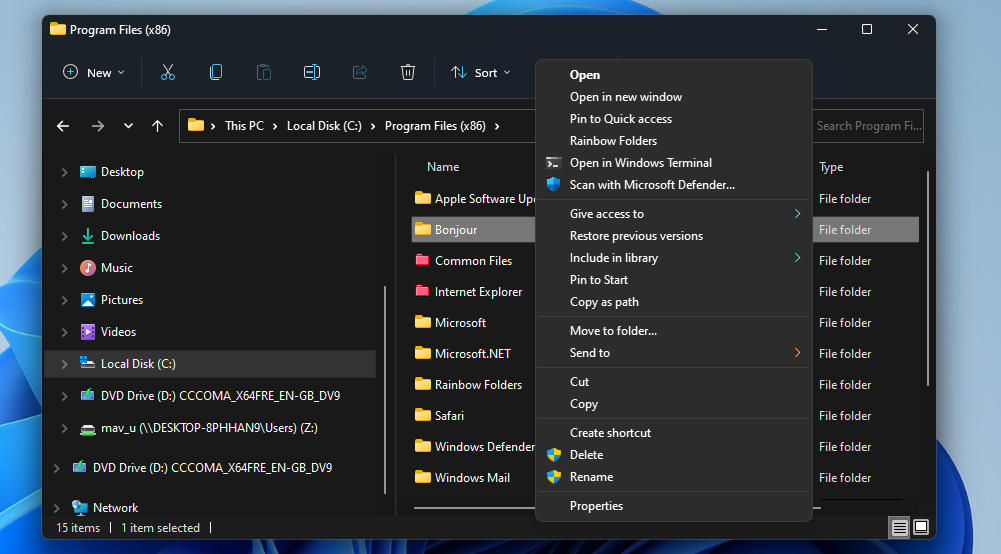
You can also select a Rainbow Folders context menu option. To do so, right-click a folder in File Explorer and select Show more options. Select the Rainbow Folders context menu option there to bring up the window.
Now you can apply a color change to the folder you right-clicked on. Note that you might have to close and reopen File Explorer for color changes to come into effect.
Adjust Permissions For Folders You Can’t Change the Color For
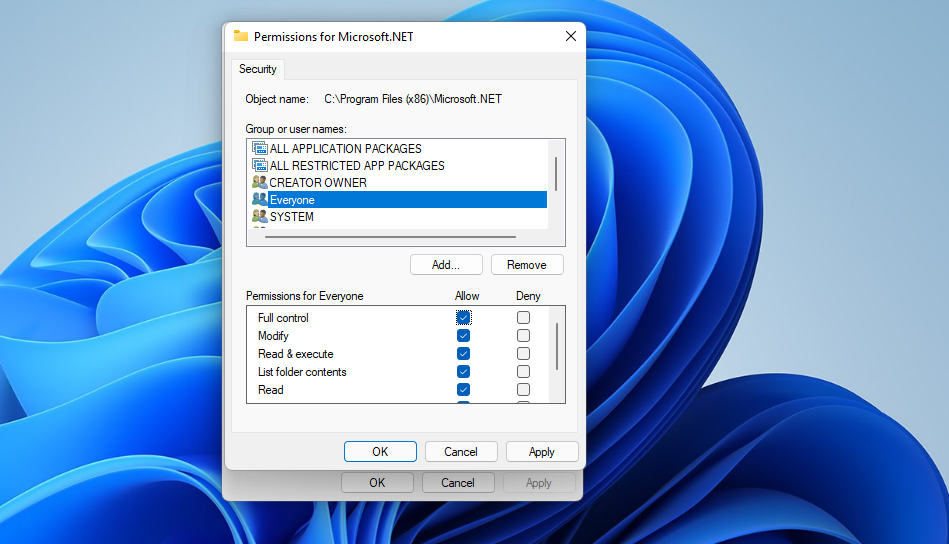
If a “Failed to write icon file” error message pops up and a folder’s color doesn’t change when you try to alter it, you probably need to adjust permissions for the folder. For Rainbow Folders to work, you need full control permissions to modify folders.HJere is how you can apply such permission to a folder you can’t change the color for.
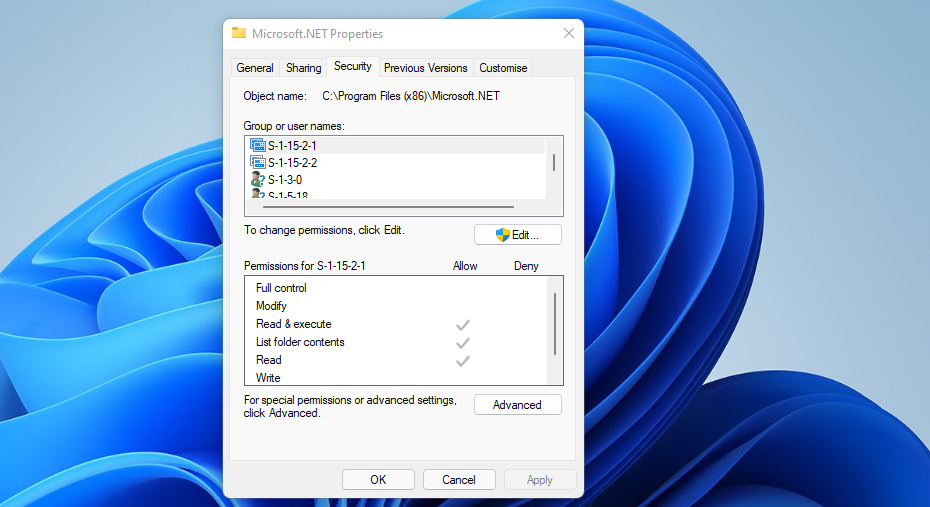
- Right-click the folder you need to change the color for and select Properties.
-
Select the Advanced option on the Security tab shown directly below.

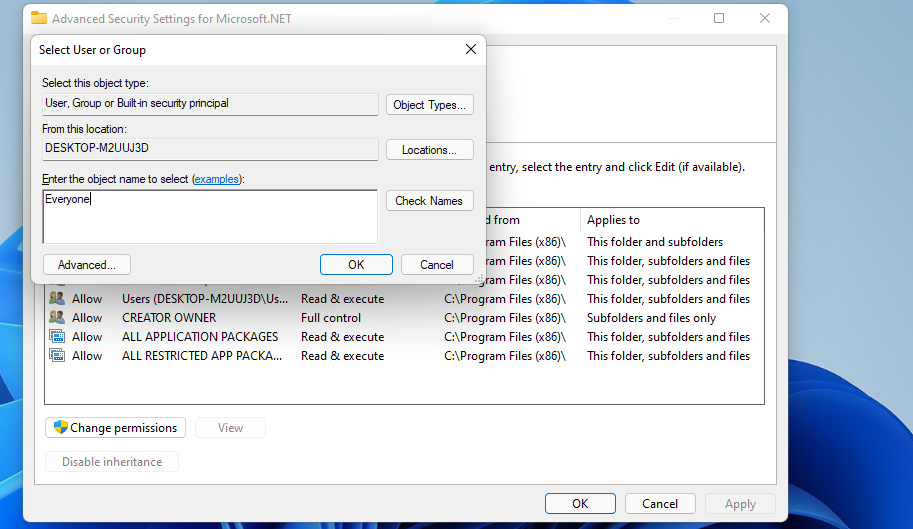
- Click Change on the Advanced Security Settings window.
-
Enter Everyone in the Select User or Group window, and click the OK button.

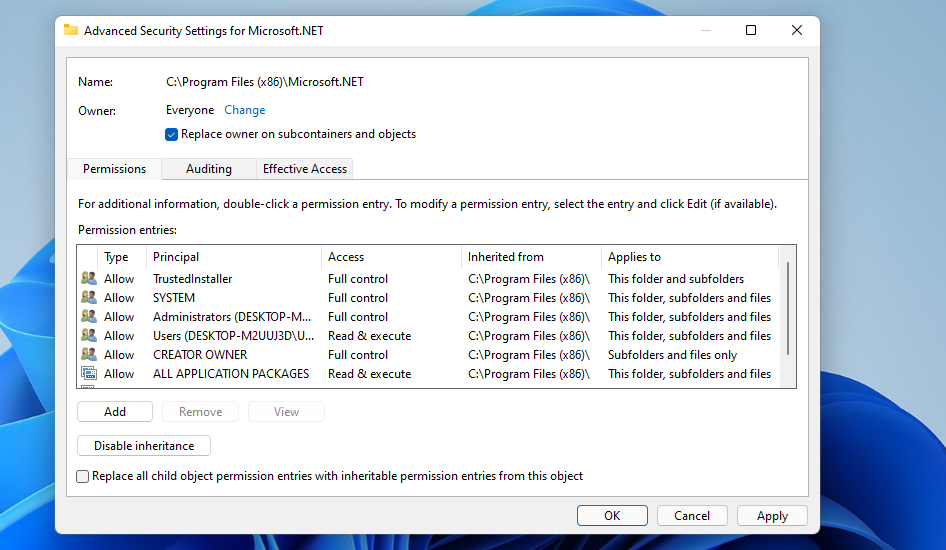
-
Then select the Replace owner on subcategories and objects checkbox.

- Click Apply to save the options.
- Select OK to exit the Advanced Security Settings window.
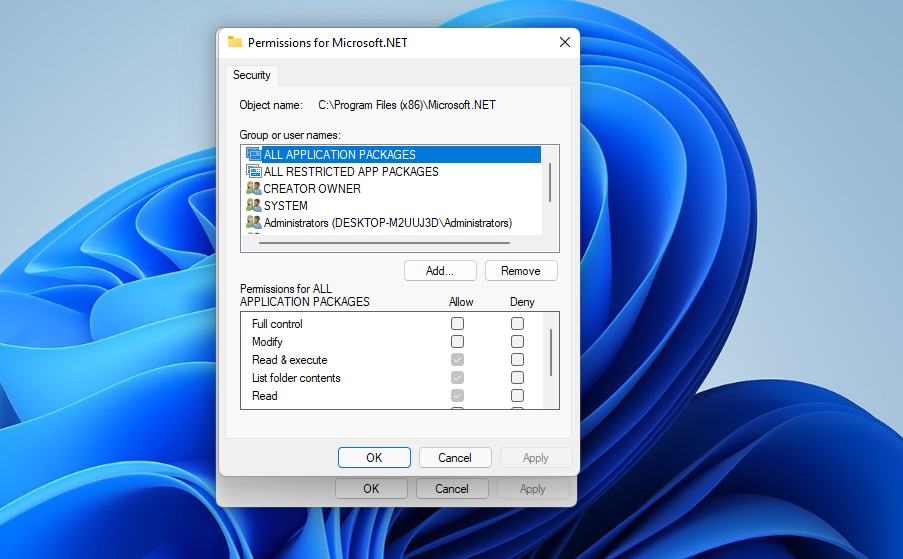
- Press the Edit button on the folder’s properties window.
-
Press the Add button in the screenshot directly below.

- Input Everyone within the text box on the Select User window, and click OK to exit.
- Select the Everyone group on the permissions window.
-
Then select the allow Full control and Modify checkboxes.

- Press the Apply and OK buttons.
- Finally, click OK within the folder properties window.
- Now try changing the color of the folder you changed permissions for.
Add More Colorful Folders to File Explorer With Rainbow Folders
That’s how you can apply all the colors of the rainbow to folders in Windows.
It’s a pity there aren’t any built-in Windows 11 options for doing so. However, Rainbow Folders is a nifty customization kit with which you can apply your favorite colors to folders. With it, you can add different colors to folders to highlight your most important ones or apply color-coding schemes for them. As such, Rainbow Folders is a freeware software package that’s worth using
Sign in to your XDA account
Windows 11 brings plenty of cool features and is always getting new ones, too, with updates like the Windows 11 23H2 update. You can enjoy Snap Layouts to multitask efficiently, play with Android apps on your PC, and even link your iPhone to your laptop. One thing that’s missing from Windows 11, however, is desktop icons.
You might have noticed that desktop icons for some classic system features are missing. Even in the taskbar, some icons might be missing for your favorite apps. There’s no icon for My PC, for example. Well, it’s super easy to bring these hidden icons back.
By default, Windows 11 hides the icons for the user folder and apps like This PC. To bring these icons and others back, follow the steps below.
- Right-click on the desktop.
- Choose Personalize > Themes.
-
Choose the link at the bottom for Desktop icon settings.

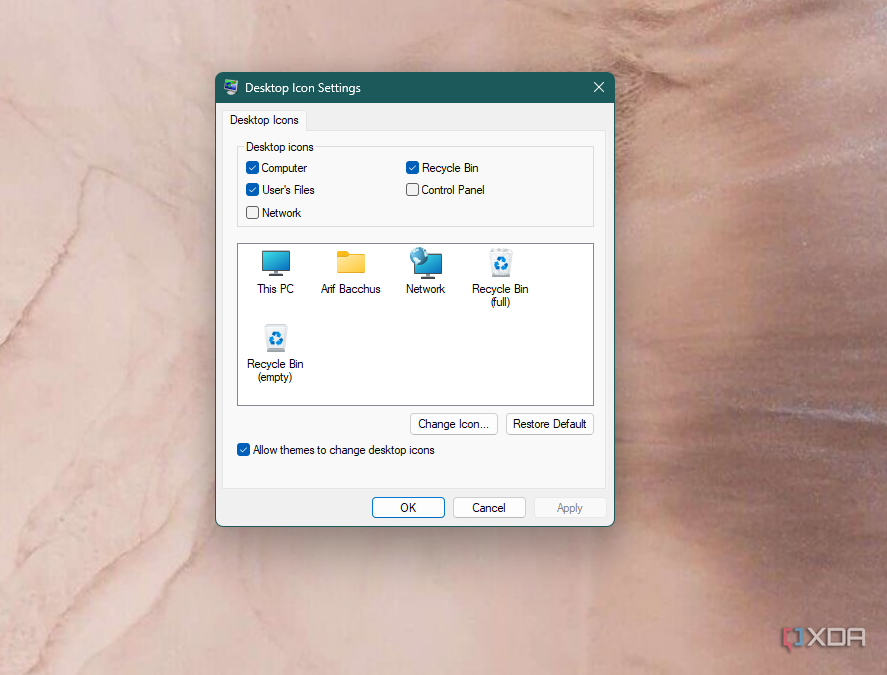
- The Desktop Icon Settings window should pop up.
-
Click the checkboxes for the items you want to see: Computer, User’s Files, Recycle Bin, and Control Panel.

- Click Apply.
You should right away see these icons restored to your desktop. At any time, if you’d like to remove these icons, repeat steps one to five, and this time, uncheck which icon you no longer want to see. Then, choose Apply.
Another place where you’ll want to see icons is in the taskbar. Typically, each app that’s running on your PC will have an icon. If you don’t see that icon, then Windows is likely hiding it under the hidden icon menu. This is an area for icons that are turned off. Here’s how to make sure these icons are being shown.
- Right-click on the Taskbar.
- Choose Taskbar settings.
-
Turn off the toggle for Hidden icon menu.

- You should now see all icons populate right next to your clock in the system taskbar.
Alternatively, if you want to keep the hidden icon menu on and prioritize a specific app icon, simply tap on the ^ on your taskbar. Then click the icon that you want to show, and drag it to an area within your eyesight.
Showcase your icons
That’s all you need to know to show hidden icons in Windows 11. It doesn’t take much other than a few clicks. Remember, we have tons of other tutorials on how to make Windows 11 look the way you want, too, like how to enable taskbar ungrouping, along with just general customization tips.
Since Windows 7, Microsoft has allowed users to customization of the Logon screen background color. To change the Logon background, users can download and utilize the Login Screen Background Changer freeware. Additionally, changing Windows folder icons is easy without third-party tools, as Windows includes a built-in feature for this purpose. However, changing the color of a folder does not have a default option.
How to change the Windows Folder Icon?
Here are the steps to change the Windows Folder Icon:-
Step 1. Right-click on the folder and select “Properties.”
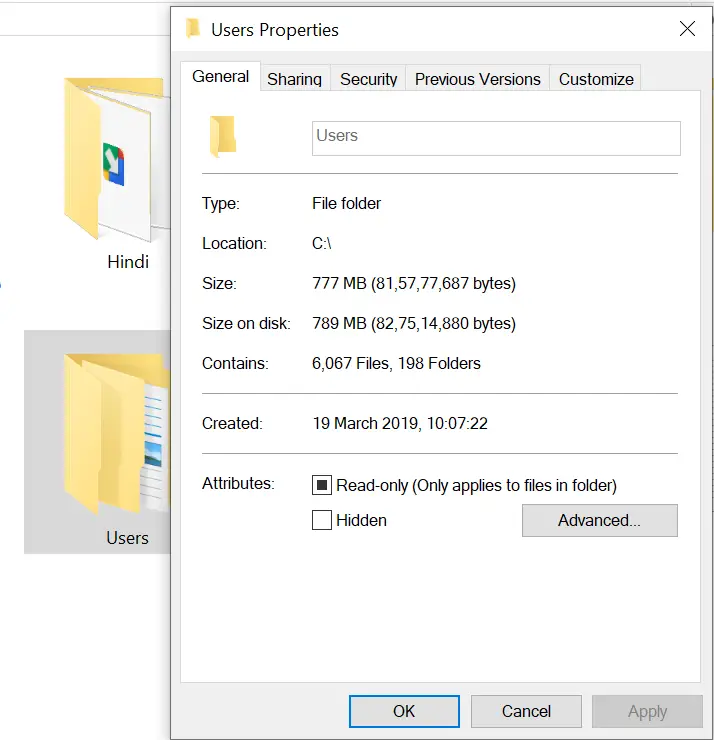
Step 2. Click the “Customize” tab.
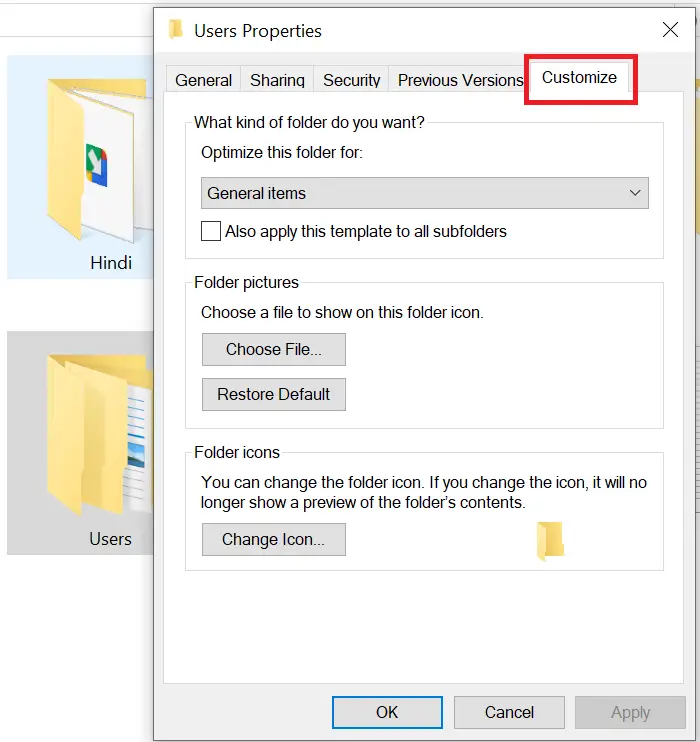
Step 3. Click the “Change Icon” button.
Step 4. The system’s default icons folder will open.
Step 5. Select any icon you want to apply and click “Apply” and “OK” to see the effect.
Since there is no default option to change the color of a folder, we recommend using the freeware tool Rainbow Folders. Rainbow Folders is not only free but also effective. According to the official website, it is compatible with Windows 98, ME, 2000, XP, 2003, Vista, 2008, 7, 2012, and 8. We tested it on Windows 11/10, and it worked fine.
Here are the steps to colorize Windows 11, 10 & 7 folders with Rainbow Folders:-
Step 1. Download and install Rainbow Folders from its official website.
Step 2. During the installation, make sure to check the “Install system shell extension” option.
Step 3. Right-click on the folder for which you want to change the color.
Step 4. Select “Rainbow Folders” from the right-click menu.
Step 5. The “Rainbow Folders” window will open.
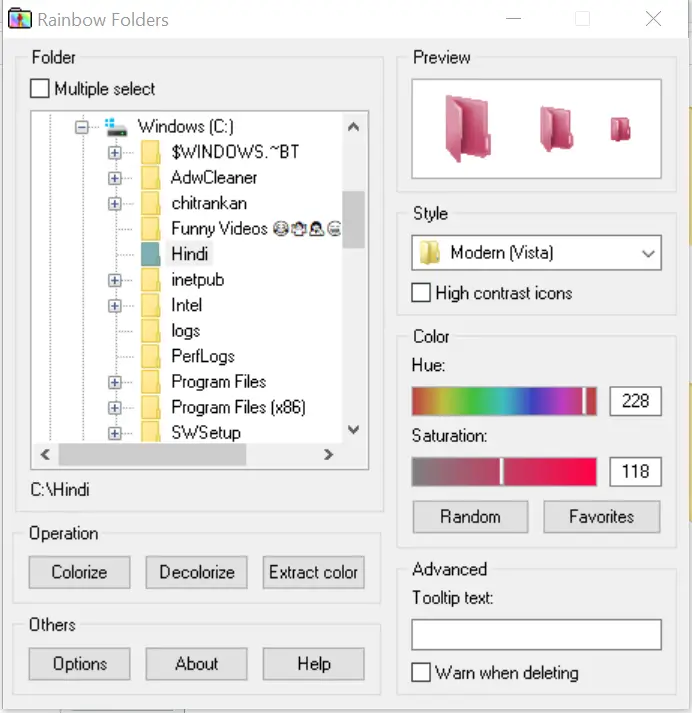
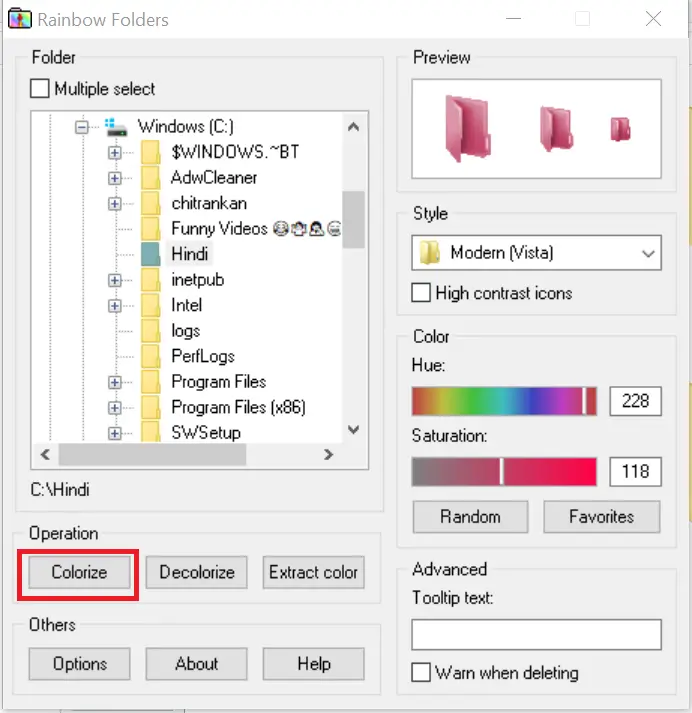
Step 6. Select the color you want to apply and click “Colorize” to see the changes.
Step 7. Refresh the screen or restart your PC to apply the effect.
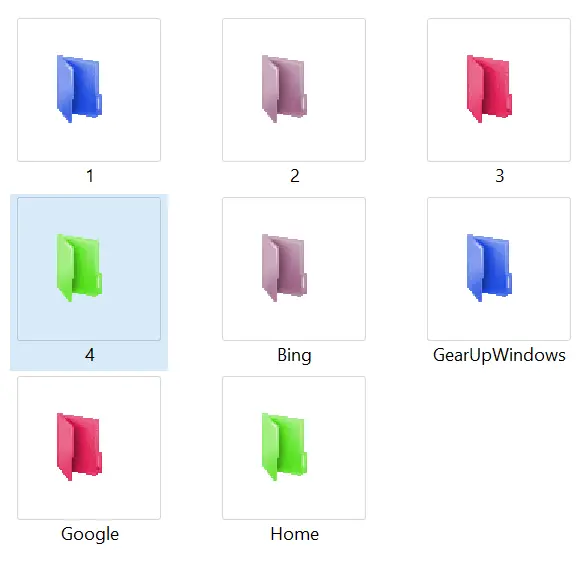
If you want to color multiple folders at once, select “Multiple Select” at the top. Rainbow Folders also allows for rebuilding the system icon cache quickly and easily, which can be found under options. It offers three types of folder styles: Classical, Typical, and Modern. To remove the color from a folder, select the folder and click “Decolorize.”
Conclusion
In conclusion, while changing the Windows folder icons is a straightforward process, changing the color of a folder does not have a default option. However, Rainbow Folders is a free and effective tool that can be used to colorize folders in Windows 11, 10, and 7. It offers multiple folder styles and allows for rebuilding the system icon cache quickly and easily. On the other hand, changing the Logon background is easily achievable by using the Login Screen Background Changer freeware, which allows users to customize the Logon screen background color. These customization options provide users with the ability to personalize their Windows experience according to their preferences. You might also be interested in our guide on how to change Folder Icons in Windows 10/8/7/Vista.