

Whenever you feel it lagging or freezing on the Windows 11, problems could possibly come from anywhere from low system storage to outdated drivers or from too many running programs to 100% disk usage. If you would like some tips to solve these issues without too much effort, this tutorial is exactly what you need.
Below are 8 easy solutions to boost your computer performance on Windows 11 without having to play around too many critical settings.
Try these solutions:
You might not need to try them all, just walk your way down the list until you find the laggy problem getting better.
Before trying the below methods, you should simply restart your computer first (maybe you have) to see if it helps, which is always the first thing to do when something goes wrong with the PC.
- Update Windows 11
- Update drivers
- Have a check on the Task Manager
- Adjust startup Apps
- Uninstall rarely-used apps
- Disable visual effects
- Delete temporary files
- Run Disk Cleanup
Method 1: Update Windows 11
Keeping the Windows 11 up-to-date can let you avoid some bugs and glitches existing in the older version that might cause your computer lag.
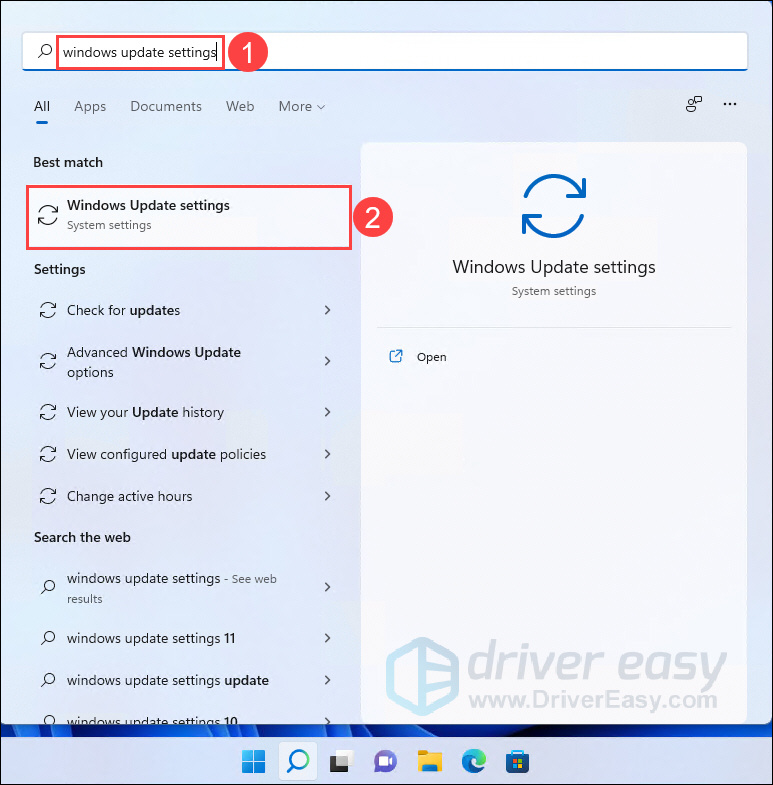
- Press the Windows key to open the Start menu, type Windows Update settings in the search box and select it from the result that appears.

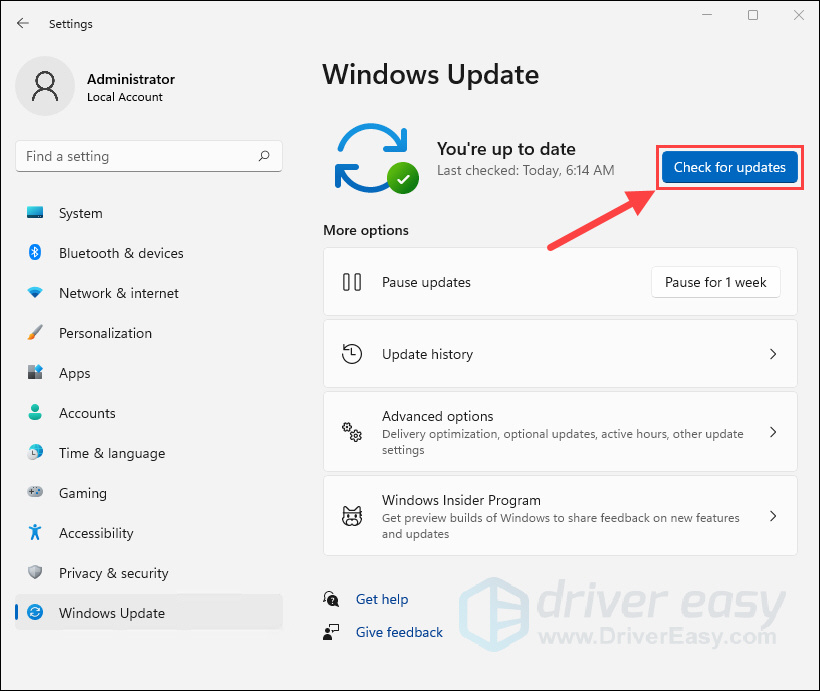
- Click Check for updates and wait for a while.

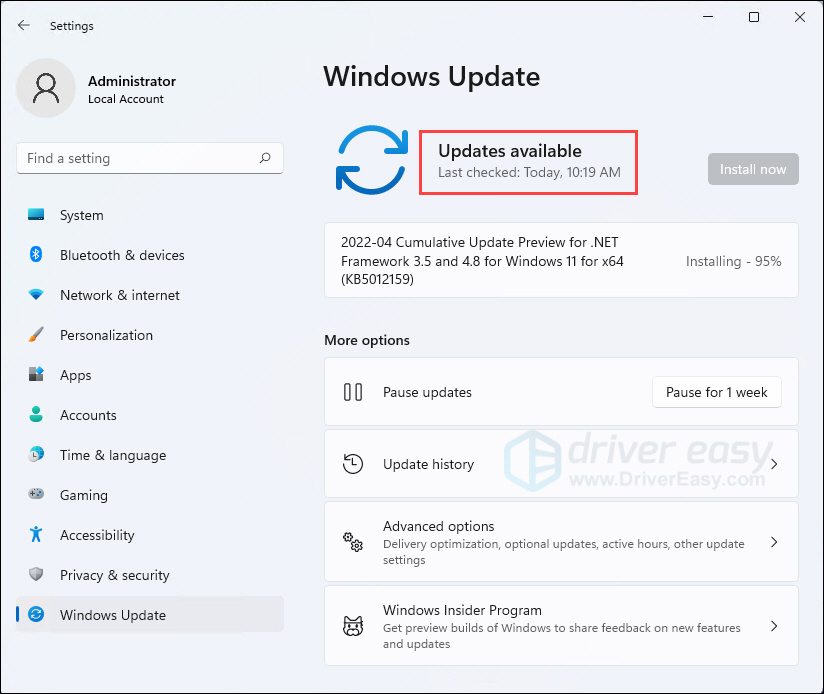
- If the checking result is updates available, the system will automatically download and install it for you.

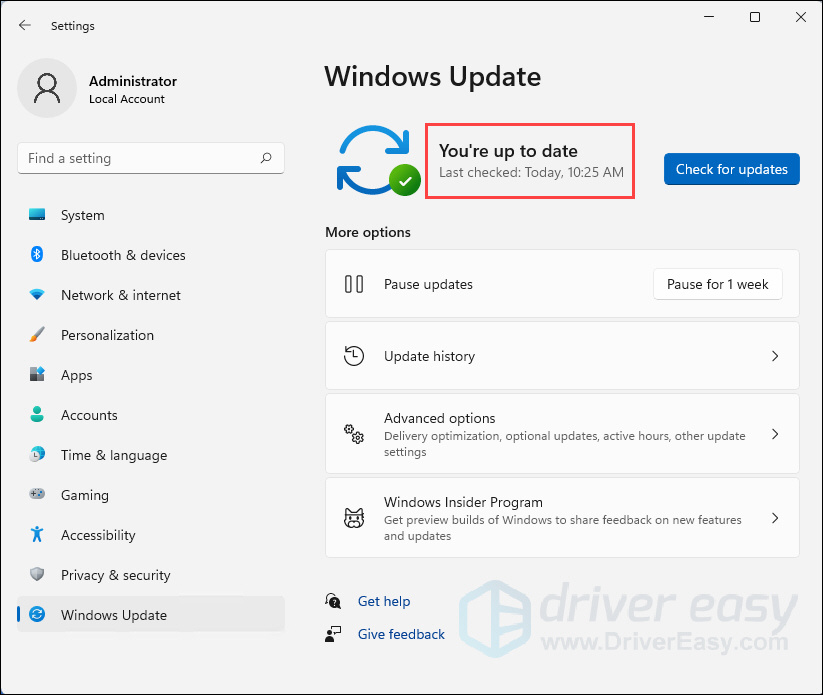
Or if the checking result is You’re up to date, then you can just close the Setting windows.

If this method doesn’t work for you, try the following below.
Method 2: Update drivers
Updating drivers should always be your go-to option when your computer or system doesn’t work as smoothly as you expected. Drivers are the interpreters between a computer and all its devices. With faulty and outdated drivers, your computer may bring you troubles. Therefore, it’s essential that you have the latest correct device drivers for your operating system at all times.
If you’re not comfortable playing with device drivers, we recommend using Driver Easy. It’s a tool that detects, downloads and installs any driver updates your computer needs. Here’s how to update drivers with Driver Easy:
- Download and install Driver Easy.
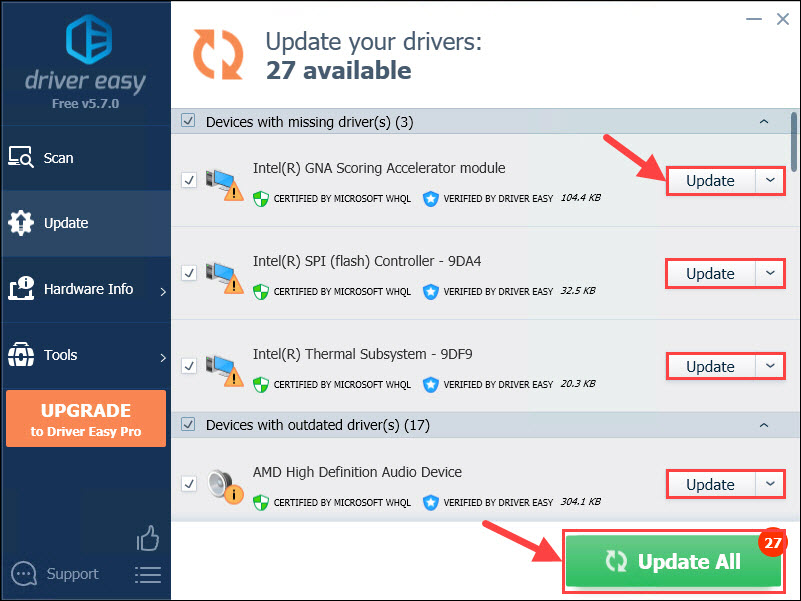
- Run Driver Easy and click the Scan Now button. Driver Easy will then scan your computer and detect any problem drivers.

- Click the Update button next to a device to automatically download the correct version of their driver, then you can manually install the driver (you can do this with the FREE version).
Or click Update All to automatically download and install the correct version of all the drivers that are missing or out of date on your system (this requires the Pro version which comes with full support and a 30-day money back guarantee. You’ll be prompted to upgrade when you click Update All).

- Restart your PC to see if your computer still stutters after updating the drivers. If the problem still persists, you should try other methods in this post.

The Pro version of Driver Easy comes with full technical support. If you need assistance, please contact Driver Easy’s support team at support@drivereasy.com.
Method 3: Have a check on the Task Manager
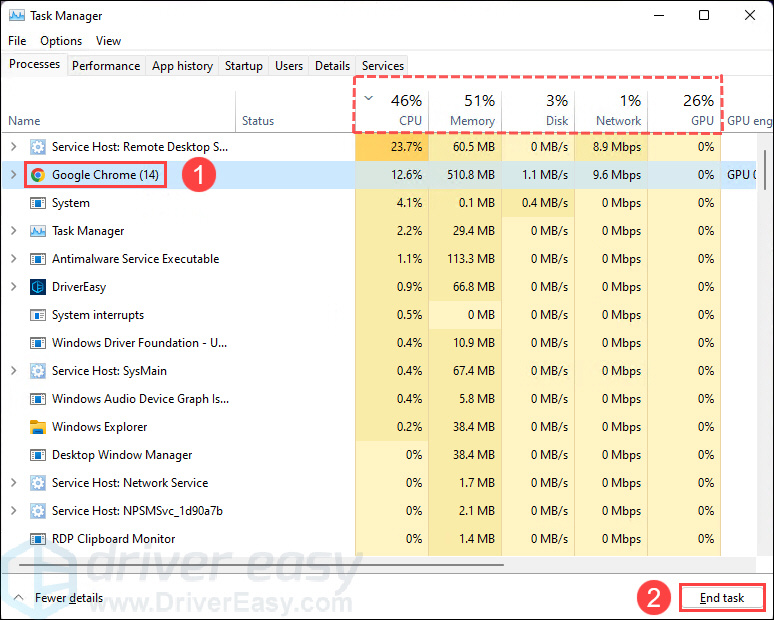
Task Manager is a tool in Windows system that enables you to monitor the CPU, Memory or Disk usage. If some of the processes are over-utilizing resources, that might make your OS run slow.
- Right-click the Windows icon on the task bar and select Task Manager from the pop-up list.
- Under the Processes tab, you will have detailed information on the right and the name of each process on the left. Select some processes using up most of the available resources and click End task.

If this method doesn’t work for you, try the following below.
Method 4: Adjust startup Apps
Usually Windows 11 would run faster when you start your computer with less startup Apps. Disable some of the unnecessary startup Apps is a way to help with the lagging problem in Windows 11.
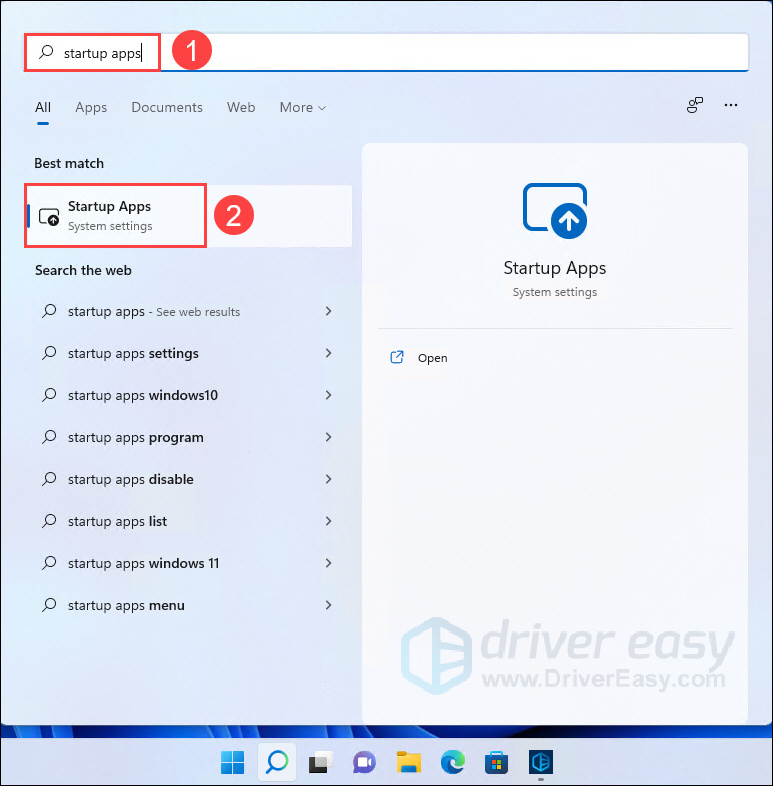
- Press the Windows key to open the Start menu, type startup apps in the search box and select it from the result that appears.

- Click the toggles to Off for those Apps you want to keep them from automatically opening (especially those with High impact).


After applying these settings, have a check to see if it works for you. If not, try next one below.
Method 5: Uninstall rarely-used apps
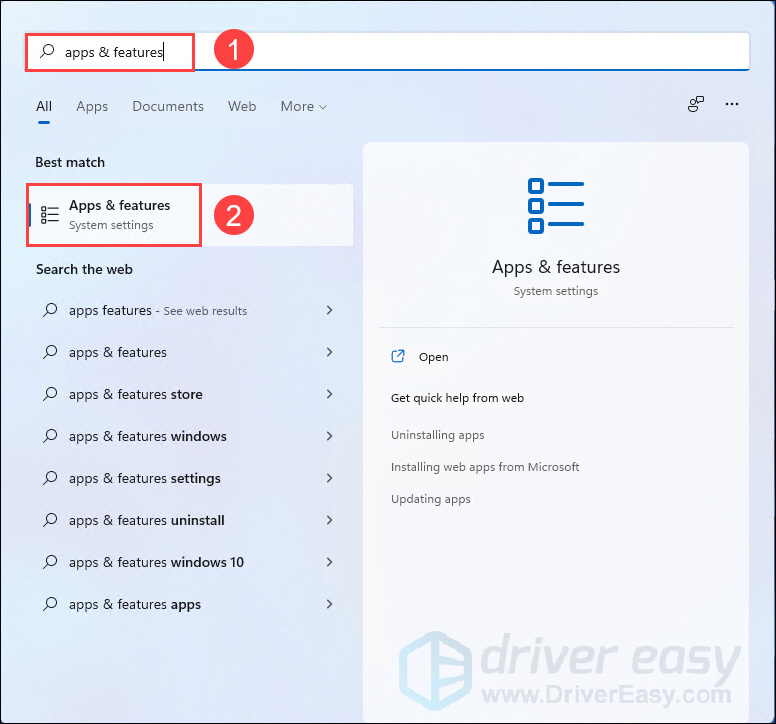
- Press the Windows key to open the Start menu, type apps & features in the search box and select it from the result.

- Next, you will see a list of apps installed in your system. Click the 3-dots button on the apps you rarely use and then select Uninstall.

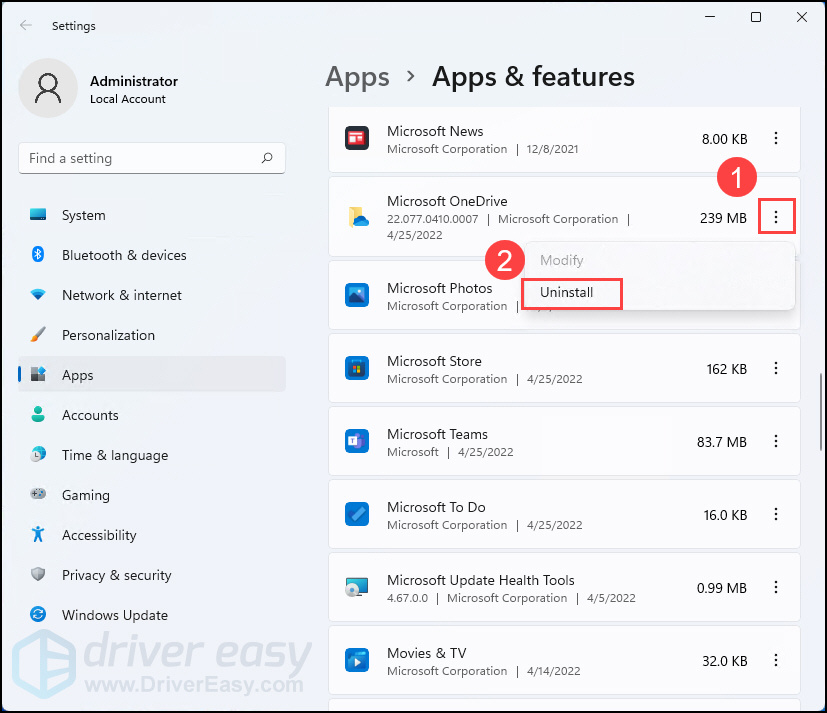
Some of the apps can not be uninstalled because they are critical built-in features of Windows 11.
Method 6: Disable visual effects
Windows 11’s visual effects are new features in Microsoft OS. They perform flashy visuals to meet users’ aesthetic needs, but in some situations, they also make the OS sluggish.
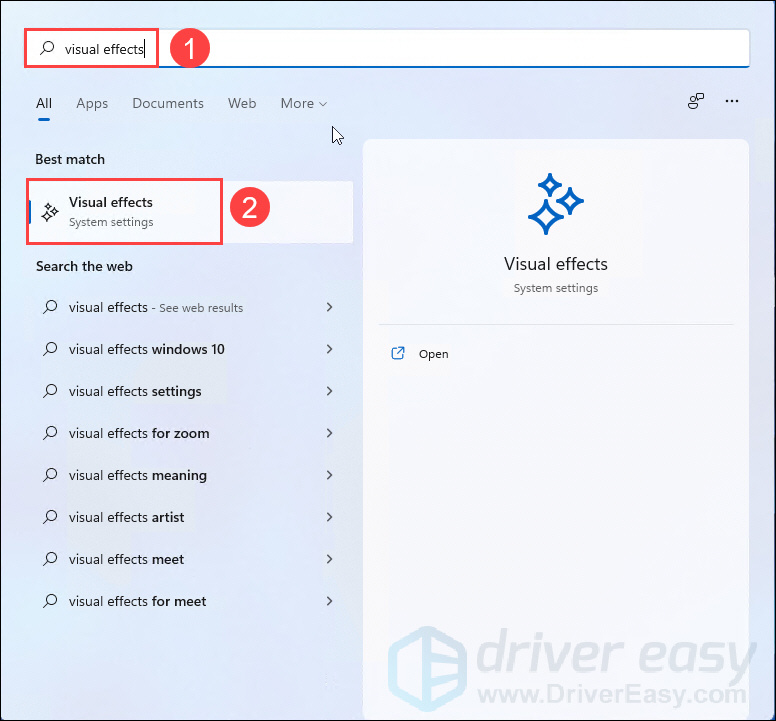
- Press the Windows key to open the Start menu, type visual effects in the search box and select it from the result.

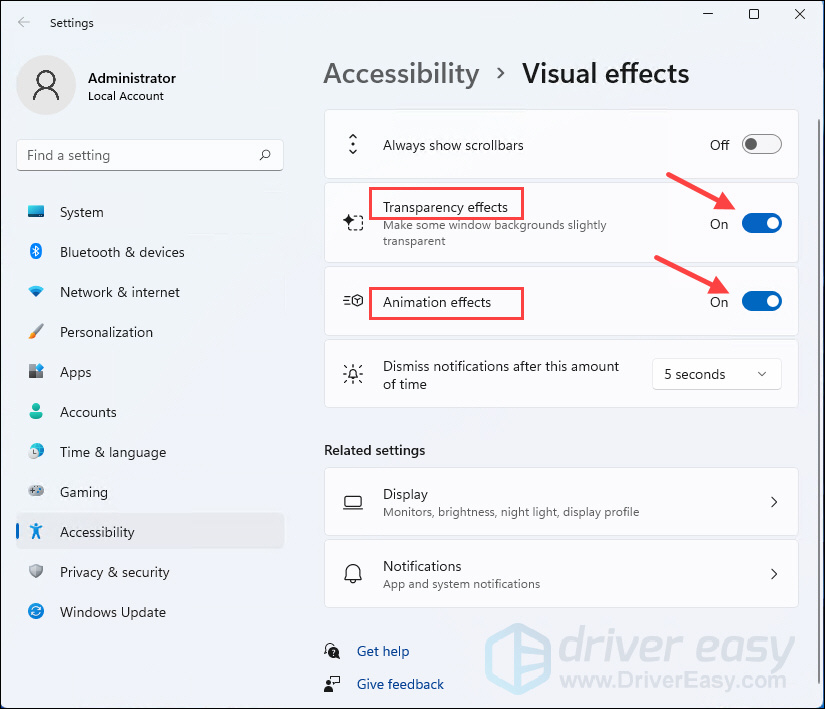
- If the Transparency effects and Animation effects are on in the list, click on the toggles to turn them off.

After applying these settings, have a check to see if it works for you. If not, try the following below.
Method 7: Delete temporary files
Temporary files are created by programs for temporary purposes. They can take up an amount of storage space over the time, so deleting temp files would be a wise choice to fix the lagging problem.
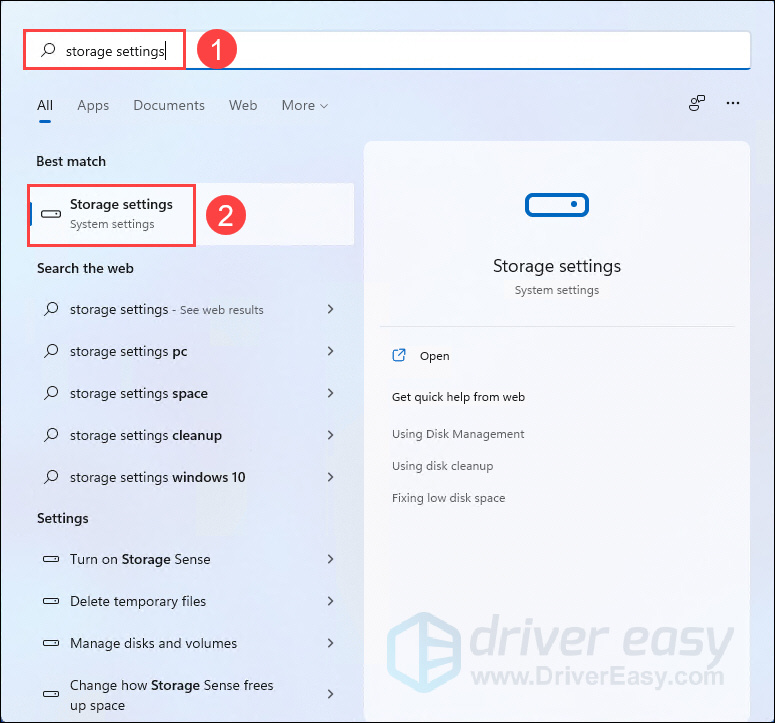
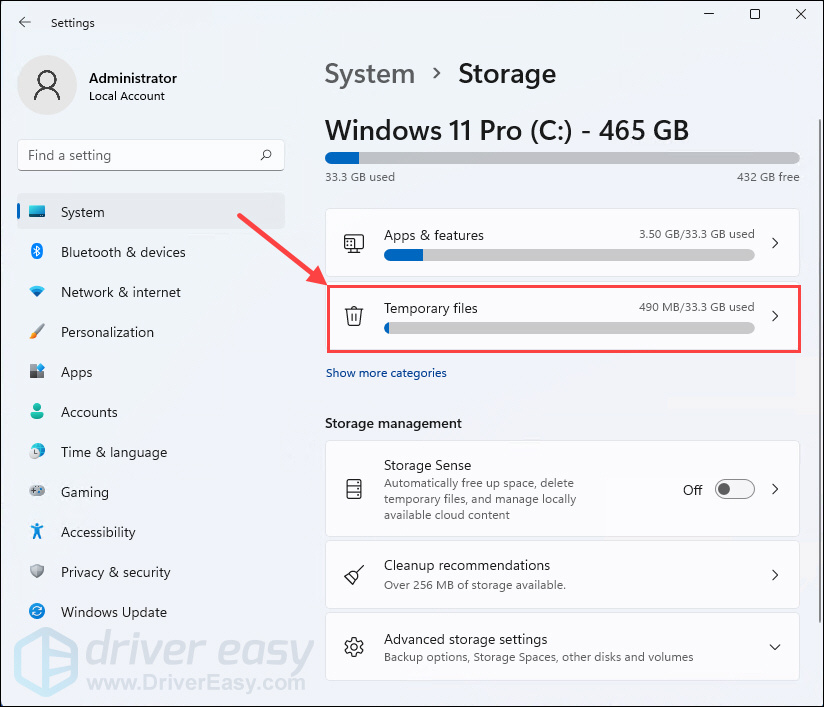
- Press the Windows key to open the Start menu, type storage settings in the search box and select it from the result.

- Click Temporary files in the right section.

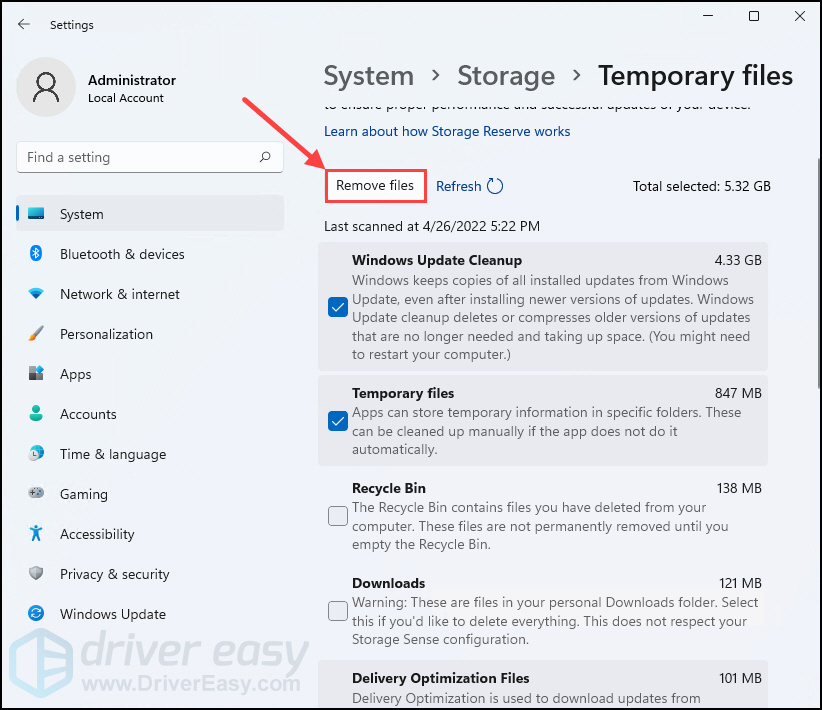
- Click Remove files.
Note: The system will autumnally select the files that can be safely deleted. If you also want to clear the Recycle bin which wouldn’t be autumnally selected, tick the check box before you make sure that there is nothing important in the Recycle bin.
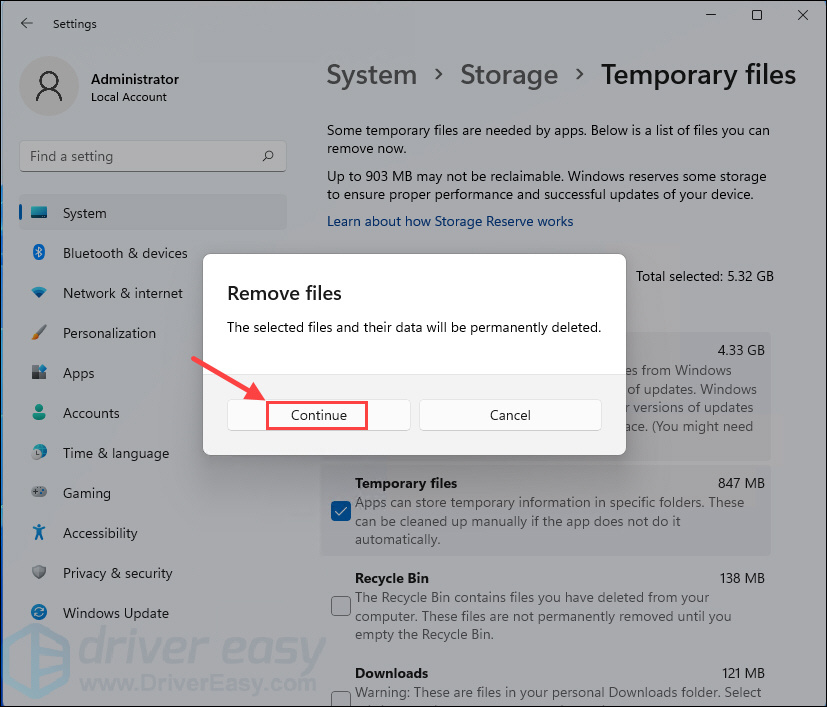
- Click Continue.

If this method doesn’t work for you, try the following below.
Method 8: Run Disk Cleanup
Disk Cleanup is a built-in tool in Windows to assist users remove useless files and free up disk space.
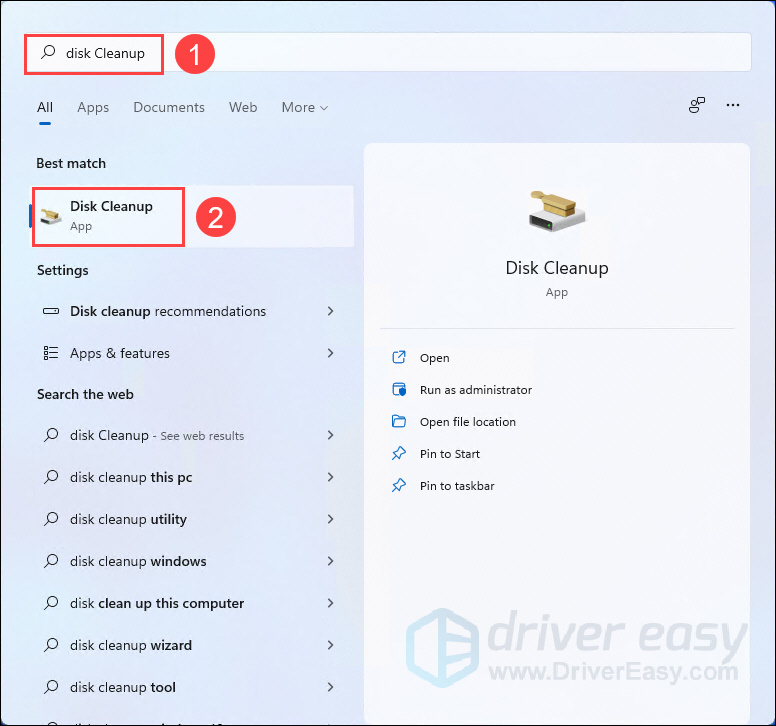
- Press the Windows key to open the Start menu, type disk cleanup in the search box and select it from the result.

- Wait a while for the calculating.
- Under the Disk Cleanup tab, tick the check box from the list of Files to delete and click OK.
- Click Delete Files.
That’s it – 8 easy ways to deal with lagging Windows 11 and to refresh your computer at the same time! Don’t forget to restart your PC after trying the above tricks to see if they help.
If you have any idea, question or suggestion, please feel free to leave us a comment below.
48
48 people found this helpful
Тормозит Windows 11 по разным причинам, но на всё есть свое решение. В данном материале создатель «Блога системного администратора» Игорь Позняев предлагает разобраться с проблемой и рассказывает об эффективных способах её исправления.
Повреждены файлы ОС — поправим в командной строке
Системные файлы Windows могли повредиться при работе. Из-за ошибок, неправильных действий пользователя и по разным другим причинам. Или же из-за установки проблемного софта, а также «игрушек». Итог печален — ноутбук или настольный ПК тормозит или система загружается очень долго. Поступим как ИТ-шники — поправим системные файлы в командной строке. Применим штатные утилиты Windows 11, которые проверят системные файлы, а затем исправят.
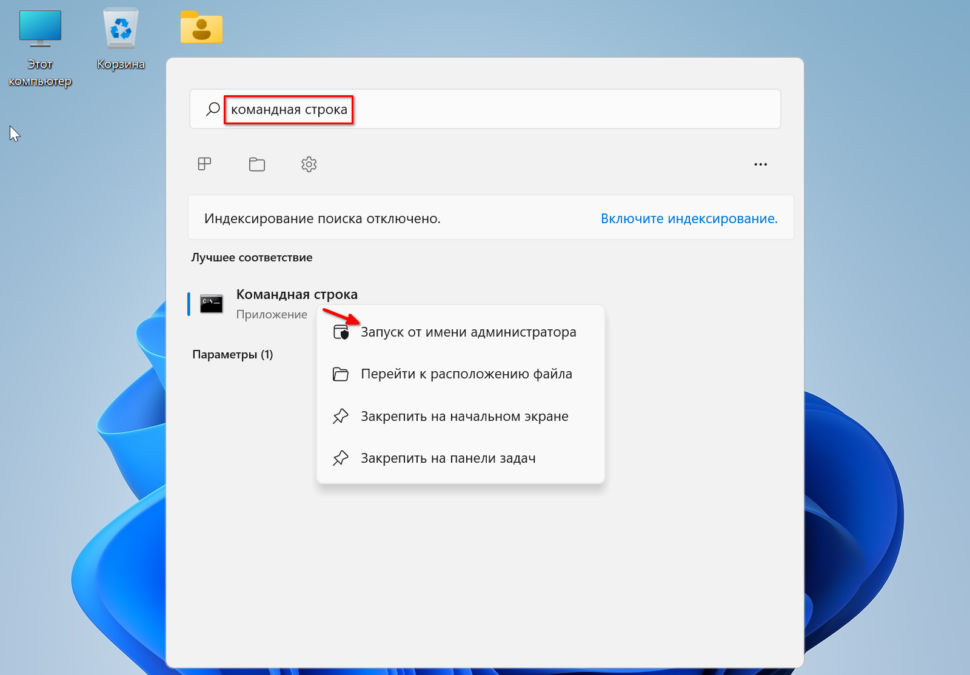
Откройте окно поиска системы — используйте сочетание клавиш Win+S. Наберите в поисковой строке:
командная строка
Кликните правой кнопкой мыши по найденному приложению. Запустите командную строку с правами админа.
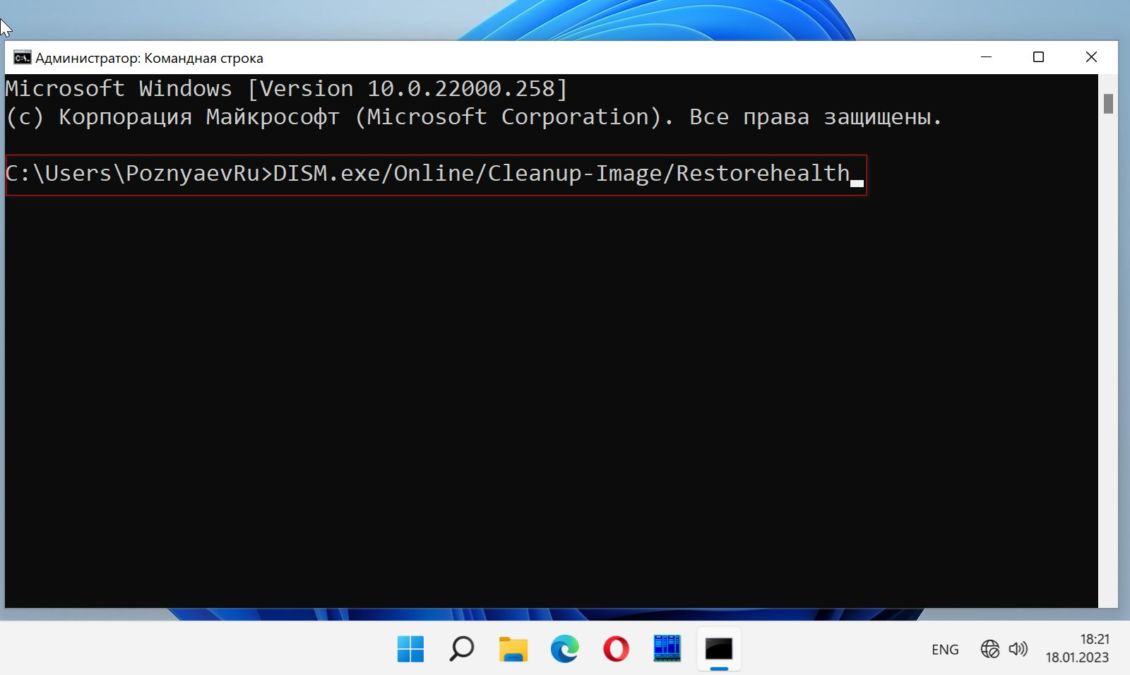
Начните с команды восстановления работоспособности DISM:
DISM.exe/Online/Cleanup-Image/Restorehealth
Затем: sfc /scannow. Утилита выявит поврежденные файлы. Заменит исправными из хранилища. Процесс потребует времени. Наберитесь терпения и не прерывайте.
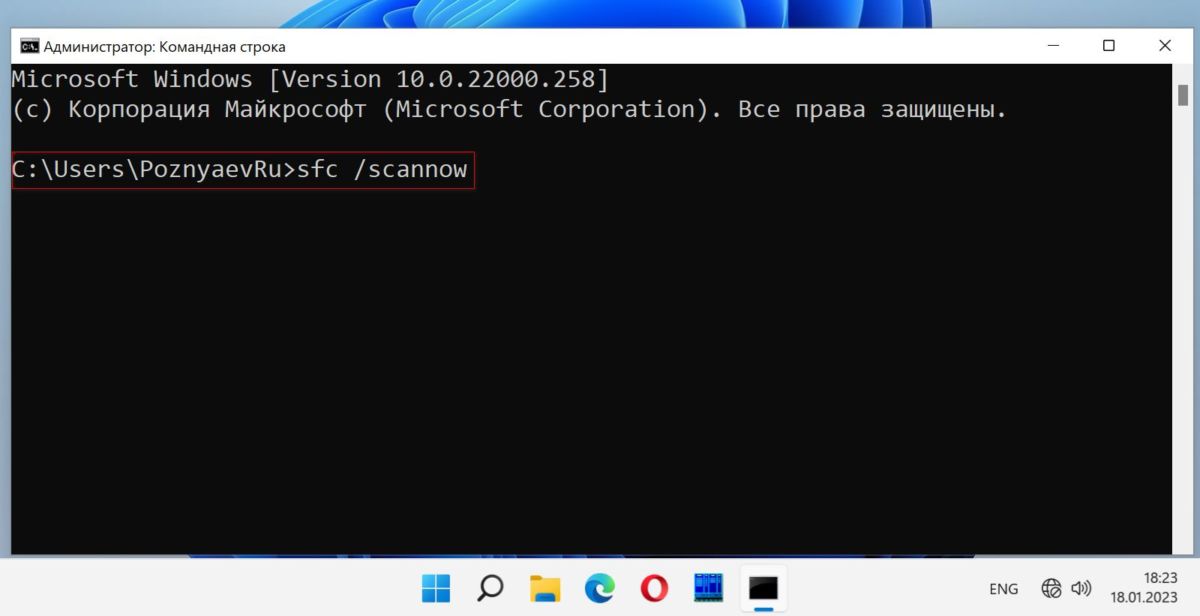
Когда процесс завершен — закройте командную строку и перезагрузите компьютер.
Поддерживайте ОС в актуальном состоянии. Microsoft регулярно выпускает накопительные обновления системы. Повышают безопасность Windows. Исправляют известные ошибки. Способствуют сохранению высокой эффективности и производительности.
Кликните правой кнопкой мыши на «Пуске». Затем — по пункту «Параметры» для перехода к настройкам ОС.
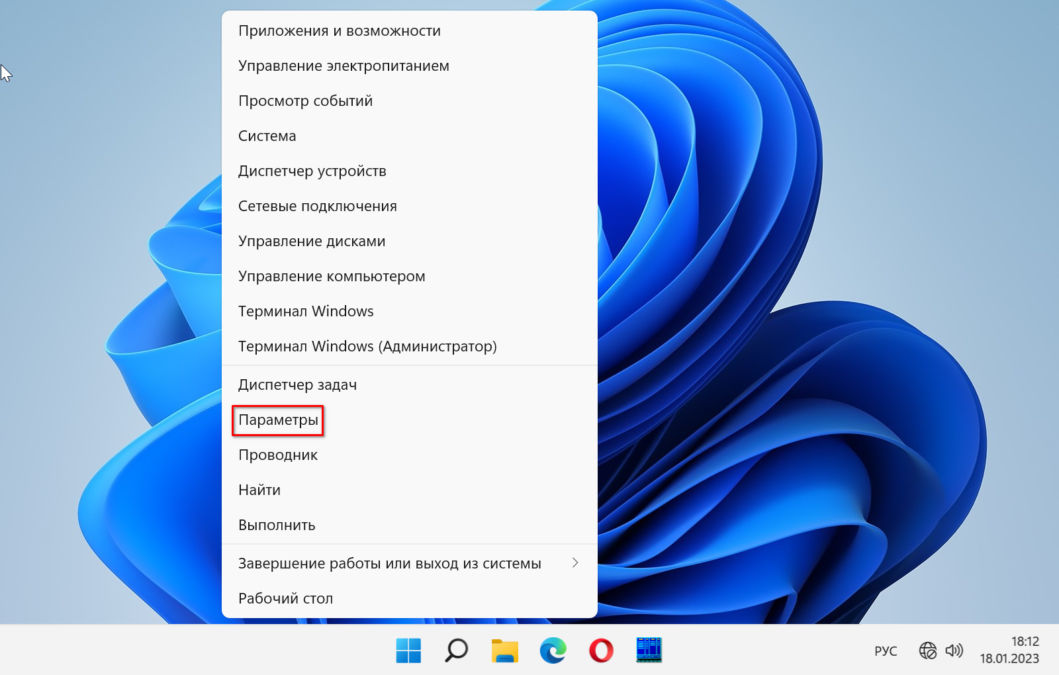
Откройте на левой панели группу параметров «Центр обновления Windows». Кликните по «Проверить наличие обновлений».
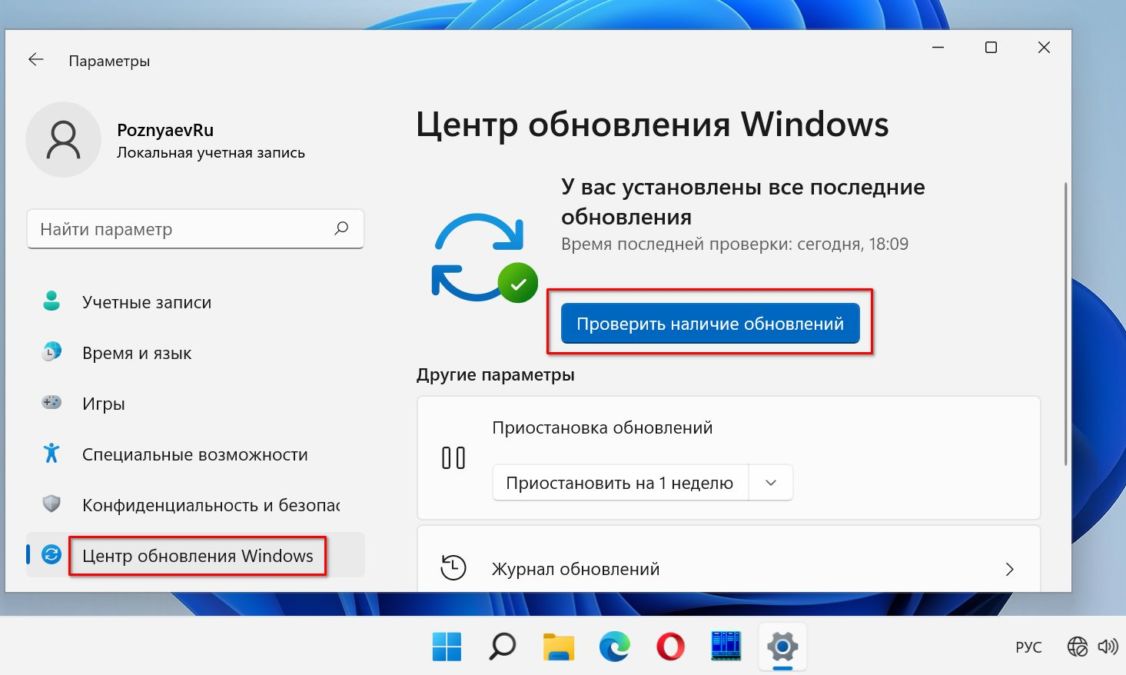
Если доступны свежие обновления — загрузите.
Включите контроль памяти
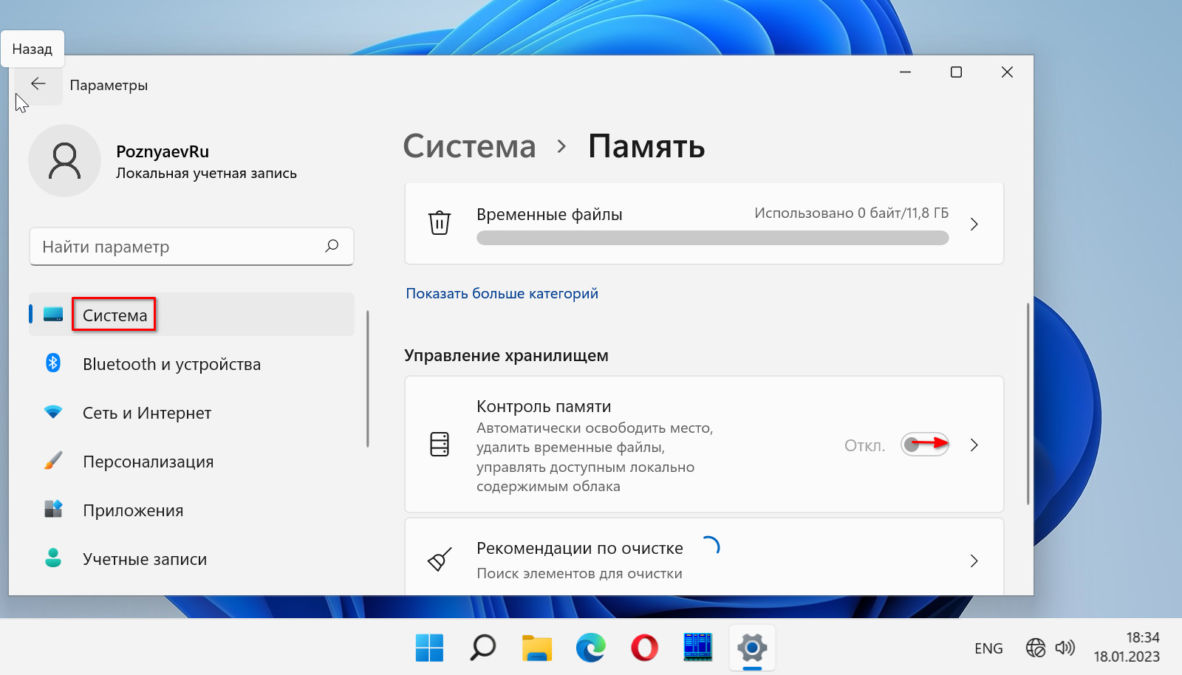
Временные ненужные файлы замедляют работу компьютера. Включите функцию Контроль памяти, которая регулярно удаляет ненужные файлы, включая предыдущие установочные, временные файлы из приложений и многое другое с вашего ПК. И повышает производительность компьютера.
Нажмите Win+I на клавиатуре. В левой панели «Параметров» выберите раздел «Система». Кликните по плитке «Память». Прокрутите до надписи «Управлении хранилищем». Включите опцию «Контроль памяти» — сместите переключатель вправо.
Почистите Автозагрузку от лишних программ
Вместе с Windows 11 запускается ряд приложений и служб. Вы можете даже не знать о них. Такой софт зачастую полез в Автозагрузку при установке. Итогом становится длительная загрузка системы. Удалите лишний софт из Автозагрузки.
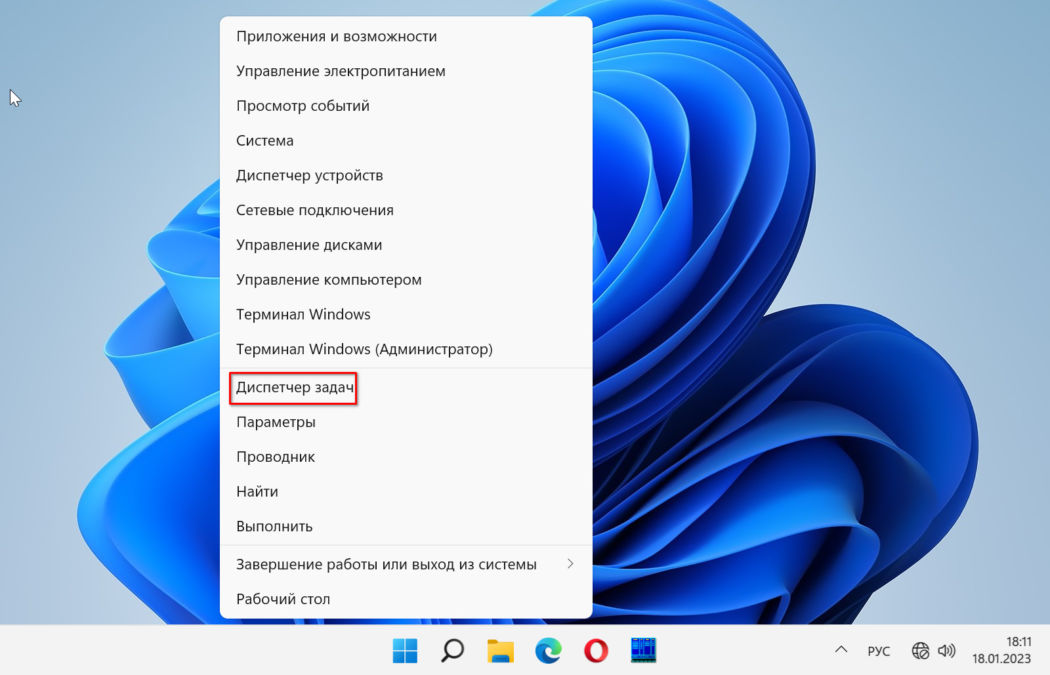
Кликните правой кнопкой мыши по «Пуску». Кликните по «Диспетчеру задач» в меню.
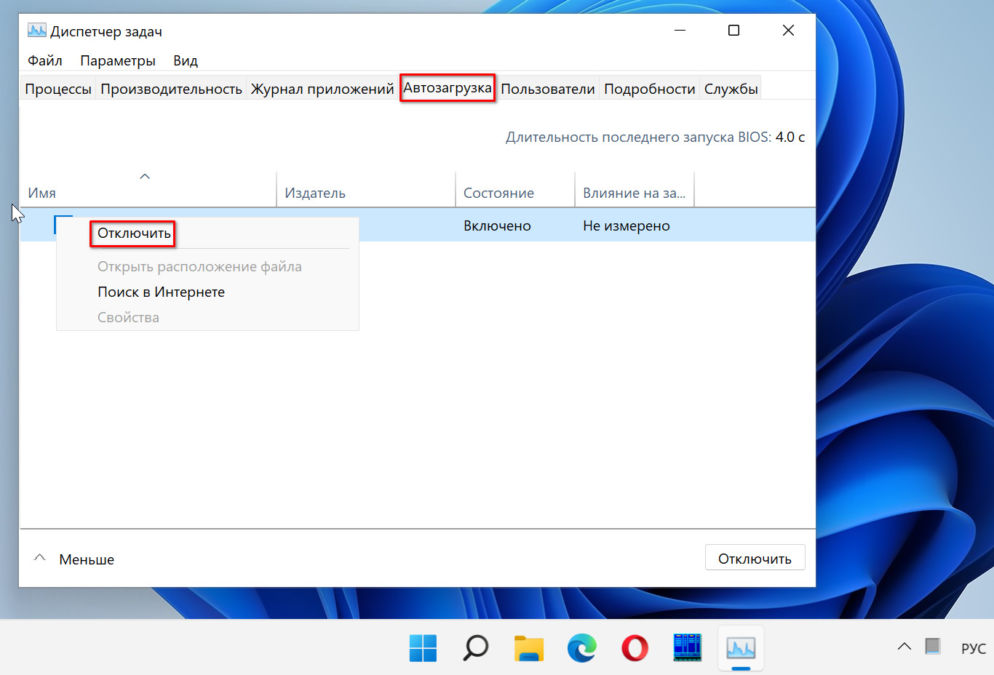
Нужная вам вкладка диспетчера — «Автозагрузка». Содержит перечень программ и служб, которые запускаются при каждом старте системы. Правой кнопкой мыши кликните на программе, которую хотите «выкинуть» из Автозагрузки. Выберите «Отключить». Повторите действие для каждого приложения, если не желаете, чтобы оно стартовало вместе с Windows.
Несвежий драйвер графики
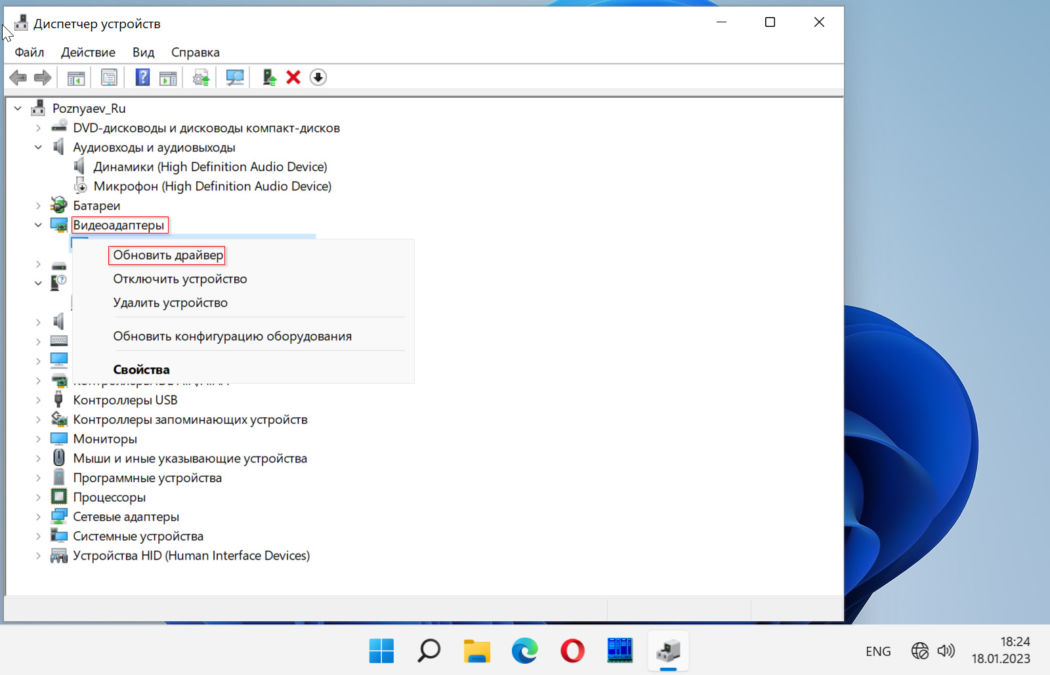
Старые драйверы ведут к уйме проблем на ПК. Из-за них могут возникать синие экраны (BSOD). А Windows 11 периодически виснет. Заметили, что система стала грузиться дольше, чем прежде? Игры тормозят или работают с проблемами? Не исключено, что виной тому древний драйвер видеоадаптера. Нажмите одновременно клавиши Win+X. Из меню перейдите в «Диспетчер устройств».

Перейдите в категорию «Видеоадаптеры». Кликните правой кнопкой мыши графическую карту, которую вы используете. Выберите «Обновить драйвер».
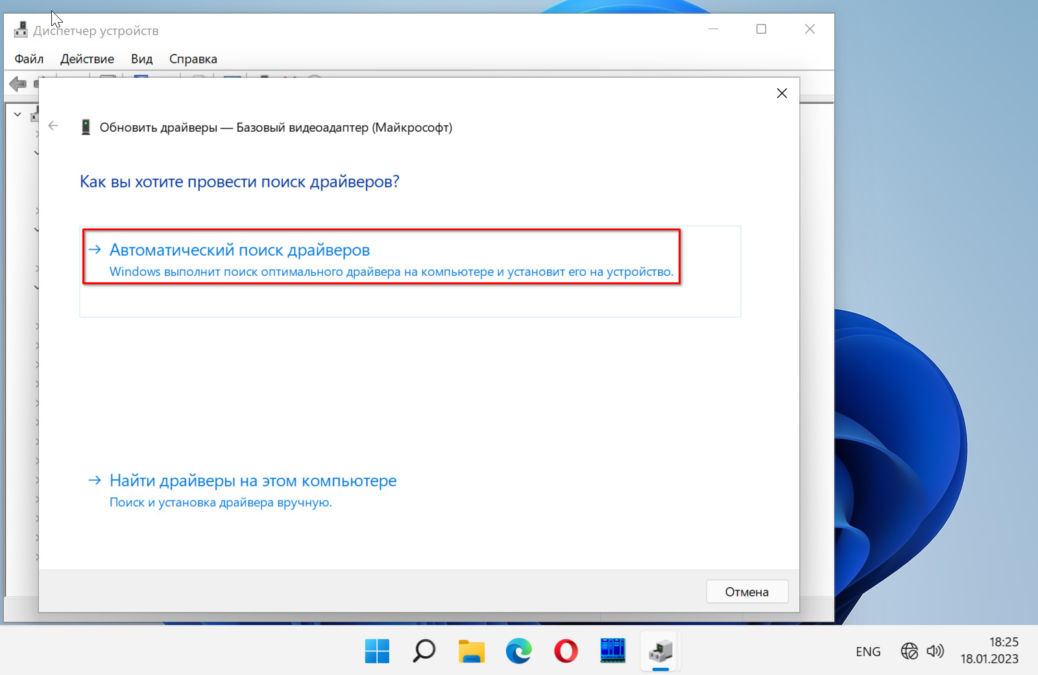
Произведите «Автоматический поиск драйверов».
Умный софт проверит наличие свежих обновлений драйверов. Если есть обновление — автоматически загрузит и поставит на ваш ПК последнюю версию.
Это простой вариант, но если вы знаете точную модель своей видеокарты и версию операционной системы, то можете скачать самый свежий драйвер с официального сайта производителя и установить его. Во время установки отметив галочкой пункт «Чистая установка». Всего три производителя графики: Nvidia, AMD и Intel.
Выполните чистую загрузку Windows 11
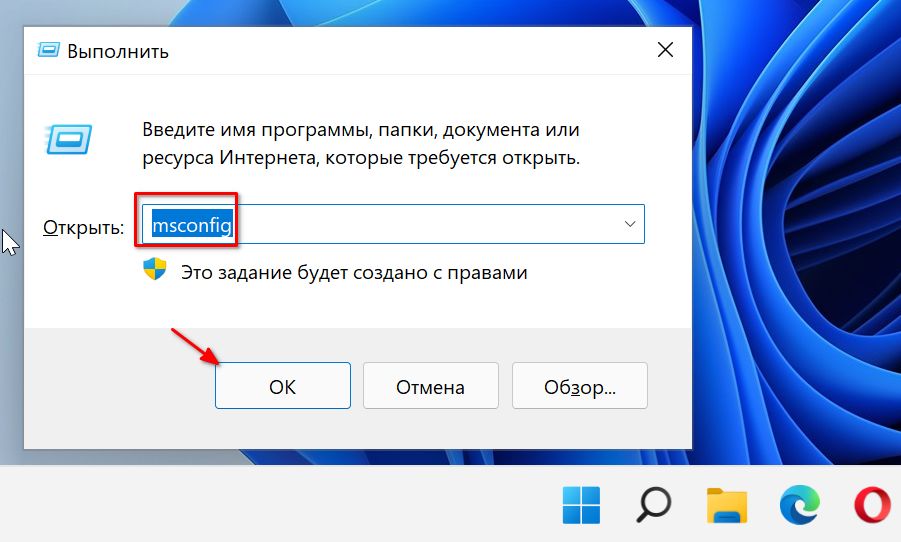
Выполните чистую загрузку — загрузите без стороннего софта и сервисов. Запуск ОС в данном режиме поможет вам выявить программные компоненты, которые отвечают за медленный запуск системы. Нажмите клавиши Win+R. Введите msconfig в строке «Открыть:» диалогового окна «Выполить». Кликните «ОК» в нижней части окна.
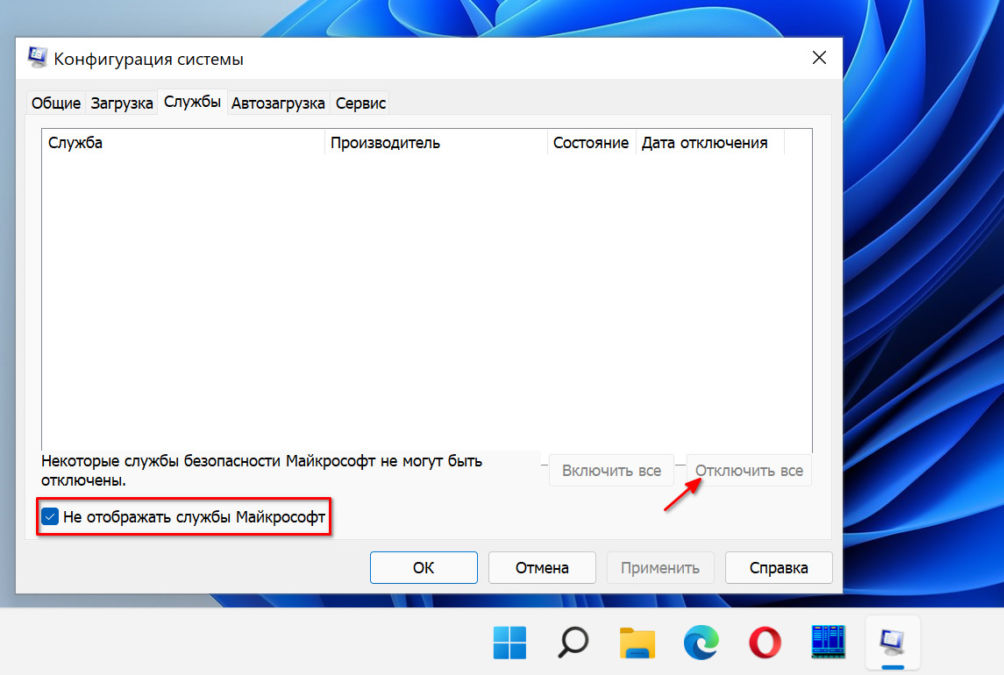
Стартует окно «Конфигурация системы». Нужная вам вкладка — «Службы». Активируйте опцию «Не отображать службы Microsoft». Нажмите «Отключить все».
Следующим шагом откройте «Автозагрузку». Кликните ссылку «Открыть диспетчер задач».
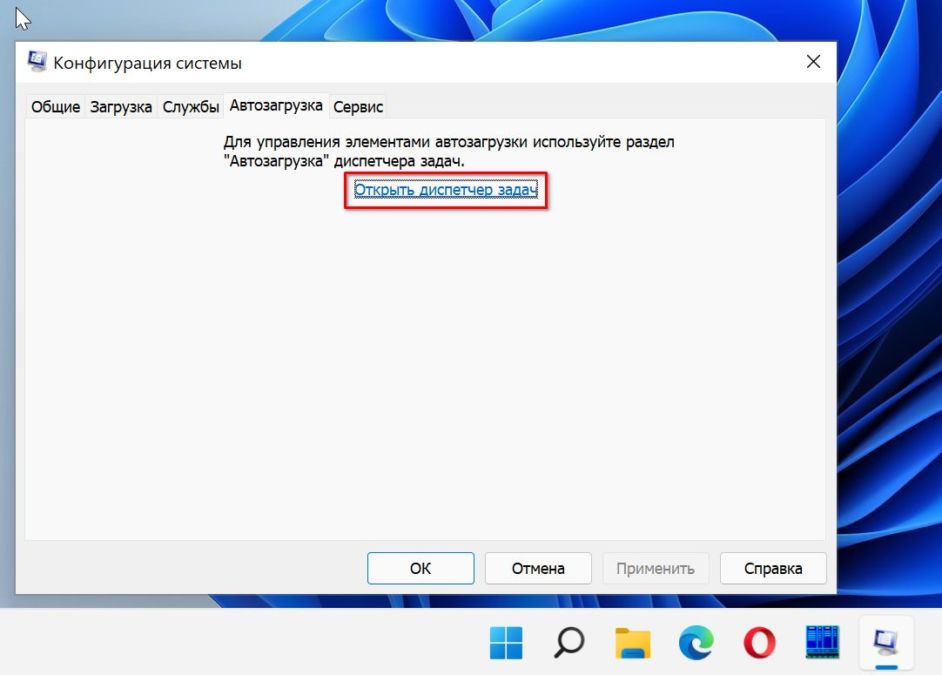
Кликните правой кнопкой мыши приложения, которые вы не хотите открывать во время запуска. Выберите «Отключить» для каждого.

Выйдите из диспетчера задач и перезагрузите компьютер. ПК запускается только с основными службами. Если вы заметили, что чистая загрузка улучшает время загрузки — повторяйте процесс. Поочередно подключайте программы и службы. В конечном итоге — выявите тот программный компонент, который вызвал медленную загрузку.
Избавьте ОС от вирусов
Систему могли поразить вирусы или вредоносный софт. В итоге ОС работает неправильно и может медленно загружаться. А также тормозят игры и приложения. Проверьте систему антивирусом. Применяйте проверенное стороннее антивирусное ПО регулярно. Сканируйте ОС на присутствие вредоносного софта. Очищайте и система будет максимально продуктивна. Можете применять и встроенную программу — Защитника Windows.
Самыми оптимальными бесплатными решениями по праву считаются Kaspersky Virus Removal Tool и Dr.Web CureIt!. Они не нуждаются в установке и могут сканировать систему параллельно с вашим антивирусом. Но имейте в виду, что оптимальнее запускать утилиты в безопасном режиме.
Используйте SSD вместо HDD
А теперь главный совет. Если вы все еще используете старый жесткий диск, пришло время заменить его на твердотельный накопитель. SSD намного быстрее, чем HDD. Уточните у технических специалистов сервиса, можно ли установить SSD на ваш ПК.
🎧 Хочешь новые наушники? Подпишись на наш Telegram-канал и участвуй в розыгрыше TECNO FreeHeat 1!
While Windows 11 is a welcome change with the start menu, taskbar, and other design improvements, the upgrade didn’t go well with some users. There have been issues with Bluetooth and Wi-Fi, and at times, many have noticed lag after Windows 11 update. If you notice your computer slowing down, here are the ways to fix the issue.

Microsoft releases Windows 11 updates to improve reliability and fix bugs in the software. Sometimes, things can go south, and you might experience lag everywhere in the system. Before ditching your perfect setup, use the troubleshooting tricks below and enjoy speed improvements.
1. Disable Startup Apps
After Windows 11 update, Microsoft might have enabled system apps to start at login. You might notice Microsoft Edge or OneDrive starting at launch, even when you don’t prefer them. You need to check and disable irrelevant startup apps from settings.
Step 1: Open Windows 11 Settings menu (use Windows + I keys) and select Apps from the left sidebar.

Step 2: Select the Startup menu.

Step 3: Check Startup apps and their impact on the system.
Step 4: Disable unnecessary apps and services at login.

From now on, Windows will start without any services or apps bogging it down in the background.
2. Remove Unwanted Apps
Some third-party apps might develop incompatibility with the shiny new OS on your computer. These apps might stop responding or start crashing on your PC. You need to update these apps or remove them (if no longer needed).
Step 1: Launch Windows 11 Settings menu and go to Apps section from the left section.
Step 2: Select Apps & features.

Step 3: Find an app you don’t need and select a three-dot menu beside it.

Step 4: Click on Uninstall and confirm your decision.
3. Free Up Storage
When dealing with little to no storage on your PC, you will notice a lag in day-to-day tasks. Windows 11 comes with a dedicated storage manager to use. Here’s how you can use it and get back some precious storage.
Step 1: Press Windows key + I to launch the Settings. On the System tab on the left column, select Storage from the right pane.

Step 2: Check temporary files and remove them from the following menu.

You can enable the Storage sense toggle to automatically free up space, delete temporary files, and manage locally available cloud content from the same Storage menu.

Note: Always keep a decent amount of storage free before downloading any major OS update.
4. Download Optional Updates
When you install a Windows 11 update on your computer, it will skip optional updates. If you notice lag after the successful update, you’ll need to install those optional updates.
Step 1: Press the Windows key + I to open the Settings and go to Windows Update.

Step 2: Select Advanced options.

Step 3: Check Optional updates in the Additional options menu.

Step 4: Checkmark all pending driver updates and hit the Download & install button.

Start using your Windows computer, and you shouldn’t notice the lag in daily use.
5. Run System Diagnostics
If there is a hardware failure on your computer after Windows 11 update, you will notice lag and the computer experience will feel like a drag. Your PC does come with built-in software to diagnose the system. At least a select laptop and desktop makers pack dedicated hardware diagnostics apps. If your computer doesn’t have it, you may skip this solution.
Note: We will use steps for an HP laptop. The same might differ on your PC.
Step 1: Open HP Support Assistant app.

Step 2: Select Run hardware diagnostics from the home menu.

Step 3: Click on Component Tests from the left sidebar.
Step 4: Enable the checkmark beside all components and select the Run once button.

Similarly, you can run system tests to ensure that the main components are functioning properly.
6. Check PC Temperature
If your computer is running at a high temperature after Windows 11 update, you will see system lag here and there. Refer our dedicated on how to reduce CPU temperature on a PC. You can check it out, take the required steps to bring down the heat, and try using the computer again.
7. Go Back to the Previous OS Version
Do you still notice lag after performing all the steps above? Microsoft may have released a buggy Windows 11 update. You have an option to roll back the Windows version on your computer.
Step 1: Press Windows key + I to open Settings app and select System from the left sidebar.

Step 2: Scroll down and select Recovery.

Step 3: Select the Go back button under the Recovery options menu.

Follow the on-screen instructions and start using a stable and fluid Windows build on your computer.
8. Run Windows Security Scan
Malicious or corrupt files can be the major reason behind system slowdown. You don’t need to rely on third-party antivirus apps to find and remove such files. Microsoft’s Windows Security tool should get the work done.
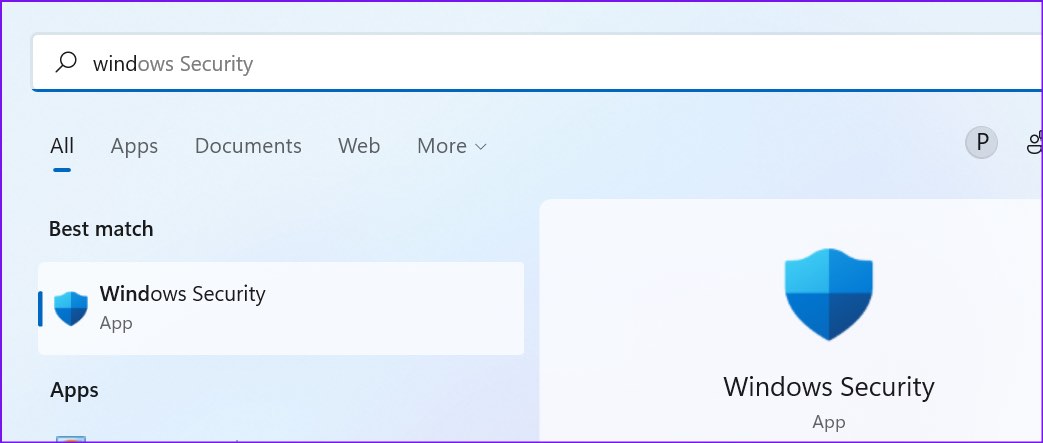
Step 1: Press the Windows key, search for Windows Security, and press Enter to open the app.
Step 2: Select Virus & threat protection from the left sidebar.

Step 3: Click on the Quick scan button and run the complete scan on your computer.

Once Windows Security finds and removes such files, restart the PC.
Keep Your Windows 11 PC Updated
Windows Updates arrive to improve your computing experience. However, when Windows 11 lags after an update, it is still fixable before you decide to install it all over again. Use the solutions mentioned above to speed up your Windows 11 PC in no time. And if you have found another trick, mention it in the comments below.
Was this helpful?
Thanks for your feedback!
The article above may contain affiliate links which help support Guiding Tech. The content remains unbiased and authentic and will never affect our editorial integrity.
Время на прочтение2 мин
Количество просмотров15K

Обновление KB5028185 из июльского пакета патчей безопасности (Patch Tuesday) для Windows 11 версии 22H2 тормозит ПК, приводит к сбоям в работе сетевых модулей связи и вызывает проблемы при входе в систему.
«После установки этого обновления время перезагрузки и запуска моего ПК значительно увеличилось, экран приветствия висит 17 секунд, тогда как раньше вход в систему занимал не более 4,5 секунд. Время выключения ПК тоже стало больше, но я не засекал», — пояснил один пользователь.
Также пользователи пожаловались, что после установки KB5028185 стали тормозить почти все игры и приложения и возникла проблема с логином в системе. Некоторые пользователи не могли войти в систему, так как Windows 11 перестала отображать панель входа и там нет возможности ввести пароль. В этом случае помогает перезагрузка в безопасном режиме или запуск режима восстановления с откатом обновления.
«Не могу поверить, насколько упала производительность ПК. Я удалил обновление, сразу всё стало нормально. Я не понимаю, зачем Microsoft постоянно вынуждает пользователей устанавливать неработающие обновления для Windows 10/11. У меня никогда не было такой проблемы с Windows 7/8», — рассказал другой пользователь.
Другие пользователи заявили, что у них перестал работать брандмауэр, не отвечает значок безопасности Windows на панели задач, пропал доступ в интернет через беспроводные адаптеры и проводное подключение. Они выяснили, что помимо удаления KB5028185 для восстановления работы сетевых адаптеров (ошибка связи — connected, but no internet available) может понадобиться аналогичное действие с обновлением KB5028851.
Ранее в тестовой сборке Windows 11 build 25905 появилась опция для быстрого восстановления или переустановки ОС с сохранением всех настроек и приложений через штатный сервис Windows Update (Центр обновления Windows). Это необходимо, например, если на ПК оказались установлены нерабочие обновления и система перестала стабильно запускаться.