
Applies ToWindows 11 Windows 10
В большинстве случаев Windows автоматически обнаруживает и устанавливает как сканеры, подключенные локально, так и сканеры, расположенные в сети. Однако если сканер не обнаруживается и не устанавливается автоматически, в этой статье описывается установка сканера вручную. После установки в этой статье описывается сканирование рисунка или документа.
В большинстве случаев для настройки сканера в Windows необходимо подключить сканер к устройству Windows. Подключите USB-кабель от сканера к доступному USB-порту на устройстве с Windows, а затем включите сканер. Windows продолжает установку сканера. Если Windows не устанавливает локальный сканер автоматически, его можно установить вручную:
-
Убедитесь, что сканер подключен к устройству с Windows через USB и что сканер включен.
-
В окне Устройства bluetooth & > Принтеры & сканеры нажмите кнопку Добавить устройство рядом с пунктом Добавление принтера или сканера.
-
Windows выполняет поиск сканеров, подключенных локально к устройству Windows. Поиск может занять несколько минут.
-
После того как локальные сканеры будут обнаружены, они отображаются в списке в окне Устройства Bluetooth & > Принтеры & сканеры . В списке нажмите кнопку Добавить устройство рядом со сканером, который необходимо установить.
-
Windows устанавливает выбранный сканер. После завершения установки сканер появится в окне устройства & Bluetooth > принтеры & сканеры .
Совет: Если сканер входит в состав многофункционального или многофункционального принтера, сканер может отображаться как принтер. Чтобы убедиться, что Windows также обнаруживает принтер в качестве сканера, выберите принтер в окне Устройства Bluetooth & > Принтеры & сканеры . Если принтер также обнаружен в качестве сканера, параметры сканера отображаются в качестве параметра в открывавшемся окне Устройства Bluetooth & > Принтеры & сканеры > <Printer_Name> .
Если сканер включен и подключен к сети, Windows должна найти и установить его автоматически. Доступные сканеры могут включать сканеры в сети, такие как сканеры Bluetooth, беспроводные сканеры или сканеры, подключенные к другому устройству и совместно используемые в сети. Если Windows не устанавливает сканер сети автоматически, его можно установить вручную:
-
В окне Устройства bluetooth & > Принтеры & сканеры нажмите кнопку Добавить устройство рядом с пунктом Добавление принтера или сканера.
-
Windows выполняет поиск сканеров в сети. Поиск может занять несколько минут.
-
После того как сетевые сканеры будут обнаружены, они отображаются в списке в окне Bluetooth & устройства > Принтеры & сканеры . В списке нажмите кнопку Добавить устройство рядом со сканером, который необходимо установить.
-
Windows устанавливает выбранный сканер. После завершения установки сканер появится в окне устройства & Bluetooth > принтеры & сканеры .
Если сканер, который требуется установить, не обнаружен и не отображается в списке, выберите ссылку Добавить новое устройство вручную рядом с пунктом Нужный принтер отсутствует в списке. В открывавшемся окне Добавление принтера следуйте инструкциям, чтобы добавить его вручную.
Советы:
-
Если сканер входит в состав многофункционального или многофункционального принтера, сканер может отображаться как принтер. Чтобы убедиться, что Windows также обнаруживает принтер в качестве сканера, выберите принтер в окне Устройства Bluetooth & > Принтеры & сканеры . Если принтер также обнаружен в качестве сканера, параметры сканера отображаются в качестве параметра в открывавшемся окне Устройства Bluetooth & > Принтеры & сканеры > <Printer_Name> .
-
Если сканер и устройство Windows подключены к сети по беспроводной сети, убедитесь, что они находятся в одной беспроводной сети или SSID.
-
Инструкции по подключению сканера с беспроводными возможностями к беспроводной сети см. в инструкциях, которые поставляется со сканером или веб-сайтом производителя.
Чтобы убедиться, что сканер установлен, убедитесь, что сканер включен, а затем выполните следующие действия.
-
Убедитесь, что в открывавшемся окне & сканеры устройства Bluetoo & th > принтеры , убедитесь, что сканер отображается в окне.
Совет: Если сканер входит в состав многофункционального или многофункционального принтера, сканер может отображаться как принтер. Чтобы убедиться, что Windows также обнаруживает принтер в качестве сканера, выберите принтер в окне Устройства Bluetooth & > Принтеры & сканеры . Если принтер также обнаружен в качестве сканера, параметры сканера отображаются в качестве параметра в открывавшемся окне Bluetooth & устройства > принтеры & сканеры > <Printer_Name> .
После установки сканера можно использовать приложение «Проверка Windows» для сканирования рисунка или документа. Вот как это сделать.
-
Убедитесь, что сканер включен.
-
На устройстве с Windows щелкните правой кнопкой мыши меню Пуск и выберите Поиск .
-
В поле поиска Введите здесь для поиска введите:
Проверка Windows
-
В результатах поиска в разделе Приложения выберите Сканировать в результатах.
Примечание: Если приложение «Сканирование » не отображается в списке результатов поиска, оно может быть не установлено. Чтобы установить приложение «Сканирование Windows» , установите его из Microsoft Store , щелкнув следующую ссылку:
Проверка Windows
-
Поместите документ или рисунок для сканирования в сканере в зависимости от типа сканера:
-
Если сканер имеет планшет, поместите документ или рисунок для сканирования лицевой стороной вниз на планшет сканера и закройте крышку.
-
Если сканер имеет средство подачи документов, поместите документ или рисунок для сканирования в средство подачи документов сканера. Обратитесь к документации сканера, независимо от того, должен ли элемент быть лицом вниз или лицом вверх.
Примечание: Если сканер имеет как планшет, так и средство подачи документов, можно использовать любой из этих средств.
-
-
На странице Сканирование приложения «Сканирование» выполните следующие действия.
-
Убедитесь , что в раскрывающемся меню Сканер выбран нужный сканер.
-
В раскрывающемся меню Источник убедитесь, что выбран нужный источник (планшет, канал, автоматически настроен). В большинстве случаев автоматическая настройка по умолчанию является нормальной. В противном случае источник должен совпадать с местом размещения документа или рисунка на предыдущем шаге.
-
В раскрывающемся меню Тип файла выберите тип файла изображения, чтобы сохранить сканированную копию. Доступные параметры: JPEG, PNG, TIFF и Bitmap.
-
Щелкните ссылку Показать дополнительно , чтобы отобразить параметр Сохранить файл в . Щелкните ссылку в разделе Сохранить файл в. Откроется окно Выбор папки . Перейдите к расположению, в котором должны быть сохранены проверки, и нажмите кнопку Выбрать папку .
Примечание: Если расположение для сохранения не выбрано, то по умолчанию приложение «Проверка Windows» сканирует папку «Изображения и сканирование » в папке пользователя.
-
-
Чтобы отсканировать документ или рисунок, выберите Сканировать в нижней части окна Сканировать приложение.
-
После завершения сканирования документа или рисунка сканер автоматически сохраняет его в ранее выбранную папку. Выберите один из следующих двух параметров в верхней части экрана, чтобы продолжить:
-
Вид — открывает отсканированный элемент в приложении «Фотографии » в новом окне, чтобы можно было просмотреть отсканированный элемент. Отсканированный элемент также можно изменить в приложении «Фотографии «. После завершения просмотра или редактирования отсканированного элемента окно приложения «Фотографии» можно закрыть.
-
Закрыть — завершает текущее задание сканирования в рамках подготовки к дополнительным заданиям сканирования.
-
-
На устройстве с Windows щелкните правой кнопкой мыши меню Пуск и выберите проводник .
-
В открывавшемся окне проводник перейдите к расположению, выбранному для сохранения сканирований в разделе Сканирование рисунка или документа с помощью приложения проверки Windows.
Совет: Если расположение не было выбрано в разделе Сканирование рисунка или документа с помощью приложения «Сканирование Windows» , по умолчанию приложение «Сканирование Windows» сохраняет сканы, — это папка «Изображения и сканирование » в папке пользователя.
Дополнительные сведения, включая дополнительные сведения об устранении неполадок, см. на веб-сайте производителя сканера.
Нужна дополнительная помощь?
Нужны дополнительные параметры?
Изучите преимущества подписки, просмотрите учебные курсы, узнайте, как защитить свое устройство и т. д.
(Image credit: Windows Central)
Although we’re now living in a digital world, from time to time, you may still need to scan important documents, such as handwritten letters, contracts, forms, and more, for many reasons. For instance, when you need to sign and send an agreement digitally via email, you want to convert important papers into digital files for inventory or preservation purposes, etc.
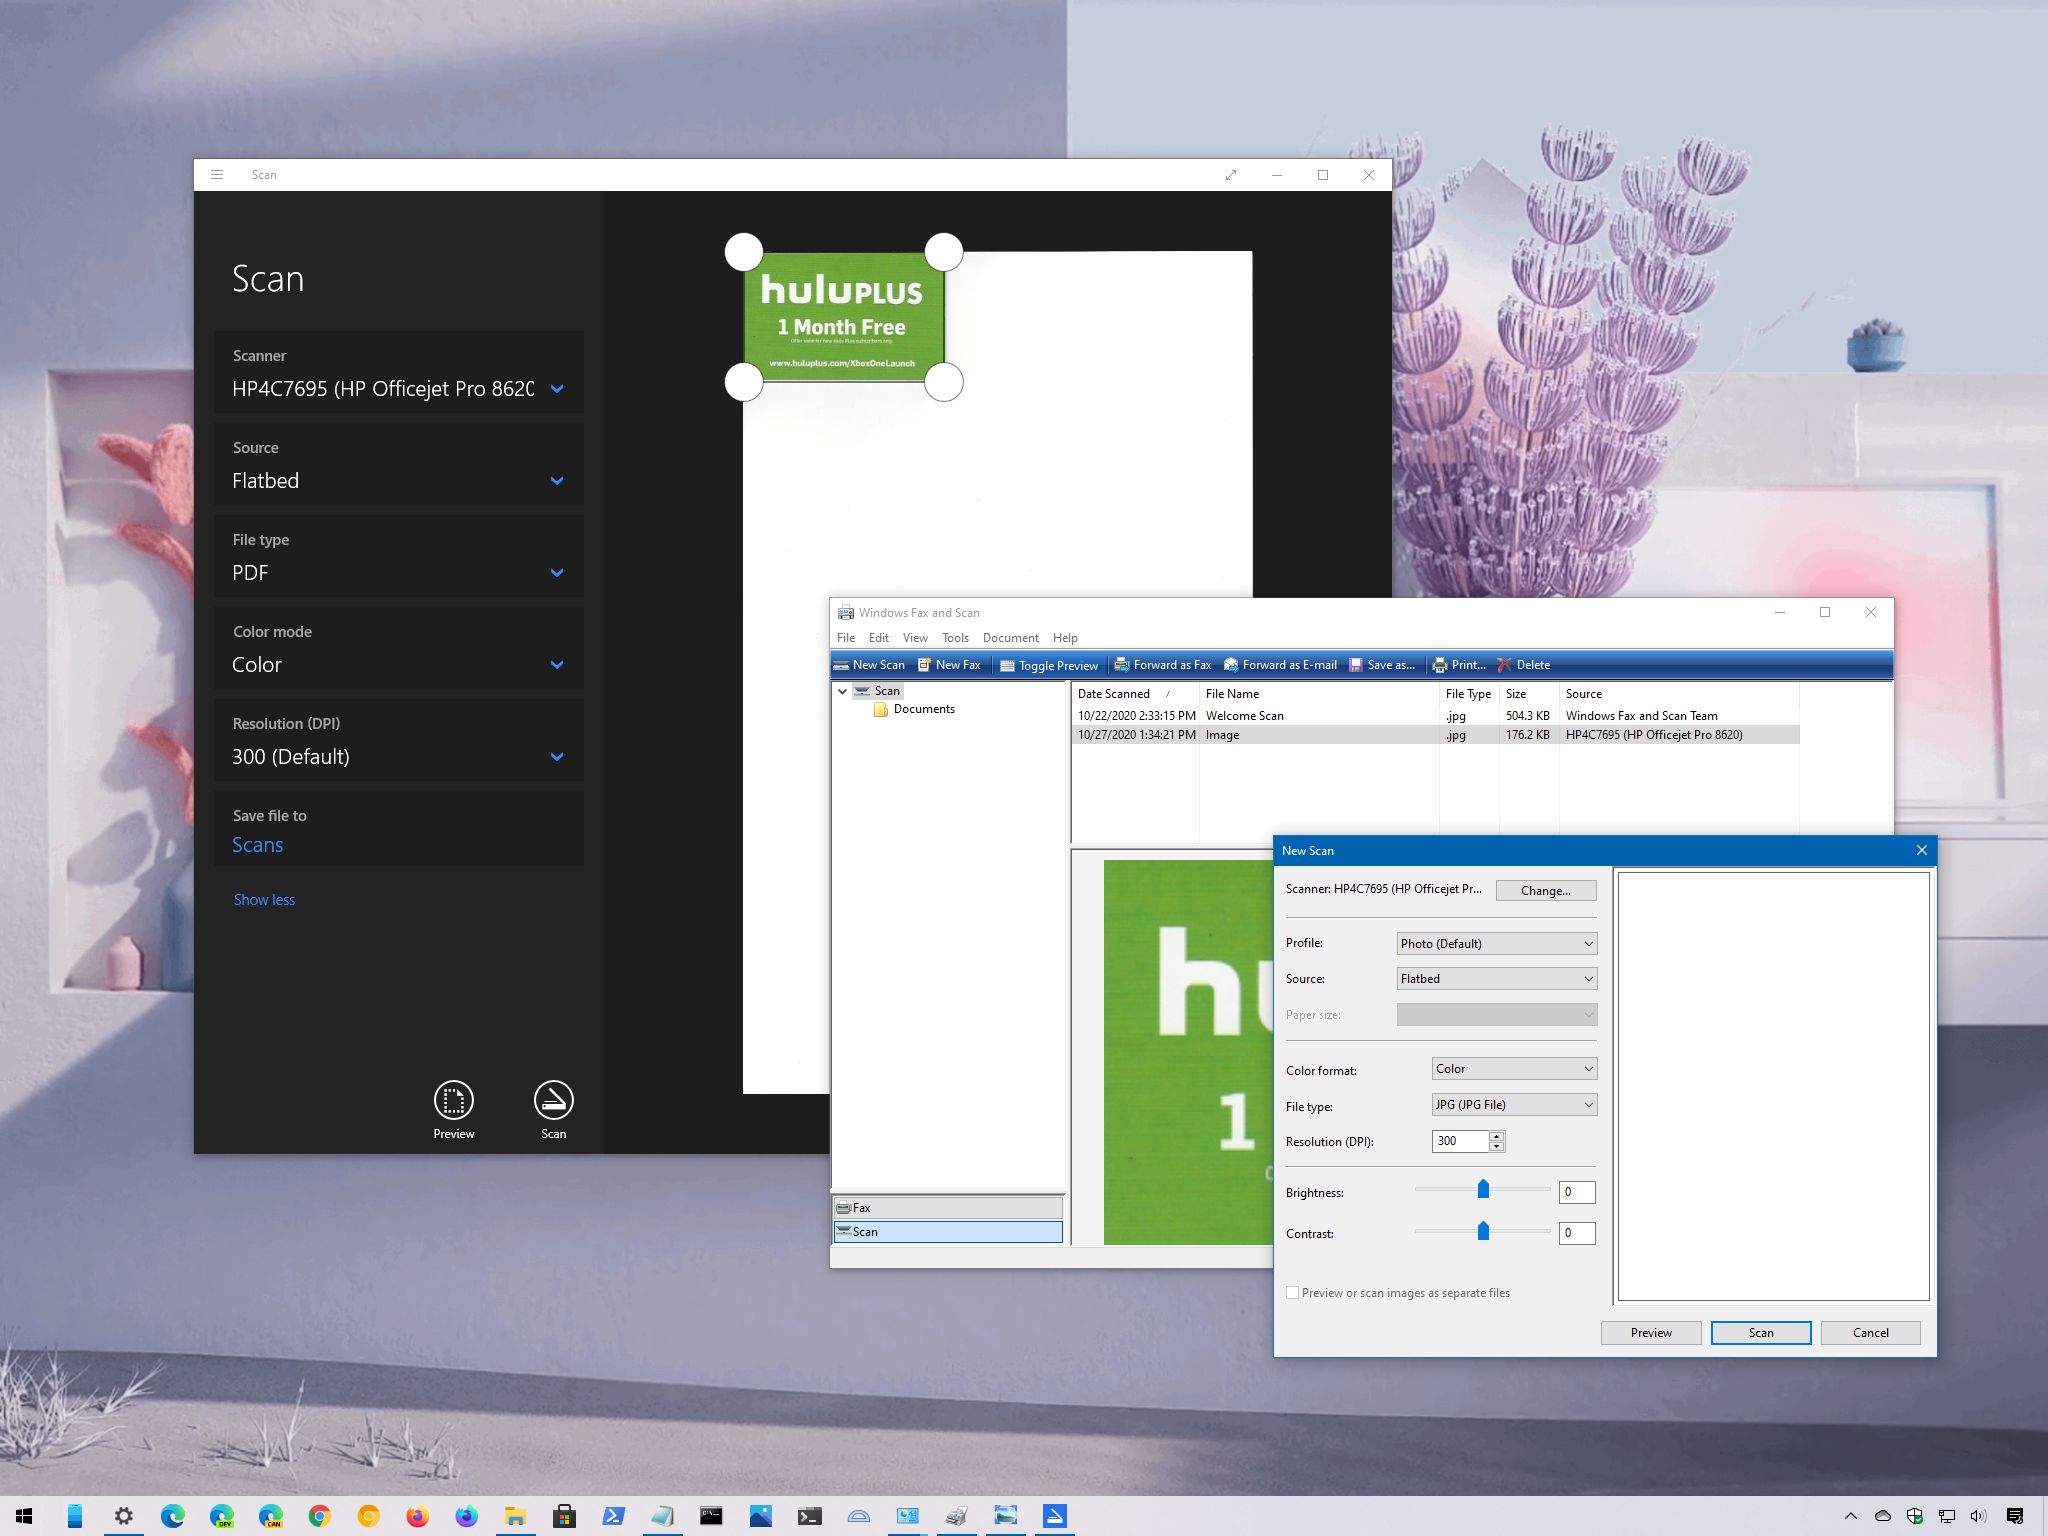
If you have a multi-function printer or standalone scanner, you can probably walk up to the device and directly scan the document (or picture) onto a USB flash drive. However, Windows 10 has two apps you can use to save you the trip to scan any documents and pictures directly onto your device without having to use the manufacturer software, whether you have a flatbed or feeder scanner.
In this Windows 10 guide, we’ll walk you through two methods to scan documents and photos on your device.
- How to scan documents using Windows Scan app
- How to scan documents using Windows Fax and Scan app
How to scan documents using Windows Scan app
Windows 10 has a modern app to scan documents using a scanner, but you must first download and install it from the Microsoft Store.
Install Windows Scan app
To install the Windows Scan app, use these steps:
- Open web browser.
- Use this Microsoft Store link to get the Windows Scan app.
- Click the Get button.
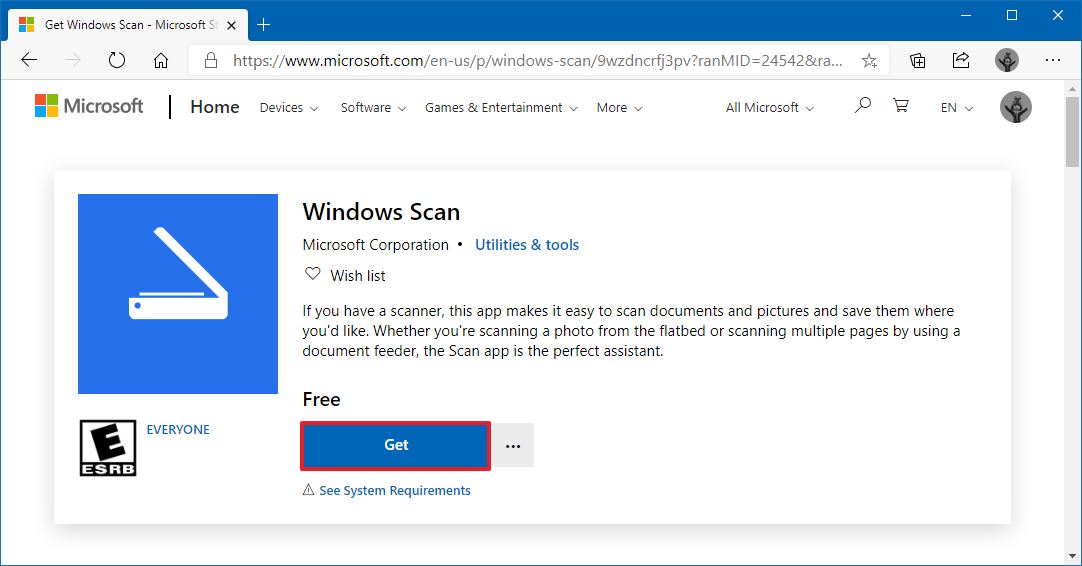
- Click the Open button.
- Click the Install button.
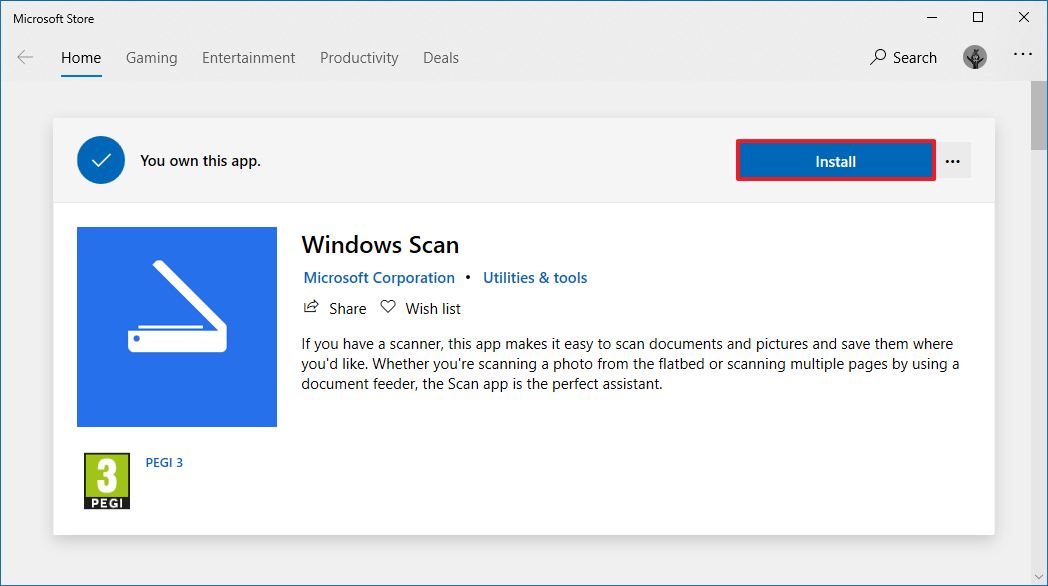
Once you complete the steps, the app will install, and you can proceed to convert documents from physical to digital.
Scan documents
To scan physical documents to PDF, JPEG, or another file format, use these steps:
All the latest news, reviews, and guides for Windows and Xbox diehards.
- Open Start.
- Search for Windows Scan and click the top result to open the app.
- Use the «Scanner» drop-down menu to select the scanning device.Quick tip: Before proceeding with the scan, make sure the scanner is powered on and connected to the computer via USB or network, depending on how you configured the device.
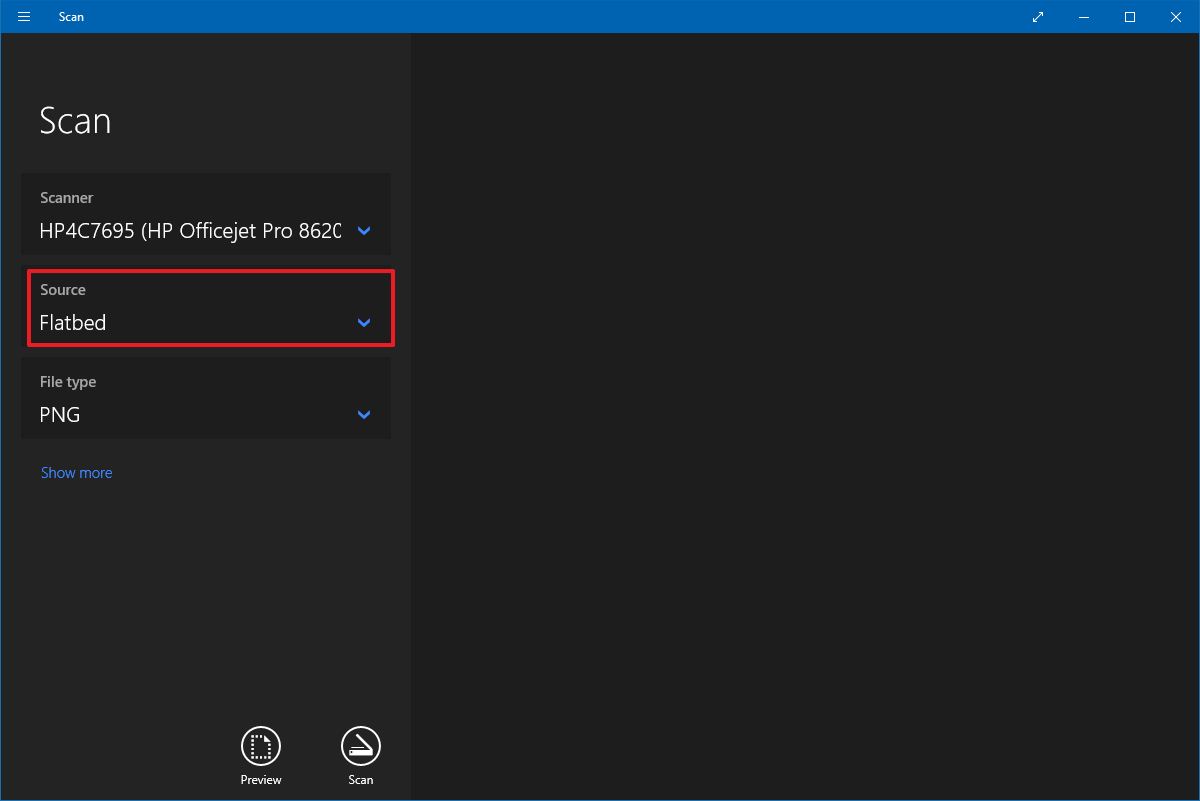
- Use the «Source» drop-down menu to select the location of the document you are trying to scan:
- Flatbed: This option will apply for most users who have a standalone scanner or multi-function printer with scanning functionality.
- Feeder: This option is for scanners that support scanning by feeding the document using the roller paper feeder. If you select this option, you’ll also be able to select two additional settings, including the ability to scan both sides and select the paper size.
- Auto-configured: This option doesn’t include additional settings, and it’ll scan the document as-is and save the output into a file.
For this guide’s purpose, we’ll be selecting the «Flatbed» option since it will apply to most users.
- Use the «File type» drop-down to select the file format to save the document scan. Options available include:
- JPEG.
- PNG.
- TIFF.
- Bitmap.
- OpenXPS.
- XPS.
- PDF.
Quick tip: Usually, you may want to select the PDF option for paper documents and JPEG when scanning images. For this guide, we’ll be selecting the «PDF» option.
- (Optional) Click the Show more option.
- Use the «Color mode» drop-down menu to select whether you want the scan. Options available include:
- Color.
- Grayscale.
- Black and white.
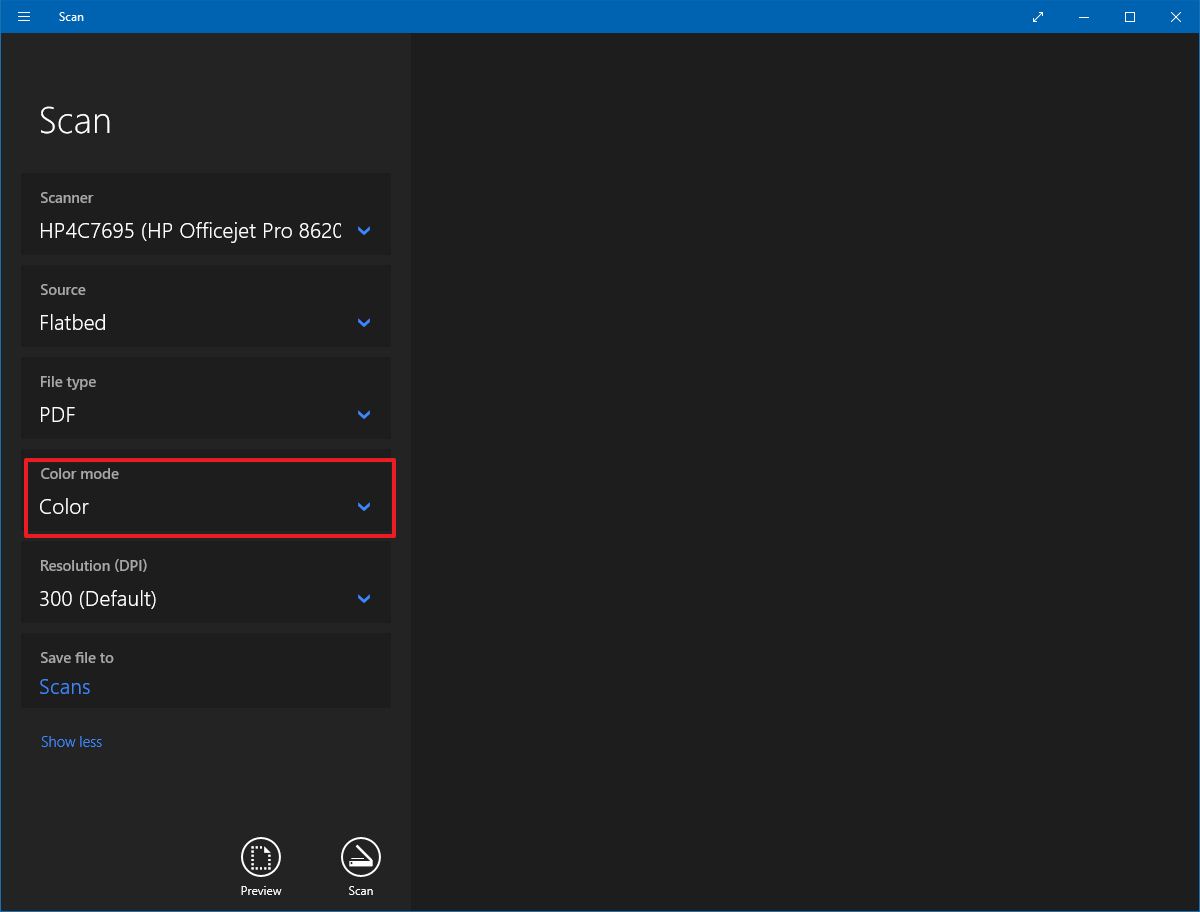
- Use the «Resolution (DPI)» drop-down menu to select the Dots Per Inch setting. The higher the DPI, the higher the resolution. (Usually, 300 DPI is suitable for most scenarios.)
- Click the Scans file to option.
- Select the destination folder.
- Click the Select Folder button.
- Click the Preview button.
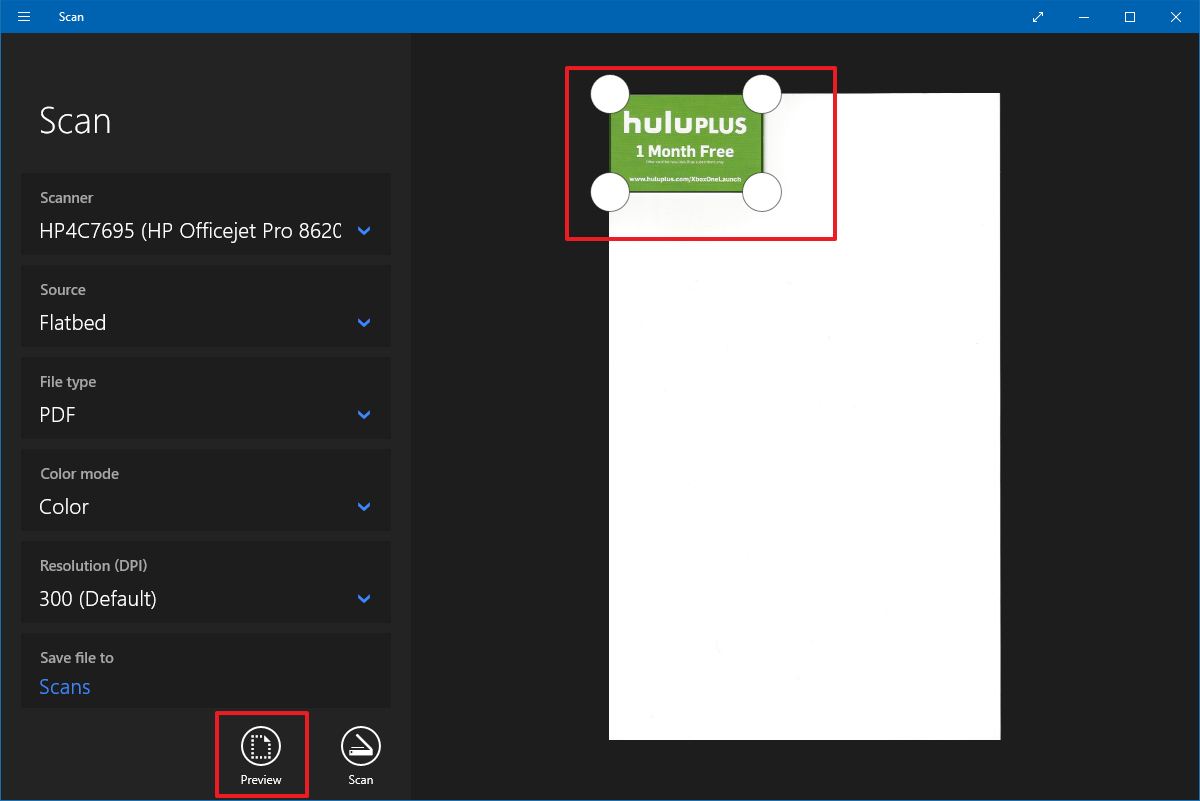
- Use the pins to crop the document (as needed).
- Click the Scan button.
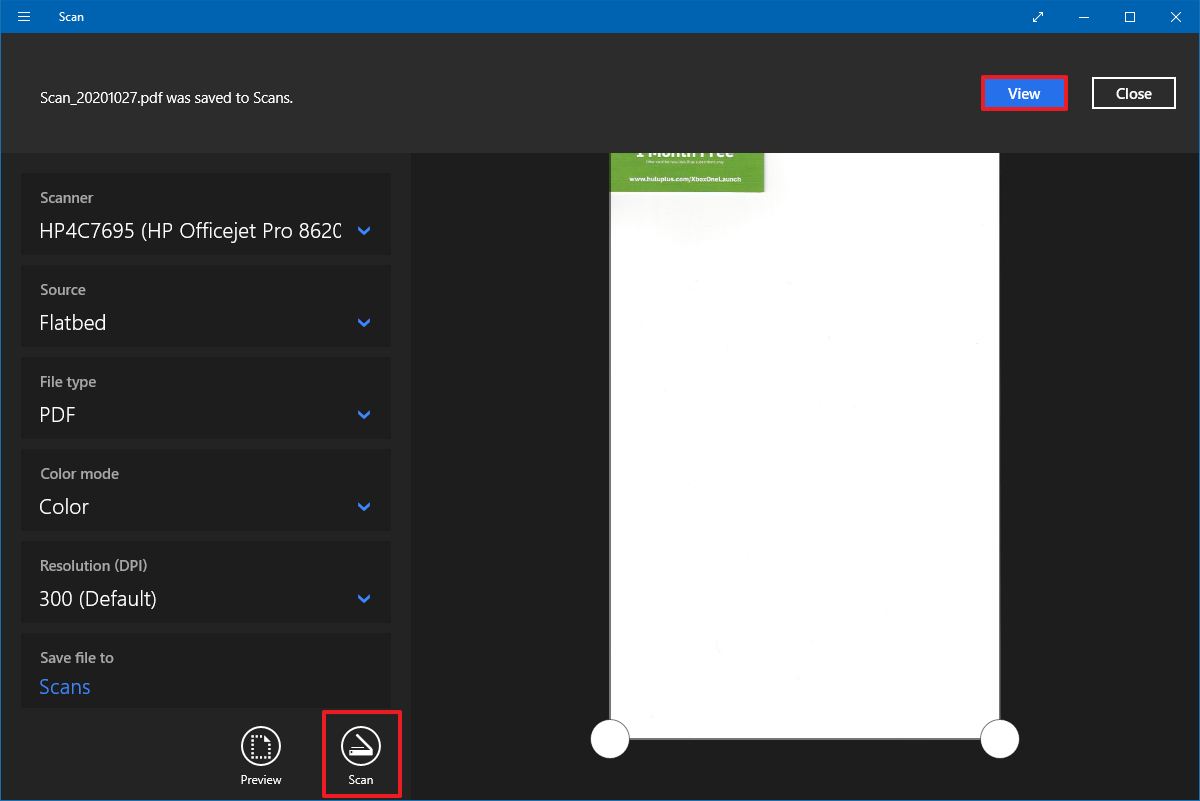
- Click the View button.
Once you complete the steps, the scanner will scan the document, and the app will save a digital copy in the Scans folder inside the Pictures profile folder unless you selected a different location.
If you scanned an image, the view option would open the file with the Photos app, and if you scanned a document as PDF, then the file will open with the default PDF viewer.
In the case that you’re in the market for a new all-in-one printer with scanning capability, then look no further than the HP OfficeJet Pro 8025 since it’s a reliable wireless printer that offers decent speed and good quality printing. Of course, it also includes a flatbed scanner with feeder functionality to scan both sides of the page. This is our best overall, but we have other picks you may want to consider.
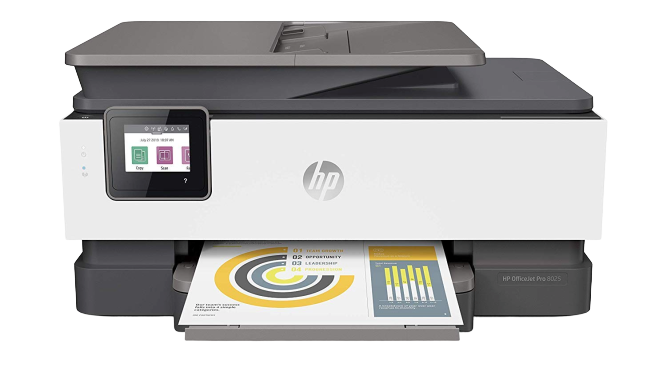
Printer and scanner
HP OfficeJet Pro 8025
It prints and scans
The OfficeJet Pro 8025 is a great solution for your home office or small business. It’s full of smarts so that you can use it with the cloud.
How to scan documents using Windows Fax and Scan app
Alternatively, you can also use the legacy Windows Fax and Scan app. The app has been available for many years, and it includes all the essential features to scan documents and images. (If you have a modem and landline, you can also use it to send and receive faxes.)
To scan a document with the Windows Fax and scan app, use these steps:
- Open Start.
- Search for Windows Fax and Scan and click the top result to open the app.
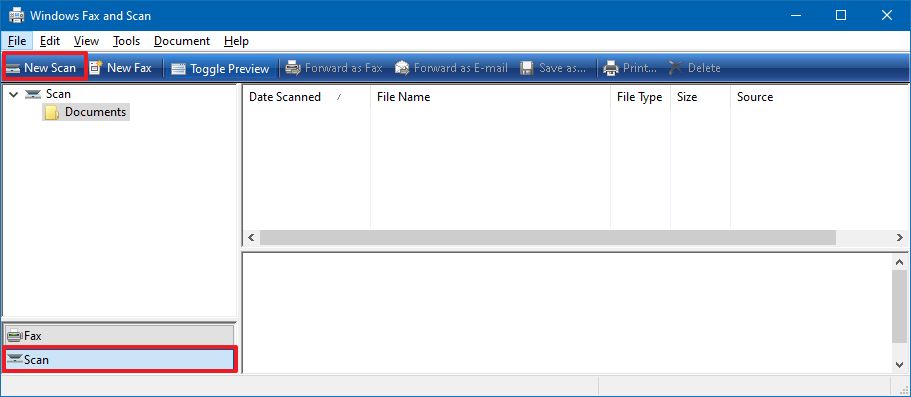
- Click the Scan option from the bottom of the page (if applicable).
- Click the New Scan button from the top-left corner.
- Click the Change button to select the scanning device (if applicable).
- Click the OK button.
- Use the Profile drop-down menu to select the profile that applies to your scan. Options available include:
- Photos.
- Documents.
For this guide, we’ll be selecting the «Documents» option.
- Use the «Source» drop-down menu to select the location of the document you are trying to scan:
- Flatbed: This option will apply for most users who have a dedicated scanner or a multi-function printer with scanning functionality.
- Feeder: This option is for scanners that support scanning by feeding the document using the roller paper feeder. If you select this option, you’ll also be able to select two additional options, including the ability to scan both sides and select the paper size.
For this guide, we’ll be selecting the «Flatbed» option.
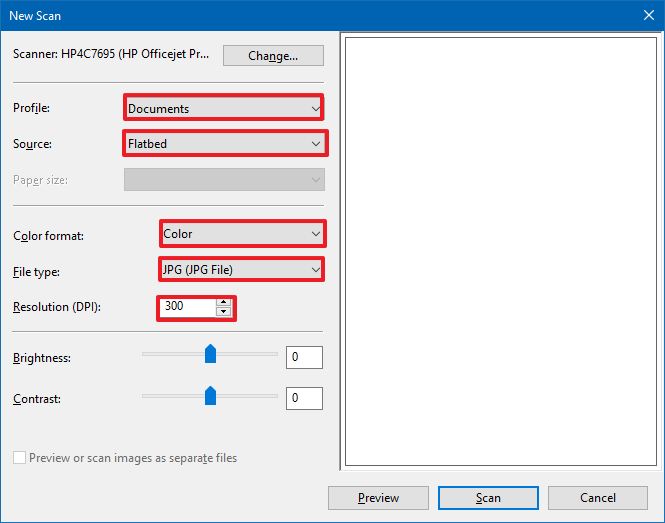
- Use the «Color format» drop-down menu to select whether you want the scan. Options available include:
- Color.
- Grayscale.
- Black and white.
- Use the «File types» drop-down menu to select the format to save the scan. Options available include:
- JPG.
- BMP.
- PNG.
- TIF.
- Use the «Resolution (DPI)» drop-down menu to specify the scan’s resolution.Quick note: When specifying the resolution, the higher the number means higher resolution, but using 300 is good enough for most scans.
- (Optional) Use the slider to control the scan brightness.
- (Optional) Use the slider to control the scan contrast.
- Click the Preview button.
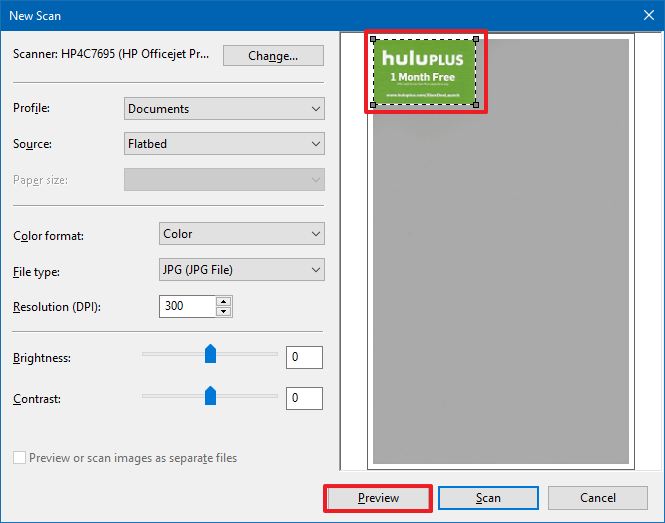
- Use the pins to crop the document (as needed).
- Click the Scan button.
- Select the image from the Windows Fax and Scan inbox to view a preview of the scan.
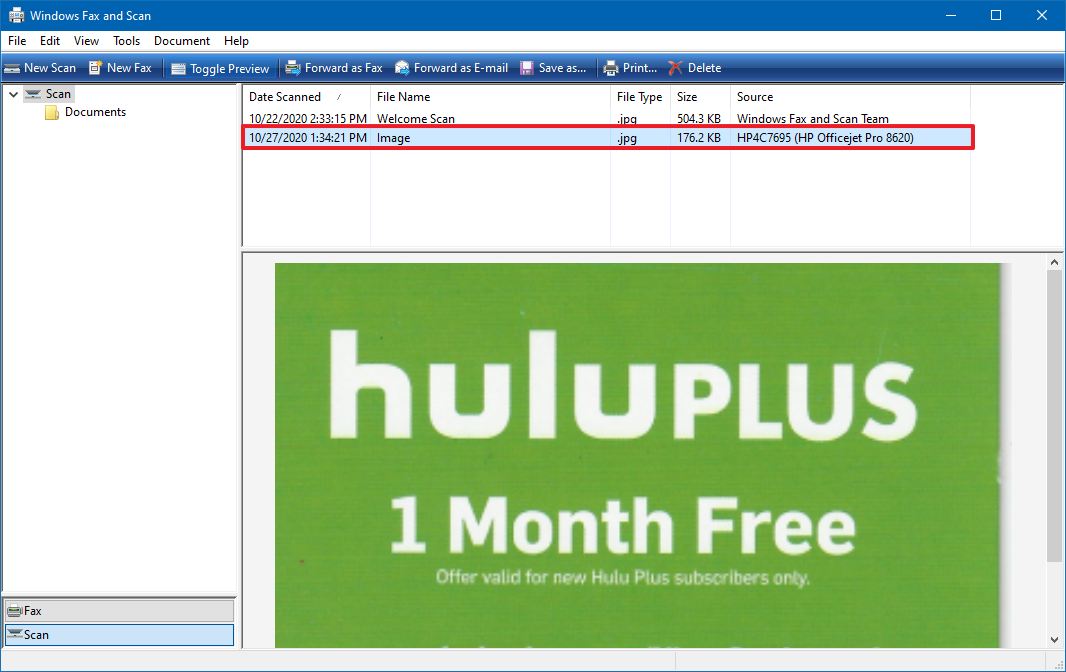
After you complete the steps, you can find the output file in the «Scanned Documents» inside the Documents folder.
We’re focusing this guide on scanning documents, but the instructions will also work to convert printed pictures into digital copies.
Mauro Huculak has been a Windows How-To Expert contributor for WindowsCentral.com for nearly a decade and has over 15 years of experience writing comprehensive guides. He also has an IT background and has achieved different professional certifications from Microsoft, Cisco, VMware, and CompTIA. He has been recognized as a Microsoft MVP for many years.
Having a scanning device upfront, the first thing that hits on your minds is How to Scan Using Printer or Scanner in Windows 10. Most of the printers these days come with default scanning feature and the ways for both are exactly same. Microsoft has also introduced new scan app utility to support that specialty which delivers a quality service. In addition, few users might have the experience to do the same with old methods from the control panel. Today, we are going to discuss multiple ways for scanning whether it is using the Settings, app, control panel or built-in manufacturer software. We suggest reading How to Add a Scanner to Windows 10 PC before starting.
How to Scan Using Printer or Scanner in Windows 10
1. Scan using Settings
- Press “Windows logo key” and I“, let the Windows Settings appear on the screen and Select “Devices”.
- Make a click on Printers & scanners and navigate to the right pane to locate the printer you have connected to your system. Hit on this and select Open Printer app.
- The HP Smart will open by default (if the printer is from HP otherwise Scan app opens). Choose Scan option from the tiles. New Scan page open on windows.
- Select Preset, Page size, Output type, Source, Resolution (DPI) as you want and finally hit the Scan button from the bottom.
- Name the document and determine a location on the Save as window and finally, click on “Save” button.
- Go to the suggested folder and collect your document.
2 Scan using Windows Scan App
Before any proceeding, installation of the Windows Scan app from Microsoft store is required. The configuration page will open and this is somewhat similar to the old one. But the advanced feature is you can crop your doc here as you want. The full procedure is in below guidelines:
Step-1: Follow this link and Click Open Microsoft store to get a view of the application. Select Get button once it comes.
Step-2: Once downloading and installation finishes, Launch the app from your system.
Step-3: Do a click on Show more in order to see configuration options.
Step-4: Crop the image according to your need, change the File type, Color mode, Resolution (DPI) using the options if you need. But in maximum cases, the default values are fit with the users’ requirement. Now hit the Scan button.
Finally, choose the destination folder where you want to store this copy clicking on Save file to option.
If you are confused about selecting the Color mode and Resolution (DPI), read the following tips to get help.
Choose Black and White for Drawings, line diagrams, B&W structures as well as clip arts.
Select Color once you are opting to scan a magazine page or a photo that seems glossy.
Go for Grayscale for other purposes
Use 300 (Default) for most of the documents in Resolution (DPI) section. Anything higher will enlarge the size thus you might face difficulty while attaching it to email. Less than 300 will lower down the scan quality.
How to Scan Using Printer or Scanner in Windows 10 using Classic method
Still, you are able to apply the old method to Scan Using Printer or Scanner in Windows 10 as you usually implemented in Windows 7 and 8. If you prefer the classic way then follow –
- To Open control panel hit the Start, type cp, and press Enter.
- Select Devices and Printers option after changing the appearance of Control panel into “Small/Large icons”.
- Execute a right click on the Printer or scanner you have attached to your system and select Scan from the list.
- Although Photo to file will be by default selected but you should make sure for this before moving ahead. Click on the Scan button from the bottom of the tray.
- Import pictures and video pop up for the scanner will appear, choose Import all new items now. Add a tag with the name with a view to find it easily afterward. In the course, Perform a click on Import button to initiate scanning.
This method is valid for all old and new printers. But if you have the latest printer, you can get your job done a lot easier using Windows Scan app.
Scan Using Printer or Scanner in Windows 10 using the manufacturer’s built-in software
For Windows 10 users, this is the ultimate method as they will need to open the native application of the manufacturer. Here I have connected the HP Deskjet printer, but every company gives a supporting application with the hardware so you can use them. See the process –
1. Open the printer software with help of the icon located on the desktop. After the interface comes on the screen, select Scan a Document or whatever the name in your printer or scanner utility.
3. You will get the same window as in the previous method so onward follow and collect your document.
Wrapping up
Scanning is a wise option to keep a document safe. Microsoft has placed a terrific app to make this task easier and smooth. Windows Scan application works faster and produces high class scanned doc. But this feature is available for latest printers only. So, we have focused on both the traditional and latest methods to tell you How to Scan from Printer to Computer in Windows 10.
Quick Links
-
Is Your Scanner Windows 10 Compatible?
A great way to preserve sensitive, written documents like W9s, contracts, and living wills is to store them digitally. This guide shows you how to scan a document in Windows 10 without installing third-party tools.
Typically, you can scan a document using the software provided by manufacturers. Printers and scanners usually ship with an optical disk containing the necessary drivers and tools. Manufacturers also make their drivers and tools available online if your PC doesn’t include an optical drive.
For instance, this guide uses Epson’s Expression Premium XP-7100 all-in-one printer as an example. In addition to drivers, the software suite installs eight separate tools for printing CD labels, scanning, updating software, and more.
Because manufacturers don’t supply identical software suites across all printers and scanners, this guide uses two «native» Windows-based tools instead: Microsoft Scan and Windows Fax and Scan.
Of course, always default to your manufacturer’s software for an experience customized to your specific scanner. If you don’t want third-party tools installed on your PC, however, Microsoft’s two solutions should do the trick.
Is Your Scanner Windows 10 Compatible?
Before moving on, we need to make a couple of points. First, your scanner’s manufacturer may supply drivers for Windows 10, but the device itself may not specifically support the platform.
For example, we tested the following tools using Canon’s PIXMA MG3520 all-in-one printer with a built-in scanner. The «recommended» drivers date back to July 2015, though Canon released a newer suite six months later. That’s still three-year-old software.
That said, the scanner portion of this AIO printer would not appear in the native Windows tools but worked correctly—using a wireless connection, in fact—through Canon’s software.
If you run into similar problems, you may have an older printer or scanner that’s not fully compatible with Windows 10. The device may also require a direct USB-based connection if used outside the manufacturer’s third-party tools. For AIO printers, you may need to tweak its networking settings, so your Windows 10 PC recognizes the scanner component in addition to the overall printer unit.
Microsoft Scan
This tool is a visual upgrade to Microsoft’s older Fax and Scan tool. It provides most of the same features, depending on your printer, but removes the fax and email components.
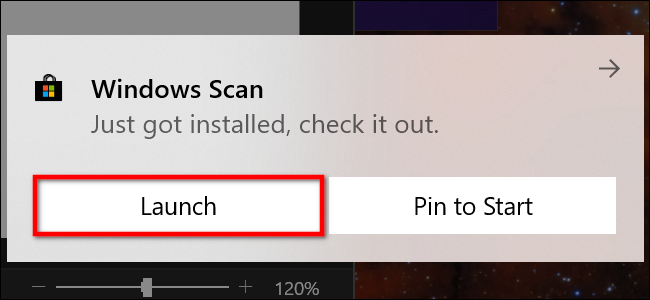
Head to the Windows Scan app listing on the Microsoft Store (free) and click the blue «Get» button. Once it installs on your PC, click the «Launch» button in the pop-up notification on Windows 10.
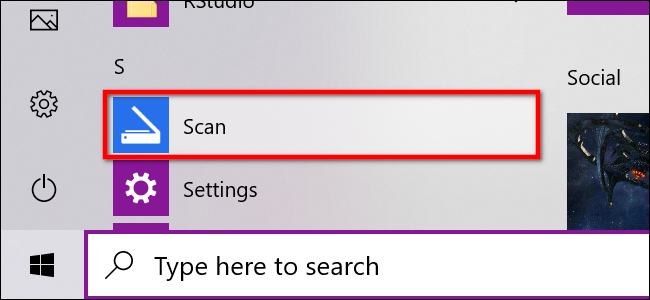
You can also access the new app—simply labeled as «Scan»—from the Start Menu.
With the app open, your scanner should appear listed on the left. As previously stated, this guide uses Epson’s Expression Premium XP-7100 all-in-one printer as an example. You’ll also see an option for «File Type» along with a «Show More» link. Click this link for the Scan app’s full menu.
For starters, you may see a «Source» category. Since our example printer has both a flatbed scanner and an automatic document feeder, both options are available for scanning a document. In this case, the default setting is set to «Auto-Configured.»
This «Auto-Configured» setting limits what you can do, locking you to «File Type» and «Save File To» options. If you select the «Flatbed» option as your source, or it’s the only source available, you’ll see two additional options appear on the list: «Color Mode» and «Resolution (DPI).»
With «Color Mode,» you can scan documents in full color, in grayscale, or a stark black and white. Meanwhile, the «Resolution (DPI)» setting allows you to switch from 100 to 300 DPI.
If you select «Feeder» as your scanning source, two additional options appear. As shown below, you can choose the paper size (A4, Legal, or Letter) and toggle on/off the option to scan both sides of your document.
With all three sources, the «File Type» setting provides four options: JPEG, PNG, TIFF, and Bitmap. We provide a separate article explaining the benefits of each format. In short, however, the JPEG and TIFF formats typically offer high-quality results, though TIFF files also support transparent backgrounds. PNG files are ideal for posting online, and BMP files are raw, uncompressed images.
Finally, you’ll see the «Save File To» option. It’s set to «Scans» by default and places your scanned documents in a «Scans» folder located within your «Pictures» folder. The proper path is:
C:\Users\youraccount\Pictures\Scans
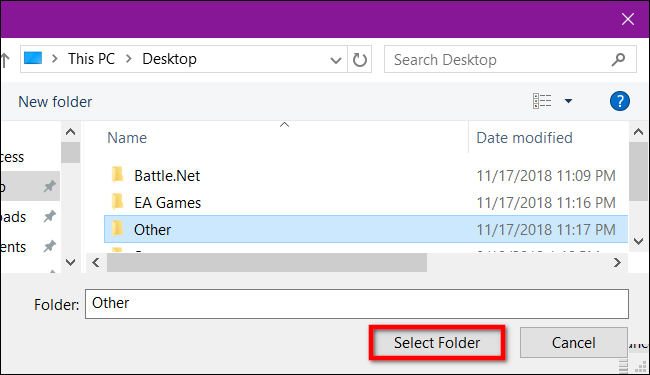
Click the «Scans» link, and File Explorer appears. Here you can create a new folder or select a current location and click the «Select Folder» button.
When you’re ready to scan, insert your document into the feeder, or lift the scanner’s lid. For the latter, place the document face-down on the glass and close the lid.
With the «Flatbed» option set as your source, you can click «Preview» to test the scan and make adjustments if needed before finalizing with the «Scan» button. If you’re using the «Feeder» source, the «Preview» option does not appear.
Windows Fax and Scan
This program first appeared in Windows Vista. Unlike Microsoft’s newer Scan app, this version provides additional settings, like a built-in tool for emailing your scan, so you’re not searching for the file through the Mail app, browser, or third-party email client.
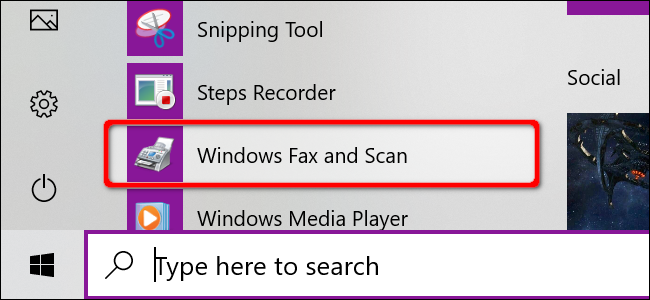
You can find the Fax and Scan program located within the Start Menu’s «Windows Accessories» folder.
Once it’s opened, click the «New Scan» option on the toolbar.
In the «New Scan» popup window, make sure the program is set to your default scanner. If not, click the «Change» button.
Next, select a scan profile: «Photo,» «Documents,» or «Last Used Settings.» As an option, click the «Add Profile» selection on the list to create a custom profile to use repeatedly.
Select your scanner’s source. This option may simply read «Flatbed.» If you have an AIO printer that includes a feeder, however, you may see two additional options: «Feeder (Scan One Side)» and «Feeder (Scan Both Sides).»
If your printer or scanner supports a feeder and you select that option, you will see a setting for the target paper size. Click the setting, and a long list of sizes appears.
Next, select your color format (Color, Grayscale, or Black and White) followed by file type (BMP, JPG, PNG, or TIF) and resolution.
For resolution, the default setting is 300, but you can manually raise or lower the number of dots the printer crams into every inch. Typically, the higher the number, the better the resolution. If you’re scanning a low-grade document, however, bumping up the resolution won’t help.
Finally, adjust the brightness and contrast accordingly.
When you’re done, click the «Preview» button to see the results. If the pre-scan looks great, then click the «Scan» button. If not, adjust your settings and click the «Preview» button again for another test. Click the «Scan» button when you’re satisfied with the settings.
-
Home
-
News
- How To Scan A Document In Windows 10 (2 Easy Ways)
By Sarah |
Last Updated
If you’re tired of keeping information in old documents and paperwork, you should try a new way – store it digitally, making it easier and more intuitively to acquire data when necessary. How to create digital copies of your old documents? You can use a Windows 10 scanner (Windows Scan or Windows Fax and Scan) to scan to computer easily.
If you’re tired of keeping information in old documents and paperwork, you should try a new way – store it digitally, making it easier and more intuitively to acquire data when necessary. How to create digital copies of your old documents? You can use a Windows 10 scanner (Windows Scan or Windows Fax and Scan) to scan to computer easily.
How to Scan a Document in Windows 10
For all its controversy, Windows 10 is amazing most of the time. It combines a lot of useful software and small programs together for a better user experience. For instance, Windows Scan is a Windows 10 scanner to help users scan documents or pictures and save them where they’d like. (MiniTool does a good job in protecting your documents, images, photos, videos, etc.)
Many people want to scan documents to Windows 10, but they don’t know how. Here, I’d like to show you how to scan a document in Windows 10 easily.
How to Scan to Computer with Windows Scan
You may use Windows Scan – the document scanner coming with Windows 10 – to scan document to your computer easily, getting rid of the confusing and time-consuming setup of third-party scanning software.
How do I scan a document and upload it to my computer:
- Click on the Start button in the lower left corner of your computer screen.
- Scroll down to find the Scan app; click it.
- Make sure your scanner is plugged in (via USB connection cable or Wi-Fi connection) and turned on. The scanner’s name and file type will show up if it’s set up correctly. (Fix: External Hard Drive Not Showing Up Or Recognized!)
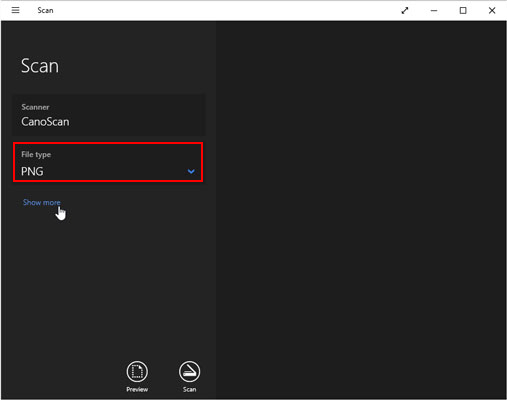
- Select a File type you want from the drop-down list. PNG is supported widely by other programs.
- Put the document you want to scan into the correct area of your scanner.
- Click on the Preview button to check whether the scan appears correct or not.
- Click on the Scan button in Windows Scan app when you’re ready.
- Wait for the scan to finish itself.
Where to find the scanned file?
Just click on the View button in the Scan app to check the file you get. The default location is C:\Users\username\Pictures\Scans; you can change it manually by clicking Show more.
Tip: You’d better get MiniTool data recovery software now in case of unexpected data loss.
MiniTool Power Data Recovery TrialClick to Download100%Clean & Safe
Q1: what if you can’t find the Scan app?
Please click Start -> click All apps from the left sidebar of the Start menu -> look for Scan among the apps list displayed in alphabetical order -> click to open the app.
Q2: what’s included in Show more?
- Color mode: it allows you to choose a color for color items (full color, grayscale, or Black and White).
- Resolution (DPI): the value is ranging from 100 to 300 (the default 300 works fine with most work). The higher the resolution is, the more details there will be; in turn, it takes up more space.
- Save file to: the Scans folder is selected by default to store your scanned documents. You are allowed to change the folder name or even create a new folder to save the documents for each scanning session.
Q3: how to download Windows scan app?
- Click Start.
- Select Microsoft Store.
- Type Scan into the search bar.
- Click Windows Scan.
- Click on the Get button and wait to the download to finish.
- Click Launch to open the Scan app.
How to Scan to Computer with Windows Fax and Scan
Windows Scan is a visual upgrade to the older Windows Fax and Scan tool, which is still used on some Windows 10 computers.
- Please go to the Microsoft Store to download Windows Fax and Scan if you don’t have it.
- Click Start -> expand Windows Accessories folder -> select Windows Fax and Scan.
- Click New Scan in the top-left side.
- Make sure the correct scanner is selected. If not, please click Change.
- Select a Profile from Photo, Documents, and Last used settings. (You can also click Add profile to create a custom one.)
- Select a Source or Paper size if you want. (You can also change the Color format, File type, Resolution, Brightness, and Contrast according to needs.)
- Click Preview and then Scan to start scanning.
- Wait for the scanning to complete.
Can you scan to PDF Windows 10?
Both Windows Scan and Windows Fax and Scan don’t support PDF as the target file type. Is there other ways to scan document to PDF? Certainly, you can finish Windows scan to PDF by using a third-party tool like PDF Document Scanner and Adobe Acrobat.
PDF related issues:
- How To Recover PDF Files (Recover Deleted, Unsaved & Corrupted)?
- Can’t Open PDF? How To Fix PDF Files Not Opening Error?
About The Author
Position: Columnist
Sarah has been working as an editor at MiniTool since she graduated from university. Sarah aims at helping users with their computer problems such as disk errors and data loss. She feels a sense of accomplishment to see that users get their issues fixed relying on her articles. Besides, she likes to make friends and listen to music after work.