
By default, when you open a windows/Linux system’s file manager, you will see network shares that are automatically advertised across your local network. Remote users are only allowed to connect to the network and access the shared files when they are directly connected to the machine.
Samba is an extremely powerful tool that allows one to create file and printer sharing to SMB/CIFS clients in both Windows and Unix systems. When it comes to file sharing, Windows 11 and Ubuntu work seamlessly since they both use the SMB protocol. Samba share was developed by Andrew Tridgell and runs on many Unix-Operating systems such as Linux, Solaris, BSD variants and AIX.
Samba share, is so significant in that:
- It allows Windows systems to share files and printers on the Unix host and allows Unix users to access the resources shared by Windows systems.
- It is so reliable it runs on a Unix host resulting in few problems and low maintenance costs. It also offers good performance under heavy loads.
- It offers secured data transfer
- Message signing-with didgital signing users who receive the data packets are assured of the origin point authenticity.
- SMB encryption.
- Allows concurrent operations.(simultaneous access to the files)
- Multichanel technology.
This guide demonstrates how to install and Configure Samba Share on Windows 11. For Samba share set up, you will need the following:
- Windows 11 installation.
- A Linux machine
Step 1: Enable Network Discovery in Windows 11
The network needs to be advertised for other devices to view and access it. This is made possible In Windows 11 by Enabling Network discovery.
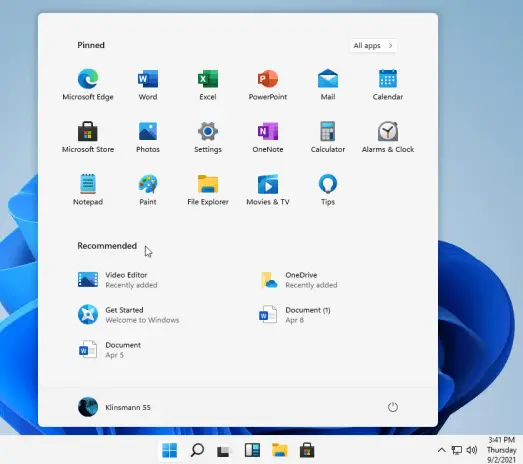
On your Windows 11 start menu, launch settings as below:
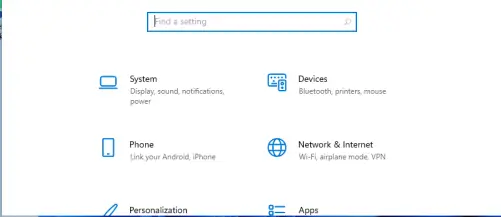
On the settings tab, click on Network & internet then select Ethernet:
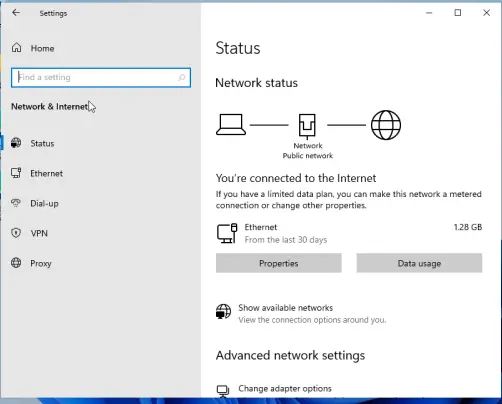
In the Ethernet settings tab, select Ethernet properties:
Here, select private under the network profile as shown:
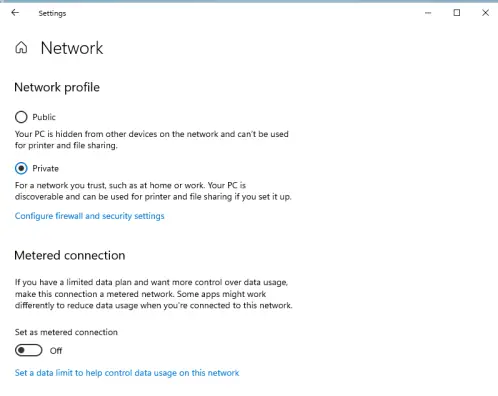
If you are connected with Wi-Fi, you will need to enable Private in the Profile settings. This profile should be selected if you need file-sharing or you are using apps that communicate over the network. With this done, exit and the network should now be discoverable.
Step 2: Turn on Public Folder Sharing in Windows 11
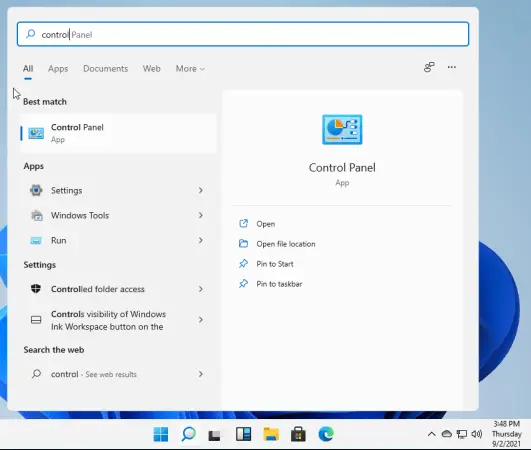
On the Windows 11 start menu, launch the Control Panel:
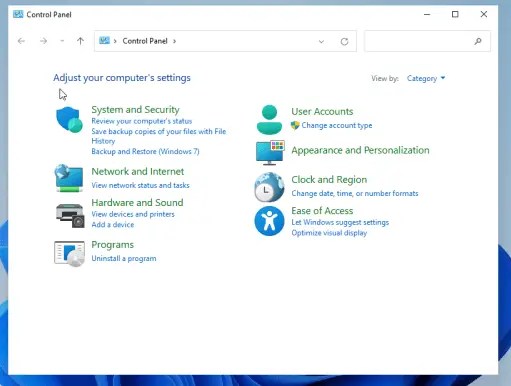
While in the Control Panel, select Network and Internet as shown:
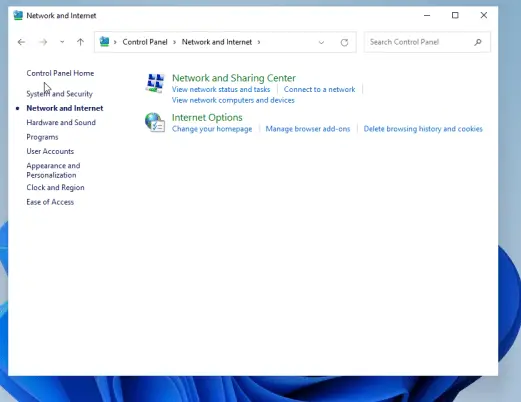
On the next page select Network and Sharing Center:
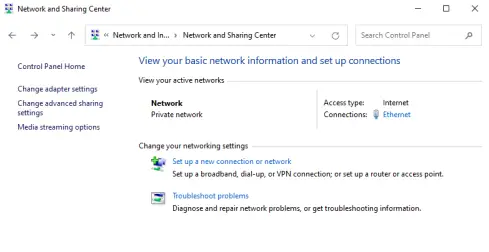
Go to the Change advanced sharing settings option on the right-hand side panel:
While here, select the Private(current profile) and make the below settings:
Turn on file and printer sharing:
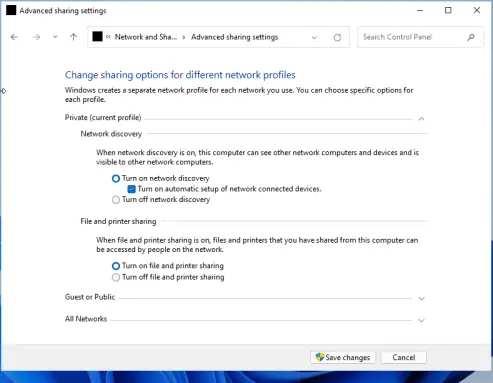
Save the changes made and exit.
While in the Advanced settings tab, Click the all networks option, and scroll down. Here there are several options such as Public folder sharing, Media streaming, File sharing connections, and Password protected sharing. By default, Windows turns on file and printer sharing, but in some cases, it is not enabled.
With password-protected sharing turned on, anyone connecting to your shared network will have to authenticate with the set password to be allowed to access your network.
While here, you can also allow Public folder sharing as shown.

With your desired changes made, save and exit.
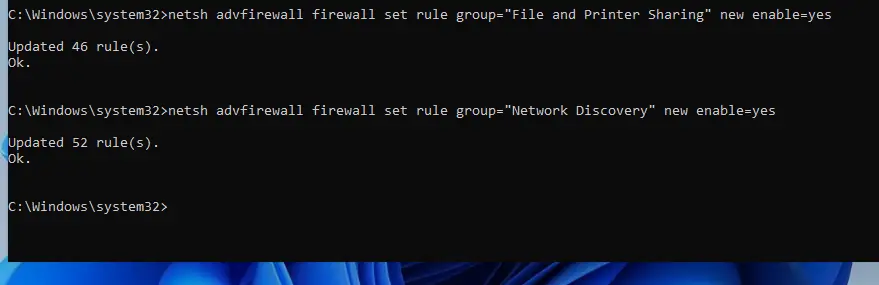
Alternatively, all the above settings can easily be done using the below commands. Run Command prompt as Administrator and issue the below commands.
netsh advfirewall firewall set rule group="File and Printer Sharing" new enable=Yes
netsh advfirewall firewall set rule group="Network Discovery" new enable=Yes
Sample Output:
Step 3: Access Windows 11 shares from Linux
In this guide, I will be using Ubuntu to access the Windows 11 shared files. Now I will have to make a few configurations on my Ubuntu system to be able to connect to the Windows network.
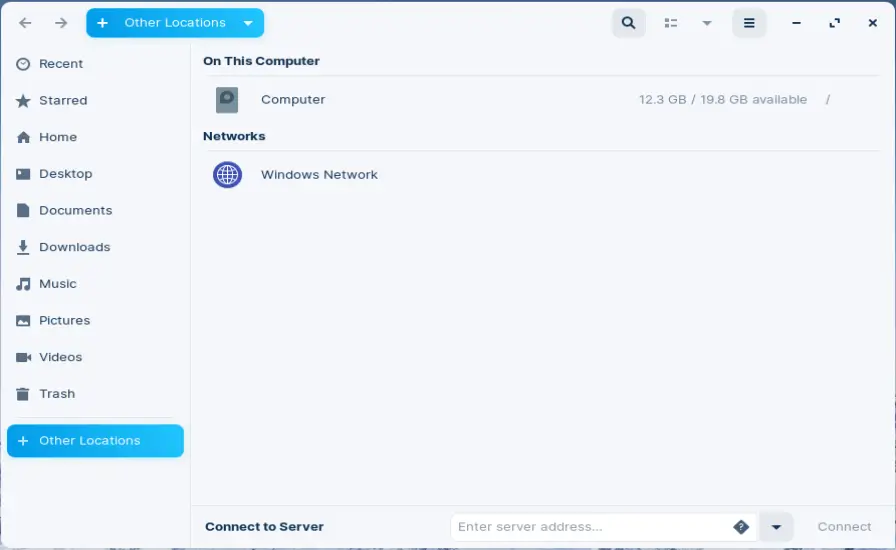
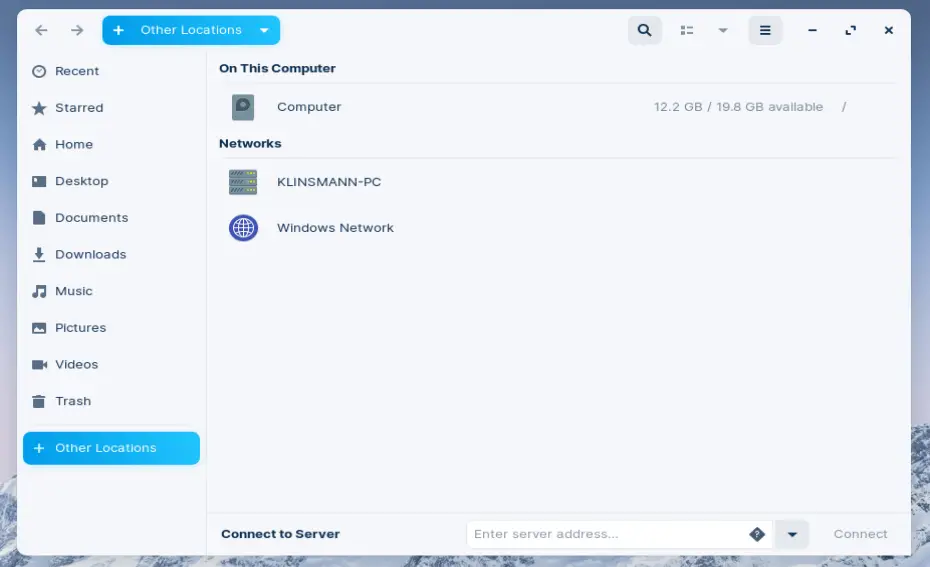
Before we install Samba your Ubuntu File Manager appears as below after clicking on Other Locations:
Install Samba file-sharing system on Ubuntu using the below command:
sudo apt update && sudo apt install sambaAdd users to Samba and create a password:
sudo pdbedit -a -u $(whoami)Sample Output:
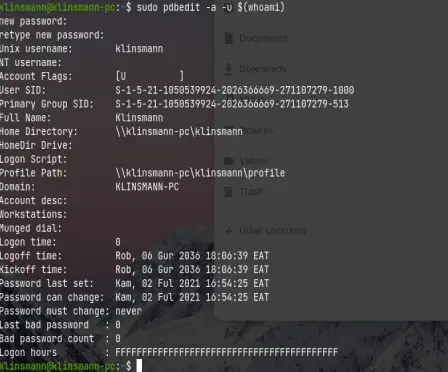
You have successfully set a Samba password which you will use to log in to samba share.
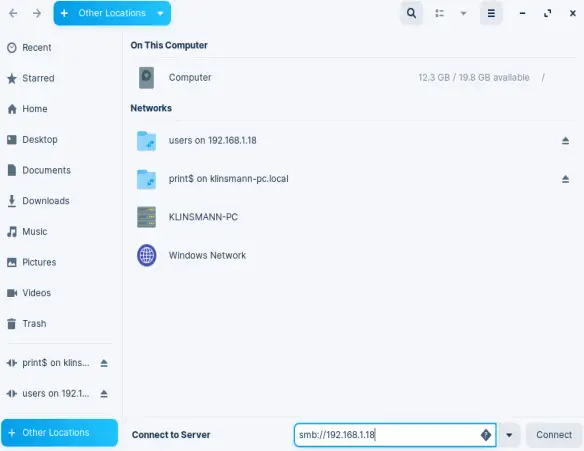
Now launch the Ubuntu File Manager, click on other locations as shown.
Now the Windows system is visible. Launch file sharing by adding the connection as shown. Enter the address of the server with the below syntax.
smb://servername/Share_nameFor example, I will use this syntax to access my Windows System.
smb://192.168.1.18See below screenshot:
In case you are prompted to enter a password for login, use the Samba login password:
You will successfully be connected to the Network and you can access files from the windows system.
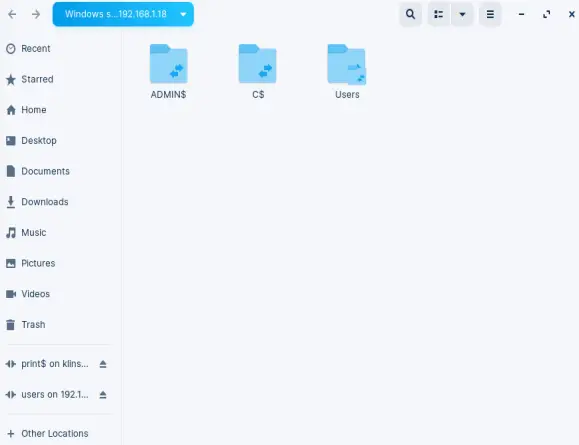
Now you are set to access the files on your Windows system. Click on Users> Default, you should be able to see these files.

Access Ubuntu Files from Windows 11
Now we want to access the Ubuntu files from Windows 11. This is done in the following steps.
First, we need to find the workgroup name in Windows 11. Launch the command prompt and issue the command below.
net config workstationSample Output:
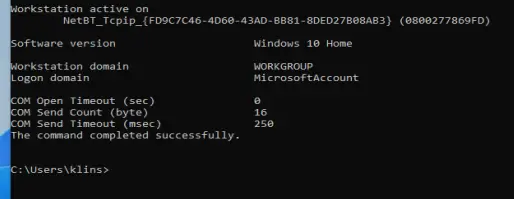
On my system, the workgroup name is WORKGROUP. This is the default workgroup name for Windows systems.
The next step is to configure Samba on Ubuntu. Since we already have samba installed we will make configuration settings as below.
Edit the Samba default configuration:
sudo cp /etc/samba/smb.conf /etc/samba/smb.conf.bak
sudo vi /etc/samba/smb.conf
Edit your file as below replacing appropriately.
[global]
........
# Configure correct UTP
 unix charset = UTF-8
# Change this to the workgroup/NT-domain name your Samba server will be part of
  workgroup = WORKGROUP
  server min protocol = NT1
  ntlm auth = yes
  netbios name = UbuntuVM
  security = user
  #interfaces = 127.0.0.0/8 eth0
  bind interfaces only = yes

# add at the end
[Public]
   comment = Ubuntu File Share
   path = /srv/samba/share
   browsable = yes
   writable = yes
   guest ok = yes
   read only = no
   create mode = 0777
   directory mode = 0777
   force user = nobody
In the configuration file, we have set to share /srv/samba/share directory. So we need to create it. This is used for experiment purposes, but you can share an existing directory.
sudo mkdir -p /srv/samba/share
sudo chown nobody:nogroup /srv/samba/share
sudo chmod -R 0777 /srv/samba/share
sudo chgrp sambashare /srv/samba/share
Now restart the Samba service.
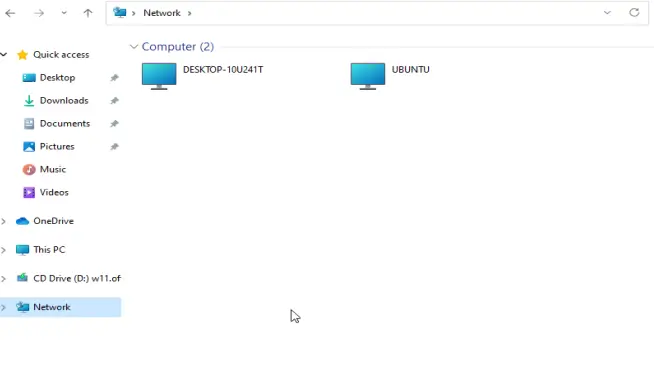
sudo systemctl restart smbd.service nmbd.serviceOn the Windows system, open the file manager and click on Network. You will see the Ubuntu system added as below. Open it and view the contents of your shared folder:
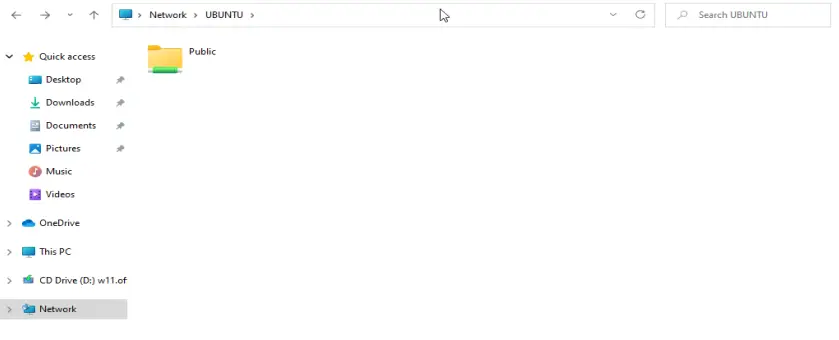
This Public folder contains contents of your shared path. For this guide, our shared path is /srv/samba/share :
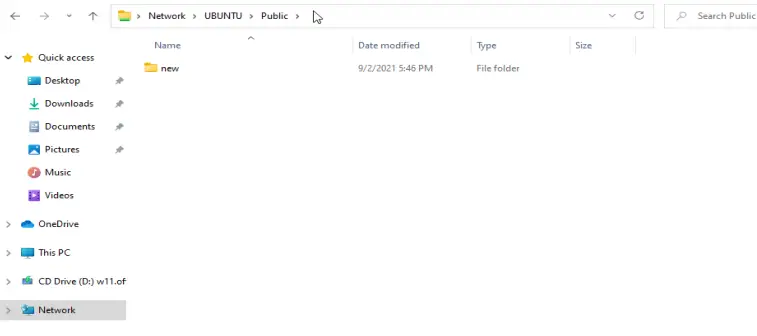
Suppose I add a new directory in the path /srv/samba/share using the command:
sudo mkdir /srv/samba/share/newOn Windows, the shared file will appear inside the Public folder as below:
Alternatively, you can create a file on this Windows tab that will appear on our Ubuntu system.
That is it! We have successfully gone through how to install and configure Samba Share on Windows 11. I hope you found this guide helpful.
See more on this page:
- How To Install MySQL 8.2 on Windows 11 / Windows 10
- Fix Windows Error “running scripts is disabled on this system”
- Fix Windows BSOD Issue caused by CrowdStrike Update
- Running Windows Server 2022 on OpenStack (Complete Steps)
If you work with different operating systems, it’s handy to be able to share files between them. This article explains how to set up file access between Linux (Fedora 33) and Windows 10 using Samba and mount.cifs.
Samba is the Linux implementation of the SMB/CIFS protocol, allowing direct access to shared folders and printers over a network. Mount.cifs is part of the Samba suite and allows you to mount the CIFS filesystem under Linux.
Caution: These instructions are for sharing files within your private local network or in a virtualized host-only network between a Linux host machine and a virtualized Windows guest. Don’t consider this article a guideline for your corporate network, as it doesn’t implement the necessary cybersecurity considerations.
Access Linux from Windows
This section explains how to access a user’s Linux home directory from Windows File Explorer.
1. Install and configure Samba
Start on your Linux system by installing Samba:
dnf install sambaSamba is a system daemon, and its configuration file is located in /etc/samba/smb.conf. Its default configuration should work. If not, this minimal configuration should do the job:
[global]
        workgroup = SAMBA
        server string = %h server (Samba %v)
        invalid users = root
        security = user
[homes]
        comment = Home Directories
        browseable = no
        valid users = %S
        writable = yes
You can find a detailed description of the parameters in the smb.conf section of the project’s website.
2. Modify LinuxSE
If your Linux distribution is protected by SELinux (as Fedora is), you have to enable Samba to be able to access the user’s home directory:
setsebool -P samba_enable_home_dirs onCheck that the value is set by typing:
getsebool samba_enable_home_dirsYour output should look like this:
3. Enable your user
Samba uses a set of users and passwords that have permission to connect. Add your Linux user to the set by typing:
smbpasswd -a <your-user>You will be prompted for a password. This is a completely new password; it is not the current password for your account. Enter the password you want to use to log in to Samba.
To get a list of allowed user types:
pdbedit -L -vRemove a user by typing:
smbpasswd -x <user-name>4. Start Samba
Because Samba is a system daemon, you can start it on Fedora with:
systemctl start smbThis starts Samba for the current session. If you want Samba to start automatically on system startup, enter:
systemctl enable smbOn some systems, the Samba daemon is registered as smbd.
4. Configure the firewall
By default, Samba is blocked by your firewall. Allow Samba to access the network permanently by configuring the firewall.
You can do it on the command line with:
firewall-cmd --add-service=samba --permanentOr you do it graphically with the firewall-config tool:

5. Access Samba from Windows
In Windows, open File Explorer. On the address line, type in two backslashes followed by your Linux machine’s address (IP address or hostname):

You will be prompted for your login information. Type in the username and password combination from step 3. You should now be able to access your home directory on your Linux machine:

Access Windows from Linux
The following steps explain how to access a shared Windows folder from Linux. To implement them, you need Administrator rights on your Windows user account.
1. Enable file sharing
Open the Network and Sharing Center either by clicking on the
Windows Button > Settings > Network & Internet
or by right-clicking the little monitor icon on the bottom-right of your taskbar:
In the window that opens, find the connection you want to use and note its profile. I used Ethernet 3, which is tagged as a Public network.
Caution: Consider changing your local machine’s connection profile to Private if your PC is frequently connected to public networks.
Remember your network profile and click on Change advanced sharing settings:

Select the profile that corresponds to your connection and turn on network discovery and file and printer sharing:

2. Define a shared folder
Open the context menu by right-clicking on the folder you want to share, navigate to Give access to, and select Specific people… :

Check whether your current username is on the list. Click on Share to tag this folder as shared:

You can display a list of all shared folders by entering \\localhost in File Explorer’s address line:


Image by:
<p class=»rtecenter»><sup>(Stephan Avenwedde, <a href=»https://opensource.com/%3Ca%20href%3D»https://creativecommons.org/licenses/by-sa/4.0/» rel=»ugc»>https://creativecommons.org/licenses/by-sa/4.0/» target=»_blank»>CC BY-SA 4.0</a>)</sup></p>
3. Mount the shared folder under Linux
Go back to your Linux system, open a command shell, and create a new folder where you want to mount the Windows share:
mkdir ~/WindowsShareMounting Windows shares is done with mount.cifs, which should be installed by default. To mount your shared folder temporarily, use:
sudo mount.cifs //<address-of-windows-pc>/MySharedFolder ~/WindowsShare/ -o user=<Windows-user>,uid=$UIDIn this command:
<address-of-windows-pc>is the Windows PC’s address info (IP or hostname)<Windows-user>is the user that is allowed to access the shared folder (from step 2)
You will be prompted for your Windows password. Enter it, and you will be able to access the shared folder on Windows with your normal Linux user.
To unmount the shared folder:
sudo umount ~/WindowsShare/You can also mount a Windows shared folder on system startup. Follow these steps to configure your system accordingly.
Summary
This shows how to establish temporary shared folder access that must be renewed after each boot. It is relatively easy to modify this configuration for permanent access. I often switch back and forth between different systems, so I consider it incredibly practical to set up direct file access.
This work is licensed under a Creative Commons Attribution-Share Alike 4.0 International License.
This is a complete tutorial to show you how to share folders over the local network between Windows and Ubuntu.
Do you have multiple devices in your home? Do you have to use Flash Drive or SD card to transfer data from Ubuntu to another computer? Do you find it annoying? We know you do. Because we don’t want you to waste your precious time while you can transfer your files, documents, and other large stuff quickly and easily, over the local network. It’s one-time setup and then with some clicks you will be able to share files between Ubuntu and Windows or any other Linux system. And don’t worry it’s easy and takes only a little time.
One more thing to add, while we performed this tutorial on Ubuntu, this tutorial should be valid for any other Linux OS.
Share folder on local network in Ubuntu
If you are using Ubuntu, there are two ways you can share your local files over the local network to access it from Windows or other Linux computers.
- Share it for everyone’s access on local network, without password
- Password protect the folders for restricted access
We’ll see both methods in this post and will let you decide which one you would prefer to use.
Method 1. Share folders on local network without password
You’ll have to do some settings on both Windows and Ubuntu.
Enable sharing on Ubuntu
To share a folder on the local network in Ubuntu, right click on the desired folder and select Local Network Share:
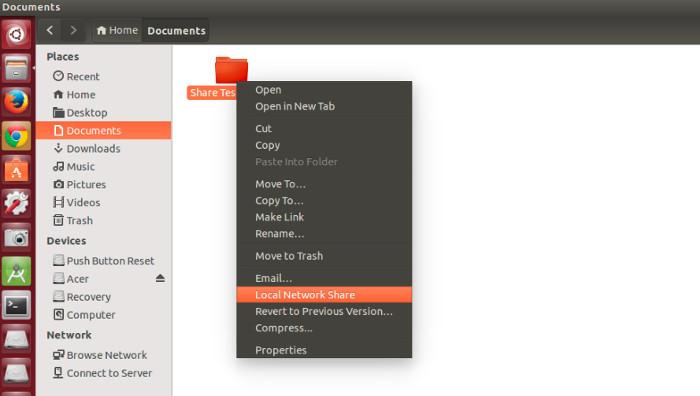
Possible troubleshoot: If you do not see the option of Local Network Share in right click menu, open a terminal and use the following command to install nautlius-share:
sudo apt-get install nautilus-shareYou’ll need to restart Nautilus. Either log out and log in back or use the command below:
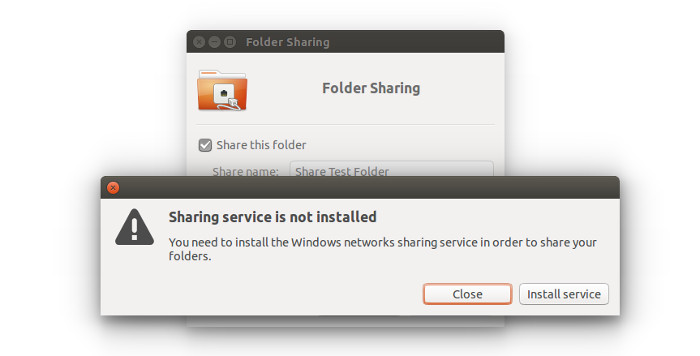
nautilus -qWhen you click on Local Network Share, you will see the option of sharing the folder. Just check the option of Share this folder:
Possible troubleshoot: If you are prompted about Sharing service not being installed, like in the screenshot below, just click on Install service and follow the instructions.
When you check the option of Share this folder, you’ll see option of Create Share available for you. You can also allow other users to edit the files in the shared folder. Option for guest access can be checked as well.
You’ll see that the folder icon have been changed to show that it has been shared. To stop sharing a folder, just uncheck the Share this folder option.
Now access the shared folder on Windows machine.
Step 2: Enable sharing on Windows
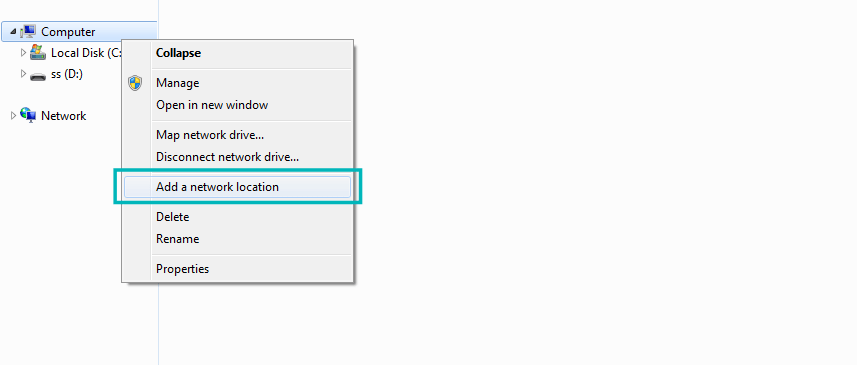
On Windows, right click on “This PC” or “My Computer”, and select “Add a new connection”.
Click on “next” button.
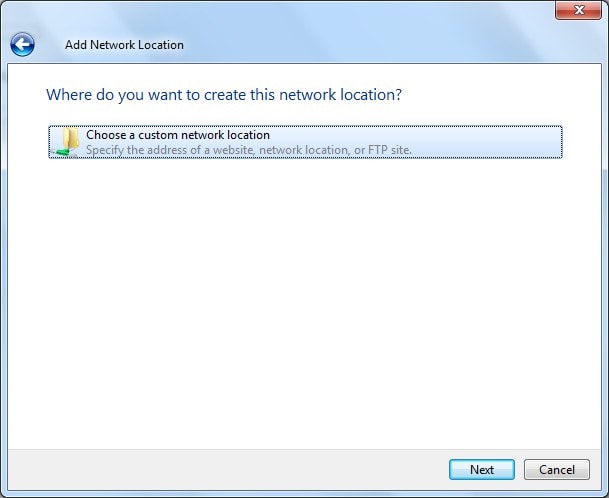
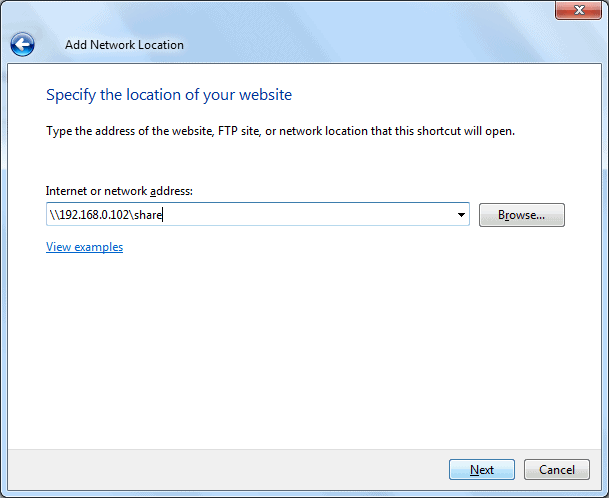
Now it’s time to enter server address and the name of folder which we’ve shared. Please enter in following format.
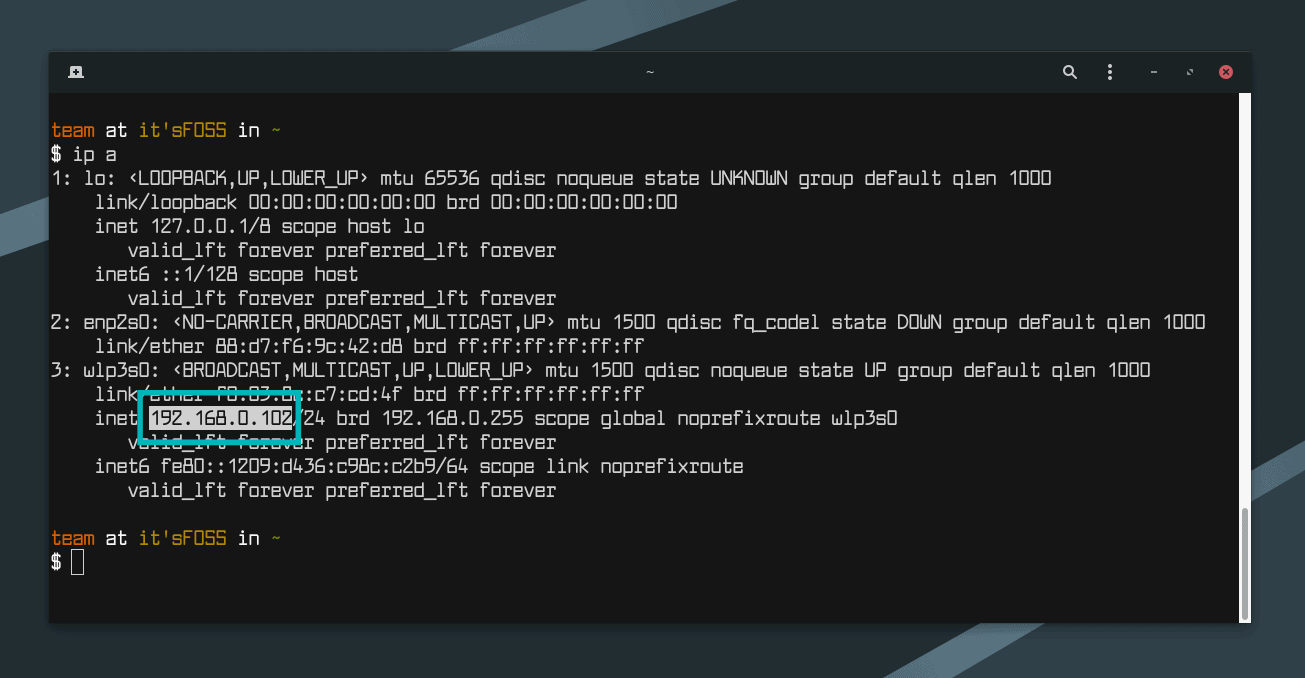
You can find your server’s address, i.e. IP address of Linux machine by entering ip a command.
In my case, IP address of Linux machine is 192.168.0.102 and folder I’ve shared is share.
Now add the location in the following manner:
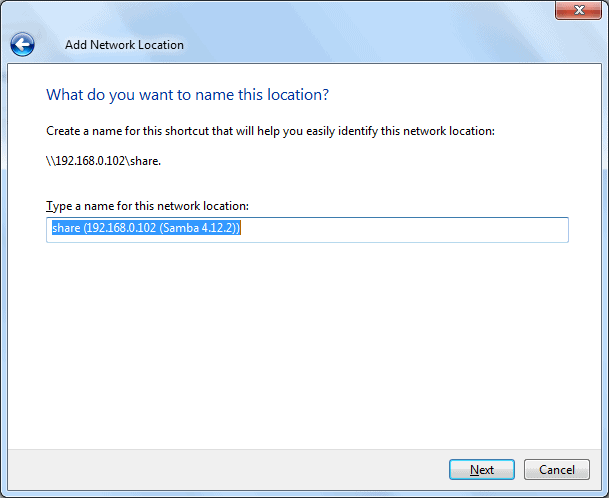
Now you will see this screen, just click next.
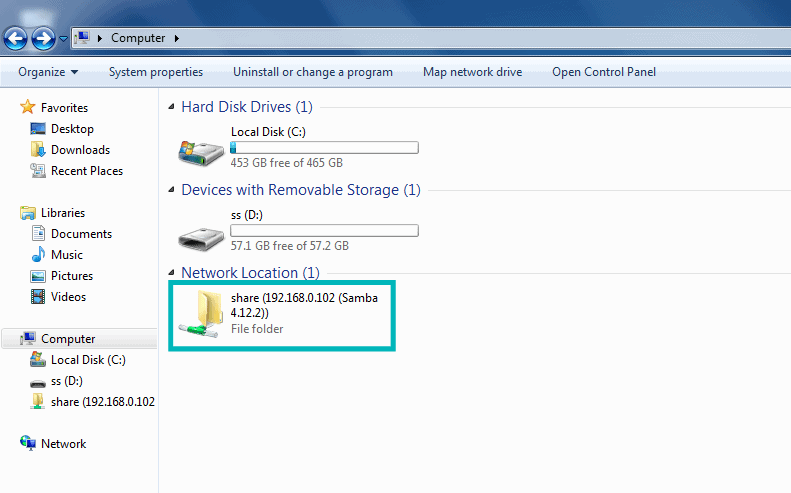
Now, you can access the shared folder in “This PC” or “My Computer” under “Network Location” section.
Now this was the easy way out. This provides access to anyone on your local network to access these files.
In normal condition, you should prefer this. I mean, devices on your home network should be generally known devices. But this could not be the case always. What if you want only certain people to access it?
This is where Samba server comes in picture. We’ll see that in the second part of the tutorial.
2. Share the folders on local network in Ubuntu with password protection
To do this, we need to configure Samba server. Actually, we did use Samba in the previous part of this tutorial. We just did not emphasize on it. Before we go on seeing how to set up Samba server for local network sharing in Ubuntu, let’s first have a quick look on what actually is Samba.
What is Samba?
Samba is the software package that allows you to share files, documents and printers across a network, irrespective of whether you are using Linux, Windows and Mac. It’s available for all major platforms and can work tremendously nice in all of them. Quoting from Wikipedia:
Samba a free software re-implementation of the SMB/CIFS networking protocol, and was originally developed by Andrew Tridgell. As of version 3, Samba provides file and print services for various Windows Clients and can integrate with a Windows Server domain, either as a Primary Domain Controller (PDC) or as a domain member. It can also be part an Active Directory domain.
Install Samba server on Ubuntu
You can easily install Samba on you Ubuntu box. Before installing update your system so that you can install any available updates.
sudo apt-get update && sudo apt-get upgradeNow install Samba serer and few other required stuffs with the following command:
sudo apt-get install samba samba-common system-config-samba python-glade2Once you’ve installed Samba server, it’s time to configure Samba from the graphical interface window to share files.
Configure Samba server on Ubuntu
Open Samba Configuration tool from the dash:
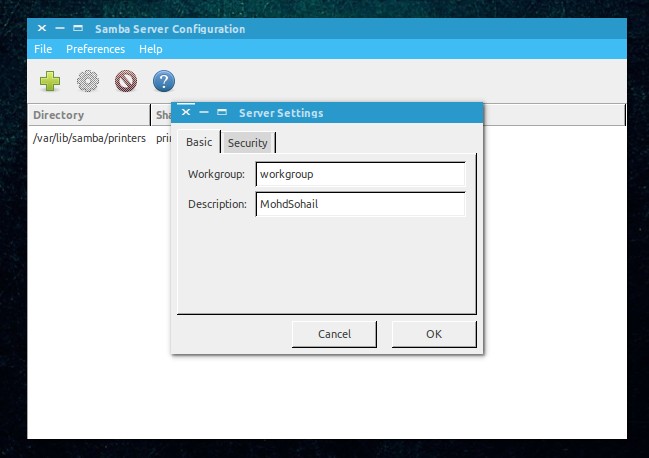
Go to Preference->Server Settings. Although the default settings are good and may be same you need. But you may need to make change to it in some cases.
Now in Server Settings you’ve two tabs, ‘Basic’ and ‘Security’. Under Basic tab you’ve the following options that mean:
- Workgroup – This is the name of the Workgroup of the computer you want to connect to. For example, if you want to connect to a Windows computer so you will enter the workgroup name of Windows computer, and in Windows you already have the same workgroup name as is set by default in Samba Server Settings. But if you have a different workgroup name on Windows then you will enter that workgroup name in this field. (In Windows 7 to get the workgroup name, right-click Computer icon and go to Properties, there you’ll see Windows Workgroup name.)
- Description – This is the name of your computer as seen by others. Don’t use spaces or non-internet friendly characters.
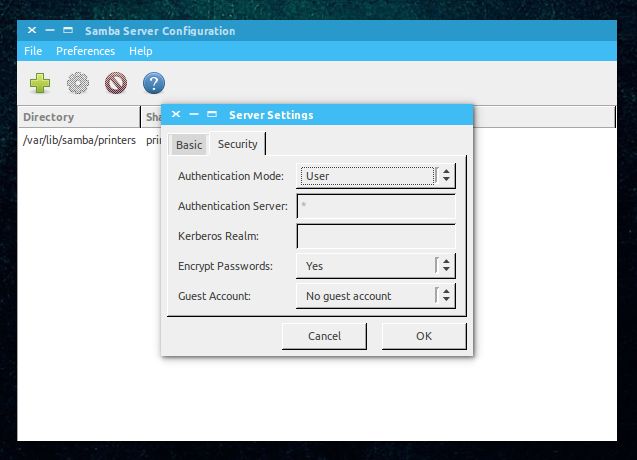
Allowing ‘Guests’ is not advisable so there is no reason to change security settings. Keep as it is.
It is all done! You’ve setup Samba Server. We are not far from sharing our first folder on network.
Create a system user for network file sharing
We will now create a system user for sharing file on network. This is how simple it is.
- Go to System Settings.
- Under Systems Settings Click User Accounts.
- Click unlock to Enable + (plus) icon.
- Click + (plus) icon to create a new system user.
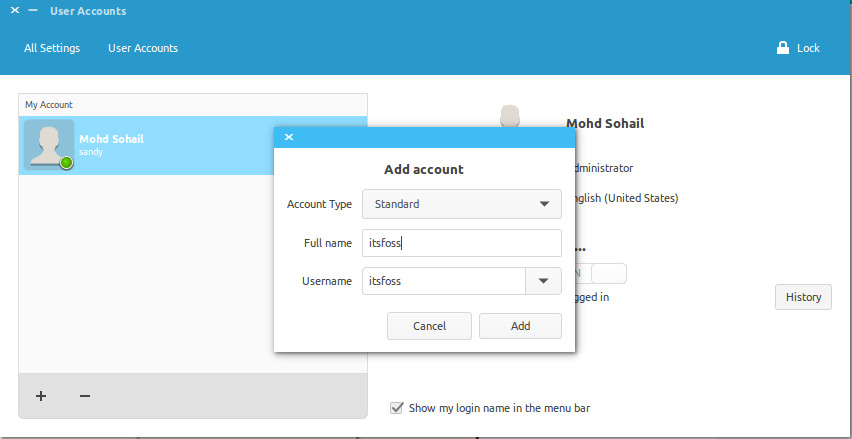
Now as you can see the above image, you can enter ‘Full name’. As you enter ‘Full name’ Username will be taken as Full name automatically. Because we are creating this user to share files so we will assign Account Type to ‘Standard‘.
Done above steps? Click add. You have created a system user. The user is not yet activated so we will activate it by setting up password for this account. Make sure Users accounts panel is unlocked. Click Account disabled and type a new password, then confirm password and click Change.

Yipee… Upto now we have installed and configured Samba and We have created a System user to share files on network from the account and we have activated our newly created account, too. Now We will move to Samba for the last step of configuring everything, then we will share a folder.
Add new Samba user
Open Samba and click Samba Users under Preference. Fill up the the simple dialogue. Here are couple of details about the fields:
Unix Username – In this case I am selecting the user that I just created.
Windows Username – You will enter this username when you are accessing from Windows Machine.
Samba Password – You will enter this password when you are accessing from Windows Machine.
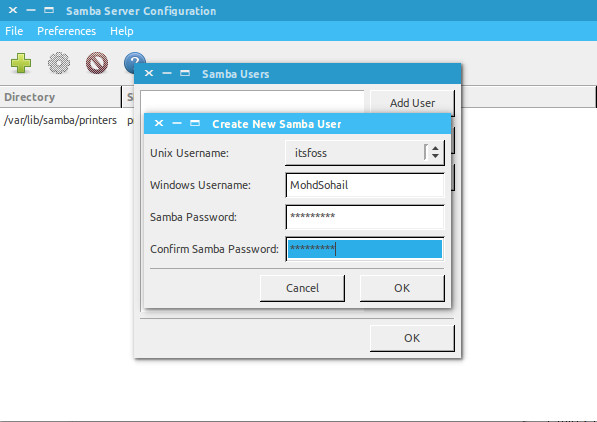
Once you’ve done click OK. Now take a deep breath. You have successfully created a network with the help of Samba. Now restart the network or Samba services and ready to share files with other machines.
sudo restart smbd && sudo restart nmbdShare folders or files over the network
To share files with Samba it’s simple with graphical user interface. Click the Plus icon in Samba and you will get dialogue like this:
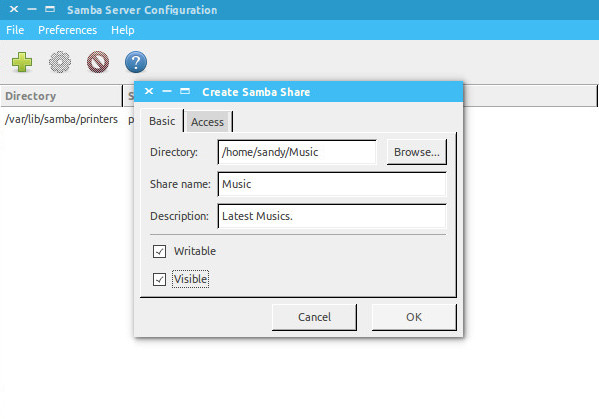
Complete the fields. In ‘Directory‘ browse the folder you want to share. Here are the details about the fields you will see here:
- Share name is the name of the folder that other would see.
- Description is simply about the content you are sharing on network.
- Writable You shared folders are ‘read only’ by default. You can set them to writable if you want others on network to change them.
- Visible As the name suggests when you click Visible, the shared folder will be visible to the people on network.
Now you can set permissions for the folder you are sharing. To do this click ‘Access’ tab and check the users you want to share the folder with. When you select Allow access to everyone, the folder will be accessible to everyone on the network.
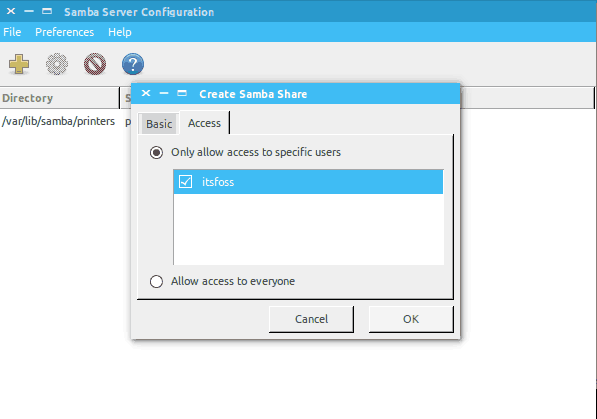
Finally click OK to complete the sharing. Now the folder is shared with the people you want. You have completed sharing file on network. Is there everything left? Yes! How to remove the folders from the network?
Remove shared folders
We will also need to remove some of the folders after sometime from network. It is very simple and here is how we can do that.
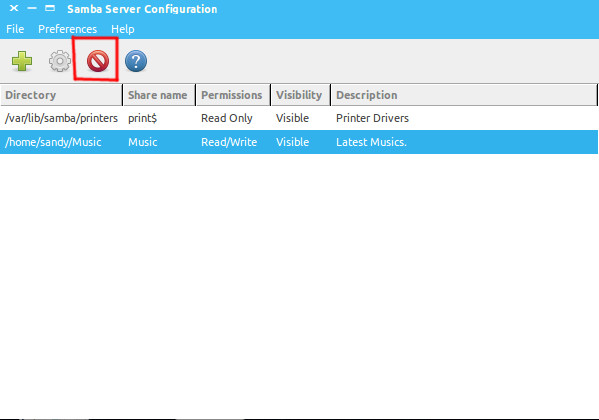
This is all done! We can also share files over network using terminal but that would not be as easy as this one. If you request for command line sharing then I will write a tutorial on how to share files over network with command line in Linux.
So, how do you find this tutorial to share files on local network in Ubuntu? I hope with this tutorial you can easily share files between Ubuntu and Windows. If you have questions or suggestions, feel free to ask it in the comment box below.
This tutorial was requested by Kalc. If you would like, you can request your own tutorial. We would be happy to help you out along with other readers facing the same issue.
With inputs from Abhishek Prakash.
This tutorial will guide you on how to create a shared directory on Samba AD DC system, map this Shared Volume to Windows clients integrated into the domain via GPO and manage share permissions from Windows domain controller perspective.
It will also cover how to access and mount the file share from a Linux machine enrolled into domain using a Samba4 domain account.
Requirements:
- Create an Active Directory Infrastructure with Samba4 on Ubuntu
Step 1: Create Samba File Share
1. The process of creating a share on Samba AD DC is a very simple task. First create a directory you want to share via SMB protocol and add the below permissions on the filesystem in order to allow a Windows AD DC admin acount to modify the share permissions accordingly to what permissions Windows clients should see.
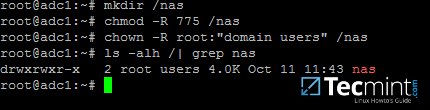
Assuming that the new file share on the AD DC would be the /nas directory, run the below commands to assign the correct permissions.
# mkdir /nas
# chmod -R 775 /nas
# chown -R root:"domain users" /nas
# ls -alh | grep nas
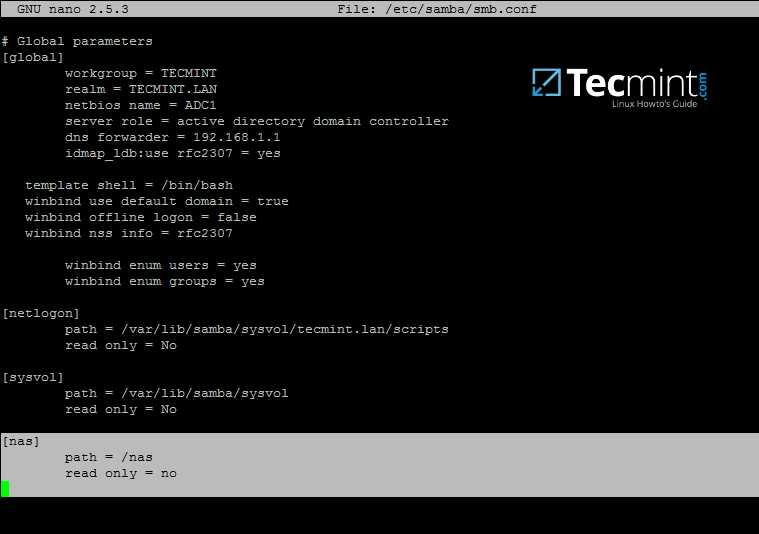
2. After you’ve created the directory that will be exported as a share from Samba4 AD DC, you need to add the following statements to samba configuration file in order to make the share available via SMB protocol.
# nano /etc/samba/smb.conf
Go to the bottom of the file and add the following lines:
[nas]
	path = /nas
	read only = no
3. The last thing you need to do is to restart Samba AD DC daemon in order to apply the changes by issuing the below command:
# systemctl restart samba-ad-dc.service
Step 2: Manage Samba Share Permissions
4. Since we’re accessing this shared volume from Windows, using domain accounts (users and groups) that are created on Samba AD DC (the share is not meant to be accessed by Linux system users).
The process of managing permissions can be done directly from Windows Explorer, in the same way permissions are managed for any folder in Windows Explorer.
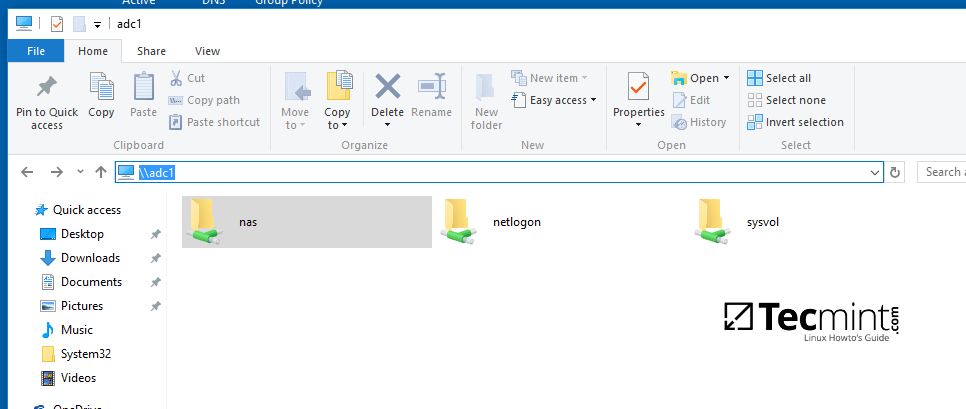
First, log on to Windows machine with a Samba4 AD account with administrative privileges on the domain. In order to access the share from Windows and set the permissions, type the IP address or host name or FQDN of the Samba AD DC machine in Windows Explorer path field, preceded by two back slashes, and the share should be visible.
\\adc1
Or
\2.168.1.254
Or
\\adc1.tecmint.lan
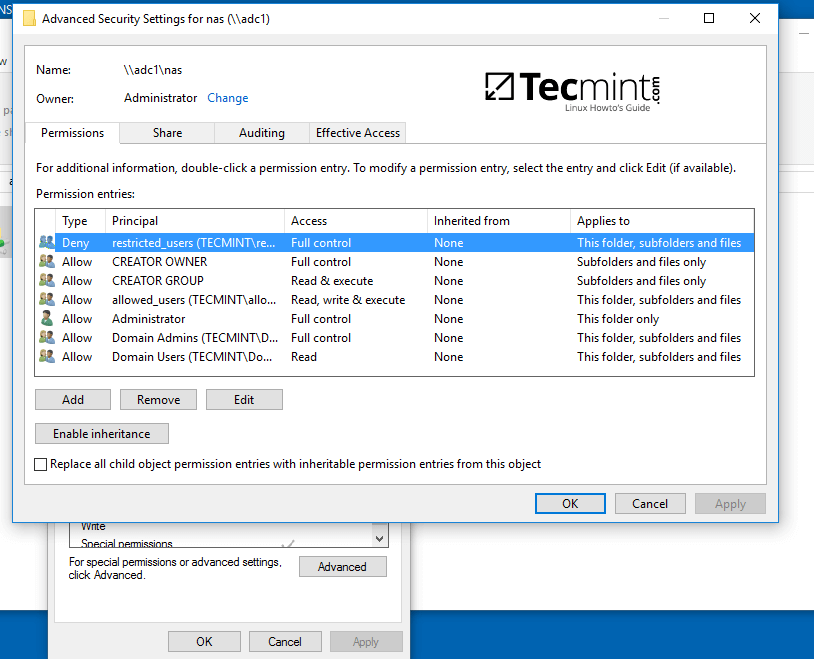
5. To modify permissions just right click on the share and choose Properties. Navigate to Security tab and proceed with altering domain users and group permissions accordingly. Use Advanced button in order to fine tune permissions.
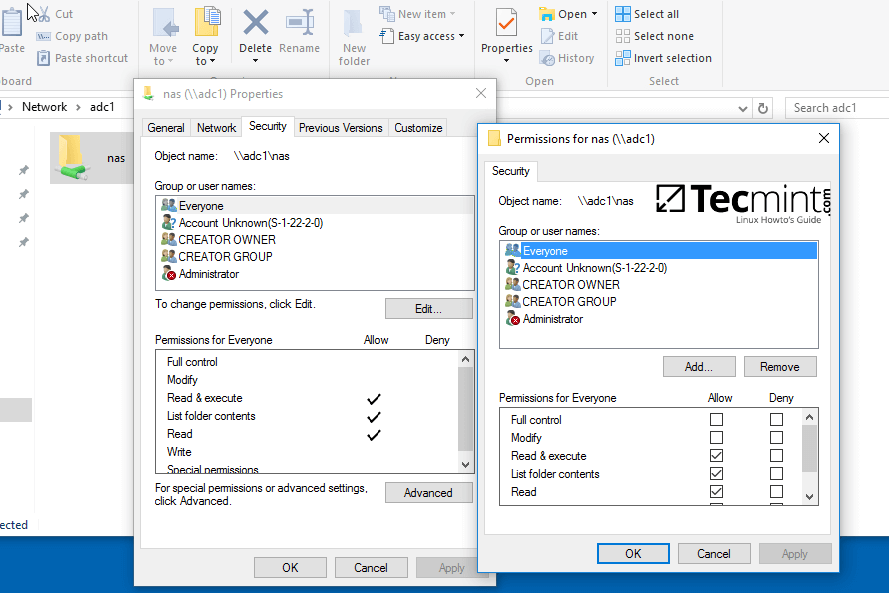
Use the below screenshot as an excerpt on how to tune permissions for specific Samba AD DC authenticated accounts.
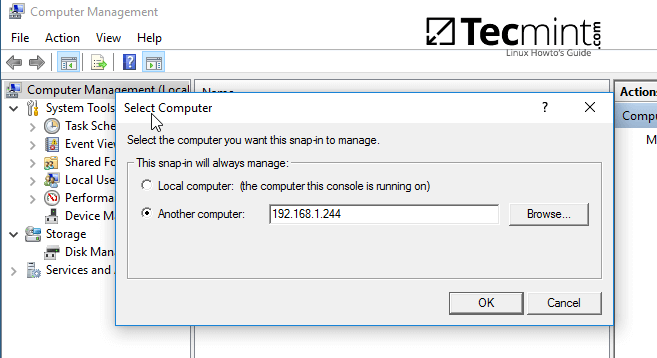
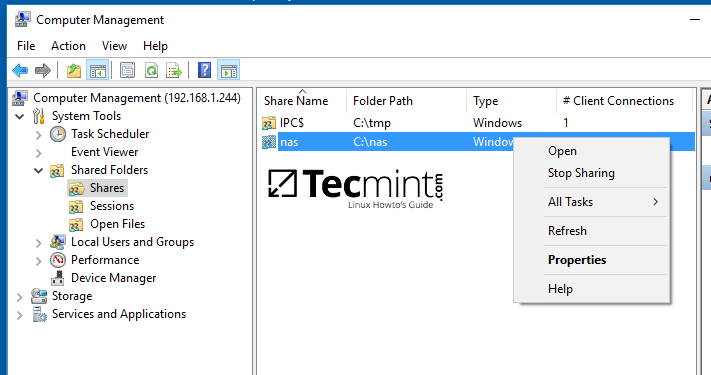
6. Other method you can use to manage the share permissions is from Computer Management -> Connect to another computer.
Navigate to Shares, right click on the share you want to modify permissions, choose Properties and move to Security tab. From here you can alter permissions in any way you want just as presented in the previous method using file share permissions.

Step 3: Map the Samba File Share via GPO
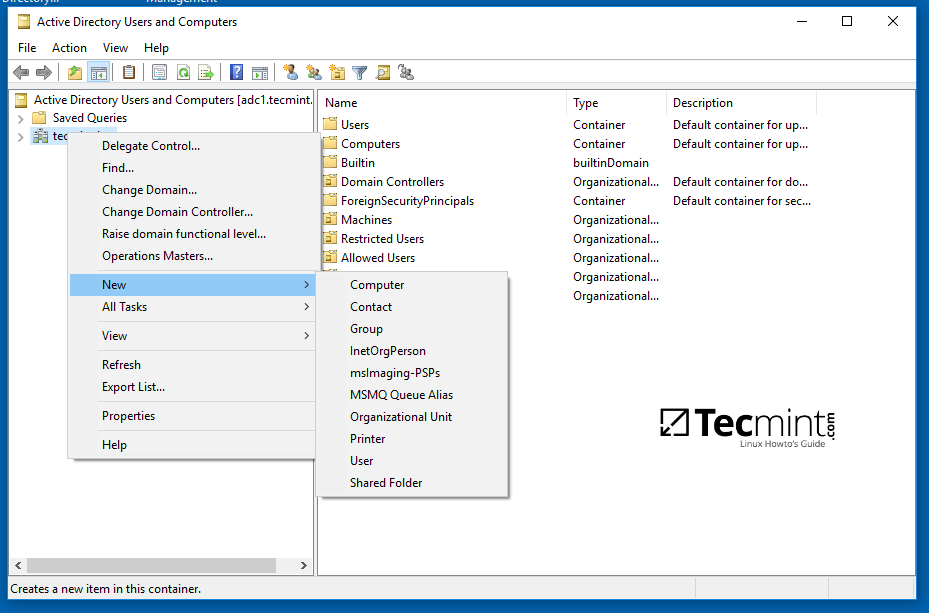
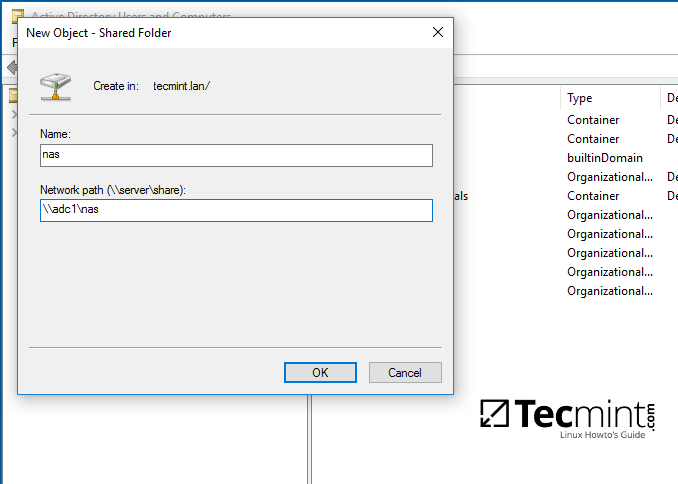
7. To automatically mount the exported samba file share via domain Group Policy, first on a machine with RSAT tools installed, open AD UC utility, right click on your domain name and, then, choose New -> Shared Folder.
8. Add a name for the shared volume and enter the network path where your share is located as illustrated on the below image. Hit OK when you’ve finished and the share should now be visible on the right plane.
9. Next, open Group Policy Management console, expand to your domain Default Domain Policy script and open the file for editing.
On the GPM Editor navigate to User Configuration -> Preferences -> Windows Settings and right click on Drive Maps and choose New -> Mapped Drive.

10. On the new window search and add the network location for the share by pressing the right button with three dots, check Reconnect checkbox, add a label for this share, choose the letter for this drive and hit OK button to save and apply configuration.

11. Finally, in order to force and apply GPO changes on your local machine without a system restart, open a Command Prompt and run the following command.
gpupdate /force
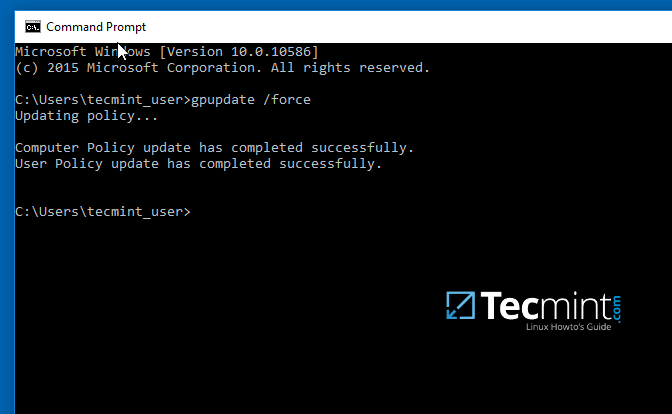
12. After the policy has been successfully applied on your machine, open Windows Explorer and the shared network volume should be visible and accessible, depending on what permissions you’ve granted for the share on previous steps.
The share will be visible for other clients on your network after they reboot or re-login onto their systems if the group policy will not forced from command line.

Step 4: Access the Samba Shared Volume from Linux Clients
13. Linux users from machines that are enrolled into Samba AD DC can also access or mount the share locally by authenticating into the system with a Samba account.
First, they need to assure that the following samba clients and utilities are installed on their systems by issuing the below command.
$ sudo apt-get install smbclient cifs-utils
14. In order to list the exported shares your domain provides for a specific domain controller machine use the below command:
$ smbclient –L your_domain_controller –U%
or
$ smbclient –L \\adc1 –U%

15. To interactively connect to a samba share from command line with a domain account use the following command:
$ sudo smbclient //adc/share_name -U domain_user
On command line you can list the content of the share, download or upload files to the share or perform other tasks. Use ? to list all available smbclient commands.

16. To mount a samba share on a Linux machine use the below command.
$ sudo mount //adc/share_name /mnt -o username=domain_user
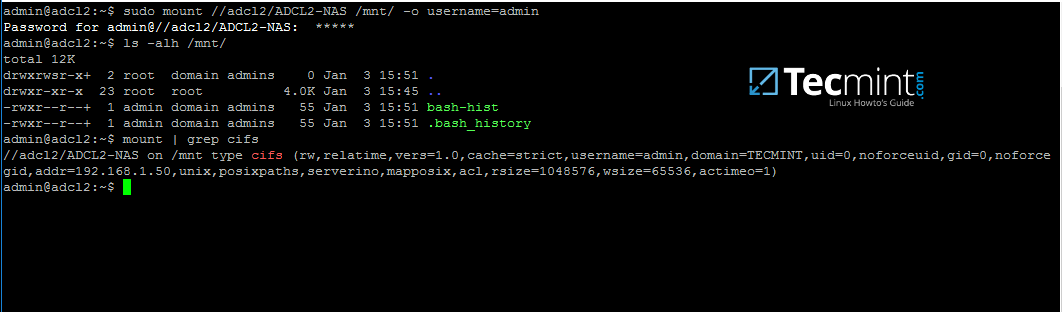
Replace the host, share name, mount point and domain user accordingly. Use mount command piped with grep to filter only by cifs expression.
As some final conclusions, shares configured on a Samba4 AD DC will work only with Windows access control lists (ACL), not POSIX ACLs.
Configure Samba as a Domain member with file shares in order to achieve other capabilities for a network share. Also, on an Additional Domain Controller configure Windbindd daemon – Step Two – before you start exporting network shares.